Extra storage space can solve many backyard clutter problems. A diy shed gives tools, bikes, and gear a proper place to stay. Building one sounds hard, but it really is not.
You just need a solid plan and some patience. Every good shed starts with strong footings and square walls. Once those are set, the rest falls into place.
You get to pick the size, style, and finishing touches. A diy shed also costs less than hiring a builder. It clears up garage space and keeps your yard organized.
Plus, it feels great to build something with your own hands. Grab your tools and start building a shed that works for you.
What Makes a Shed a Practical Addition to Your Yard?
A shed gives a yard extra storage space without crowding the garage. Bikes, tools, and holiday items can move outside, freeing up indoor space.
Gardeners often need a spot for pots, soil, and hand tools within easy reach. A shed placed near the garden keeps supplies close and cuts down on extra trips.
A well-placed shed also fits naturally into the rest of the yard. It can match the house color or sit tucked behind trees for a clean look.
Easy access matters too, since a shed near a path saves time and effort. A simple shed adds real function without taking over the yard.
Tools and Materials You’ll Need
Before you break ground, it helps to have everything laid out in advance. Gathering lumber, roofing, trim, and fasteners early saves time later. Here is a full breakdown of what you need for this build:
| Category | Items |
|---|---|
| Framing Lumber | 2x6x8 Pressure Treated (x11), 2x4x8 (x50), 2x4x10 (x22), 2x6x8 (x2) |
| Subfloor and Siding | AdvanTech Subfloor Panels (x2), LP SmartSide 4×8 Panels (x11) |
| Roofing | 12′ Metal Panels (x3), Ridge Cap, Drip Edge (x4), Inside Closures (x2 packs), Outside Closures (x2 packs), 10 x 1-1/2-in Self-Tapping Roofing Screws, 10 x 2-1/2-in Self-Tapping Roofing Screws |
| Soffit, Fascia, and Trim | Vented Soffit Panels (x2), 6″ Aluminum Fascia (x4), F Channel (x4), Z Flashing (x4), 3-1/2″ PVC Boards, Exterior Trim Nails, 1-1/2″ Galvanized Roofing Nails (for soffit) |
| Doors and Windows | Windows (x4), Gable Vents (x2), 32″ Exterior Door |
| Fasteners | 2-3/8″ Galvanized Ring Shanked Framing Nails, 3-1/4″ Galvanized Ring Shanked Framing Nails, 8 x 1/2″ Stainless Steel Screws, 4-1/2″ Flat-Head Exterior Structural Wood Screws, 3-1/2″ Construction Screws |
| Sealants | Window and Door White Paintable Sealant Caulk (x3), Silicone Caulk (x3) |
Having this list ready keeps the project moving once digging begins. Double-check each item before starting to avoid mid-build delays.
How to Build a Shed: Step-by-Step Process
A complete walkthrough from foundation to final coat, everything you need to build your own shed from scratch.
Step 1: Foundation
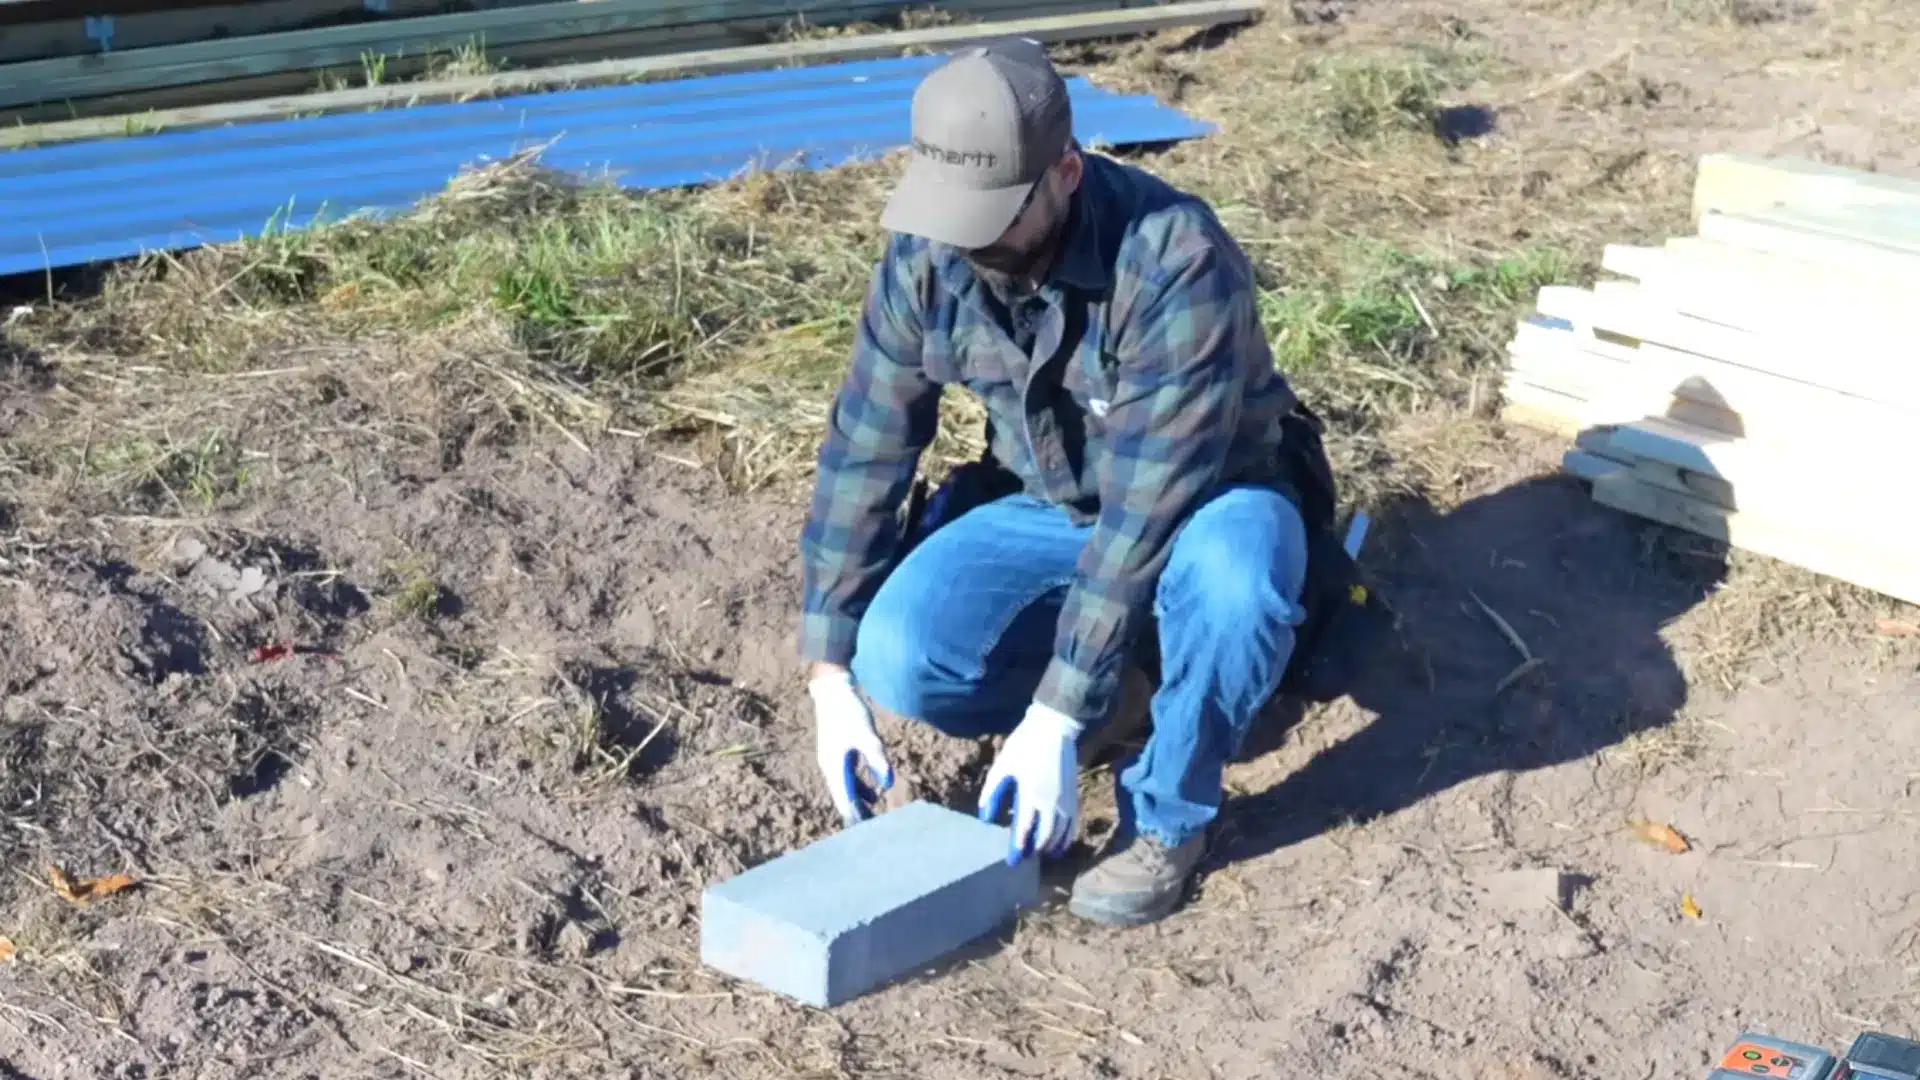
Start by choosing your foundation type: cinder blocks, posts, or a poured slab. Cinder blocks are the easiest and most affordable option for beginners.
Level out a spot, dig slightly wider than needed, and place four cinder blocks in a square layout. Use diagonal measurements to check that the corners are square.
A sloped yard needs extra care here, since the same sloped backyard landscaping issues can undermine a shed’s foundation.
Step 2: Floor Construction
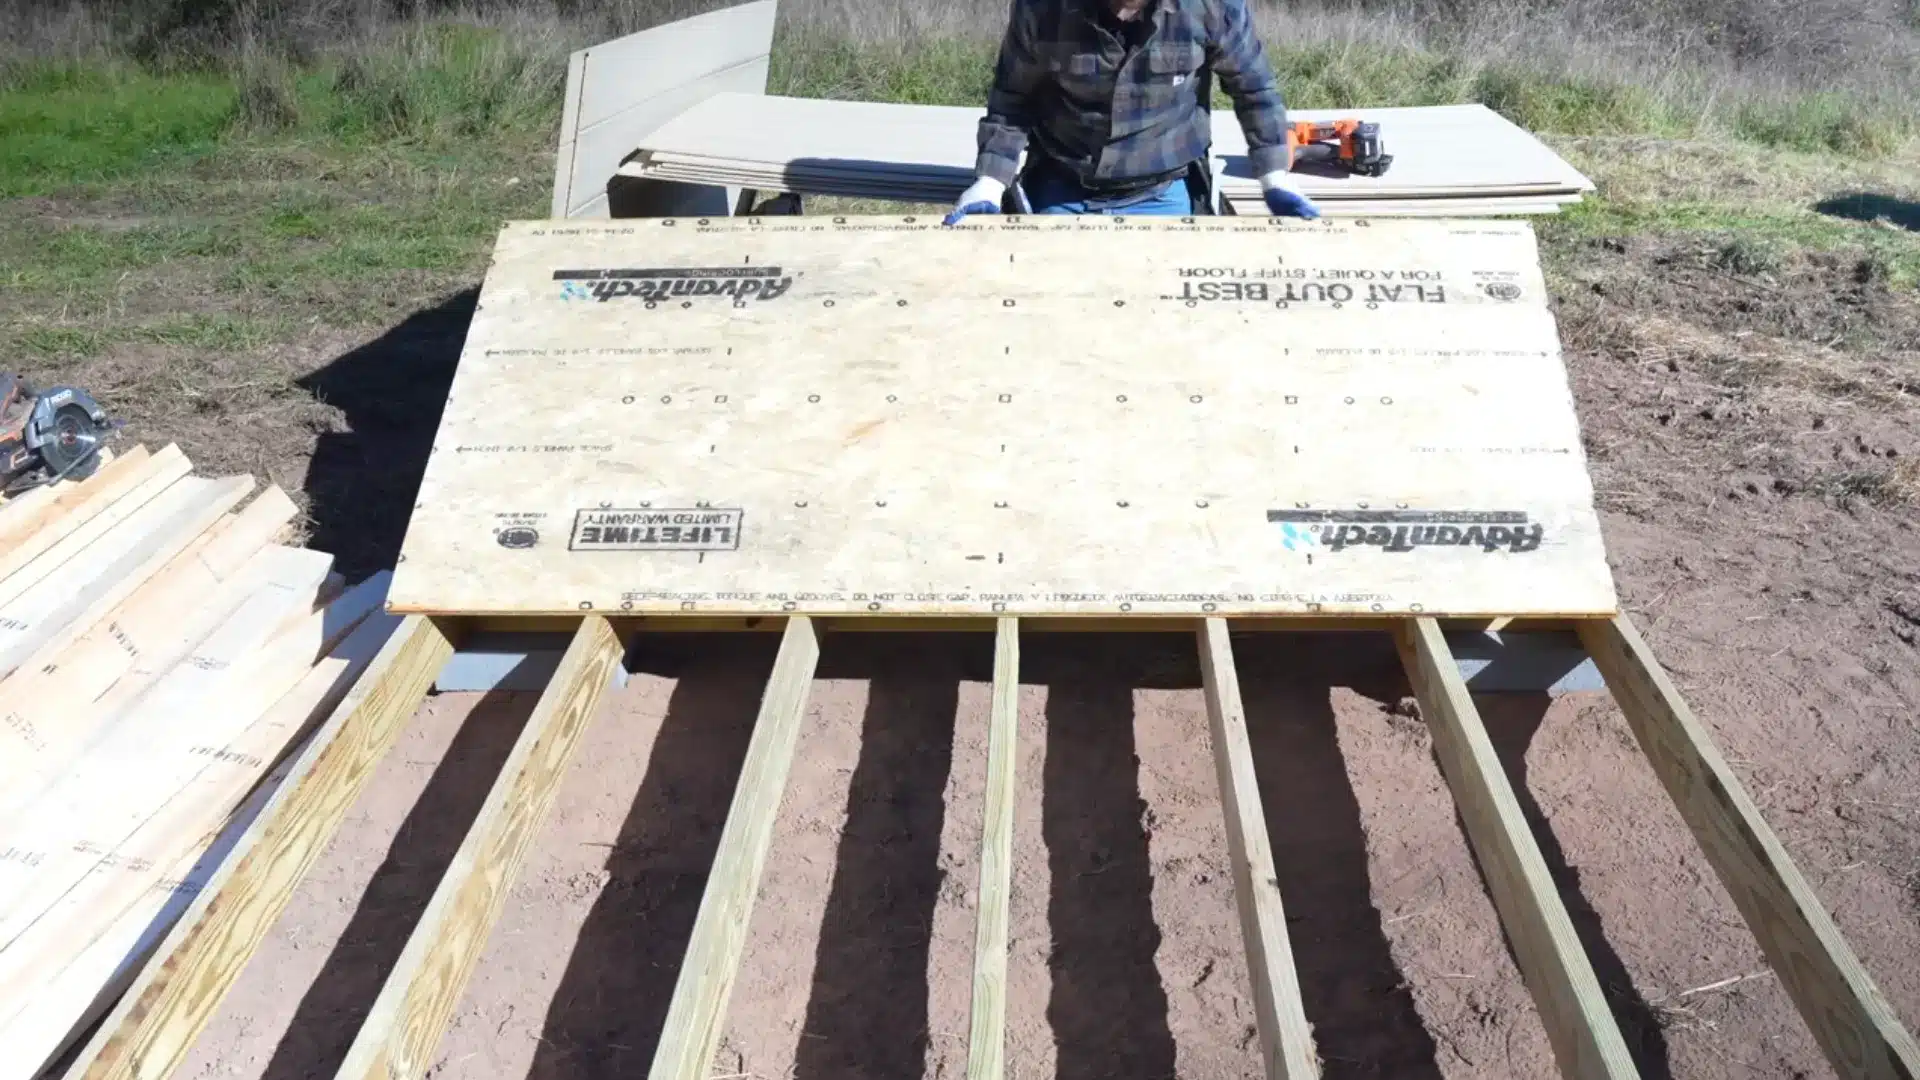
Cut pressure-treated 2×6 boards for the floor joists, sized to account for the header thickness and exterior sheathing. Build header boards on each end to frame the floor.
Lay out joists 16 inches on-center, crowning them upward slightly so weight presses them flat over time rather than sagging.
Nail everything together, then install Advantech subflooring perpendicular to the joists, staggering sheets and leaving a small expansion gap.
Step 3: Wall Construction
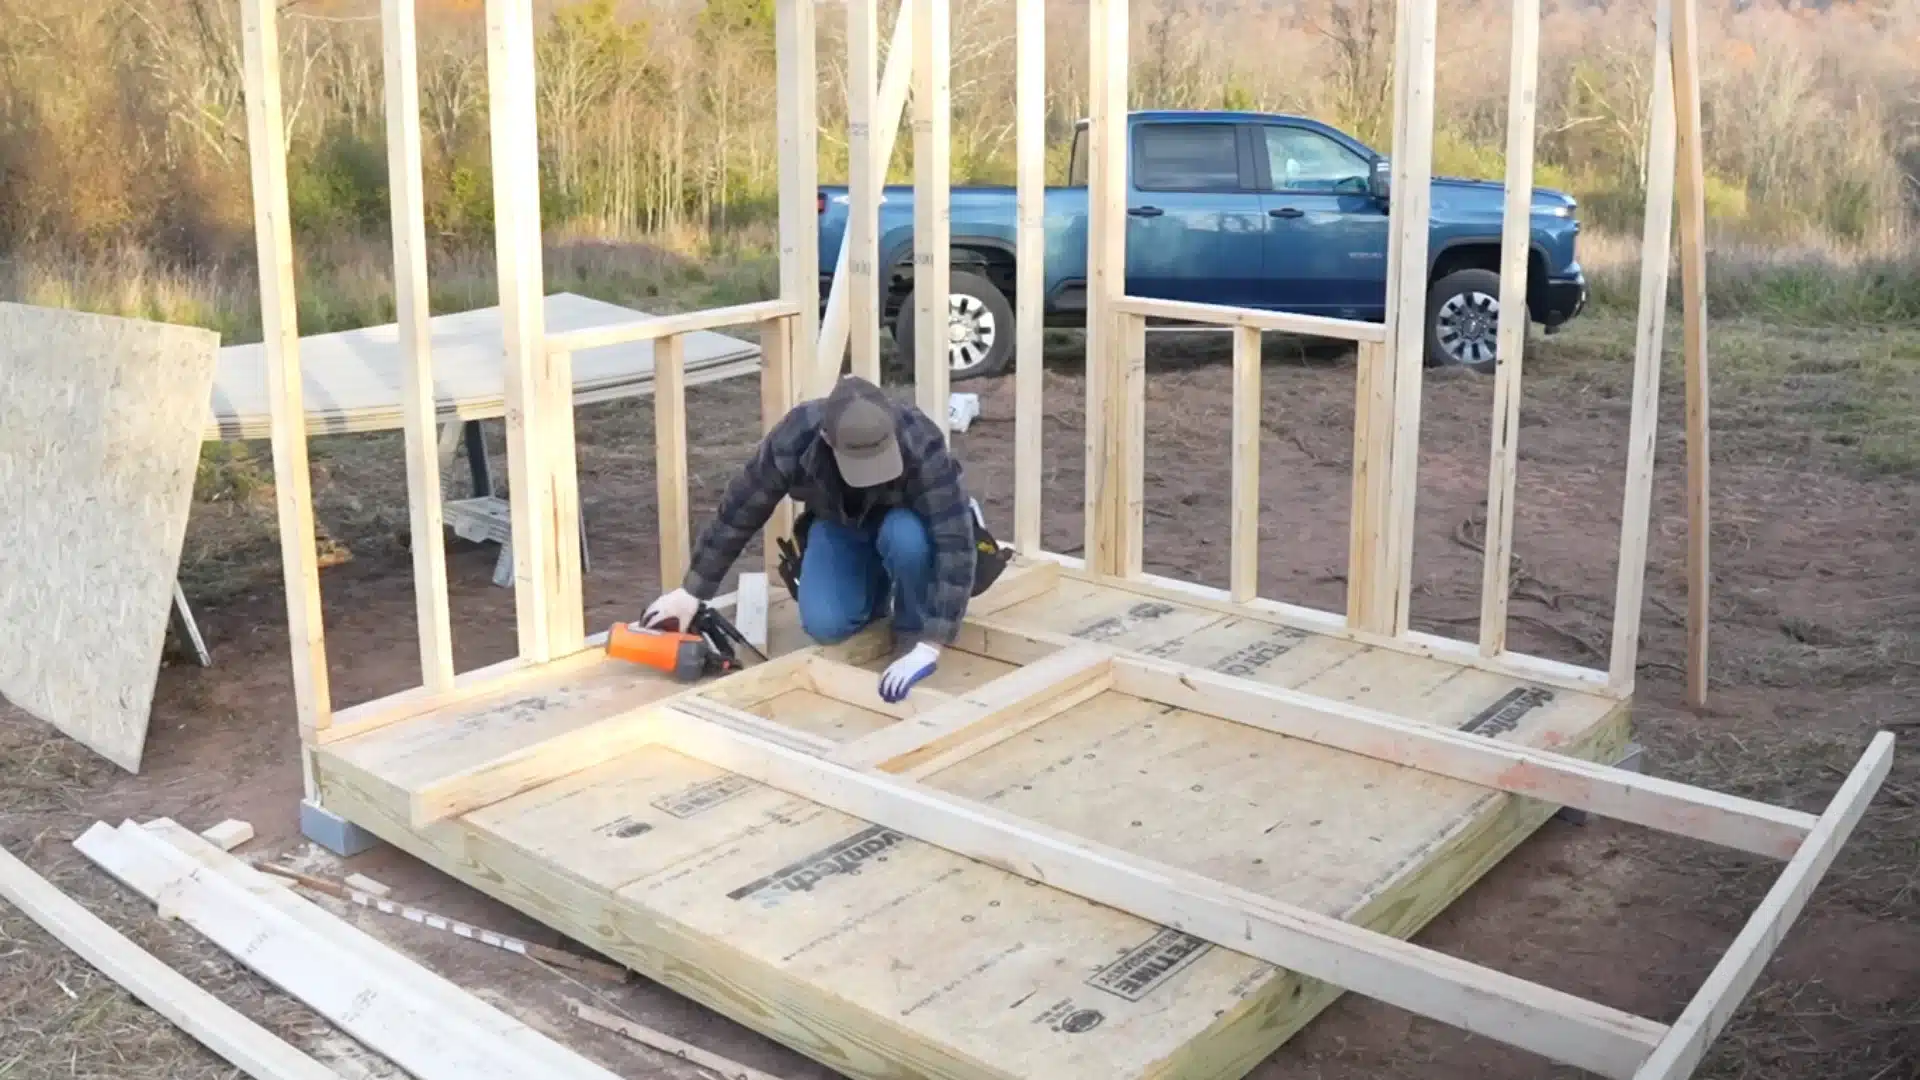
Cut wall plates to length and mark 16-inch on-center layout lines for studs. Frame rough openings for windows and doors first, building headers and jack studs to support them.
Assemble the wall flat on the subfloor, then stand it upright and check it for plumb and level before temporarily securing it.
Repeat for each wall, then lace the top plates together at the corners to tie the walls into one solid structure.
Step 4: Roof Construction
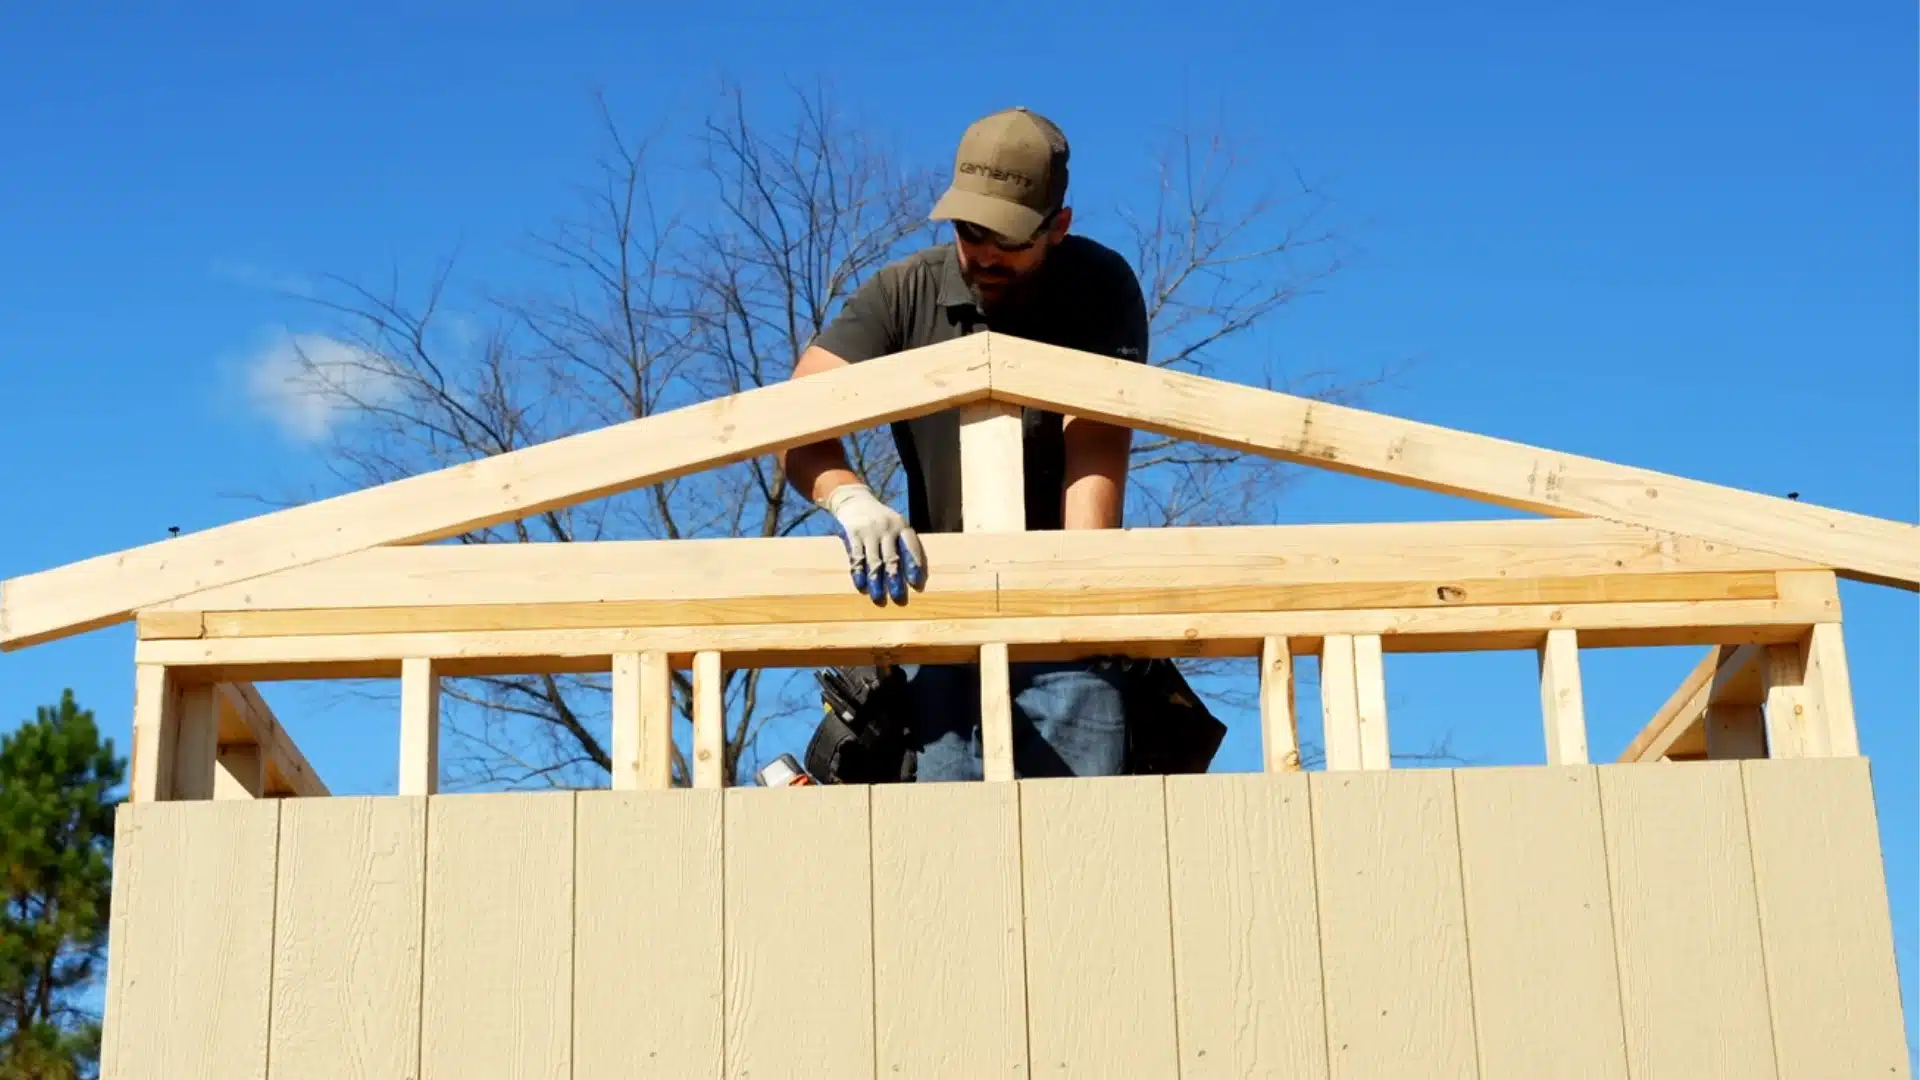
Build trusses by hand using a 3:12 pitch, cutting the bottom cord and rafters with a framing square, then joining them at the peak with screws.
Add a center support block to reinforce the peak, then repeat the process to build the full set of trusses needed for the shed.
Set each truss 16 inches on-center, aligning them with the wall studs below, and use a string line to keep the tops running straight before securing them.
Step 5: Z Flashing Installation
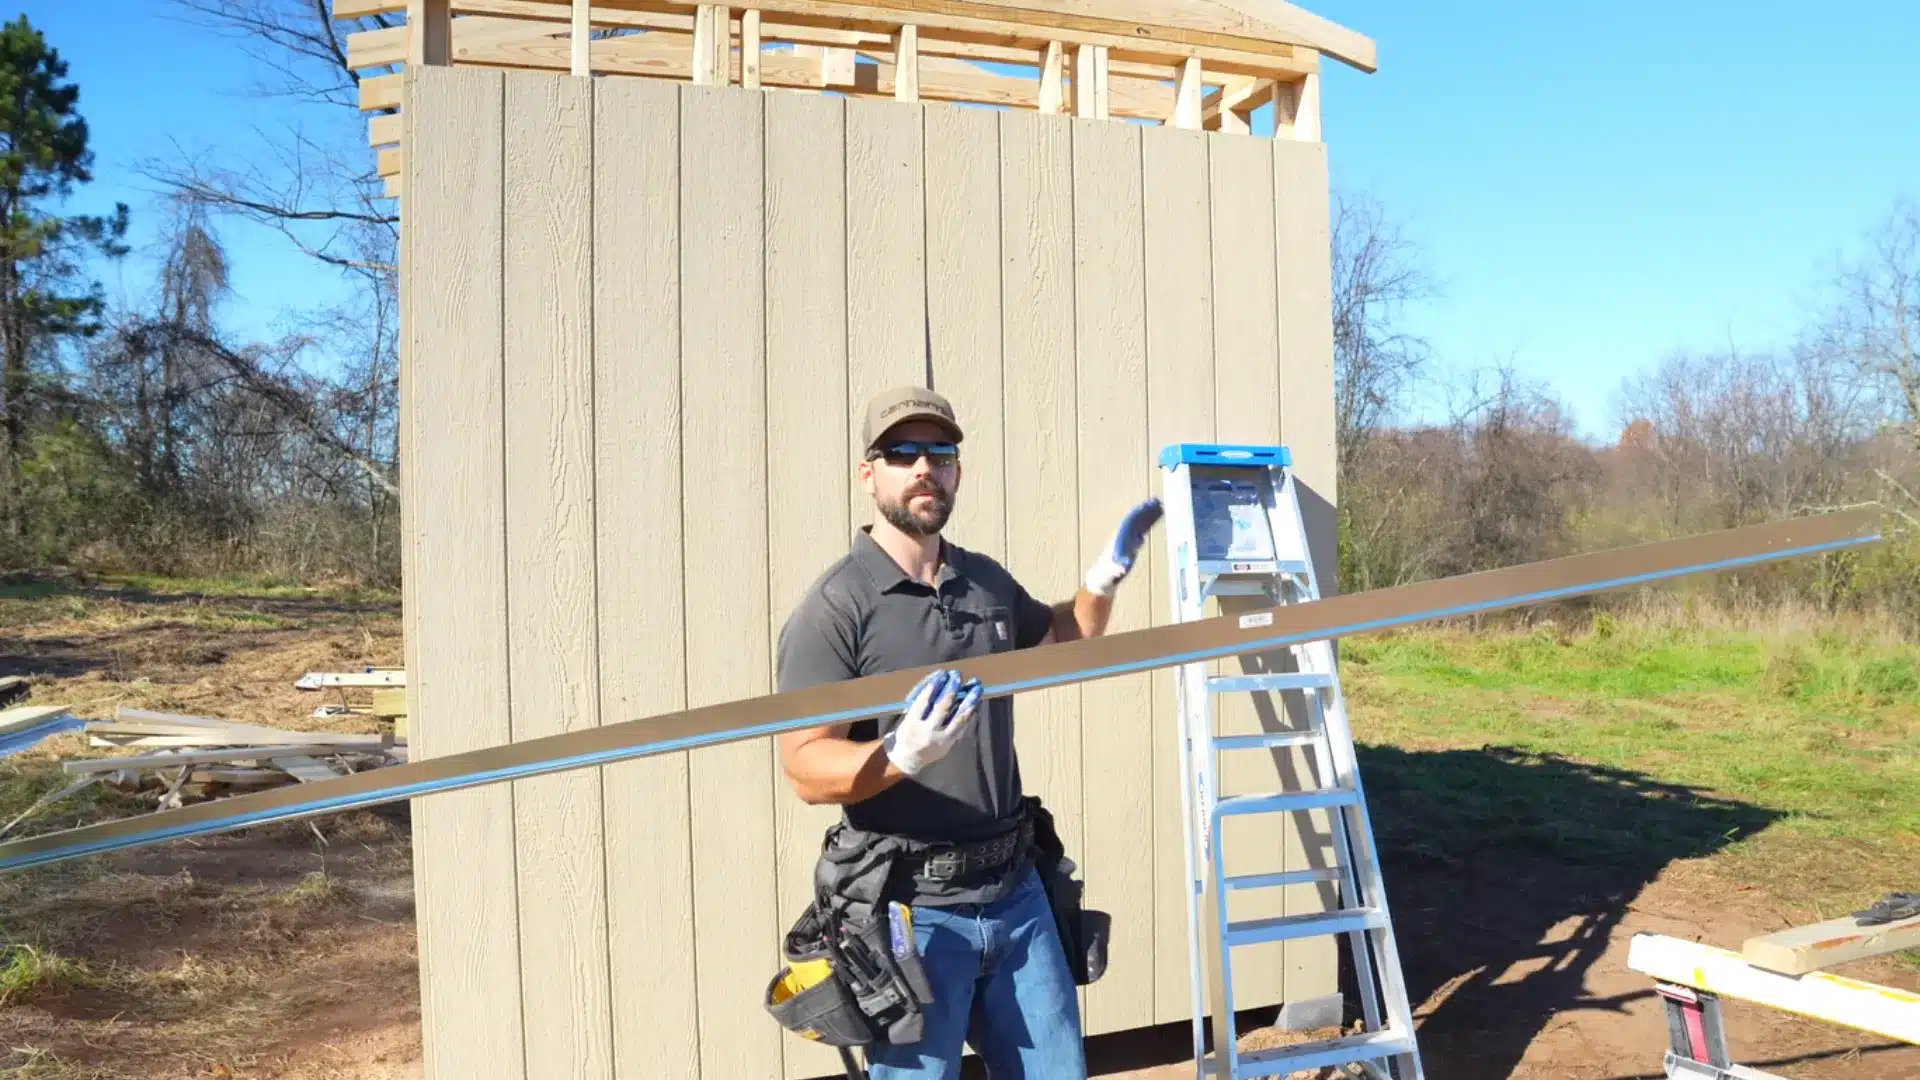
Install Z flashing above each row of exterior wall panels before the next row goes up.
Its job is simple but important, directing water down and over the panel below rather than letting it seep in behind.
Cut the flashing to length using tin snips, then nail it high along the top edge using galvanized nails, keeping nails away from the low point where water could otherwise find its way in.
Step 6: Overhang and Sub Fascia Installation
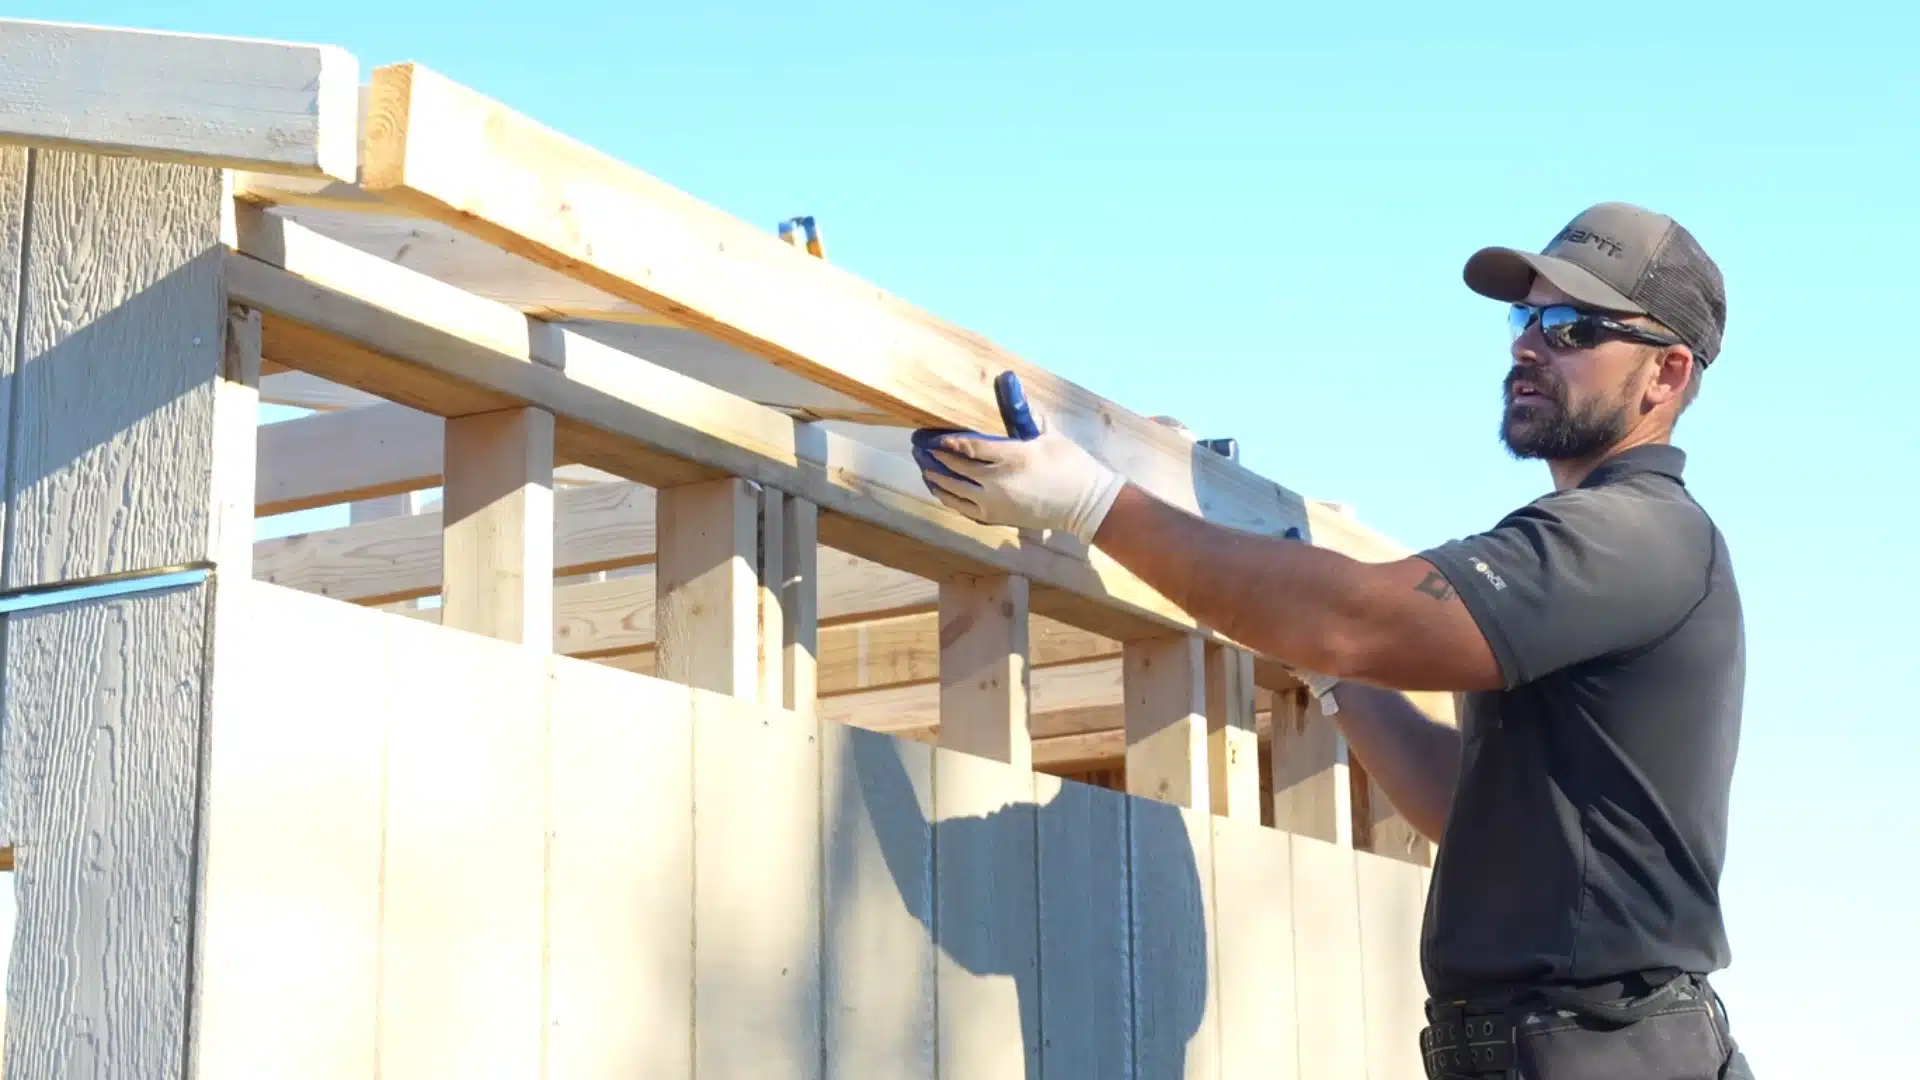
Build out the roof overhang using spacer blocks along the top and bottom of the gable ends, giving the roof its finished overhang look.
Install the sub fascia board along the truss tails, keeping it flush and straight so the metal fascia trim goes on cleanly later.
This step sets up the structure for both the metal roofing and the finished trim work that follows in later stages.
Step 7: Metal Roof Installation
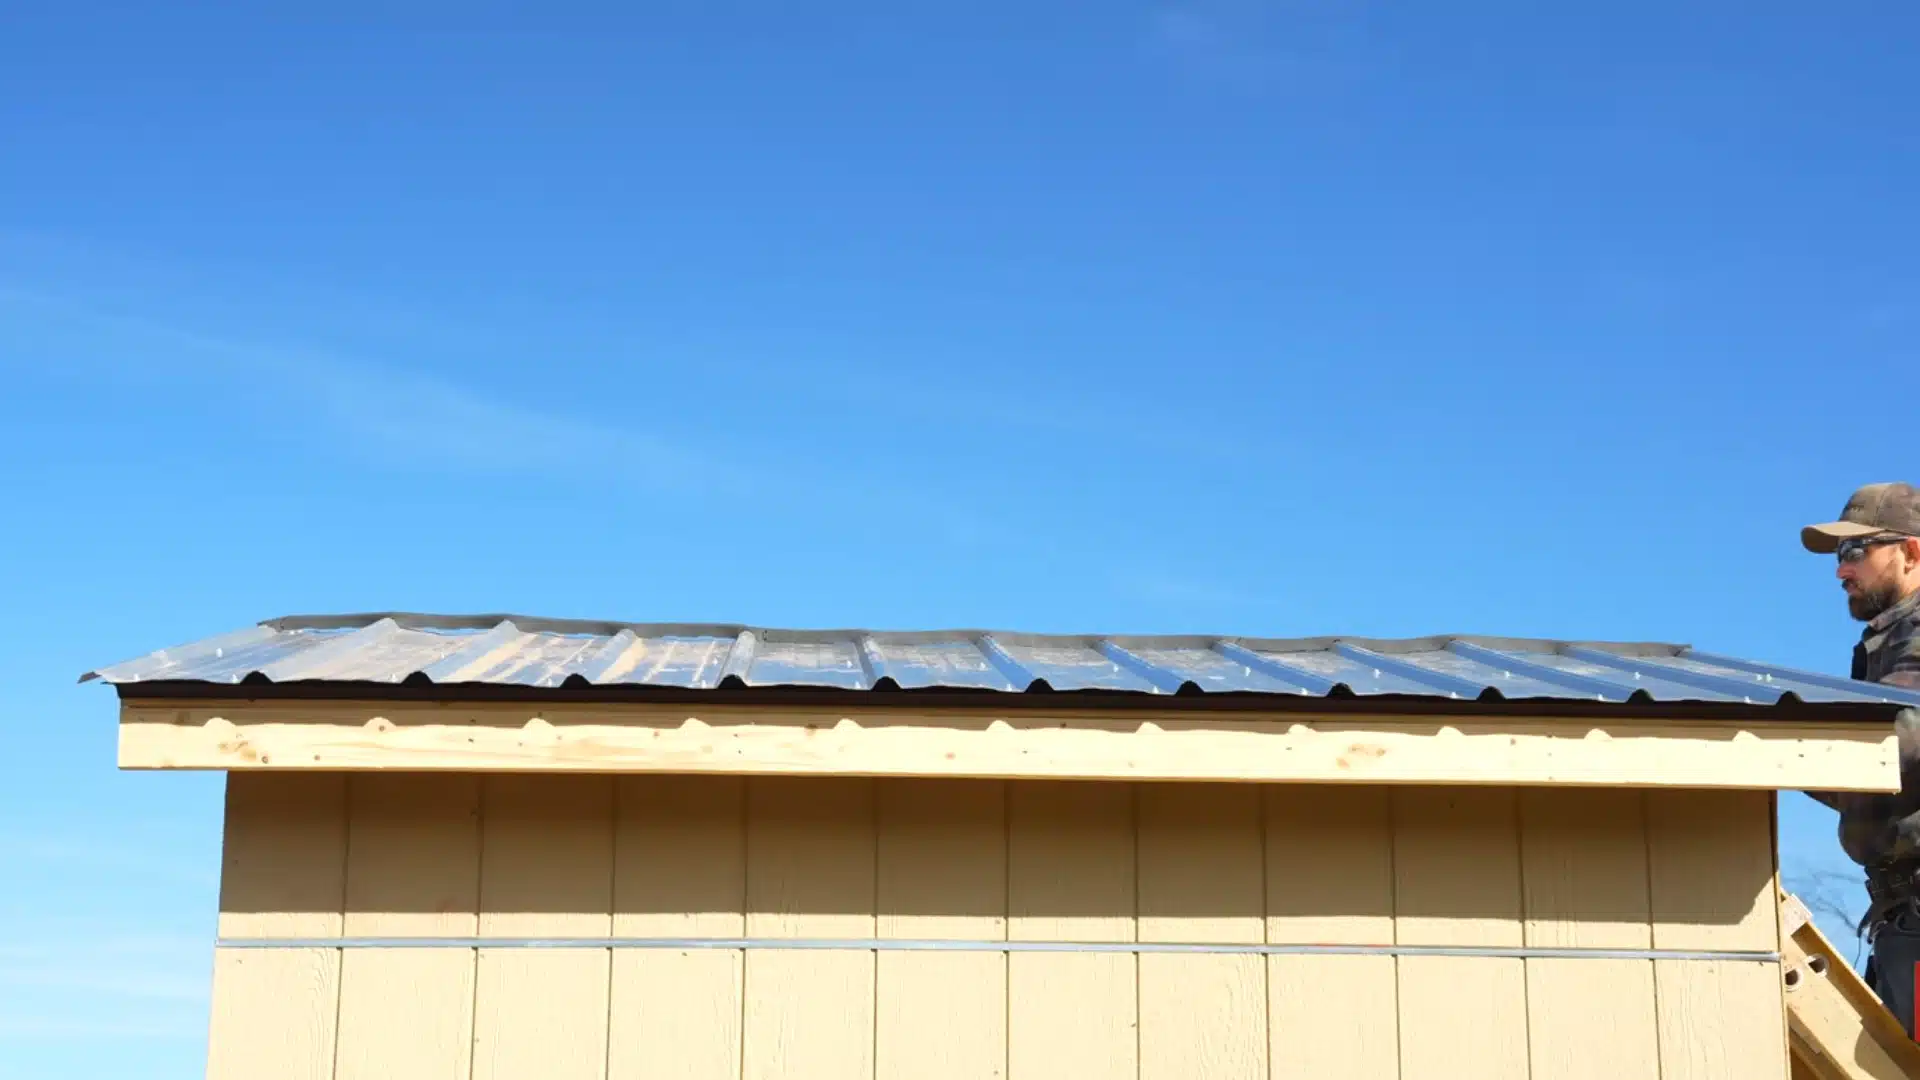
Install drip edge along the roof’s overhang first, giving water a clean path to drip away from the fascia rather than soaking into it.
Dimple and screw down the metal roofing sheets in order, sealing rib gaps along the way with inside and outside foam closures to keep bugs and birds out.
Finish by capping the peak with ridge cap, screwing through every other rib to secure it in place.
Step 8: Soffit and Fascia
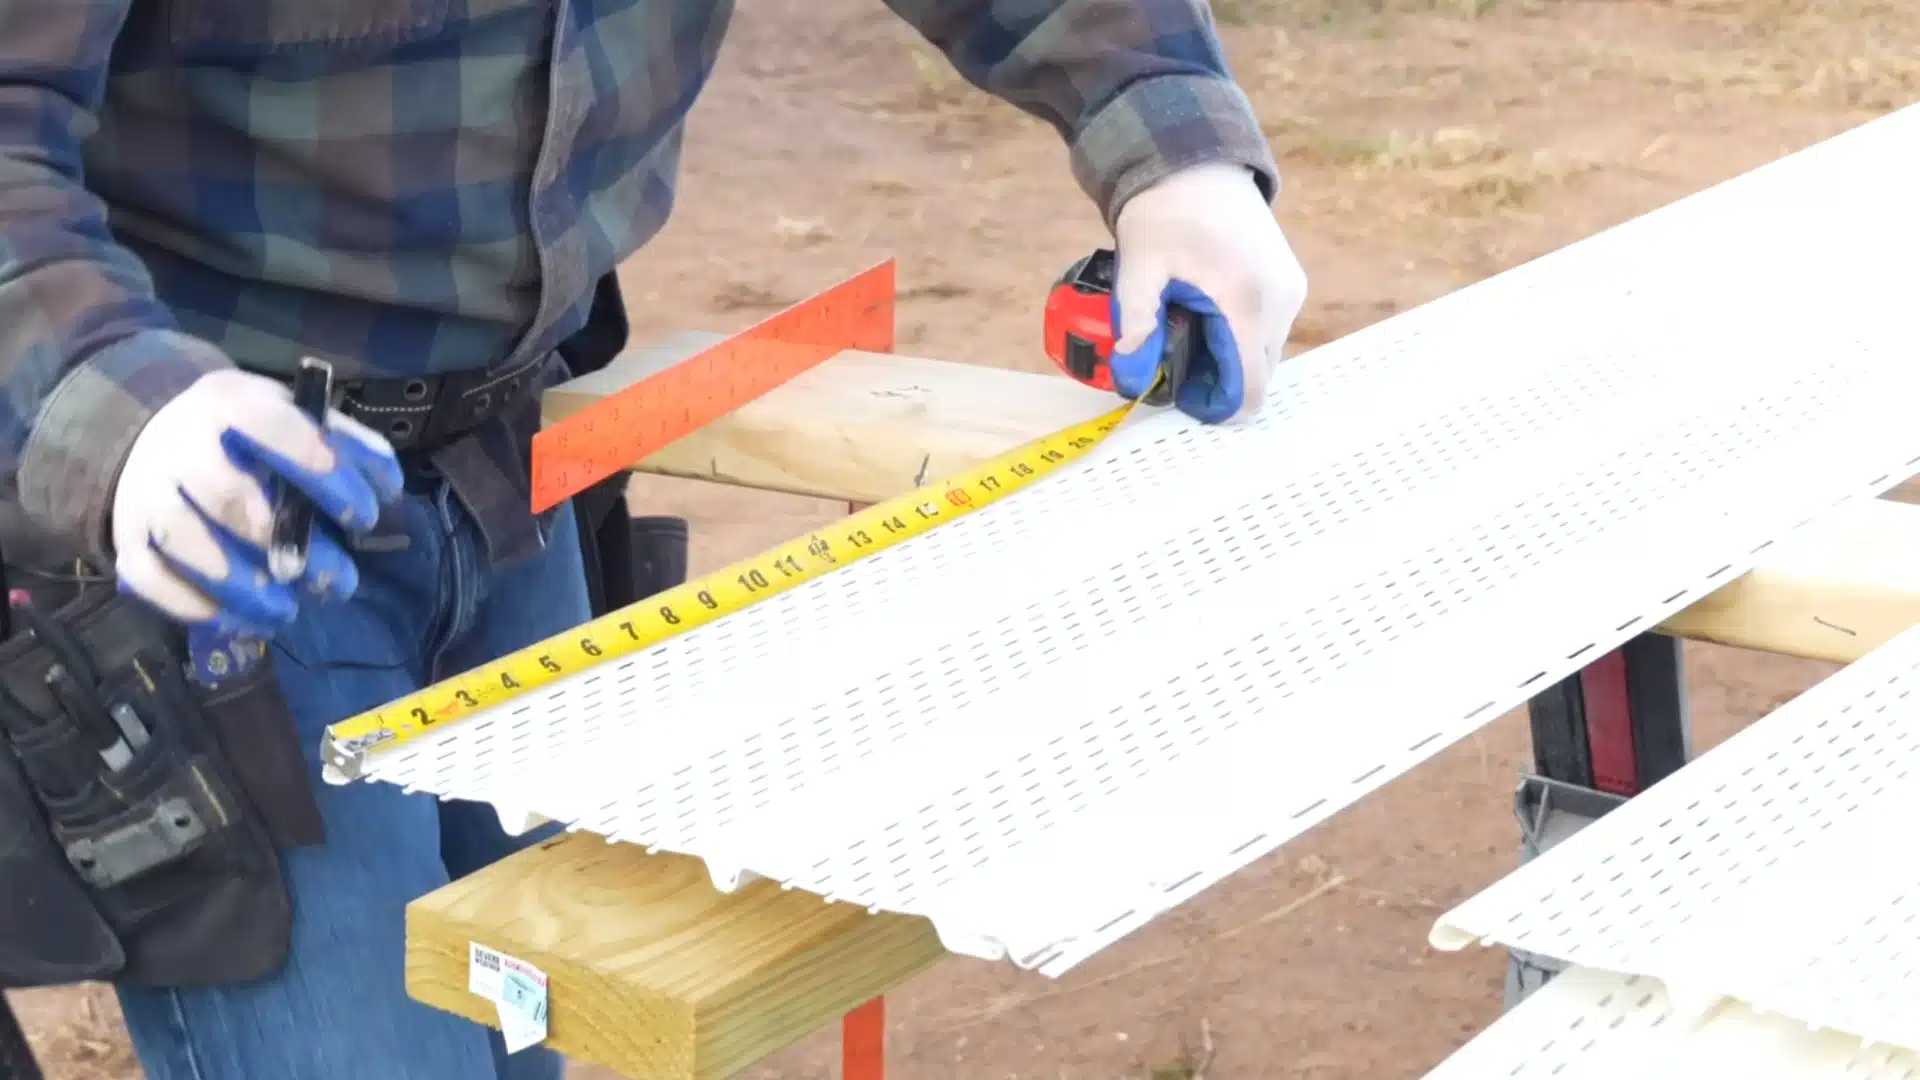
Build small bird boxes at each gable overhang using scrap 2×4 blocks, then install F-channel around the perimeter to hold the soffit panels.
Cut vented vinyl soffit panels to length and slide them into the F-channel, nailing loosely in the slots to allow for expansion.
Finish by bending and installing metal fascia trim around the bird boxes and gable ends for a clean, finished look.
Step 9: Gable Vent Installation
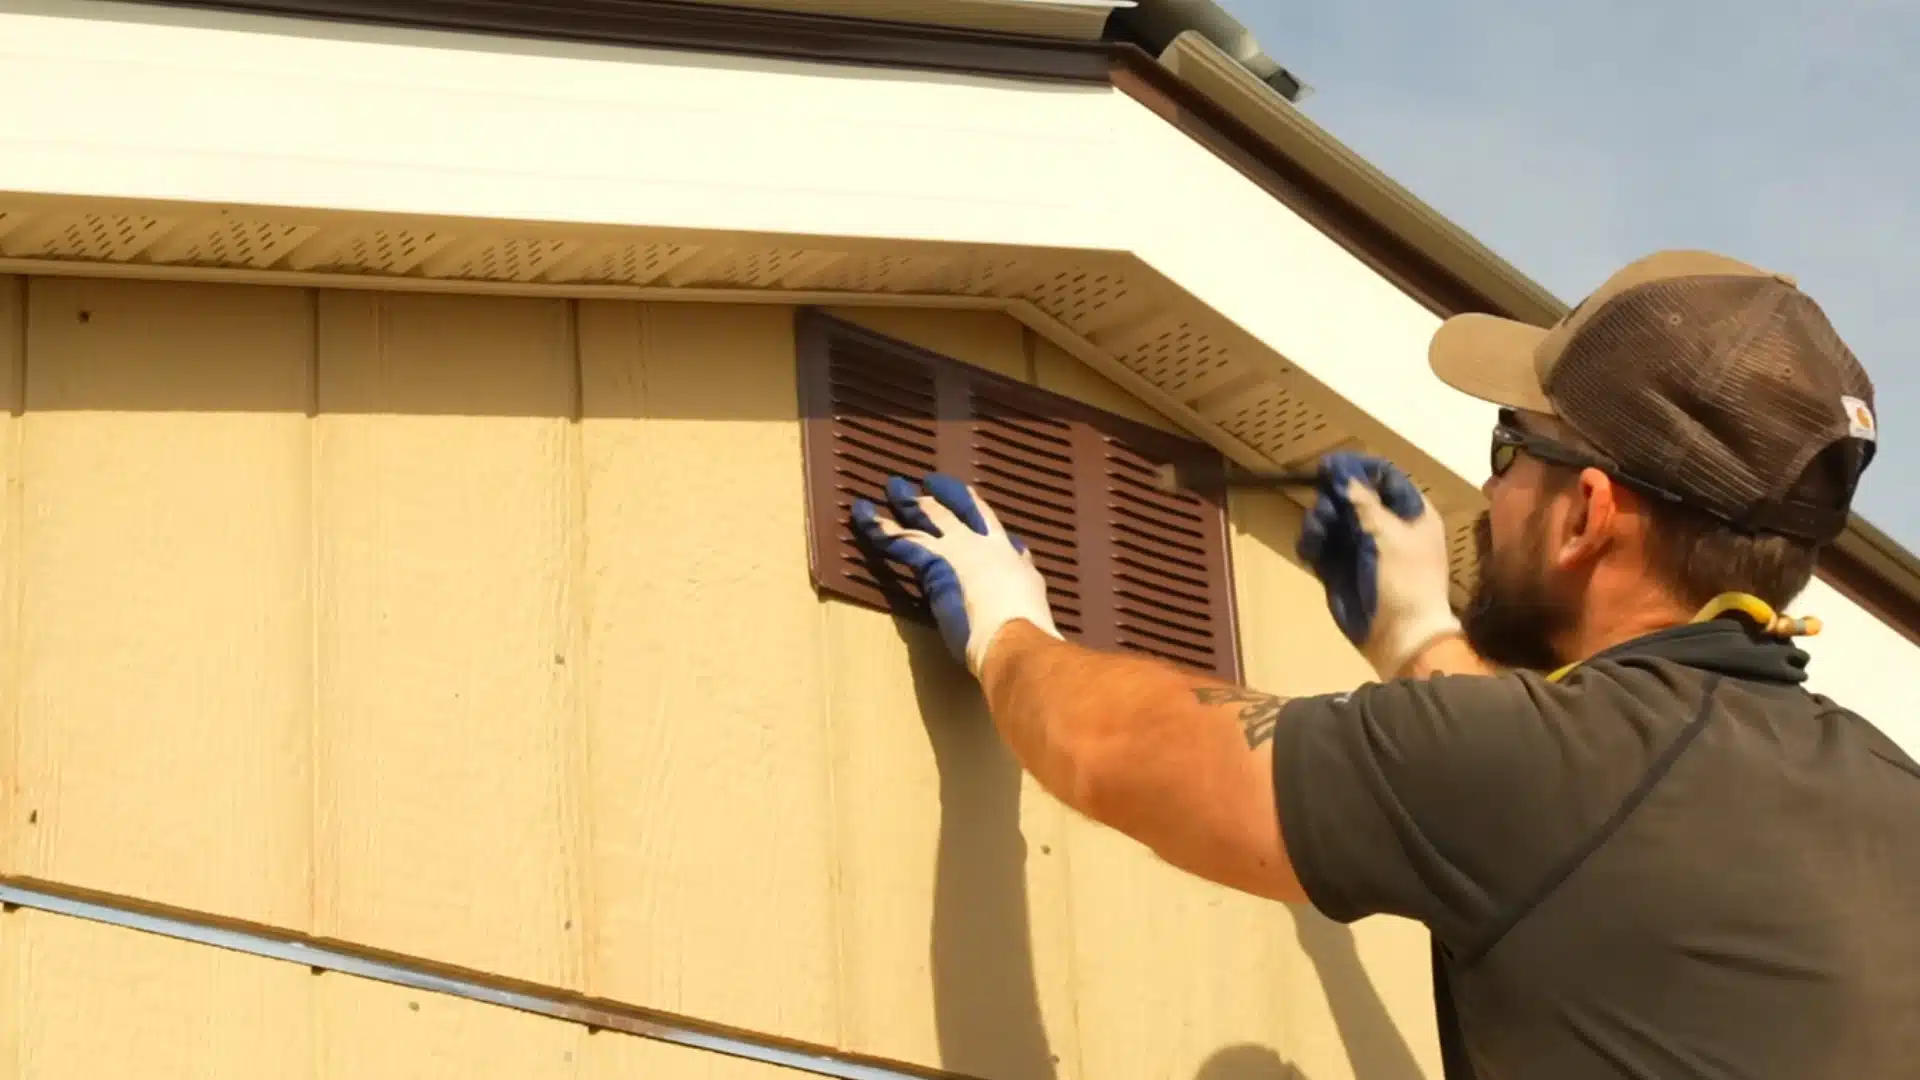
Trace the gable vent’s outline onto the wall, then cut the opening slightly smaller than the trace line so the vent frame overlaps and covers the cut edges cleanly.
Position the vent so rain runs off and away from the opening rather than pooling into it.
Secure it in place using stainless steel screws through the pre-drilled mounting holes on the vent frame.
Step 10: Window and Door Installation
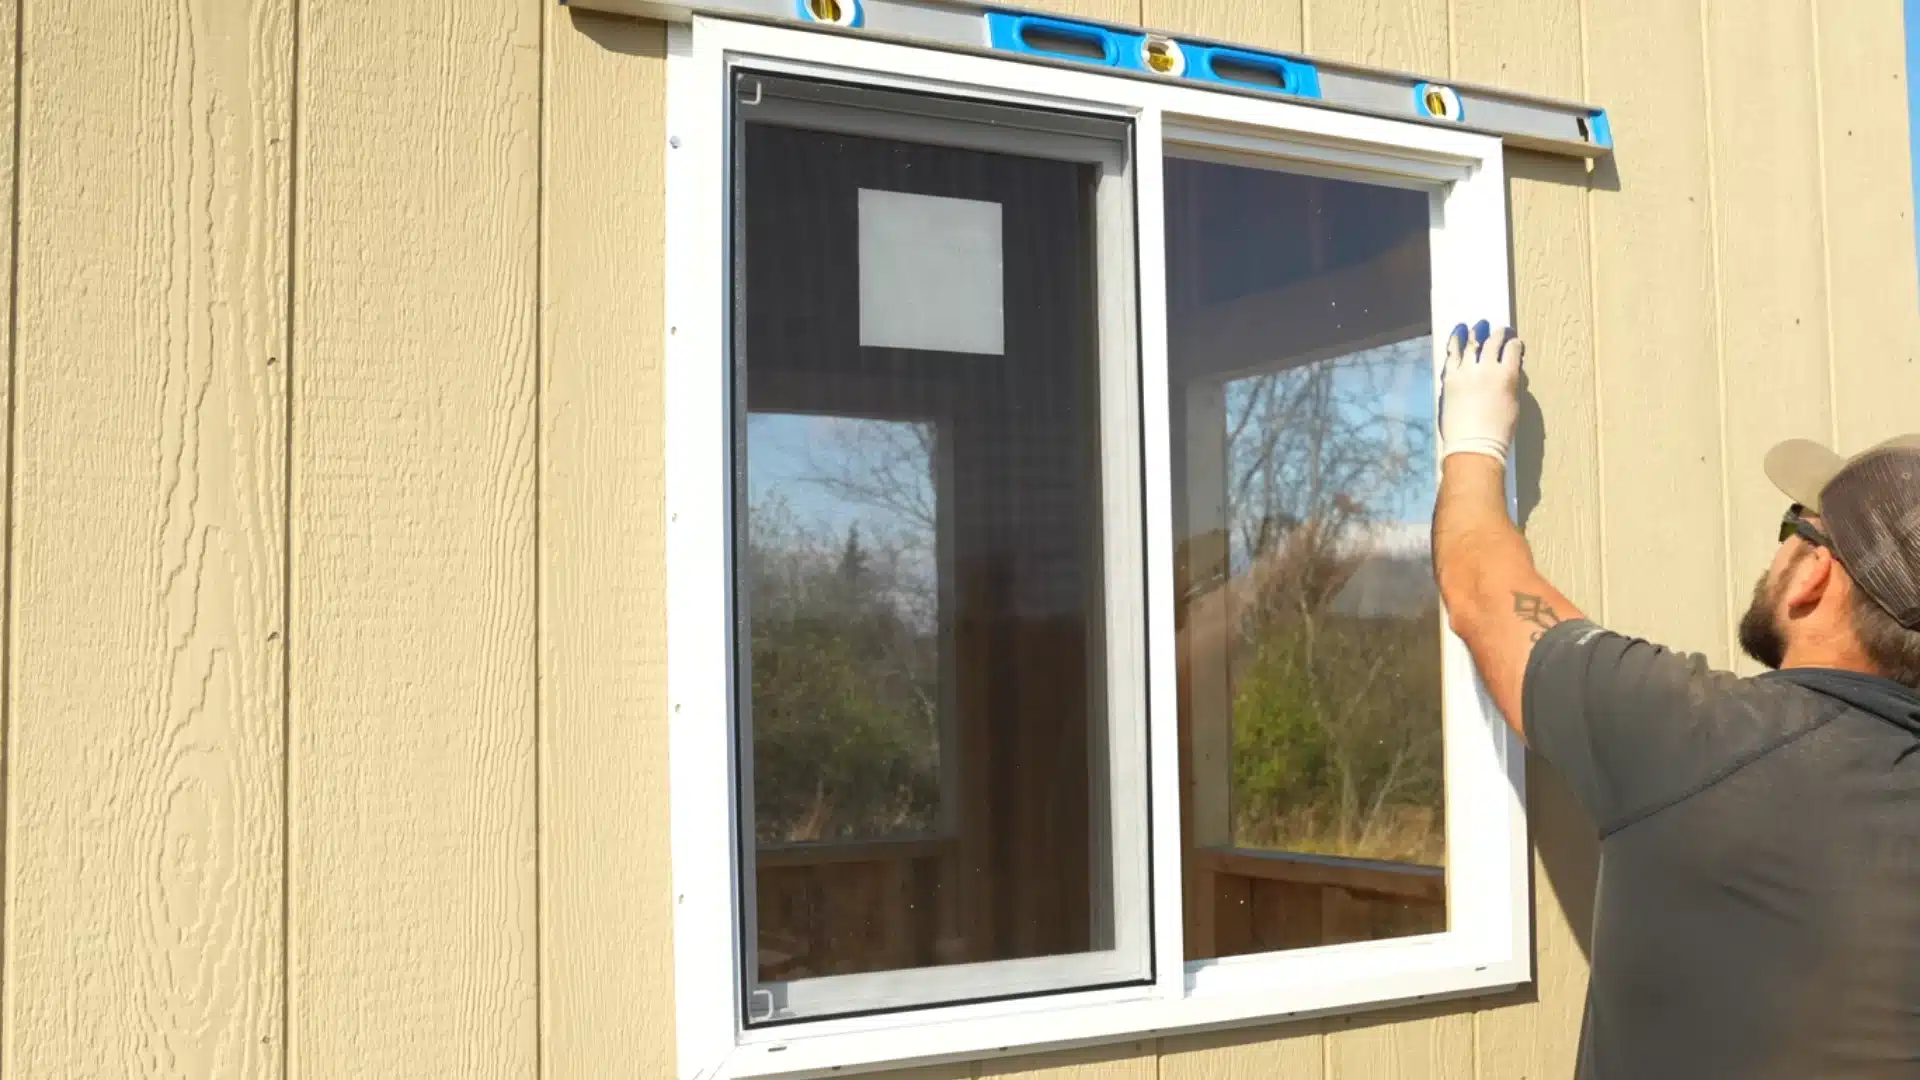
Apply silicone to the back of the window’s nailing flange, then set it into the rough opening, centering it and checking for level and plumb before nailing it into place.
Trim around the window using PVC board cut to fit each side, sliding it into the window’s J-channel.
Set the prehung door the same way, then reinforce each hinge with a construction screw for extra strength.
Step 11: Trim Installation
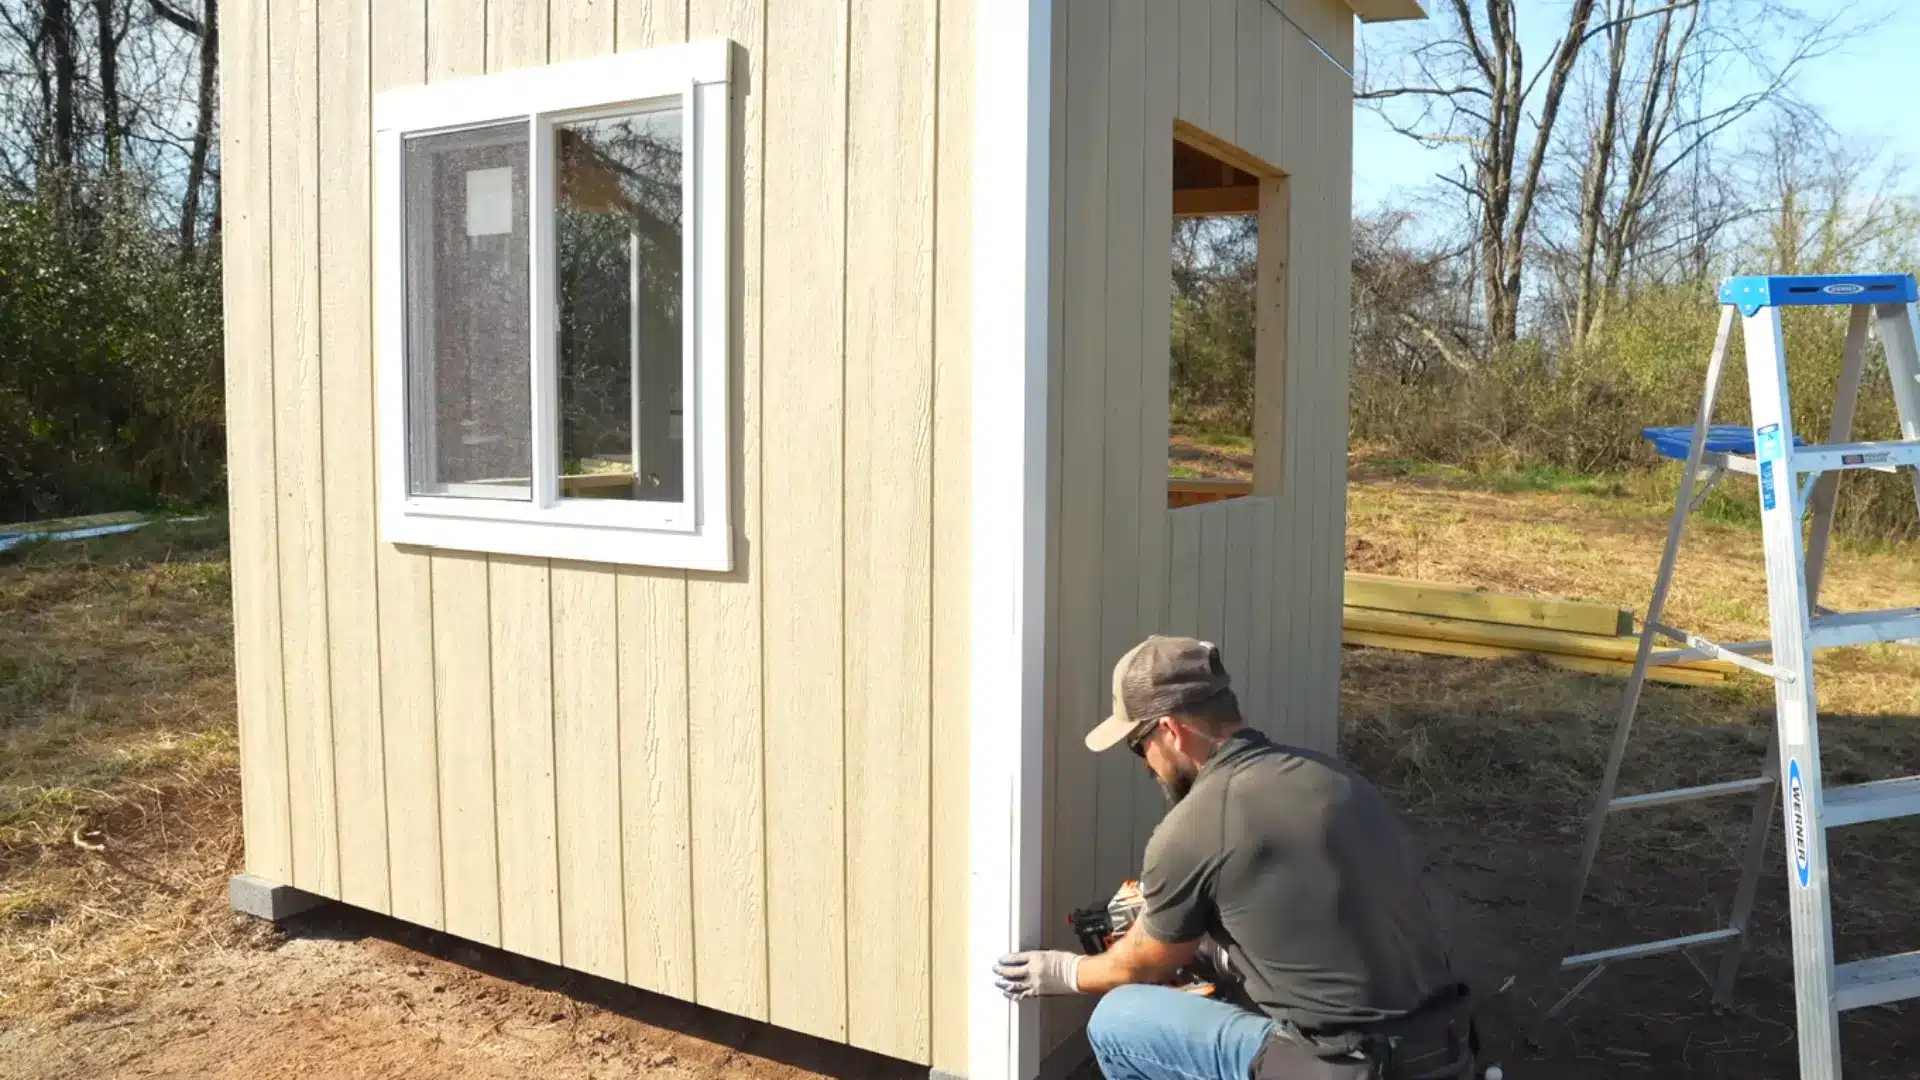
Cut and install corner trim boards running from the soffit down to the base of the shed, including one angled piece cut to match the roof’s 3:12 pitch at the gable ends.
Once trim is up, run a bead of paintable caulk along every seam, especially around the Z flashing, since that’s a common spot for water to sneak in behind the trim.
Step 12: Painting and Final Touches
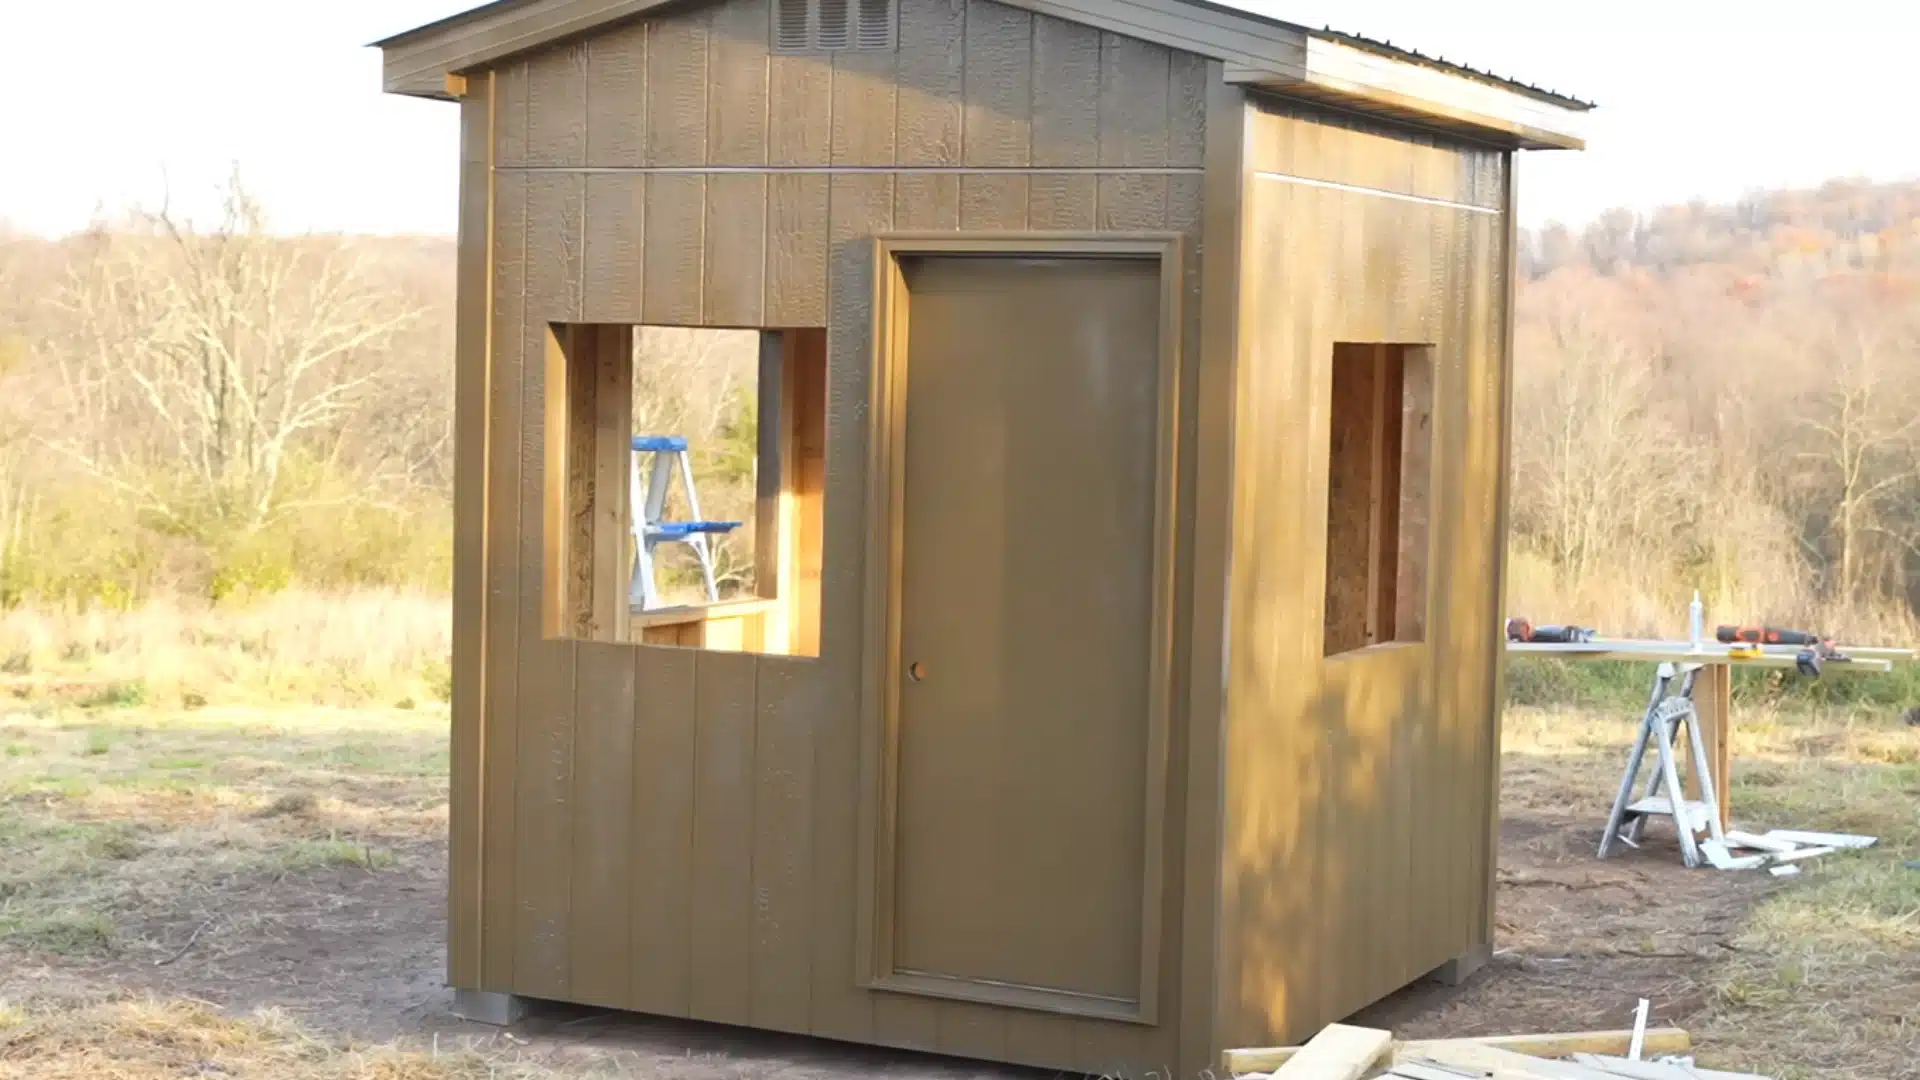
With all trim, windows, and doors installed, the shed is ready for a final coat of paint.
Using a handheld paint sprayer makes the job faster and gives a smoother, more even finish than rolling or brushing.
Choose an exterior-rated paint to protect the wood and siding from weather over the long run.
For more details, visit The Excellent Laborer.
Permit Requirements for Building a Shed
Most small sheds do not need a permit at all.
Under the International Residential Code, Section R105.2, one-story detached accessory structures are exempt from permits when the floor area does not exceed 200 square feet.
This covers most standard tool and storage sheds. Larger sheds, or ones with electrical or plumbing hookups, usually need a permit. Local zoning rules can still apply even for exempt sheds.
Setbacks, height limits, and placement rules often apply regardless of size. Checking with the local building department before starting avoids costly surprises later.
Shed Upgrades and Customization Ideas
Interior shelving follows built-in floating shelf project principles, using vertical wall space instead of piling supplies on the floor. A few other upgrades round out the list nicely:
- Small porch or overhang: A dry spot to wipe your feet, stack firewood, or store boots by the door; low cost, big everyday convenience.
- Interior shelving: Uses vertical wall space to keep tools and supplies organized instead of piled on the floor.
- Loft storage: Tucks away rarely used items like decorations or camping gear, using otherwise wasted roofline space.
- Solar lighting: Lights up the shed after dark without the cost or hassle of running electrical wiring.
- Workbench setup: Turns the shed into a real workspace; pair it with a pegboard for a dedicated project spot.
- Window boxes or trim details: Inexpensive touches like flower boxes or contrasting trim tie the shed into your home’s exterior style.
Small touches like these add function without much extra cost. Pick one or two upgrades that match how you plan to use the space.
How Much Does a Shed Cost to Build?
Shed costs and build times shift based on size and how complex the design gets. A small shed sized 8×8 to 10×10 often runs $2,000 to $4,000 to build yourself.
Hiring a professional for that same size usually costs $5,000 to $8,000. Medium sheds run $4,000 to $7,000 DIY, or $8,000 to $14,000 professionally.
Large sheds can reach $7,000 to $12,000 or more yourself, or $14,000 to $25,000 or more with a professional.
Roofing choice, window count, foundation type, and builder skill level all affect the final price. Metal roofing and extra windows raise costs, while a simple block foundation keeps them lower.
Note: These figures are general estimates. Actual costs vary based on location, current material prices, and the complexity of your specific shed design.
Maintenance Tips to Extend Your Shed’s Life
A well-built shed can last decades, but a little regular upkeep goes a long way. Simple checks throughout the year help catch small issues before they grow. Here are a few habits worth building into your routine:
- Reseal caulk annually, since sun and weather break it down over time around windows, doors, and trim.
- Repaint every 3 to 5 years to protect the wood underneath from moisture and UV damage.
- Check flashing and roofing for water intrusion, especially after storms, for gaps, rust, or loosening.
- Clear debris from soffits and vents once or twice a year to keep airflow steady.
- Inspect the foundation periodically for shifting, settling, or gaps that could throw it out of level.
- Touch up hardware as needed, since hinges, handles, and locks can loosen or rust with use.
Staying on top of these small tasks keeps the shed standing strong for years. A little attention now saves time and money later.
Frequently Asked Questions (FAQs)
How Long Does It Take to Build a Shed Yourself?
For a small to medium shed, expect 3 to 8 weekends, depending on size, complexity, and your construction experience.
What’s the Cheapest Foundation Option for a Shed?
Cinder blocks are typically the most affordable and beginner-friendly option, faster and cheaper than pouring a concrete slab, while still providing solid support for most shed sizes.
Can I Build a Shed without Any Construction Experience?
Yes, with careful planning and patience. Following a clear step-by-step process, like framing, roofing, and trim in order, makes it manageable even for first-time builders.
Final Thoughts
Building a diy shed covers every stage, from footings through final paint. You now have the steps needed to plan, build, and finish it right.
Every part plays a role in the final look and strength. Take your time on each stage, footings first and trim last. A solid diy shed adds real value to your home and yard.
It gives you space for tools, hobbies, or a quiet corner. Stick to good materials and steady work for lasting results.
Your yard deserves a sturdy, useful space like this. Ready to start your own build? Drop a comment below and share your plan!