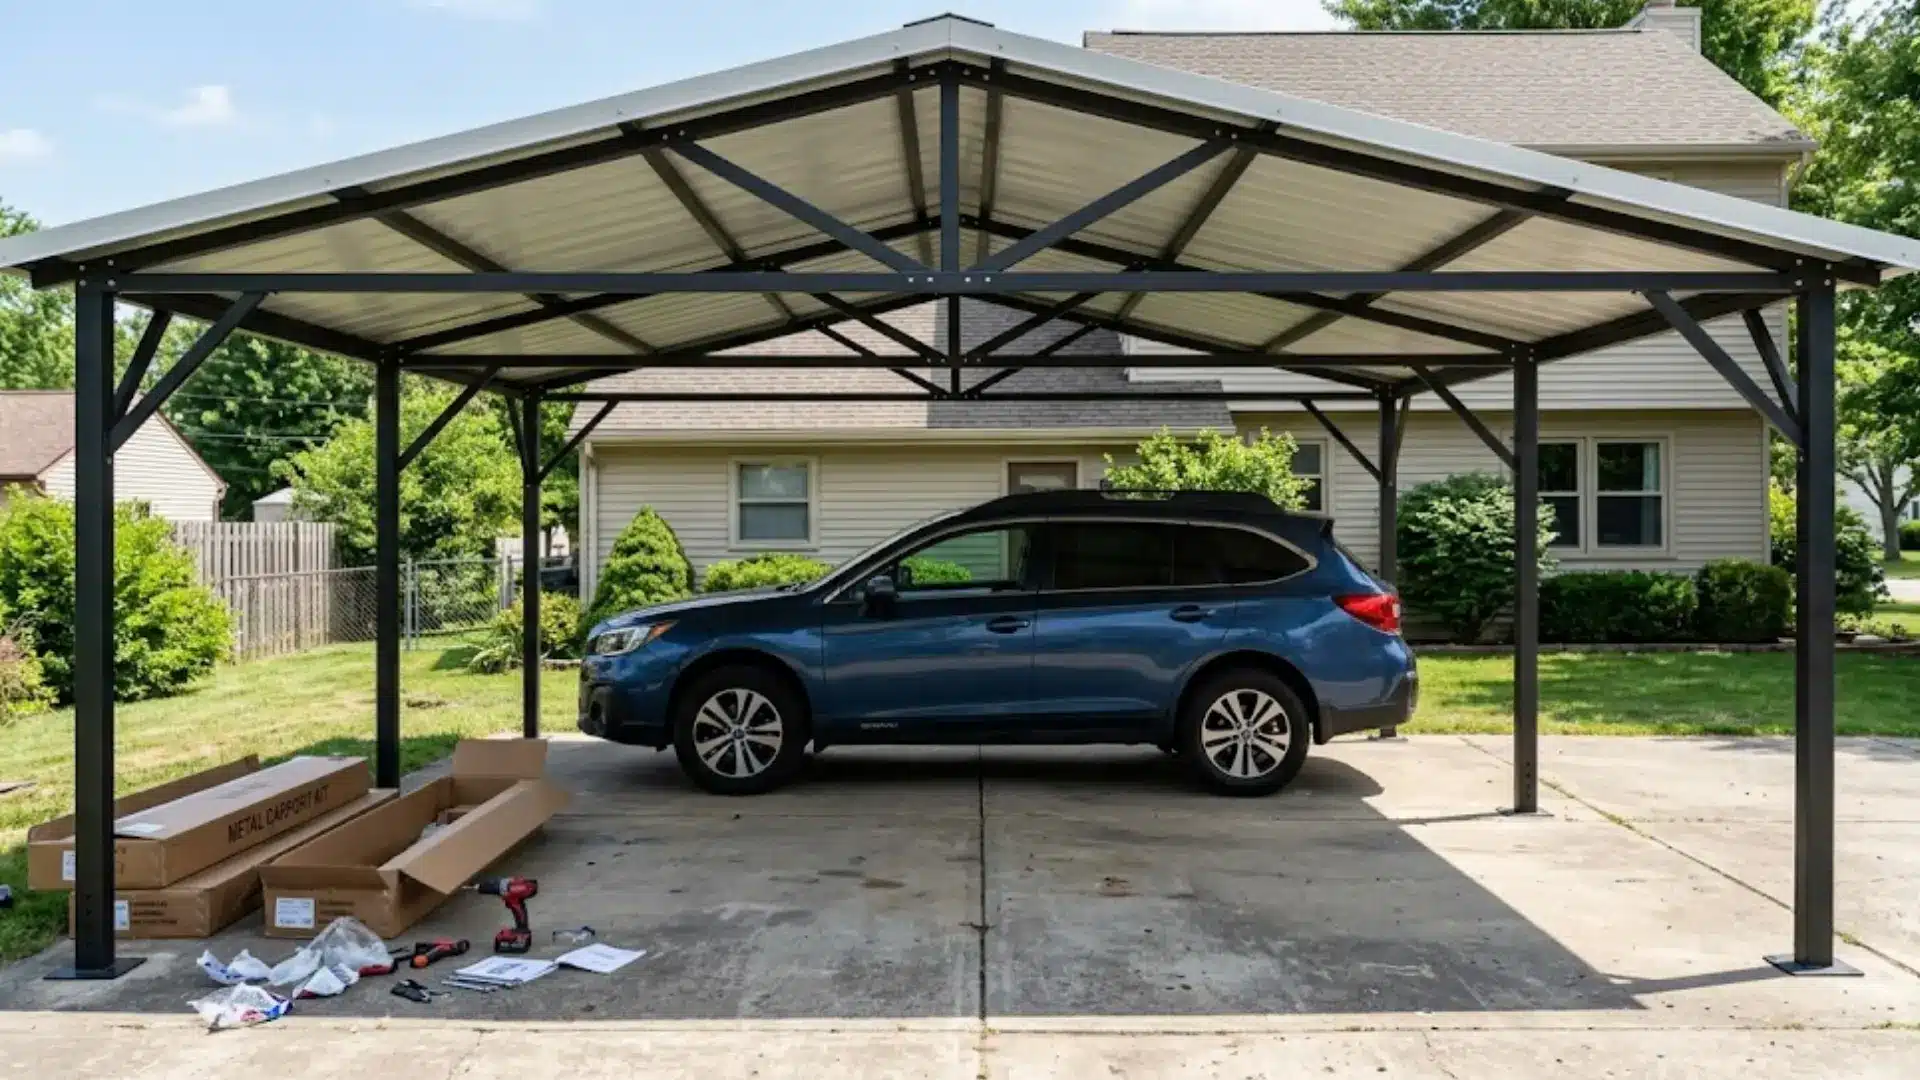
A bare driveway leaves your car soaked, sunburned, and leaf-covered. A diy carport fixes that problem without draining your bank account.
It fits almost any yard, tight or wide. You get sturdy posts, a solid roof, and a clean finished look. Materials stay simple, and most tools are easy to rent locally.
Storage space for tools, bikes, or yard gear comes as a bonus. Each step stays manageable, even for someone building their very first structure.
Planning ahead saves time, money, and frustration later on. A clear plan keeps costs low and looks sharp. A diy carport turns bare concrete into a useful, protected parking spot fast!
What Makes a Carport a Practical Home Addition?
A carport gives you covered parking without the cost of building a full garage. You can park close to the house and skip walking through rain or snow.
It also protects your vehicle from sun damage, frost, and falling leaves all year. Loading groceries or getting kids inside becomes easier with dry space right by the door.
Many homeowners use the extra area for storage, bikes, or yard tools. A carport can double as a shaded spot for grilling or relaxing on weekends.
It’s simple, useful, and adds real value without a big investment upfront. For everyday living, a carport offers steady convenience that fits almost any budget and lifestyle.
Different Types of Carports to Consider
Carports come in different builds, and picking the right one depends on your needs. Some are made for daily vehicle protection, while others serve as flexible outdoor space. Here’s a quick look at the main types you can choose from:
- Single Carport: A compact, budget-friendly build that works well for narrow driveways or one-car households.
- Double Carport: Provides side-by-side coverage for two vehicles, making it a smart pick for families or shared driveways without the cost of a garage.
- RV Carports: Built with extra height and length to comfortably fit campers and motorhomes.
- Boat Carports: Open-sided for easy loading and trailer access, a practical choice for boat owners without dock storage.
- Patio Carports: Doubles as a shaded outdoor space for seating or entertaining, great for homeowners who want a hangout spot beyond just vehicle coverage.
- Outdoor Shelter Use: Flexible enough to handle general storage, tools, or workshop projects for those needing adaptable space.
Each type serves a different purpose, so matching it to your lifestyle makes a real difference. Once you’ve picked the right fit, you’re ready to move on to sizing and materials.
Tools and Materials You’ll Need
Building a DIY carport like this takes the right tools and materials from start to finish. Below is a breakdown of everything you’ll need:
| Tools Required | Materials Required |
|---|---|
| Laser level with tripod | 6×6 wood posts |
| Circular saw | Concrete |
| Siding nailer | 2×4 boards |
| Drill | LVL beams |
| Skid steer | Metal hurricane ties |
| Ratchet straps | Structural sheathing (OSB) |
| Chalk line | House wrap |
| Tape measure and square | LP Smart Side siding |
| Putty knife | 5/4 trim boards |
| Pocket hole jig | Nails and structural screws |
| Painter’s tape | Caulk/sealant |
| Flex router | Metal roofing panels |
| Framing hammer | Roofing felt (moisture barrier) |
| Wheelbarrow | Gravel |
Most of these items are easy to find at any local hardware store. Having them ready ahead of time will save you a lot of back-and-forth trips.
How to Build a Carport: Step-by-Step Instructions
Building a carport takes patience and a clear plan from start to finish. Follow these steps in order to get the best results:
Step 1: Setting the Posts
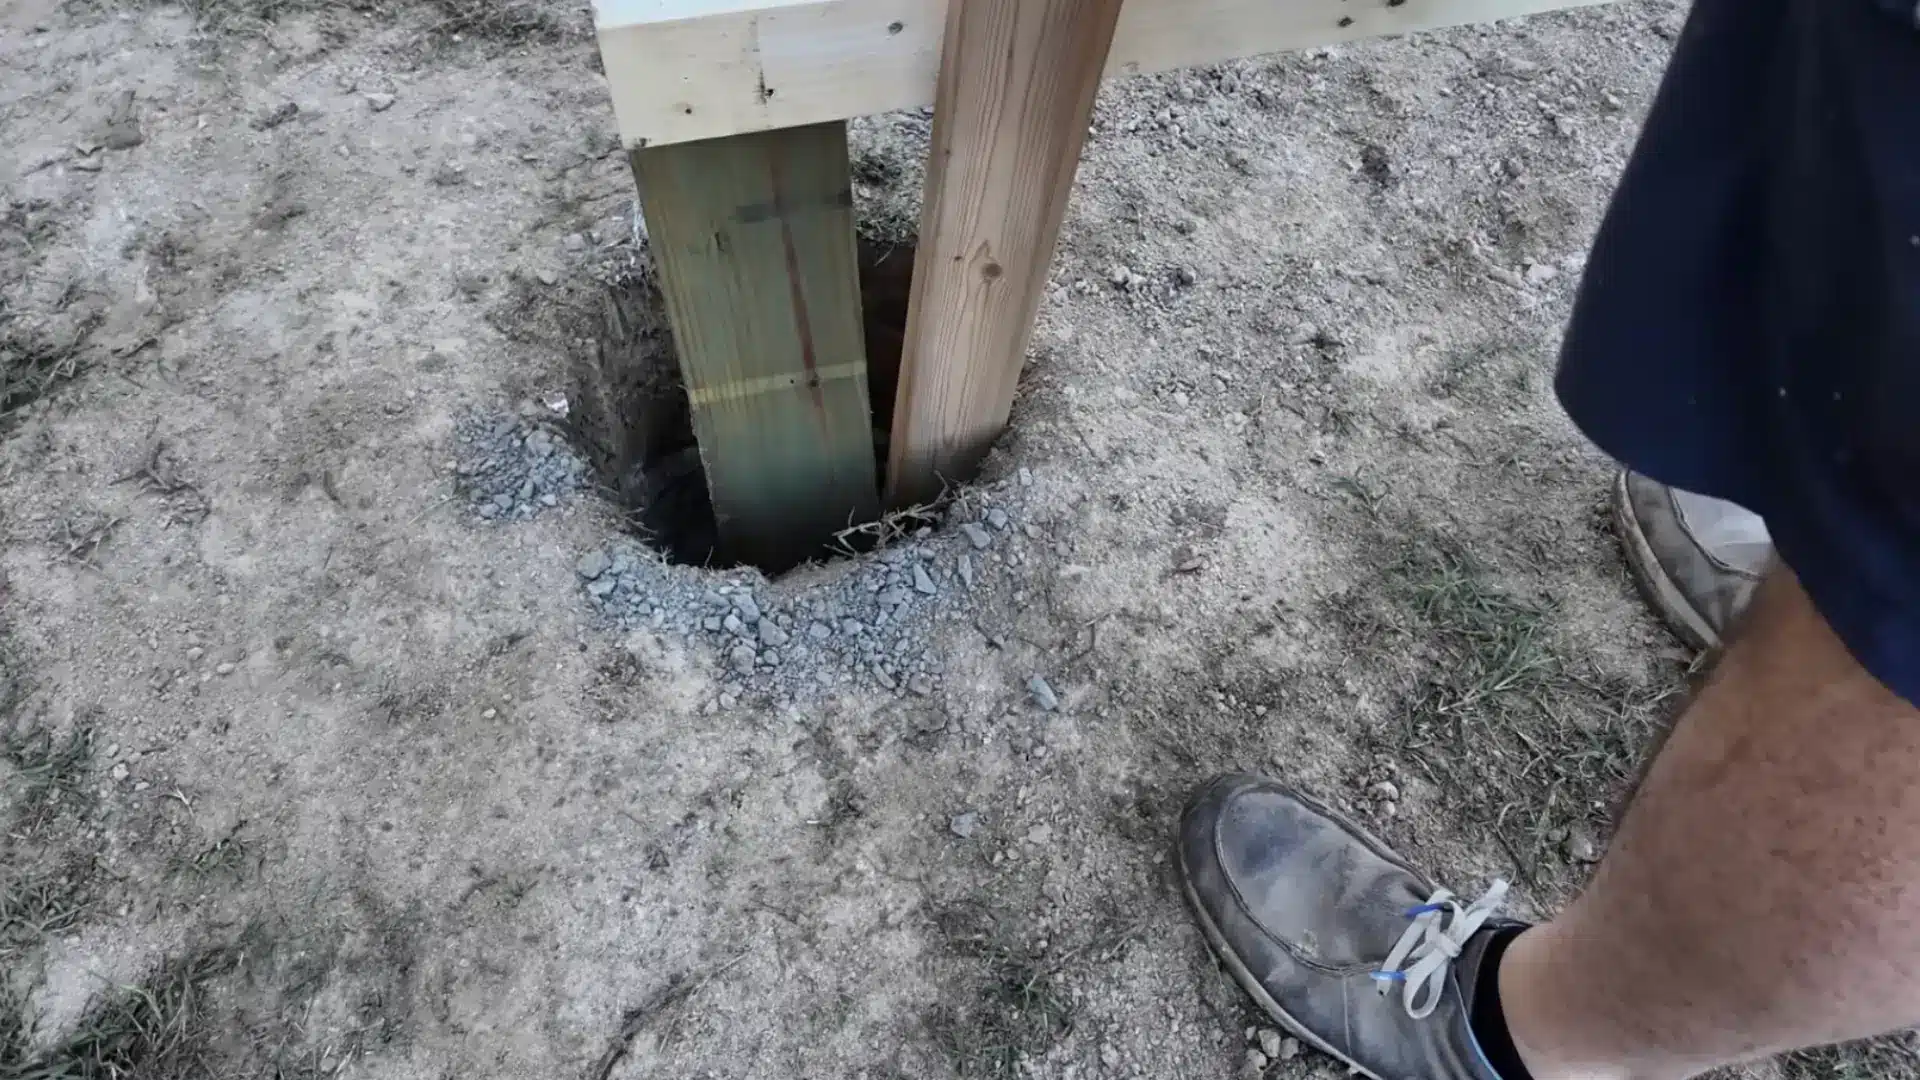
Fill the post holes with concrete first, then set the posts in place. Builders tie the posts together using 2×4 boards, keeping the layout at 24 feet all around.
This makes the frame more stable while the concrete sets. Post holes go about 24 inches deep, which gives good side support in most areas.
Depth can change depending on your local frost line, so always check what works best for your region before digging.
Step 2: Squaring the Building
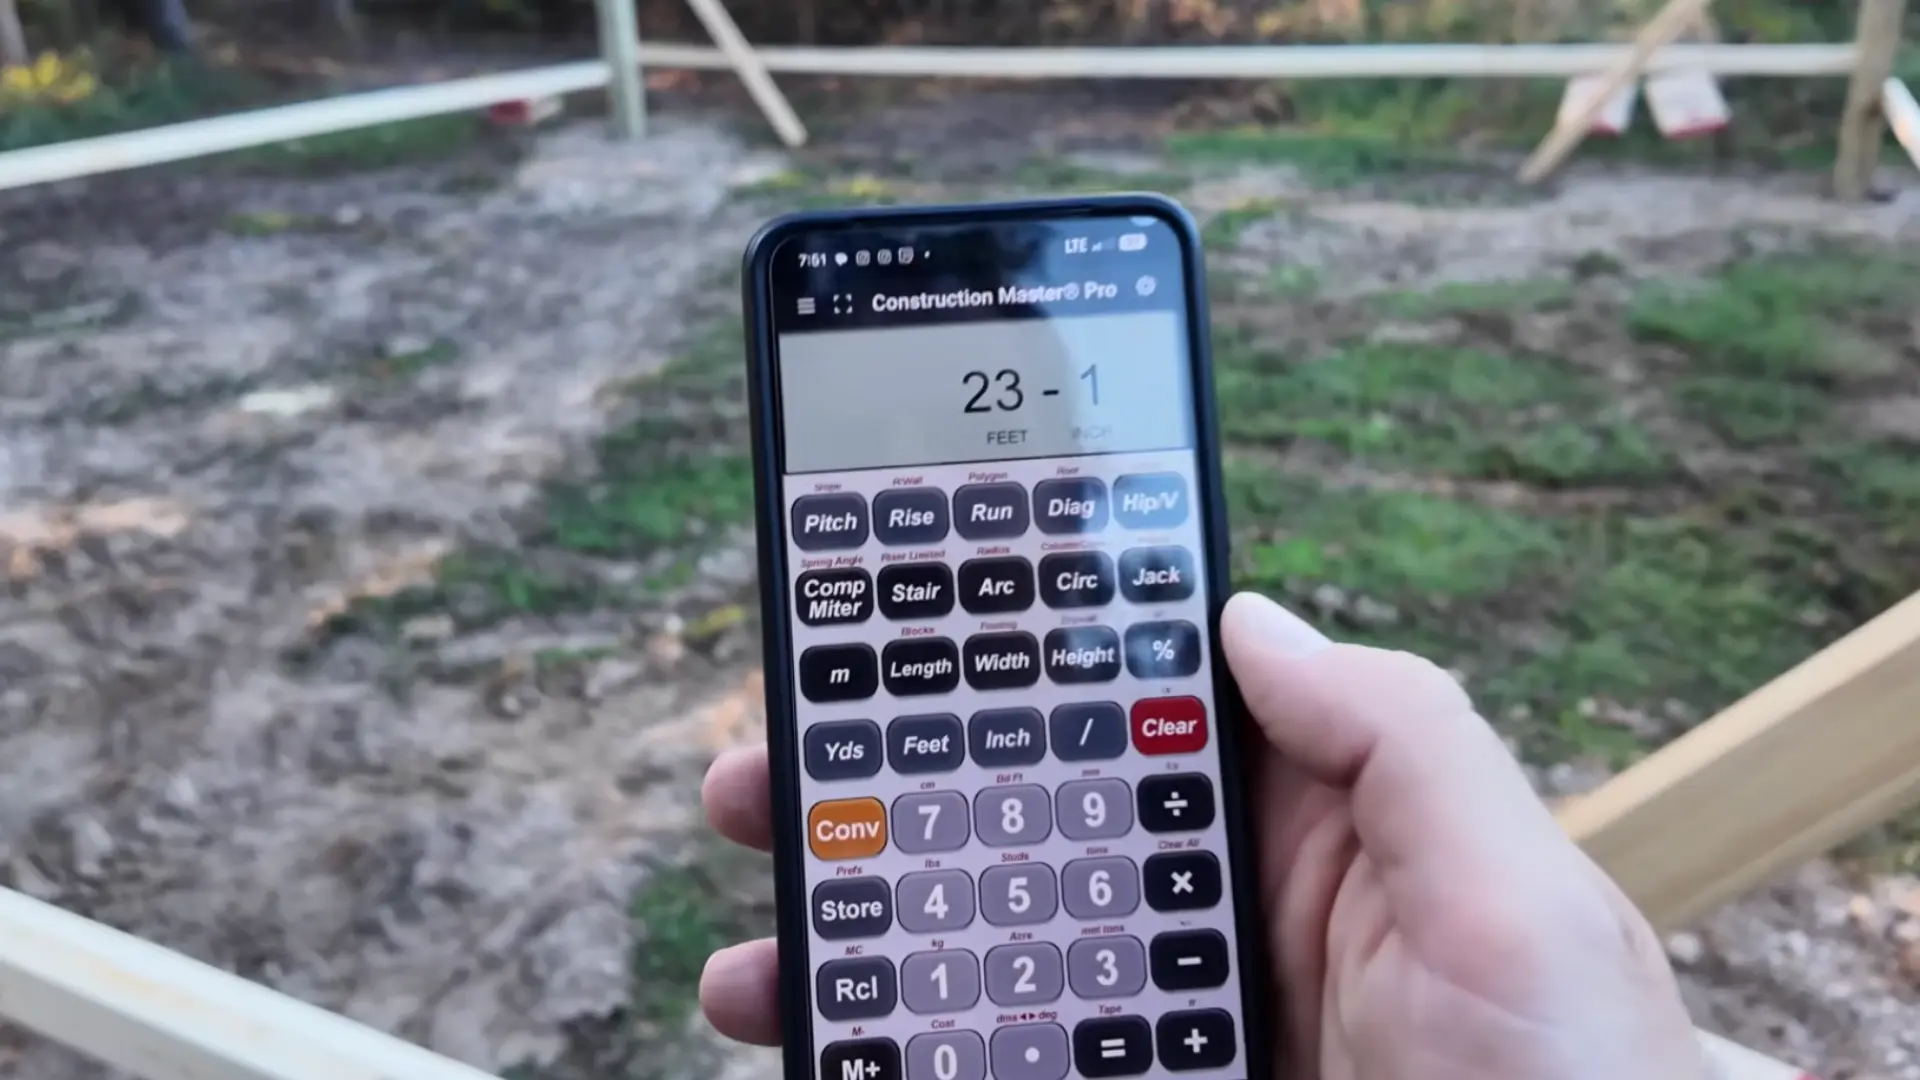
A construction calculator helps you lay out the layout perfectly square before building continues. Since the posts measure 5 1/2 inches wide, builders subtract 11 inches from the 24-foot mark.
This gives a target measurement of 23 feet 1 inch, corner to corner. Builders shift the posts slightly inside the holes until both diagonal measurements match exactly.
A tape measure confirms the numbers stay consistent all the way around the structure.
Step 3: Leveling and Notching the Posts
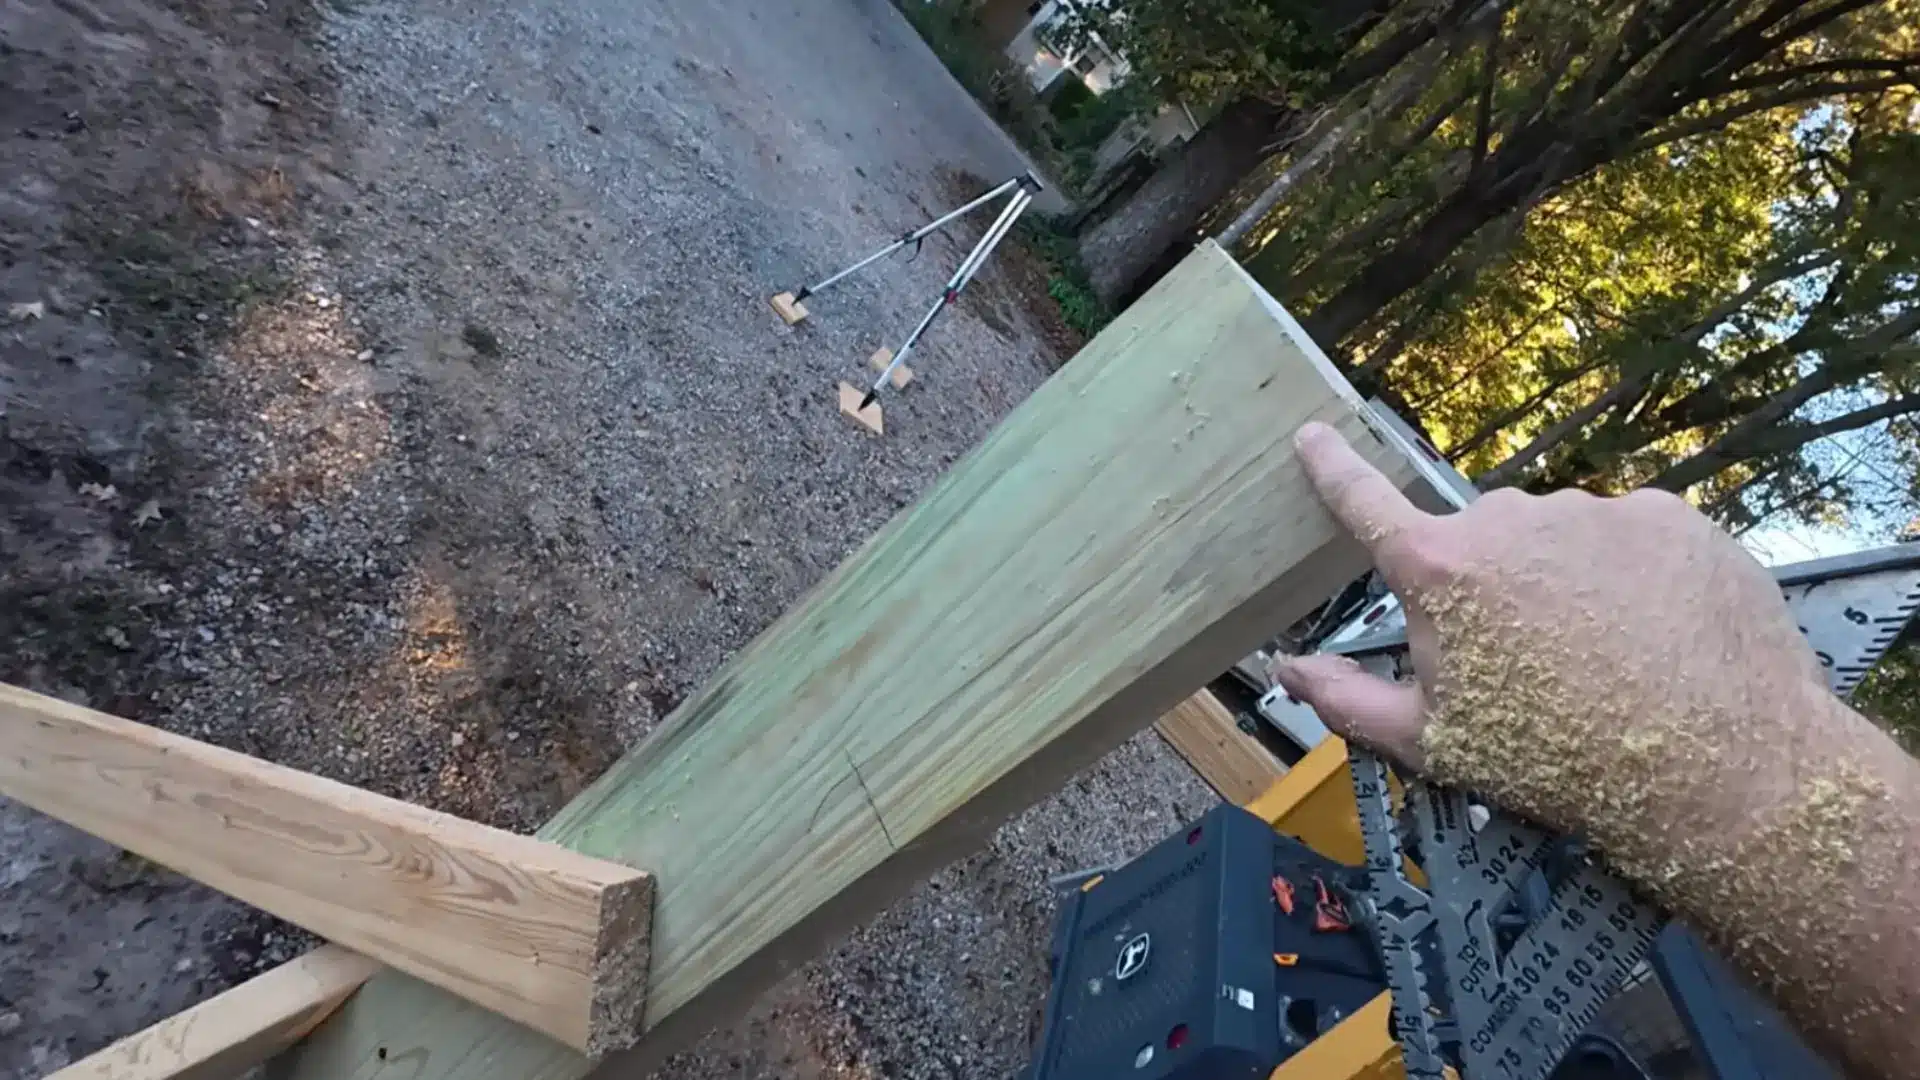
Set up a laser level to find a flat, even line across all the posts. The lowest post becomes the reference point, and its height gets marked as 20 1/2 inches.
Use a square to cut every other post down to match that height. Once the posts are level, cut a notch into each one so the beam can rest fully on top with solid, even support.
Step 4: Prepping Beams and Trusses
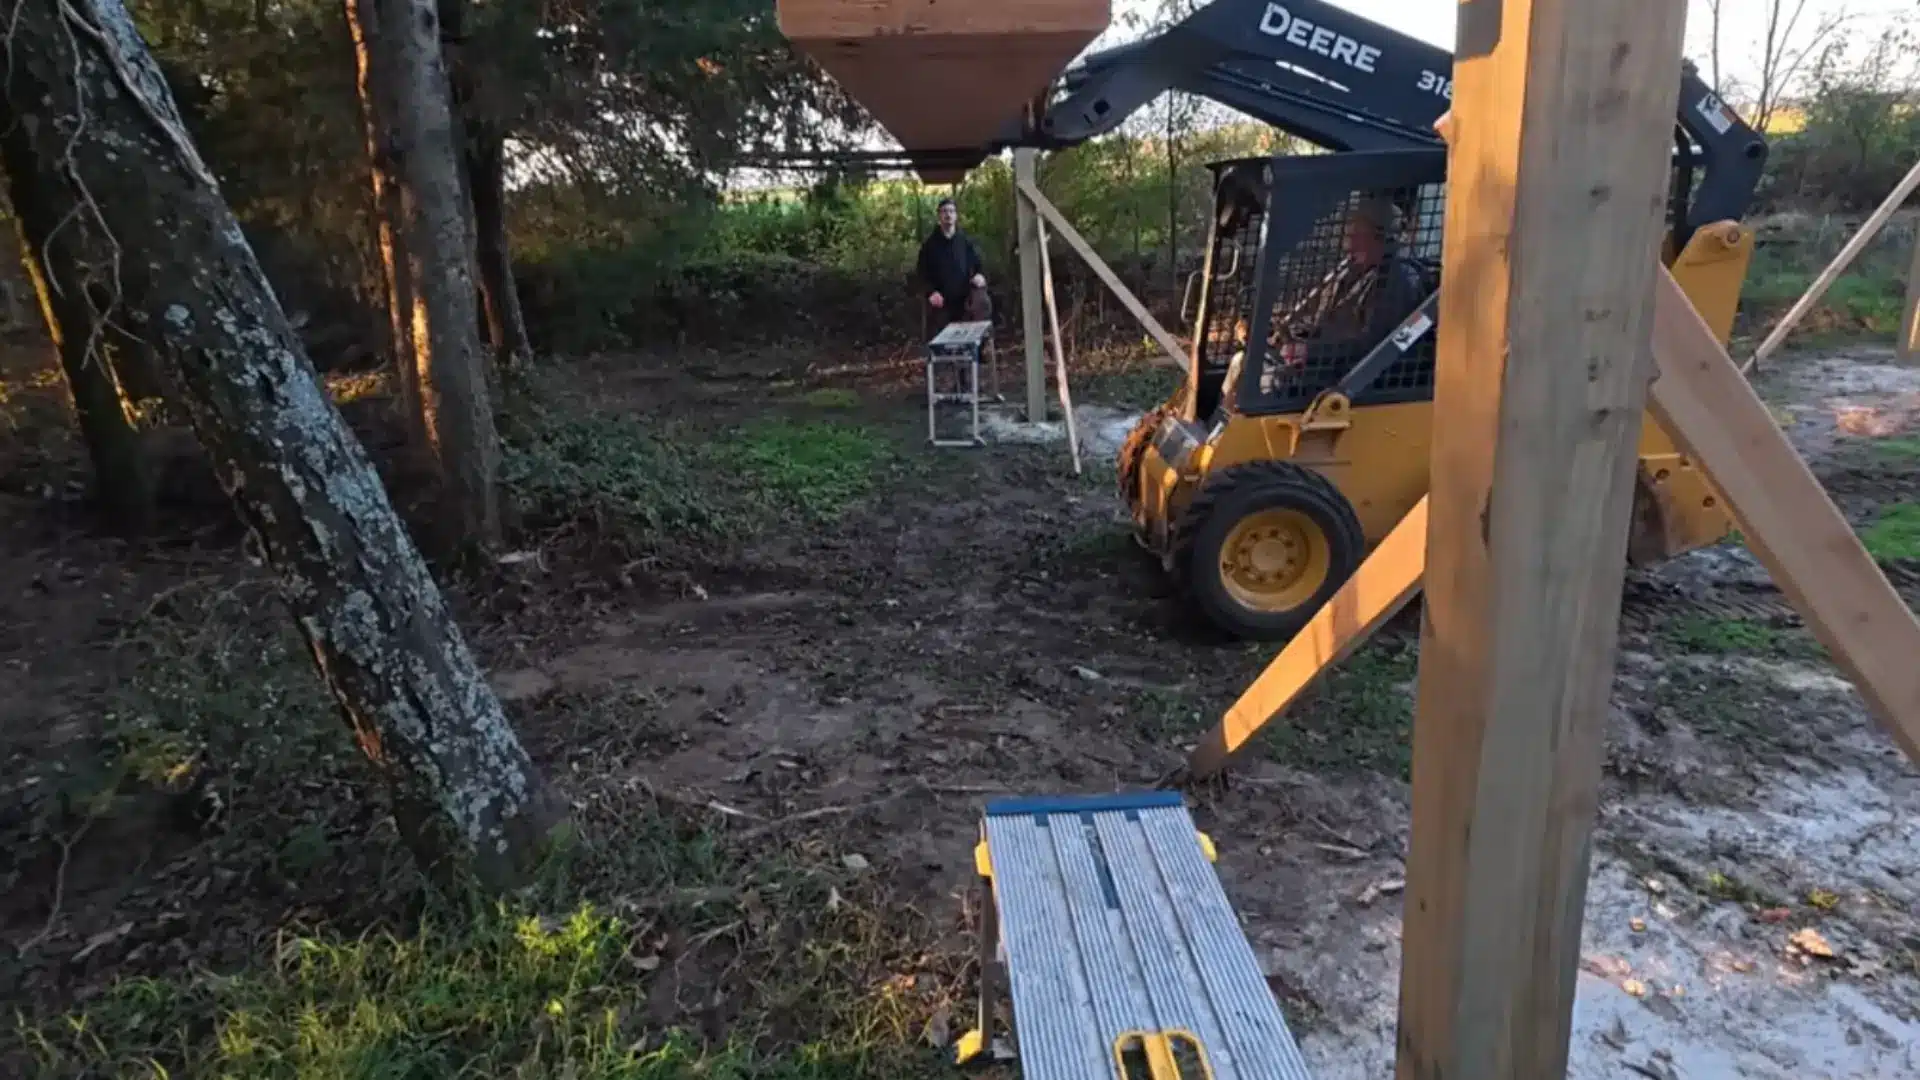
Metal hurricane ties get screwed onto the beams before anything gets lifted into place. This step saves extra work later while standing on a ladder.
Trusses also get prepped on the ground, with lath marks spaced 2 feet apart even though the trusses themselves sit 3 feet apart.
These marks make it much easier to keep everything lined up straight once the trusses go up later.
Step 5: Building the Gable Trusses on the Ground

Instead of working high up, the gable trusses get fully assembled while still on the ground. Structural sheathing goes on first, followed by a durable, water-resistant house wrap layer.
This whole panel, including siding trim, gets prepared before it ever leaves the ground. A skid steer lifts the finished panel into place later, which keeps workers safer and saves time overall.
Step 6: Installing Trim and Siding

A 5/4 by 8 board gets ripped in half, creating two trim boards about 3 5/8 inches wide. A small groove gets cut into the back of each board so caulk isn’t needed there later.
LP SmartSide siding, an engineered wood product, then gets installed with a 3/16-inch expansion gap between pieces.
The crew carefully seals this gap with caulk and painter’s tape for a clean, tight finish.
Step 7: Lifting and Bracing the Trusses
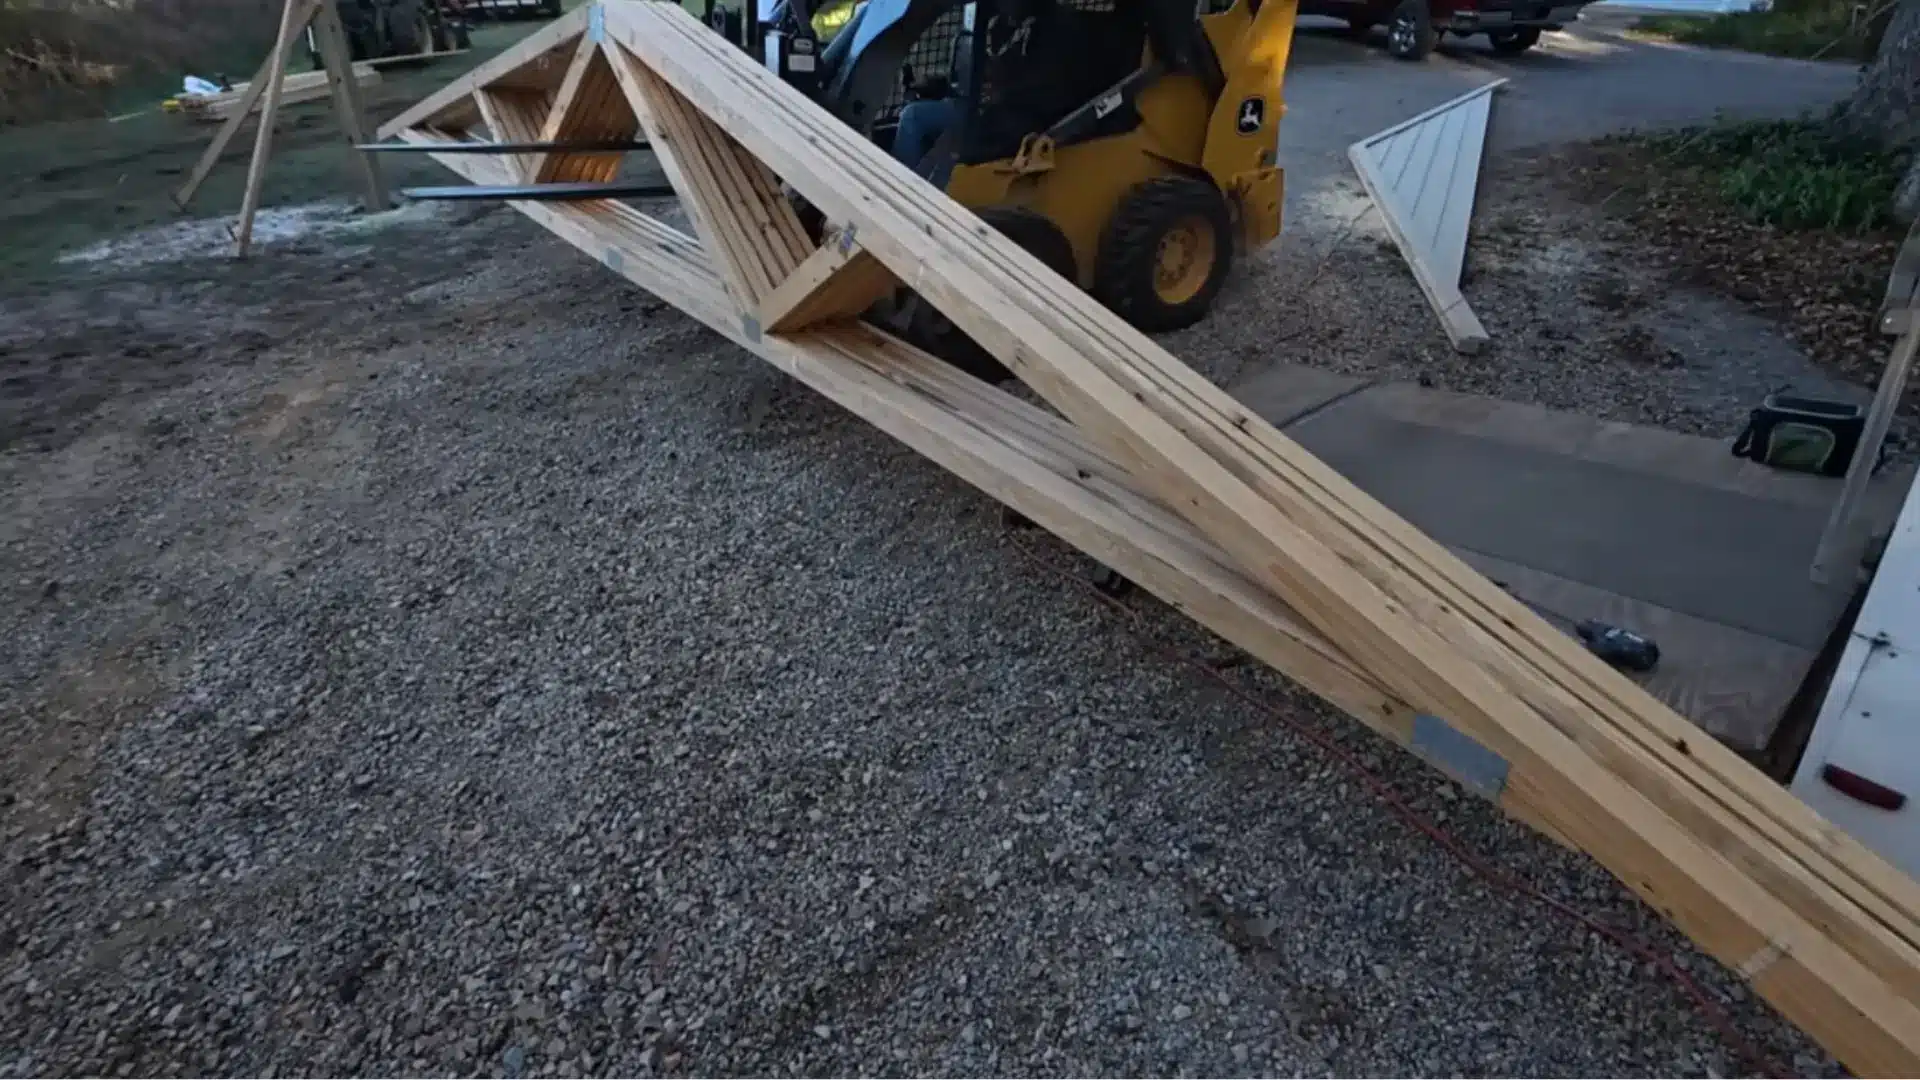
A skid steer with forks lifts the finished gable panels up into position. Screws driven through the beam anchor each truss securely on both ends.
Ratchet straps then pull the trusses plumb, adjusted slowly one click at a time. A runner board across the bottom ties all the trusses together.
Cross braces, added with pocket screws, make the whole frame much more rigid and steady.
Step 8: Installing Lath and a Moisture Barrier
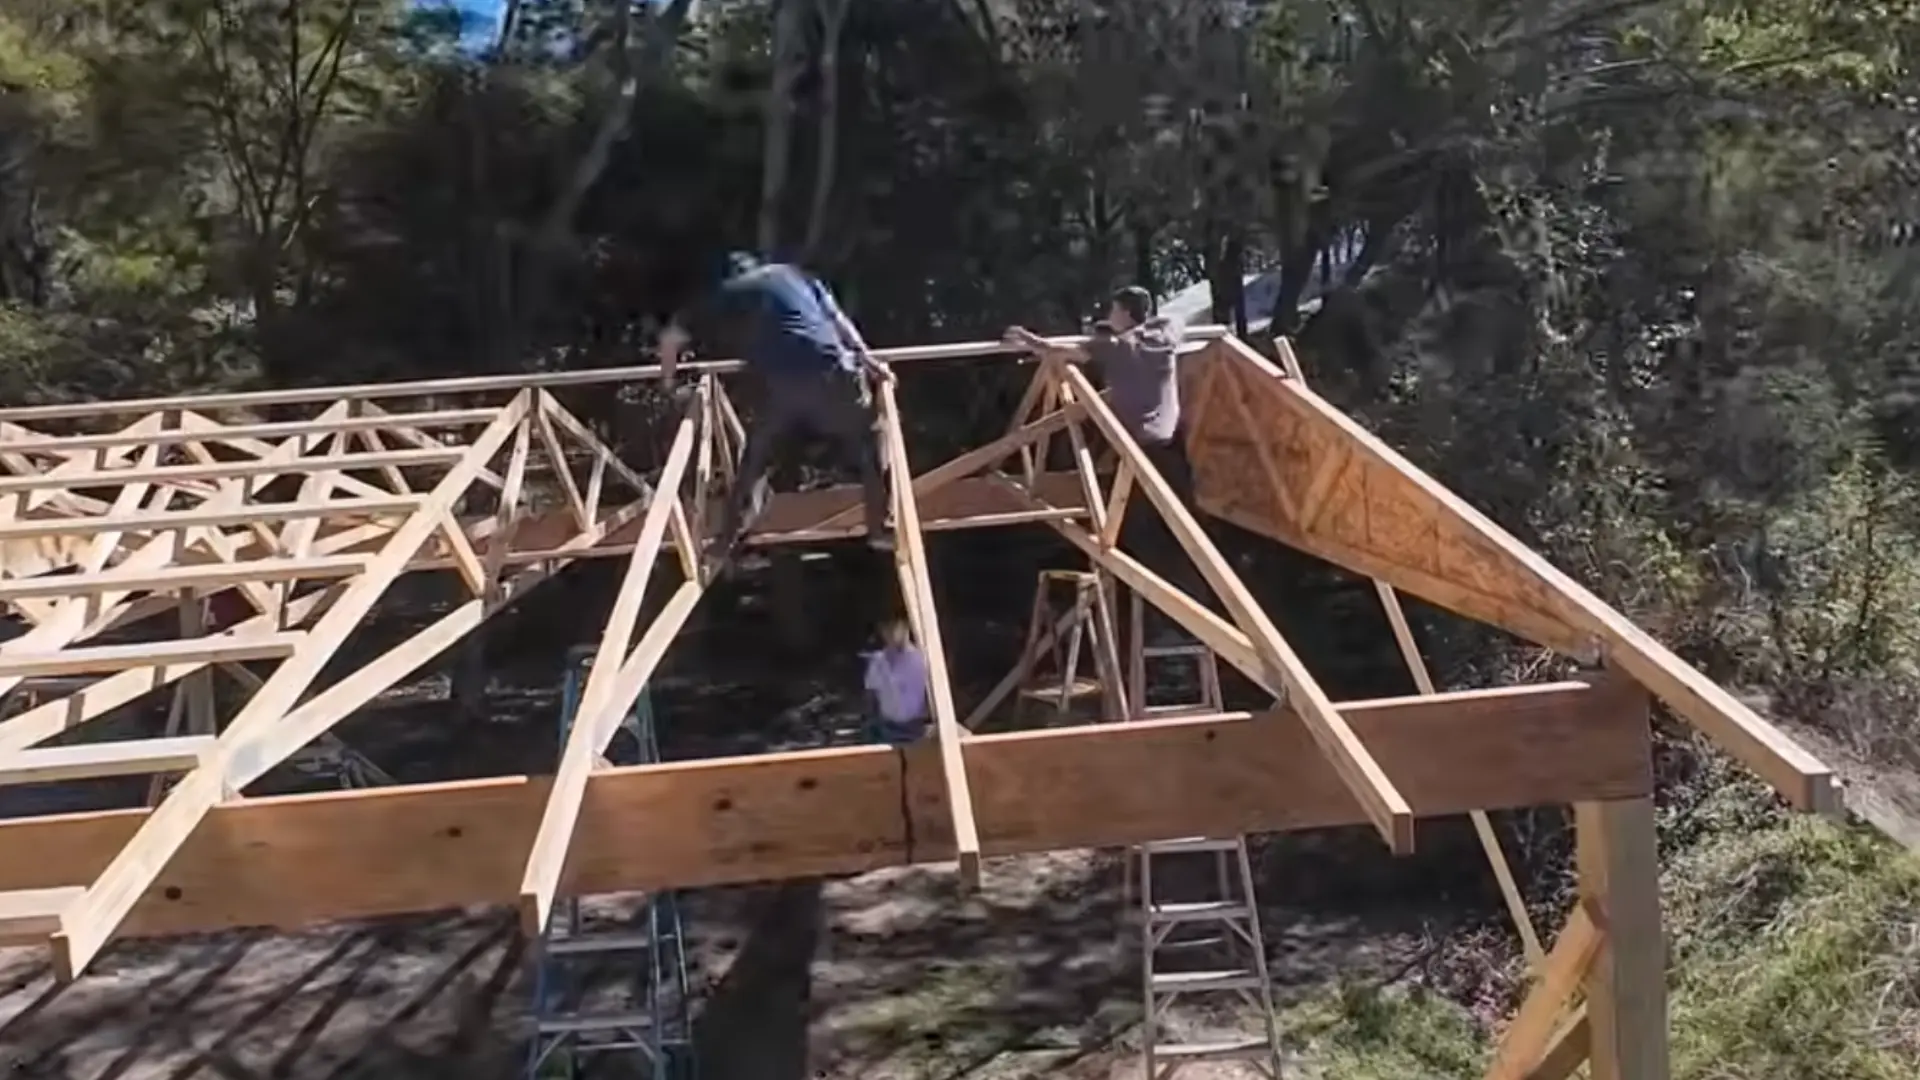
Lath boards get placed across the trusses about 2 feet apart for steady roof support. Each board is fastened with one nail and one extra screw for added holding strength.
Before the metal roof goes on, synthetic roofing felt gets rolled out across the lath.
This layer helps stop condensation from slowly damaging the wood underneath, especially in areas that deal with a lot of moisture.
Step 9: Installing the Metal Roof Panels
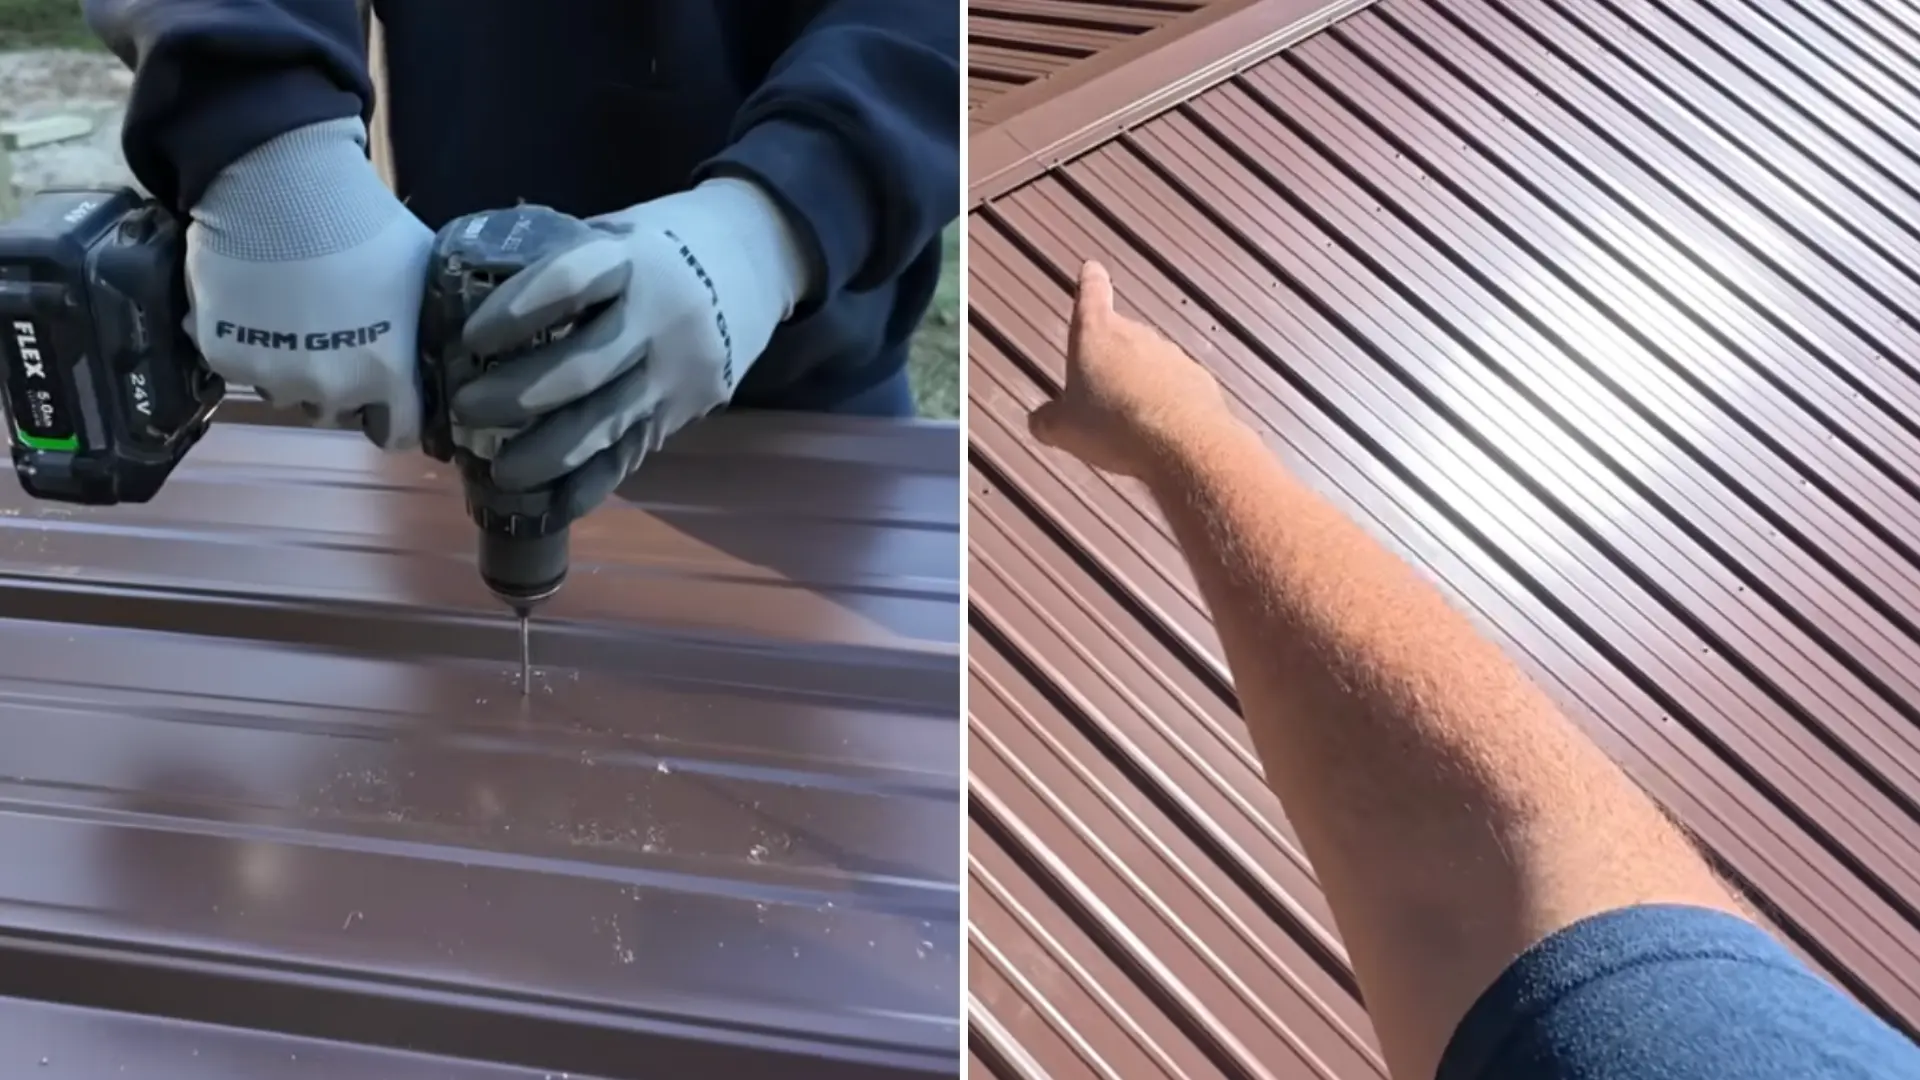
Snap a chalk line across the bottom of the lath to keep every panel straight. Mark each panel 4 inches up from its bottom edge to match that reference line.
Screws go in roughly every 4 feet across the field of the roof. At the bottom edge, use two fasteners per panel instead of one for extra strength against strong wind uplift.
Step 10: Adding Trim, Roof Cap, and Final Touches

Install rake trim along both roof edges once the panels are secure. The roof cap goes on last, with small tabs folded to close any gaps.
Apply roofing sealant into the seams, facing away from the prevailing wind direction.
Replace the temporary screws holding the beams with stronger, structurally rated screws. A treated board and fresh gravel finish off the base of the carport.
For more details, watch the complete video tutorial by Miillers Construction.
Tips for Building a DIY Carport Successfully
A little planning up front can save you a lot of headaches later. Here are some simple tips to keep your build on track:
- Measure your site first: Check your vehicle’s size, needed clearance, and property setbacks before buying any materials.
- Check local permits: Look into building codes and property-line rules before you start any work.
- Level the ground first: Make sure your foundation, slab, or footings are stable and even before building up.
- Pick materials for your weather: Think about wind, rain, snow, or rust based on where you live.
- Square the frame before adding the roof: Measure corner to corner and check levels before locking everything in place.
Following these steps will help your carport last for years to come. A little extra care now means fewer repairs down the road.
Carport Ideas That Go Beyond Basic Parking
A carport can do more than just shelter your car. Small additions can boost its function, style, or even its value. Here are some creative options worth exploring:
1. Solar Panel Carport
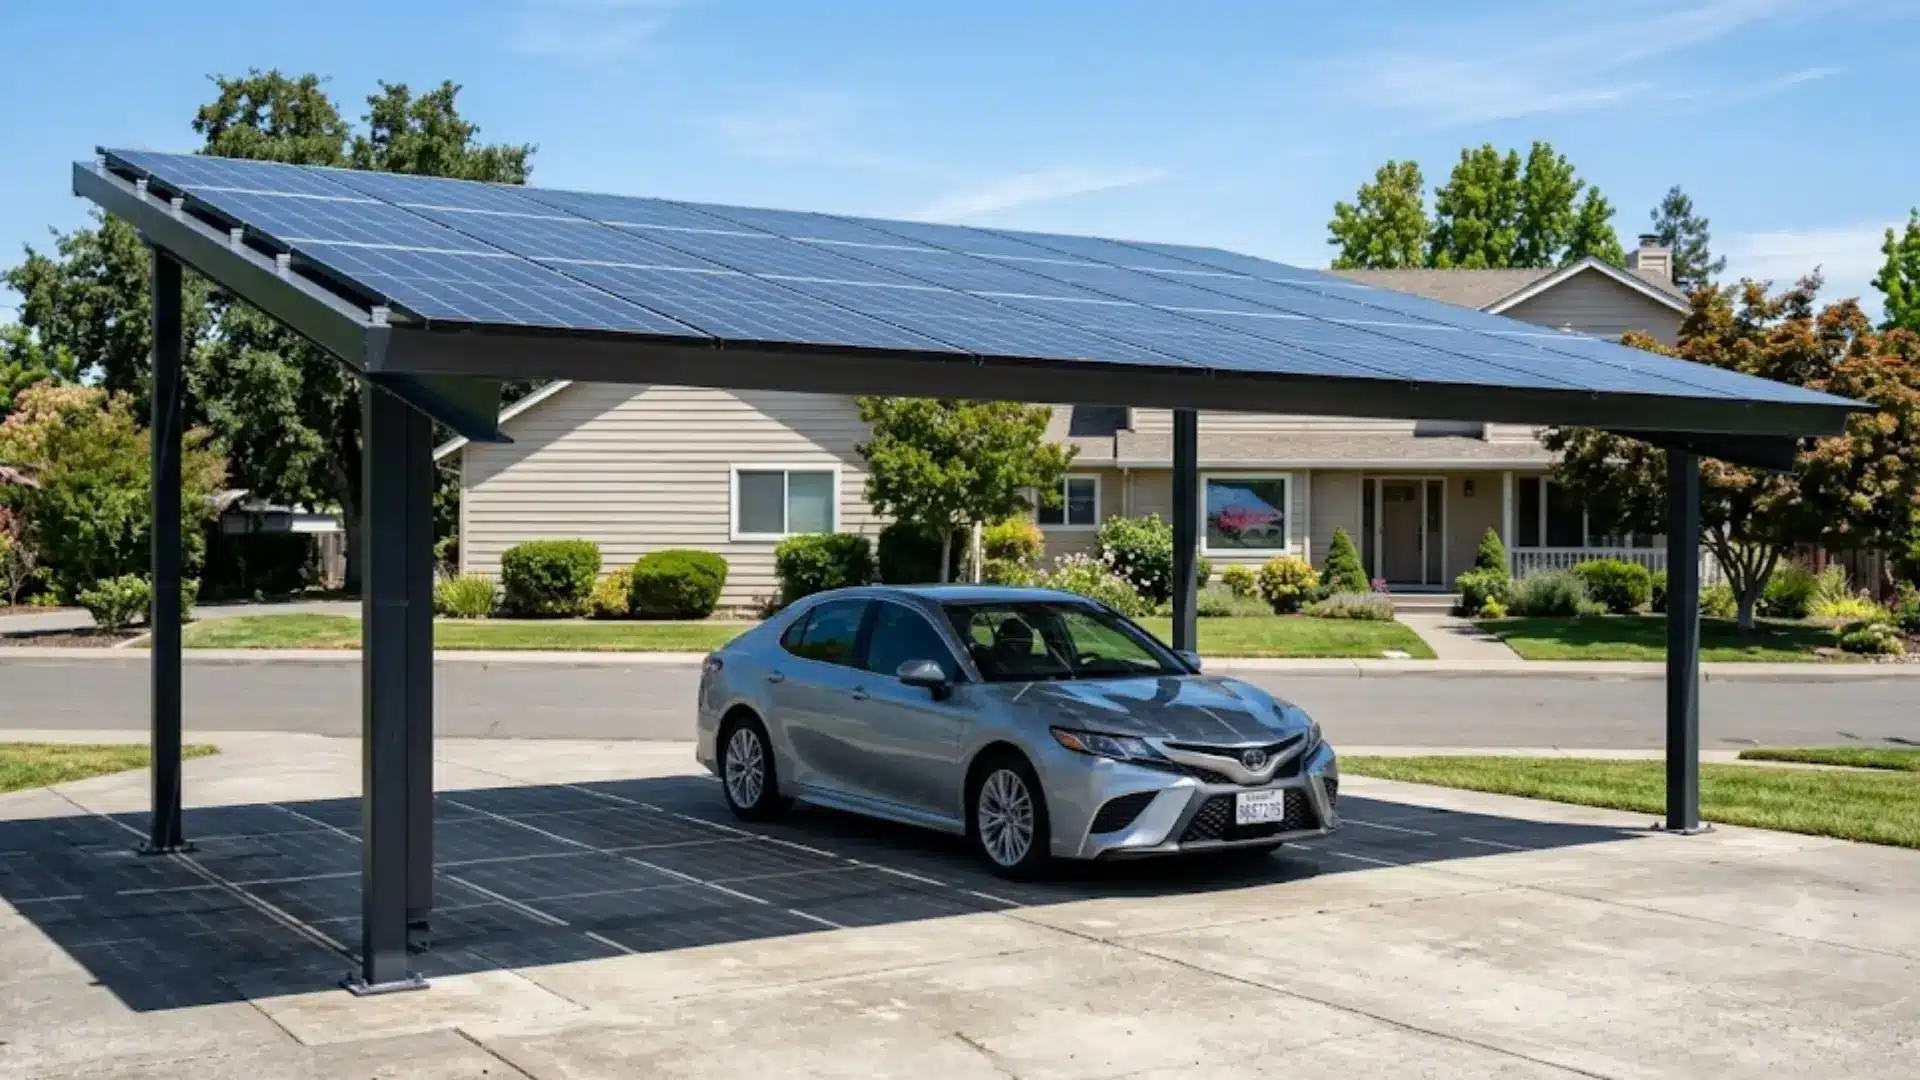
Solar panels form the roof here, so your car stays covered while the sun makes power. Homeowners get shade and lower energy bills at the same time.
It’s a smart pick if your house roof doesn’t get enough sunlight. Residential solar carports are already a proven setup across many neighborhoods.
You get two benefits from one structure. Many people like getting extra value from a space they already needed.
2. Carport With Built-In Storage
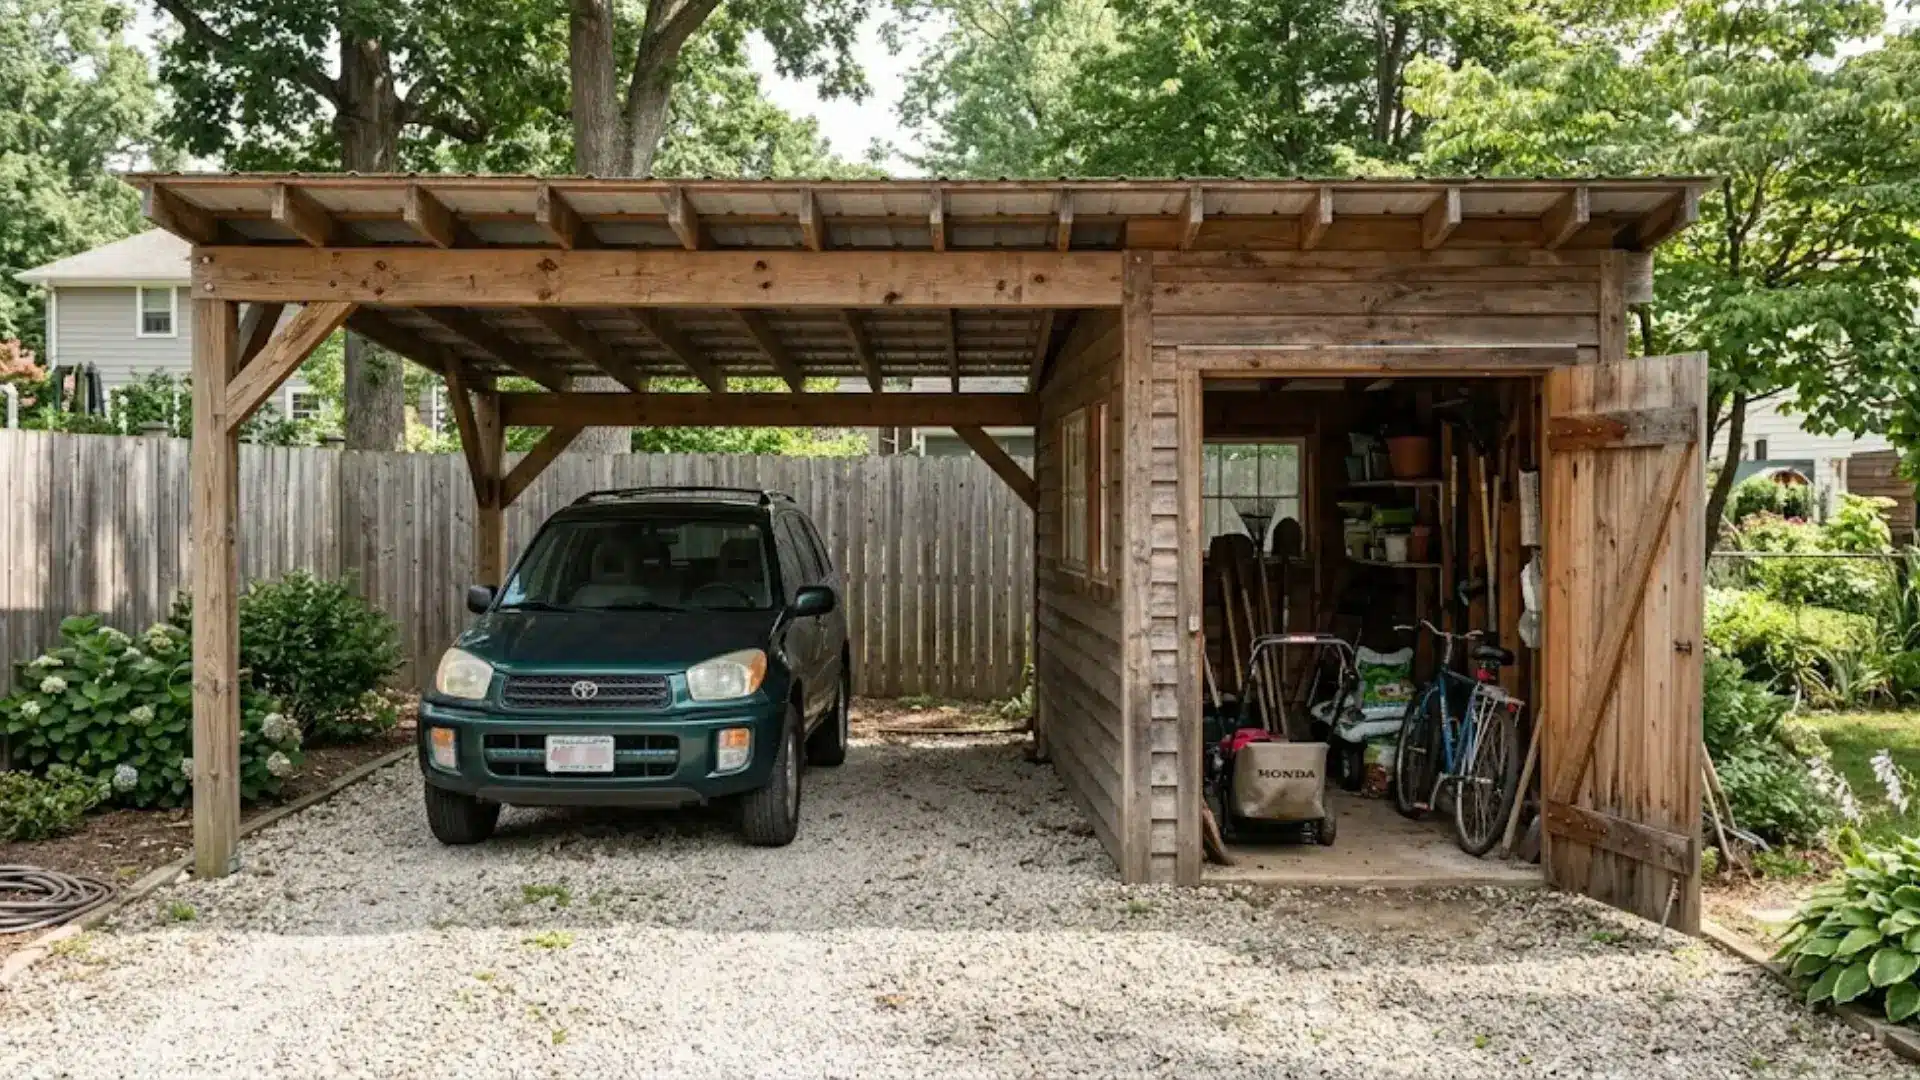
A lockable section gets added along one end or side of the carport. Tools, bikes, and gardening gear all fit nicely inside. Automotive supplies stay dry and protected from rain or snow.
Garages that are already packed benefit most from this setup. It adds real storage without using extra yard space. Many owners find this a practical way to stay organized.
3. Carport With Privacy Slat Wall
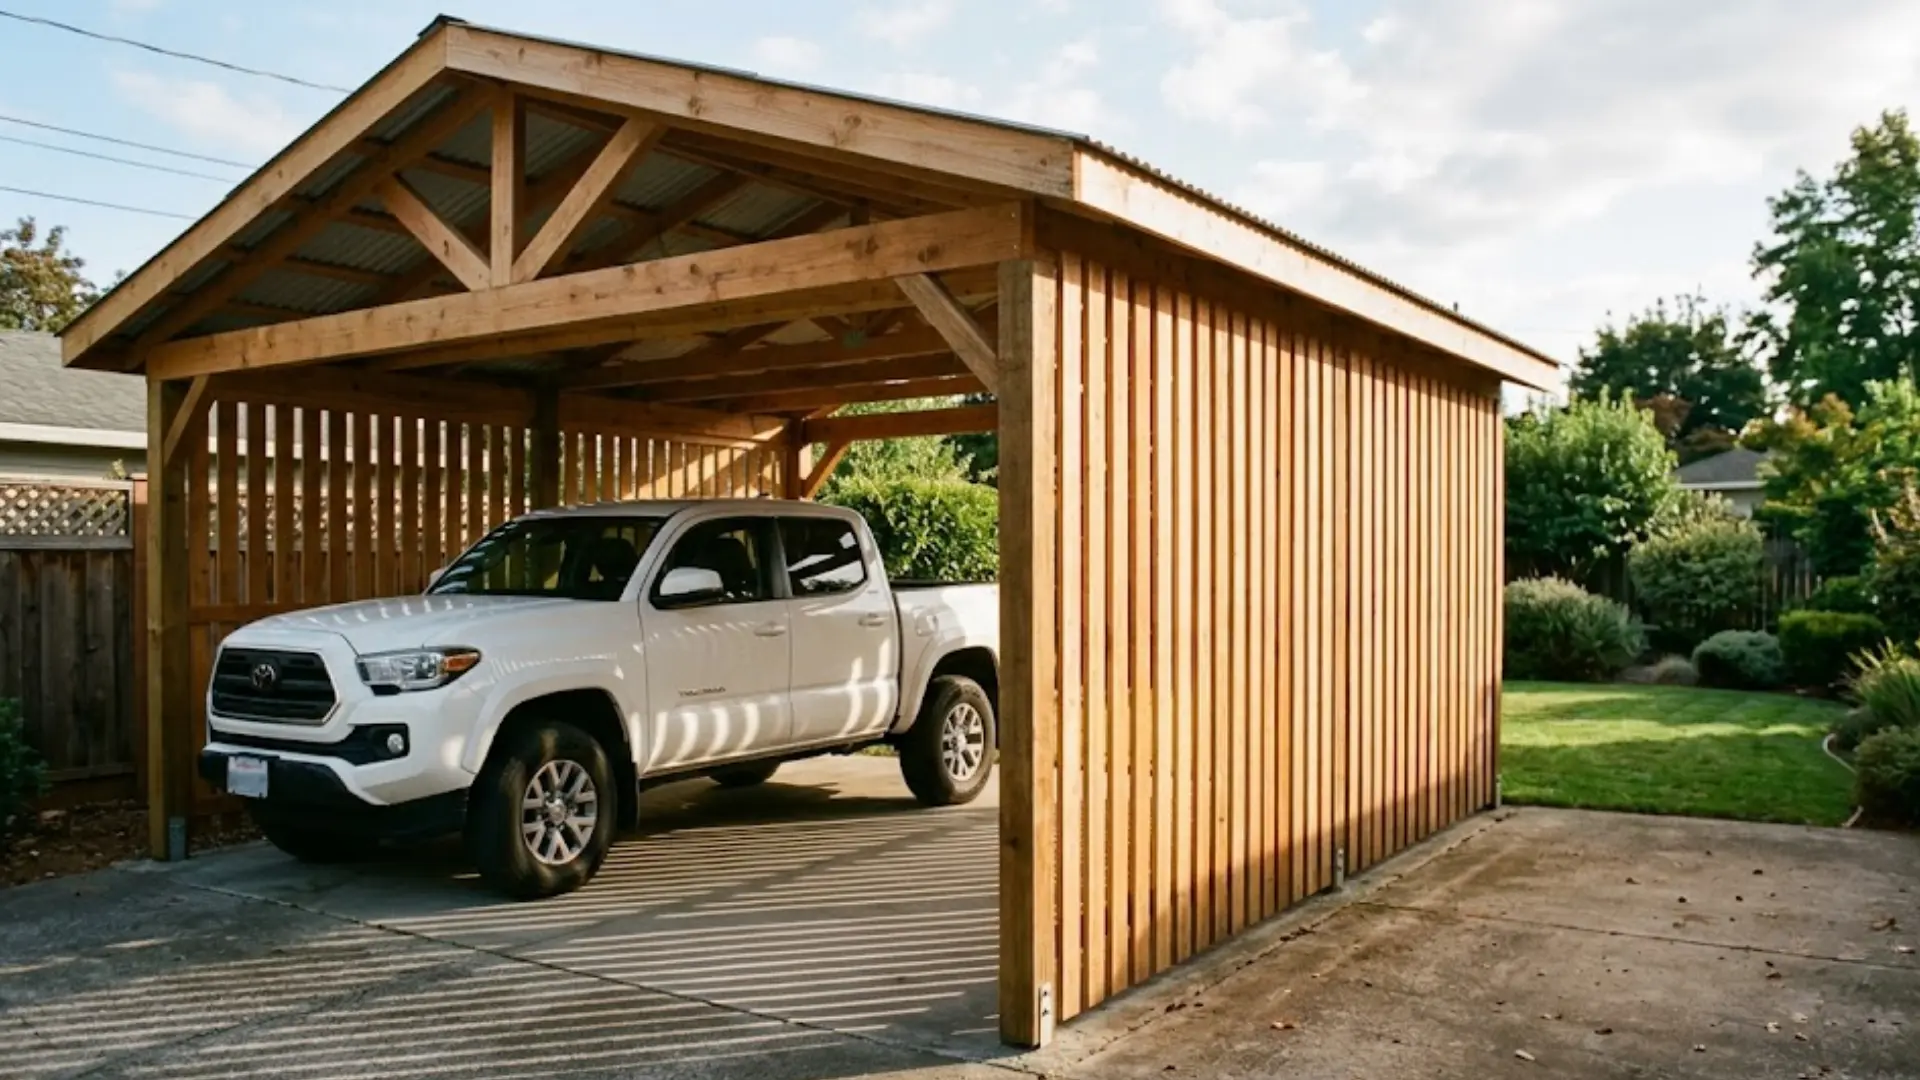
Wood slats line one side of the carport in this style. Vertical or horizontal placement both work, depending on what looks best.
Neighbors and passersby get a blocked view of your parking area. Privacy increases while the structure gains a more finished look.
Visual clutter in the yard drops noticeably with this addition. Many homeowners pick this option for both looks and privacy.
4. Carport With Lattice Side Panels
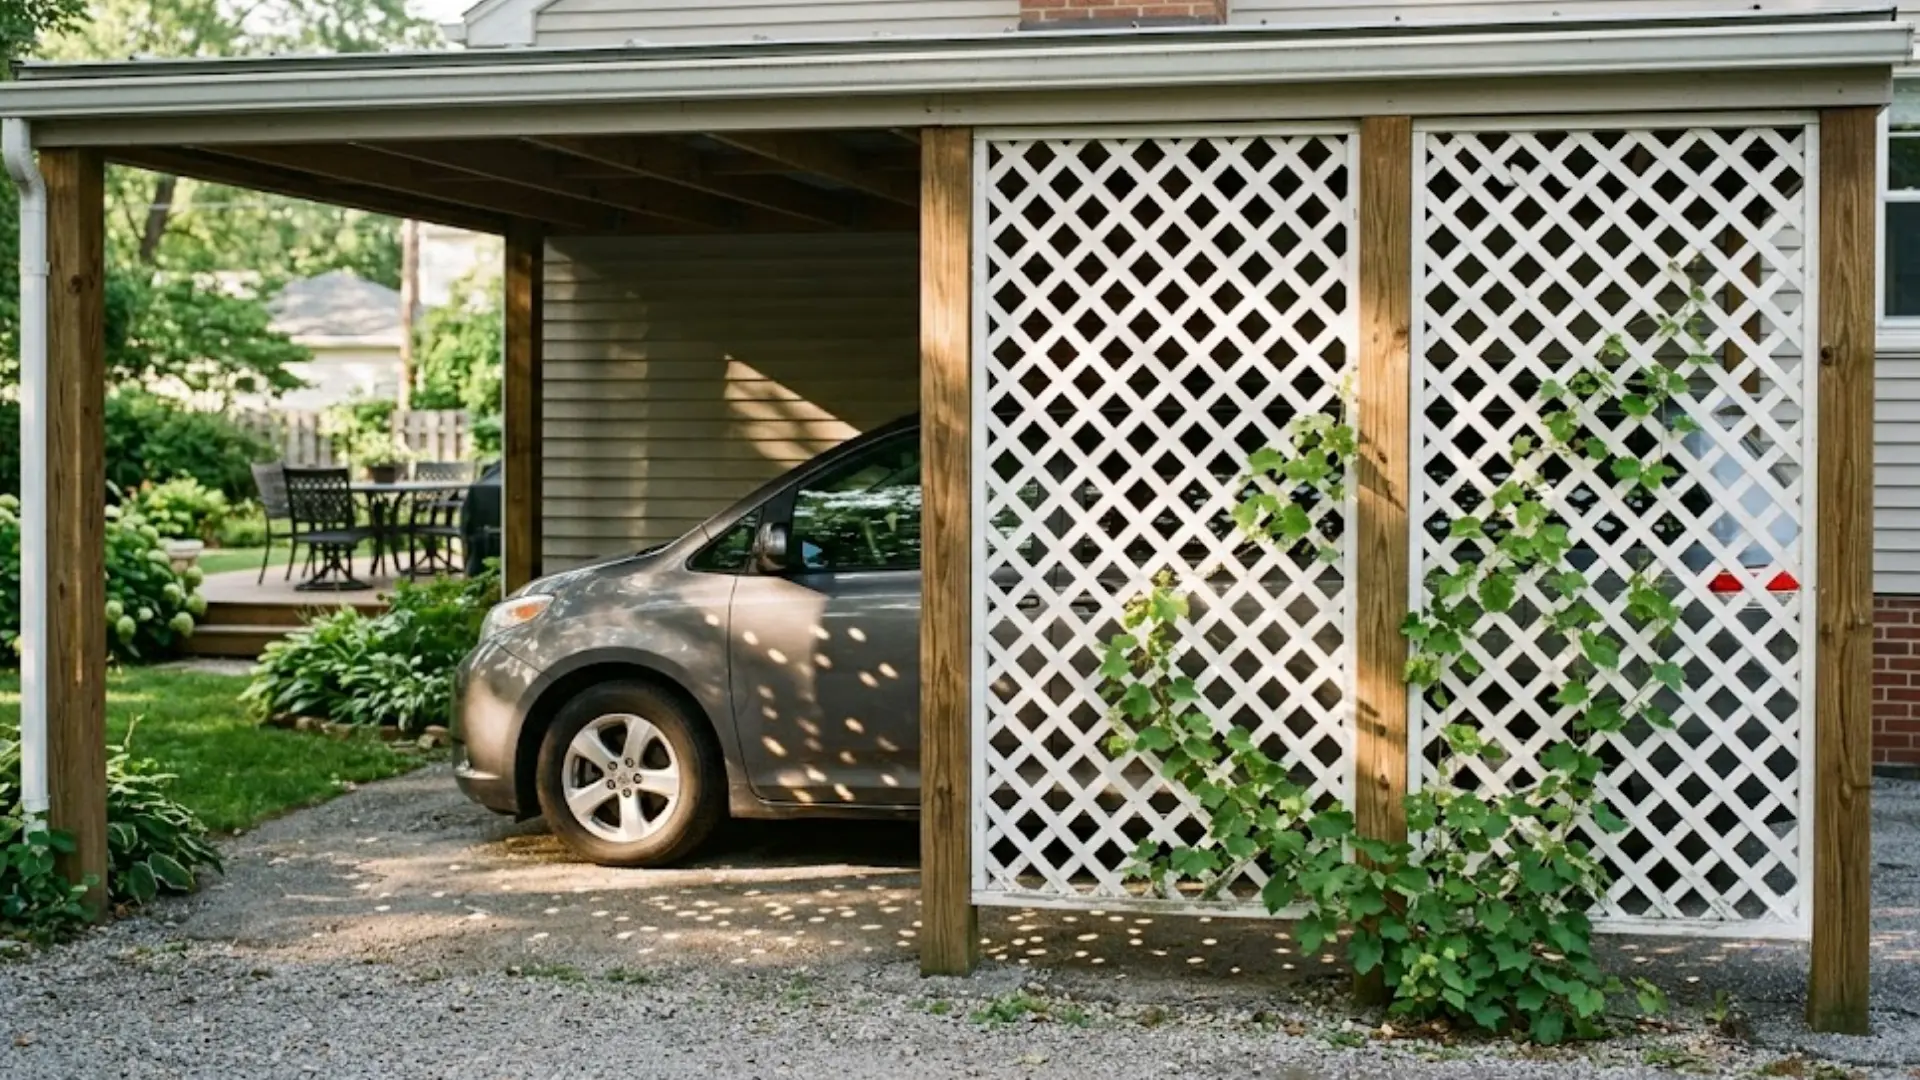
Decorative lattice fills the gaps between posts in this design. Partial screening happens without blocking airflow through the structure.
Air keeps moving freely even with the panels installed. DIY carport builds often already use this lattice style.
It’s a simple upgrade that adds privacy and appeal. Many people enjoy how it softens the overall appearance.
5. Carport With Integrated Planter Boxes
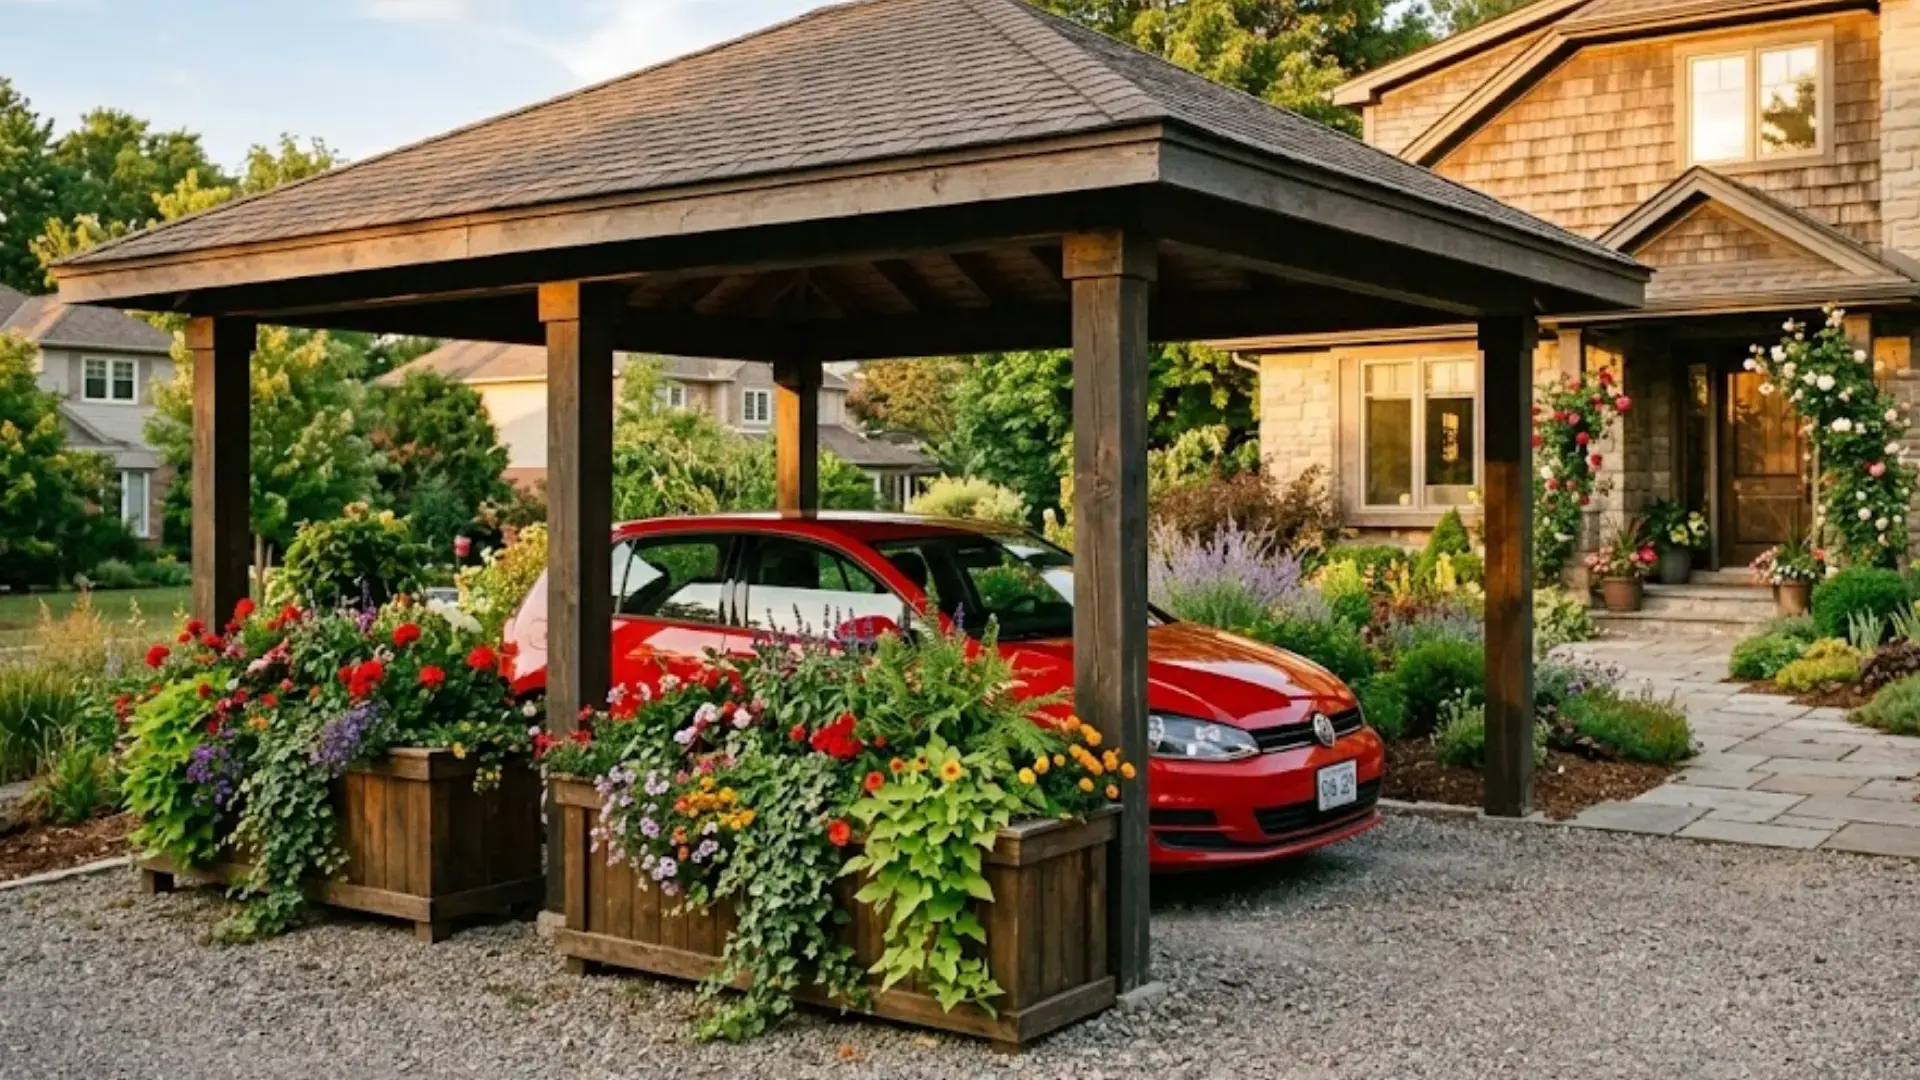
In this version, raised planter boxes wrap around the posts or perimeter. Plants soften the hard lines of the carport structure. Greenery nearby makes integrating into the yard much easier.
Flowers, herbs, or small shrubs all work well in these boxes. This simple addition creates a more natural look. Many homeowners like adding color and life this way.
6. Carport With a Green Roof
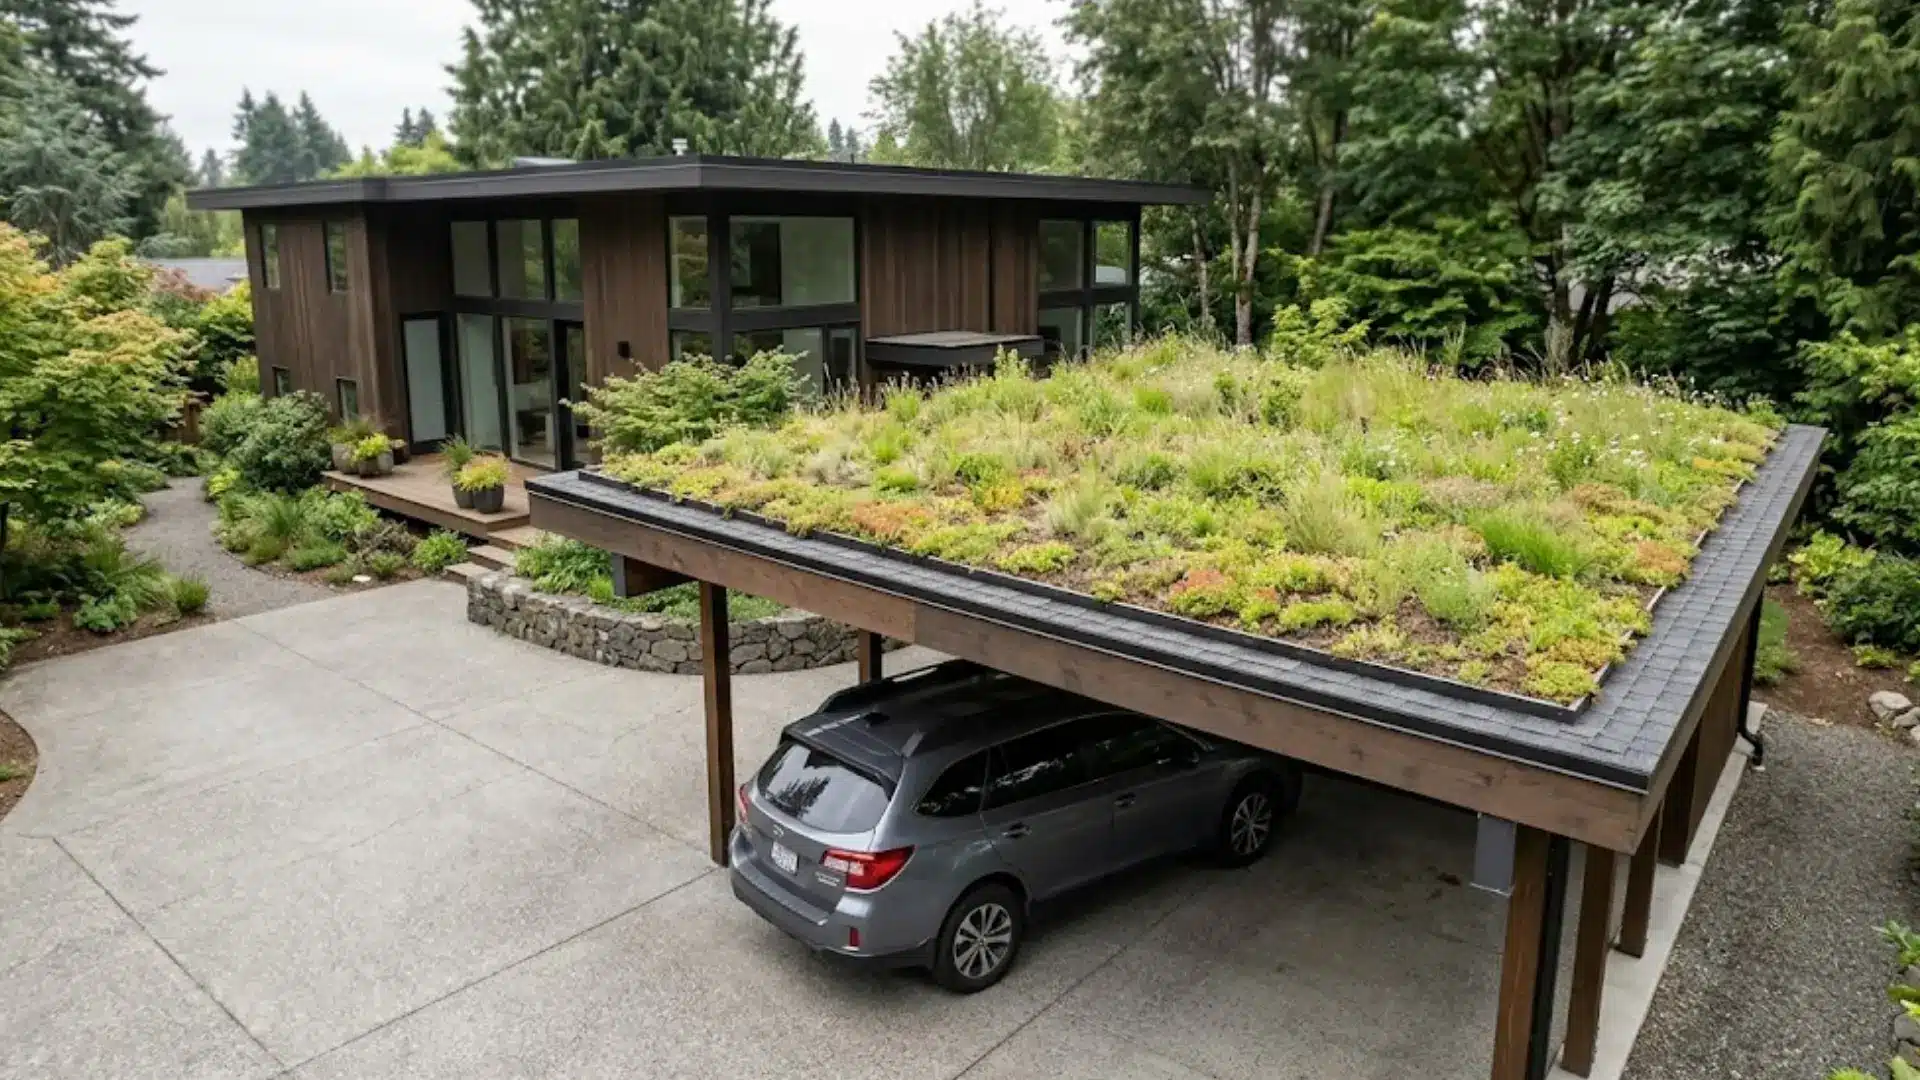
A flat or low-slope roof gets built to hold planted material. Extra weight needs proper engineering before adding any plants. Insulation and rainwater absorption improve with a green roof design.
Overhead greenery gives the whole structure a softer, natural feel. Planning takes more effort compared to a standard roof.
Eco-conscious homeowners often choose this option for its added benefits.
7. Carport With an EV Charging Station
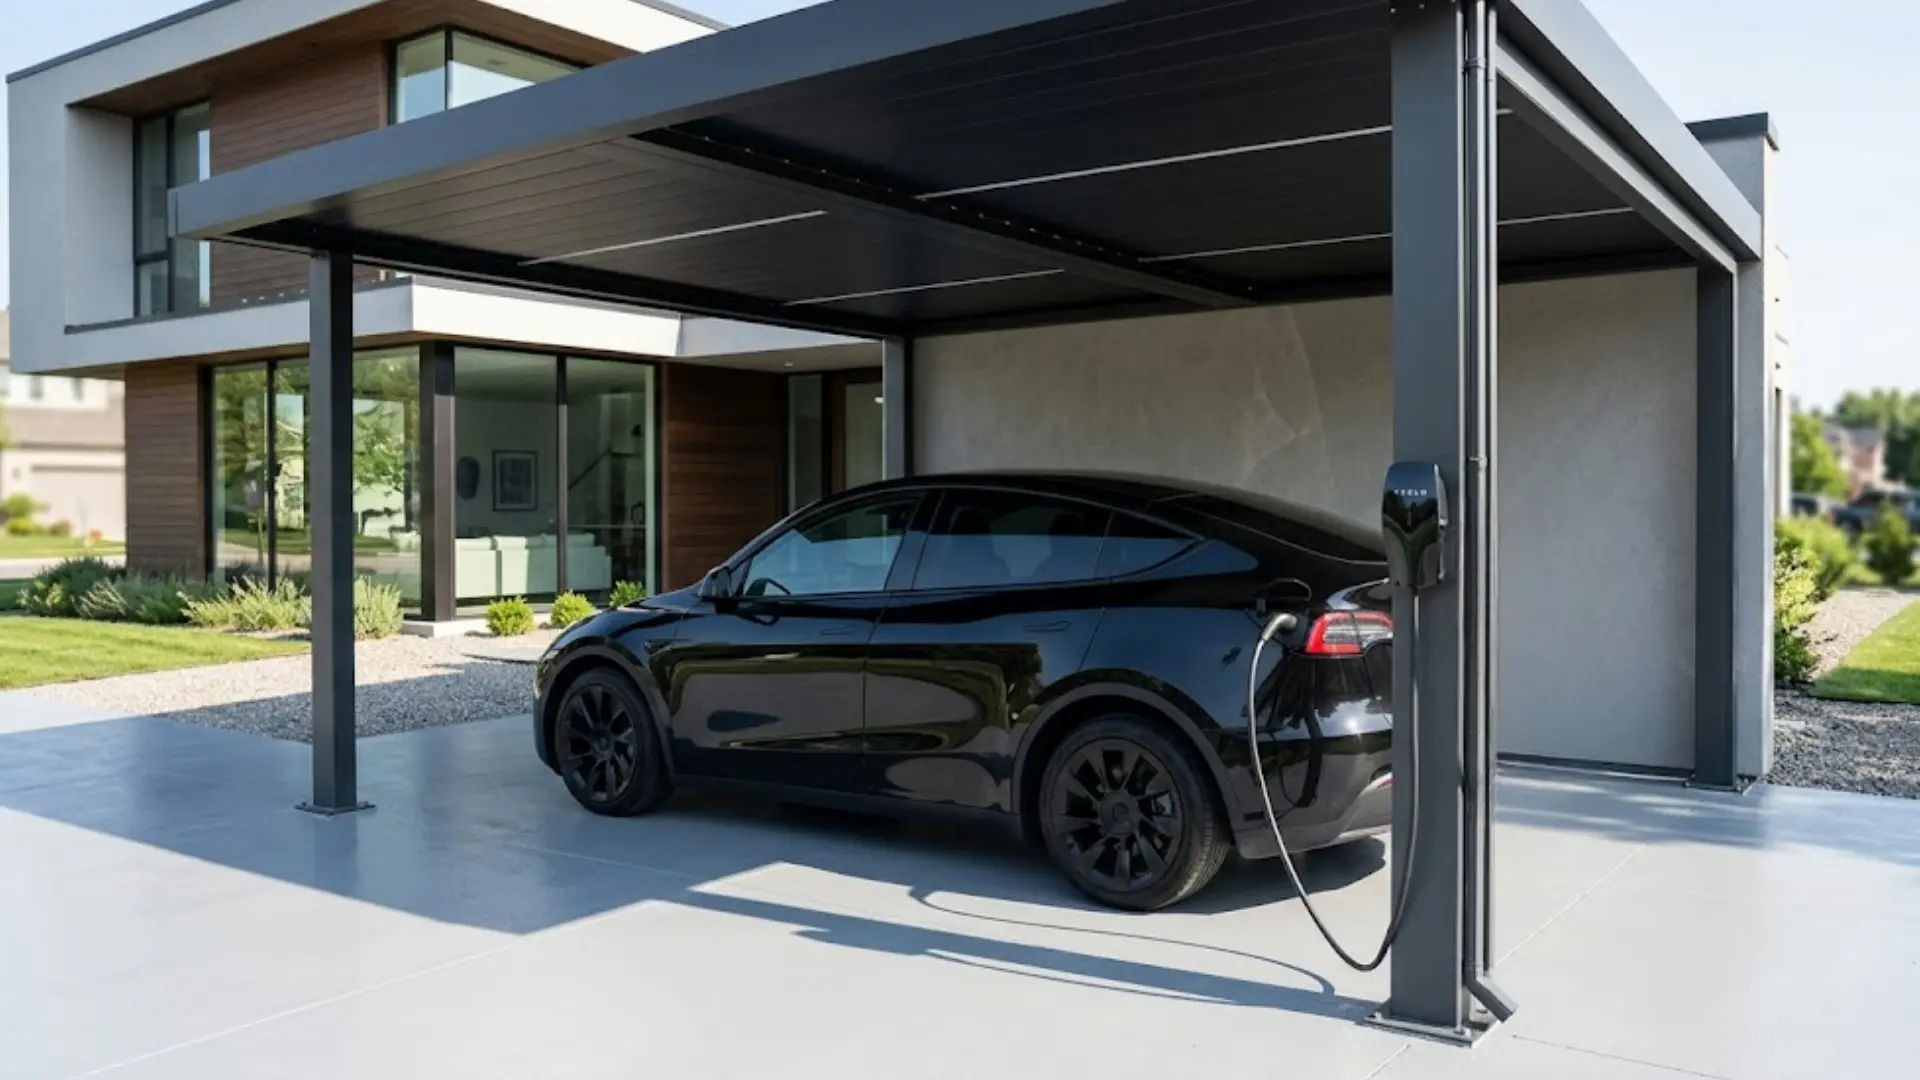
A charging spot for electric vehicles fits right beside the parking bay. Wiring gets built into the structure instead of running loose cords.
Charging becomes simple and convenient every time you park. EV infrastructure is becoming more common in home carport designs.
The roof protects equipment from rain and sun. Current or future EV owners benefit most from this feature.
Recommended DIY Carport Kits to Consider
Picking the right carport kit depends on your budget, vehicle size, and local weather. Here’s a comparison of specific products to help you find the best fit:
| Kit Name | Frame | Roof | Assembly |
|---|---|---|---|
| VersaTube Classic Carport 22’x24.5’x12′ | 14-gauge steel tubing | Horizontal steel panels | Slip-fit, no welding |
| Arrow 10’x15’x7′ Eggshell Carport | 2″ square steel tube | Galvanized steel | Slip-fit, bolt-together |
| Arrow 12’x29’x7′ Charcoal Carport | 2″ square steel tube | Galvanized steel | Slip-fit, self-drilling screws |
| MetalCarport.com 2-Car Kit (6 Posts) | Heavy-duty steel posts and purlins | Western Rib metal panels | Bolt-together, needs concrete footings |
| Arrow 20’x24’x7′ Eggshell Carport | 2″ square steel tube | Galvanized steel | Slip-fit, bolt-together |
| Arrow 14’x38’x14′ RV Carport | 2″ square steel tube | Galvanized steel | Slip-fit, bolt-together |
Comparing a few kits side by side makes it easier to spot the right size and price for your project. Always check current pricing directly on each brand’s website before ordering.
Common Mistakes When Buying a DIY Carport Kit
DIY carport kits save money, but small errors can cause big headaches later. Knowing what to watch for helps you avoid wasted time and cash. Here are a few common mistakes buyers should keep in mind:
- Buying too small: Allow extra room around the vehicle rather than matching its dimensions exactly.
- Ignoring roof height: Trucks, boats, and RVs need additional vertical clearance.
- Comparing price alone: Low-cost kits may differ substantially in materials and engineering.
- Skipping weather ratings: Choose wind and snow ratings suitable for your location.
- Overlooking anchoring: A strong frame still depends on an appropriate foundation and anchor system.
A little research before you buy can prevent costly surprises down the road. Taking these points seriously helps your carport last longer and perform better.
Frequently Asked Questions (FAQs)
Do I Need a Permit for a Carport?
In many areas, yes, especially if the carport is attached to your home or exceeds a certain size. Requirements vary by city and county, so check with your local building department before ordering materials.
What’s the Best Roofing Material for a Carport?
Polycarbonate roofing is popular for letting in natural light while blocking rain and UV rays. Aluminum framing paired with polycarbonate panels offers strength with less maintenance over time.
How Long Does a Carport Last?
A well-built aluminum carport with proper anchoring and rust-resistant materials can last several decades with minimal upkeep, especially compared to structures using lower-grade materials.
Conclusion
Now you’ve got the full idea behind building a sturdy carport. That knowledge turns bare concrete into real shelter for your car.
You get shade, storage, and a longer-lasting vehicle without a huge bill. Steady work and patience carry every project toward a finished roof.
Picking sturdy materials and checking local rules keeps the whole project smooth. Small upgrades, like lighting or storage walls, add extra value later.
Every choice you make affects how long your carport holds up outdoors. A tidy plan and steady hands turn simple lumber into a solid shelter. Drop your questions in the comments below and start your build today!