

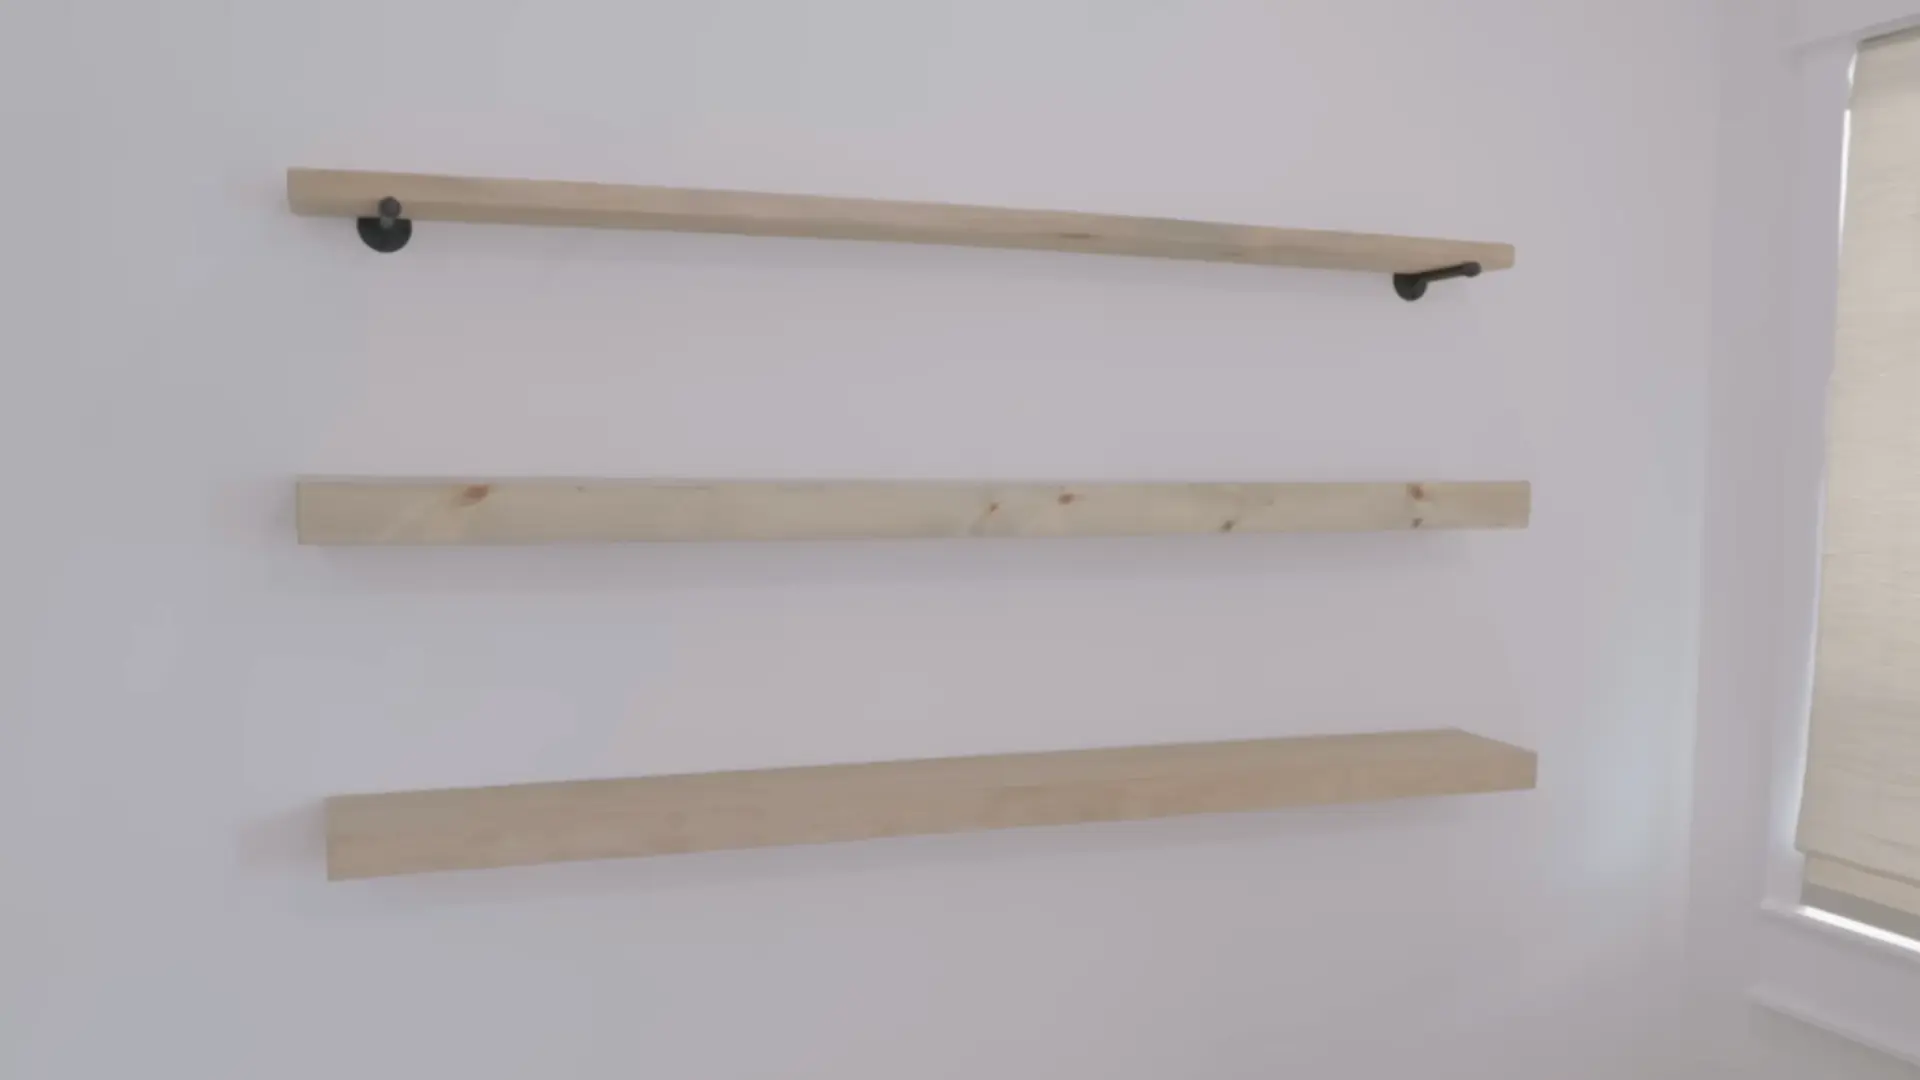
Floating shelves give any room a clean, modern look without visible brackets or hardware breaking up the design.
Learning how to build floating shelves is more approachable than it looks, if you are picking up a drill for the first time or are already comfortable with a table saw.
This post walks through three methods for how to build wall shelves, starting with a simple hidden-cleat design, moving to hidden rod brackets, and finishing with an advanced box-style build using an internal frame.
Each method covers the cutting, finishing, and mounting steps, so you can choose the build that matches your skill level and the tools you have on hand.
Where Do Floating Shelves Work Best in Your Home?
Floating shelves work well in spots where traditional bracket shelving feels too bulky or visually heavy, such as kitchens above counters, living rooms beside a TV, or hallways that need a little extra storage without crowding the space.
Because the hardware stays hidden, it tends to suit minimal or modern farmhouse-style homes especially well, though any of the three methods below can be stained or finished to match a more traditional look, too.
Knowing where you plan to install the shelf can also help decide which method fits best, since longer runs above a counter may benefit from the added support of an internal frame.
What You Need Before You Start
Before jumping into any of these three methods, gather the right tools and materials so the build goes smoothly from cutting through final mounting.
| Category | Items Needed |
|---|---|
| Cutting Tools | Table saw, miter saw |
| Mounting Tools | Drill, level, stud finder |
| Assembly Supplies | Wood glue, brad nails, wood filler, clamps |
| Sanding Supplies | Sandpaper in multiple grits (eighty, one twenty, two twenty) |
| Finishing Supplies | Wood conditioner, stain, topcoat sealer |
| Lumber Options | One-by-six boards, two-by-six boards, half-inch plywood |
| Hardware | Wall cleats, hidden rod brackets, lag bolts, screws |
Lumber and hardware choice depends on which method you pick, ranging from basic dimensional lumber for the beginner build to half-inch plywood and painted rod brackets for the more advanced versions.
Method 1 – Beginner Floating Shelf with a Hidden Cleat
This beginner-friendly method uses a hidden cleat and basic lumber, making it the easiest entry point before moving on to more advanced builds.
Step 1: Cut and Prep the Boards

Start with one-by-six boards for the top, bottom, and front face, plus a two-by-two strip for the wall cleat.
Sand with progressively finer grits, starting coarse and working finer, then round over the edges slightly for a softer look.
Cut the top, bottom, and front pieces to your finished shelf length, sizing the cleat about a quarter inch shorter than the shelf interior so it slides in without binding once assembled.
Step 2: Assemble and Finish the Shelf Box

Apply wood glue along the edges and use brad nails to join the top, bottom, and front face into a box, clamping the assembly as it dries to keep the corners square.
Once dry, fill any visible gaps or nail holes with wood filler and sand smooth.
Apply stain in the direction of the grain for even color, letting it dry fully before handling or moving on to mounting.
Step 3: Mount the Cleat to the Wall
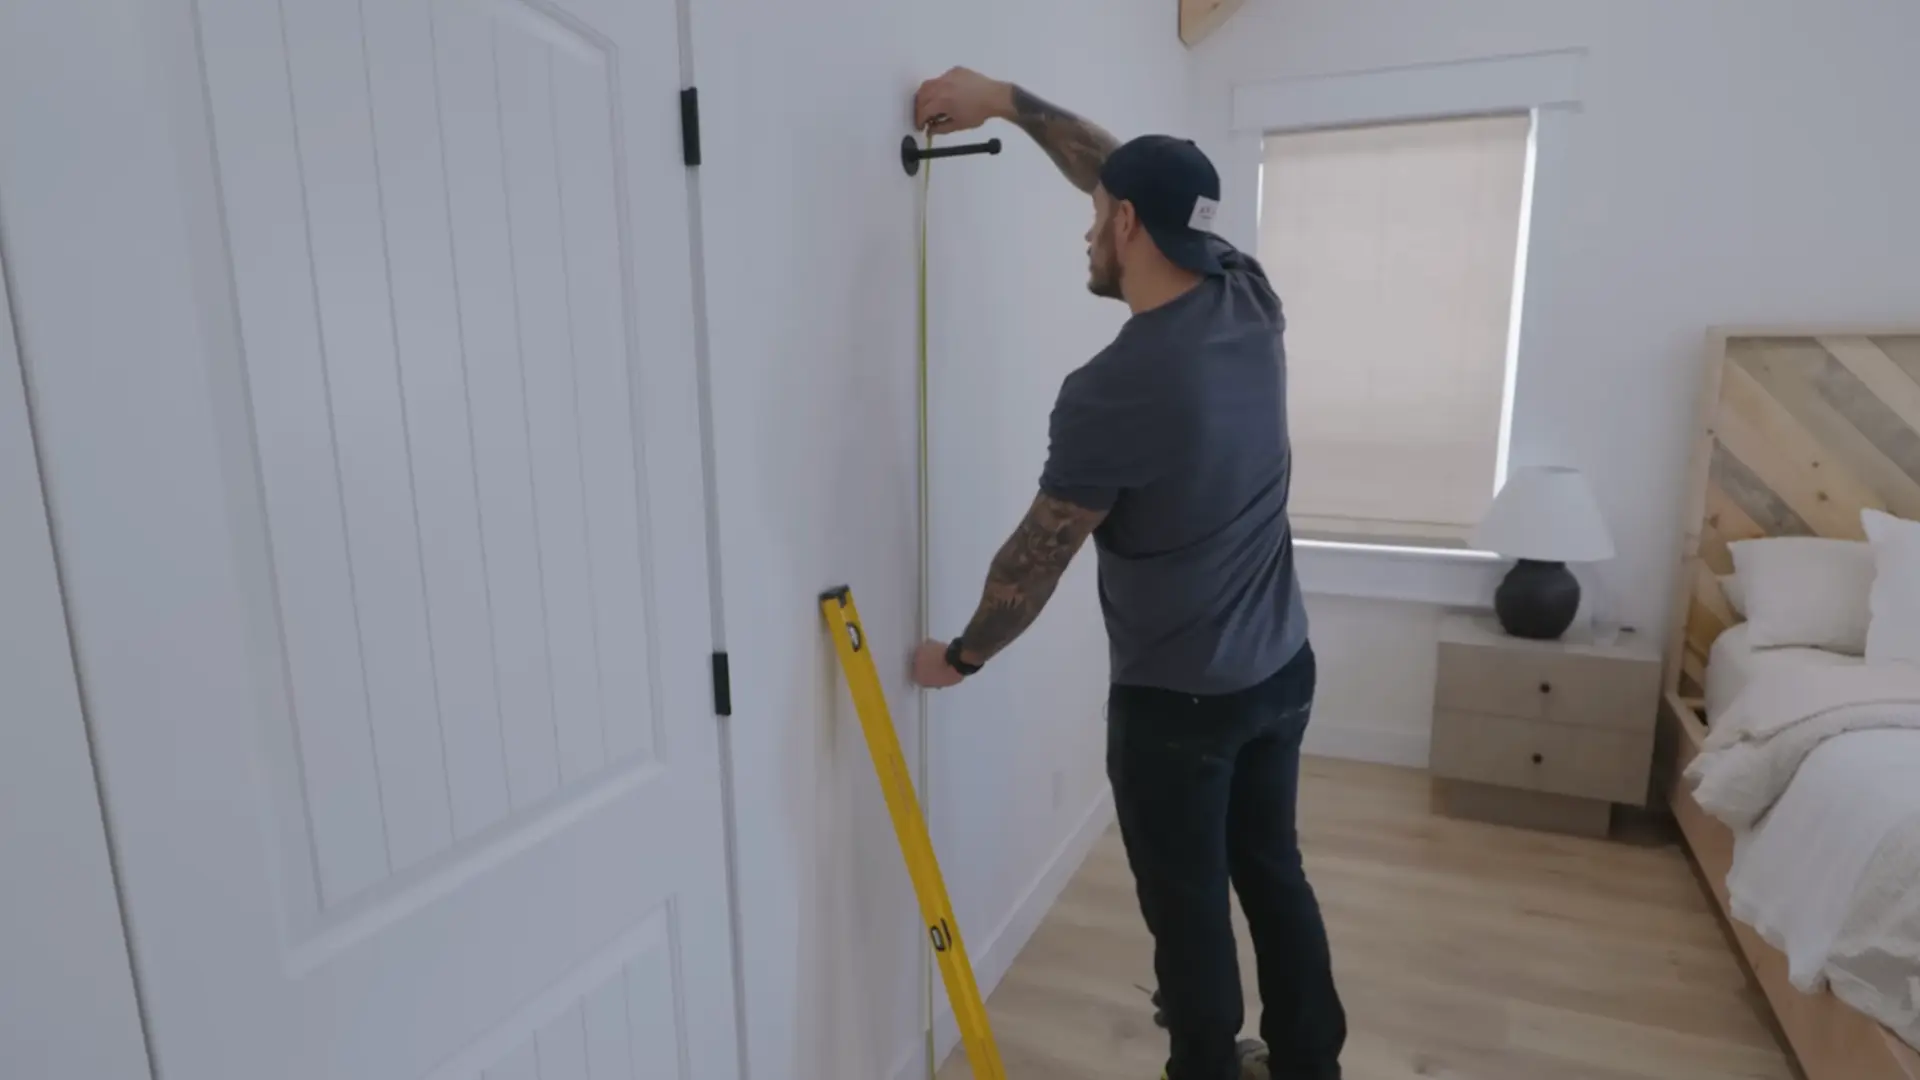
Mark 16 inches on-center along the wall to locate the studs, since the cleat needs solid framing behind it to support any real weight.
Pre-drill the cleat at each stud location, then secure it firmly with lag bolts or long screws.
Check the cleat with a level before fully tightening everything, since even a slight tilt here will throw off the entire finished shelf later.
Step 4: Slide the Shelf Into Place

Once the finished shelf box has fully dried and cured, slide it over the wall-mounted cleat so the two-by-two fits snugly inside the open back of the box.
Tap gently if needed to seat it evenly against the wall.
Secure the connection from underneath with a few screws driven into the cleat, giving extra hold while keeping all the hardware completely hidden from view.
Method 2 – Intermediate Floating Shelf with Hidden Rod Brackets
Once you are comfortable with the basics, this next method swaps the cleat for hidden rod brackets, giving your shelves a slightly different look while still keeping all the hardware out of sight.
Step 1: Prep and Drill the Shelf Board

Cut a piece of two-by-six lumber, Douglas fir works well, to your finished shelf length.
Sand the surface and edges with several grits, then slightly round the edges for a cleaner, less boxy appearance.
Measure and mark drill points along the back edge of the board to match your rod spacing, then drill holes deep enough to fit the rods snugly without splitting or weakening the wood.
Step 2: Drill Holes for the Rods

Measure and mark drill points on the back edge of the board to match your rod spacing, keeping the spacing even so the shelf sits level once mounted.
Use a drill bit sized to match the diameter of your rods for a snug fit, and mark the depth on the bit with tape so you do not drill too far in one spot.
Drill each hole slowly and check periodically, since drilling too deep can weaken the board or cause it to split, especially near the edges or end grain.
Step 3: Stain the Board and Paint the Hardware

Apply stain to the shelf board with the grain for even coverage, stirring the can thoroughly first since pigment settles at the bottom.
While that dries, clean the galvanized flange caps and rods with acetone to remove shipping grease, then apply primer to ensure the paint adheres properly.
Finish with a few light coats of flat black spray paint, letting each coat dry before adding more.
Step 4: Install the Brackets into the Wall

Mark stud locations 16 inches on-center across the wall, since the brackets need to anchor into solid framing for safe support.
Pre-drill each spot before driving screws in, then attach the painted flange caps directly into the studs.
Double-check that all the brackets line up level with each other across the wall, since uneven brackets will leave the finished shelf sitting crooked.
Step 5: Slide the Shelf into Place
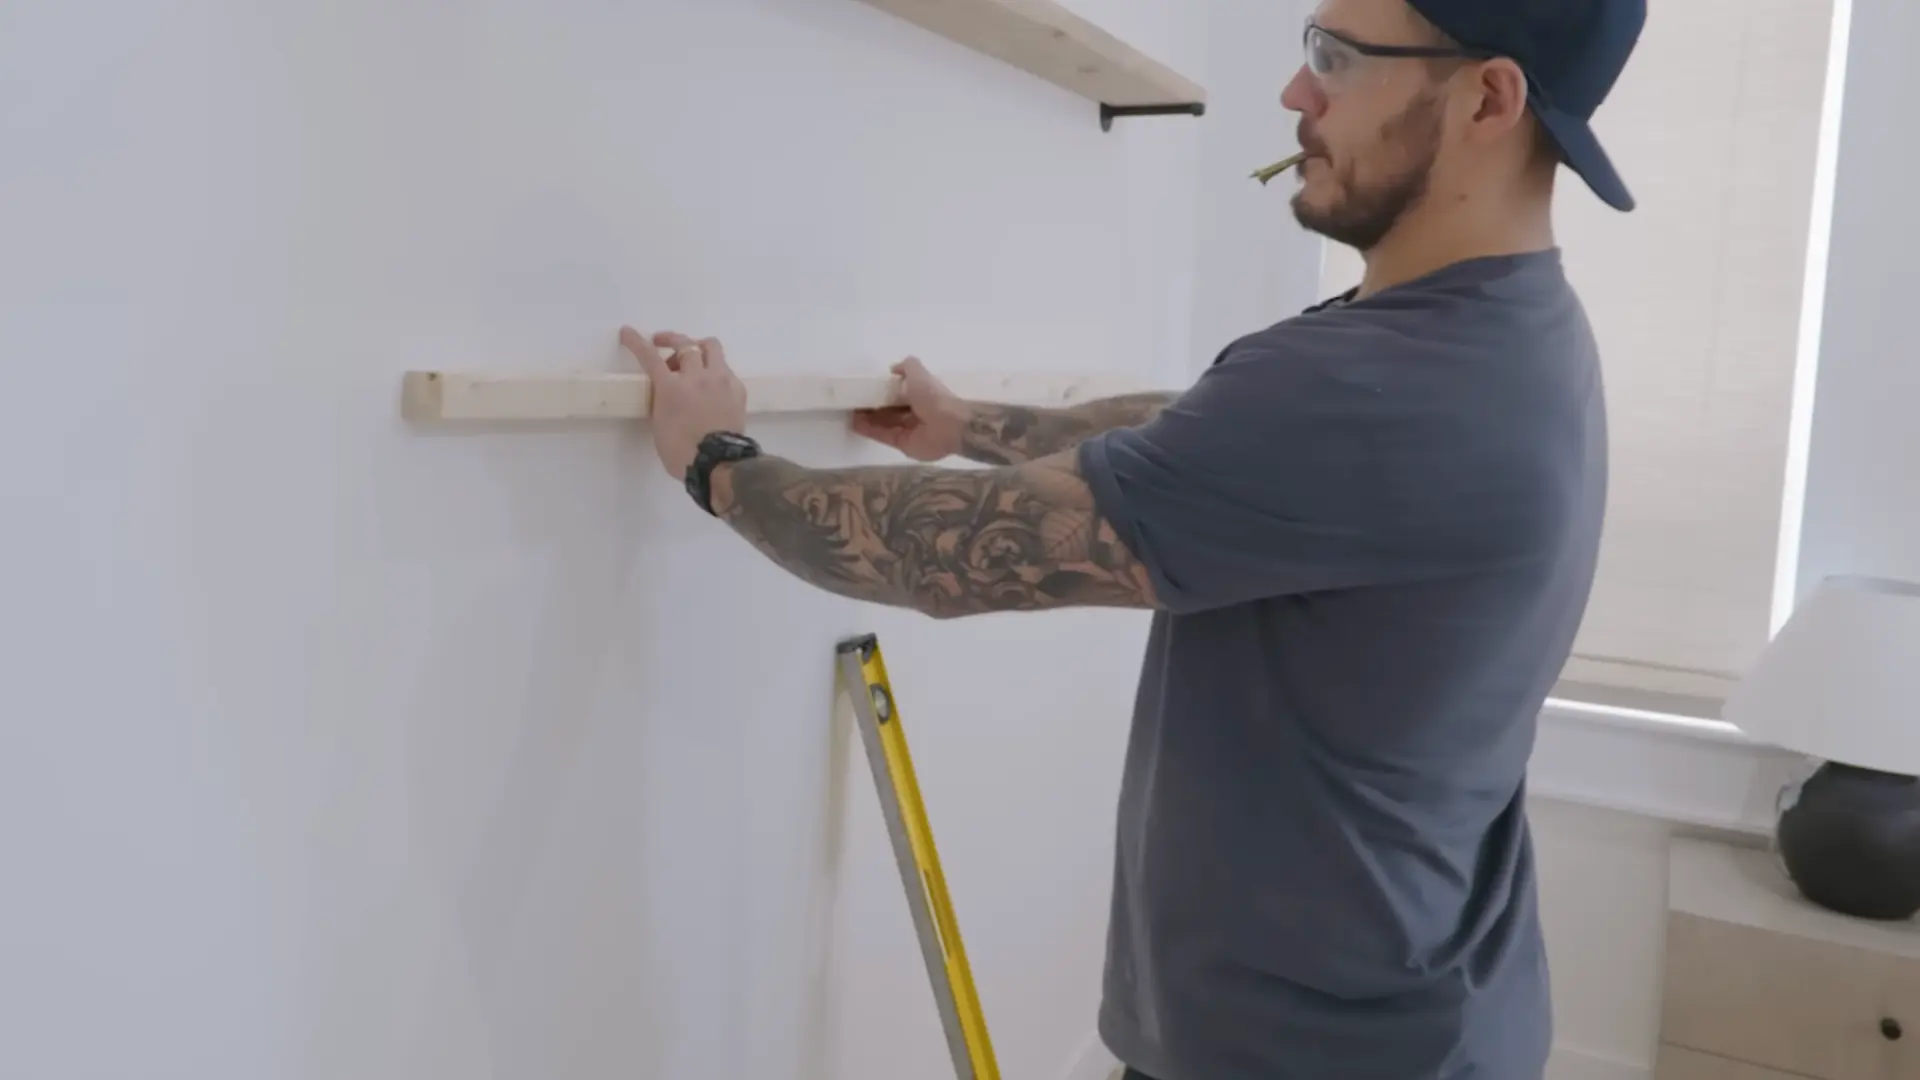
Once the rods are securely mounted and the shelf board finish has fully cured, slide the drilled holes onto the rods until the board sits flush against the wall surface.
Tap gently with a mallet if the fit feels tight, working evenly across the board.
Check the front edge with a level once it is in place, adjusting the rods if anything looks off.
Method 3 – Advanced Box-Style Floating Shelf with an Internal Frame
For anyone ready to take their skills further, this final method walks through a more advanced box-style shelf built around an internal frame, resulting in a thicker, more substantial-looking finished piece.
Step 1: Cut the Plywood Panels

Use half-inch plywood and cut mitered forty-five-degree corners using a table saw and miter saw for clean, tight joints.
Measure your finished outside dimensions first, then account for the inside dimension separately since the miter angle shifts that measurement depending on which way the blade leans.
Keep all your pieces labeled and organized so the panels go back together in the right order later.
Step 2: Build and Square the Internal Frame

Build a support frame from two-by-two material using pocket holes for clean, strong joints.
Size the front and back pieces about a quarter inch shorter than the finished length so the outer box has room to slide on later.
Add a few evenly spaced center supports for rigidity, then check the whole frame with a square before securing each joint with screws and a bit of wood glue.
Step 3: Assemble the Plywood Box

Tape the mitered seams together along the outside face first, then fold the panels up around the frame shape so all the corners come together evenly.
Apply wood glue along the seams as you fold, then nail the top panel into place last.
Tape the front face as well to keep everything from shifting while the glue sets and the box holds its shape.
Step 4: Fill, Sand, and Finish

Fill any gaps or seams with wood filler, letting it cure before sanding.
Lower your sander’s oscillating speed to avoid removing the thin plywood veneer, especially along the mitered edges.
Wipe away dust, then apply a wood conditioner to prevent blotchy absorption of stains. Apply your stain evenly with the grain afterward for a smooth, professional-looking finish on the box.
Step 5: Mount the Box Shelf Securely
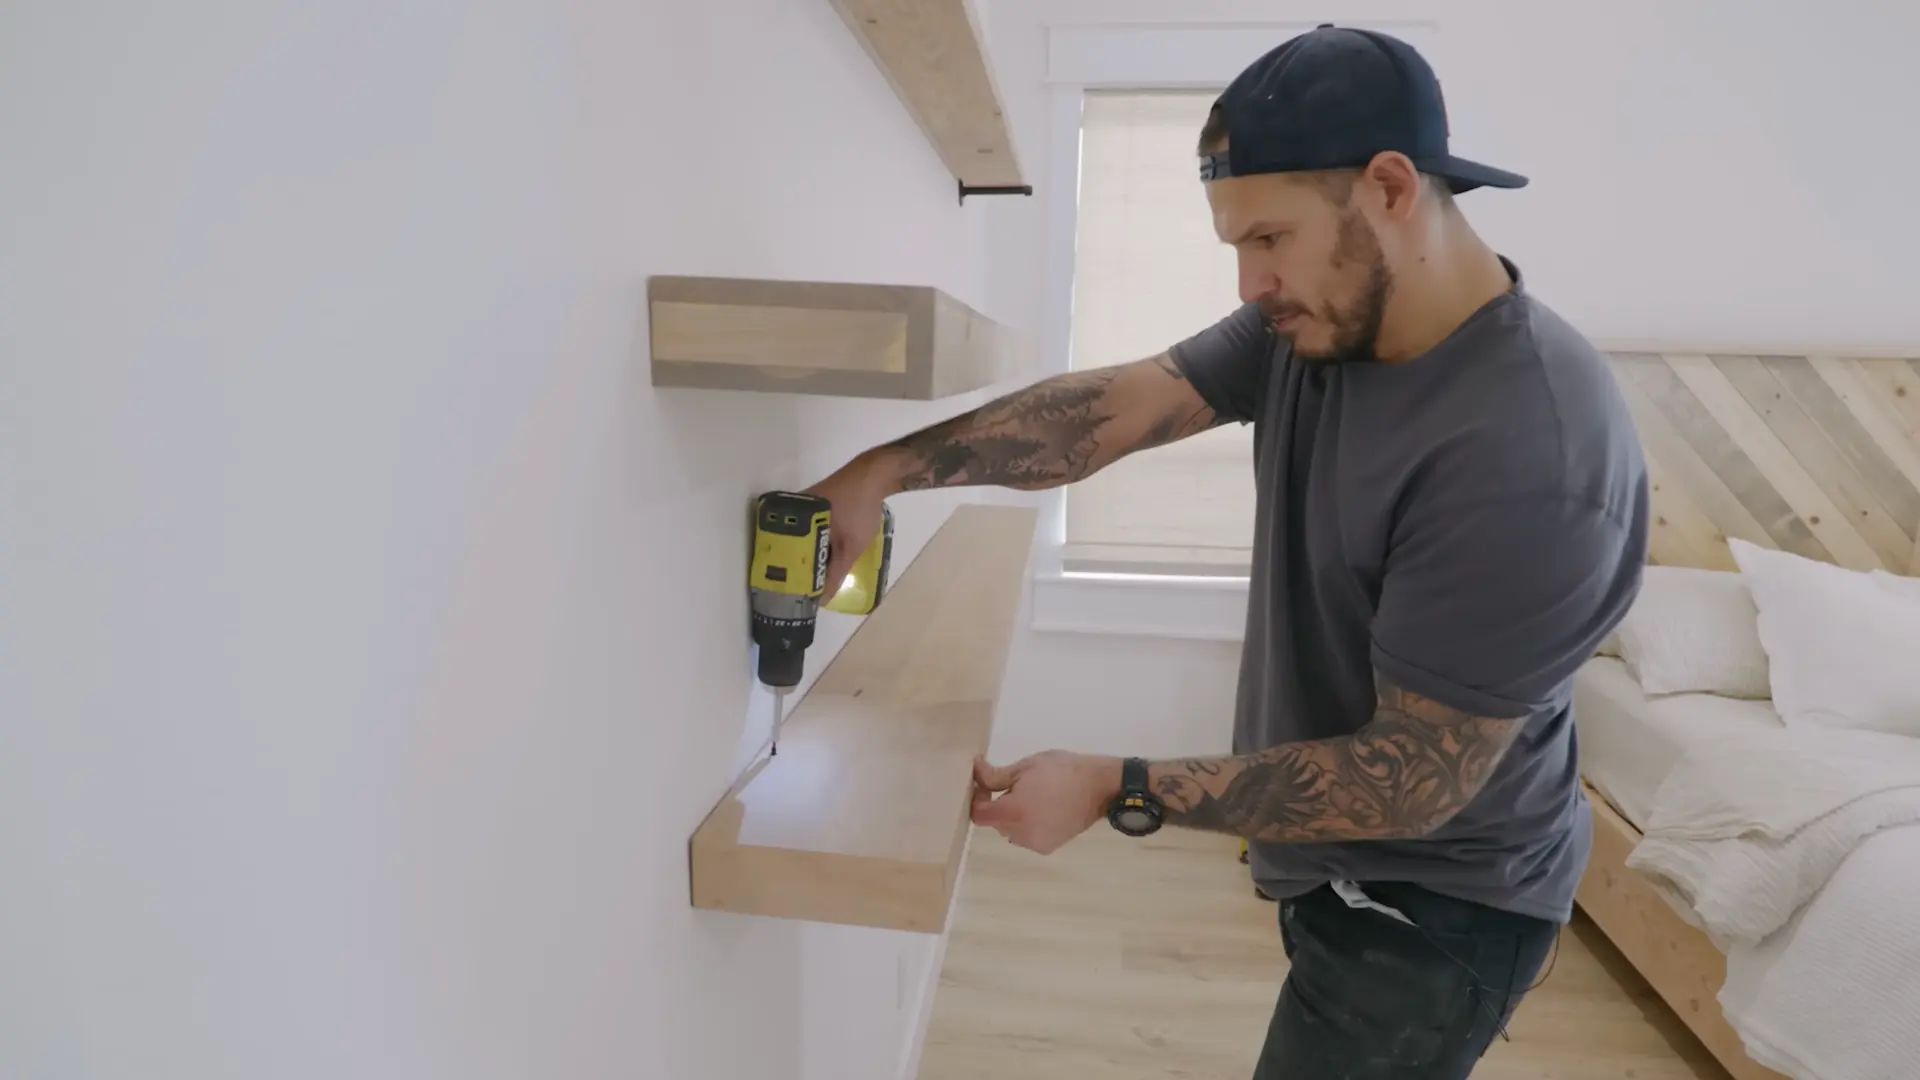
Mark 16 inches on-center to locate wall studs, then pre-drill the interior frame at each point.
Anchor the frame firmly into the studs using lag bolts, checking it with a level before tightening completely.
Once the finished plywood box has cured, slide it over the mounted frame until flush against the wall, then secure it underneath with a few screws for extra stability.
To see how each method works in practice, watch the walkthrough video below:
Sanding, Staining, and Finishing Your Shelves
Getting a smooth, professional finish on floating shelves comes down to following the right steps in the right order. A little patience here makes the difference between a shelf that looks store-bought and one that looks rushed.
- Sand through progressive grits starting at eighty, moving to one twenty, then finishing at two twenty for a smooth surface.
- Apply a wood conditioner before staining to prevent blotchy, uneven absorption, especially on plywood.
- Stir the stain thoroughly before applying, since pigment settles at the bottom of the can.
- Apply stain in the direction of the wood grain for even color and to avoid streaking.
- Seal with a topcoat once the stain is fully dry, allowing it to cure overnight before handling.
Letting each layer dry fully before moving to the next keeps the finish even and helps the stain absorb the way it should.
How Much Weight Can a Floating Shelf Hold?
Weight capacity depends mainly on the mounting method and whether the hardware reaches the wall studs.
A shelf anchored with a hidden cleat or rod brackets directly into studs can typically hold between fifty and one hundred pounds, while shelves relying on drywall anchors alone hold significantly less, often under twenty pounds.
Thicker lumber and a sturdier internal frame, like the box-style build with two-by-two supports, add extra rigidity and distribute weight more evenly.
For heavier items like books or dishware, always mount into at least two studs using lag bolts rather than standard screws, and avoid placing weight near the unsupported front edge.
Common Mistakes to Avoid When Building Floating Shelves
A few small missteps can compromise both the look and the strength of a floating shelf. Knowing what to watch for ahead of time saves a lot of rework later.
- Mounting brackets or cleats into drywall alone instead of locating and anchoring into wall studs.
- Overloading the shelf beyond what the hardware and wall anchoring can safely support.
- Skipping the level check before tightening leaves the entire shelf sitting at an angle.
- Using screws that are too short to reach solidly into the stud behind the wall.
- Sanding plywood edges too aggressively, which removes the thin veneer and exposes the layers underneath.
Most of these mistakes happen in the first five minutes of installation. Take the extra time at the start, and the shelf will hold exactly as long as it should.
Frequently Asked Questions (FAQs)
Is Building Wall Shelves Different from Floating Shelves?
Floating shelves are simply a style of wall shelf built without visible brackets, but the steps for building wall shelves and floating shelves are largely the same.
Can You Build Floating Shelves Without a Cleat?
Yes, hidden rod brackets are a cleat-free option that works well for thinner boards. They mount directly into studs and slide the shelf board onto exposed rods instead.
What is the Best Wood for Floating Shelves?
Douglas fir and one-by-six boards work well for beginner builds, while half-inch maple plywood gives a cleaner, more refined look for advanced box-style shelves.
Do Floating Shelves Need to Hit a Stud?
Yes, hardware should always be anchored to wall studs spaced 16 inches on-center. Drywall anchors alone cannot safely support real weight over time.
How Thick Should a Floating Shelf Be?
Most floating shelves range from 1.5 to 3 inches thick. Thicker shelves look sturdier but require deeper cleats or longer rod brackets to match.
Final Thoughts
Building floating shelves does not require advanced carpentry skills, just the right method for your comfort level and tools.
If you go with a simple hidden cleat, hidden rod brackets, or a more advanced box-style build with an internal frame, each approach results in a clean, hardware-free shelf that adds storage and style to any room.
Now that you know how to build floating shelves using any of these three methods, the key is to anchor securely to wall studs and take the time to sand and finish properly for a polished look.
Try one of these methods for your next wall-shelf project, and drop a comment below to let us know which build you chose and how it turned out.


One Response