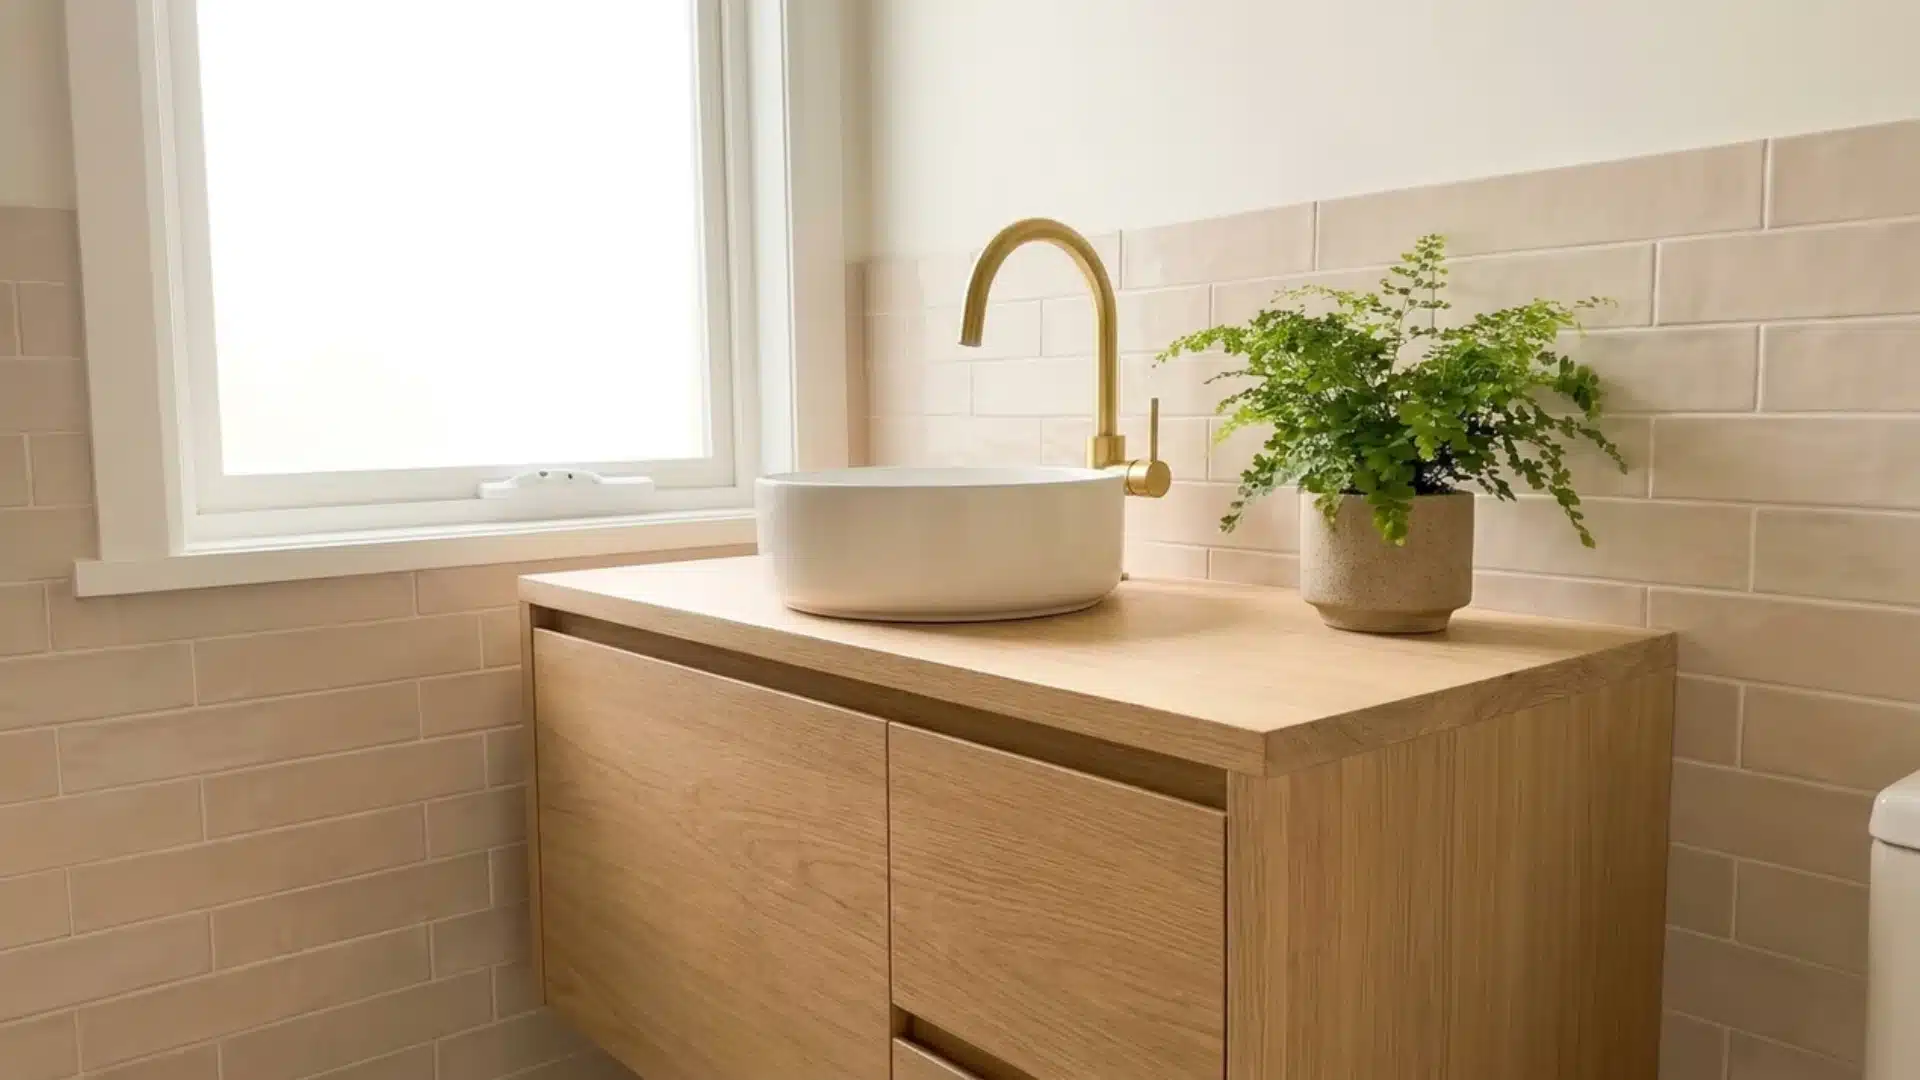
Plenty of bathrooms still have a plain, basic sink cabinet. Building a DIY bathroom vanity is a simple way to update that space.
No fancy tools or years of woodworking skill are needed to pull this off. With a few boards, a saw, and a free weekend, a sturdy new vanity comes together fast.
A DIY bathroom vanity lets you pick the exact size, style, and storage your space needs. You choose the finish, the hardware, and the layout that fits your taste.
Store-bought cabinets rarely offer that kind of freedom. Building it yourself also tends to cost less overall. Grab some tools, clear some space, and start on a vanity built your way.
What Makes a Good DIY Bathroom Vanity?
A good vanity needs to work well, not just look nice. Storage space matters since bathrooms often need extra room for supplies.
Durability is important because bathroom furniture is exposed to moisture and daily use. Wood or other materials used should resist warping due to humidity over time.
The design should also match the size and style of the room. A vanity that looks great but lacks storage can feel impractical.
Function and style both matter when planning a build like this. Balancing the two creates a piece that lasts and looks good. A well-built vanity holds up daily while still fitting the space.
The best designs combine steady function with a simple, clean look.
How to Build a DIY Bathroom Vanity (Step-by-Step)
Ready to actually build the thing? This is the part where sawdust happens.
Every good build starts with the right setup, so this section breaks down exactly what to gather and how to put it together, one step at a time.
Tools and Materials Needed
Every solid build starts with having the right pieces on hand, so here’s exactly what this project calls for before any cutting begins:
| Tools | Materials |
|---|---|
| Miter saw | 2×2, 1×2, and 2×3 pine boards |
| Table saw or circular saw with straight edge guide | 1×3 boards for doors |
| Pocket hole jig | Plywood (half-inch and three-quarter-inch) |
| Drill with self-centering drill bit | Pocket hole screws and wood glue |
| Concealed hinge jig | European inset hinges and magnetic door catches |
| Clamps and a square | Cabinet knobs, wood stain, satin polyurethane, and silicone caulk |
Having everything ready before starting keeps the build moving without delays. Double-check each item on the list before making the first cut.
Build the Vanity Step-by-Step
With everything gathered and ready to go, here’s how the whole vanity comes together, one step at a time:
Step 1: Cut Every Board to Size
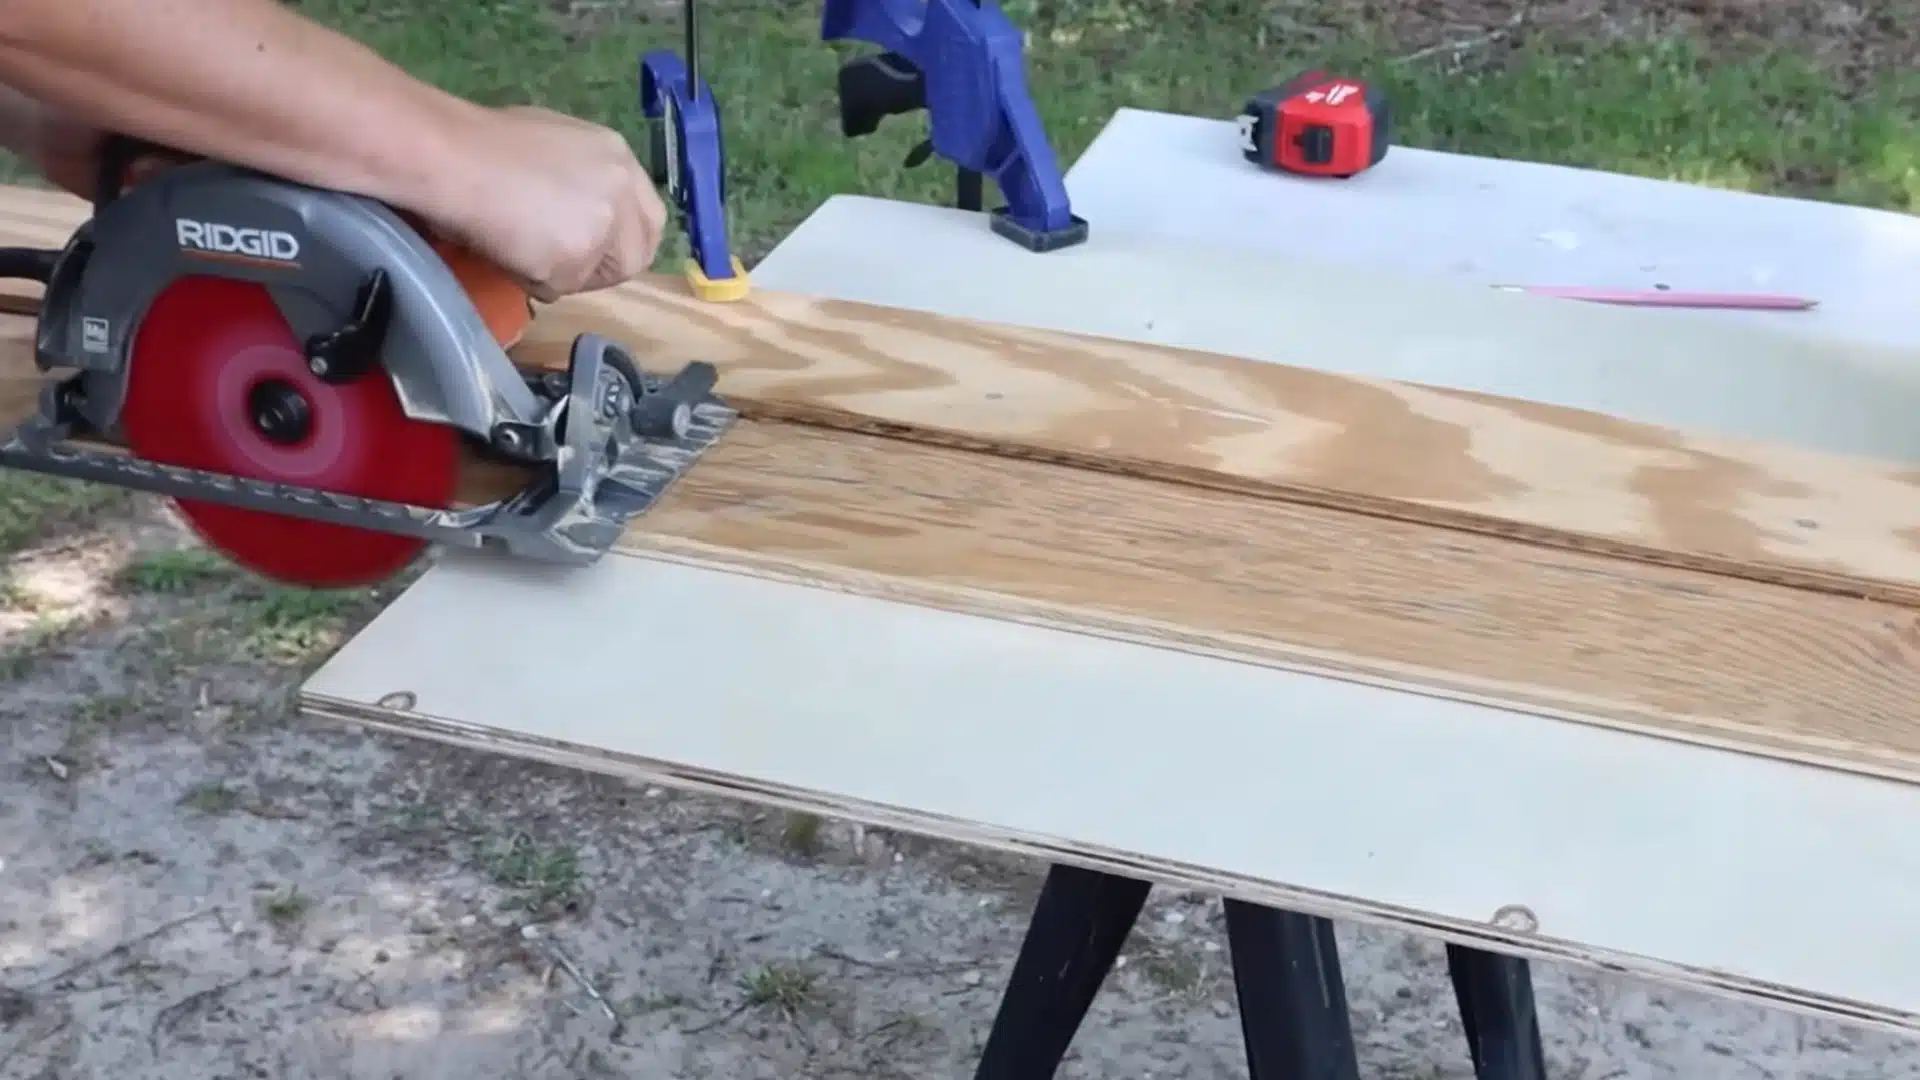
Start with the miter saw for the 2×2, 1×2, and 2×3 boards, cutting each piece to the measurements on the full cut list.
Switch to a table saw or a circular saw with a straight-edge guide for the plywood panels, since clean, straight cuts matter most here.
Having every piece cut and sorted before drilling keeps the rest of the build moving without constant back-and-forth to the saw later on.
Step 2: Drill Pocket Holes Throughout
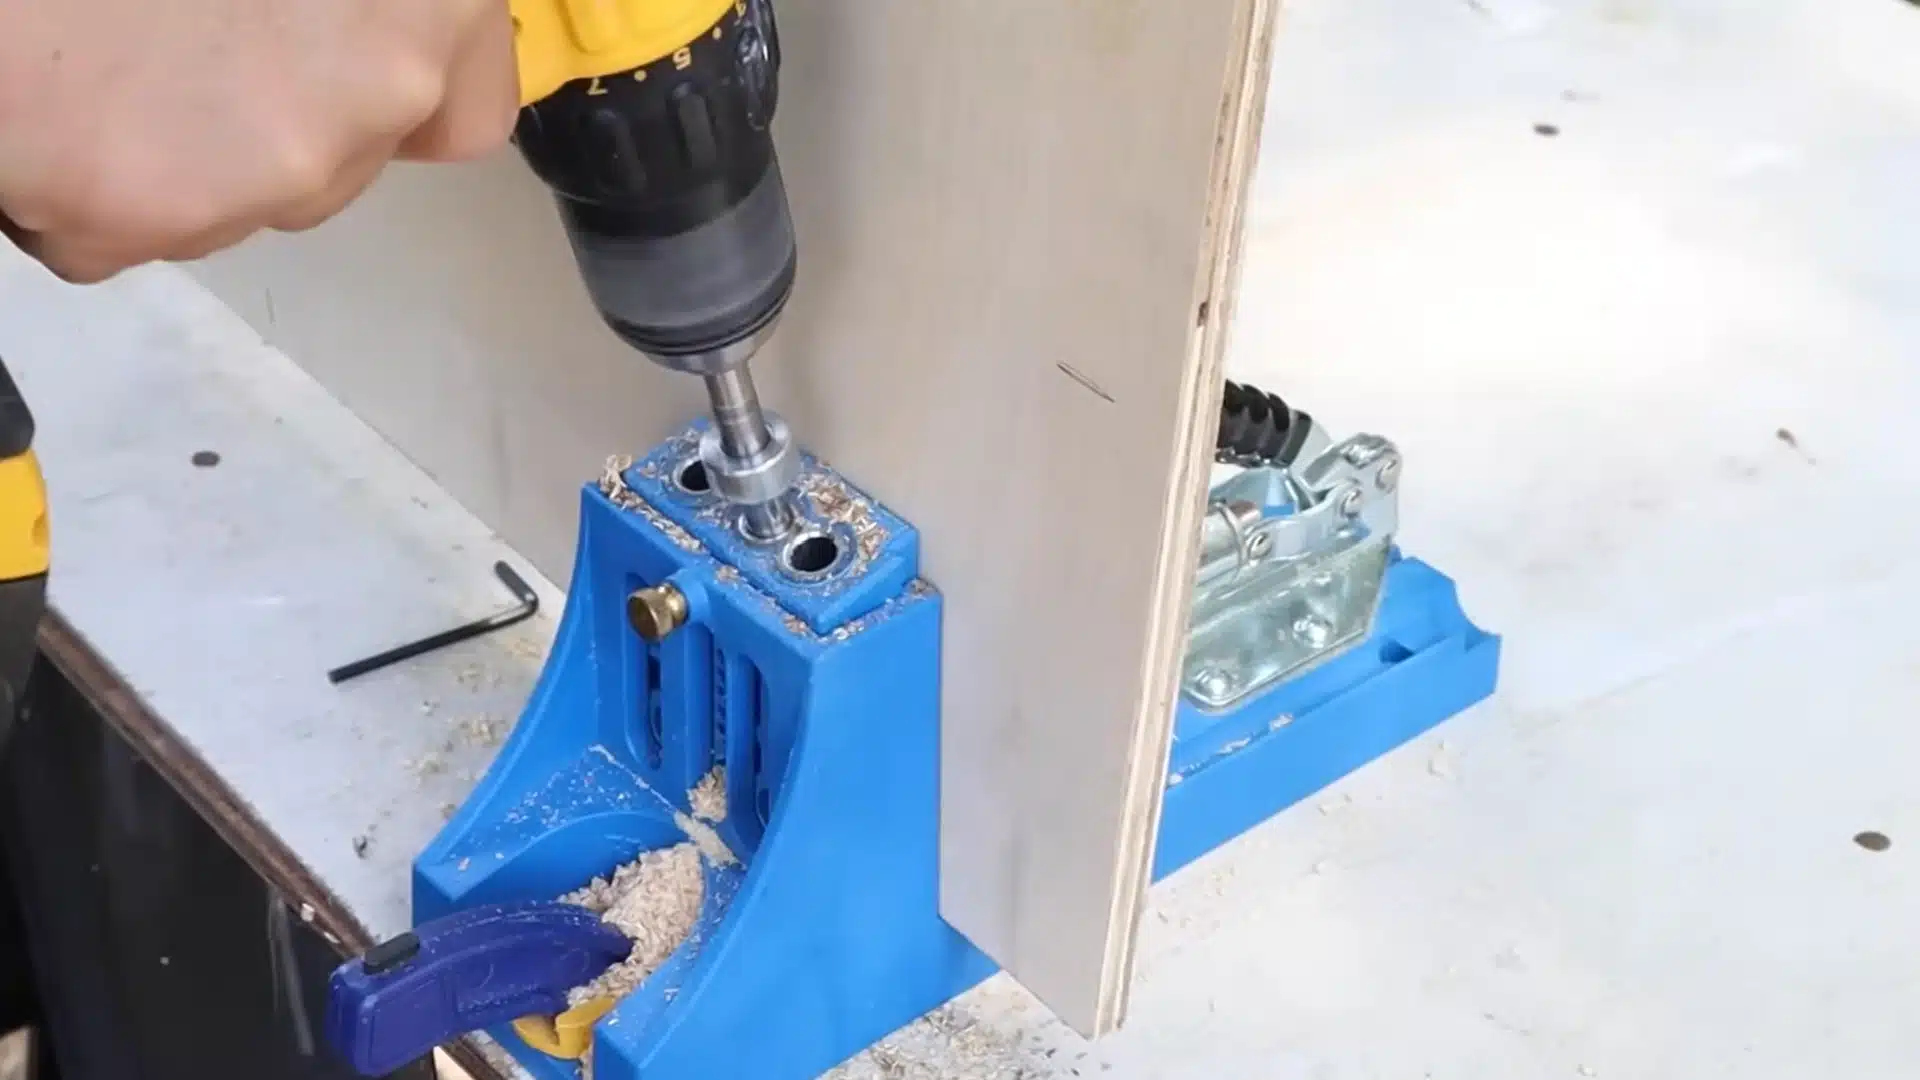
Set the pocket-hole jig to match each board’s thickness before drilling.
Use the half-inch setting for the plywood panels, adjust to one and a half inches for the 2×2 and 2×3 boards, then switch to three-quarter inch for the 1×2 boards.
Add pocket holes to every side that will need a joint, since going back to redrill later slows everything down considerably.
Step 3: Build the Two Side Frames
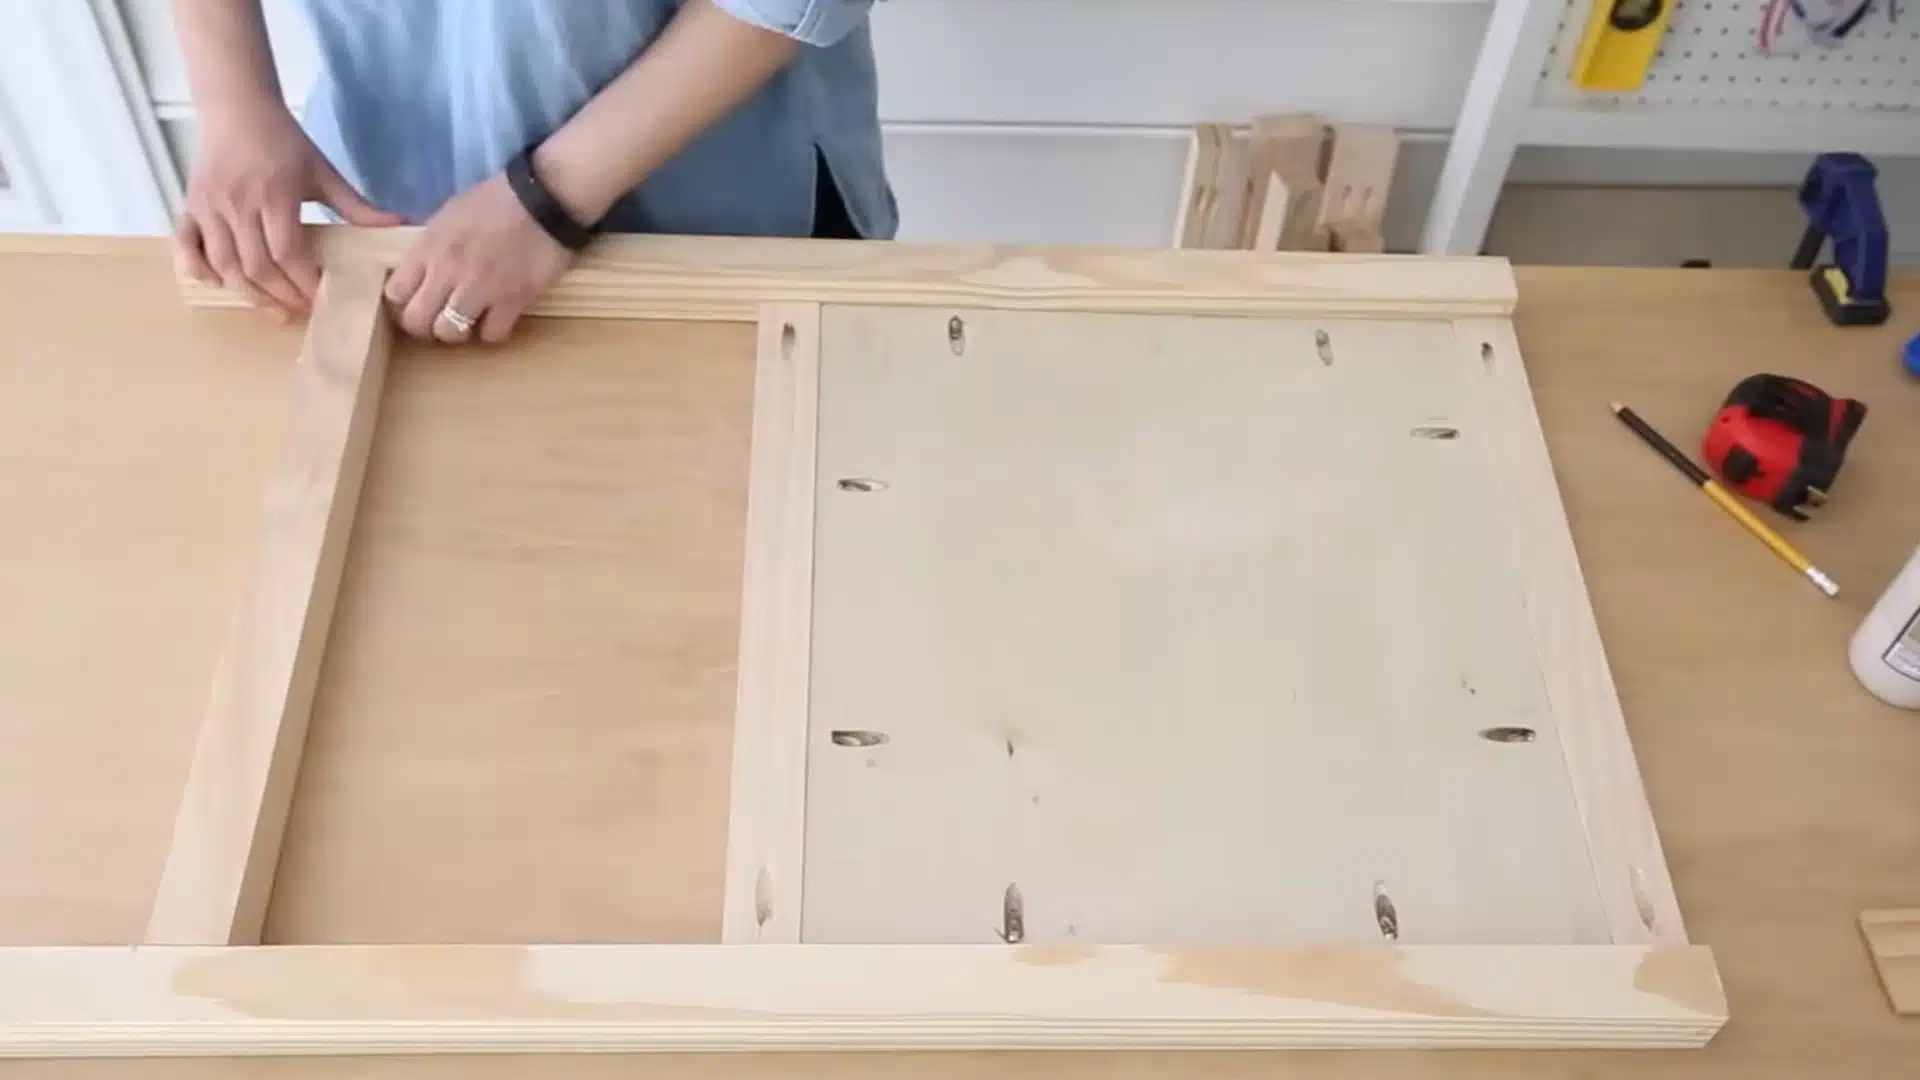
Attach a 1×2 to the bottom of each plywood side panel, keeping the back edges flush.
Add a 2×2 leg to each side, then screw a 2×2 shelf support to the legs three and a half inches up from the bottom.
Wood glue plus pocket screws hold everything together securely. Repeat the process a second time so both side frames match exactly.
Step 4: Join the Frames and Back
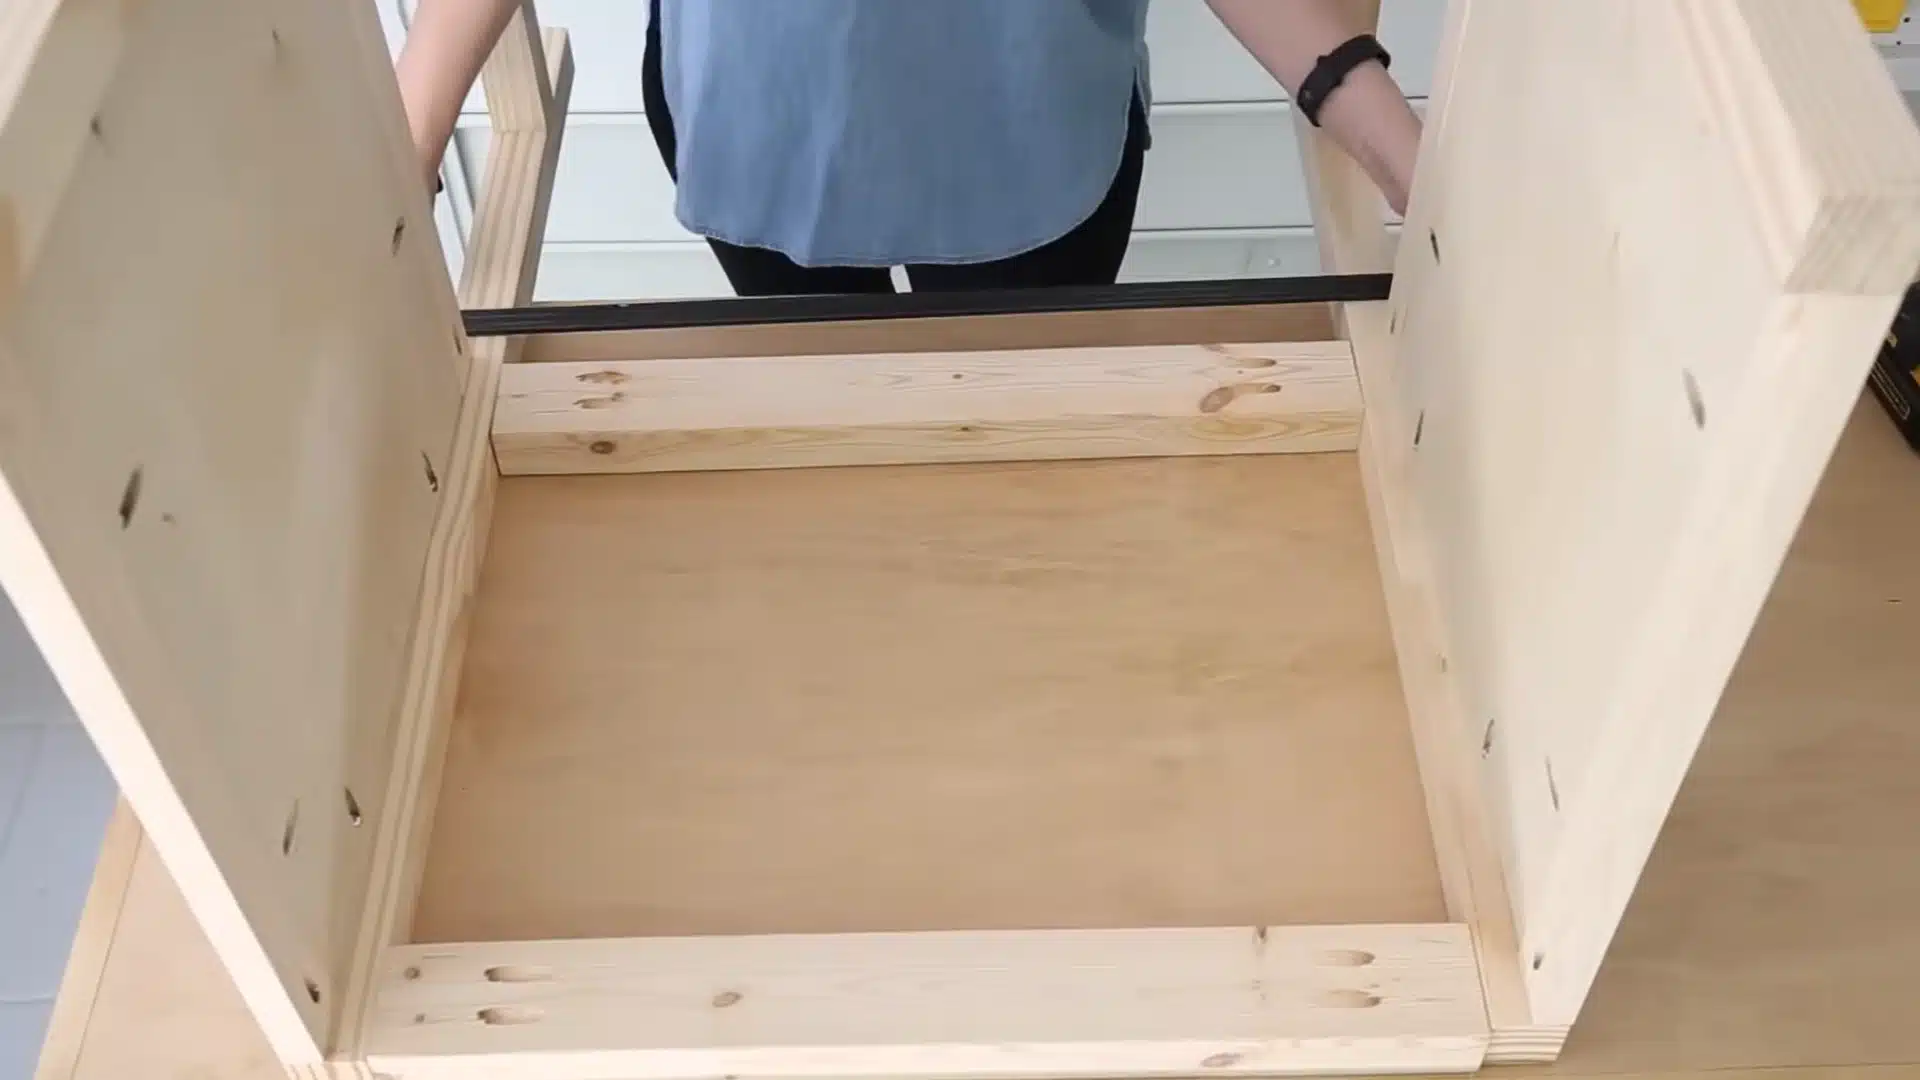
Connect both side frames with 2×3 boards along the back, one at the top and one fourteen inches up from the bottom.
Leave the back open so plumbing lines have room to pass through later without extra cutting.
Add a lower shelf support 2×2 three and a half inches from the bottom, matching the shelf height already used on the side frames.
Step 5: Add Front Boards and Shelves
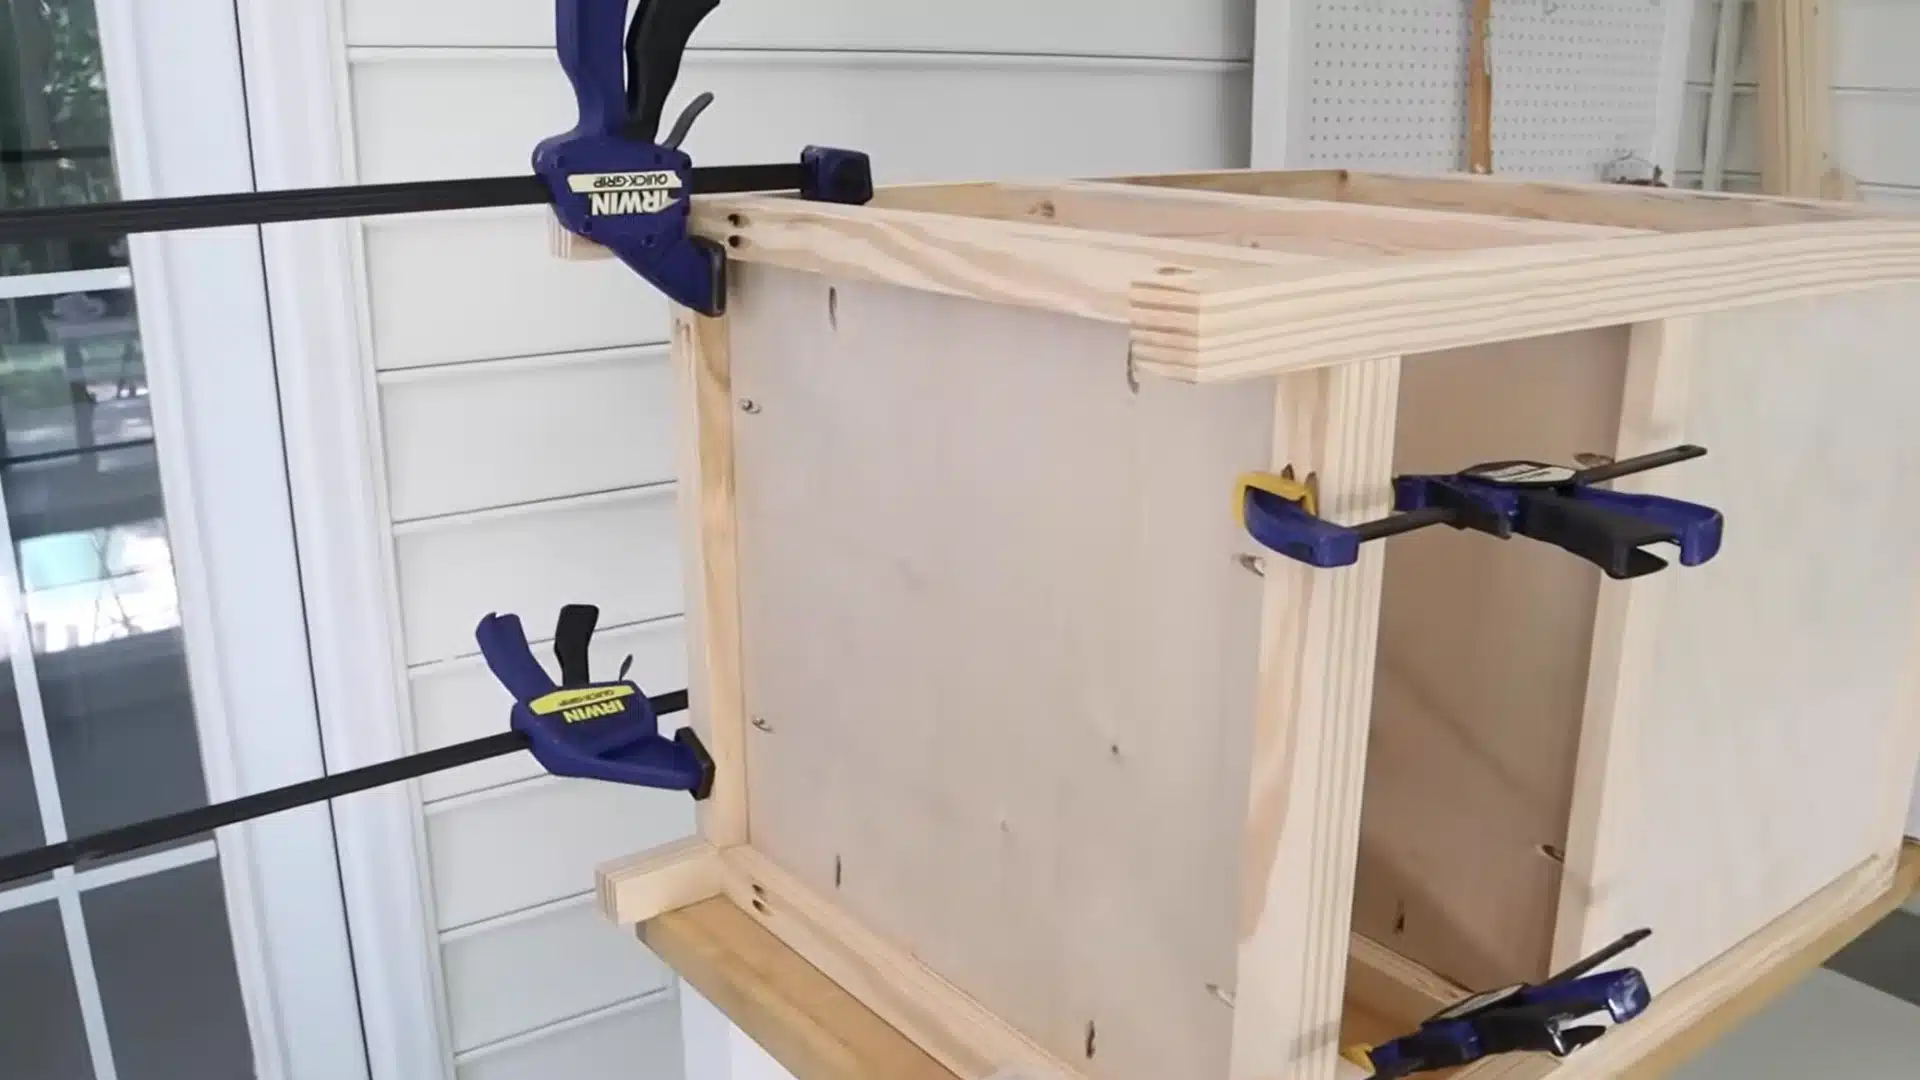
Attach three 2×2 boards across the front at the top, middle, and bottom to complete the frame.
Measure the two shelf openings directly, since actual gaps can vary slightly from the plan, then cut and install plywood shelves to fit snugly.
Leave room in the lower shelf for a plumbing cutout rather than losing that storage space to pipework.
Step 6: Build and Hang the Doors
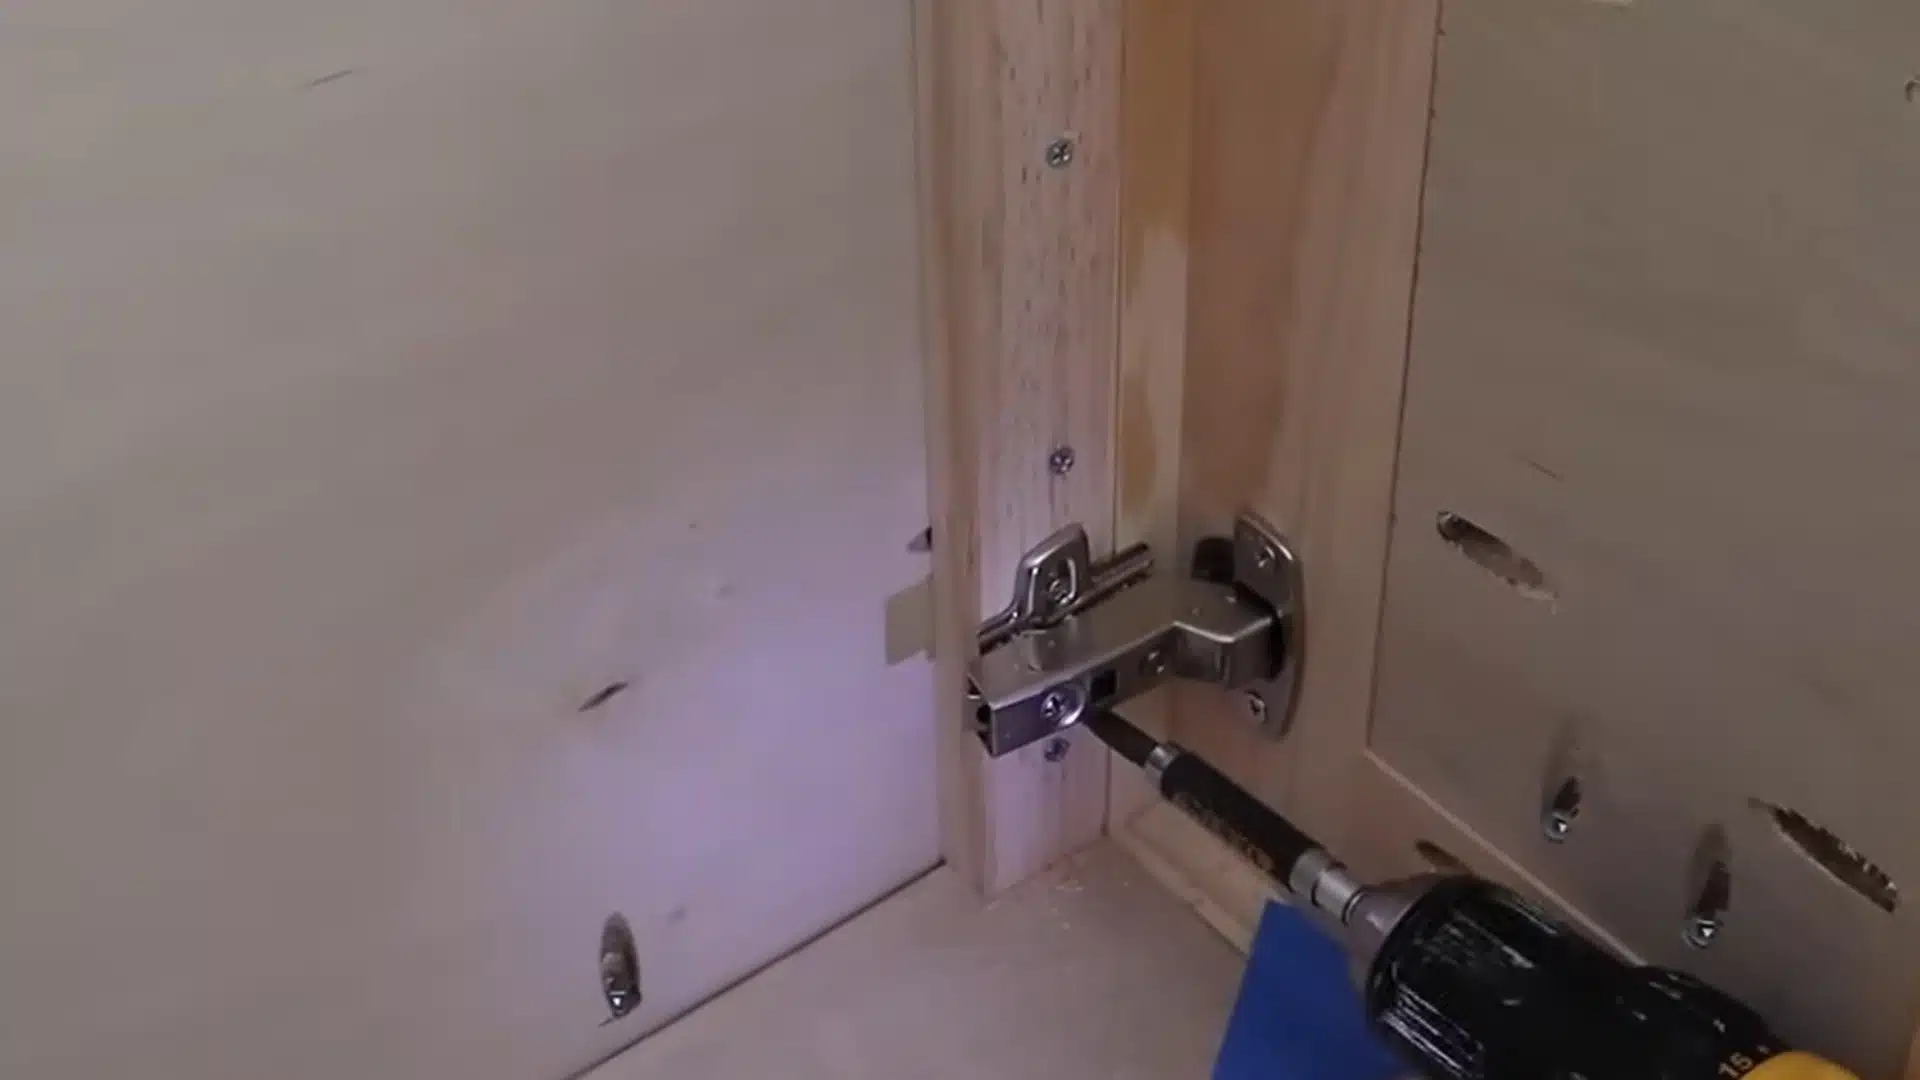
Frame two plywood door panels with 1×3 boards, leaving an eighth-inch gap on all sides for clearance.
Drill knob holes before installing hinges to keep everything aligned properly. European inset hinges allow fine adjustment after mounting, so gaps can be evened out once both doors sit in place.
Magnetic catches help keep doors flush if the hinges shift out of alignment.
Step 7: Finish and Install the Sink
Stain with two coats, let it cure fully, then seal with a satin polyurethane topcoat for lasting protection.
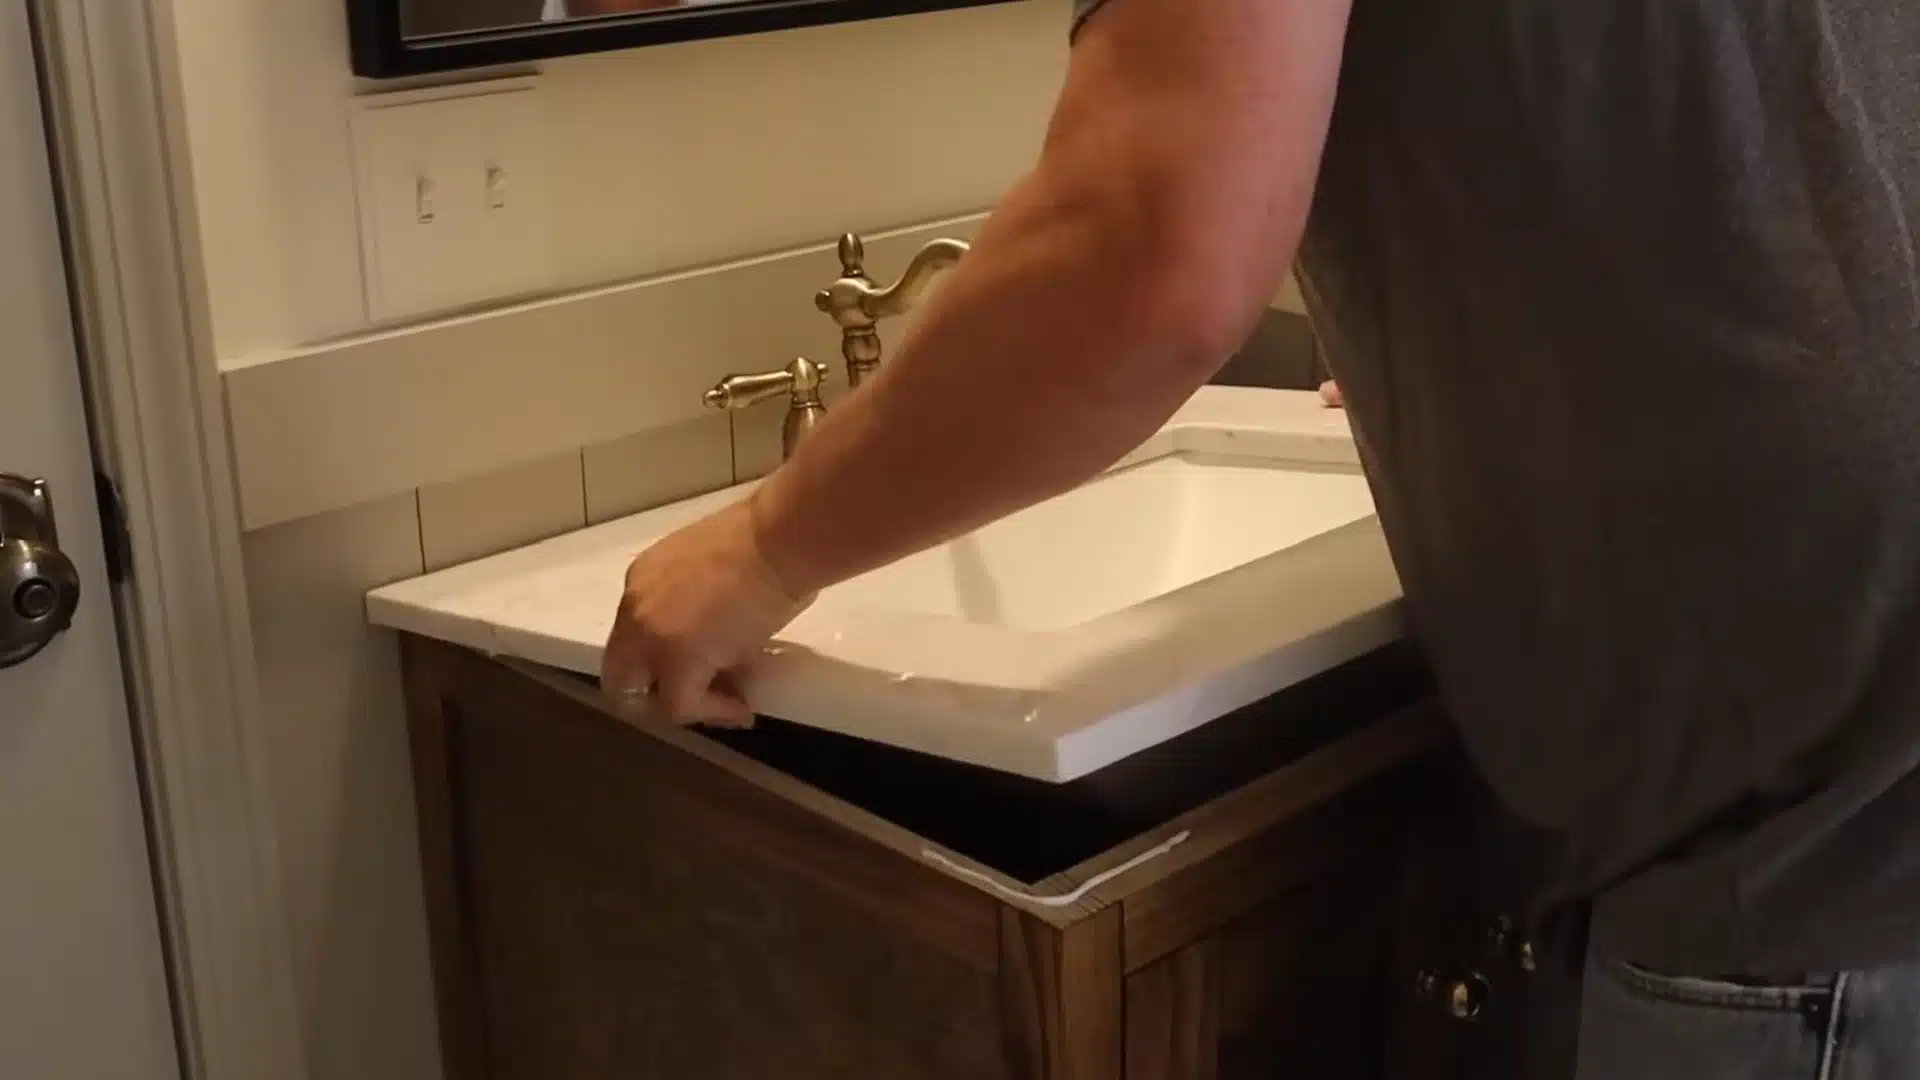
Attach the sink top with silicone caulk, leaving a slight overhang on each side for a clean edge.
Cut any plumbing openings into the shelf with a jigsaw or hole saw, and finish with cabinet knobs for a polished, custom look.
For a more detailed version, check out the video below by Angela Marie Made.
DIY Bathroom Vanity Mistakes to Avoid
Even a well-planned build can go sideways if a few common pitfalls slip through, so here’s what to watch for before you start.
- Bathrooms are humid, and unsealed wood soaks up moisture, then warps and rots, so seal every cut edge.
- Skipping this is the biggest reason a DIY vanity falls apart within a year.
- Skipping plumbing measurements can leave a cabinet misaligned with your water lines or drain.
- Confirm measurements first, and leave enough room for the plumbing to connect easily.
- Unsealed wood or untreated stone can stain, swell, or warp once standing water gets involved.
- Stick with sealed quartz, solid surface, or finished wood, and reseal it periodically.
Floating and Wall-Mounted Vanity Ideas
Mounting a vanity to the wall rather than the floor instantly makes a bathroom feel lighter and airier, since your eye reads more open space beneath.
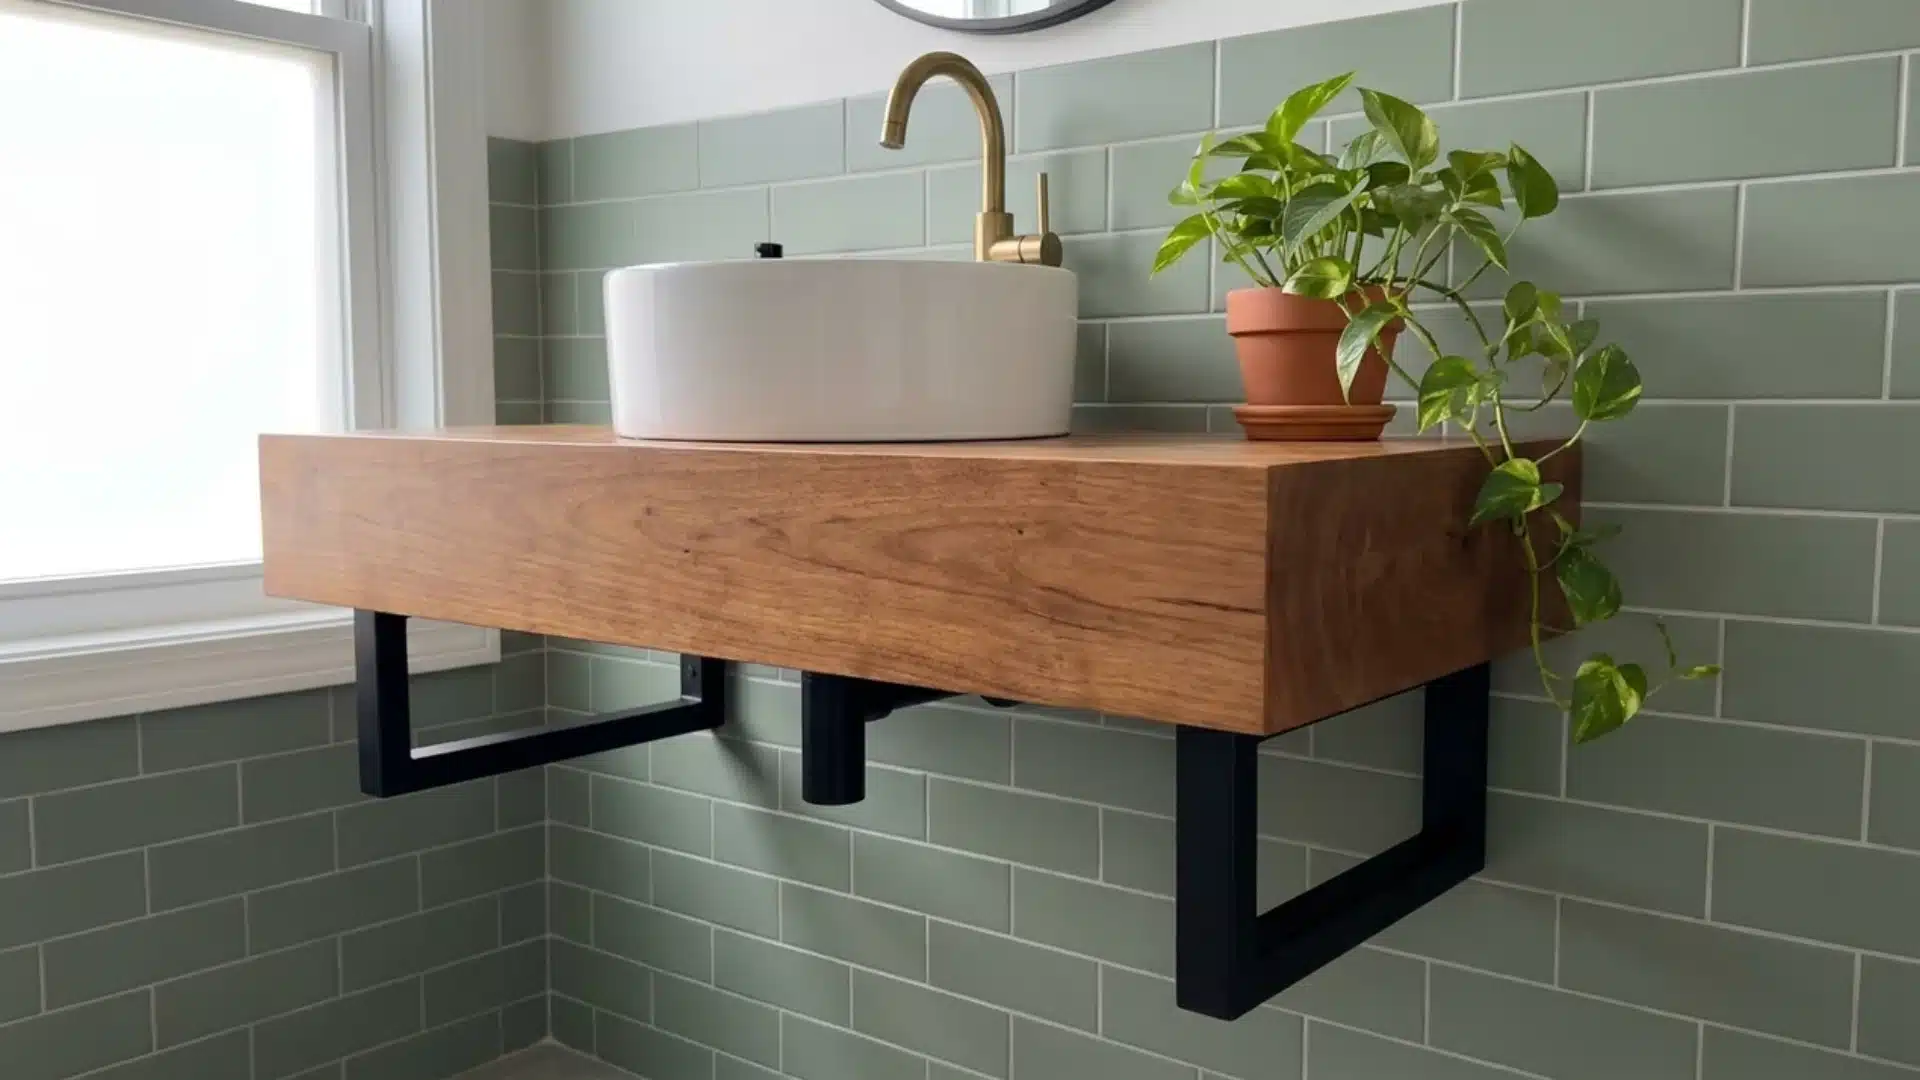
1. Single Floating Shelf Vanity
A single floating shelf vanity keeps things refreshingly simple: one slab of wood mounted on sturdy brackets, topped with a vessel sink.
The same bracket-and-stud approach used in building sturdy floating shelves applies directly to this style of vanity. There are no cabinet doors, no extra hardware, and no clutter competing for attention.
The wall stays visible underneath, which makes even a small bathroom feel more open. It is a striking, minimalist piece that comes together quickly.
2. Two-Tier Floating Vanity
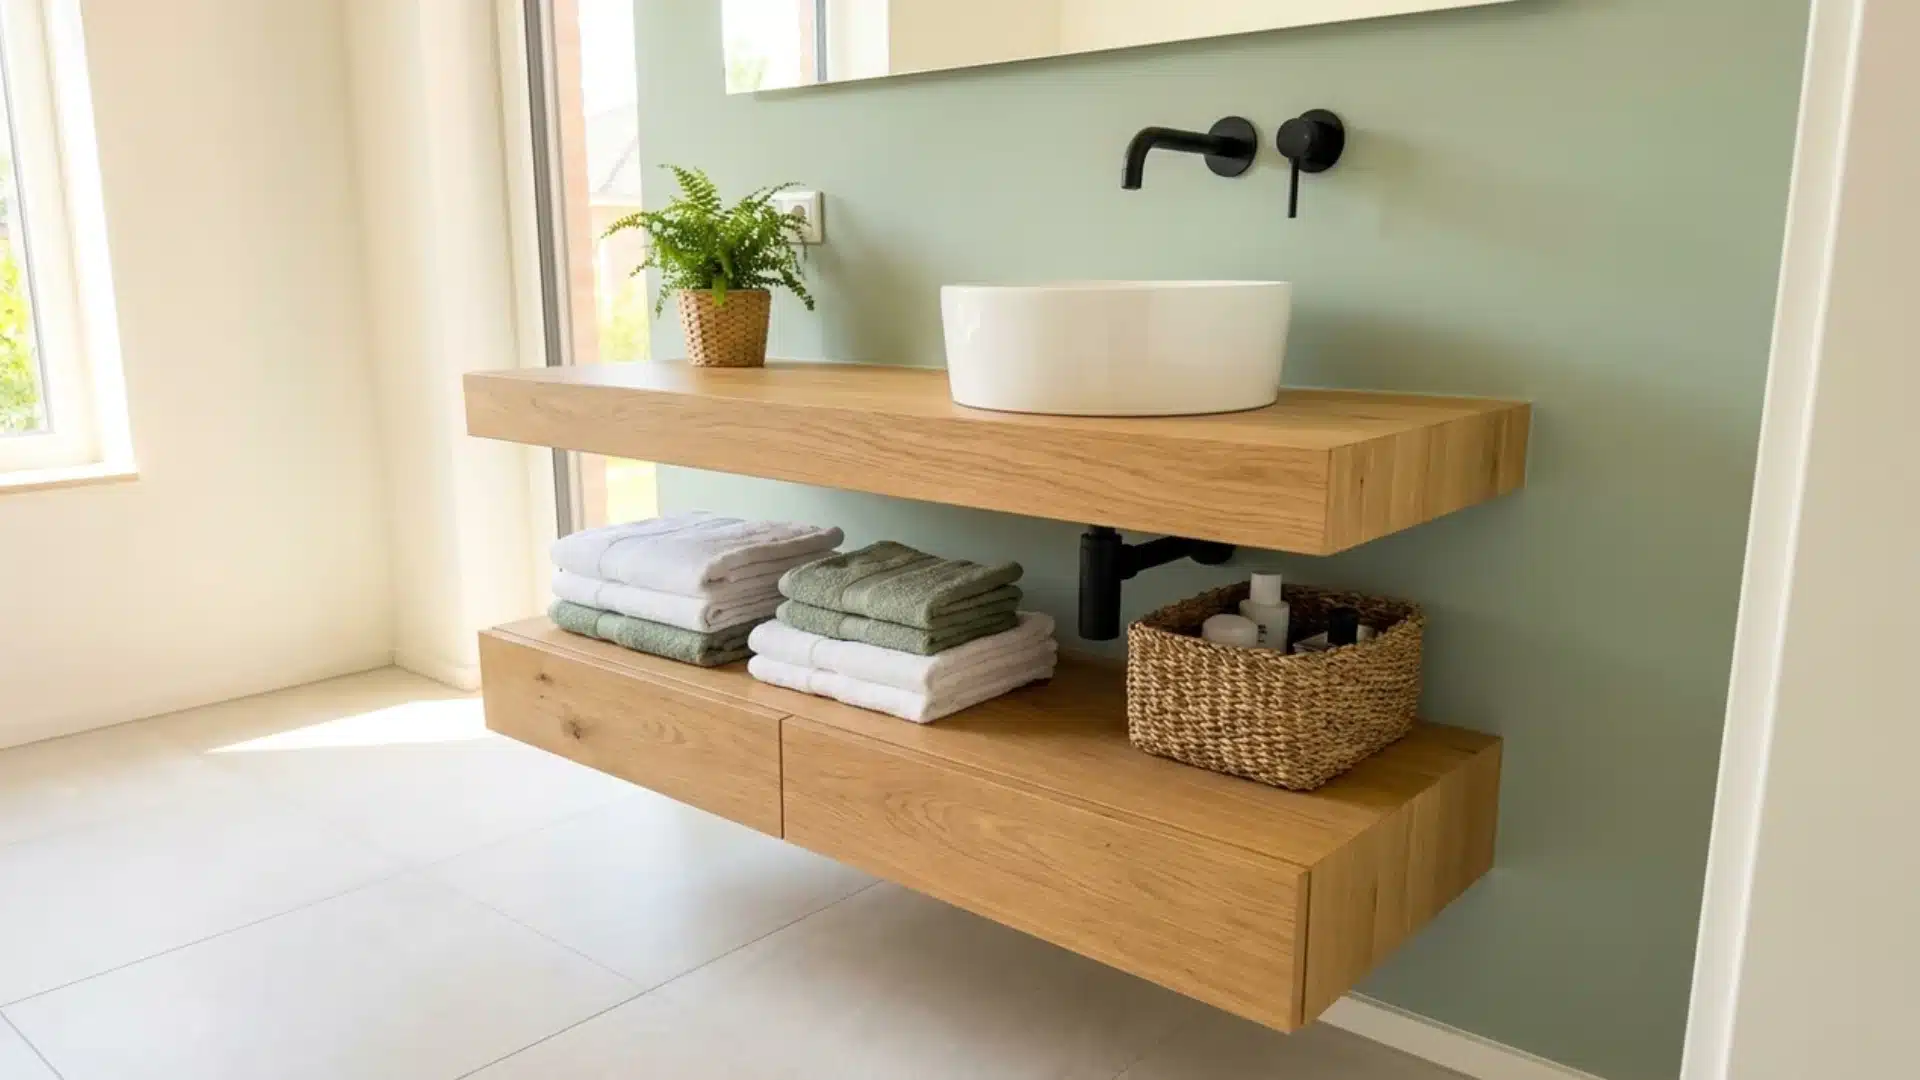
A two-tier floating vanity builds on the single shelf idea by adding a lower shelf for rolled towels, baskets, or everyday essentials.
Nothing touches the floor, so the whole setup still reads light and airy.
The extra tier solves the biggest complaint about floating vanities: that they lack storage, without sacrificing that open, uncluttered look everyone wants in a bathroom.
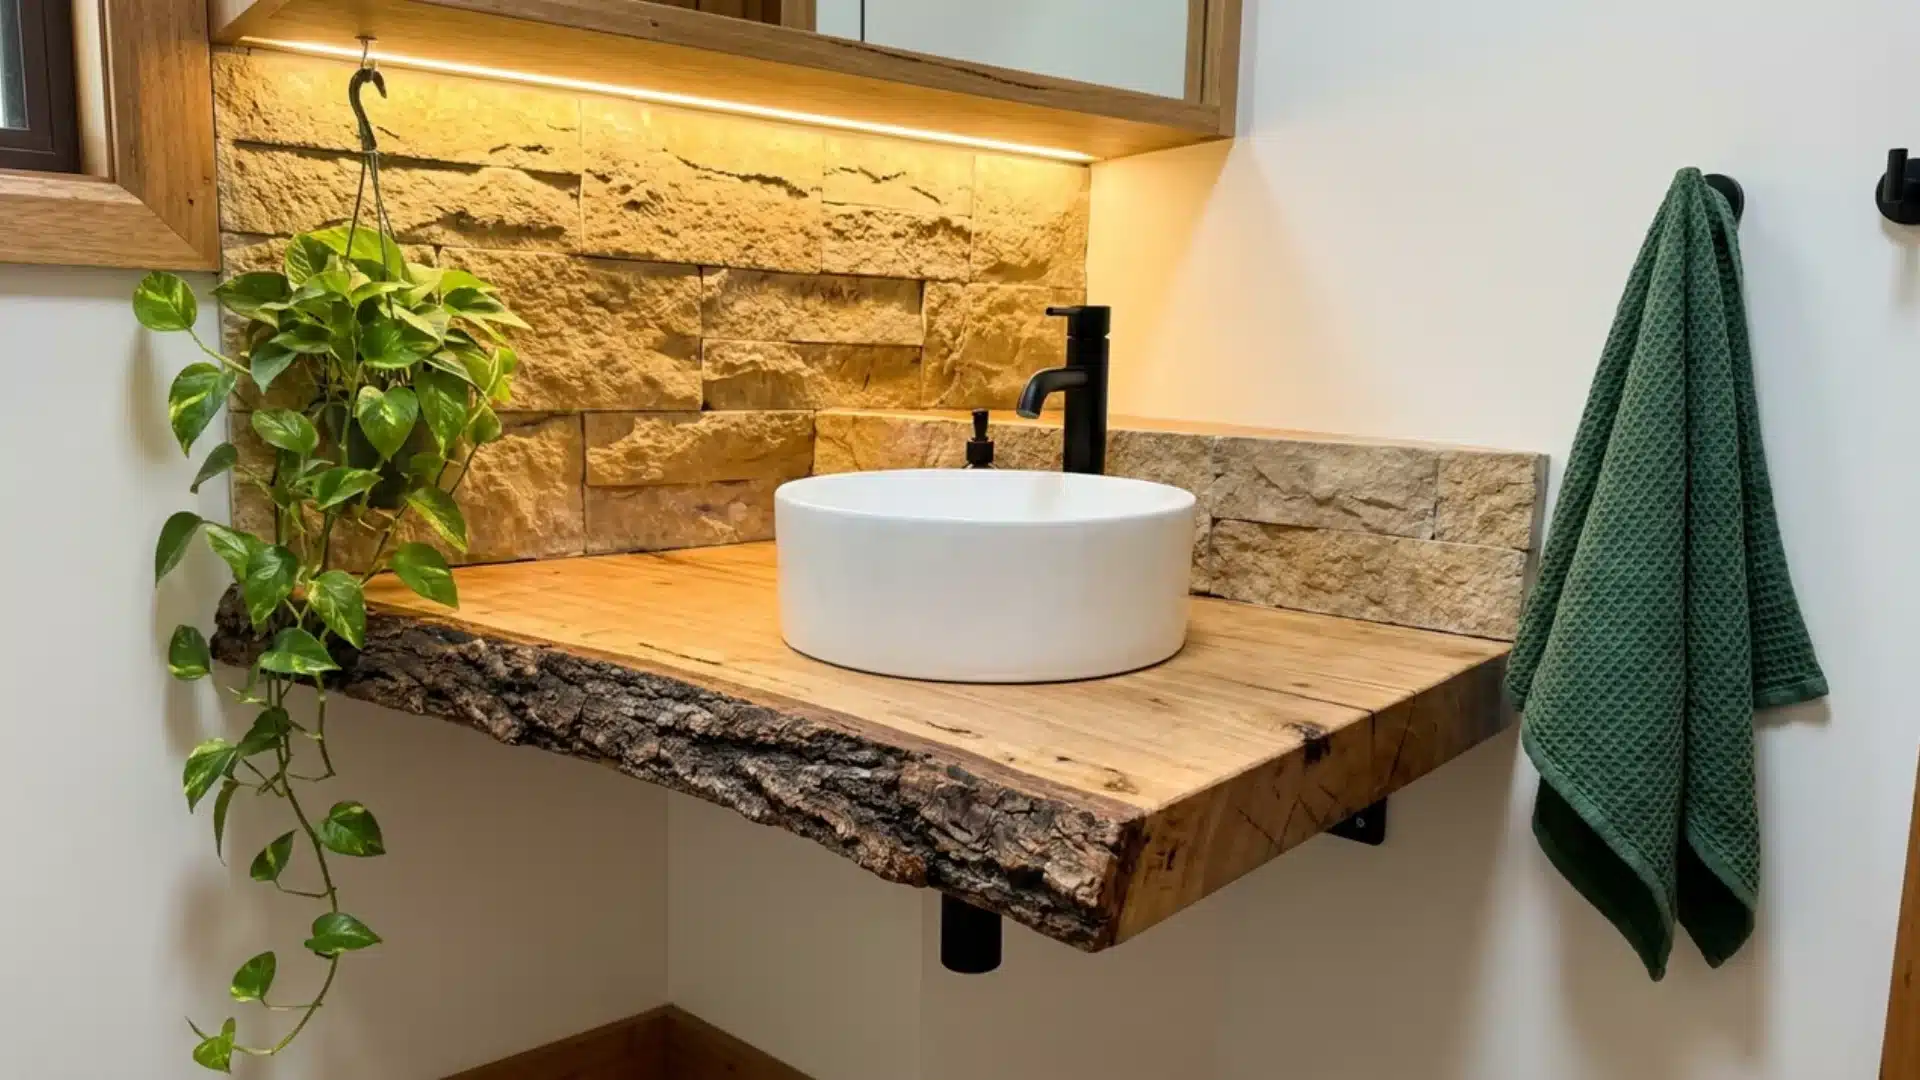
3. Live Edge Floating Vanity
A live edge floating vanity uses a raw wood slab with the natural bark edge left intact, letting the material’s imperfections become the design feature.
Mounted on hidden brackets, it pairs beautifully with a simple vessel sink.
This style works especially well in cabin-style or nature-inspired bathrooms where you want warmth and texture instead of a polished, factory-made look overall.
4. Floating Vanity With Hidden Drawers
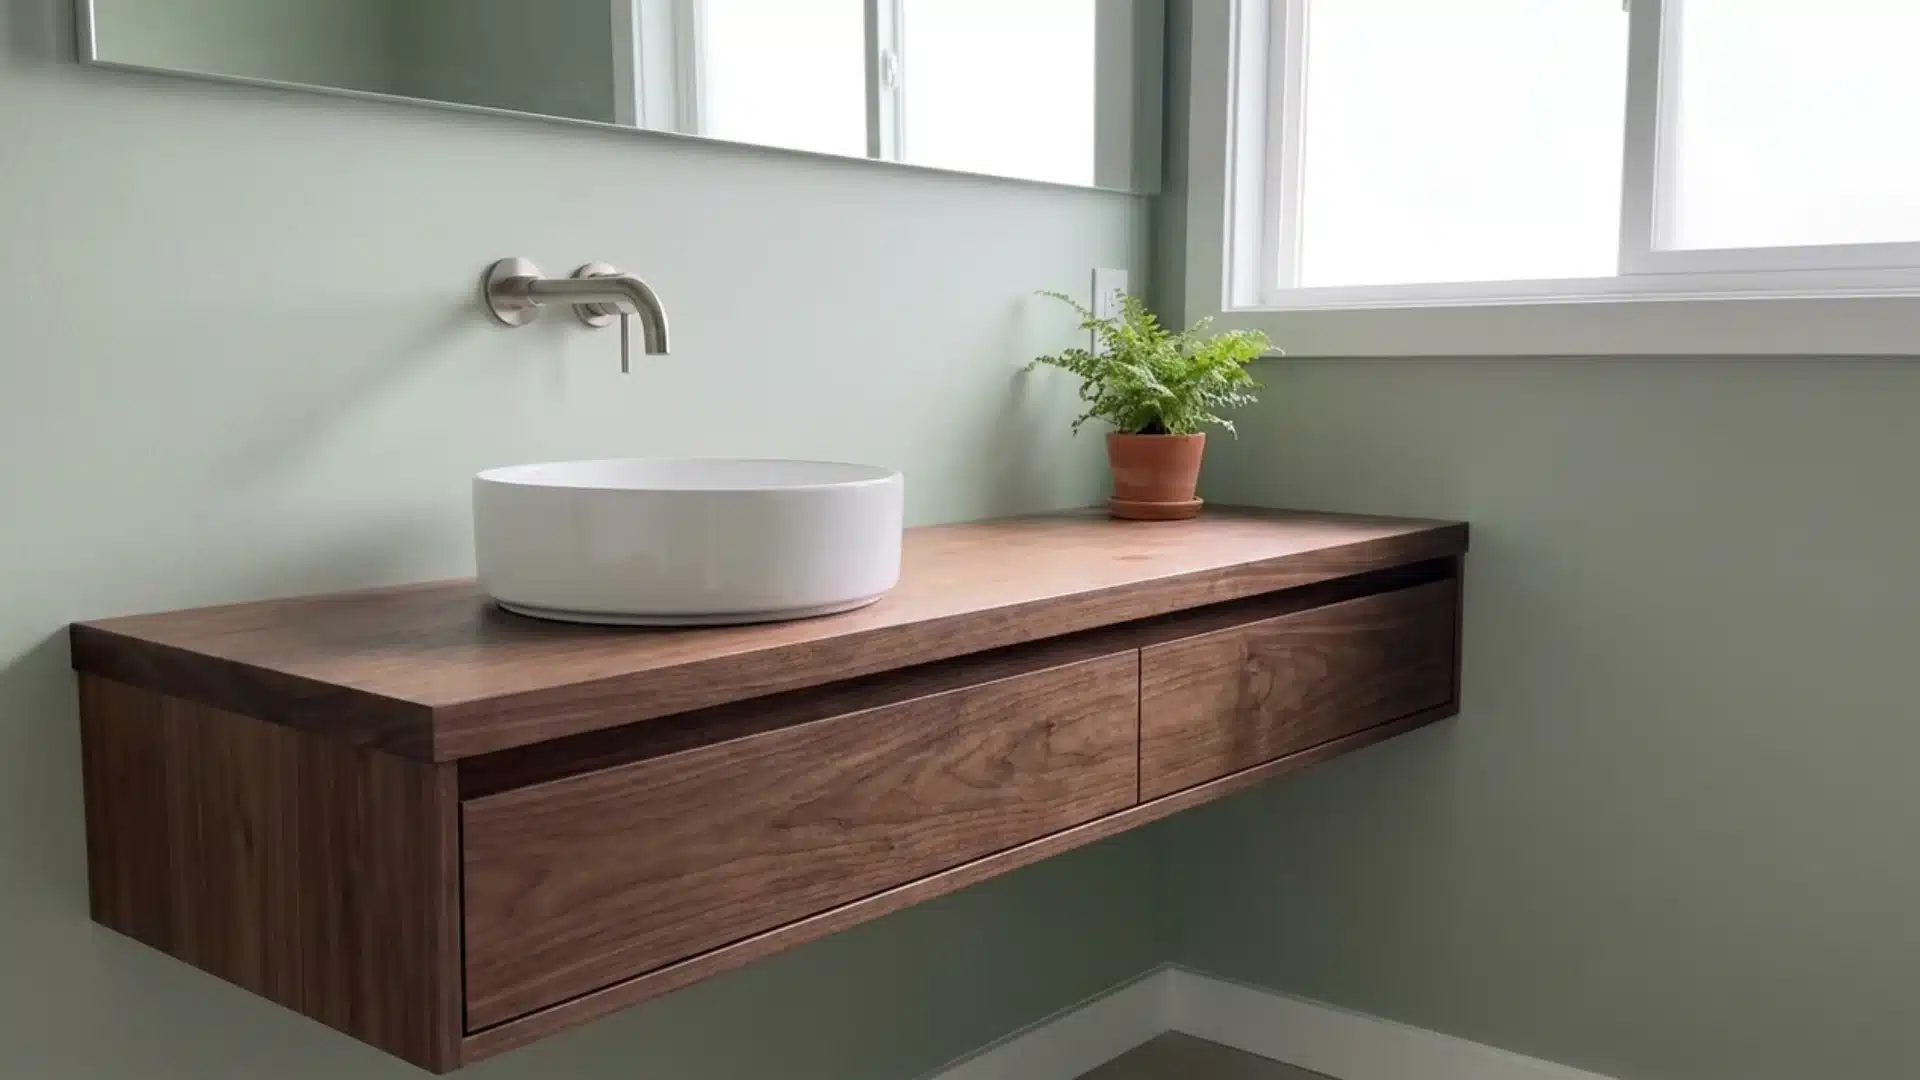
This build hides slim push-to-open drawers directly under the floating slab, giving you real storage without a single visible pull or hinge anywhere.
The front stays completely clean and seamless, which is exactly the appeal.
It takes more precise woodworking than a basic shelf, but the payoff is a vanity that looks minimal while still holding your everyday clutter neatly.
5. Floating Double Vanity
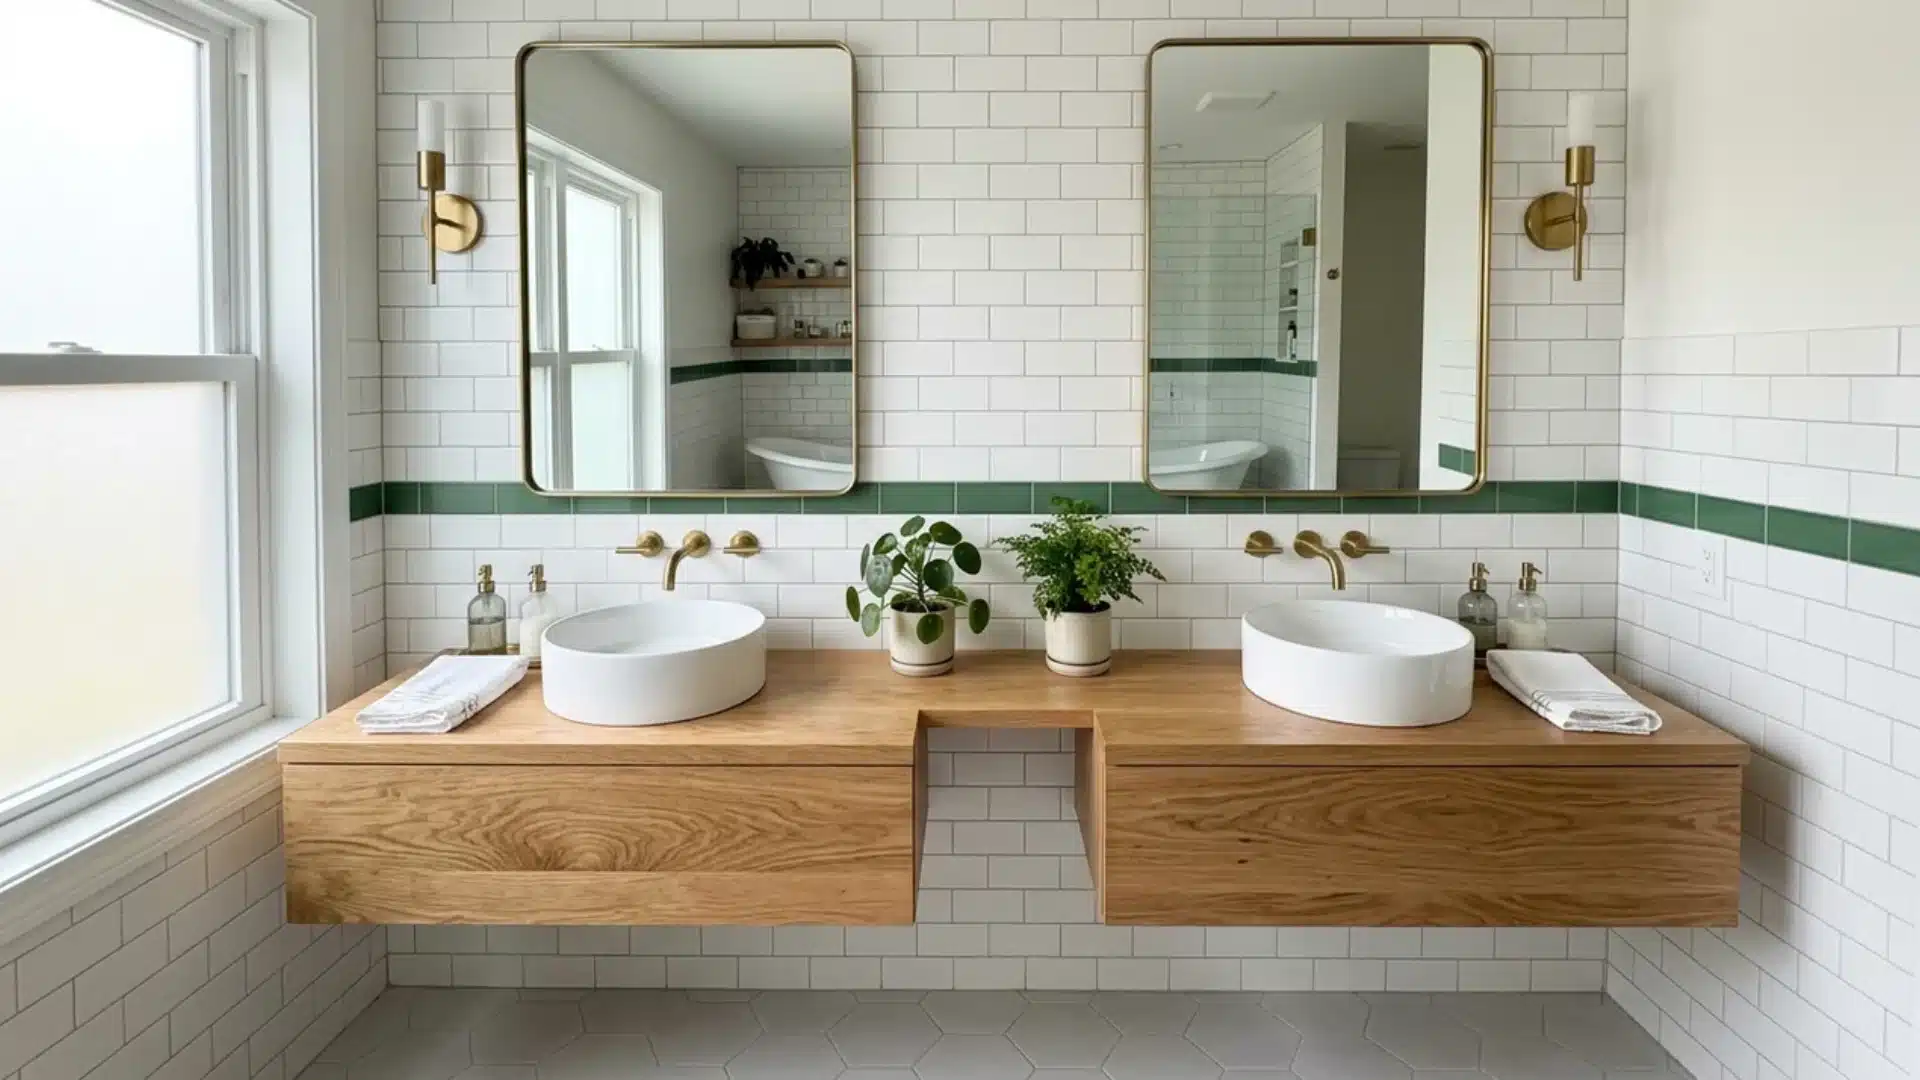
A floating double vanity mounts two matching wall-hung slabs side by side, each with its own sink, ideal for households where two people are getting ready at once.
Keeping both floating rather than boxed in preserves that open, spacious feeling even with double the plumbing and double the counter space, making it a great weekend project for shared bathrooms overall.
Small Bathroom Vanity Ideas for Tight Spaces
Small bathroom vanity ideas are all about squeezing in real storage without the room feeling like it’s closing in on you.
6. Slim 18-Inch Vanity
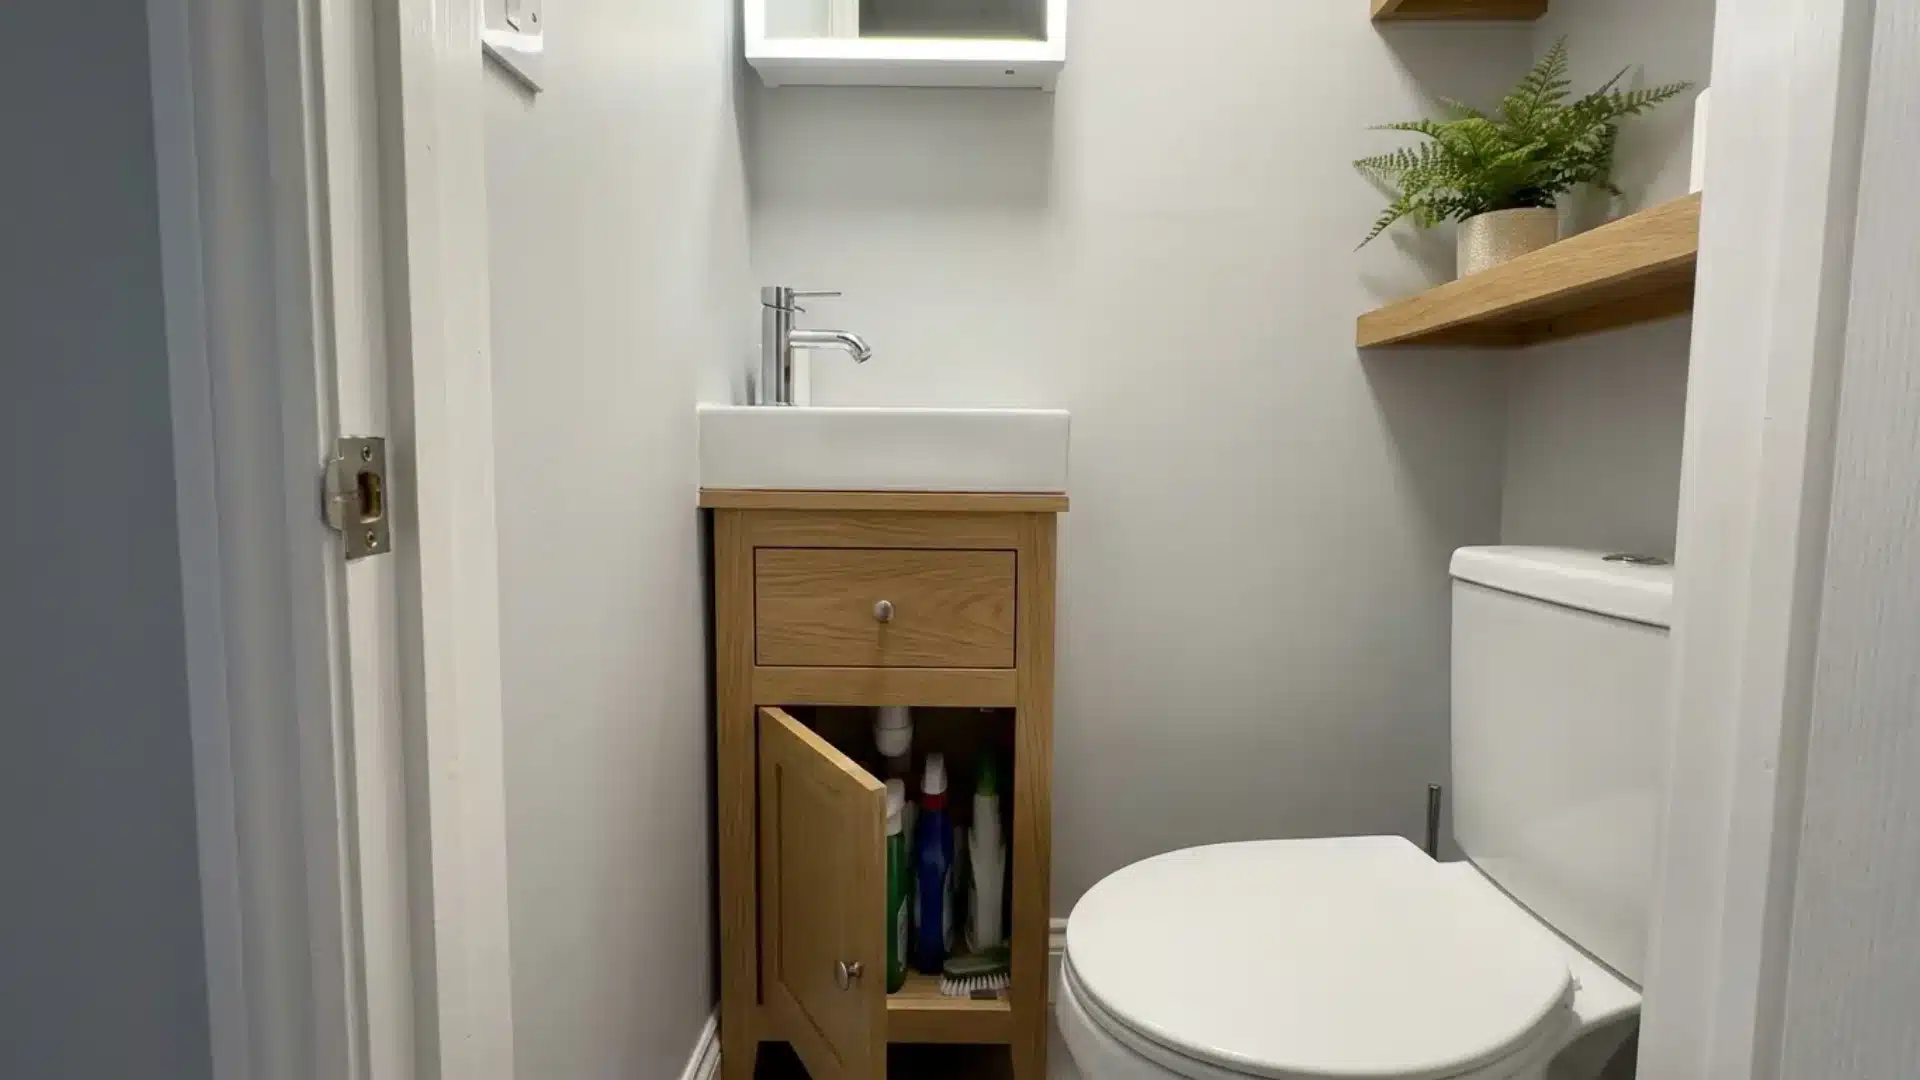
Built narrow on purpose, a slim 18-inch vanity is perfect for a powder room or tiny half bath where every inch of floor space counts.
Despite the small footprint, you can still fit a compact drawer or a single door for cleaning supplies.
It proves you do not need a wide cabinet to get functional, good-looking storage.
7. Corner Vanity
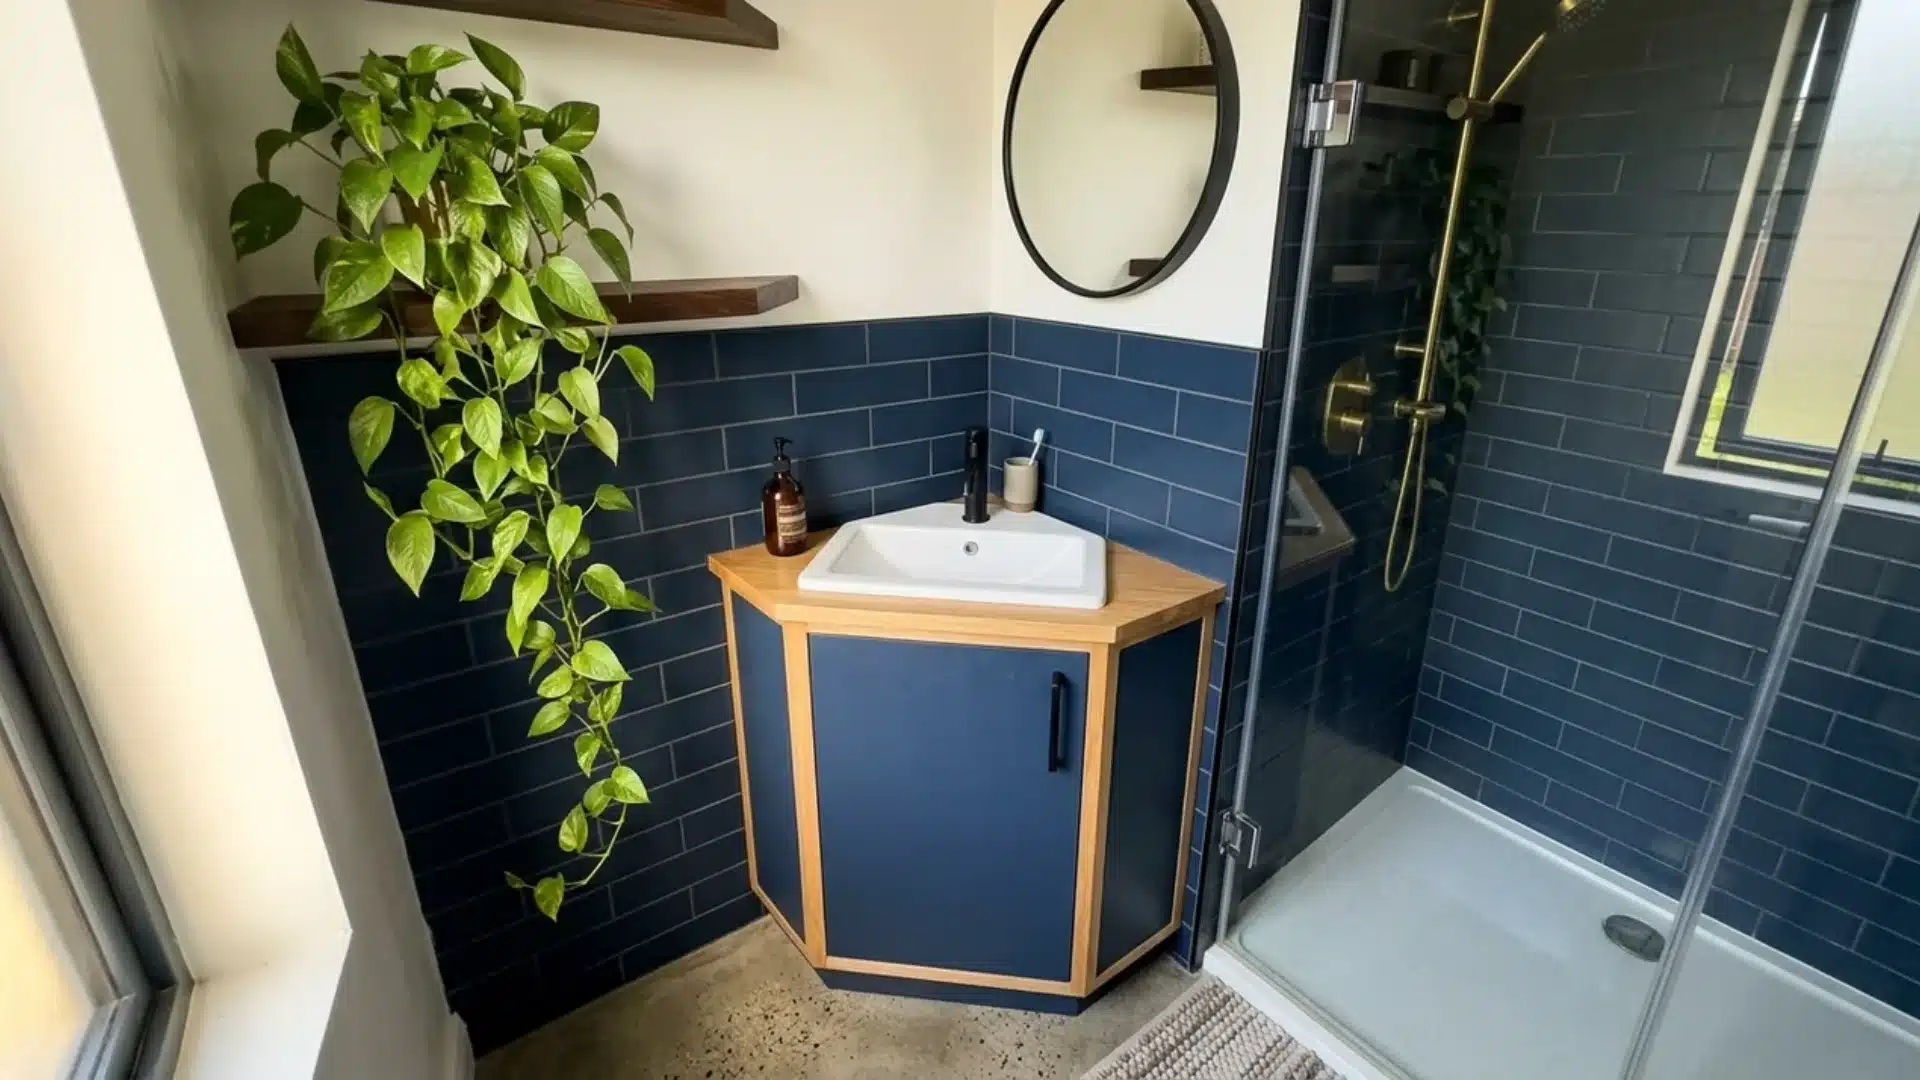
A corner vanity tucks into a dead corner most bathrooms waste, using an angled cabinet front to fit snugly where two walls meet.
This frees up surprising amounts of walking room in a small space, especially near a door or shower entry.
It takes a bit more cutting precision but pays off well with storage most bathroom layouts never capture.
8. Recessed Niche Vanity
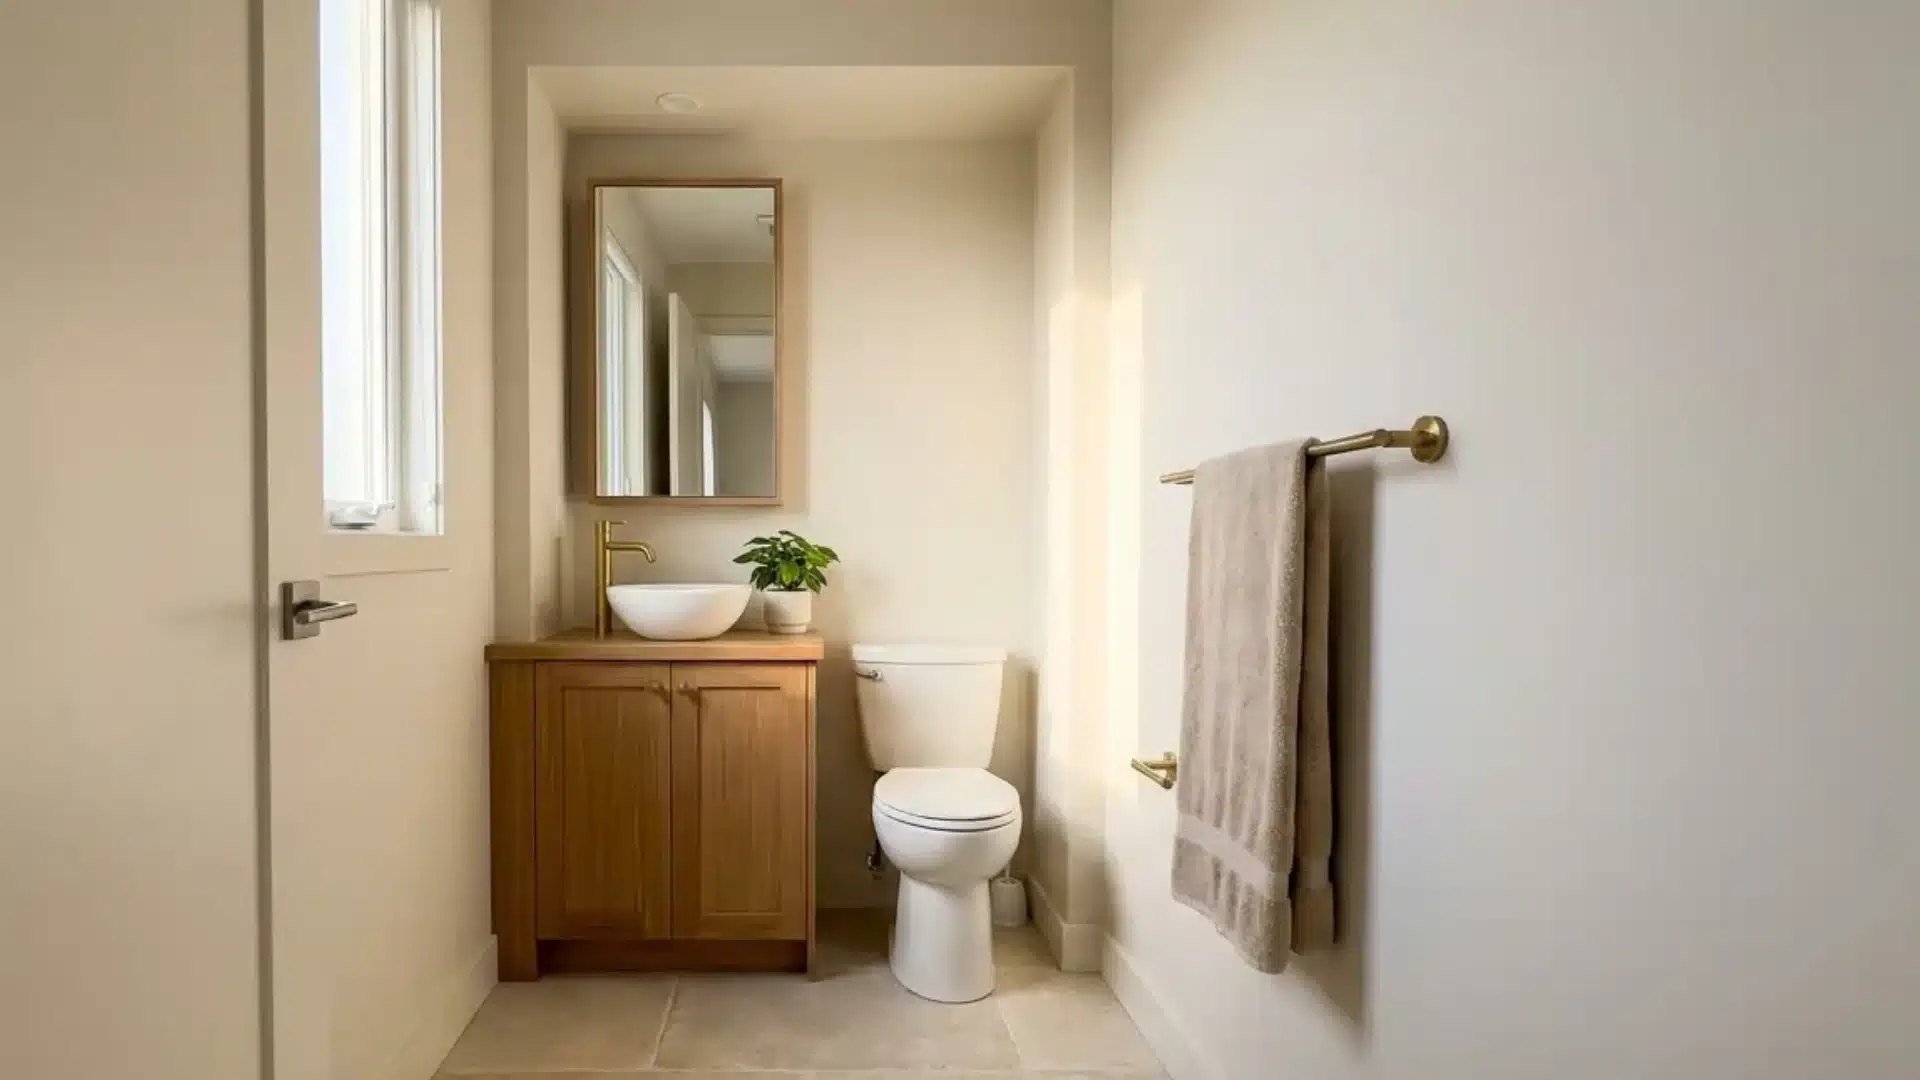
A recessed niche vanity is built directly into a wall cavity between studs, so the cabinet sits flush instead of jutting into the room.
This setup requires more upfront framing work, but it reclaims space that a standard cabinet would otherwise take up.
It suits a narrow hallway bathroom where a few extra inches of walking room actually matter.
9. Open Shelf Small Vanity
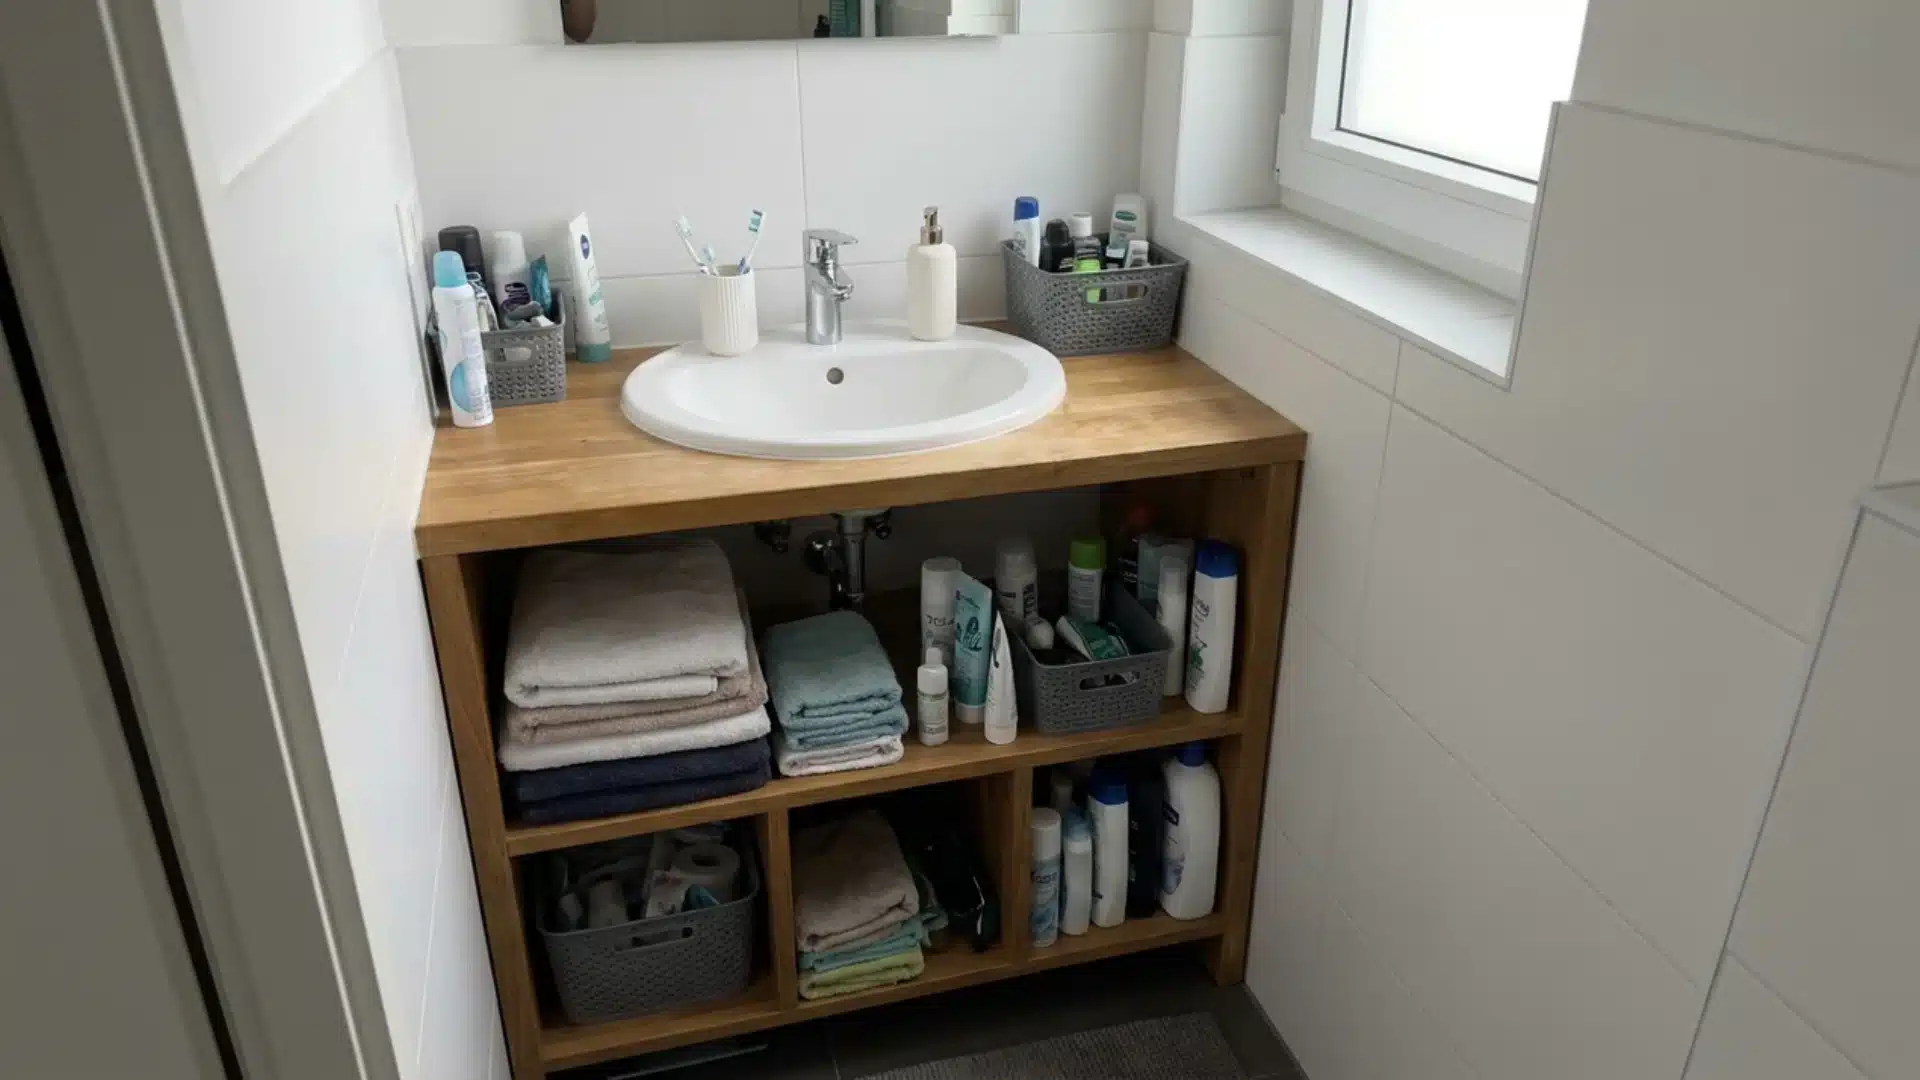
Instead of doors, an open shelf small vanity uses exposed cubbies to hold towels, baskets, and daily items in plain sight for easy access.
Skipping the doors tricks the eye into seeing more space than actually exists, which is exactly what a cramped bathroom needs most.
It also means faster, simpler construction since there is no hardware to fuss over.
10. Wall-Hung Single Door Vanity
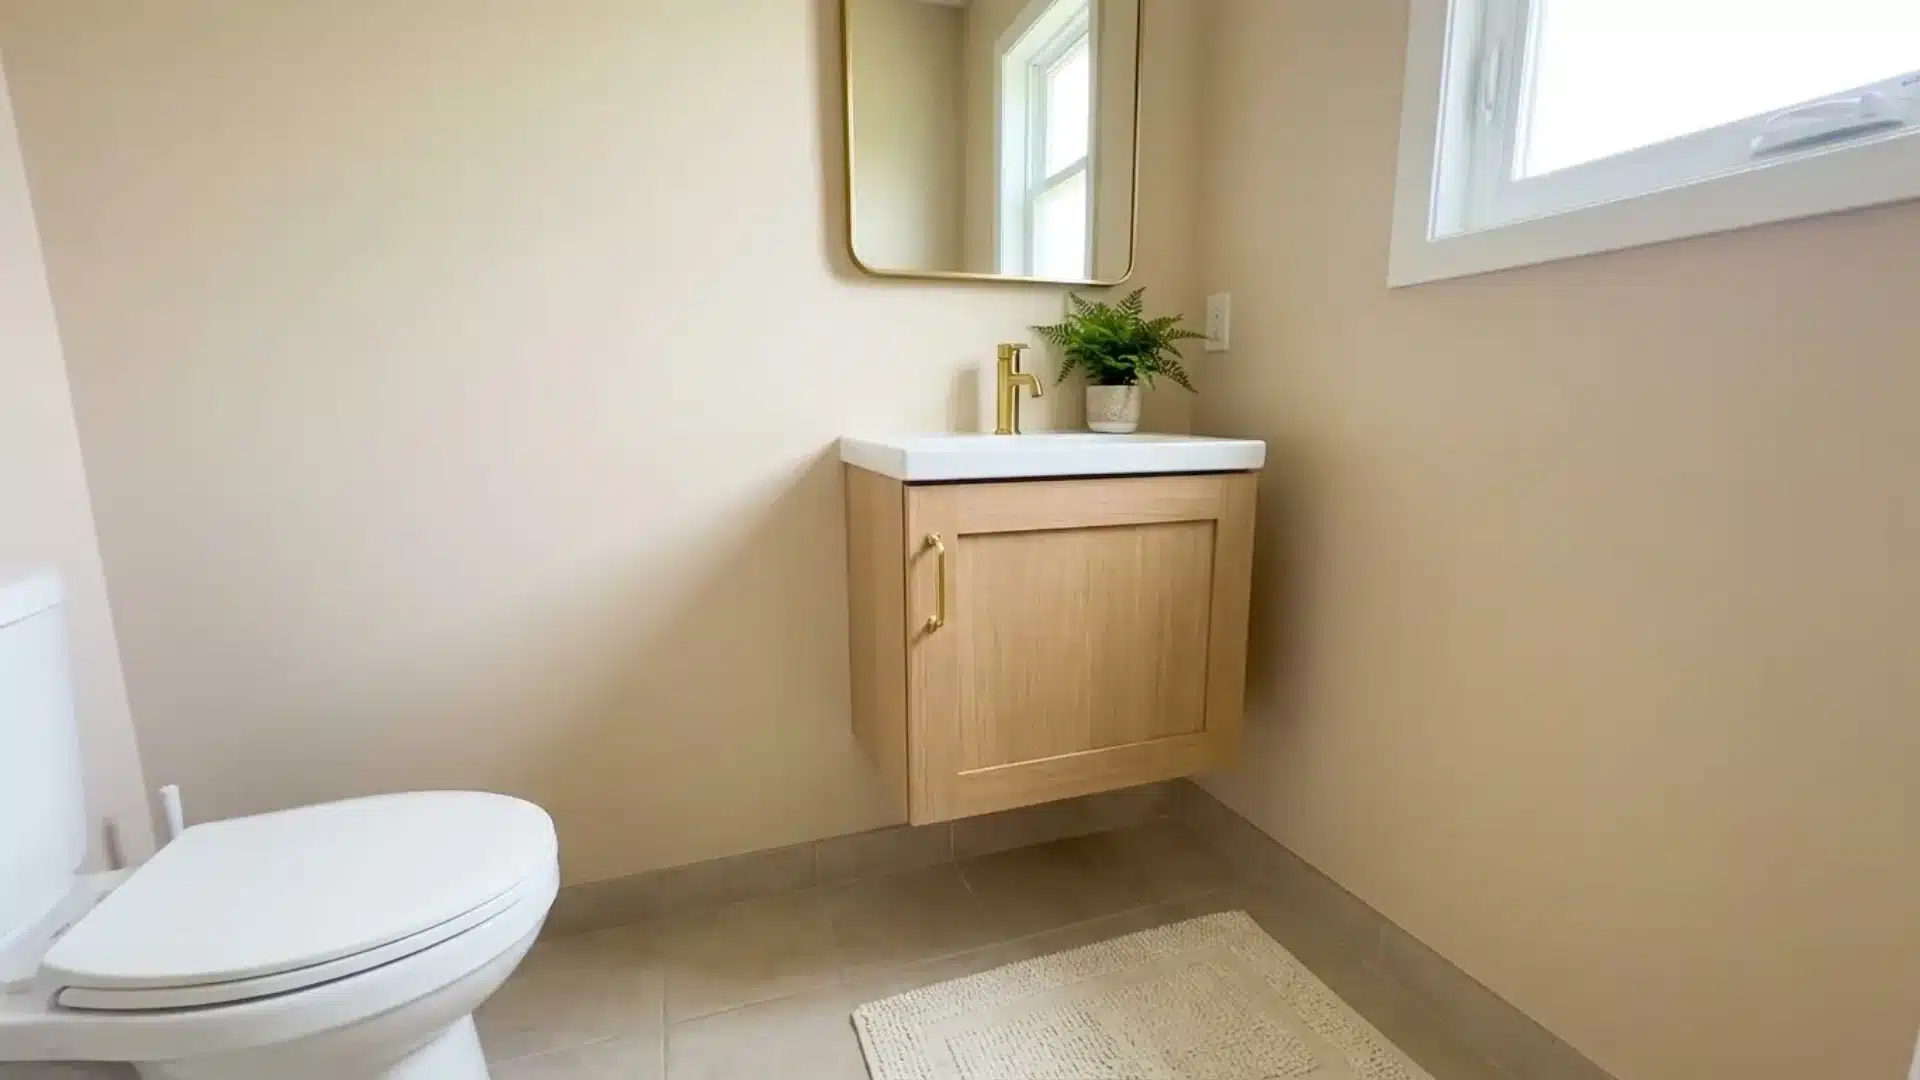
A wall-hung single door vanity mounts directly to the wall studs, skipping legs or a base entirely to keep the floor completely clear.
One door hides plumbing and cleaning supplies, while the compact top comfortably holds a small sink.
This build is straightforward for a first-timer and works well in a bathroom where every inch of floor space counts.
Rustic and Farmhouse Vanity Ideas
There’s something about reclaimed wood and a warm stain that makes a bathroom feel like a cozy cabin, even in the middle of the city.
11. Reclaimed Barn Wood Vanity
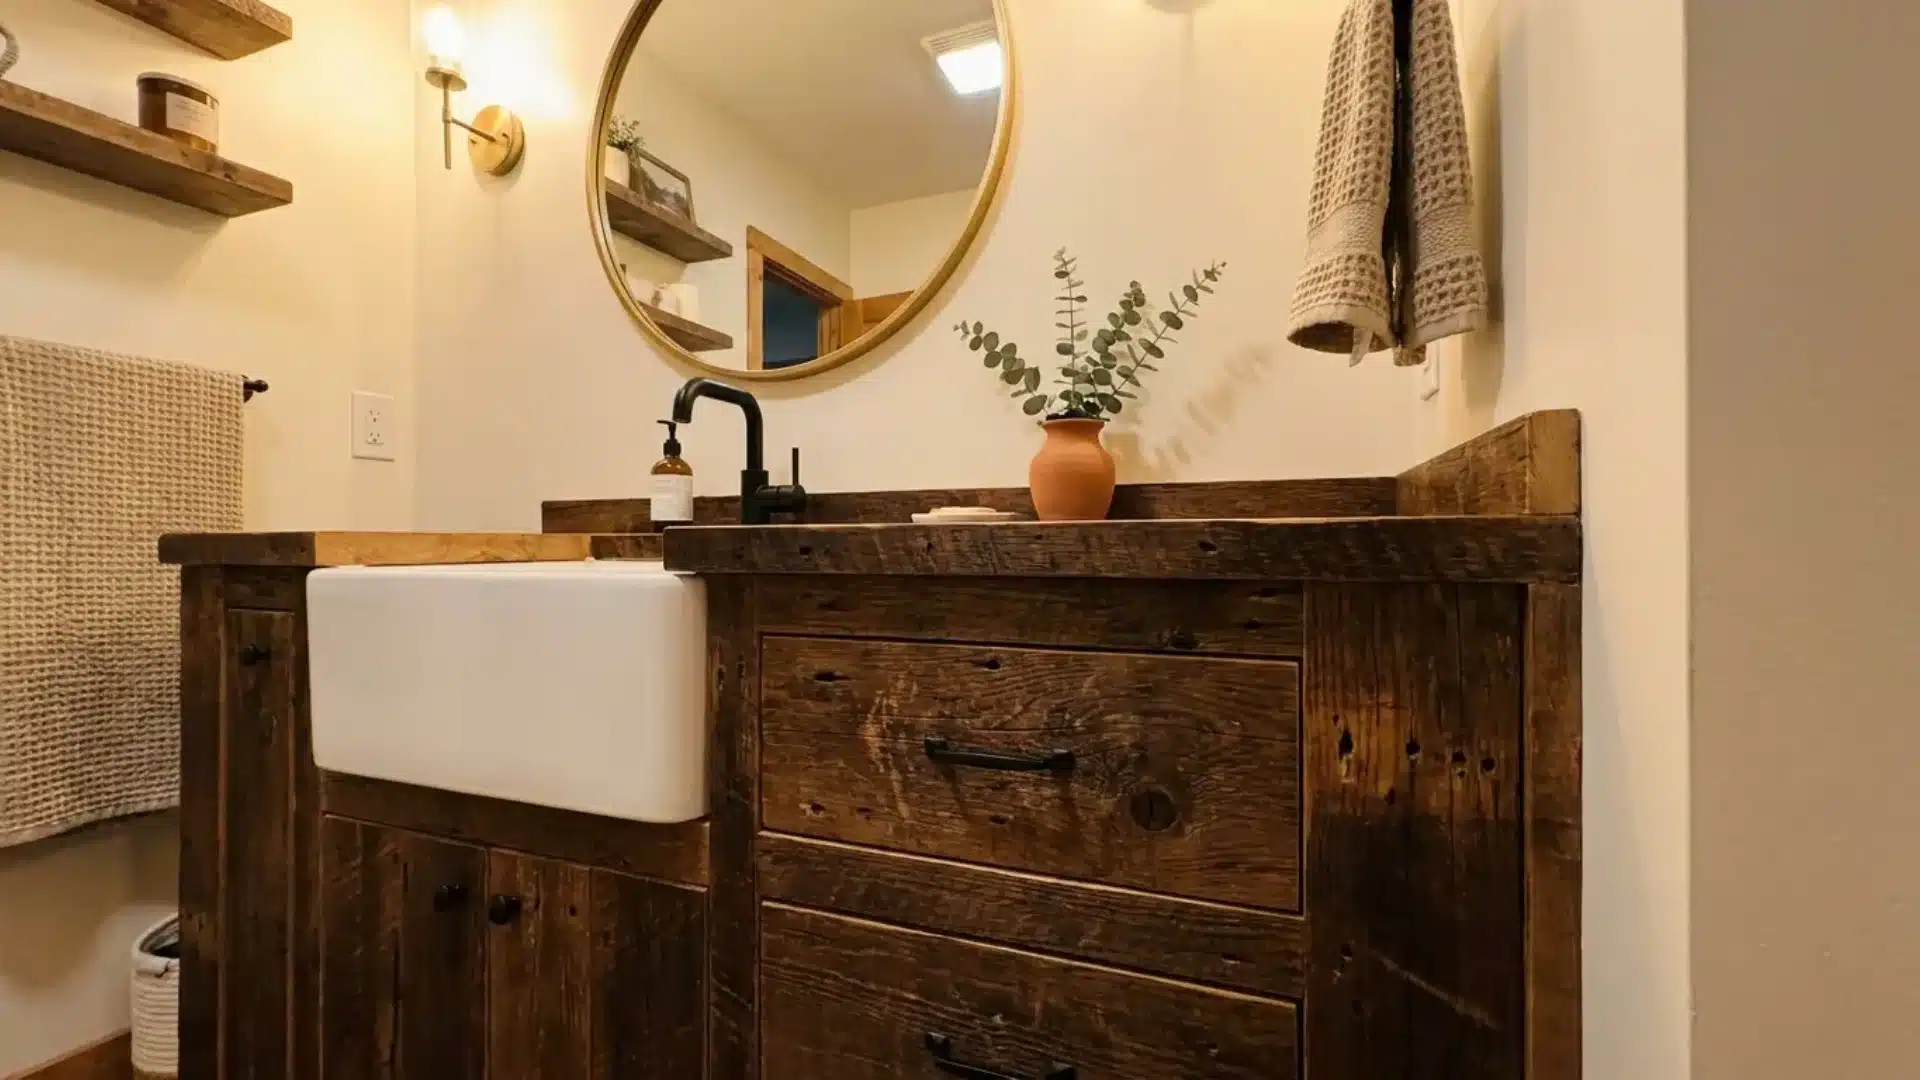
Built from salvaged boards, knots, nail holes, and all, a reclaimed barn-wood vanity turns imperfections into the very point of the design.
Every board tells a slightly different story, so no two builds ever look quite the same.
This rustic style pairs naturally with farmhouse sinks and matte black hardware for a bathroom that feels lived-in and warm.
12. Shiplap Front Vanity
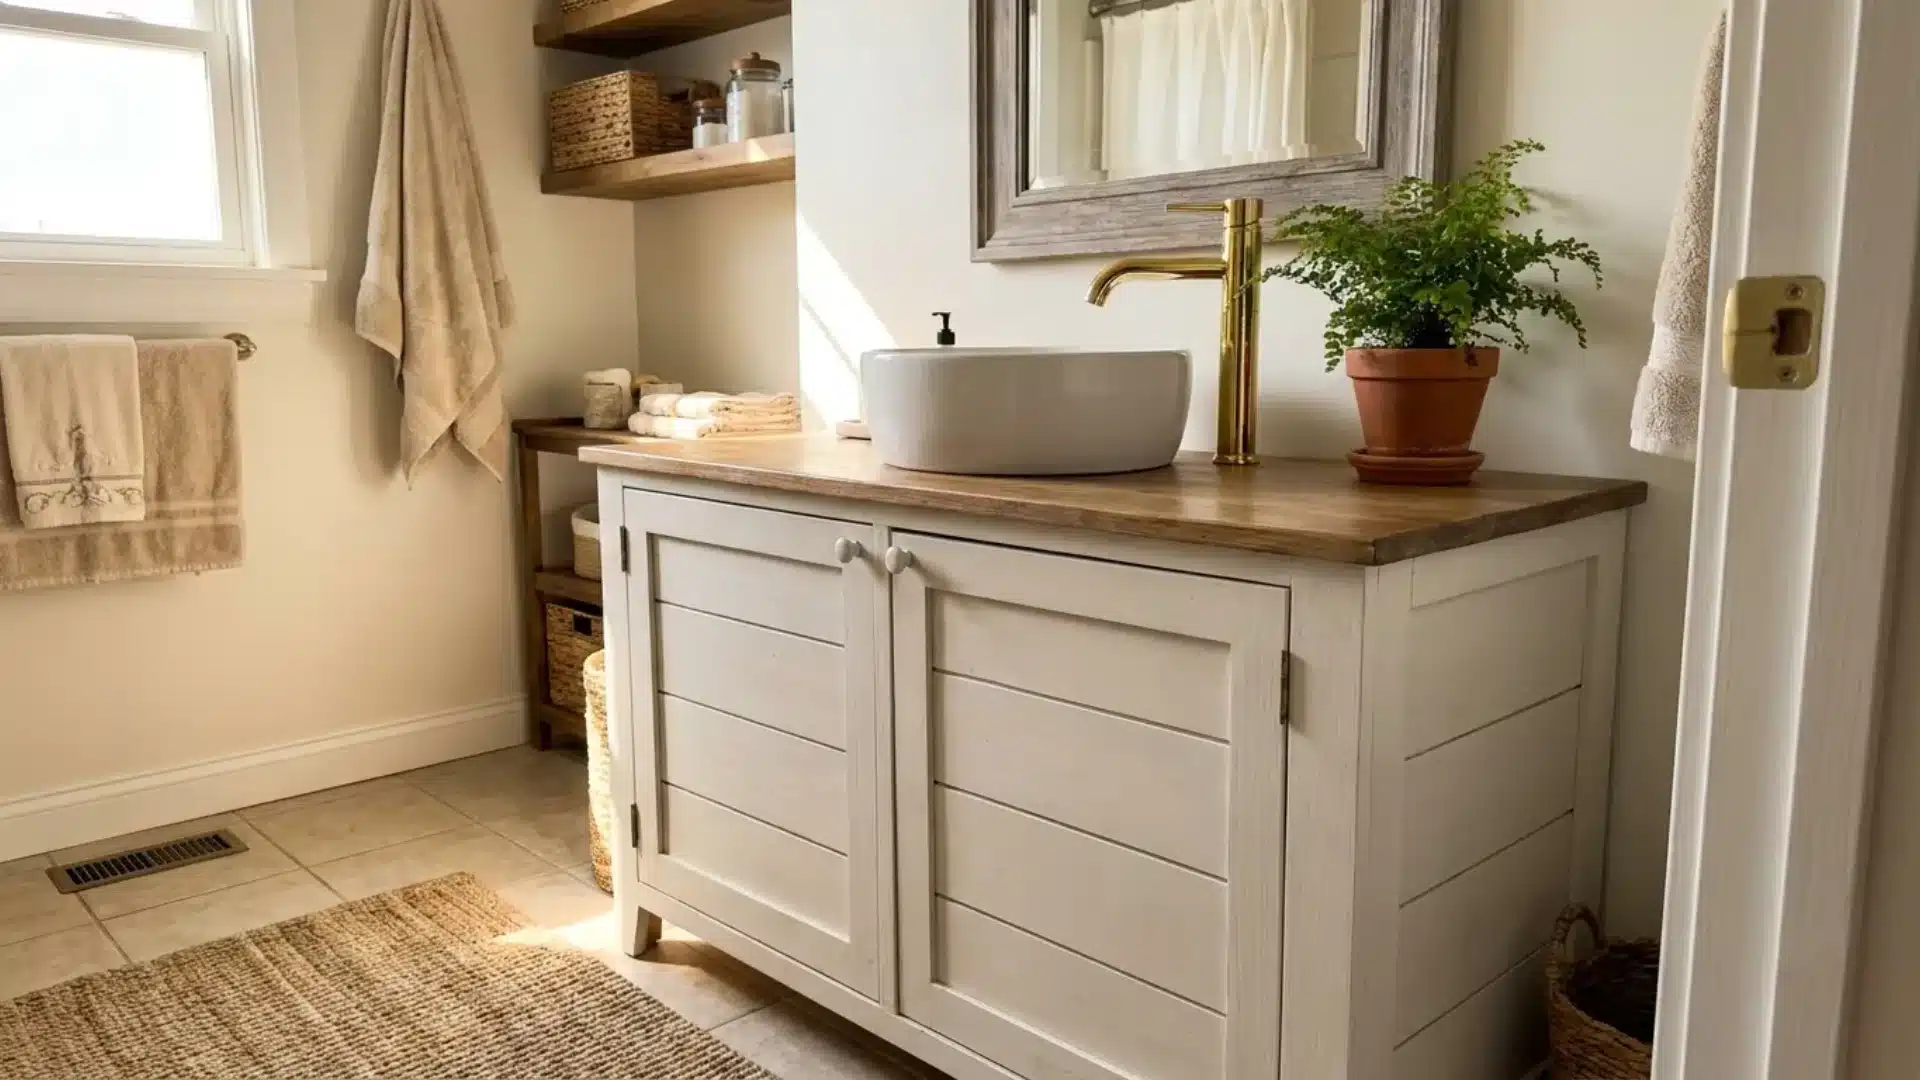
Horizontal shiplap paneling applied directly to the cabinet doors gives a shiplap front vanity instant farmhouse charm with minimal extra effort or cost.
It is one of the simplest ways to transform a plain cabinet box into something with real character and texture.
A coat of white or soft gray paint finishes off the classic, cozy farmhouse look nicely.
13. X-Brace Open Base Vanity
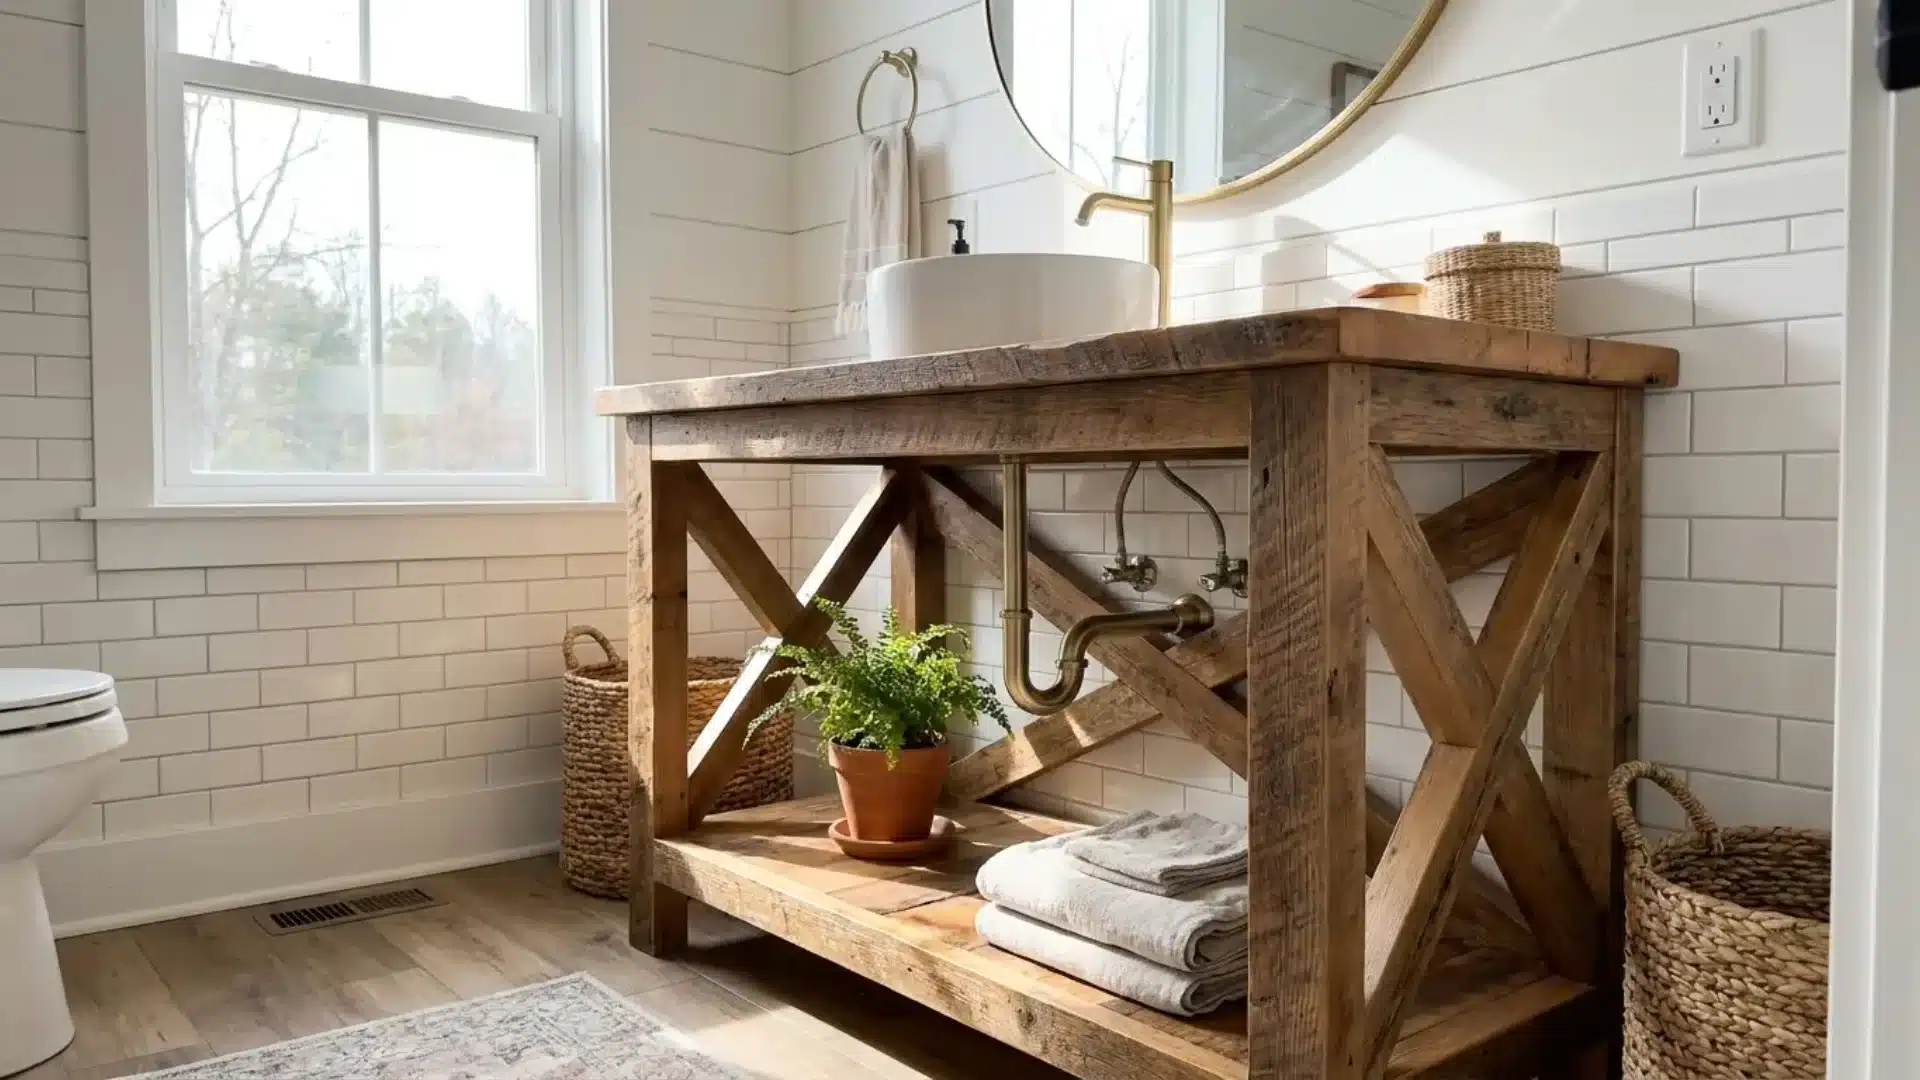
An X-brace open base vanity uses an open wood frame with a crossed brace underneath instead of a solid cabinet front, a farmhouse classic for good reason.
The exposed legs and crisscross detail add visual interest while keeping the whole piece feeling lighter than a boxed-in cabinet design would.
It works especially well paired with a simple wood countertop overall.
14. Barn Door Vanity
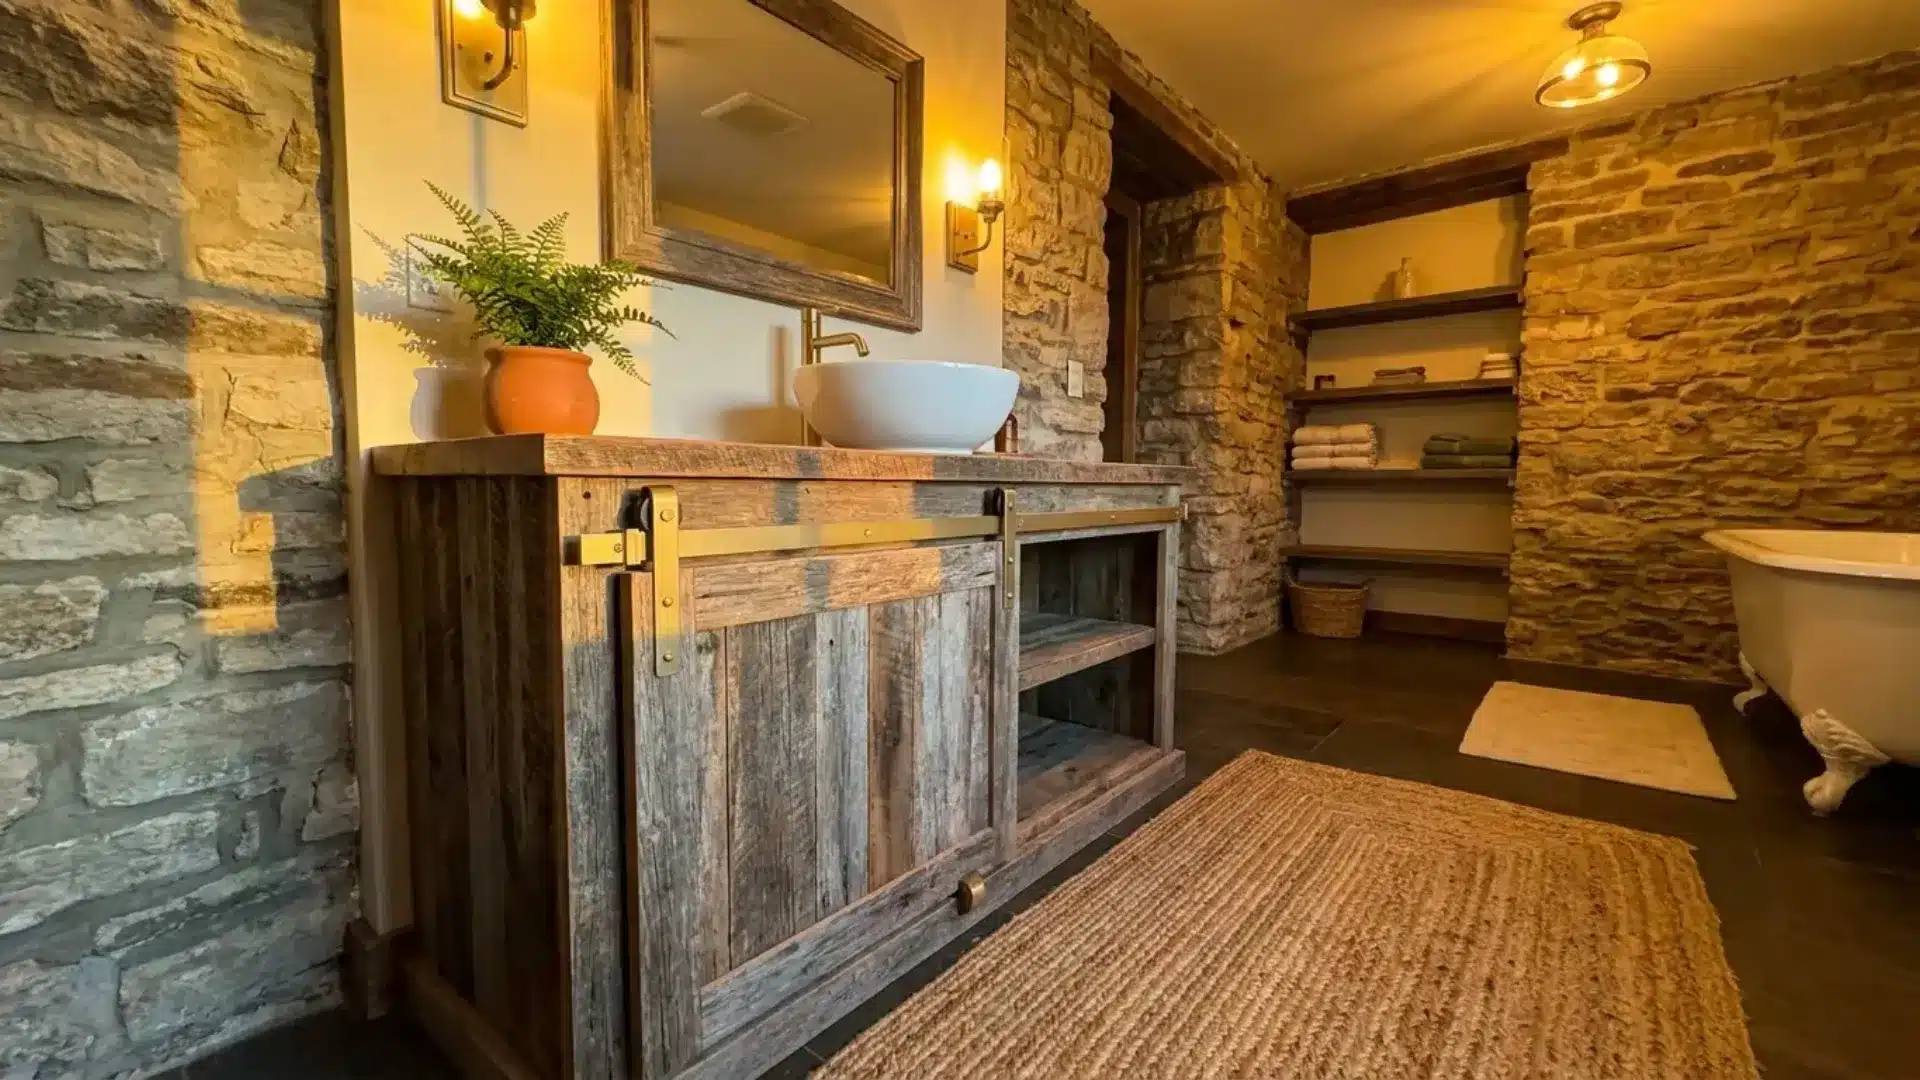
Swapping traditional cabinet doors for a mini sliding barn door instantly gives a barn door vanity its own personality, turning a functional piece into a focal point.
The sliding hardware adds rustic charm and saves swing space in tight bathrooms where doors would otherwise get in the way.
It takes more hardware shopping, but the visual payoff is worth it.
15. Whitewashed Wood Vanity
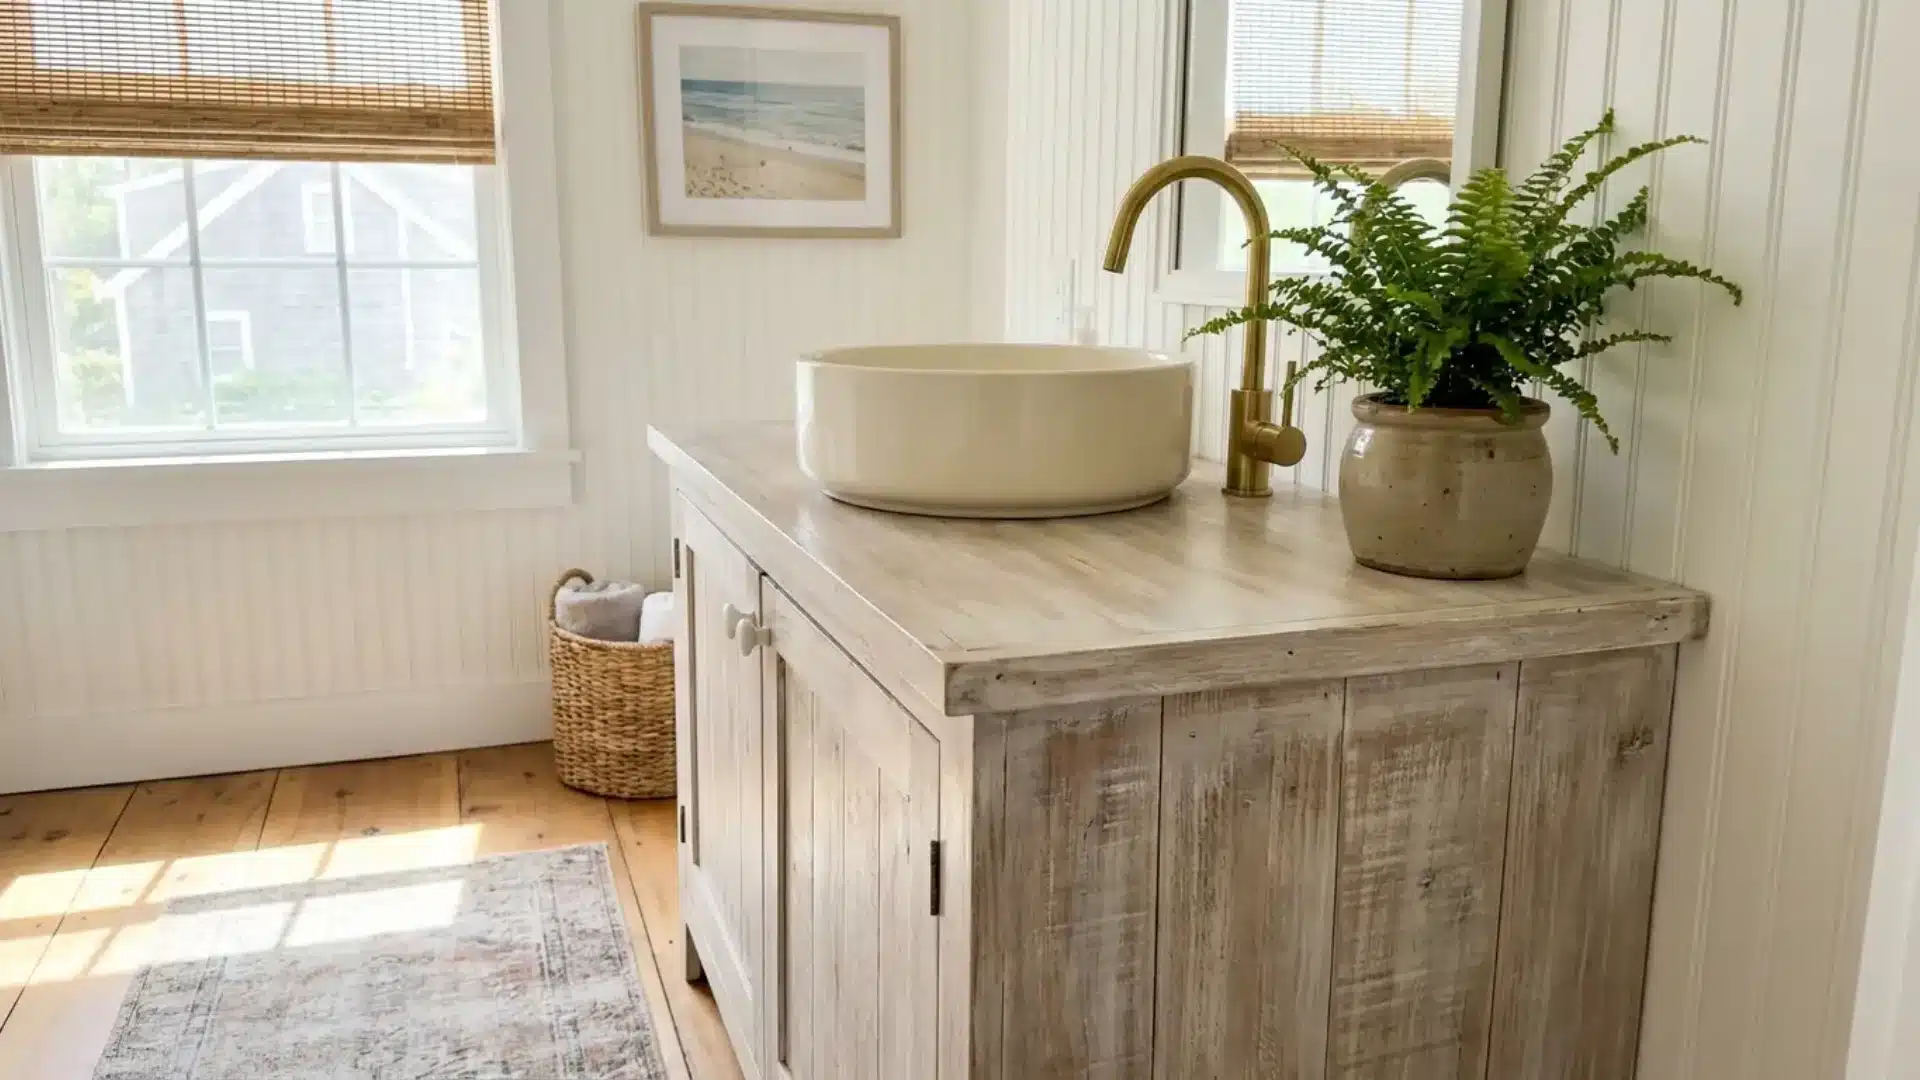
A whitewashed wood vanity uses a soft, milky wash brushed over rough-sawn wood, keeping the farmhouse feel without going too dark or heavy overall.
The grain still shows through, so the wood texture stays visible under the lighter finish applied on top.
This technique works well in bathrooms that want a coastal or cottage feel rather than a deep look.
Repurposed Furniture Vanity Ideas
An old piece of furniture with good bones can become a showstopper vanity; all it needs is a sink cutout and some waterproofing.
16. Dresser Conversion Vanity
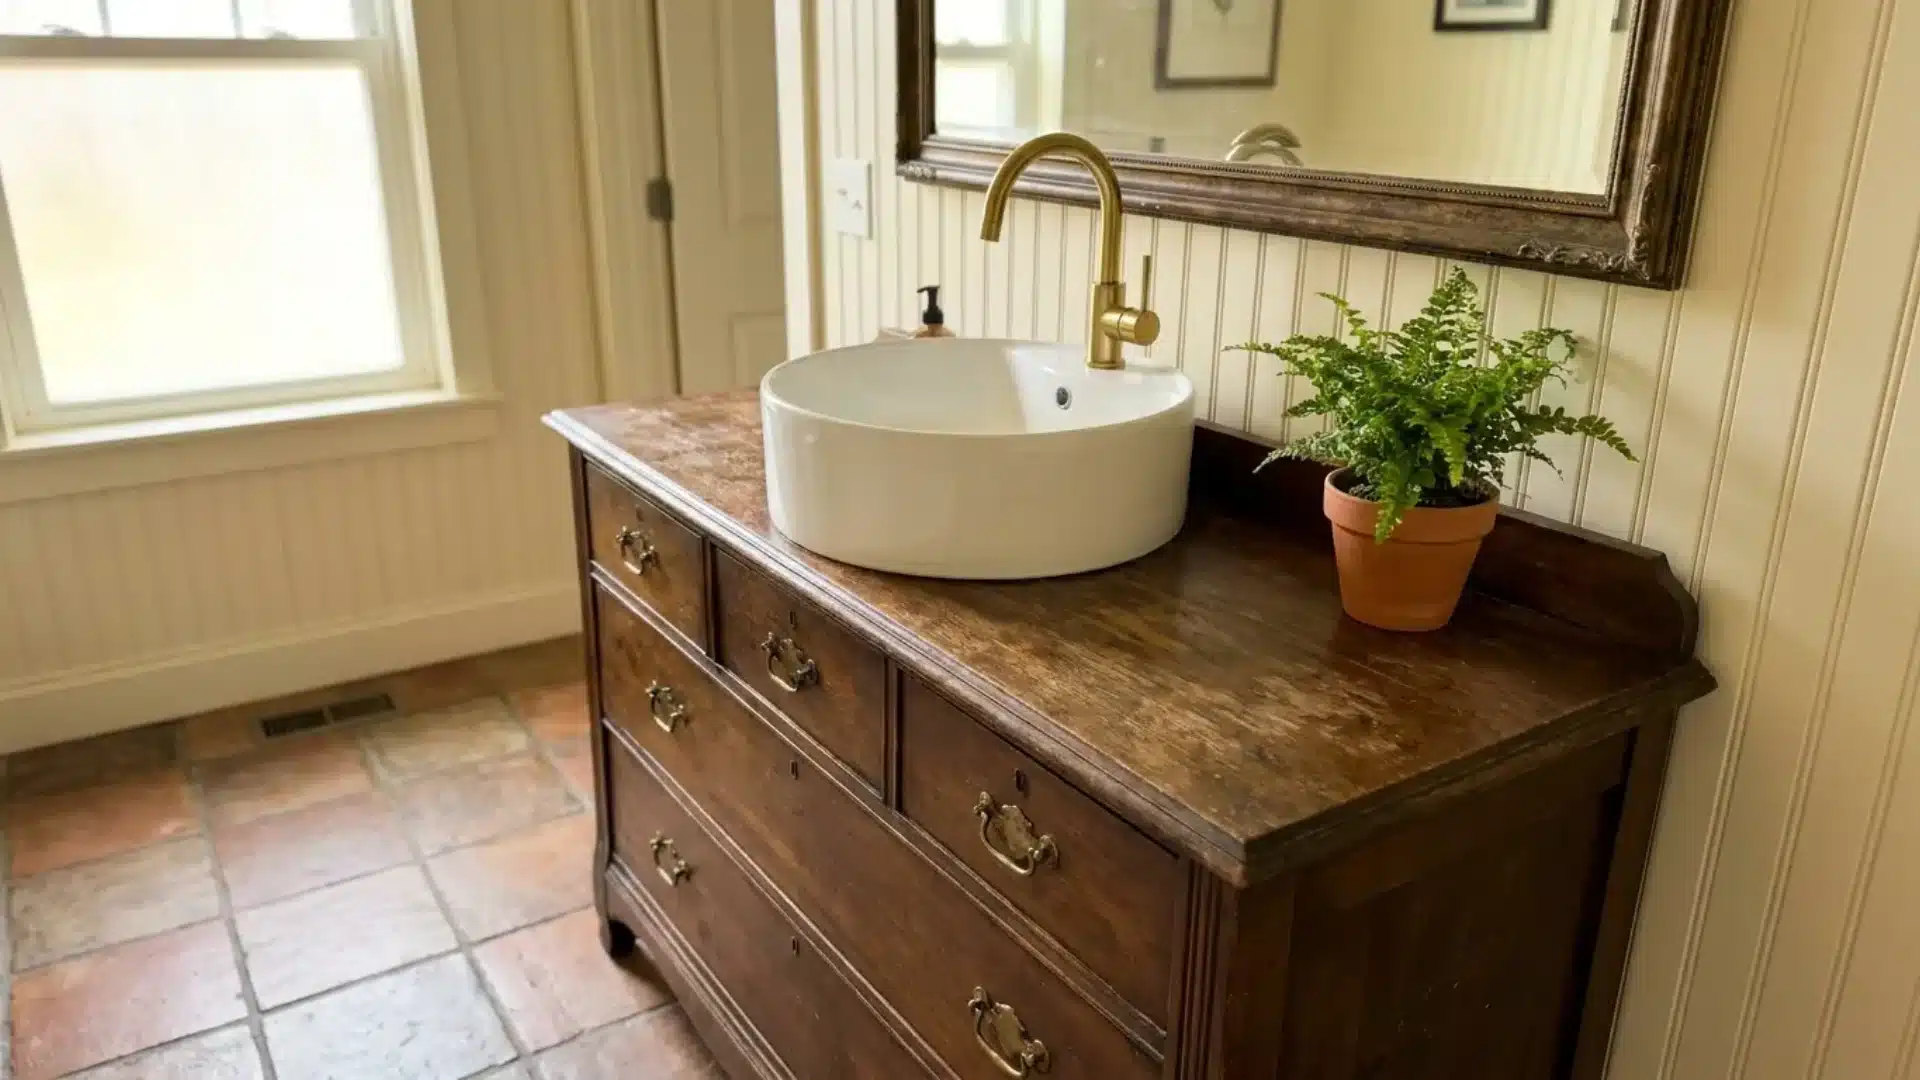
An old dresser with good bones can become a dresser conversion vanity with a sink cutout, plumbing access, and careful moisture sealing on every exposed surface.
The payoff is drawer space most built-in vanities cannot match, plus genuine antique character throughout.
It takes patience to seal properly against water damage, but the result rarely looks like a typical bathroom fixture.
17. Console Table Vanity
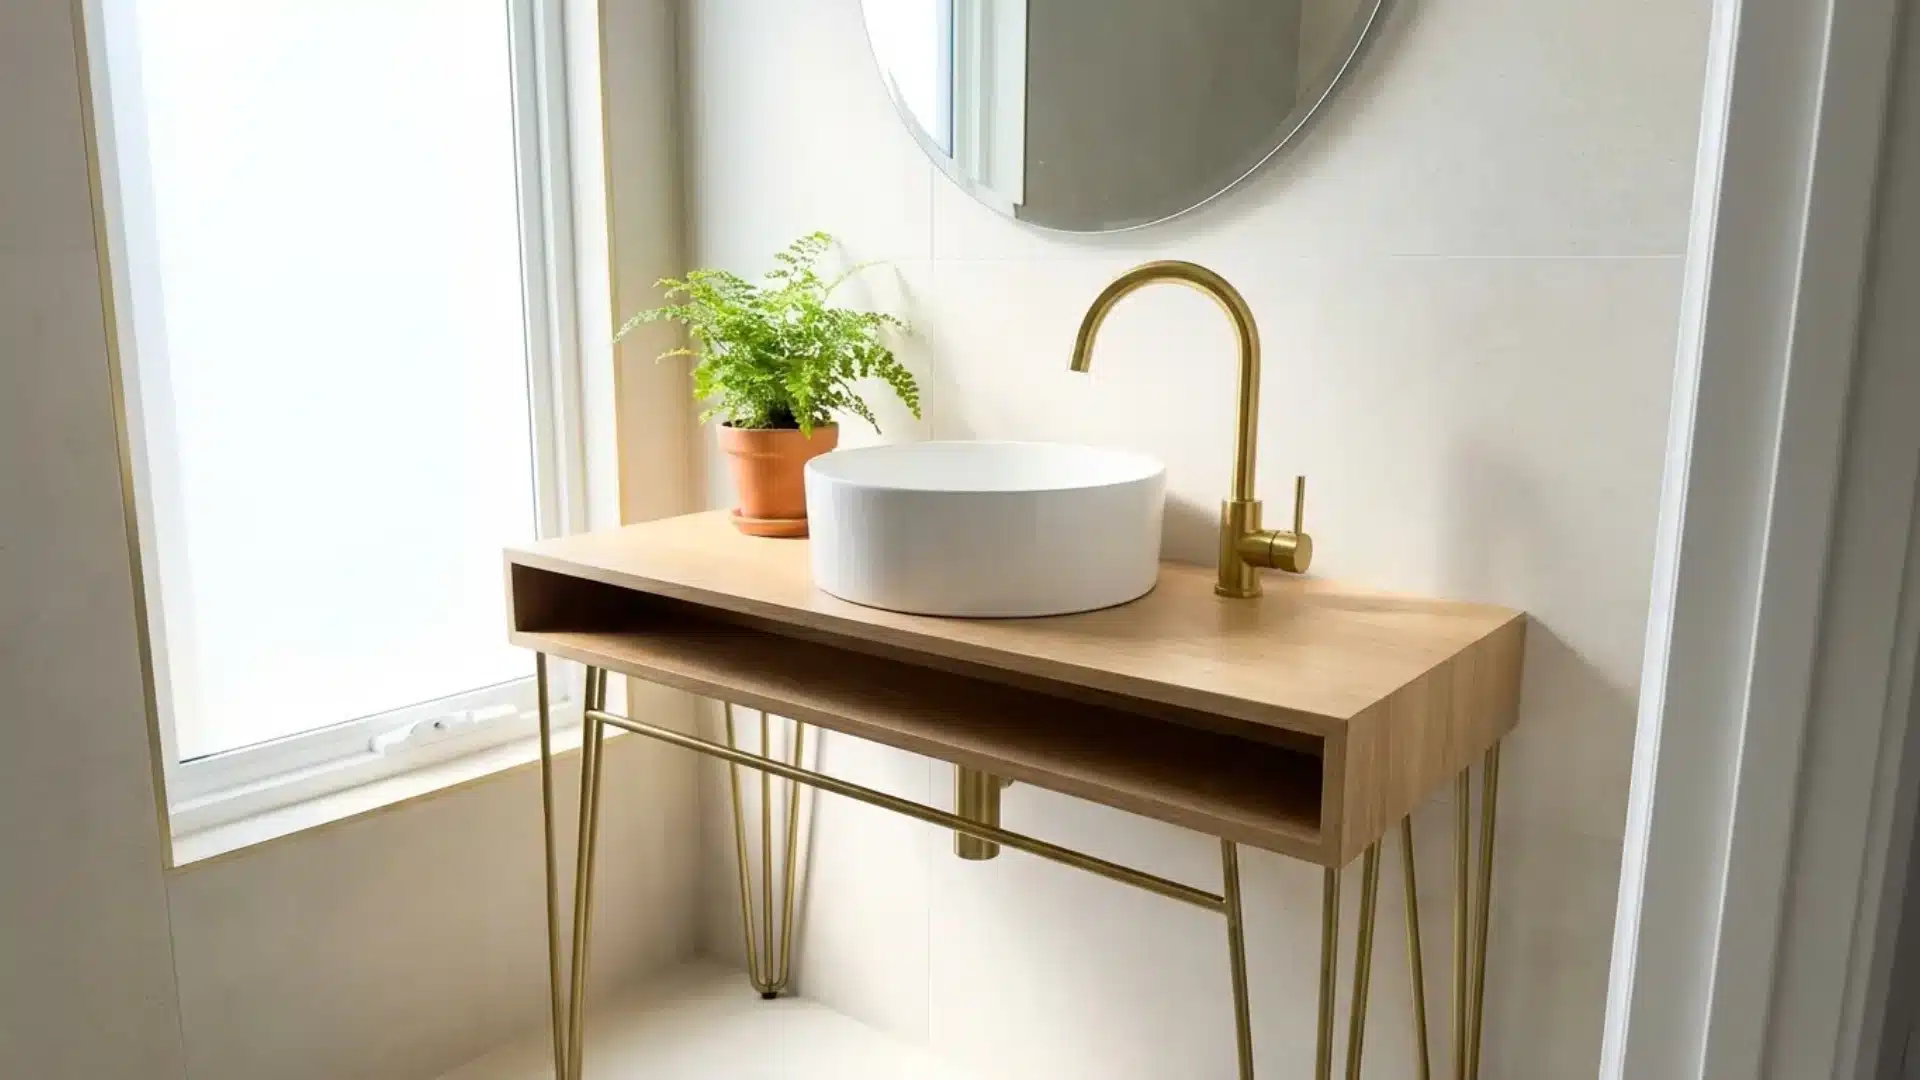
A slim entryway table topped with a vessel sink makes a console table vanity that barely reads as a bathroom fixture at all in most rooms.
Its open legs keep the room feeling light, and the narrow profile suits powder rooms or hallway half baths particularly well.
Choose a table with a sturdy top, since it needs to handle splashes.
18. Sideboard Vanity
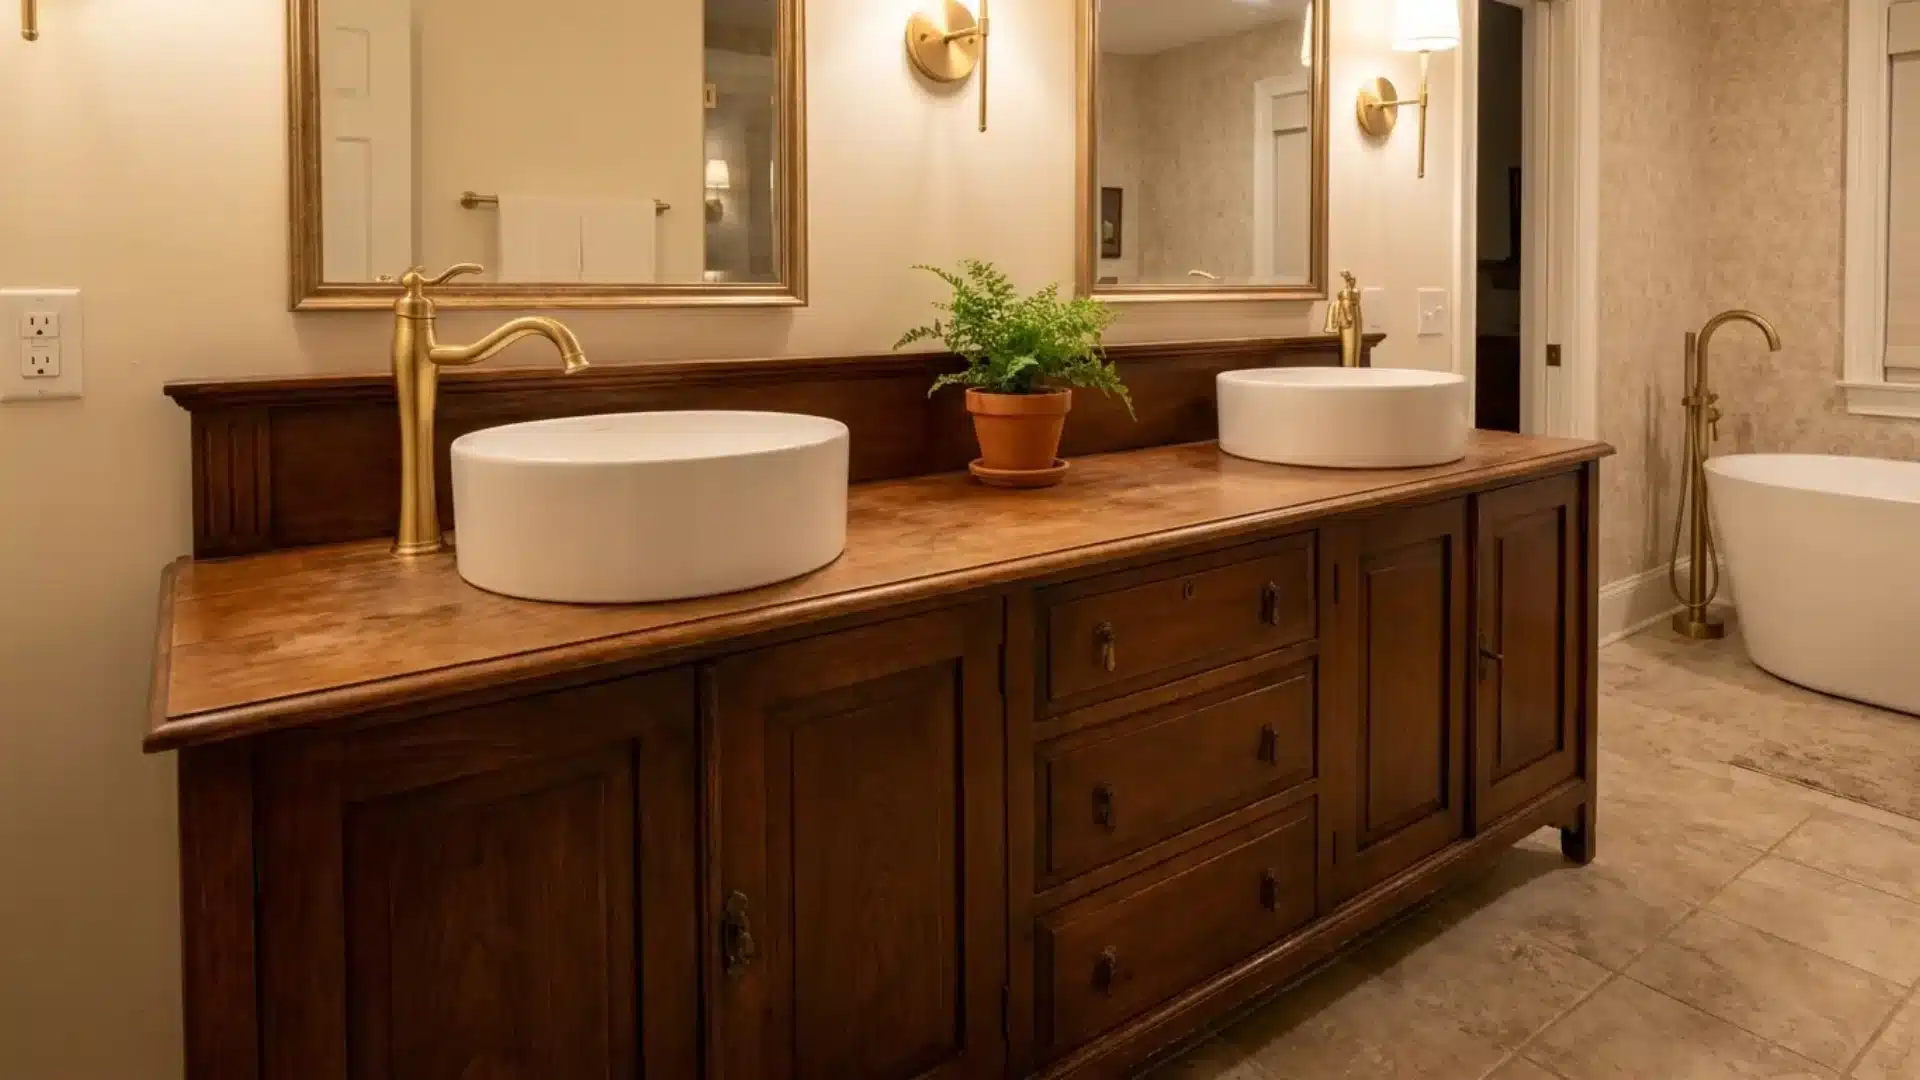
A bigger buffet-style find converted into a sideboard vanity works beautifully for double sinks, offering more storage than most manufactured built-ins on the market today.
The wide surface comfortably fits two sink cutouts with plenty of room to spare between them on either side.
This is a strong pick for a primary bathroom where you want serious daily storage space.
19. Vintage Sewing Table Vanity
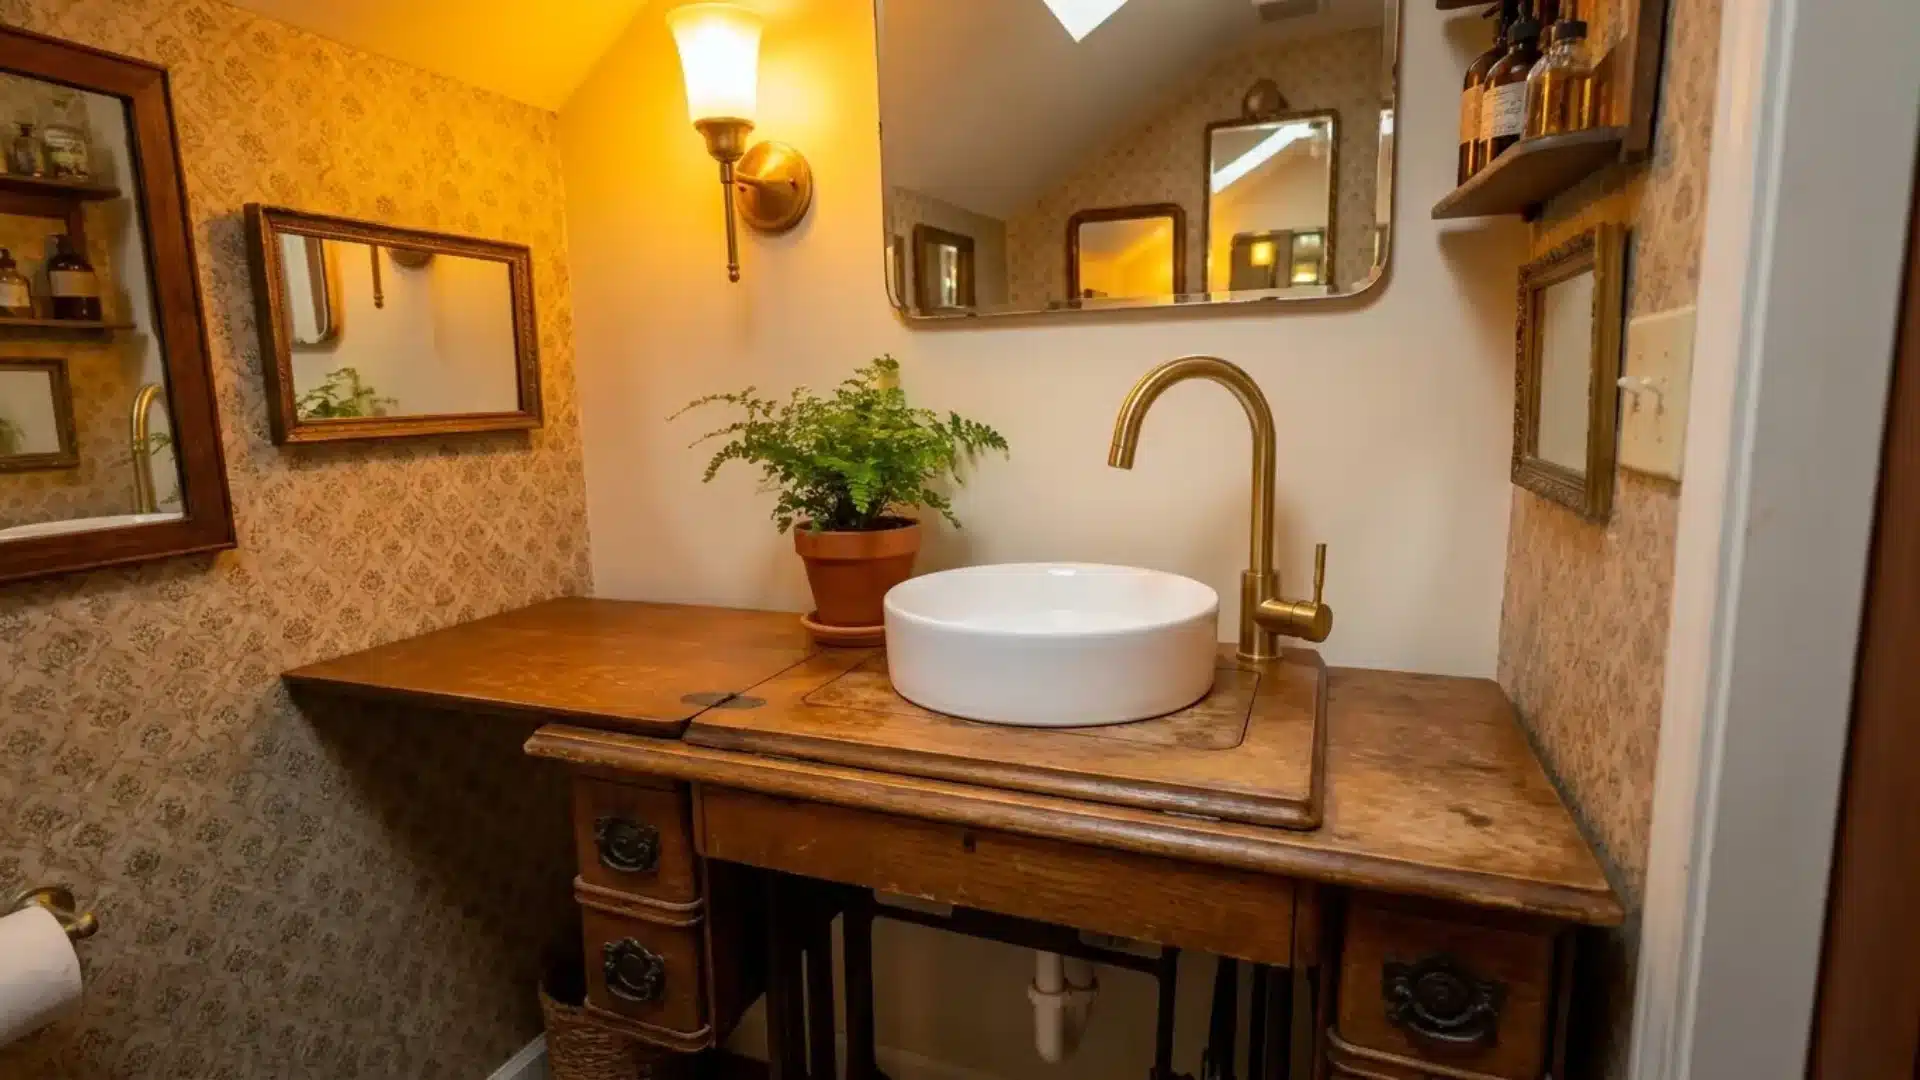
Small, quirky, and full of character, a vintage sewing table vanity is ideal for a powder room that wants personality to spare above anything else.
The compact size fits tight spots, and original details like drawer pulls or fold-out extensions add charm you simply cannot buy new anywhere.
Sealing against moisture is essential, but the character payoff makes it worthwhile.
Modern and Minimalist Vanity Ideas
If clutter stresses you out, this is your lane: clean lines, flat fronts, and hardware that barely announces itself.
20. Flat-Panel Two-Drawer Vanity
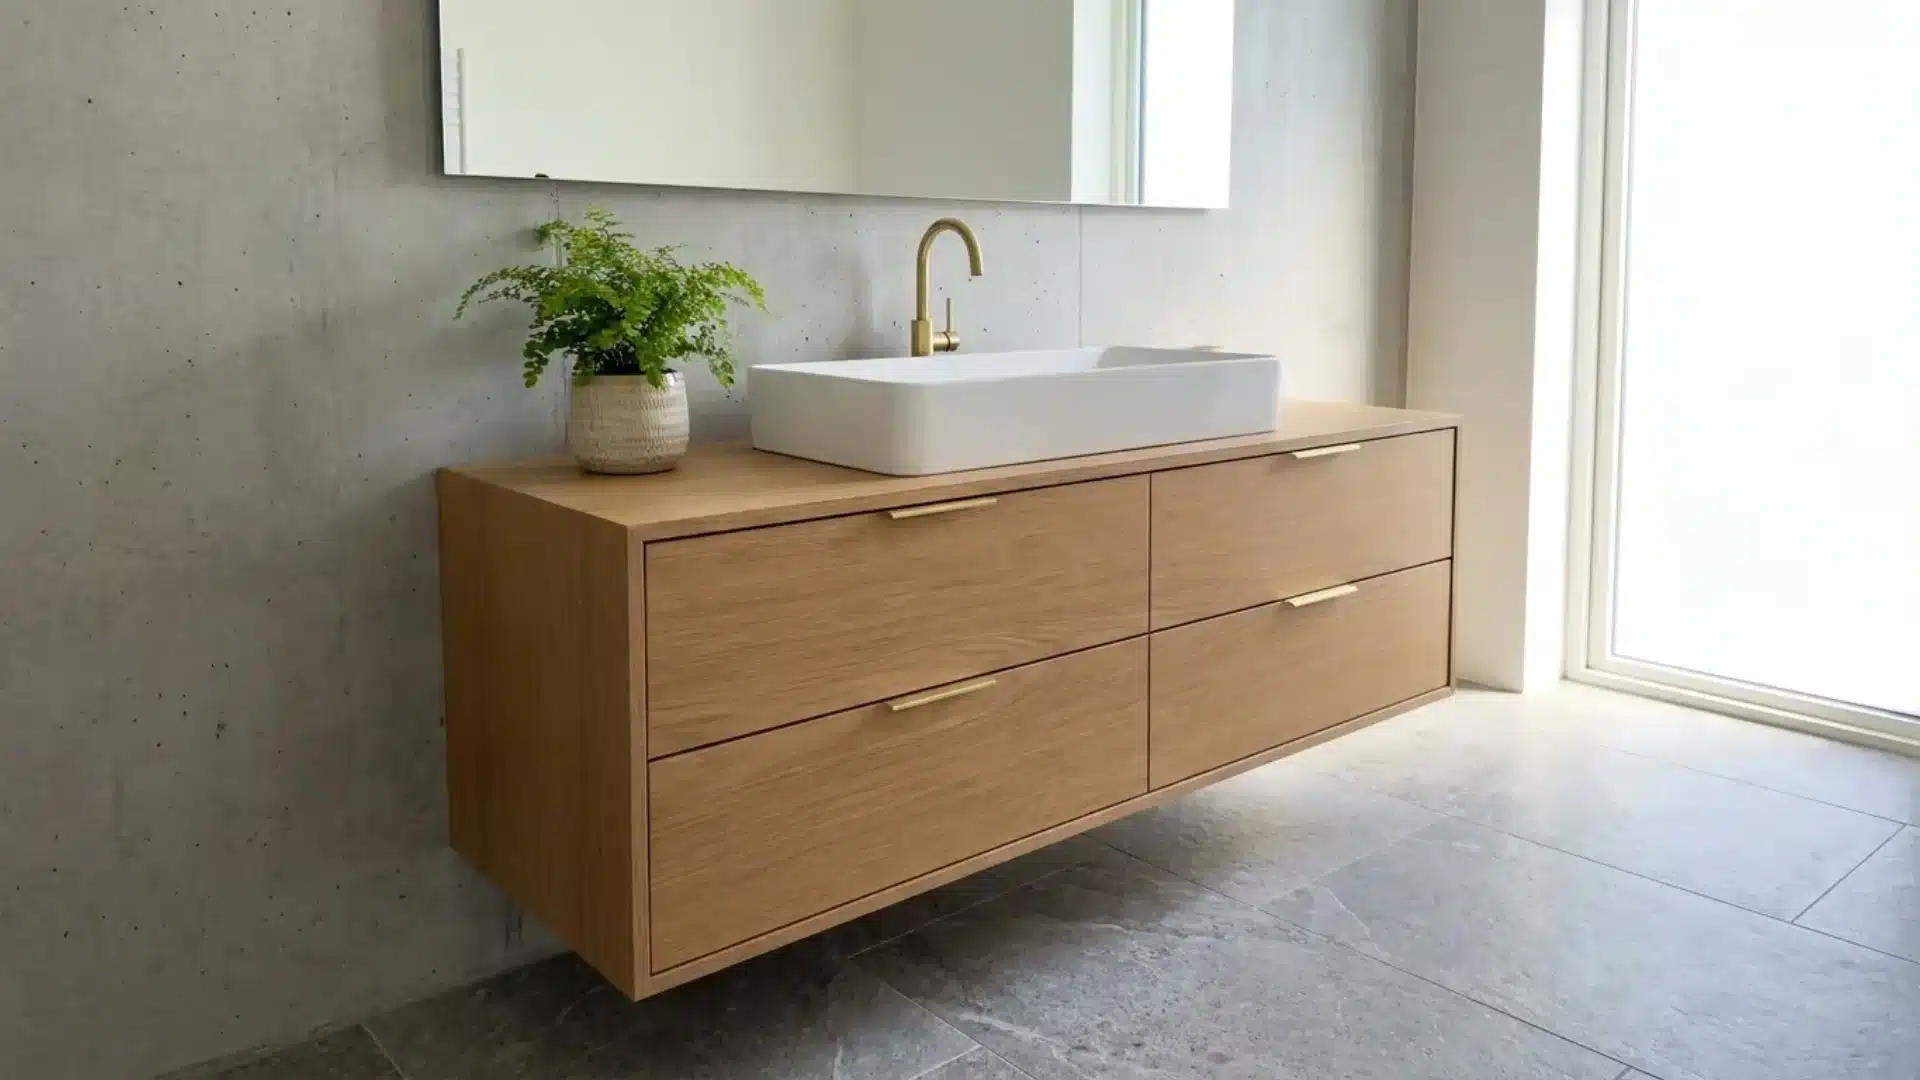
A flat-panel two-drawer vanity skips ornamentation entirely, relying on crisp edges and simple proportions that age well no matter how trends shift.
Clean lines and minimal hardware keep the whole piece feeling calm and uncluttered throughout the room.
It is an easy, beginner-friendly build that still looks intentional, making it a smart choice for a modern, low-fuss bathroom.
21. Black Matte Vanity
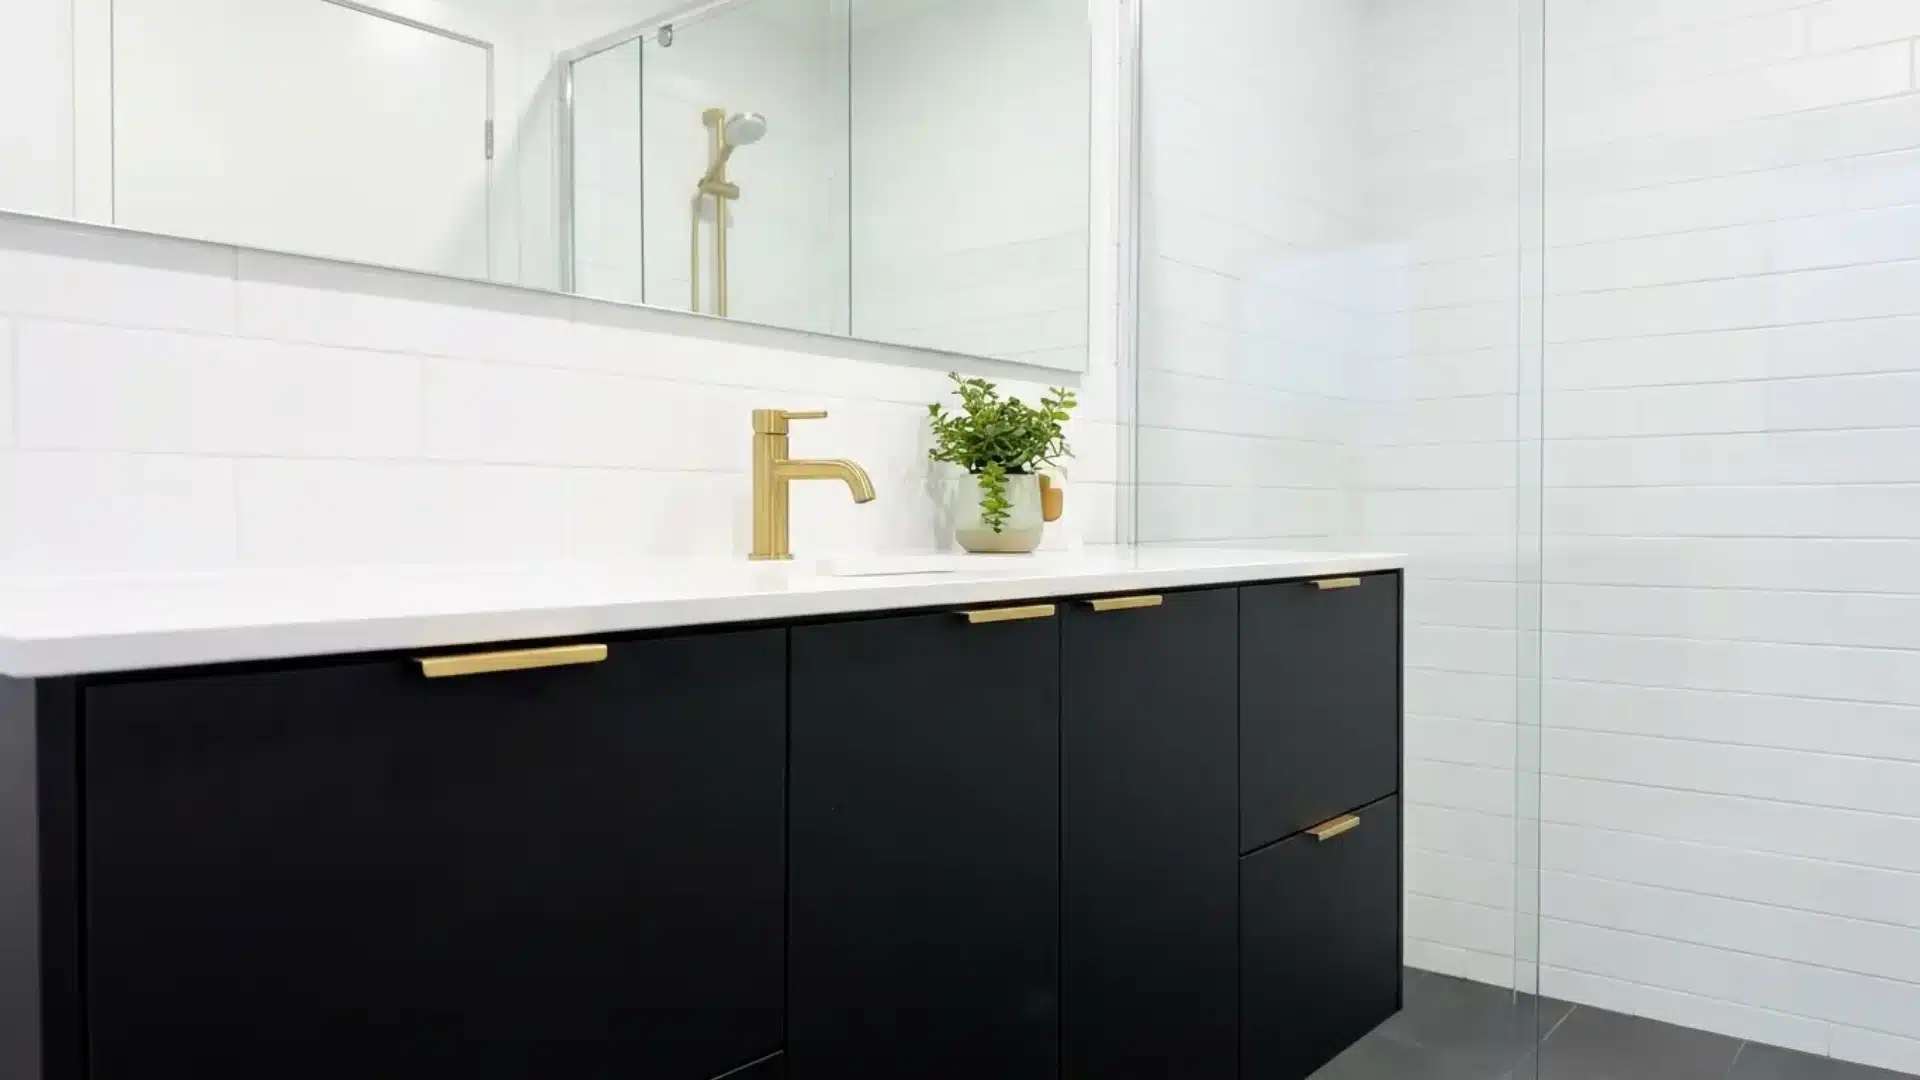
A black matte vanity features a moody, non-reflective finish that pops dramatically against light tile, white countertops, or nearby bright bathroom walls.
The matte texture hides fingerprints and water spots better than glossy paint, which is a genuinely practical bonus for busy households.
It is a bold statement piece that still works in small bathrooms, since dark cabinetry can feel heavy.
22. Handleless Push-Open Vanity
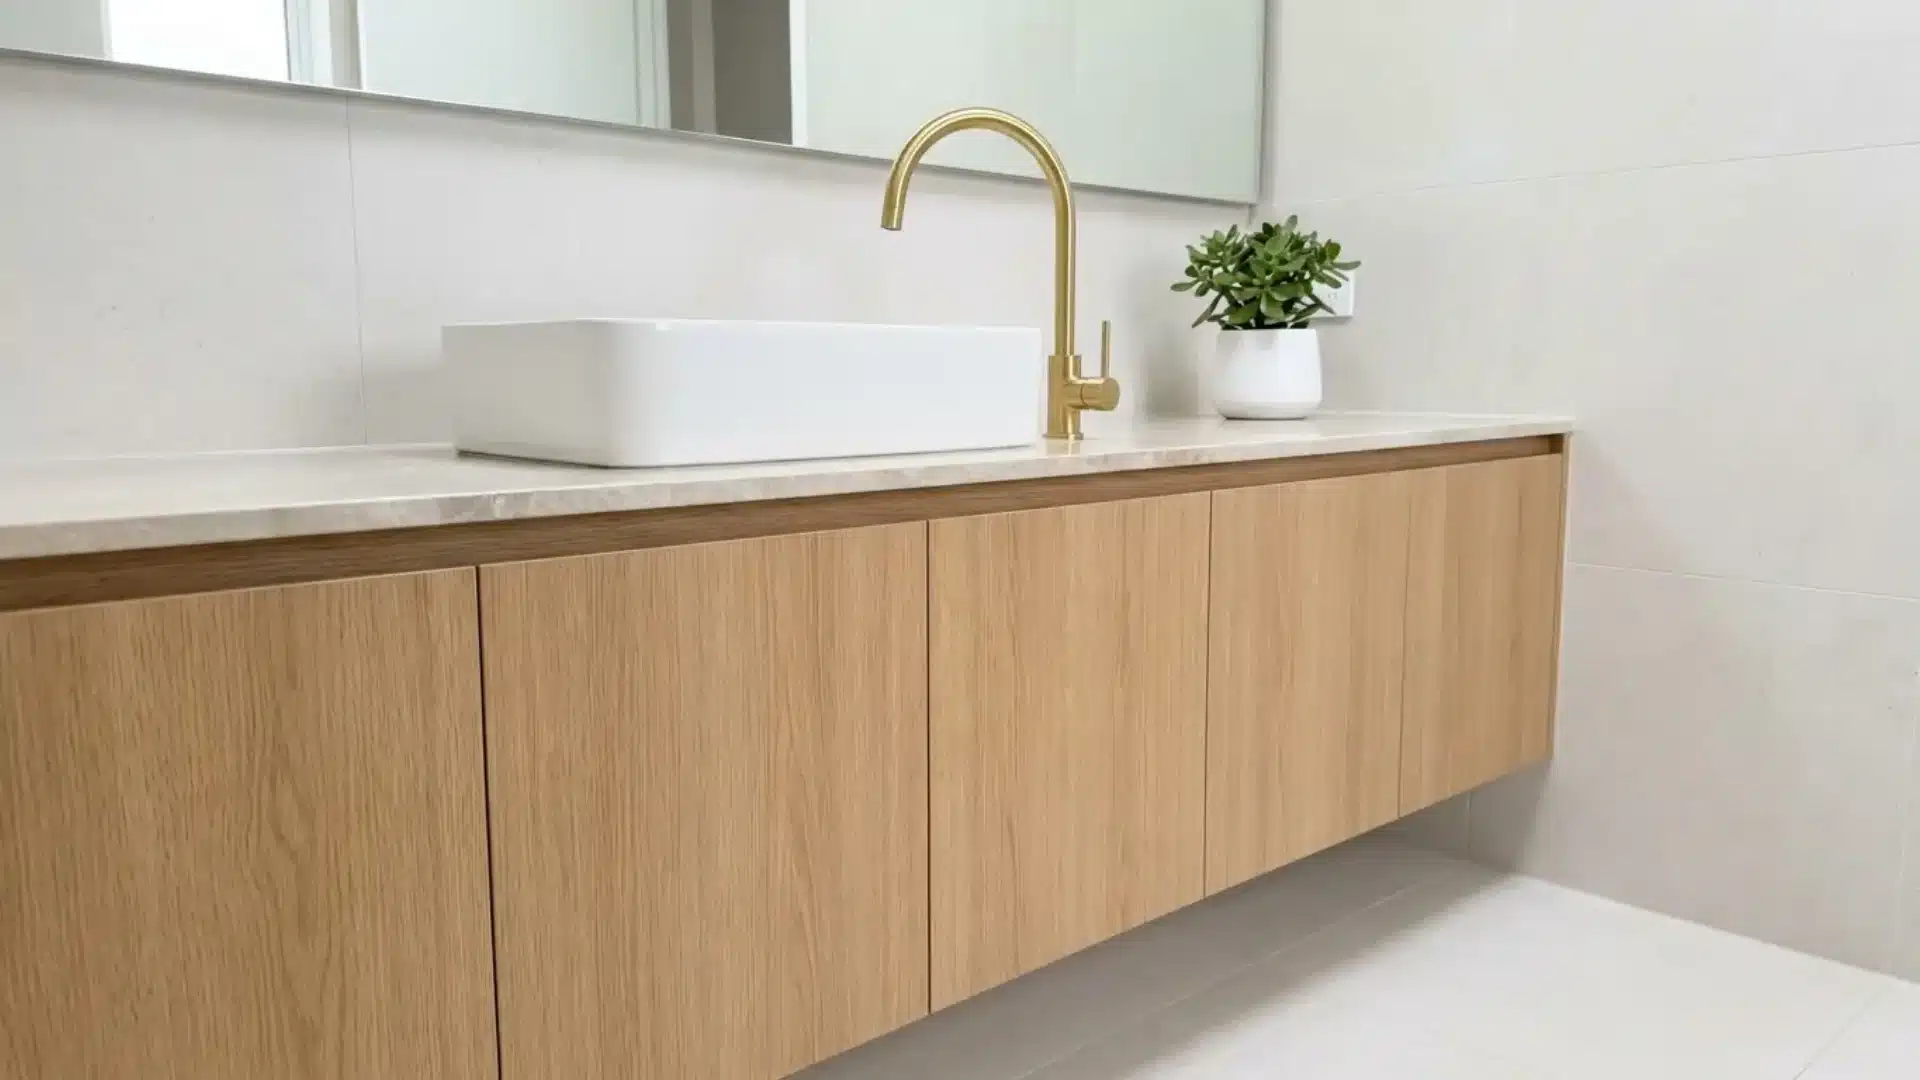
Doors and drawers on a handleless push-open vanity pop open with a light push, keeping the entire front seamless, with no visible pulls.
This design demands more precise hardware installation than standard builds, but the payoff is a clean, gapless look throughout.
It suits minimalist bathrooms where even small hardware details can feel like unwanted visual noise.
23. Concrete Top Modern Vanity
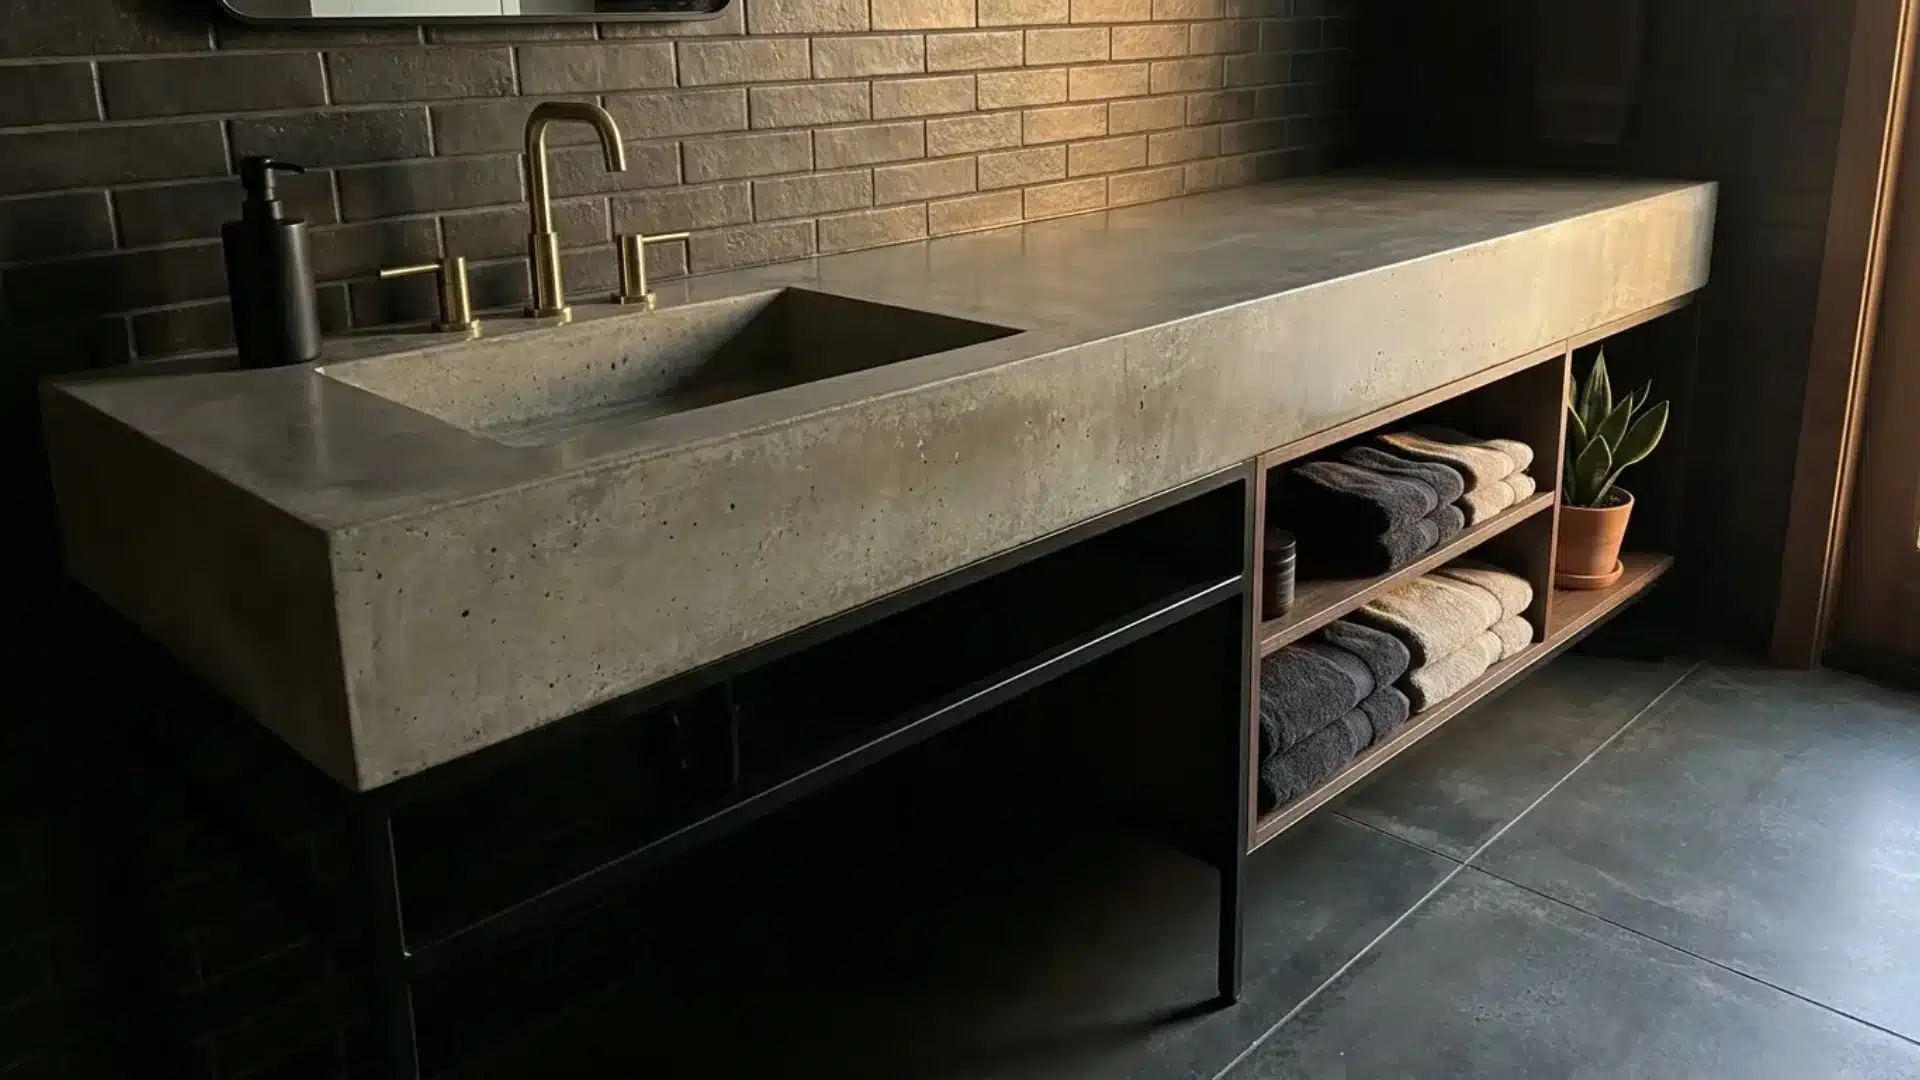
A poured concrete counter over a simple wood or metal base gives a concrete-top vanity a modern, industrial-chic edge so many people are chasing right now.
The material is durable, water-resistant once sealed properly, and develops a unique patina over time with regular use.
It pairs well with black fixtures and open shelving for a cohesive, modern bathroom look.
Double Sink and Storage-Focused Vanity Ideas
Built for busy households where two people (or a whole family) need real space and zero morning bathroom traffic jams.
24. Full Double Sink Vanity
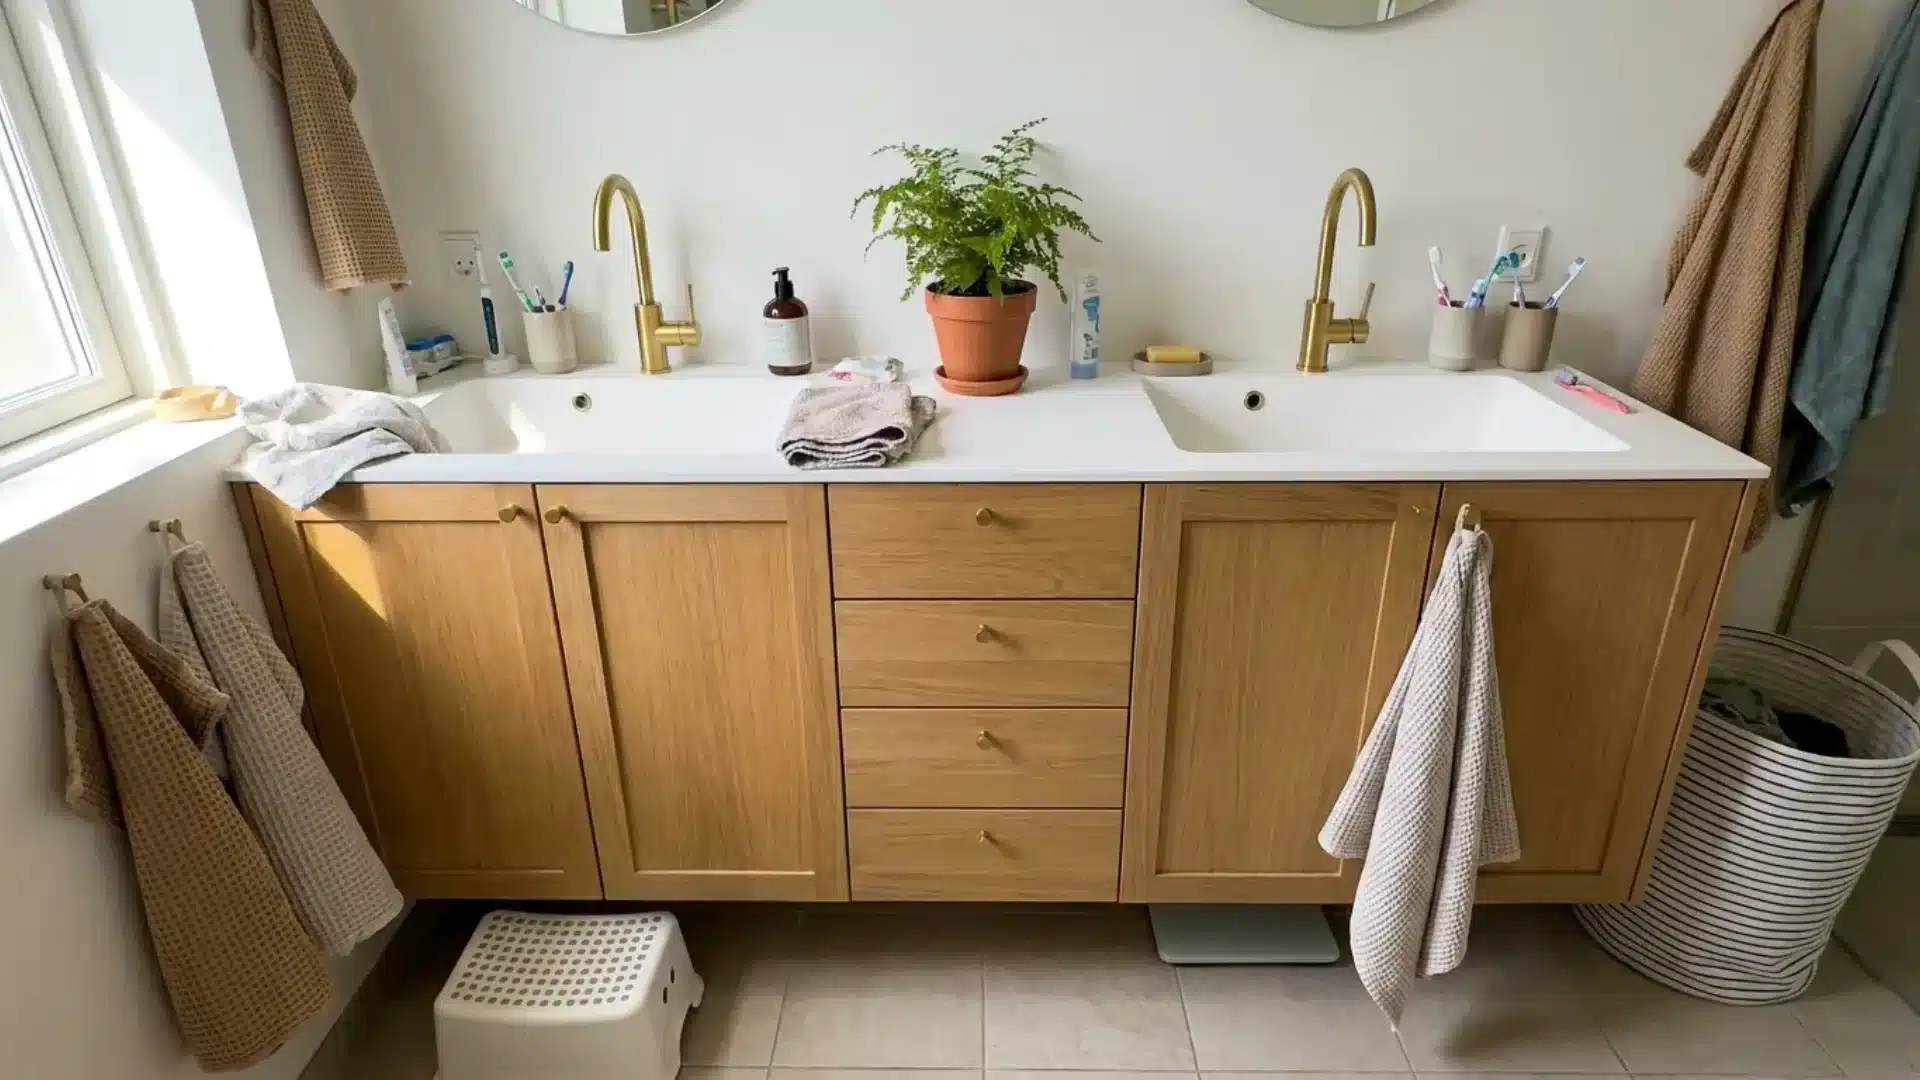
One wide cabinet with two sink cutouts and a bank of drawers running down the middle makes a full double-sink vanity a strong pick for busy households everywhere.
It is built for mornings when two people need counter space at once without constantly bumping elbows.
The extra drawers in the center handle overflow storage that other double vanities often skip.
25. Vanity With Built-In Hamper
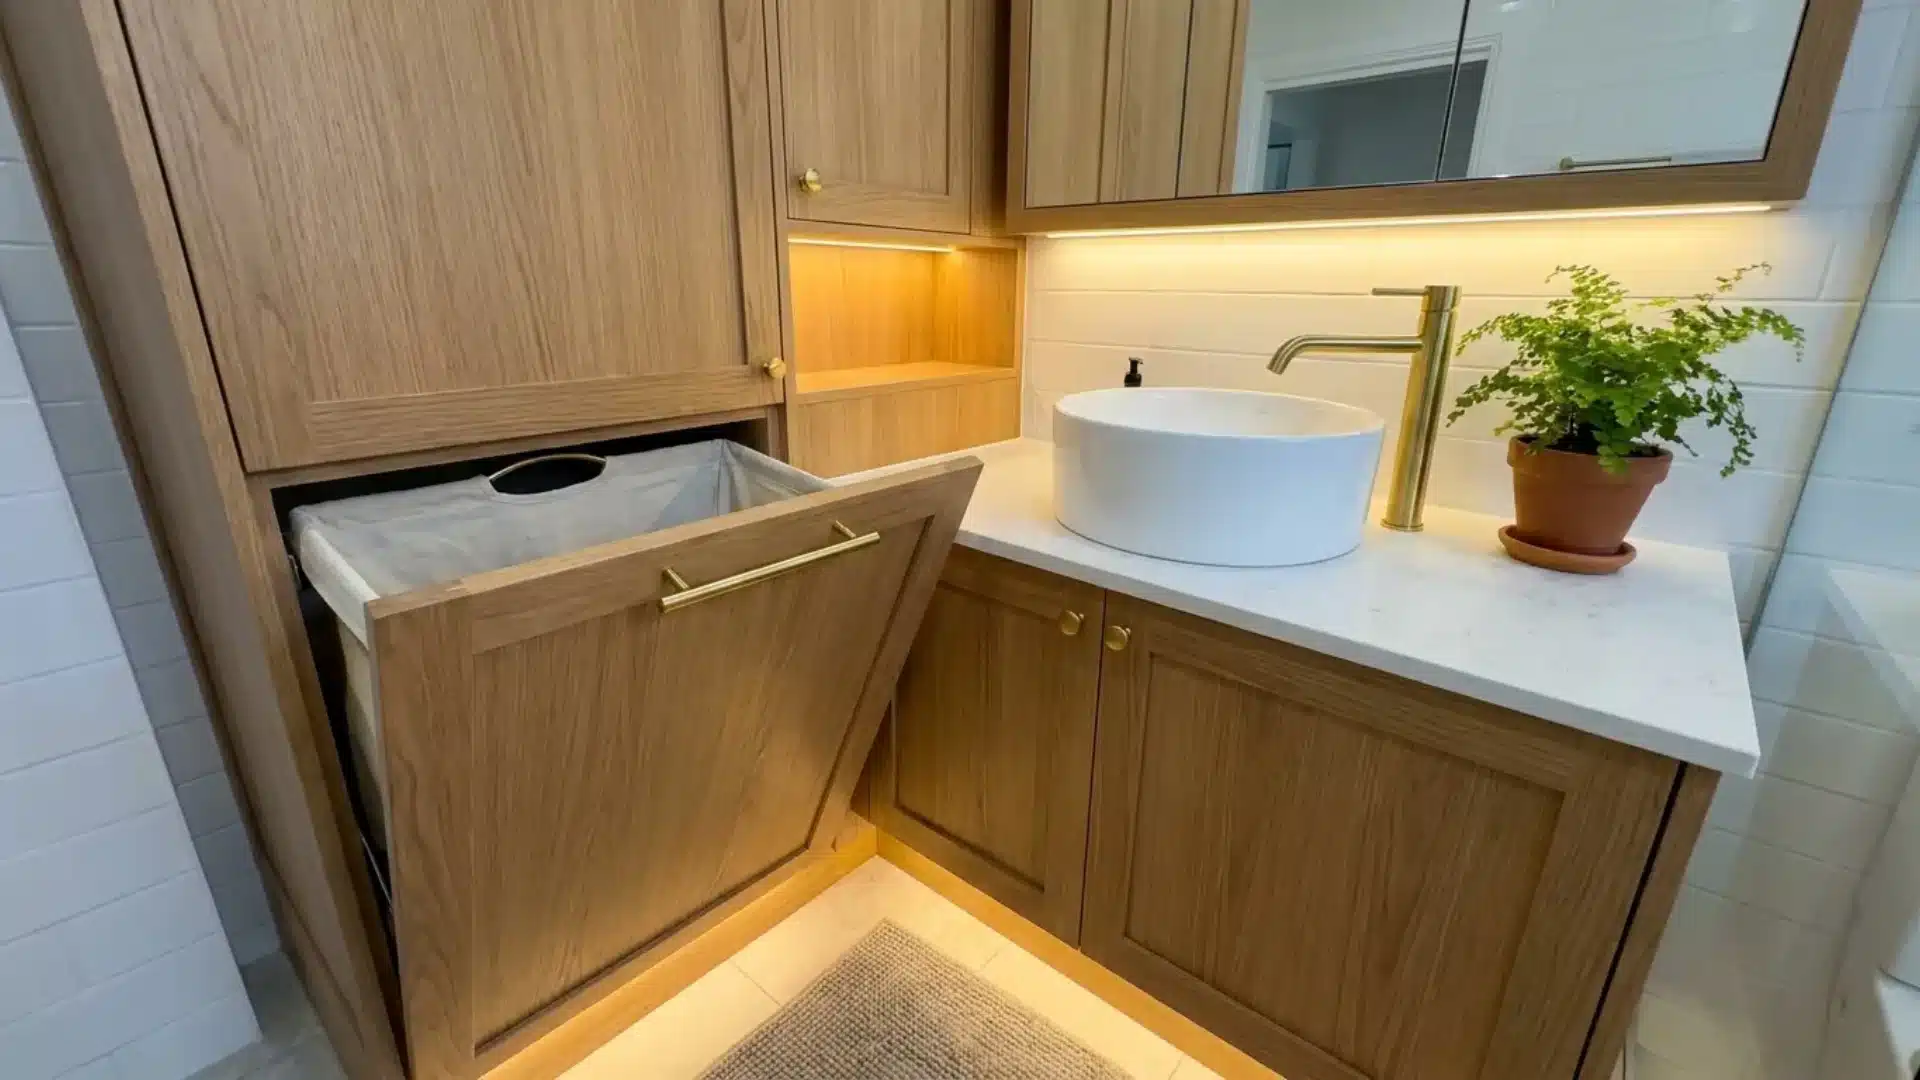
A pull-out laundry hamper built directly into one cabinet section makes a vanity with a built-in hamper quietly one of the smartest upgrades on this whole list.
It keeps dirty towels and clothes out of sight without needing a separate hamper or bin taking up floor space elsewhere.
This works especially well in family bathrooms that see heavy daily traffic.
26. Tower-Flanked Double Vanity
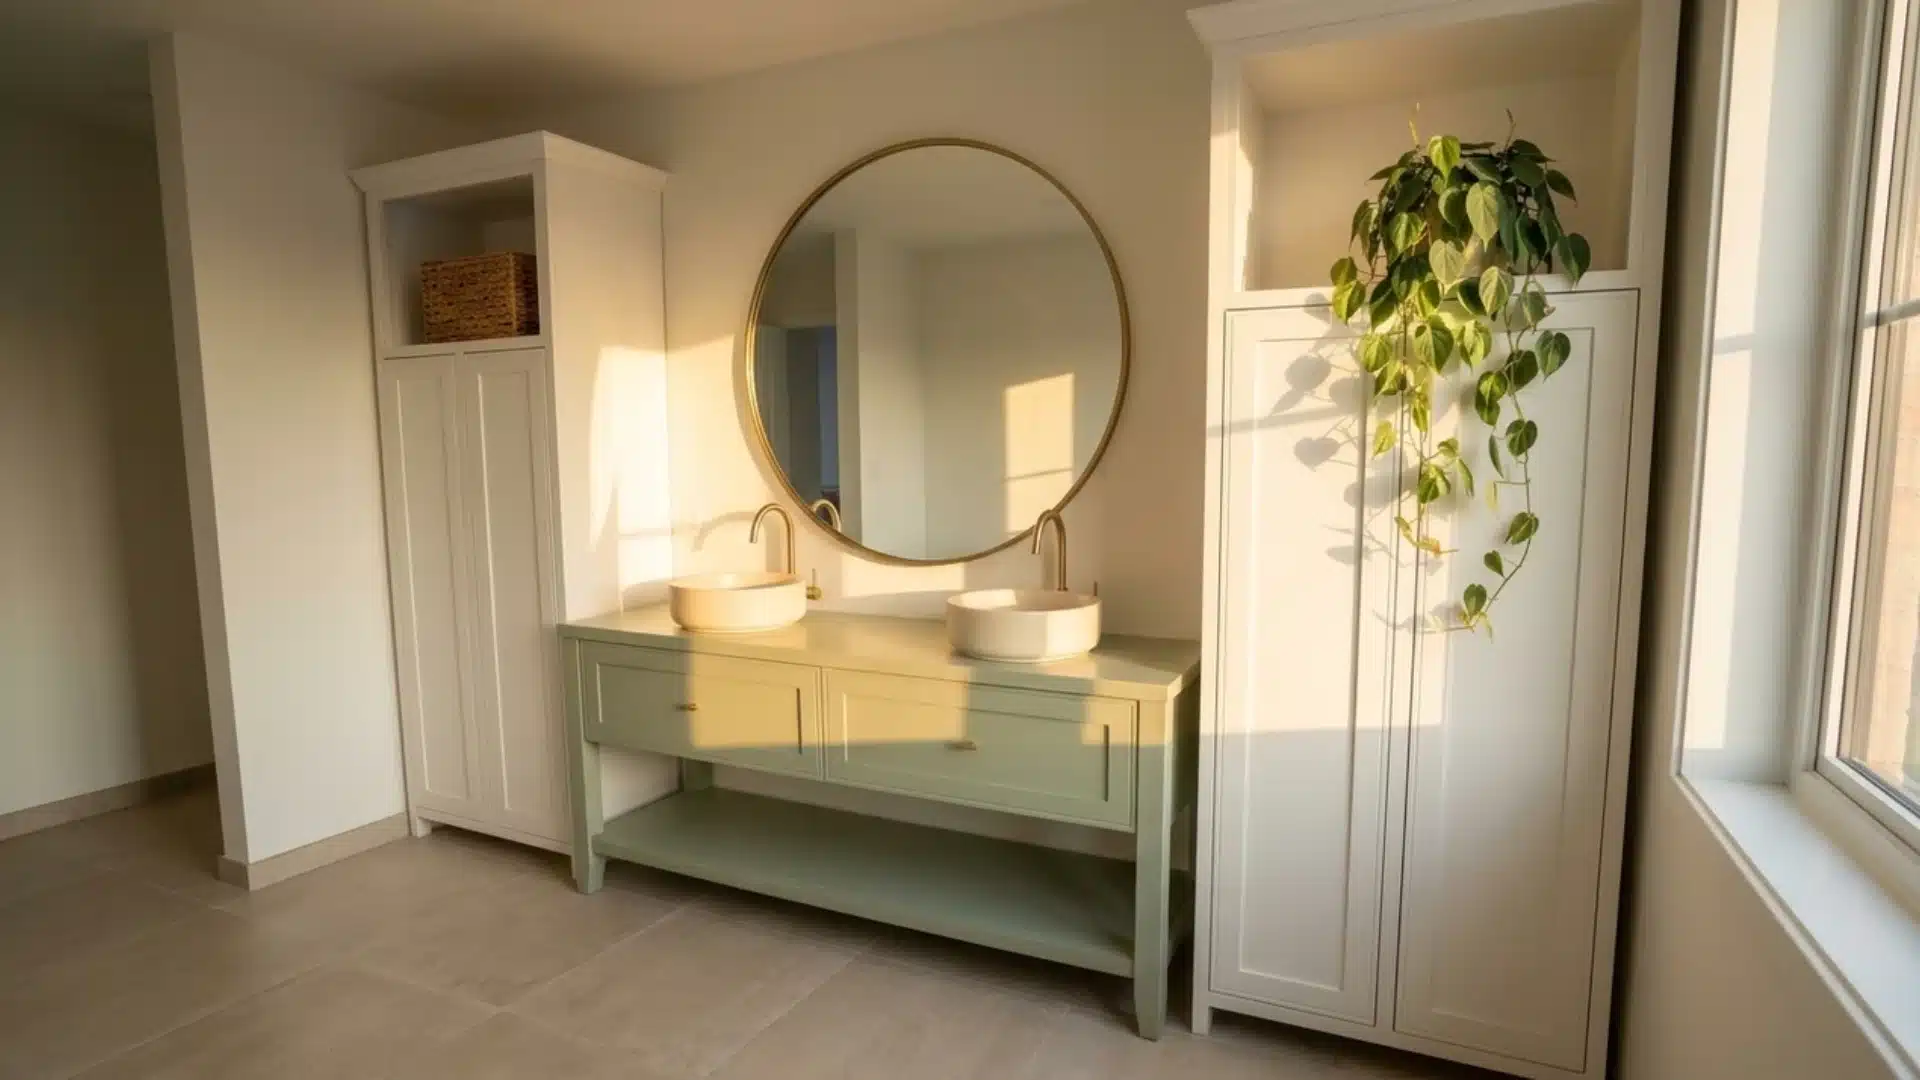
Tall storage towers on either side of two sinks give a tower-flanked double vanity real vertical storage, since linens and toiletries need a proper home in every bathroom.
The towers add height and visual balance to a wide double sink setup, breaking up what could otherwise feel like one long, flat cabinet run.
It suits primary bathrooms with wall space.
27. Under-Sink Pull-Out Vanity
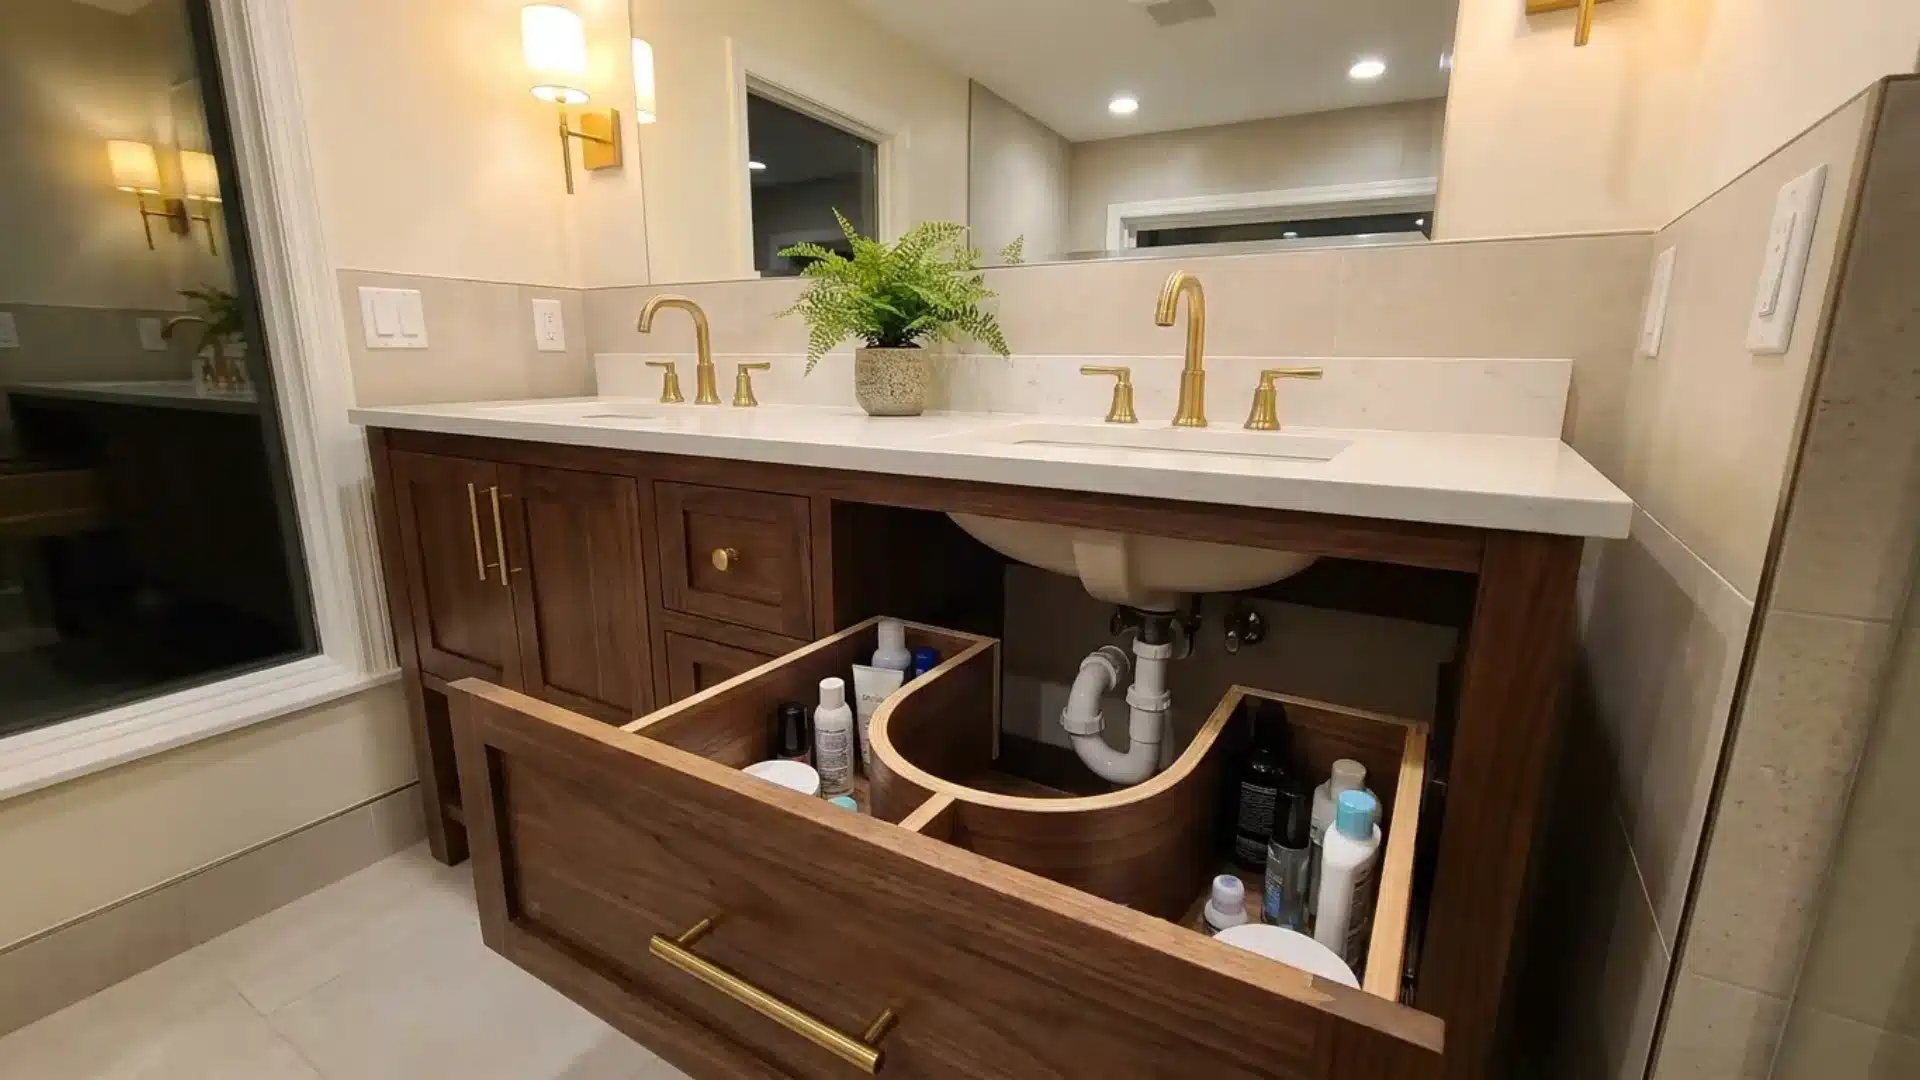
Deep pull-out drawers cleverly built around the plumbing let an under-sink pull-out vanity capture storage that most double vanities lose to pipework and wasted space.
Rather than wasting the awkward space beneath each sink, these drawers slide out around the plumbing lines themselves with ease.
It takes careful measuring during the build, but you gain real, usable storage most cabinets waste.
How Much Does a DIY Bathroom Vanity Cost?
Compared to a full renovation, such as budgeting for a full kitchen remodel, a single vanity build costs far less overall.
A basic vanity build usually runs $200 to $600 in materials, depending on finishes chosen. Prices vary by region, so check current costs before setting a budget.
Cabinet materials run about $50 to $150 depending on wood type. A simple sink adds another $40 to $100 to the total. Countertops range from $30 laminate to $200 stone options.
A faucet typically costs $30 to $90 for basic models. Hardware like knobs and pulls adds $10 to $30 total. Paint or finish runs $20 to $40 per can.
Plumbing supplies add another $20 to $50. Reusing old furniture significantly reduces material costs compared to building new.
Note: These figures are estimates and may vary by brand, location, and material choices.
How to Maintain a DIY Bathroom Vanity?
A little upkeep keeps a DIY vanity looking good for years. Small habits prevent bigger problems like water damage or peeling finish. Here are a few simple ways to keep it in shape:
- Wipe up standing water right away to protect the wood underneath.
- Check plumbing connections every few months for small leaks or drips.
- Inspect caulk and sealant regularly, and reapply if you spot cracks.
- Keep hinges and drawer slides clean so they move smoothly over time.
- Avoid harsh cleaners that can strip or dull the painted finish.
Staying on top of these small tasks saves time and money later. A well-kept vanity stays sturdy and looks great for a long time.
Frequently Asked Questions (FAQs)
How Much Does It Cost To Build A DIY Bathroom Vanity?
A basic DIY vanity usually costs between $100 and $300 in materials. Choosing a stone counter or upgraded hardware can push that closer to $500, still less than most store-bought options.
Can A Beginner Build A Bathroom Vanity?
Yes. A simple box-style vanity is doable with a miter saw and a drill. Skip curved fronts or soft-close hardware at first, and follow a clear plan for a smoother build.
Do I Need a Plumber to Install a DIY Vanity?
If you’re comfortable with basic tools, you can often connect the sink and faucet yourself. If plumbing needs to move or you feel uncertain, call a licensed plumber to avoid leaks or damage.
Final Thoughts
Building a vanity at home comes down to good planning and simple steps. Every idea in this list shows that style and storage can work together.
A DIY bathroom vanity fits your space, your budget, and your daily routine. Building one takes patience, careful measuring, and steady hands.
The payoff is a sturdy piece made exactly the way you pictured it. Seal every edge, double-check your plumbing lines, and take each step slowly.
Small mistakes are easy to fix when caught early on. Once it’s finished, walking into that bathroom feels like a small daily win. Comment “vanity” below if you want more builds like this.