
A DIY wreath is one of the simplest ways to add a handmade touch to a front door, wall, or mantel.
You don’t need floral training or a big budget to make one that looks good. You just need a base, some greenery or flowers, and a few basic supplies like ribbon, wire, or fabric.
Almost anyone can put together a wreath suited to their style and the season.
Today we’ll cover the wreath forms and materials worth having on hand, and a simple step-by-step method for building one from scratch.
We’ll cover a few easy seasonal ideas, realistic cost ranges, and tips for hanging, storing, and avoiding common mistakes, so your first DIY wreath comes out the way you pictured it.
What to Know Before Making a DIY Wreath
Before buying materials, decide where your wreath will hang and how long you want it to last.
An indoor wreath can use delicate paper, fabric, or dried flowers, while an outdoor design needs sturdier, weather-resistant materials.
Measure the door or wall so the finished wreath feels balanced rather than oversized.
Next, choose a base, such as grapevine for a natural look, wire for flexibility, or foam for fuller arrangements.
Select a simple color palette and gather decorations that suit the season.
If you plan to reuse the wreath, attach accents with removable ties instead of permanent glue whenever practical.
What You Need to Make a DIY Wreath
Every wreath starts with a handful of basic supplies, and the good news is that none of them need to be expensive or hard to find.
This particular build uses items sourced entirely from Dollar Tree, making it one of the most budget-friendly versions you can put together.
The right supplies always depend on the style of wreath you’re making and where you plan to display it, but this list covers everything needed for the tutorial ahead.
Tools and materials required:
- 14-inch wreath ring (Dollar Tree)
- 8 rolls of Christmas-themed ribbon (Dollar Tree), 4 different types/patterns
- 1 three-pack of silver flowers (Dollar Tree)
- Zip ties
- Scissors
Disclaimer: Handle hot glue carefully, secure sharp wire ends and protect sensitive skin as resh greenery, sap, and dried florals may cause irritation.
How to Make a Wreath: Step-by-Step Process
Making a DIY wreath becomes easier with the right materials and a clear process. Follow these steps to create a beautiful wreath.
Step 1: Gather Your Materials
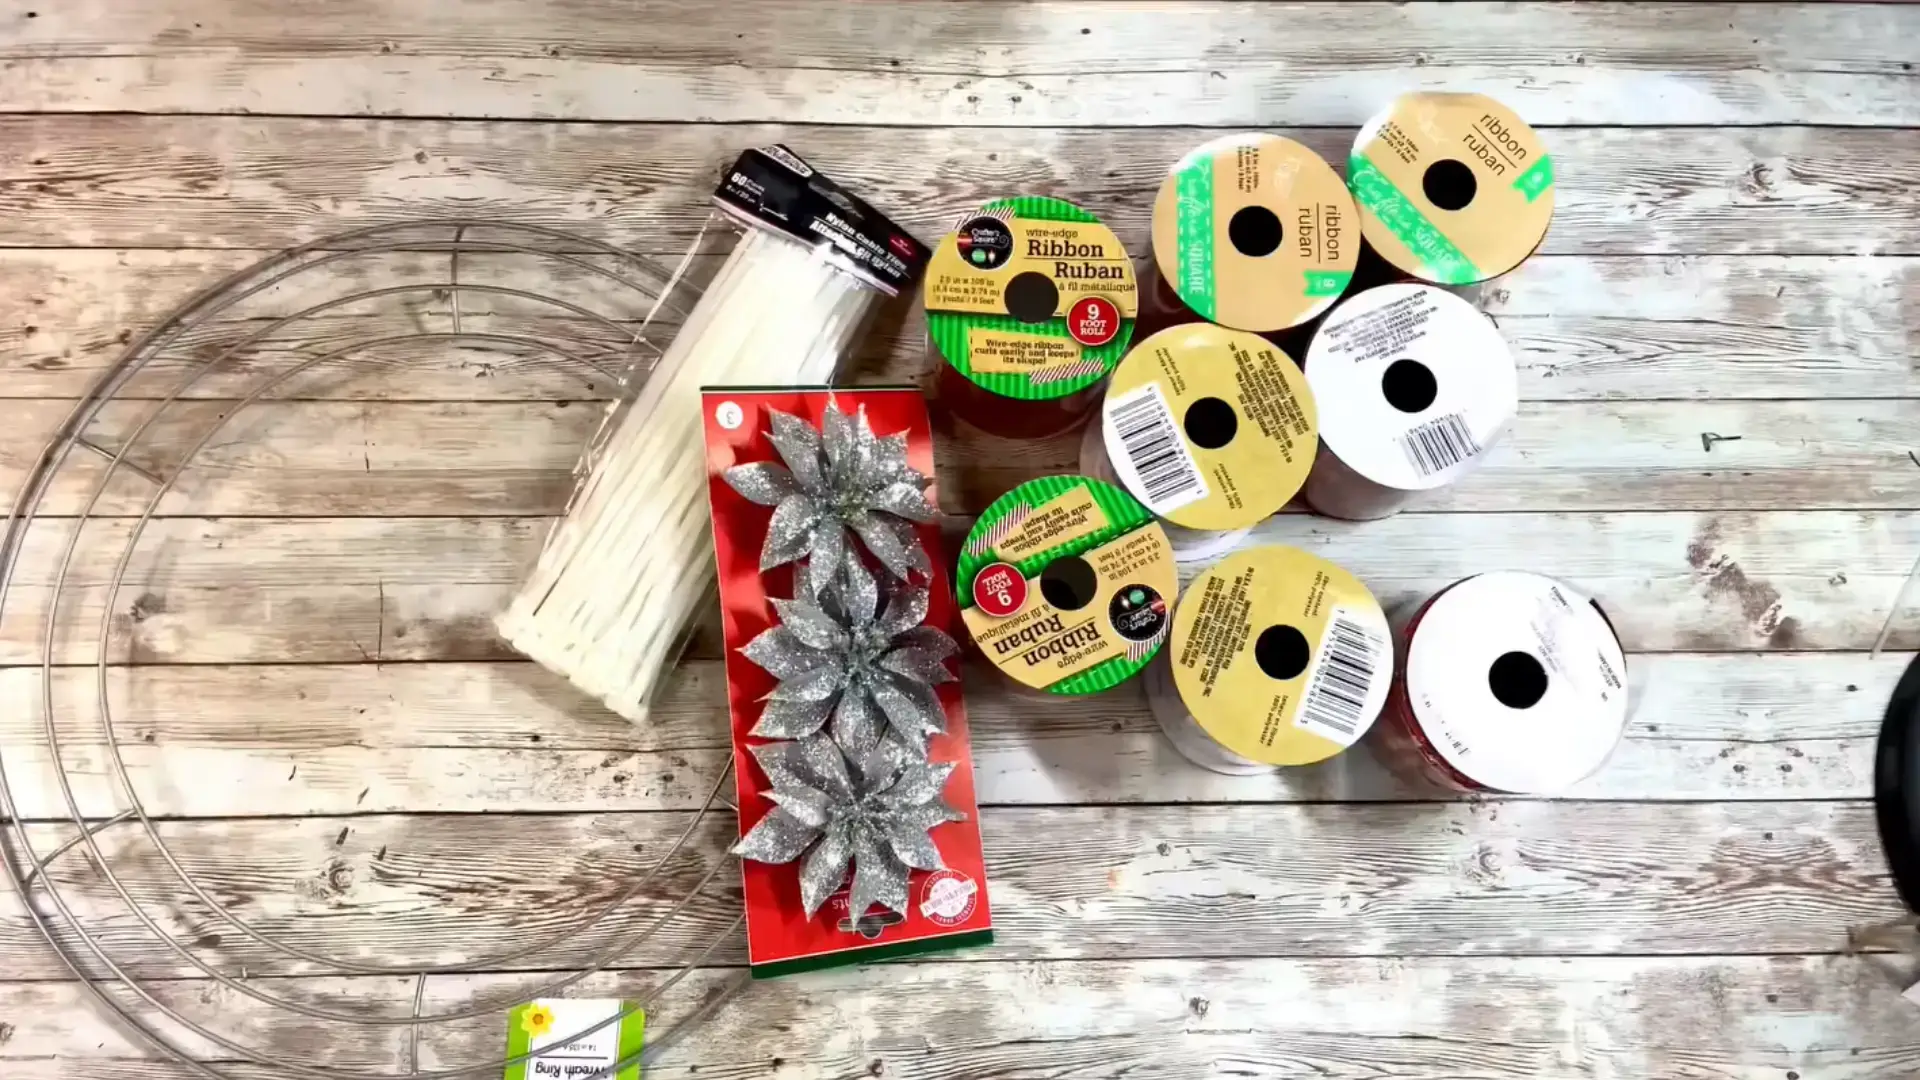
Before starting, gather everything you’ll need, as mentioned above.
All of these supplies are inexpensive and easy to find at a craft or dollar store.
Having everything laid out ahead of time makes the looping process faster, and it helps you see how the ribbon colors work together before committing to a section.
Step 2: Stack the Ribbon
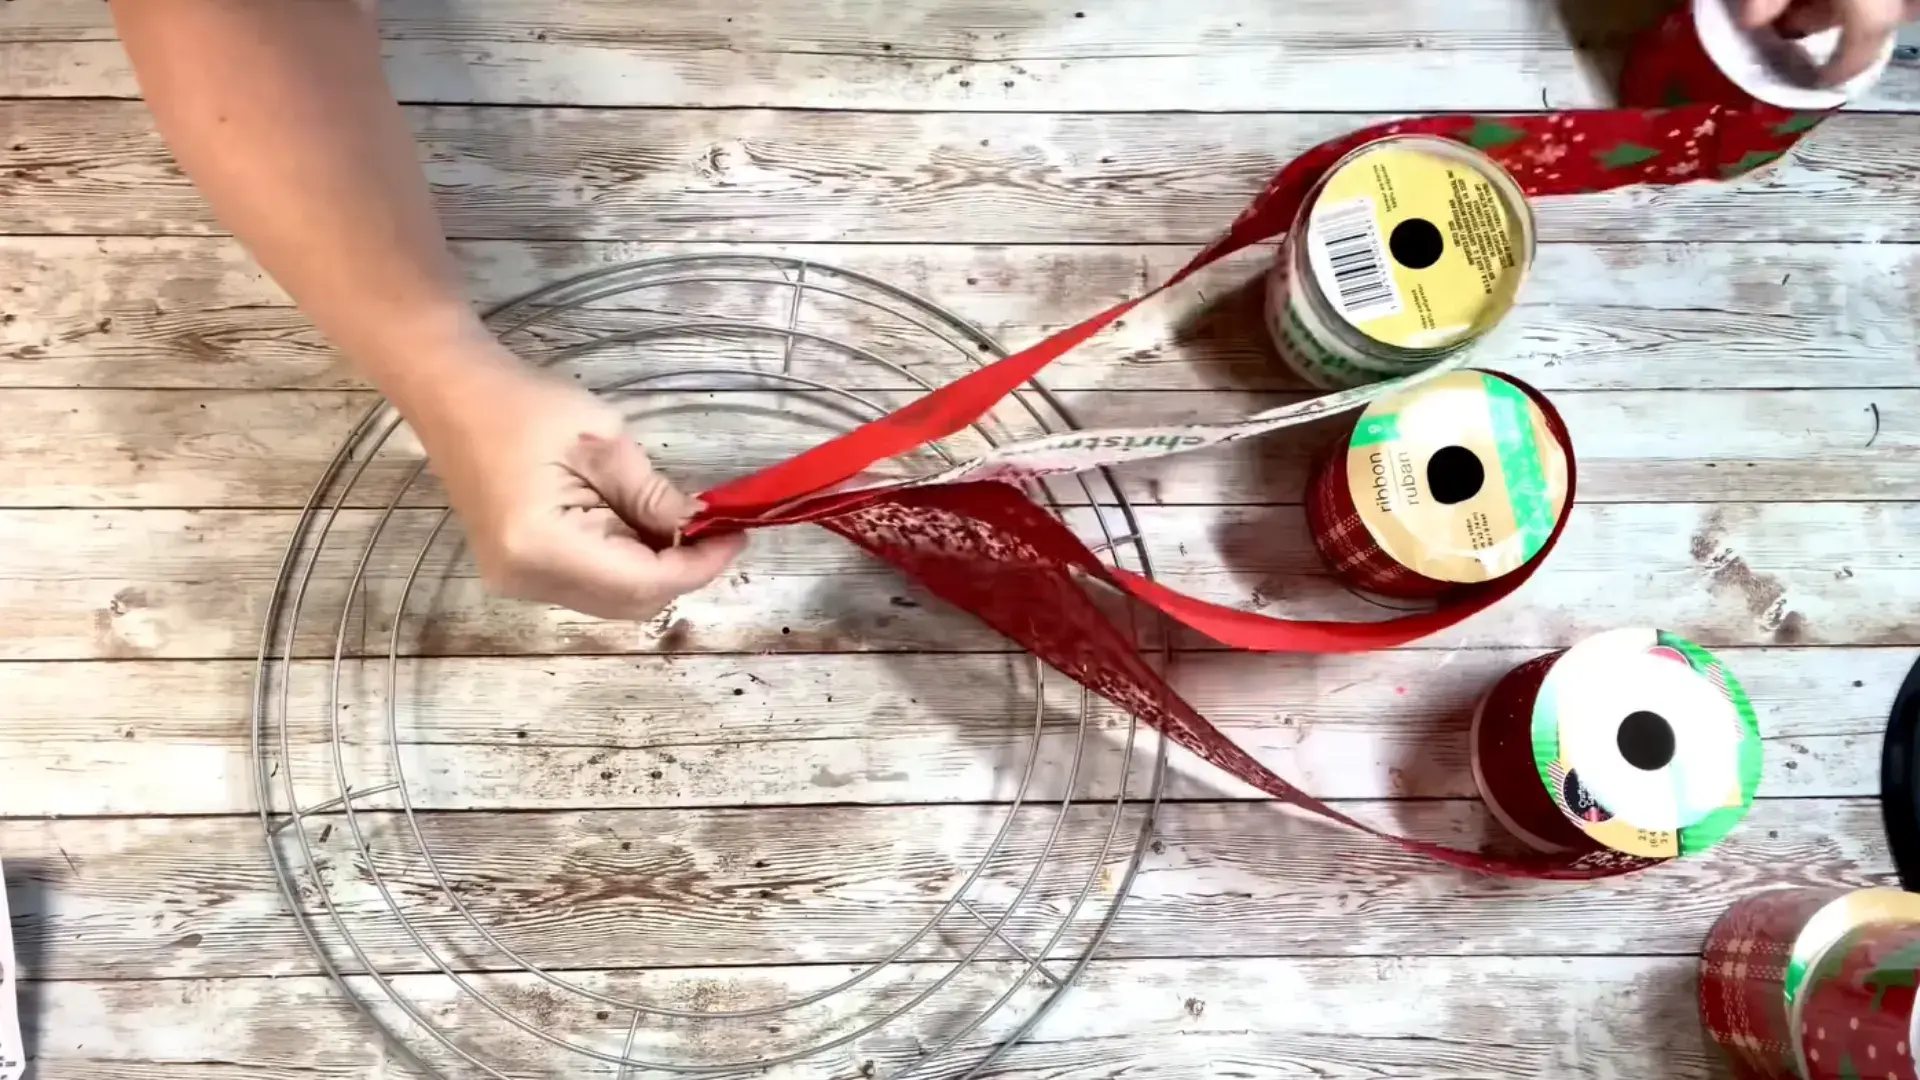
Take the four different ribbon types and stack them one on top of the other.
Working only on the second ring in from the middle of the wreath frame, pinch the stacked ends together and position them against that inner ring.
This stacking method is what gives the finished wreath its full, layered look, so keep the ribbons aligned neatly before securing them in the next step.
Step 3: Secure the First Section
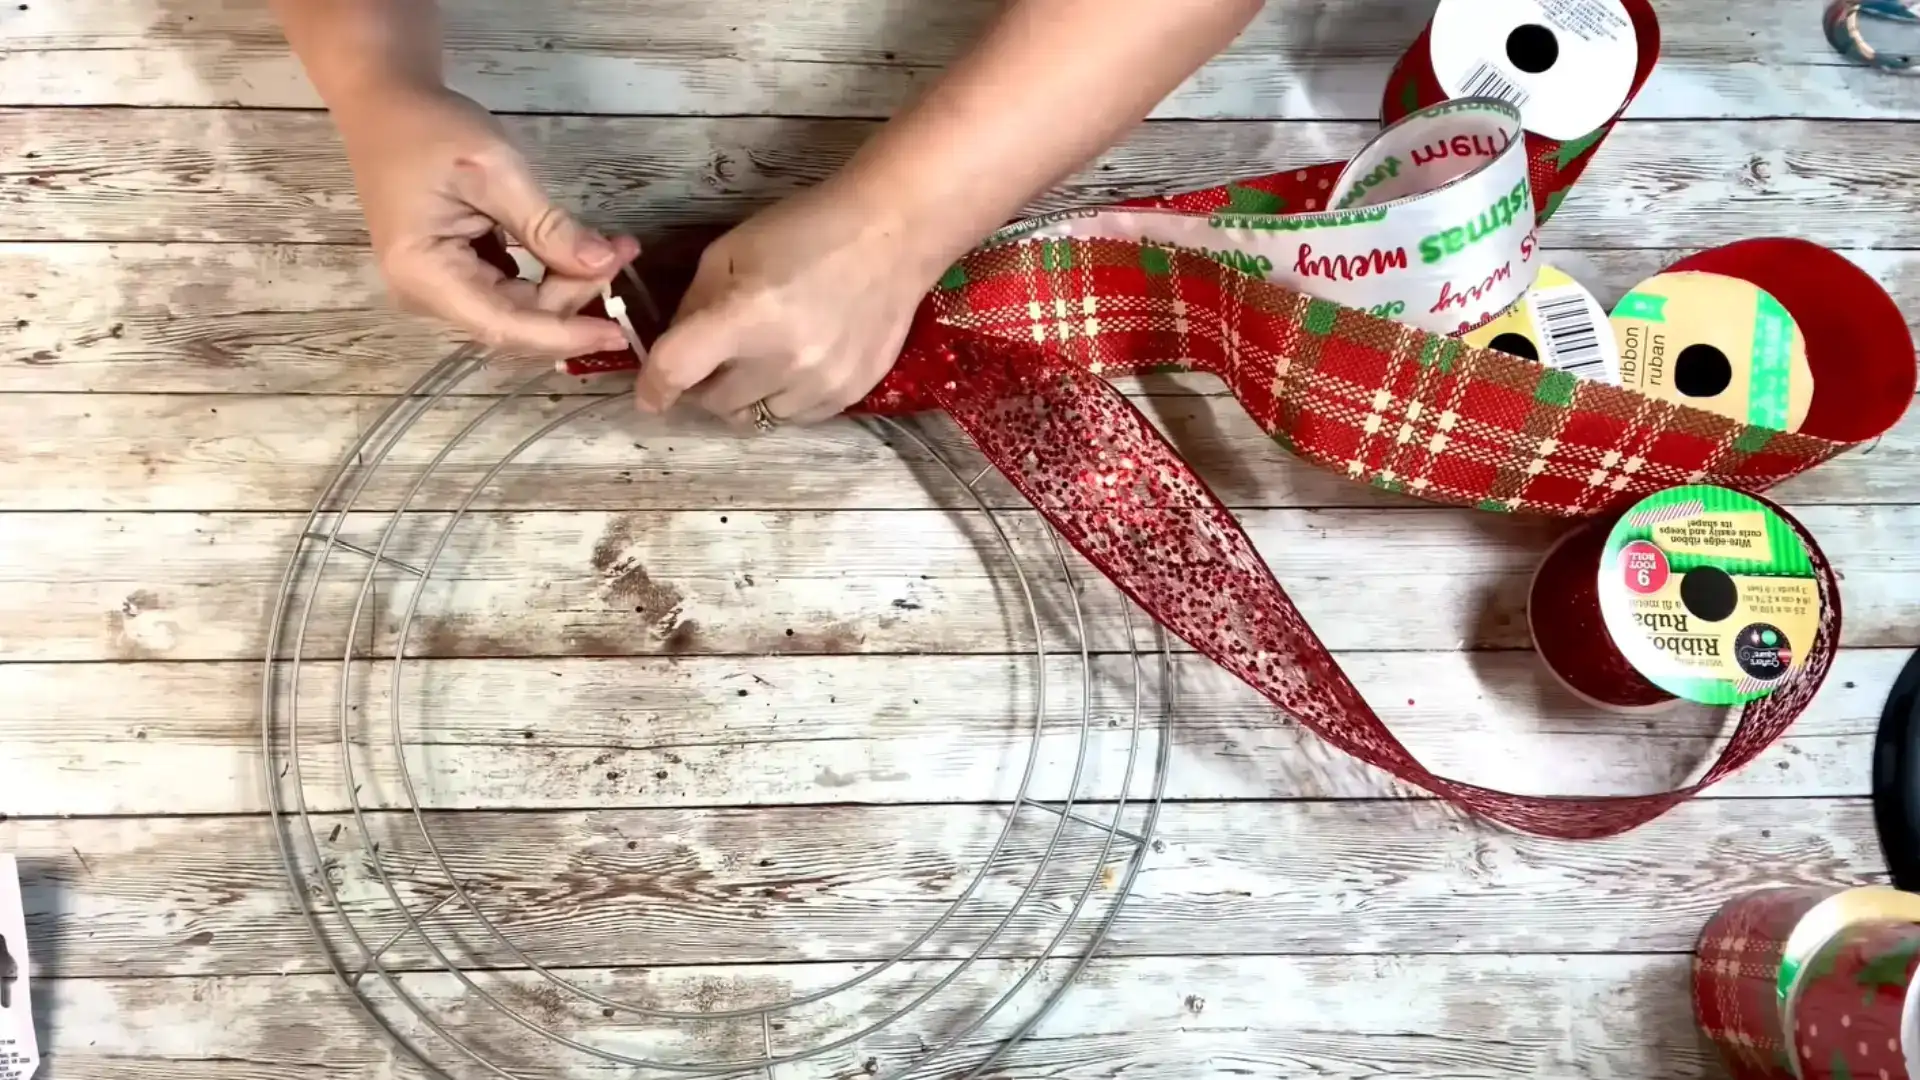
Take a zip tie and secure the stacked ribbon ends tightly to the second ring.
Tuck the zip tie tail to the back side of the wreath ring so it stays hidden from the front.
This anchors your starting point and gives you a clean base to begin forming loops from. Make sure the tie is pulled snug so the ribbon doesn’t shift as you continue working.
Step 4: Form the Loops
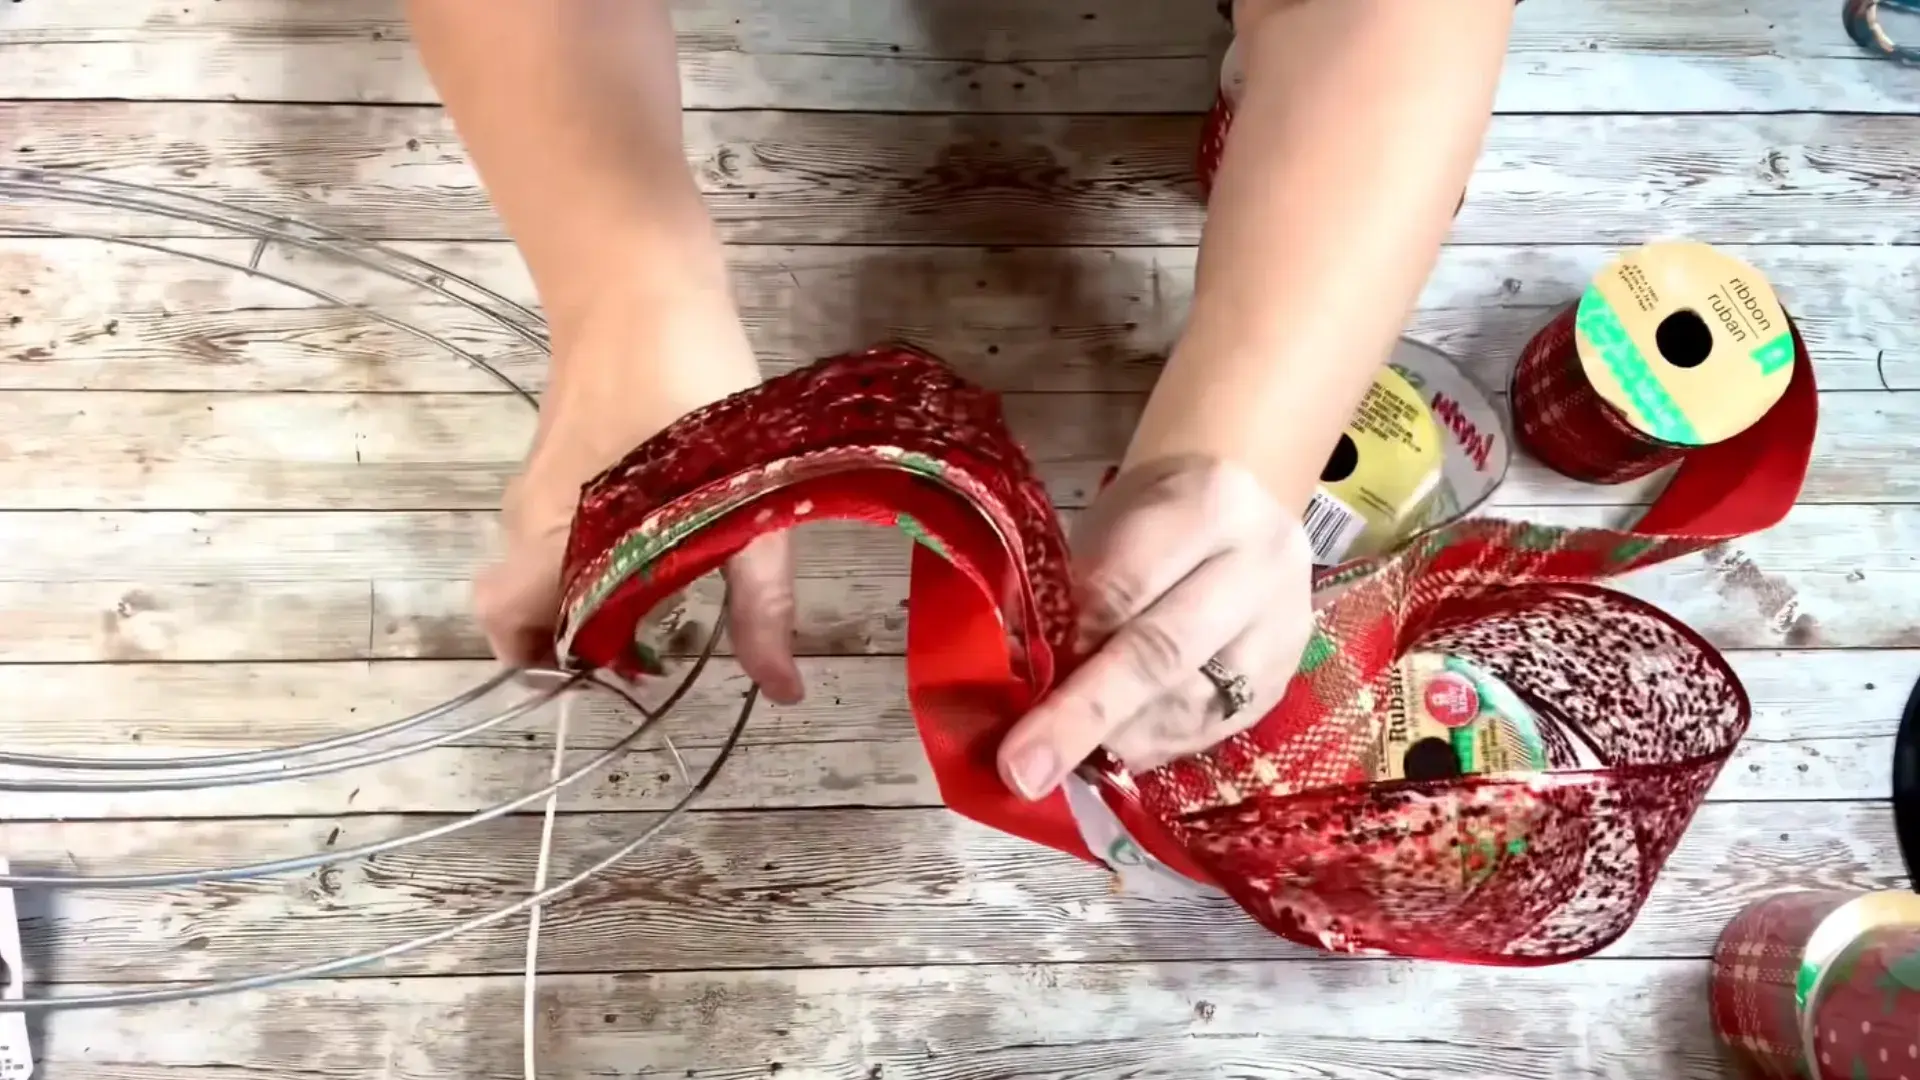
Create a loop with the ribbon by eye, without measuring, deciding the size based on how full you want the finished wreath to look.
Secure it with another zip tie, tighten, and tuck the tail to the back.
Repeat this process to form more loops in the same section, keeping each one roughly the same size, until that section has four loops total.
Step 5: Continue Around the Wreath
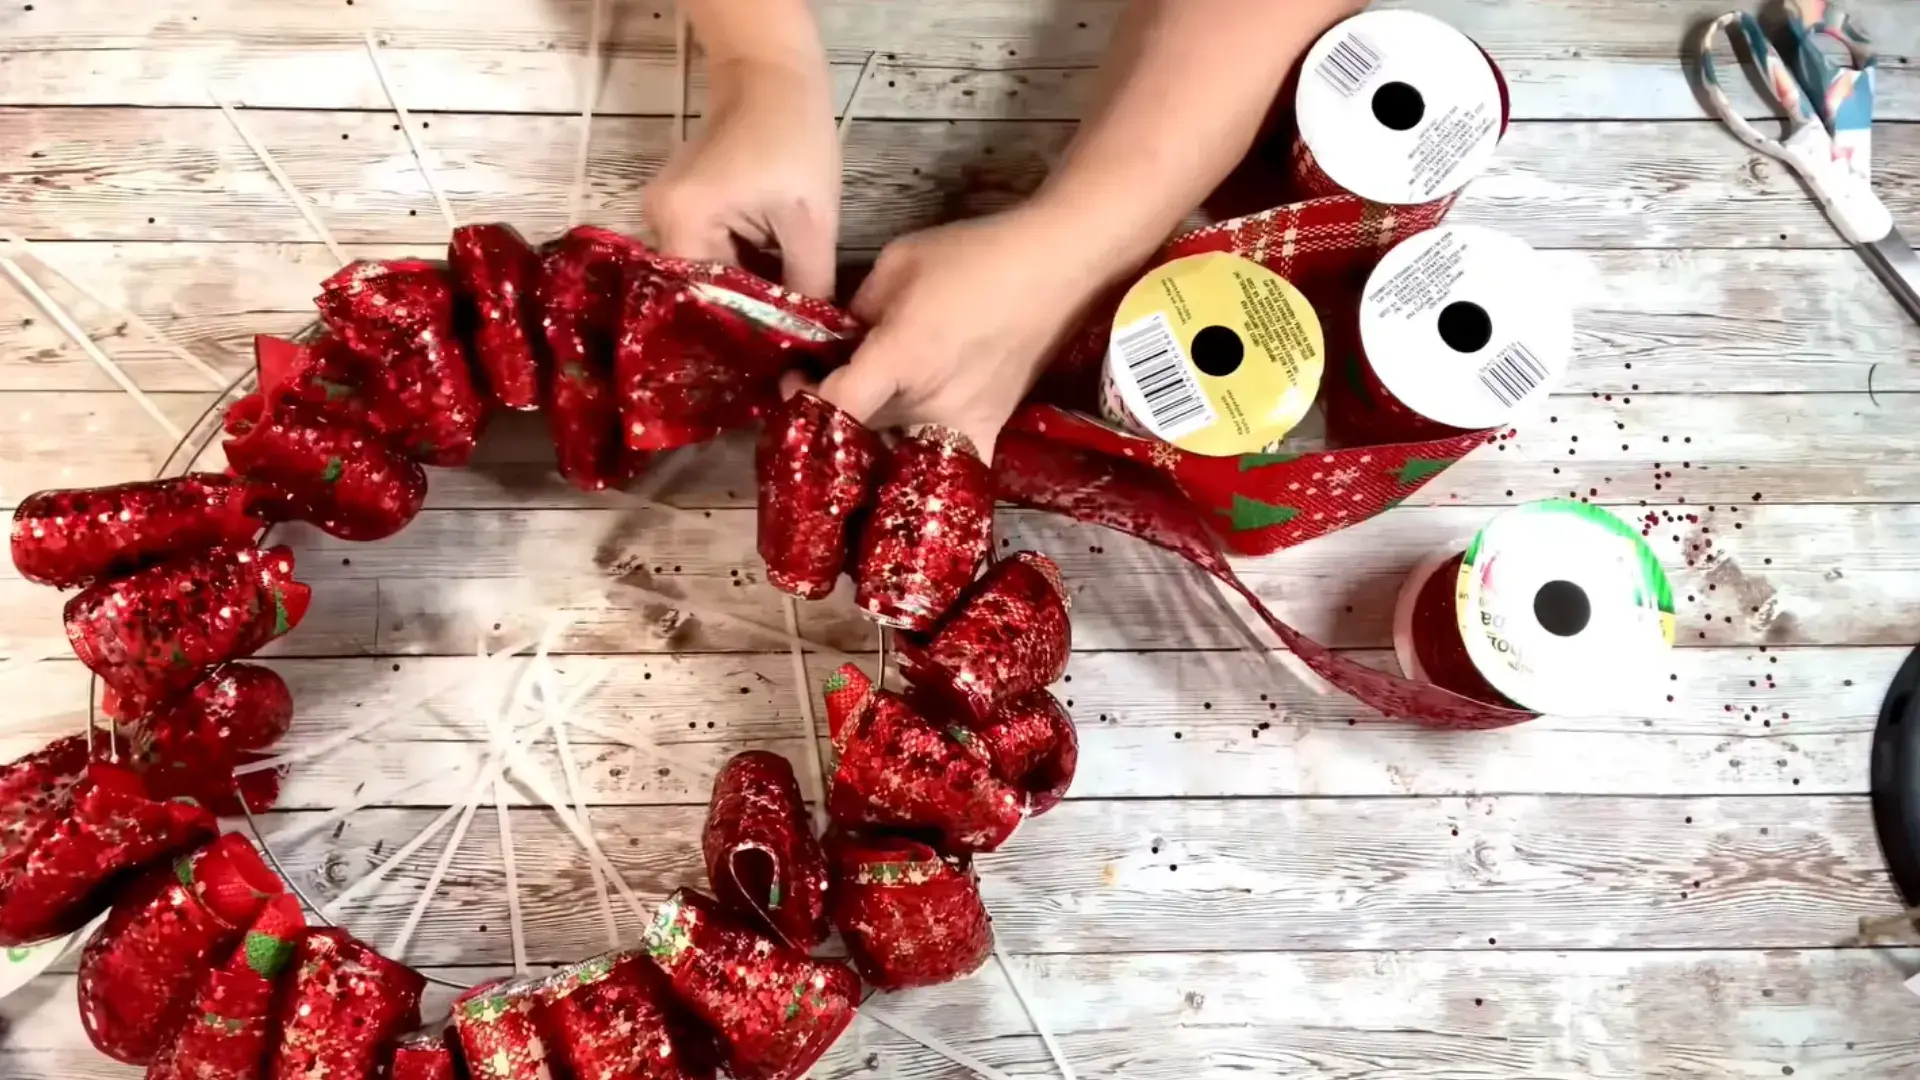
Once a ribbon set runs out, zip tie the last loop and tuck the excess to the back for trimming later.
Start a fresh stack of four ribbons, pinch the ends, and zip tie them where the previous section ended.
Continue making four loops in each section using the same method, working your way around until the entire wreath ring is fully covered.
Step 6: Trim and Secure the Back
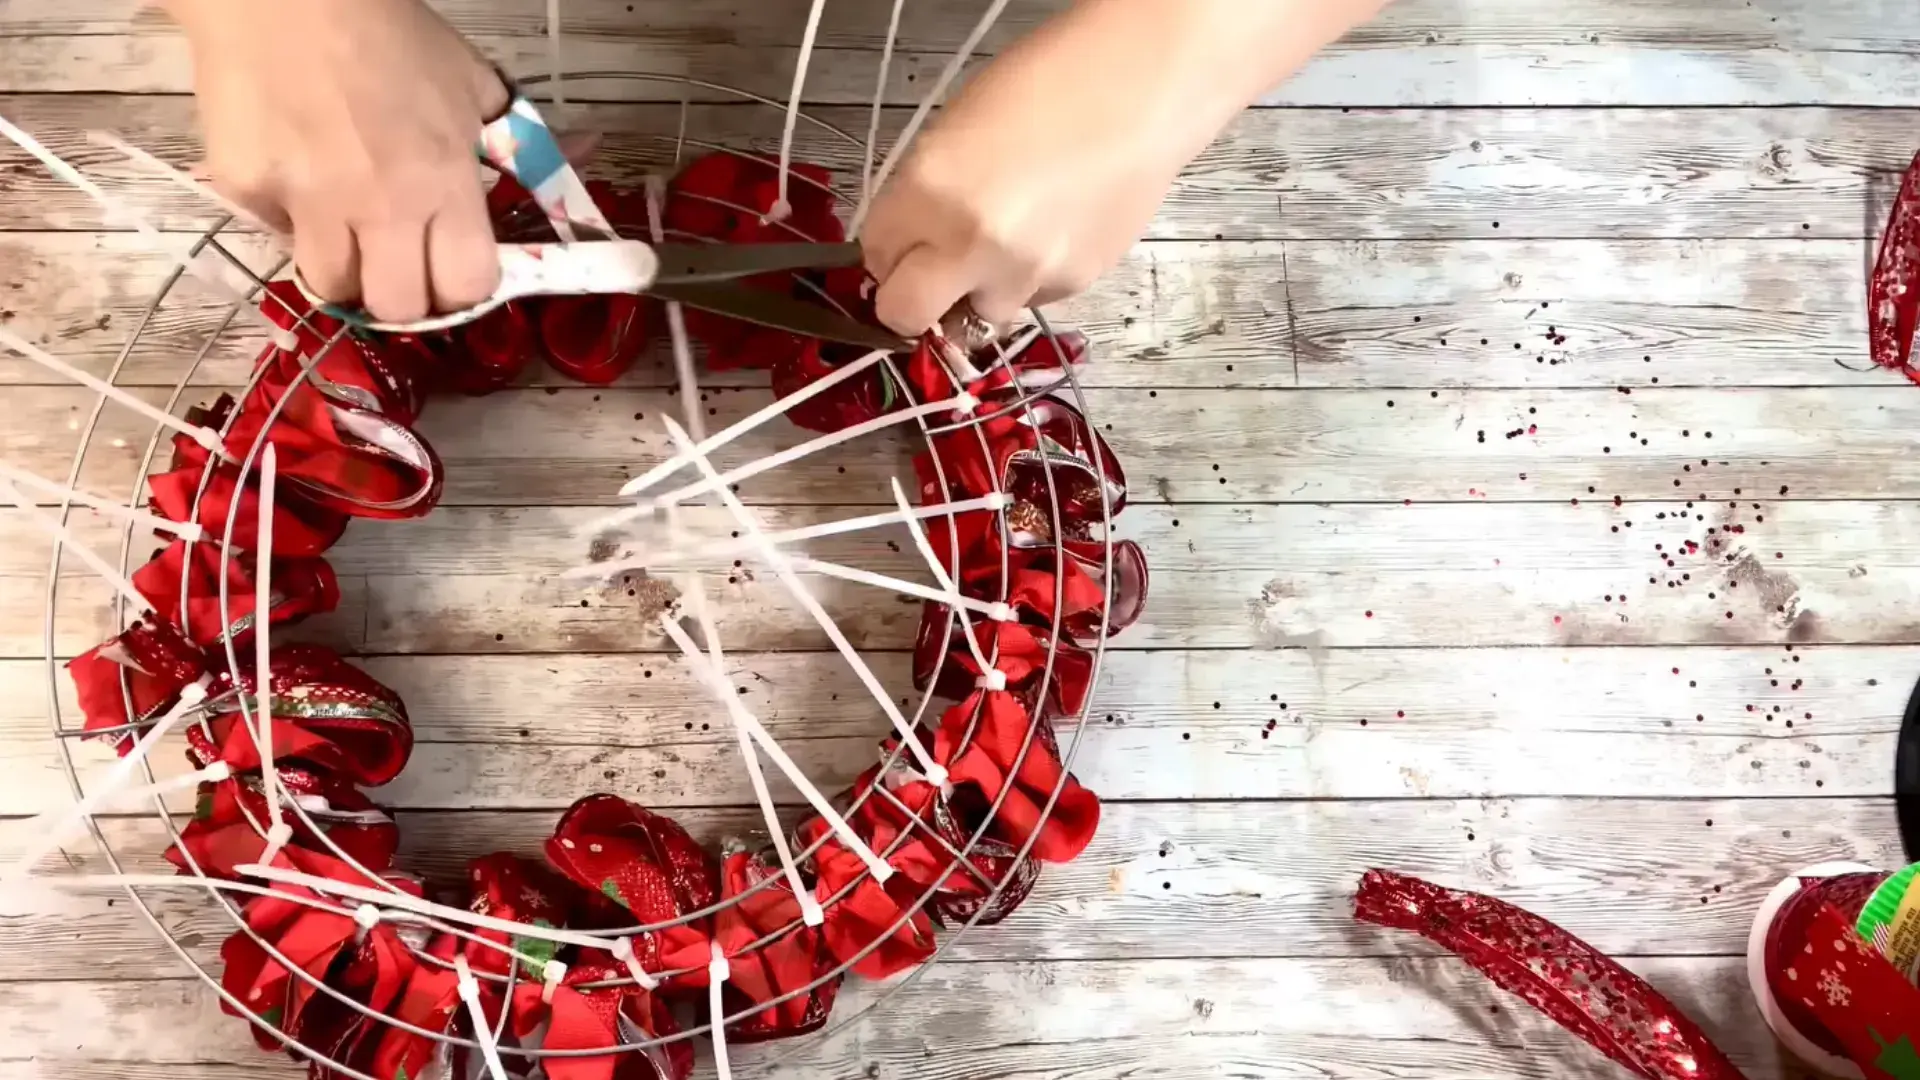
Once the wreath is fully looped, flip it over and trim any excess ribbon left on the back.
Go through each zip tie and tighten it again to confirm every loop is securely fastened, then snip off the extra zip tie ends so nothing sticks out.
This keeps the back of the wreath neat and prevents loops from loosening or shifting over time.
Step 7: Fluff and Add the Flowers

Flip the wreath back to the front and pull apart each ribbon loop, spreading and fluffing them until the wreath looks full and open.
A mix of wired and non-wired ribbon works fine here, so don’t worry about matching types.
Finally, clip the three-pack of silver flowers together in a cluster on one section to finish the wreath.
For more details, watch the complete video tutorial by DIYwithBeth
Choosing the Right Wreath Base
The wreath base shapes the final design and affects how easily decorations stay attached. Choose one that matches your materials and preferred style.
| Wreath base | Best for | Skill level | Indoor or outdoor | Reusable |
|---|---|---|---|---|
| Grapevine | Flowers, greenery and natural designs | Beginner | Both | Yes |
| Wire | Ribbon, mesh and fresh greenery | Beginner to intermediate | Both | Yes |
| Foam | Fabric, yarn and ornaments | Beginner | Mostly indoor | Sometimes |
| Straw | Full, traditional wreaths | Beginner | Sheltered areas | Yes |
| Metal hoop | Minimal, modern designs | Beginner | Both | Yes |
| Cardboard | Paper and lightweight materials | Beginner | Indoor | Limited |
| Wire hanger | Budget and repurposed wreaths | Beginner | Both | Yes |
Spring DIY Wreath Ideas
Celebrate the new season with cheerful wreaths featuring colorful blooms, fresh greenery, and soft accents. These light, airy designs bring an inviting touch of spring to any door.
1. Tulip Wreath
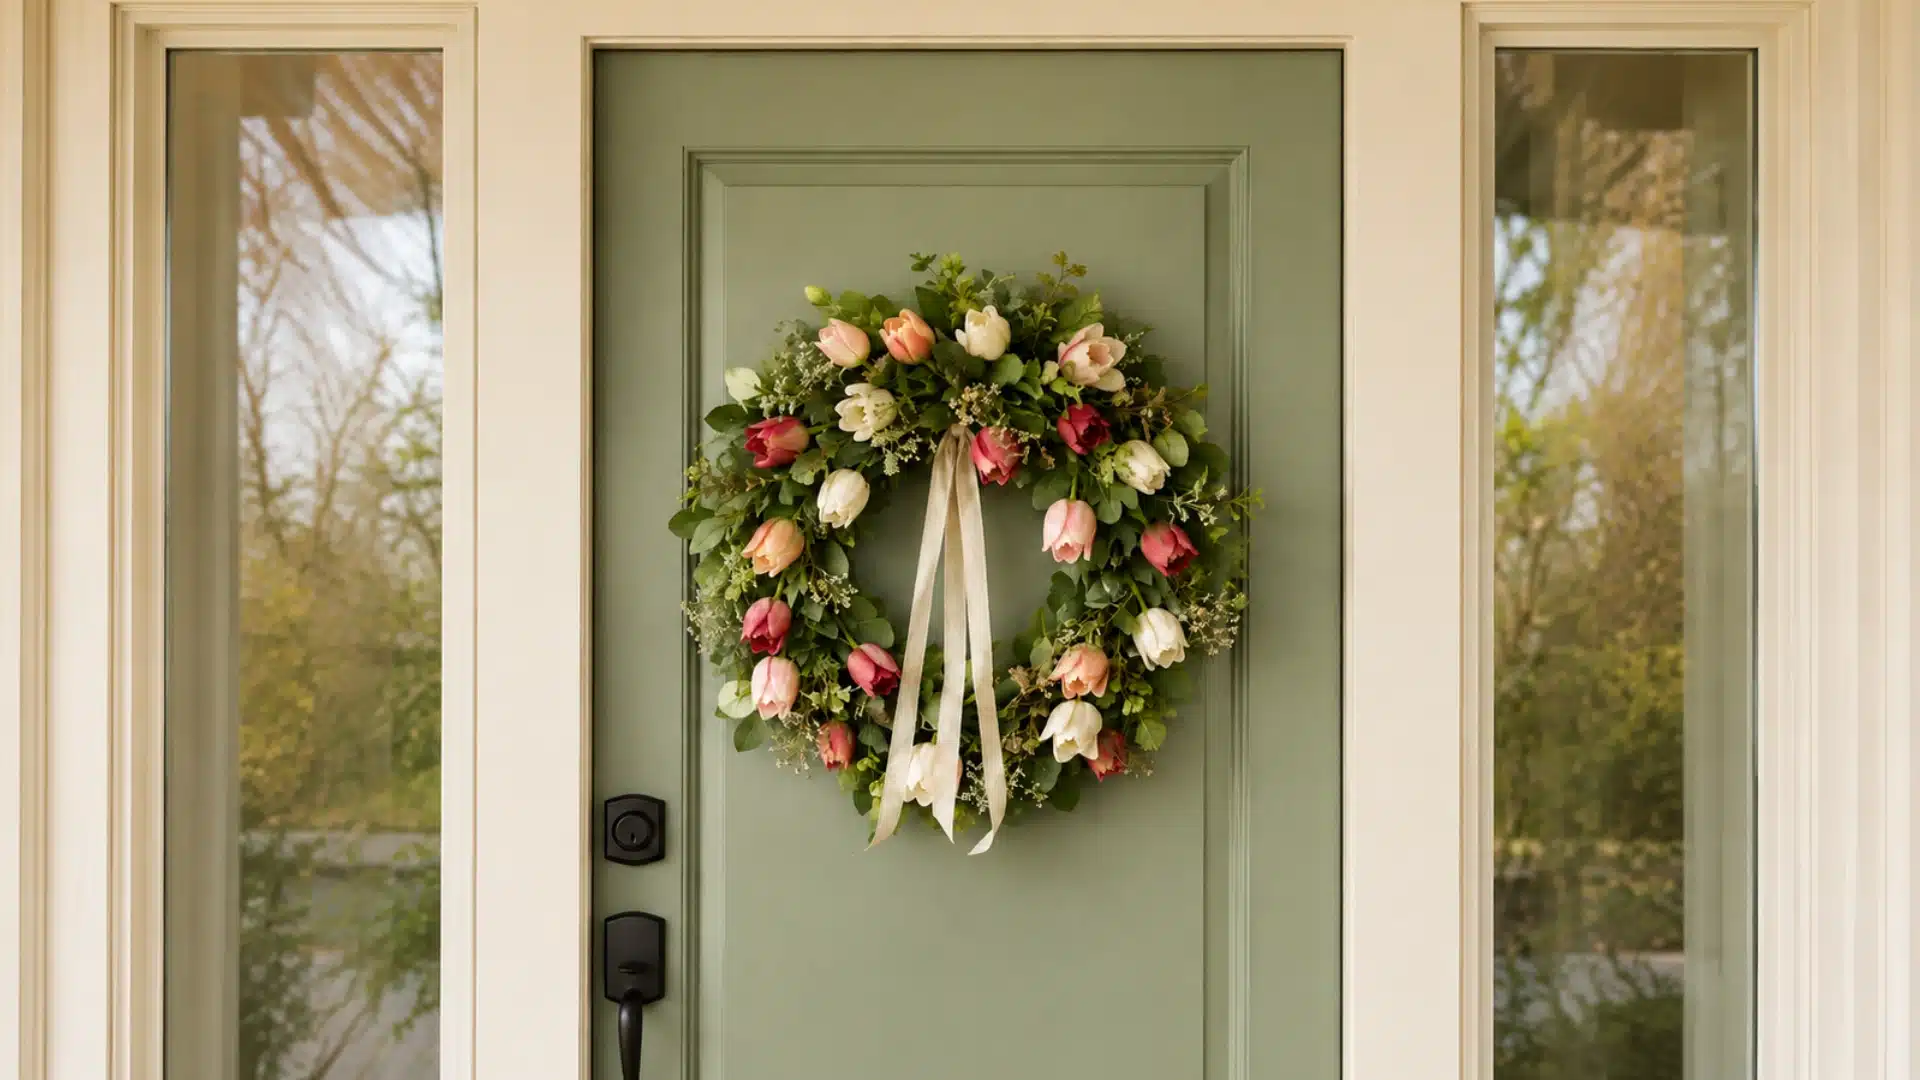
Materials: Grapevine or foam wreath base, faux tulips (2-3 colors), floral wire, wire cutters
Trim tulip stems to a manageable length and group them by color.
Wire each stem to the base one at a time, angling them all in the same direction as you work around the ring.
Overlap the blooms as you go so the base and wire stay hidden, then tuck in a few smaller stems wherever gaps remain.
2. Wildflower Hoop Wreath

Materials: Thin metal hoop, wildflowers, greenery, floral wire
Pick one section of the hoop where you want the arrangement to sit.
Gather the wildflowers and greenery into a small bundle, then wire that bundle securely to just that one section.
Leave the rest of the hoop open, and adjust the stems until the cluster looks balanced from the front.
3. Lavender Wreath

Materials: Grapevine wreath base, dried or faux lavender bundles, floral wire
First, divide the lavender into small, even bundles.
Wire each bundle to the grapevine base one by one, overlapping them slightly so the stems stay hidden.
Continue working around the ring until the base is fully covered, then fluff the bundles gently to add a bit more fullness to the finished wreath.
4. Moss and Nest Wreath
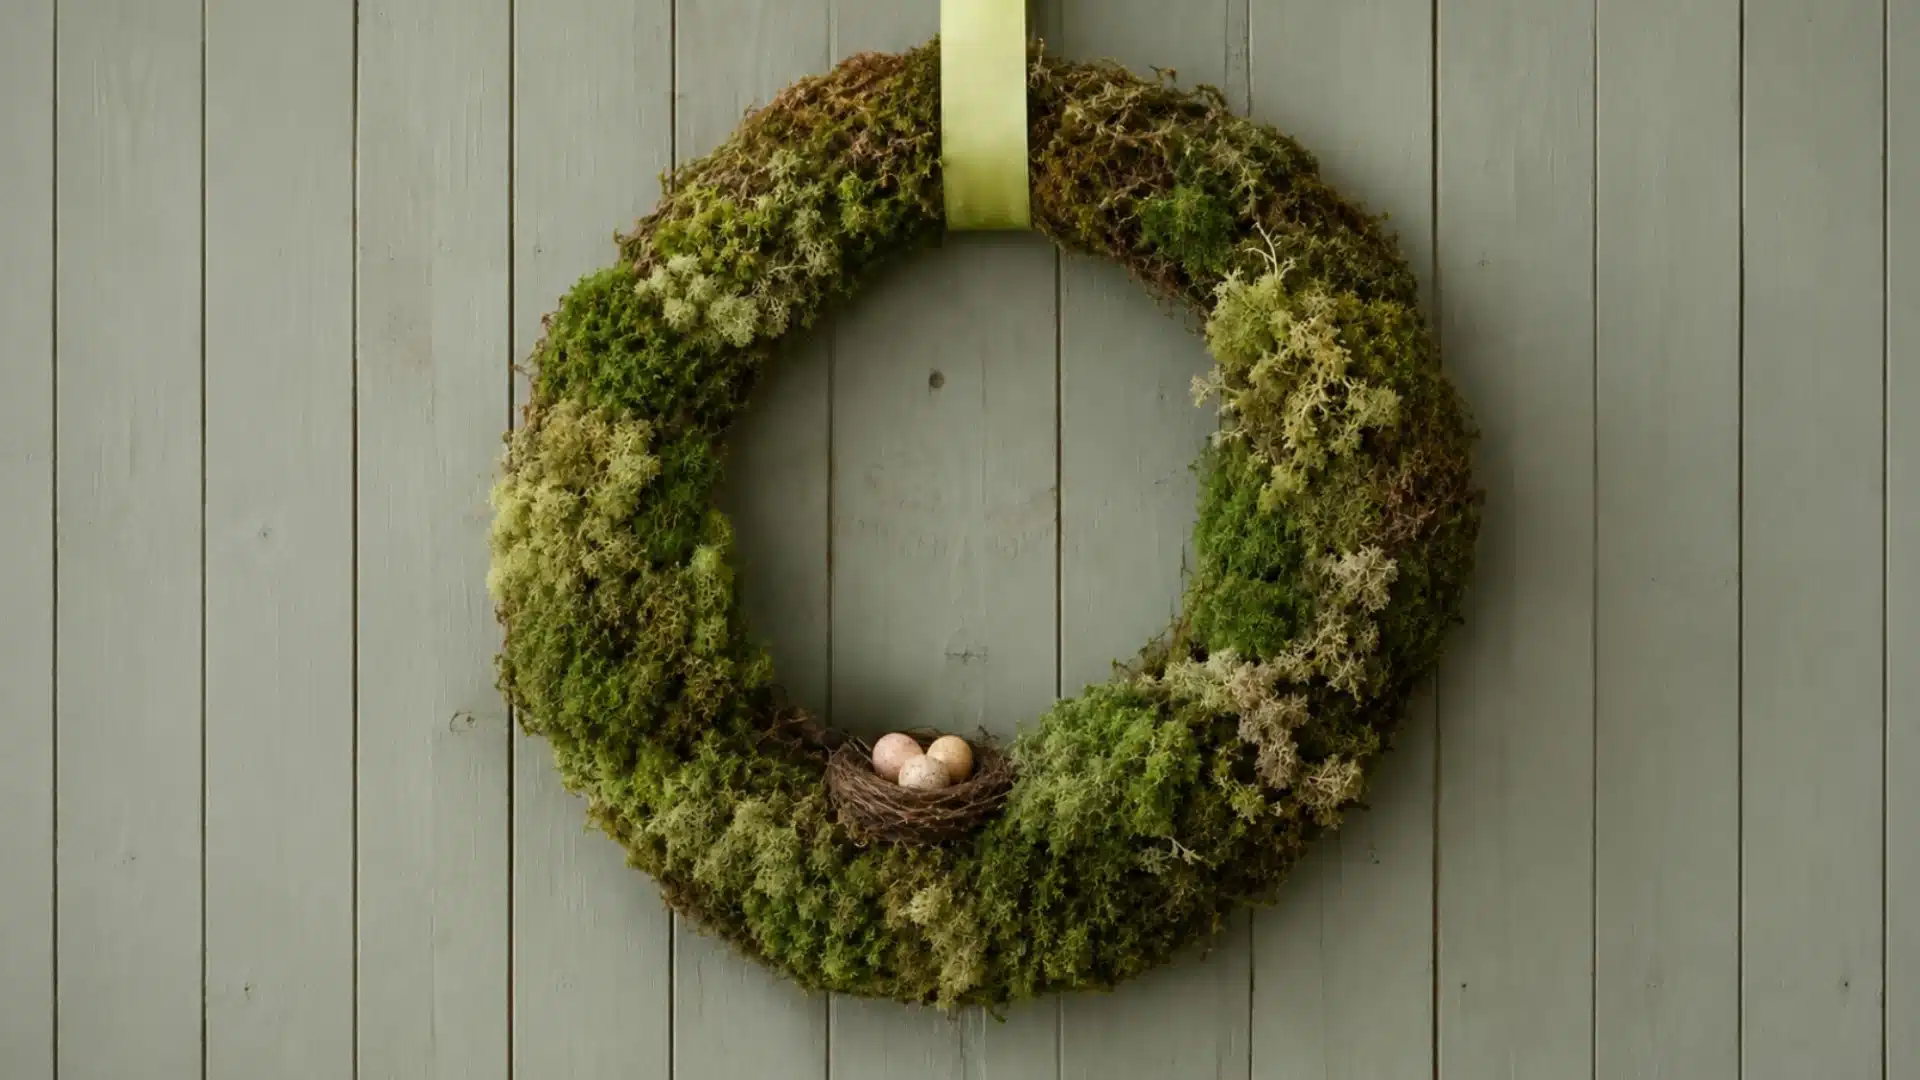
Materials: Grapevine or foam wreath base, preserved moss, small decorative nest, faux speckled eggs, hot glue
Glue the moss onto the base in sections, letting each section dry before moving to the next. Once the moss is set, position the nest wherever you want the focal point to sit.
Nestle the faux eggs inside the nest and secure them with a small dot of glue, so they stay in place.
5. Rain Boot Wreath

Materials: Decorative rain boots or boot-shaped base, spring flowers, floral wire, hot glue
Arrange the flowers inside the boot opening first, trimming the stems so they sit at varied heights.
Glue or wire the stems in place once you’re happy with the arrangement, then fill any remaining gaps with smaller filler flowers. Finish by attaching a hanging loop to the boot.
Summer DIY Wreath Ideas
Welcome warmer days with bright wreaths featuring vivid flowers, lush greenery, and playful seasonal details. These breezy designs add cheerful summer color and texture to any door.
6. Lemon and Greenery Wreath

Materials: Grapevine wreath base, faux lemons, eucalyptus stems, floral wire
Attach eucalyptus stems around the grapevine base first, overlapping them so the greenery forms a full, even layer.
Wire the faux lemons in place next, spacing them unevenly rather than at equal intervals so the design doesn’t look too symmetrical.
Adjust the greenery around each lemon to keep them secured and framed nicely.
7. Sunflower Wreath

Materials: Grapevine or foam wreath base, large sunflowers, smaller yellow blooms, greenery, floral wire
Wire two or three large sunflowers to the base first as the focal points, spacing them so they don’t overlap.
Fill in around them with smaller yellow blooms and greenery, layering as you go to hide the wire and base.
A few large flowers placed well create more impact than covering the whole ring.
8. Coastal Rope Wreath
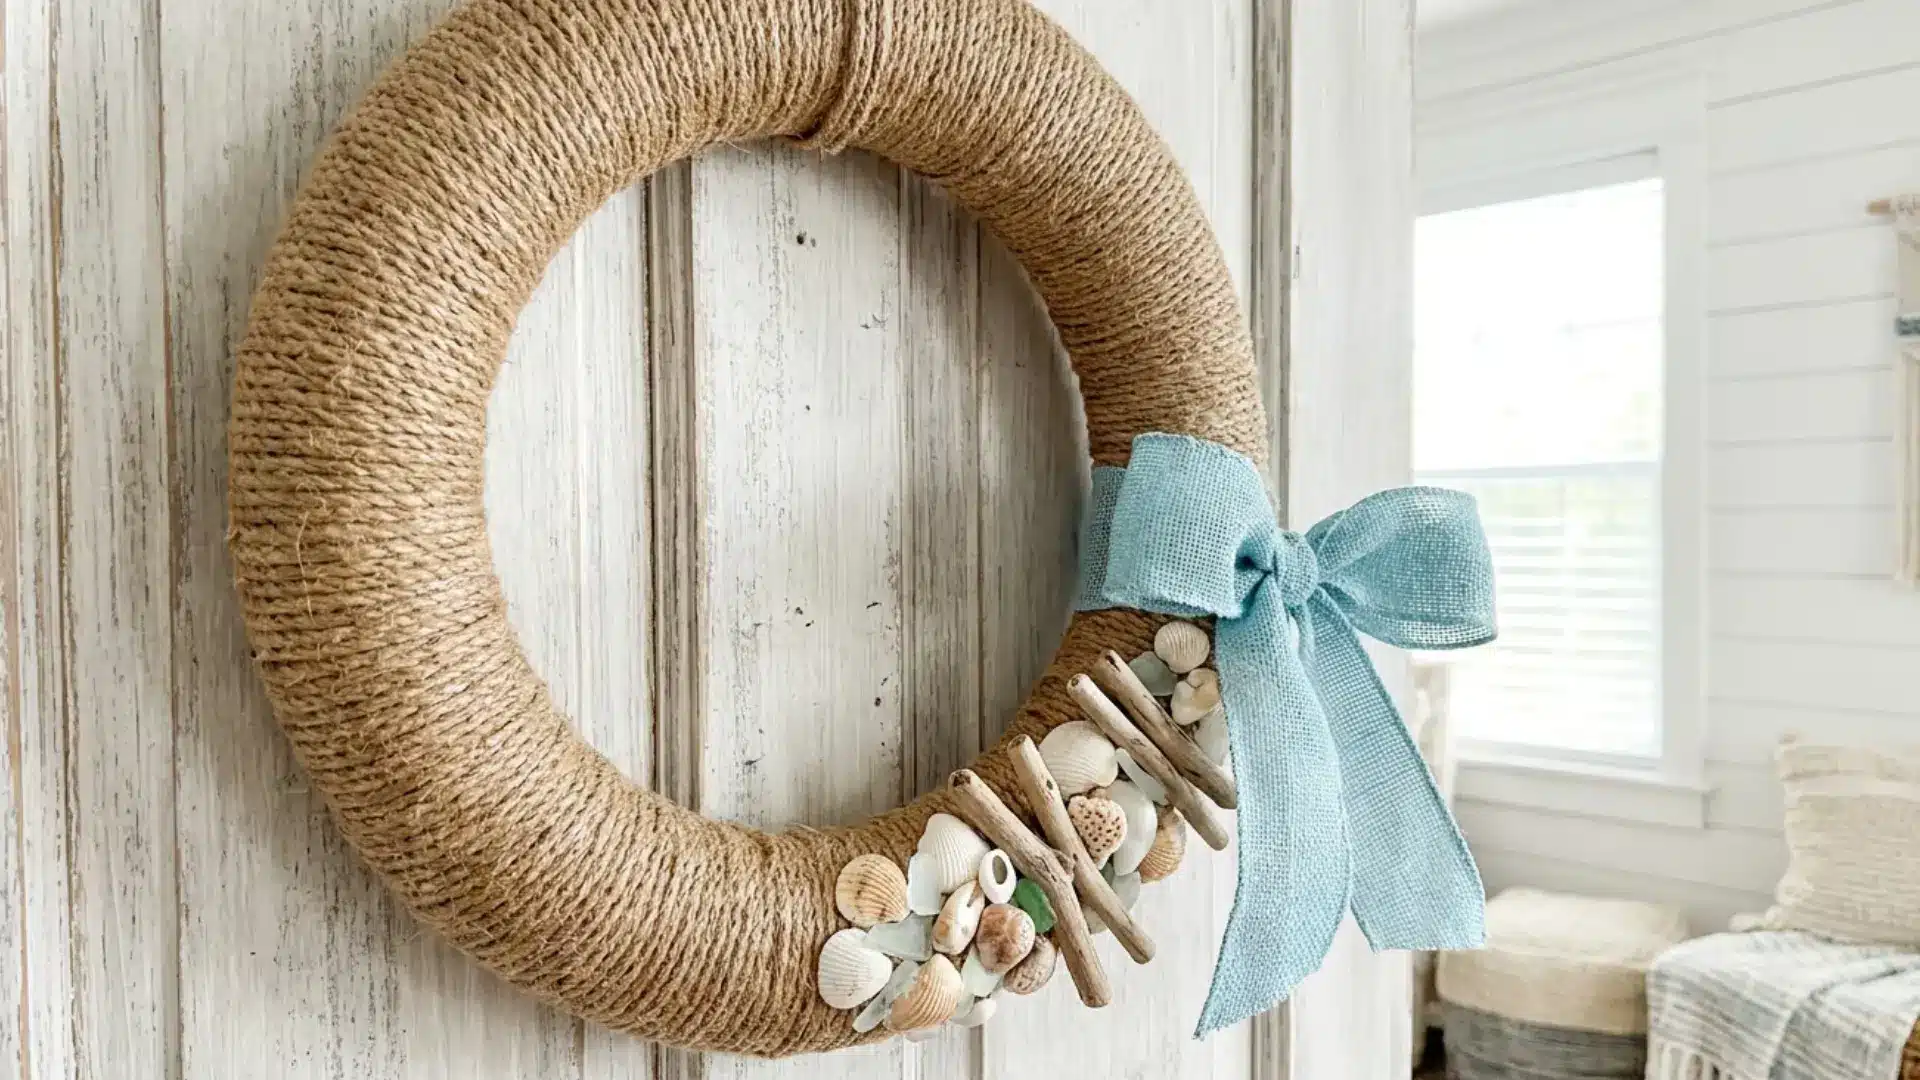
Materials: Foam ring, natural rope, shells, driftwood pieces, blue ribbon, hot glue
Wrap the rope tightly and evenly around the foam ring, securing the ends with hot glue so it doesn’t unravel.
Glue shells and small driftwood pieces onto one section of the wrapped rope as the focal cluster.
Finish by tying a simple blue ribbon bow near the accents, keeping the overall look light and uncluttered.
9. Herb Wreath

Materials: Wire frame, rosemary, thyme, bay leaves, floral wire
Bundle small sprigs of rosemary, thyme, and bay leaves together, then wire each bundle to the wire frame one at a time.
Overlap the bundles as you work around the ring so the stems stay hidden.
The herbs will dry naturally over time, which is part of the wreath’s appeal, especially for kitchen display.
10. Hydrangea Wreath

Materials: Grapevine or foam wreath base, dried or artificial hydrangea blooms, floral wire
Wire the hydrangea blooms closely together around the base, working section by section to keep the coverage even.
Because the blooms are large, place them so they balance each other around the ring rather than clustering too many in one spot.
Overlap the petals slightly to hide the base and create a full, soft finish.
Fall DIY Wreath Ideas
Embrace the season with cozy wreaths featuring richly colored leaves, berries, pumpkins, and natural textures. These harvest-inspired designs bring welcoming autumn warmth to any door.
11. Autumn Leaf Wreath

Materials: Grapevine or foam wreath base, faux or preserved leaves (rust, ochre, burgundy, green), floral wire
Sort the leaves by size and color before starting. Wire the larger leaves to the base first, working around the ring to establish an even layer.
Layer smaller leaves on top, overlapping different sizes and colors as you go, since this overlapping is what gives the finished wreath its sense of depth.
12. Mini Pumpkin Wreath

Materials: Grapevine or wire wreath base, lightweight foam pumpkins, berries, fall foliage, floral wire, hot glue
Attach the fall foliage around the base first as the backdrop layer. Glue or wire the lightweight foam pumpkins on next, spacing them evenly around the ring.
Fill in the remaining gaps with berry stems to soften the transitions.
Only use lightweight foam pumpkins here, since heavier real pumpkins aren’t suited to a hanging wreath.
13. Wheat and Grass Wreath
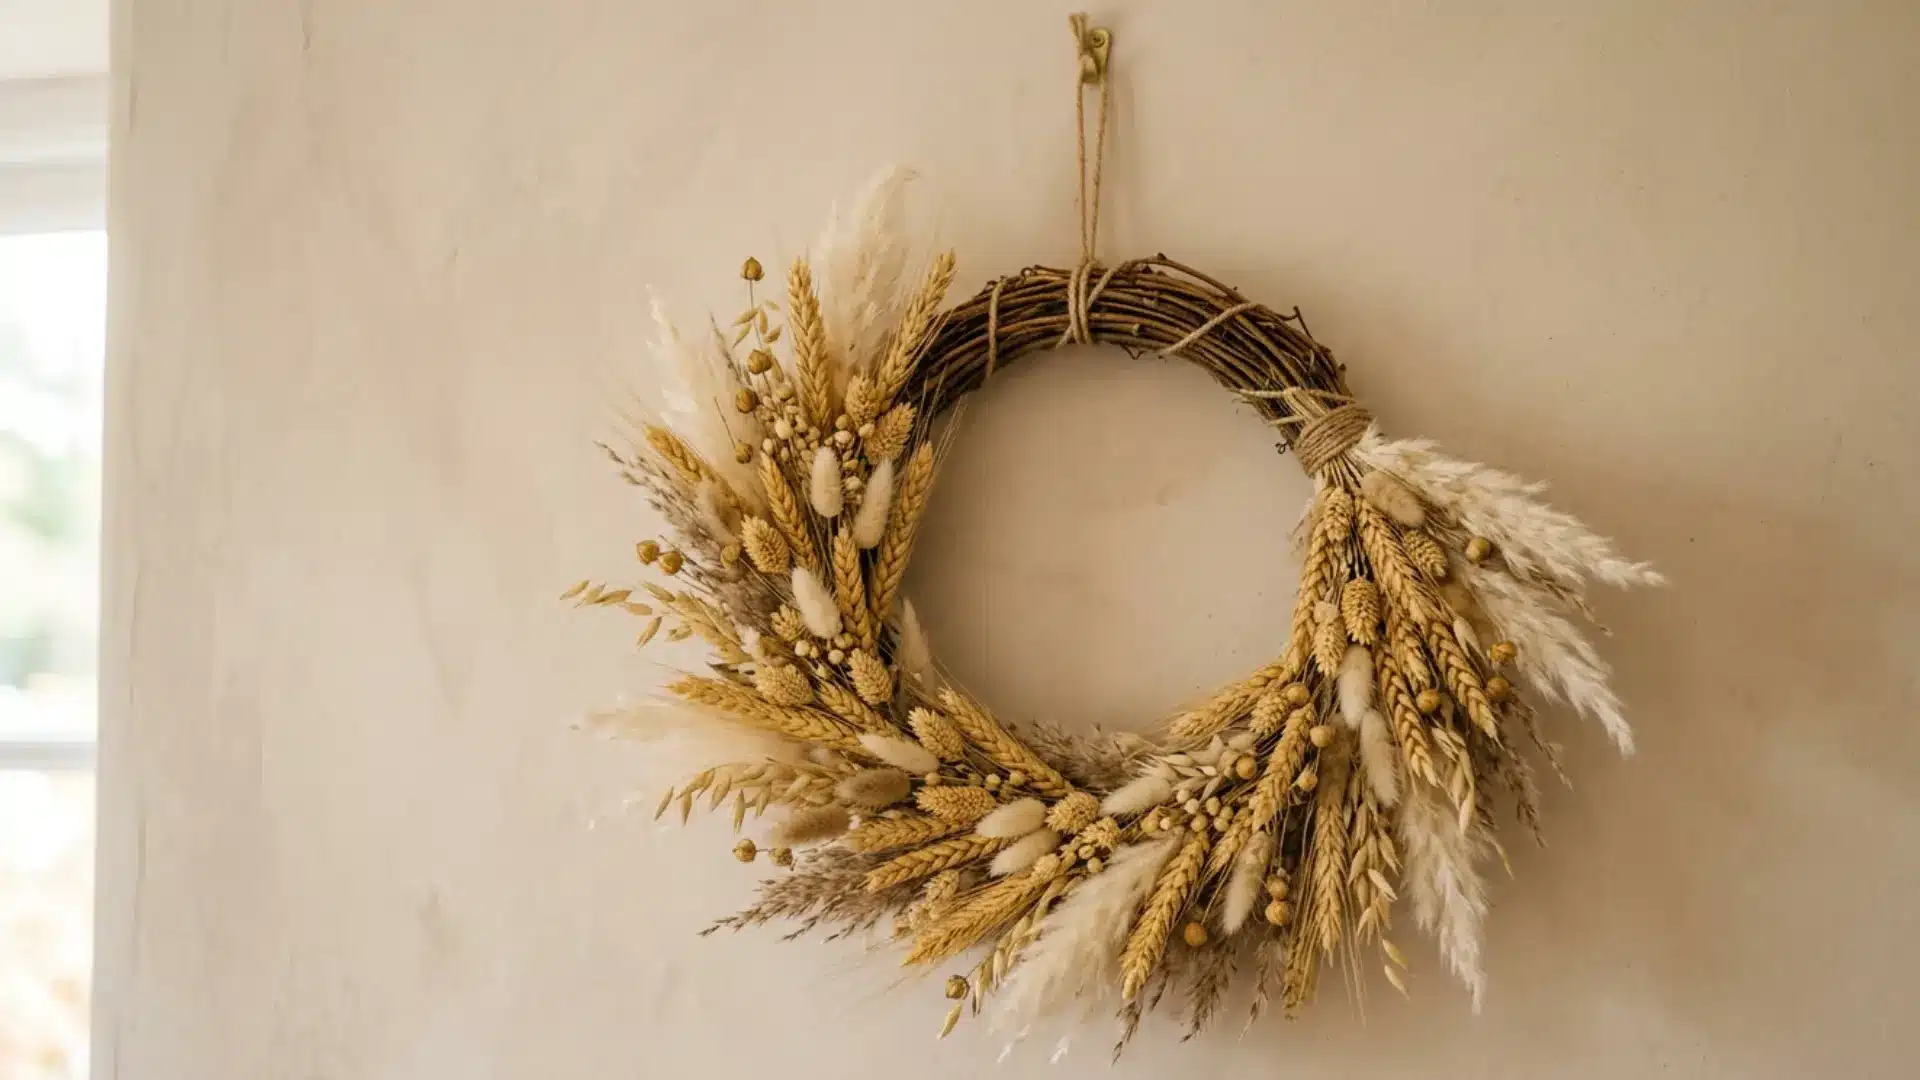
Materials: Grapevine or metal hoop base, dried wheat, pampas grass, floral wire
Bundle small groups of dried wheat and pampas grass together before attaching them.
Wire each bundle to the base, overlapping them as you move around the ring to hide the stems.
If the dried materials start shedding, a light coat of sealant can help hold everything in place without affecting the natural texture.
14. Pinecone Wreath

Materials: Wire or foam wreath base, pinecones (mixed sizes), floral wire or hot glue
Clean and fully dry any collected pinecones before bringing them indoors to work with.
Attach the larger pinecones to the base first, spacing them evenly around the ring.
Fill the gaps between them with smaller pinecones, tucking each one in snugly so the base stays fully covered and no gaps remain visible.
15. Dried Orange Wreath

Materials: Grapevine wreath base, dried orange slices, cinnamon sticks, greenery, floral wire
Wire the dried orange slices to the base individually rather than relying on glue, since wire holds them more securely over time.
Tuck cinnamon sticks and greenery in between the orange slices as you work around the ring.
Space the slices evenly so the pattern reads clearly once the wreath is finished.
Winter and Christmas DIY Wreath Ideas
Celebrate the season with cozy wreaths featuring fragrant evergreens, pinecones, ornaments, and festive ribbons. These cheerful designs bring warmth and holiday spirit to any door.
16. Fresh Evergreen Wreath
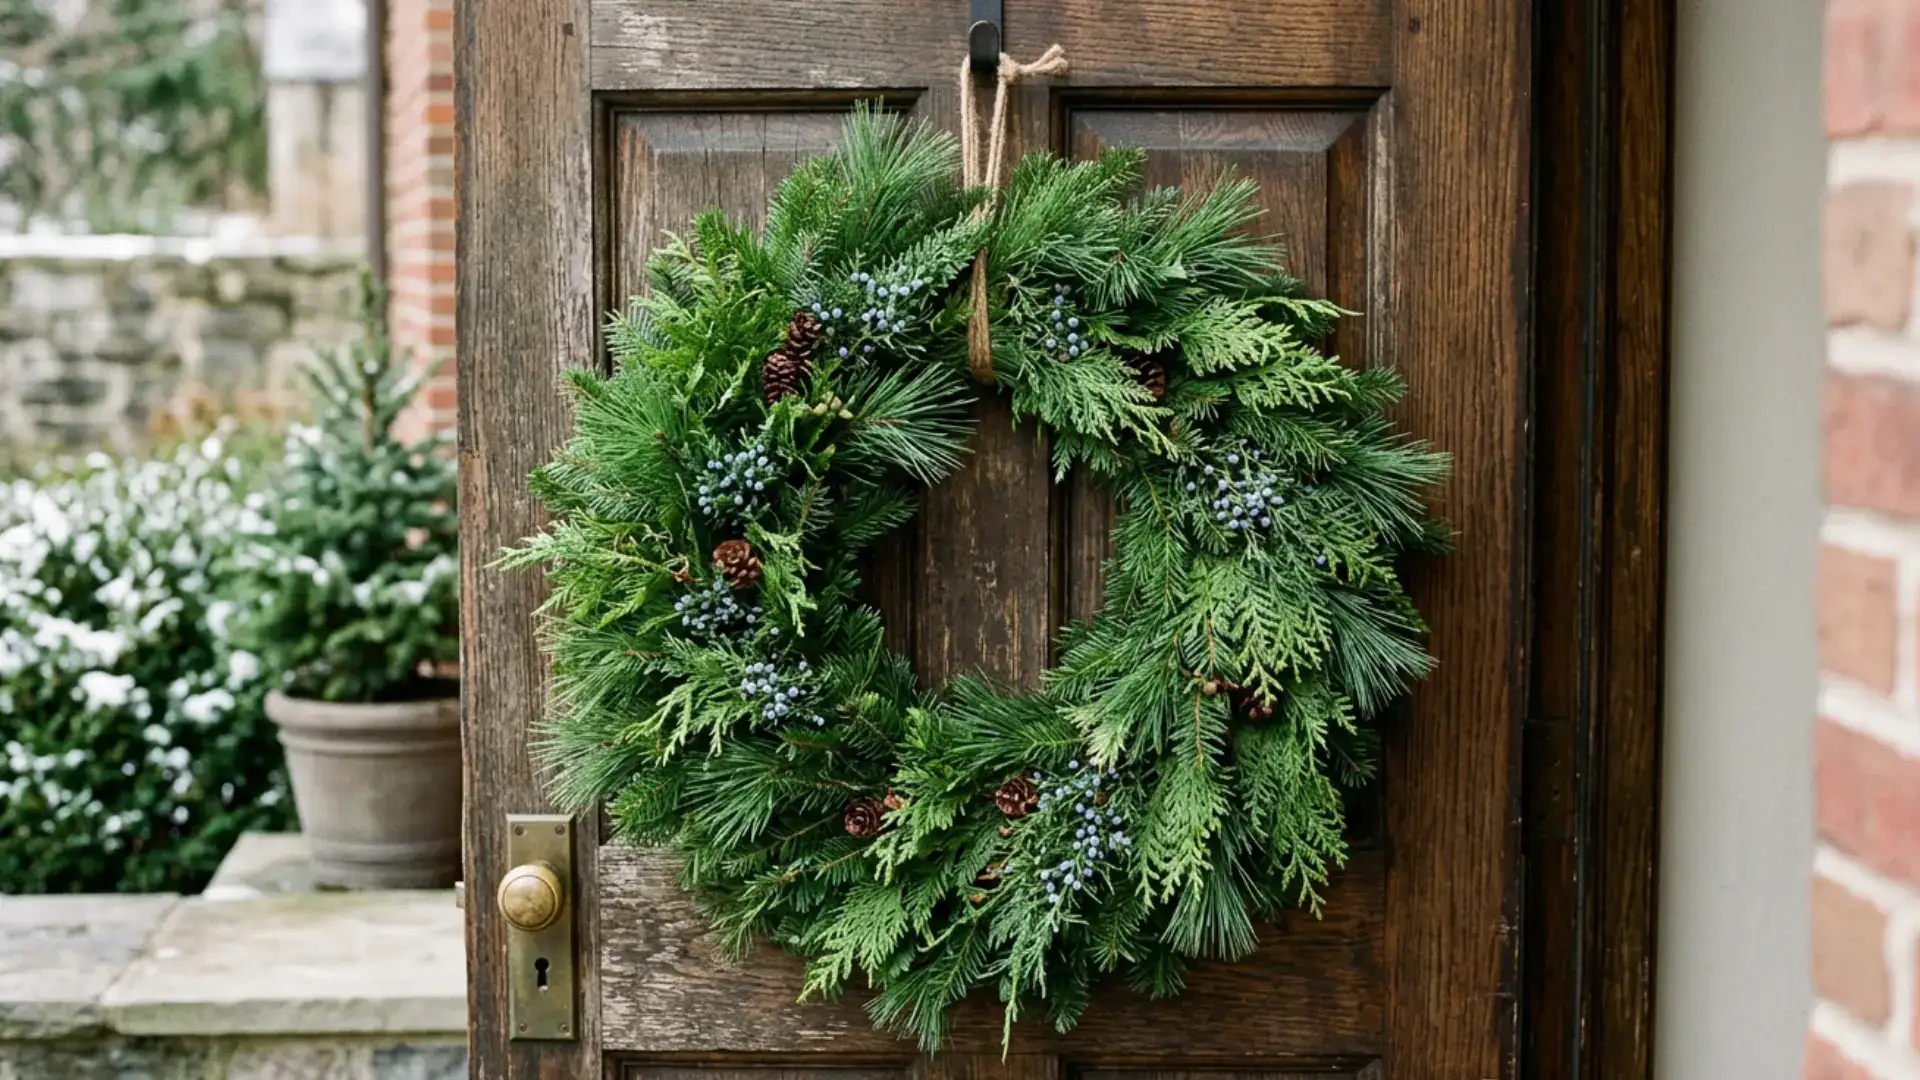
Materials: Wire frame, pine, cedar, fir or juniper bundles, floral wire
Bundle small sections of pine, cedar, fir, or juniper together, then wire each bundle to the wire frame.
Overlap each new bundle over the stems of the last one as you work around the ring, since this is what conceals the attachment points and creates full coverage.
Fresh greenery like this is also one of the easier design touches to bring into a room without redoing the whole space.
17. Ornament Wreath

Materials: Wire, foam, or pool-noodle wreath base, shatter-resistant ornaments (mixed sizes), floral wire or hot glue
Sort the ornaments by size before starting. Attach the largest ornaments to the base first, spacing them evenly around the ring.
Fill in the gaps with medium and smaller ornaments, layering different sizes together as you go,
Mixing many sizes is what gives the finished wreath depth instead of a flat, uniform look.
18. Snowy Pinecone Wreath
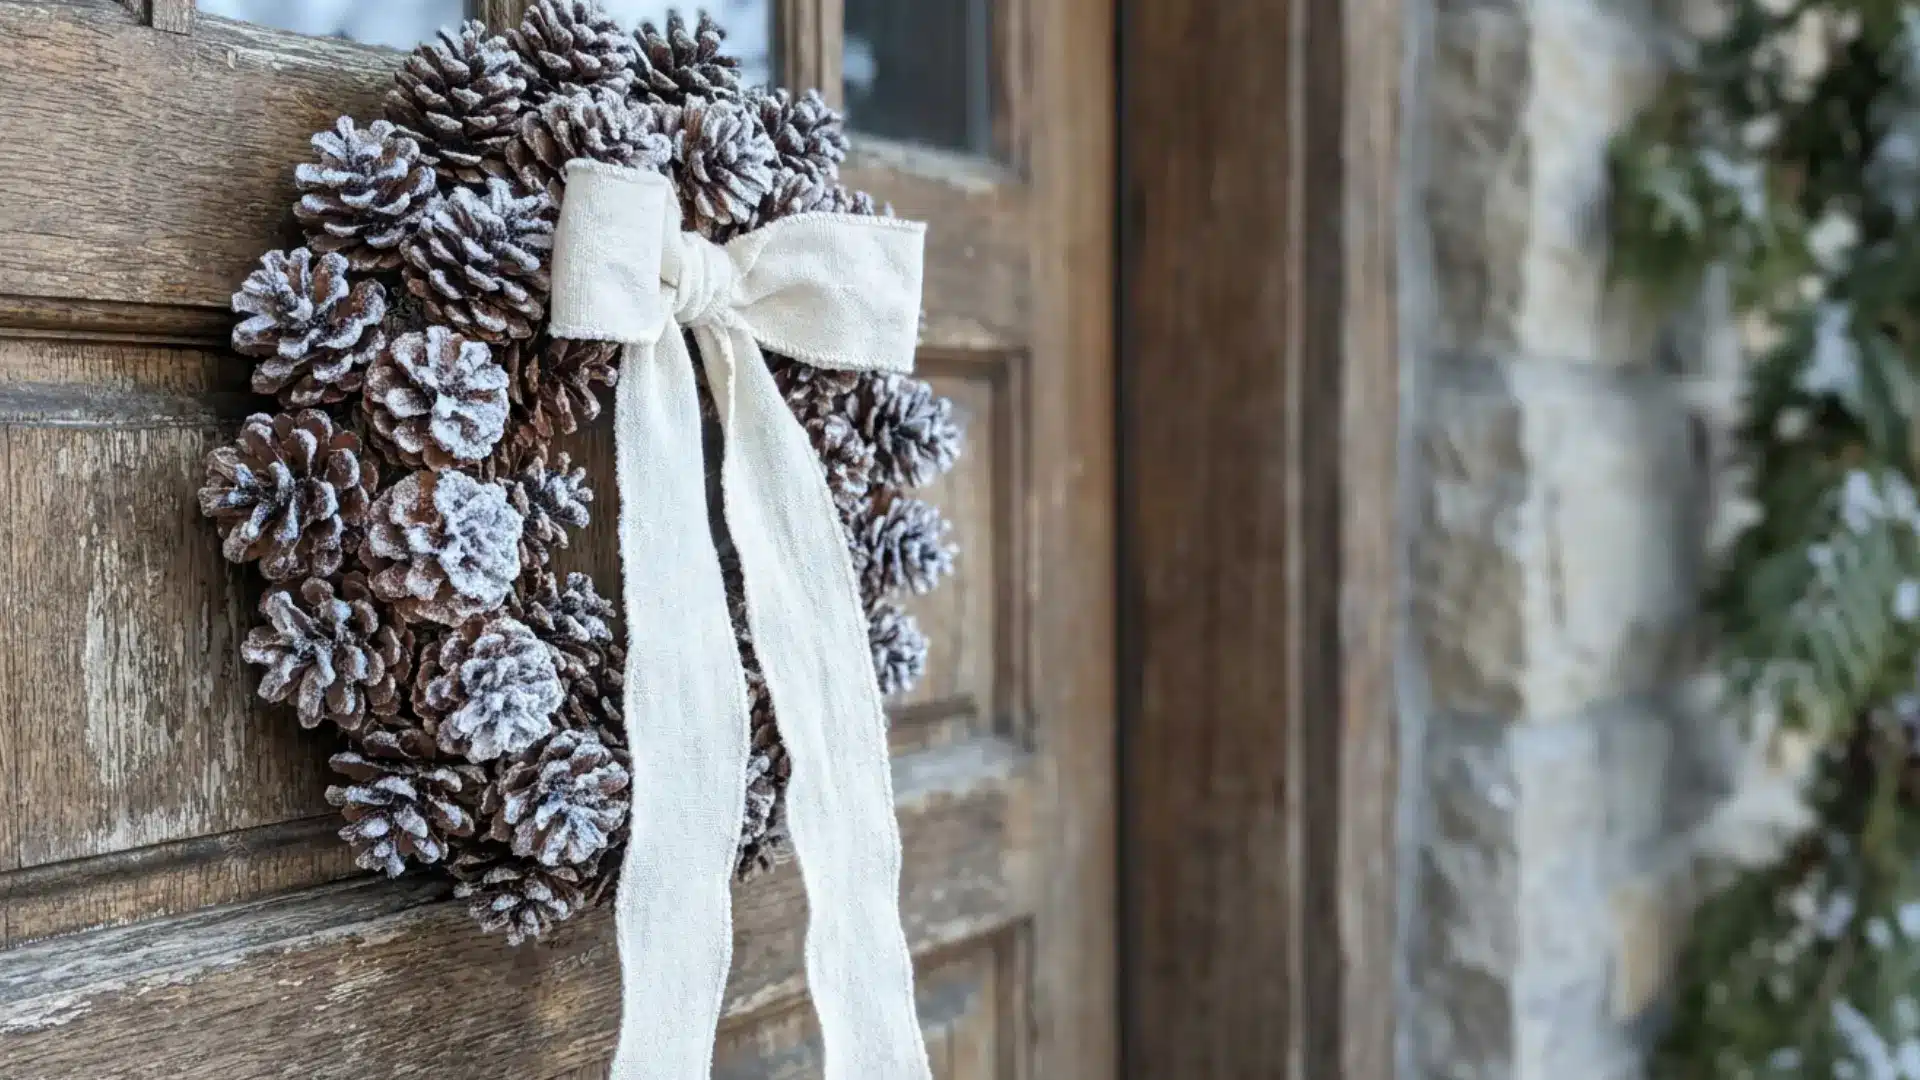
Materials: Wire or foam wreath base, pinecones, cotton ribbon, light frosted spray finish
Arrange the pinecones on the base first without gluing them, adjusting their direction and spacing until the layout looks balanced.
Once you’re happy with the arrangement, glue each pinecone in place.
Add a light frosted finish for a snowy look, then finish with a cotton ribbon bow or trailing ribbon ends.
19. Berry and Eucalyptus Wreath

Materials: Grapevine or wire wreath base, faux or dried eucalyptus, red, white, or burgundy berry stems, floral wire
Wire the eucalyptus stems to the base first, overlapping them to create a soft, full backdrop layer around the ring.
Add the berry stems next, spacing them evenly so they stand out against the eucalyptus rather than blending in.
The contrast between the muted greenery and the bright berries is what gives this wreath its finished look.
20. Minimal Bell Wreath
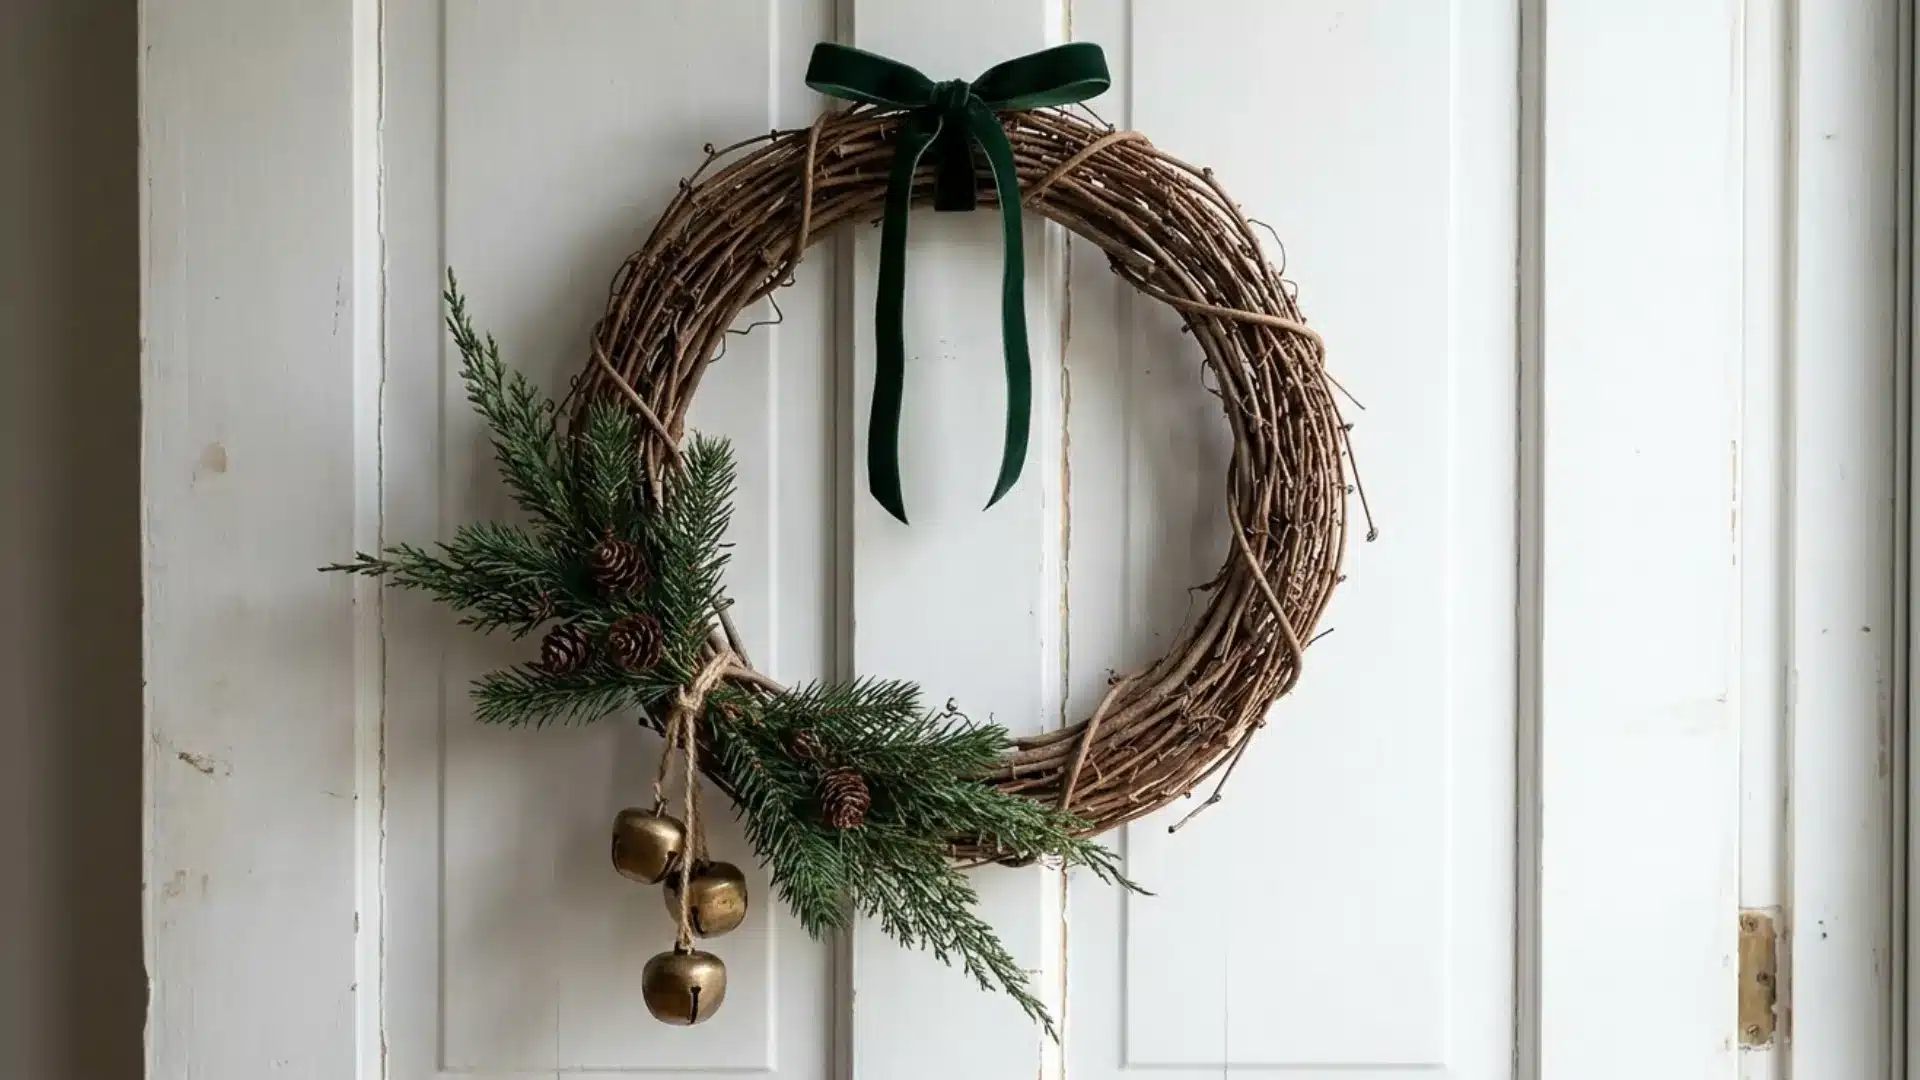
Materials: Evergreen or grapevine wreath base, brass bells, velvet ribbon, floral wire
Attach a light layer of evergreen or leave the grapevine base mostly bare, depending on how minimal you want the design.
Wire a few brass bells to one section of the wreath rather than spacing them evenly throughout.
Finish with a velvet ribbon bow, keeping the overall look restrained for a modern or Scandinavian-style finish.
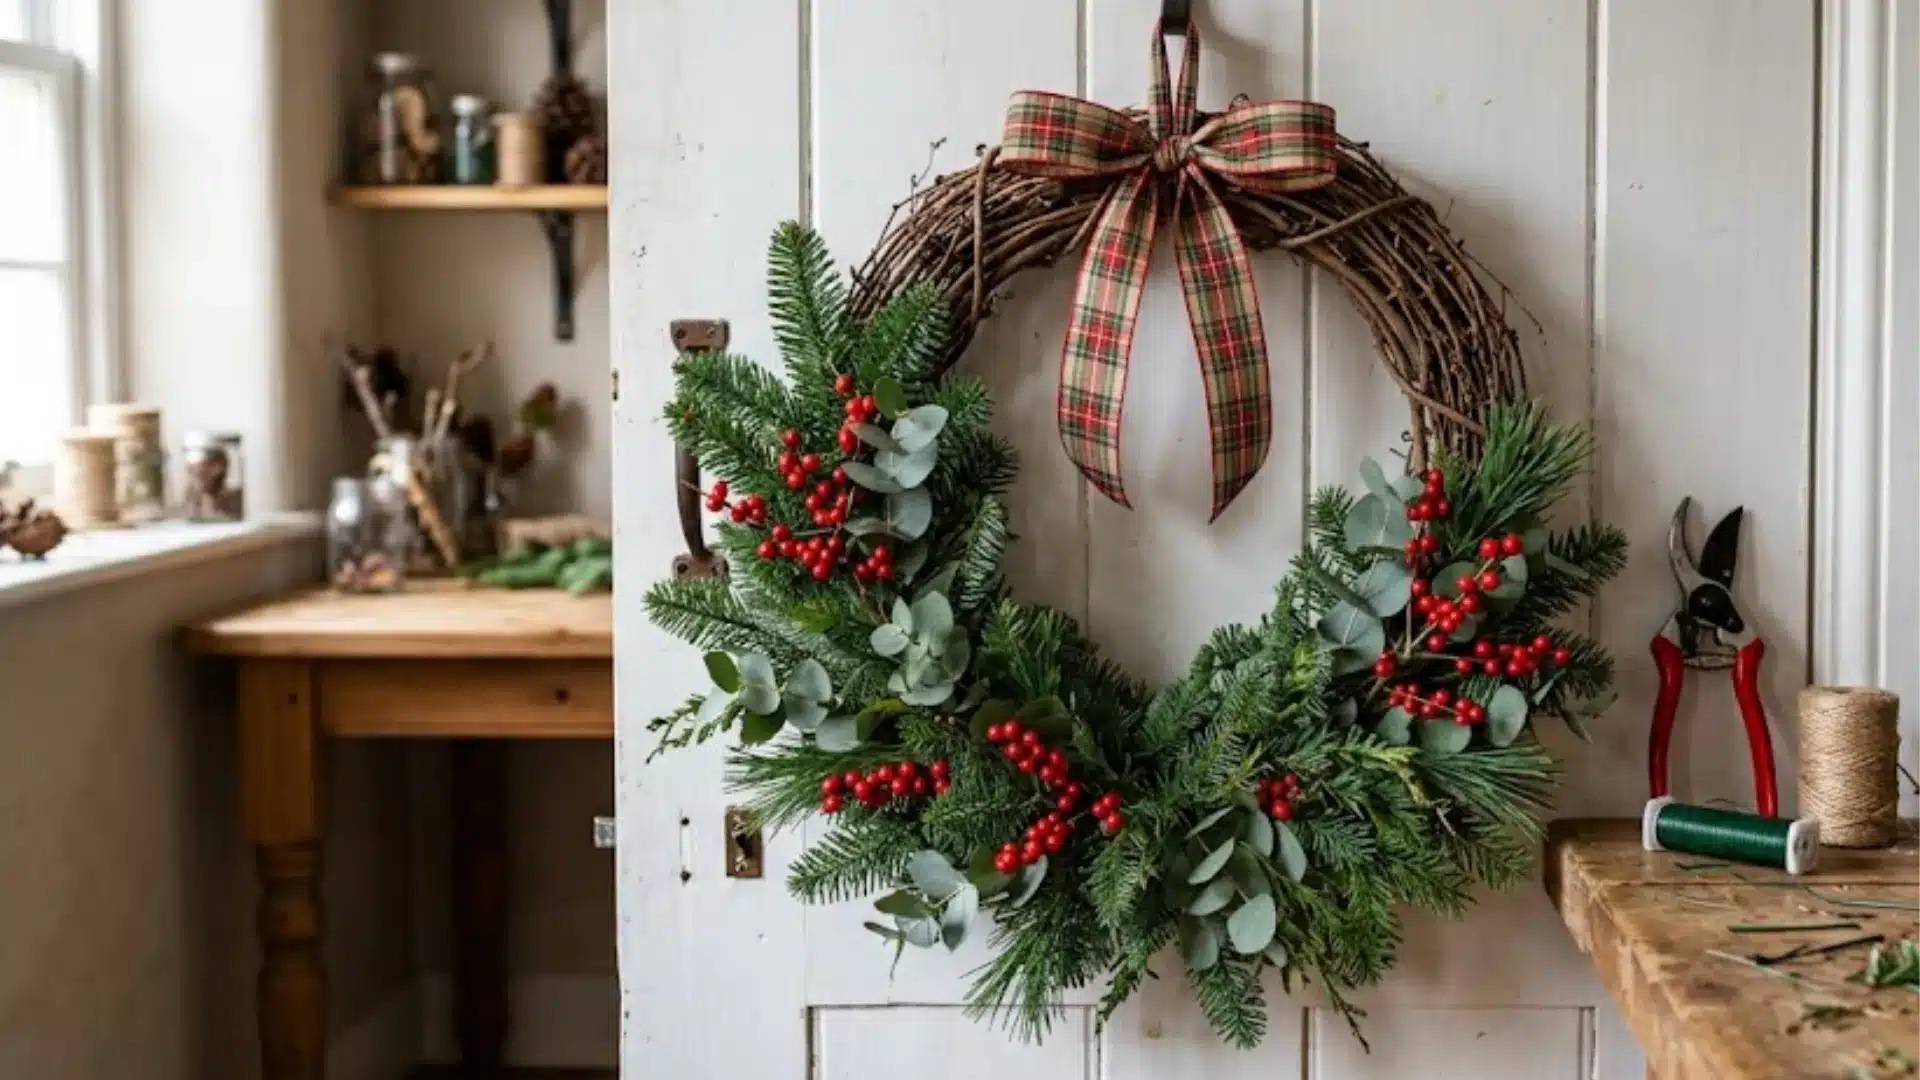
21. Plaid Bow and Greenery Wreath

Materials: Grapevine or wire wreath base, faux greenery, plaid ribbon, floral wire
Attach faux greenery around the base first, overlapping the stems as you work around the ring to build a full backdrop layer.
Wire a large plaid ribbon bow to one section of the wreath as the focal point, leaving the tails trailing down.
Tuck a few smaller greenery sprigs near the bow to help blend it into the rest of the design.
How Much Does a DIY Wreath Cost?
Costs vary depending on size, material quality, and whether you’re starting from scratch or reusing supplies you already have. Here’s a general breakdown for the US market:
| Wreath type | Estimated cost |
|---|---|
| Cardboard or wire-hanger wreath | $5 to $15 |
| Basic grapevine wreath | $15 to $30 |
| Faux flower wreath | $20 to $50 |
| Fresh greenery wreath | $20 to $45 |
| Large ornament wreath | $35 to $75 |
| Premium dried-flower wreath | $40 to $100 or more |
I’m not fully certain these ranges hold in every region; prices shift with craft store sales and local supply costs, so treat them as a starting point rather than a fixed quote.
A Few Ways to Keep Wreath-Making Costs Down
Simple swaps and smart habits can stretch your wreath-making budget further without compromising the finished look.
- Reuse the base: Refresh an existing wreath frame instead of purchasing a new one.
- Shop seasonal clearance: Buy discounted ribbon, artificial florals, and ornaments after major holidays.
- Gather natural materials: Use garden trimmings, pinecones, branches, leaves, or greenery when suitable.
- Choose one focal piece: Use one eye-catching decoration instead of buying several smaller accents.
- Purchase stems in bundles: Multipacks are often more affordable than individually priced floral stems.
- Make decorations removable: Attach embellishments with wire or clips so you can reuse them later.
- Try an alternative base: Turn cardboard, a wire hanger, or a pool noodle into an inexpensive wreath form.
Hanging and Storing Your Wreath
A few simple choices keep your wreath damage-free on display and in good shape between seasons.
To hang it without marking your door:
- Use an over-the-door hook, a magnetic hook for metal doors, or an adhesive hook rated for your surface.
- Try ribbon looped over the top of the door, or fishing line for a nearly invisible look.
- Use an existing door knocker or handle as a hanging point, and check the wreath’s weight against the hanger’s rated capacity. Add felt pads to the back to prevent scratches.
To store it well between seasons:
- Remove any loose, edible, or perishable materials, and repair any loose decorations.
- Cover it with a wreath bag or plastic covering, then store it flat or securely suspended, not compressed under other items.
- Keep it in a cool, dry area away from humidity. An interchangeable wreath with removable accents takes up far less storage space than keeping a separate one for every holiday.
Conclusion
A DIY wreath can be built with almost any base, style, or budget, whether that’s a full grapevine design covered in flowers or a simple wire hanger wrapped in ribbon.
Start with a basic grapevine or wire form, then personalize it with materials suited to the season or occasion.
With the steps and ideas covered in this guide, you have everything needed to put together a wreath that fits your space.
Pick an idea from this list, gather your supplies, and start making your own DIY wreath today.
Share a photo of your finished wreath in the comments; we’d love to see what you create.
Frequently Asked Questions
Is Floral Wire Better than Hot Glue?
Floral wire holds up better for outdoor, fresh, or reusable wreaths. Hot glue works well for lightweight indoor decorations.
What Size Wreath Works Best on a Front Door?
Measure your door first and leave some visible space around the wreath. There’s no universal size; it depends on the door and your style.
How Can I Make a Homemade Wreath Look Fuller?
Check it upright under natural light, spot the thin patches, and tuck in filler stems or ribbon loops to fill them in.