A chicken coop needs to do more than give your flock a place to sleep.
It must keep chickens dry, protected from predators, well-ventilated, and comfortable through changing weather.
Building a DIY chicken coop lets you control these details instead of settling for a ready-made structure that may not fit your space or flock.
With the right plan, a homemade chicken coop can be built around the number of chickens you have, the space available in your yard, and the materials you can source.
In this blog, you will find steps for building a DIY chicken coop and design ideas for creating one at home.
How to Plan Your Homemade Chicken Coop?
Before building your homemade chicken coop, take some time to plan the design and layout.
Start by deciding how many chickens you plan to keep, as this will help you determine the right coop size.
Choose a dry, well-drained location that gets some sunlight and shade throughout the day. Make sure the area is easy to access for feeding, cleaning, and collecting eggs.
A sloped or uneven yard needs some grading before the coop goes in, since standing water under the floor invites rot and pests.
Next, decide on the type of coop you want, such as a raised, walk-in, portable, or small backyard design. Plan space for nesting boxes, perches, feeders, and waterers.
You should also include a secure chicken run where your birds can move around safely.
Materials and Tools Checklist
Before you start building, gather the right materials and tools to make your DIY chicken coop sturdy, safe, and easier to assemble.
| Tool | Material |
|---|---|
| Circular saw | Pressure-treated lumber |
| Reciprocating saw (Sawzall) | 4×4 posts |
| Drill or impact driver | 2x4s |
| Tape measure | Plywood |
| Clamps | Tin roofing |
| Hammer | Hardware cloth |
| Level | Chicken wire |
Step-by-Step DIY Chicken Coop Build
Building a DIY chicken coop becomes much easier when the work is divided into clear stages.
The following steps cover site preparation, framing, roofing, ventilation, nesting boxes, and predator protection, helping create a safe and comfortable home for the flock.
Step 1: Frame the Walls and Cut Notches

Start by building the exterior walls plus one interior wall for the nesting box.
Clamp several boards together before cutting notches so every notch lands at the same height, keeping pieces lined up later rather than sitting crooked.
A circular saw handles the bulk of each cut, while a reciprocating saw finishes off tight corners the circular saw cannot reach cleanly on its own.
Step 2. Build the Base, Then Raise the Walls
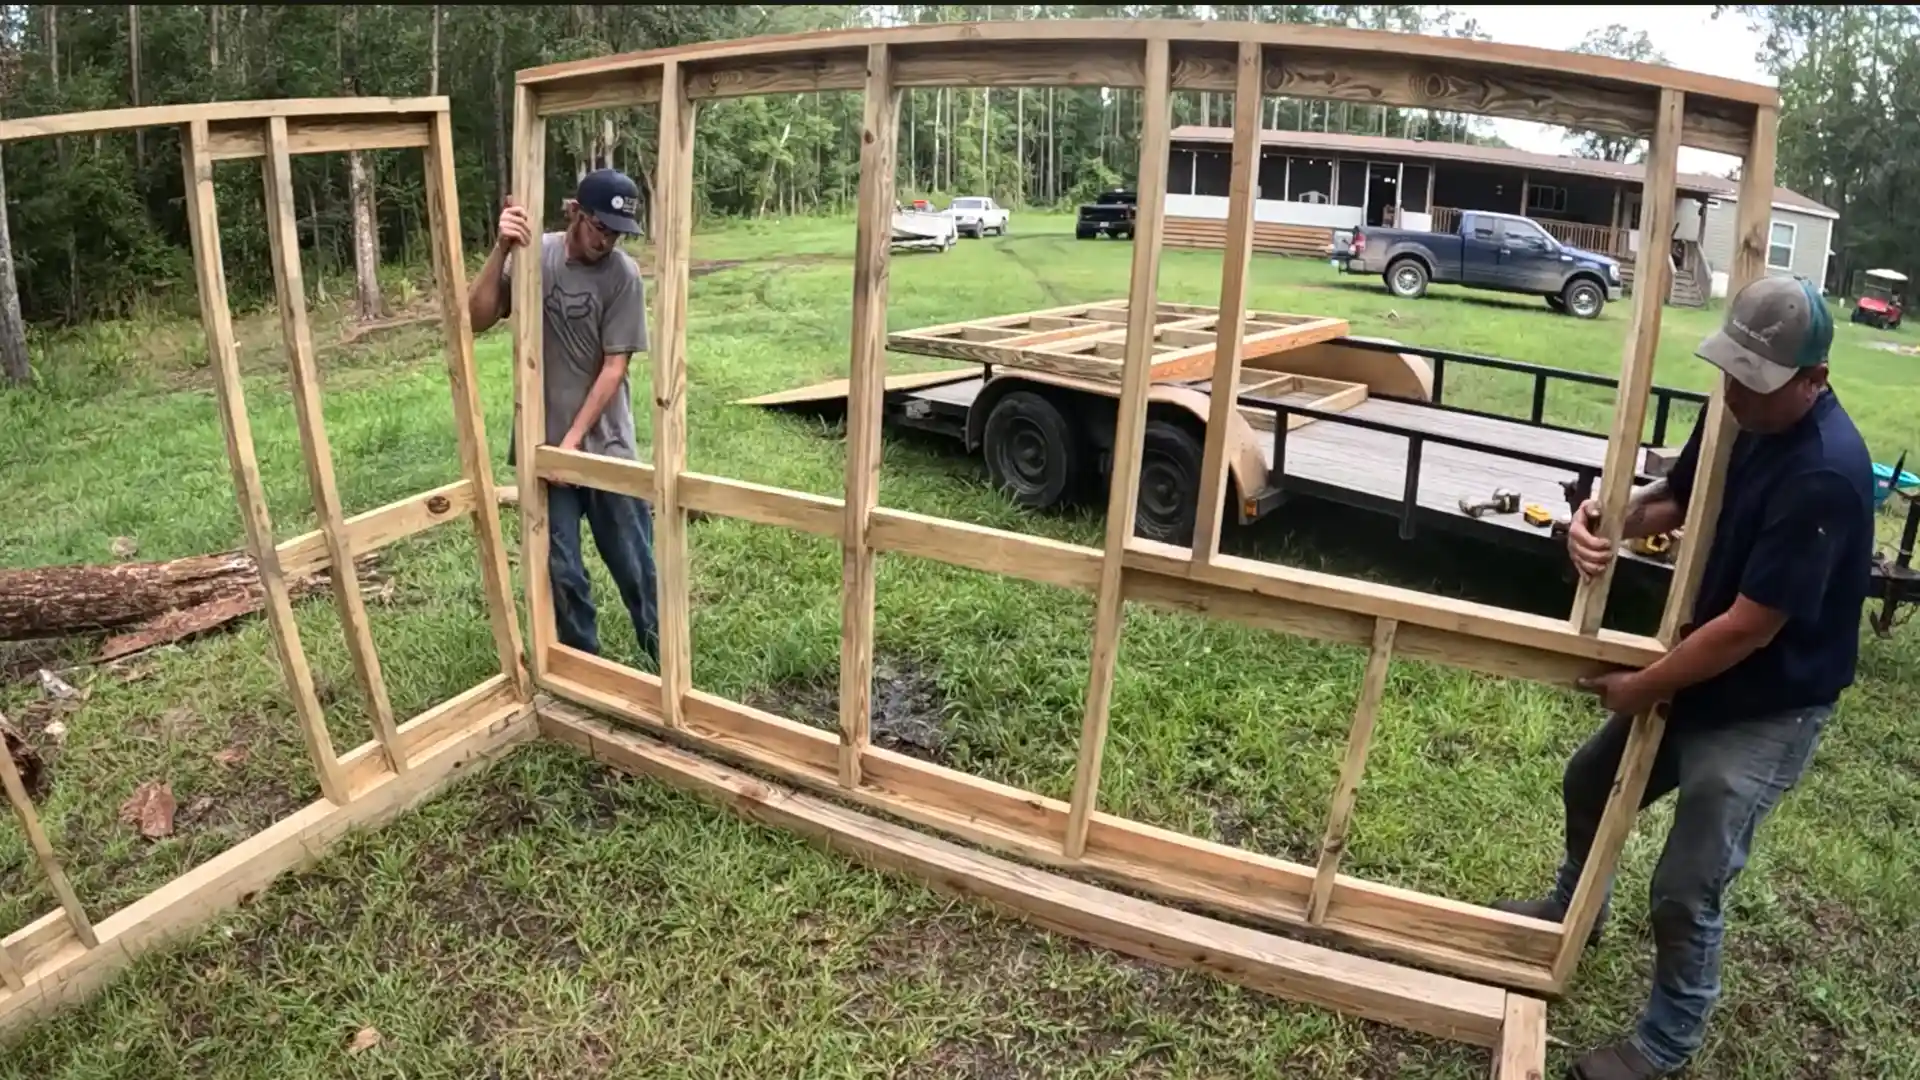
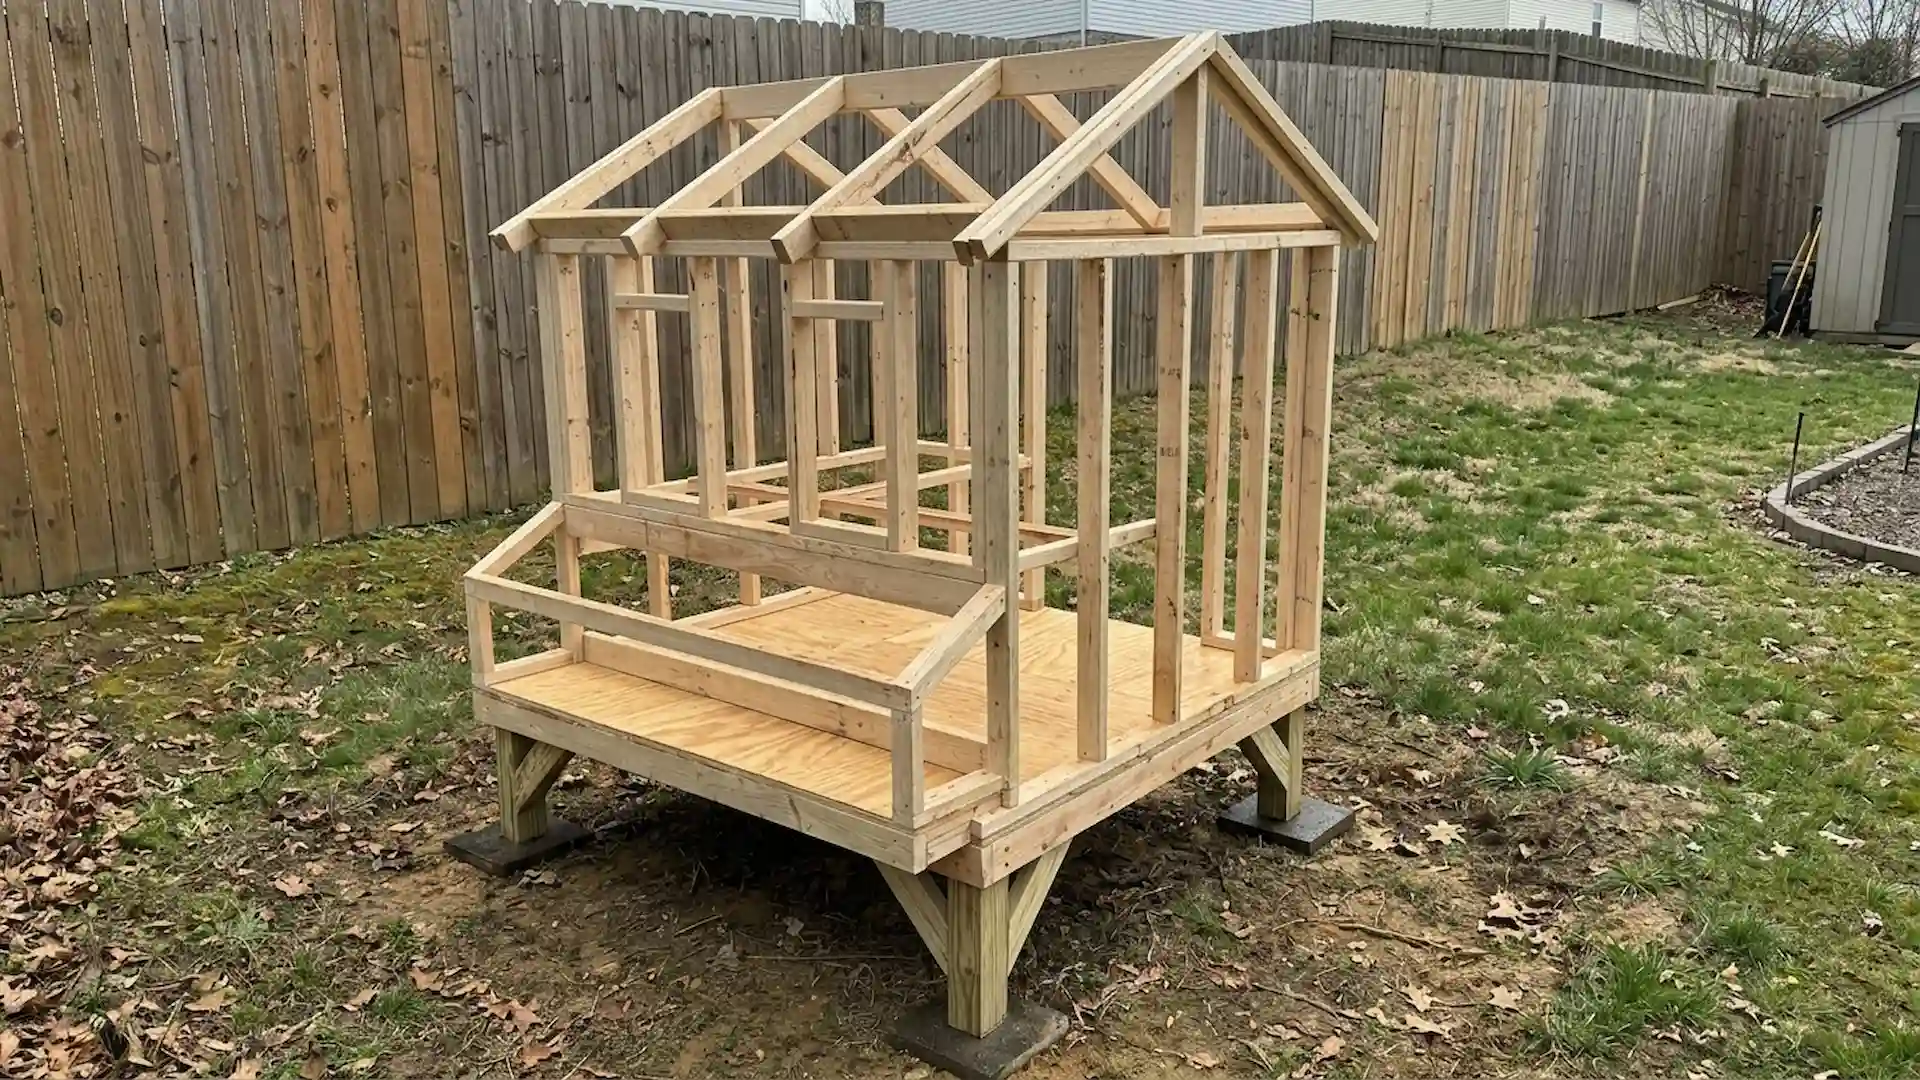
Lay two 8-foot and two 10-foot 4x4s down, notch the corners, interlock them, and secure each corner with screws.
Square the base carefully before tightening everything, ensuring each corner aligns properly and the frame remains stable throughout construction.
Raise each wall individually, checking for square and stability before securing it, creating a strong foundation for the roof.
Step 3: Add Rafters and Frame the Nesting Box
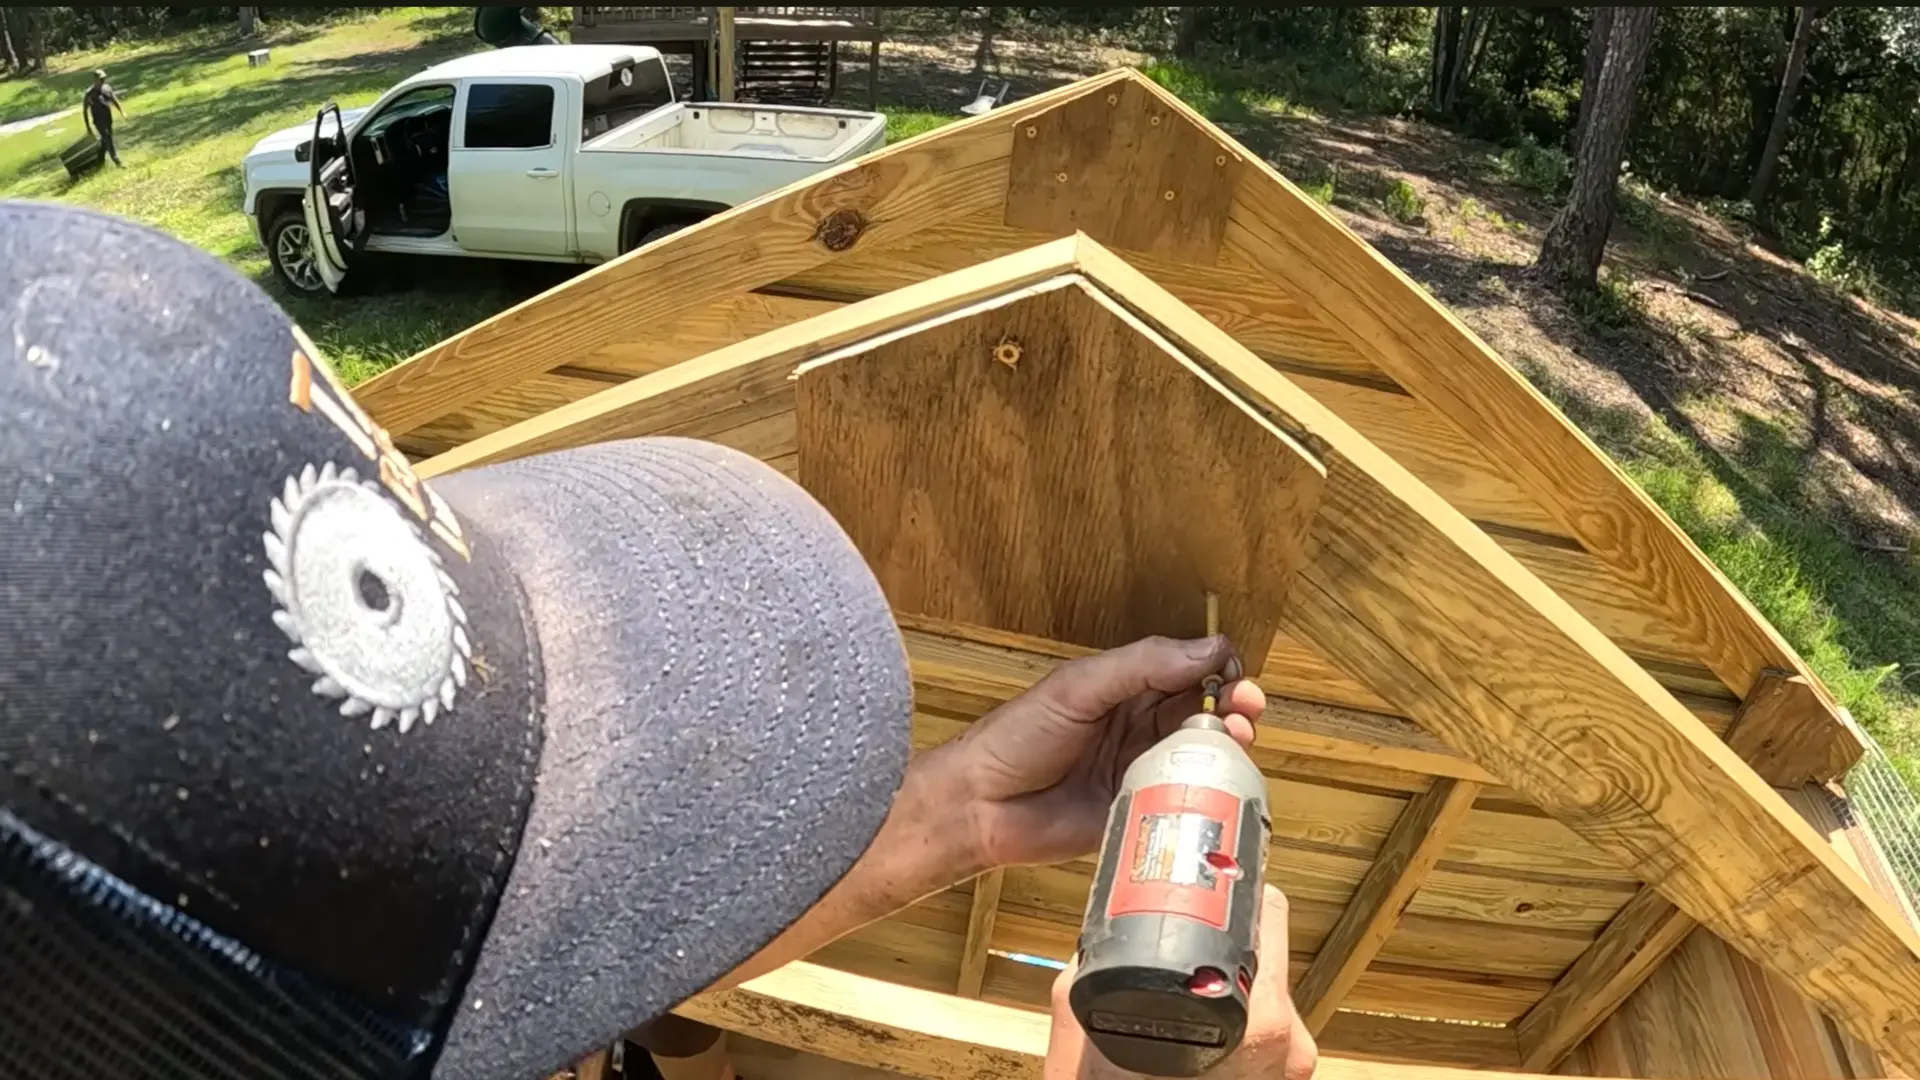
Set the front and rear rafters first, then mark equal spacing to keep the roof structure properly aligned. Build the nesting box frame with sturdy 2x4s and add a plywood floor for support.
Leave one small access opening to give chickens a simple, controlled entrance to the enclosed nesting area.
Make sure every joint is firmly secured, and check the measurements before installing roofing materials or finishing the nesting box.
Step 4: Enclose With Hardware Cloth and Chicken Wire
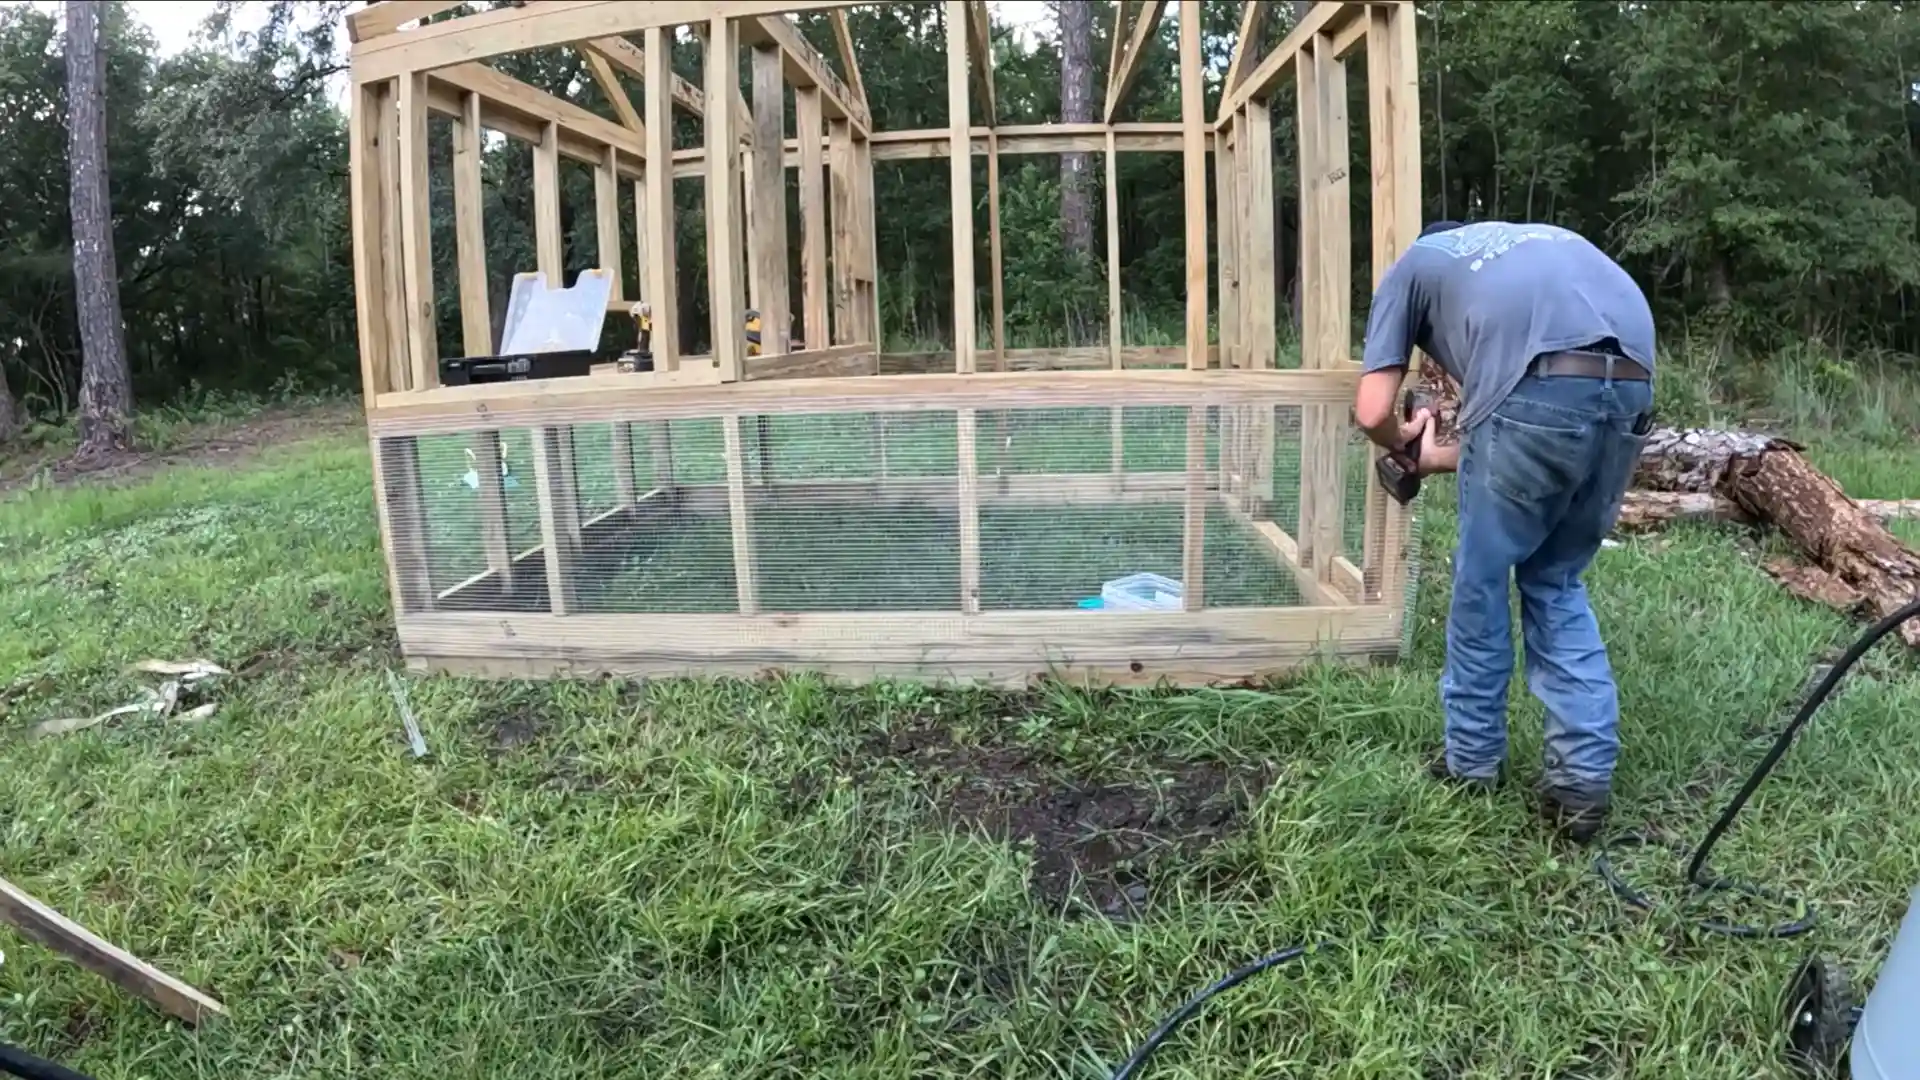
Cover the lower sections with hardware cloth because its thicker construction provides stronger protection against raccoons and other digging predators.
Secure hardware cloth tightly around the base to prevent determined predators from clawing at, chewing through, or forcing their way through weak barriers.
Use standard chicken wire higher up the walls, where its main purpose is to keep chickens safely contained.
Step 5: Trim, Doors, and Roofing
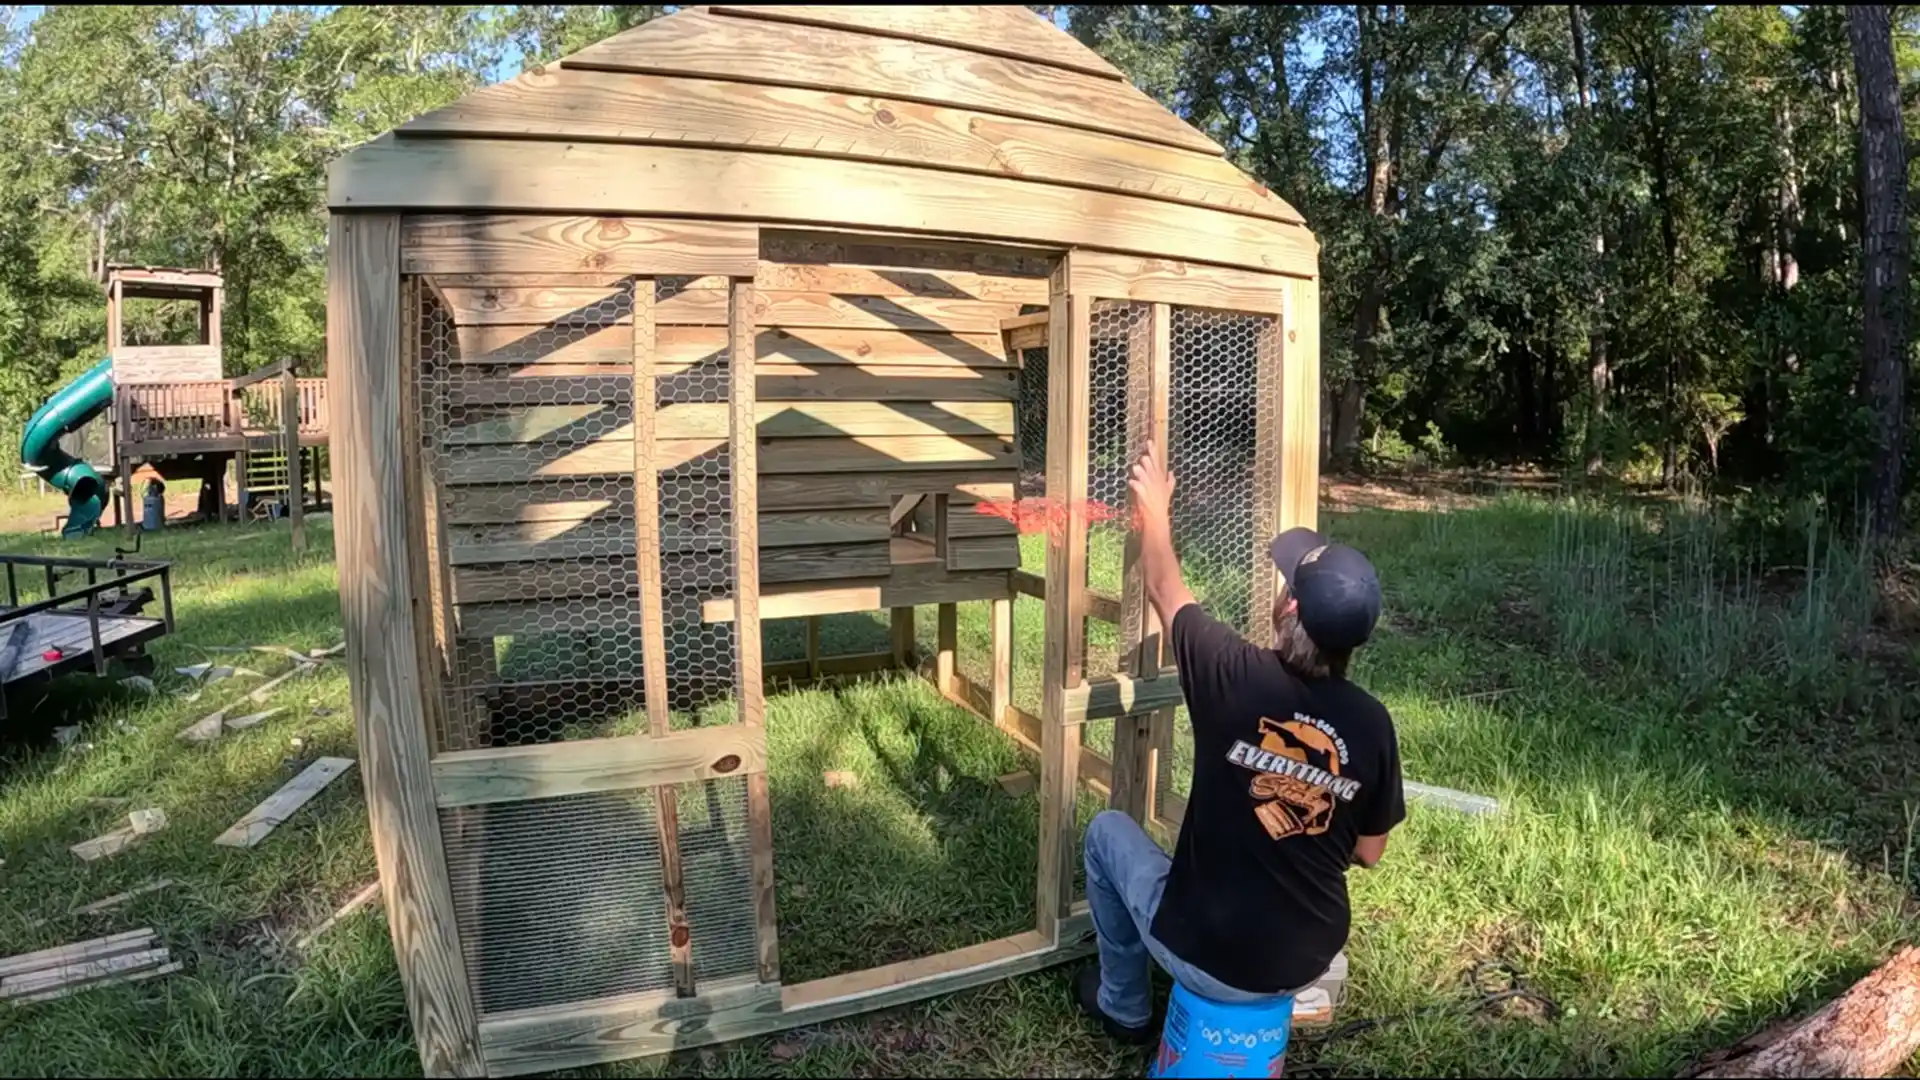
Add trim strips over every seam to hide rough edges and give the coop a finished, tidy look throughout the structure.
Build a front door by sandwiching hardware cloth between two wooden frames to improve airflow and security.
For the roof, run 1×4 supports across the rafters, screw down tin, keeping the first row perfectly square, then finish the peak with a sealed ridge cap.
Step 6: Final Touches, Roosts, Bedding, Move-In Day
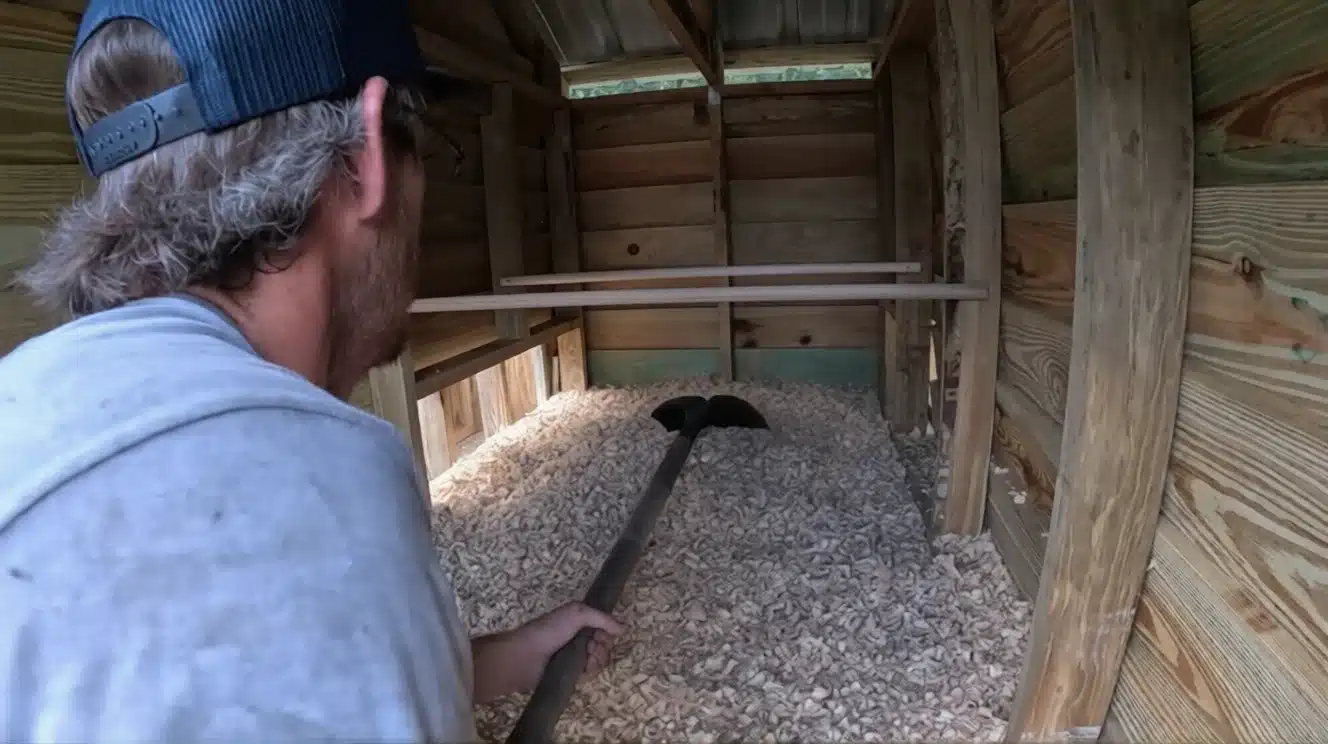
Add dowel rods inside for roosting bars, then spread wood shavings across the floor for bedding before the first residents move in.
Your homemade chicken coop is now ready for chickens to settle.
Double-check that every door latches securely at this point, since a loose hook or hinge is the easiest way for a predator to slip in overnight once the birds are settled.
If you want to watch all the steps in detail, refer to this video by SuperDuperSouth.
DIY vs Store-Bought Chicken Coop: Which one is Better for You?
Price is usually the first thing people compare, so here is how a basic store-bought coop stacks up against a homemade coop built with sturdier, longer-lasting materials from the start.
| Factor | Store-Bought Coop | DIY Chicken Coop |
|---|---|---|
| Price Range | $200 – $300 | $400 – $900 |
| Materials Used | Thin plywood, lightweight wire mesh | Pressure-treated lumber, hardware cloth, metal roofing |
| Durability | Prone to warping and predator damage over time | Built to withstand years of outdoor exposure |
| Predator Resistance | Weak, flimsy panels don’t stop a determined raccoon | Strong hardware cloth and solid framing deter digging predators |
| Customization | Fixed size and layout, no design flexibility | Fully customizable size, door placement, and nesting box layout |
| Labor Involved | None; arrives ready to assemble | One to two weekends of hands-on build time |
| Long-Term Value | Often needs replacing within a few years | Lasts considerably longer, reducing repeat costs |
The higher upfront cost of a DIY chicken coop pays off considerably over time, since fewer repairs and replacements make it the better value for anyone keeping chickens for years.
Homemade Chicken Coop Design Ideas
Once the basic framework is in place, there are dozens of directions you can take a homemade chicken coop, depending on your flock size and how much time you want to spend on it.
1. A-Frame Coop
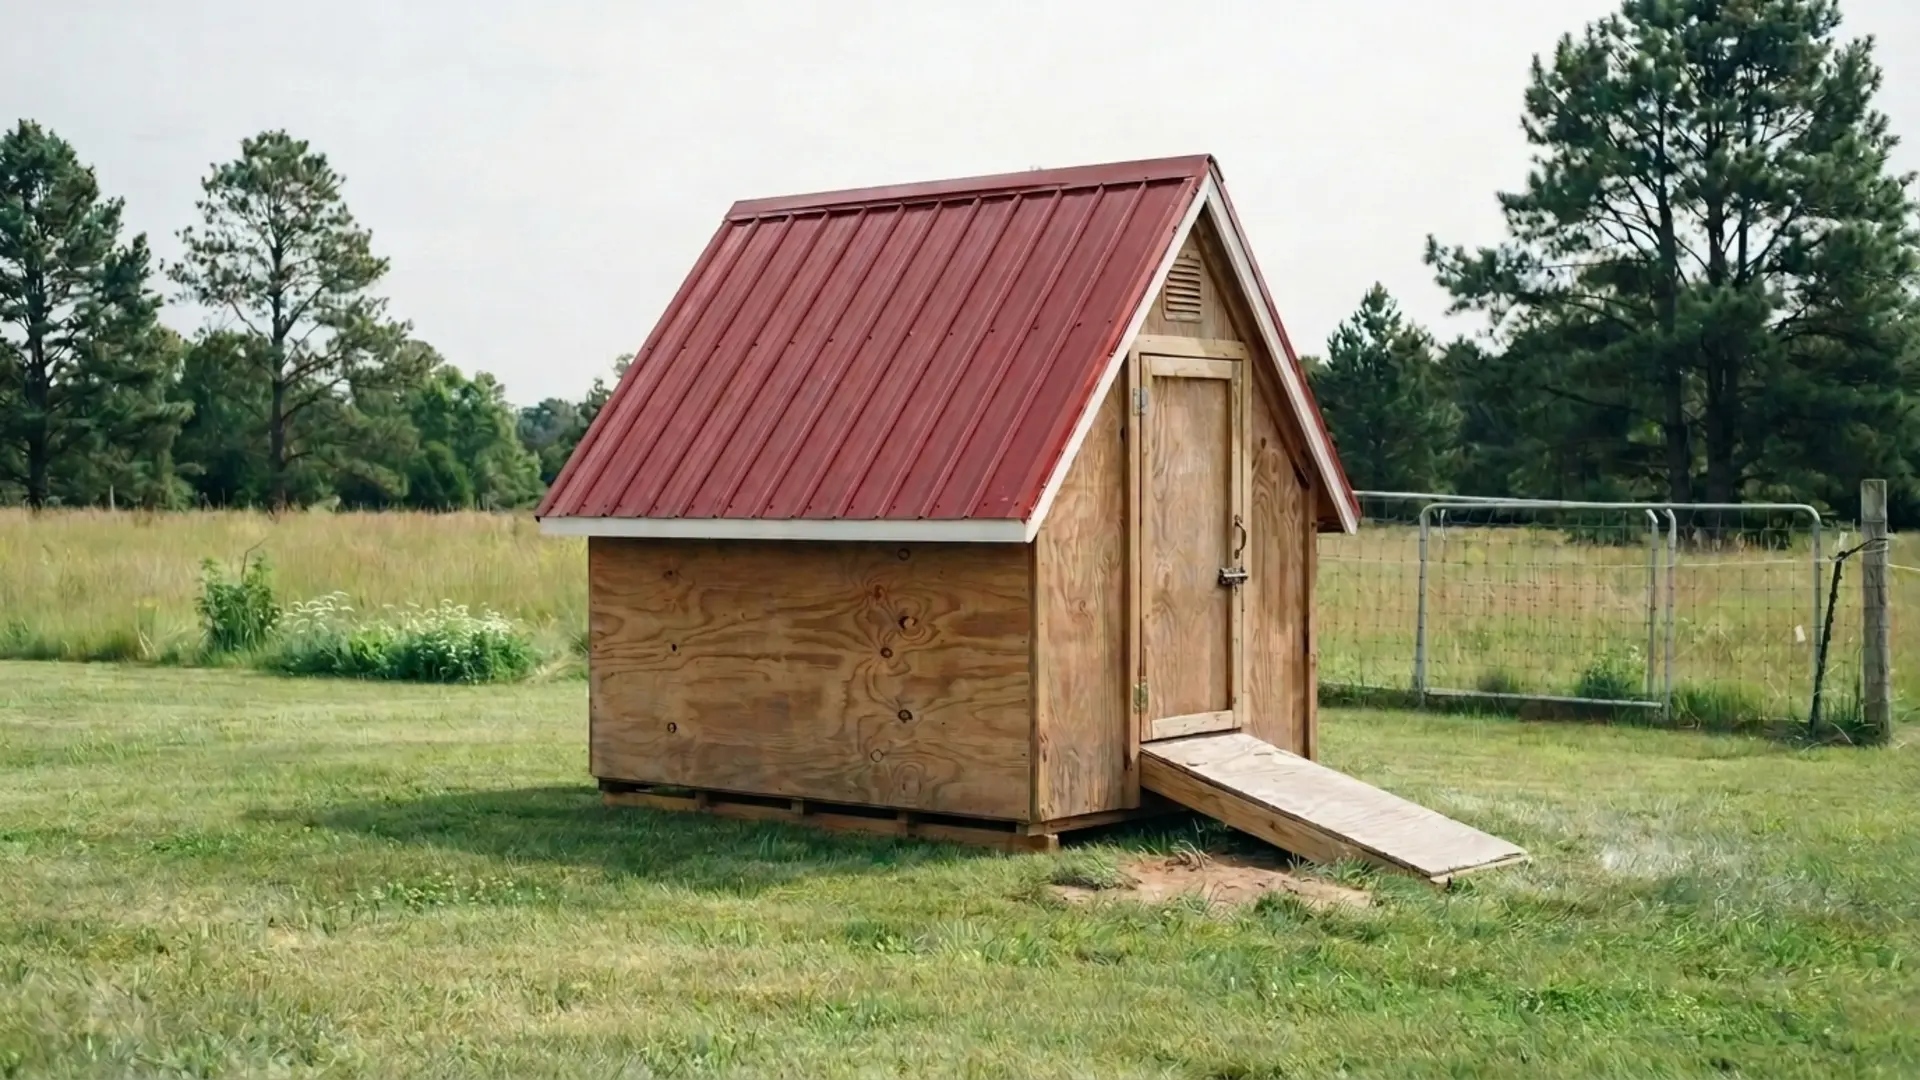
A simple triangular structure with a peaked roof that doubles as the walls themselves, since the two angled sides meet directly at the ridge with no separate framing needed.
This design sheds rain naturally and requires far less lumber than a standard box-shaped coop.
It is one of the fastest builds on this list for anyone short on time, tools, or a large materials budget.
2. Chicken Tractor
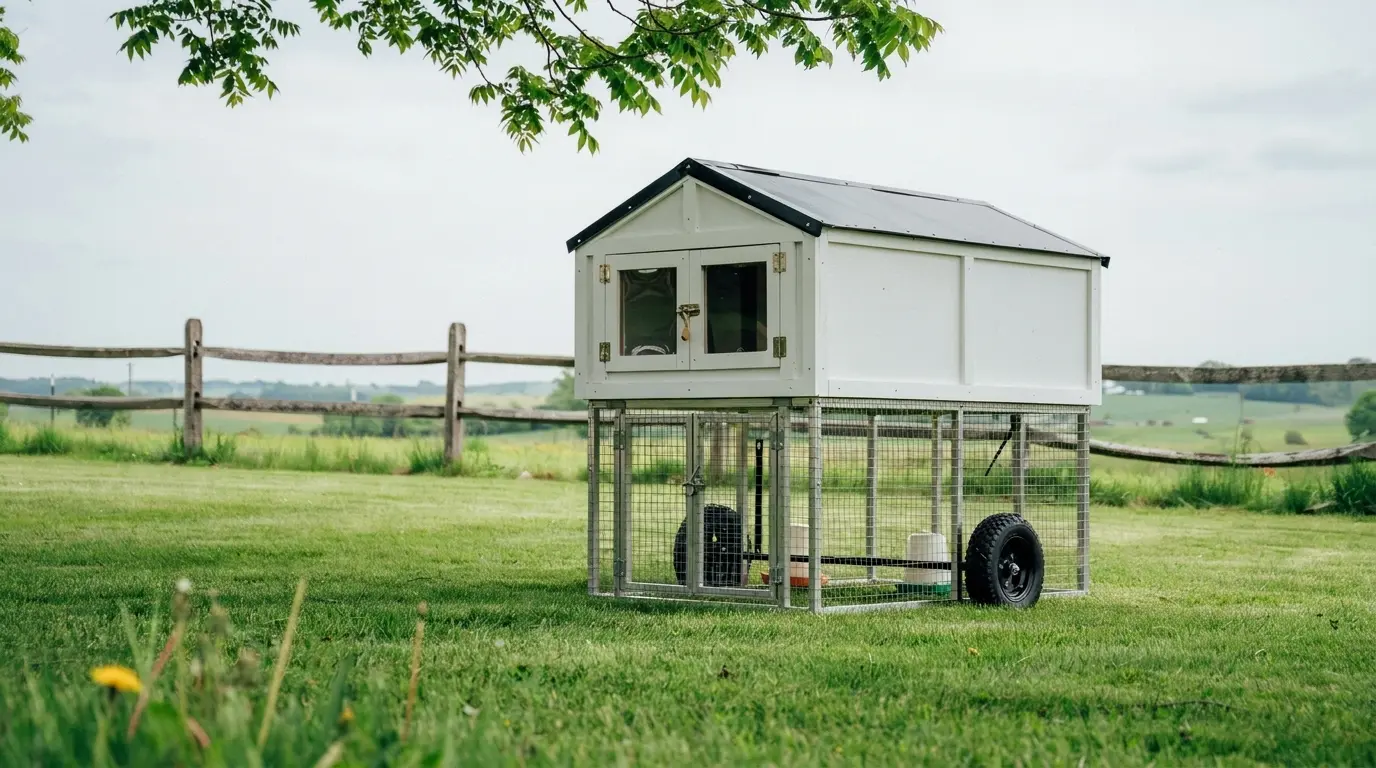
A lightweight, wheeled or skid-mounted coop built specifically to be moved around the yard regularly. It lets chickens graze on fresh grass without any permanent fencing.
Because it stays mobile, droppings and worn-down grass never accumulate in one fixed spot the way they would with a stationary coop,
It keeps the yard healthier and considerably reduces the frequency of cleaning over time.
3. Converted Shed Coop
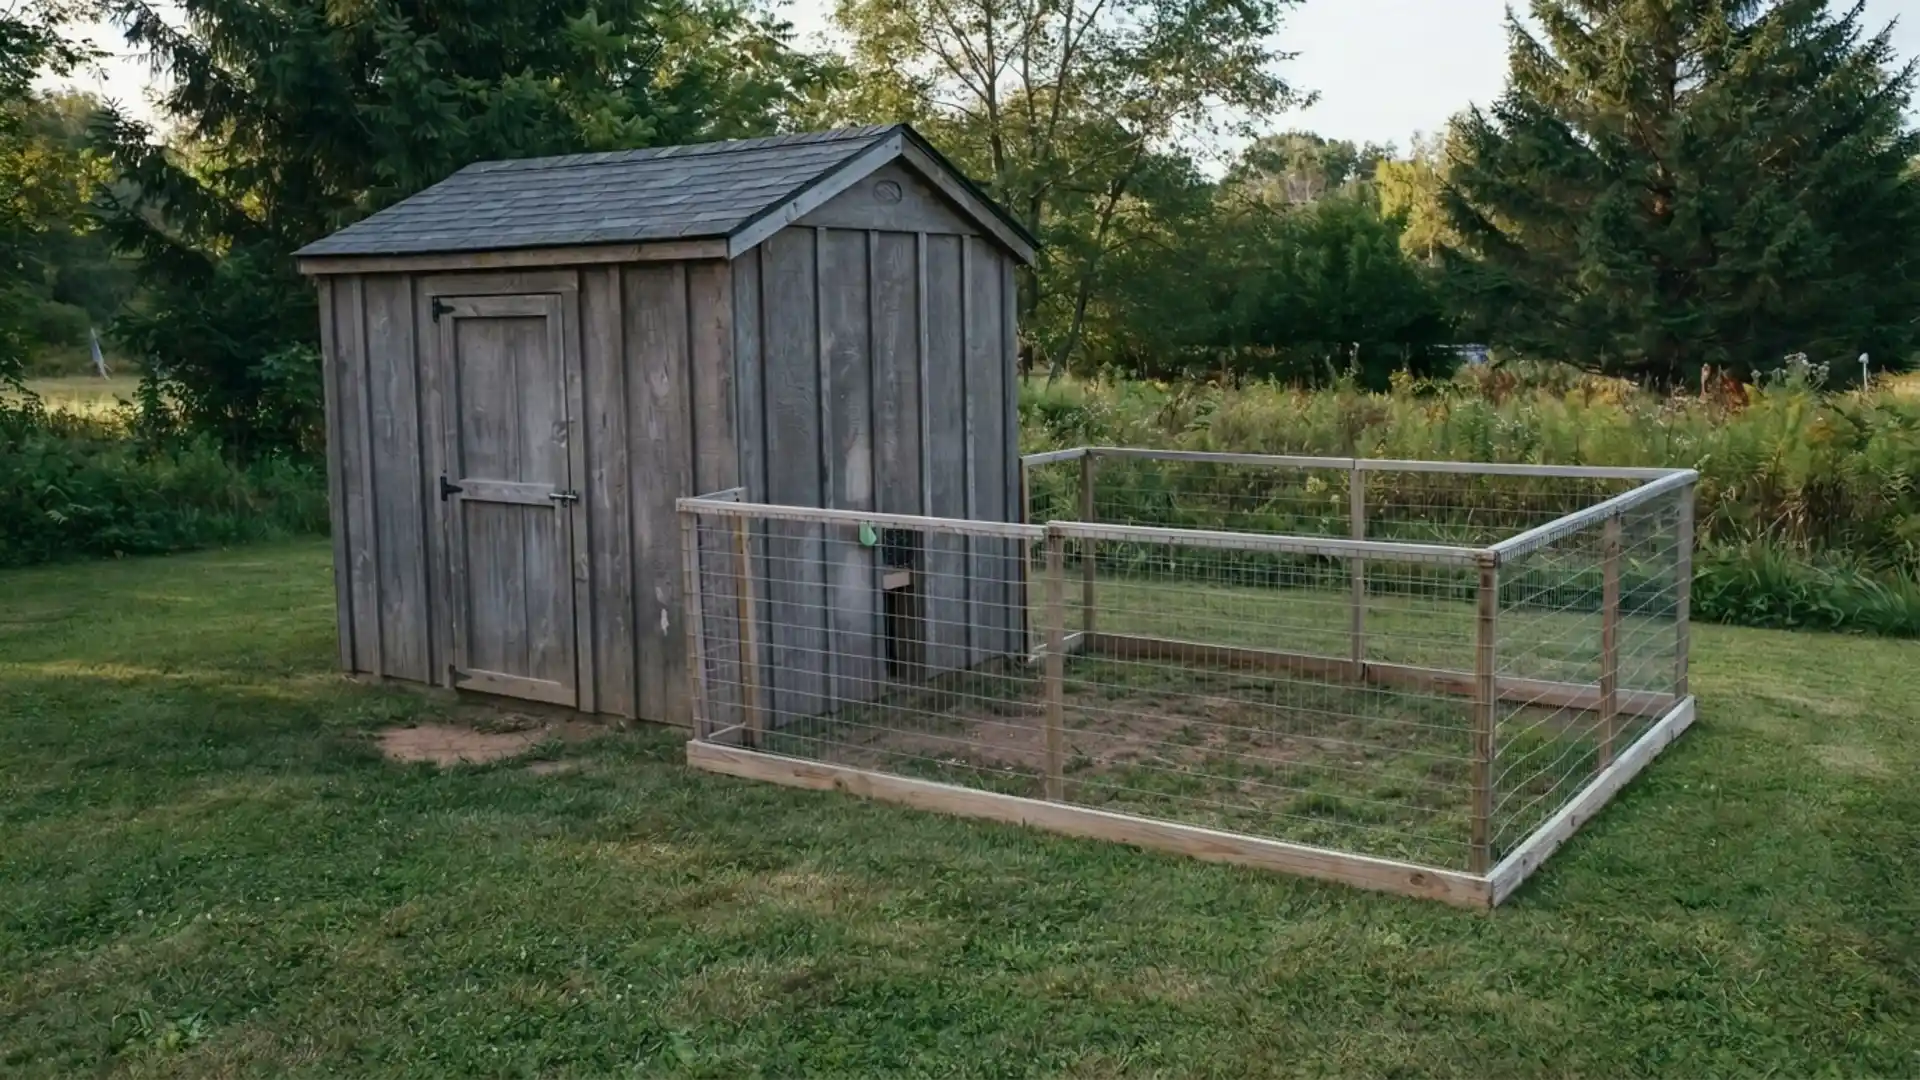
An old garden shed retrofitted with roosting bars, nesting boxes, and a small chicken-sized door cut into one wall.
It is ideal for anyone who already has a structure sitting unused in the yard.
Converting an existing shed skips most of the framing work, so the project becomes mostly an interior fit-out rather than a full build, saving both time and lumber costs.
4. Walk-In Barn Style Coop
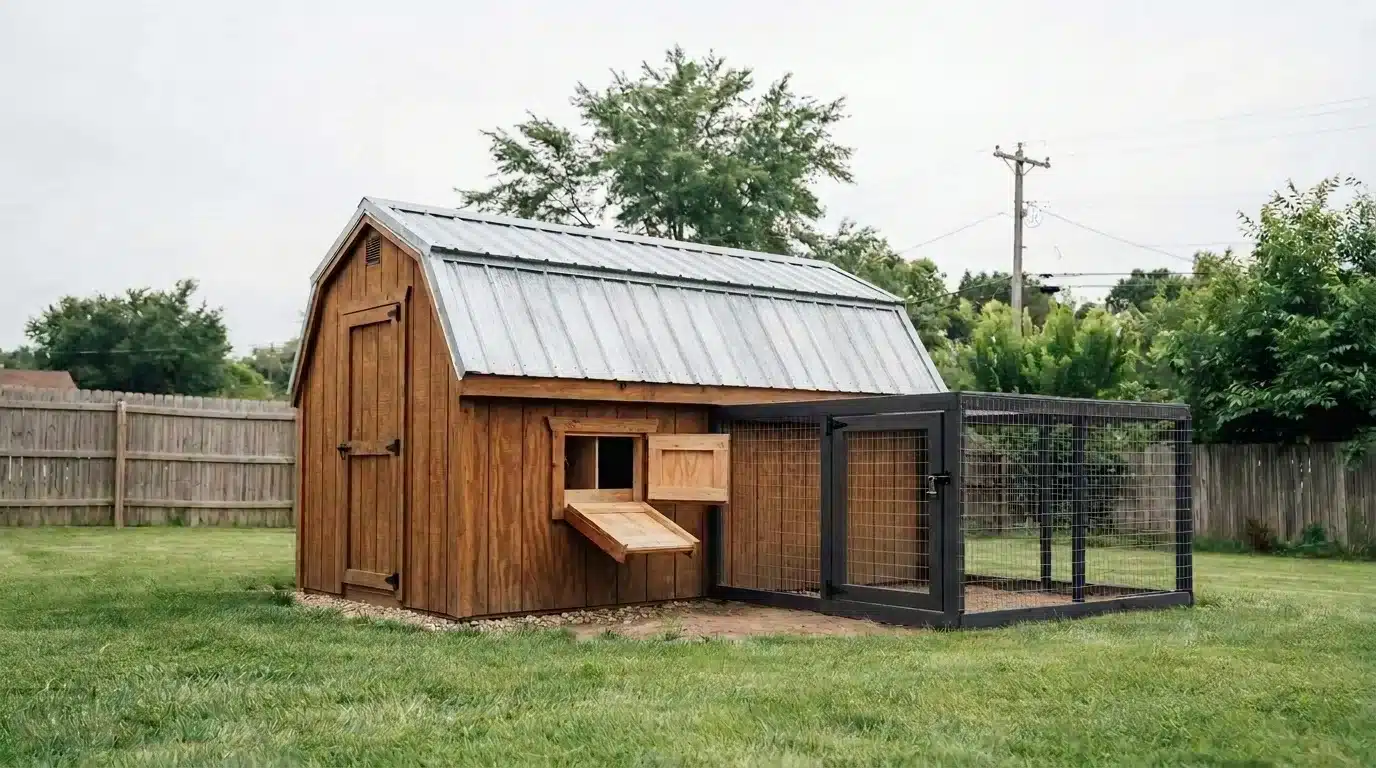
A tall, gable-roofed chicken coop offers ample interior space, making it ideal for larger flocks.
A full-height human door provides easy access for cleaning, collecting eggs, checking roosts, and handling routine maintenance.
This walk-in design eliminates bending or crawling, making daily chores much easier when caring for several chickens.
5. Raised Coop on Stilts
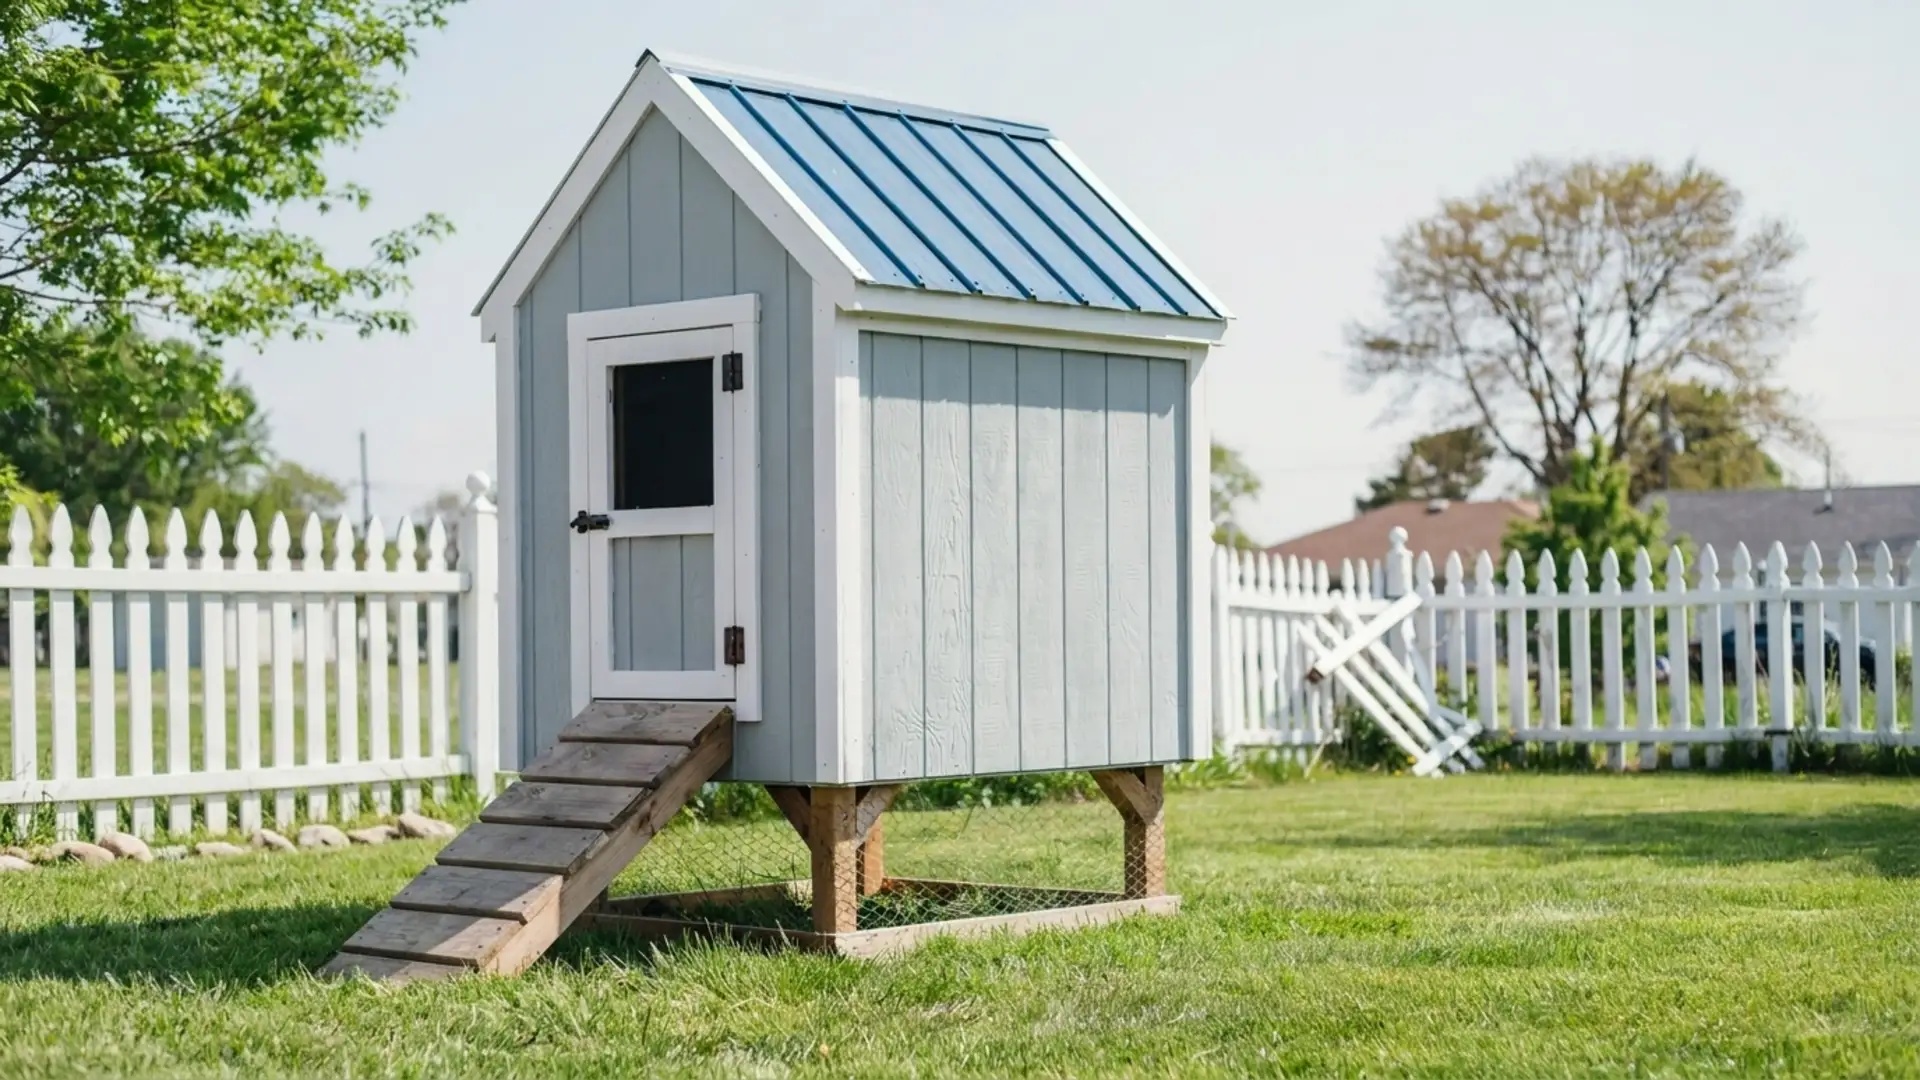
Raise the coop several feet above the ground on sturdy posts to create shade beneath it and protect the structure from moisture.
Elevating the coop improves airflow beneath the floor, helping to prevent dampness, rot, and damage from heavy seasonal rain.
This design works especially well in humid or low-lying areas where ground-level coops often remain wet for longer periods.
6. Urban Backyard Coop
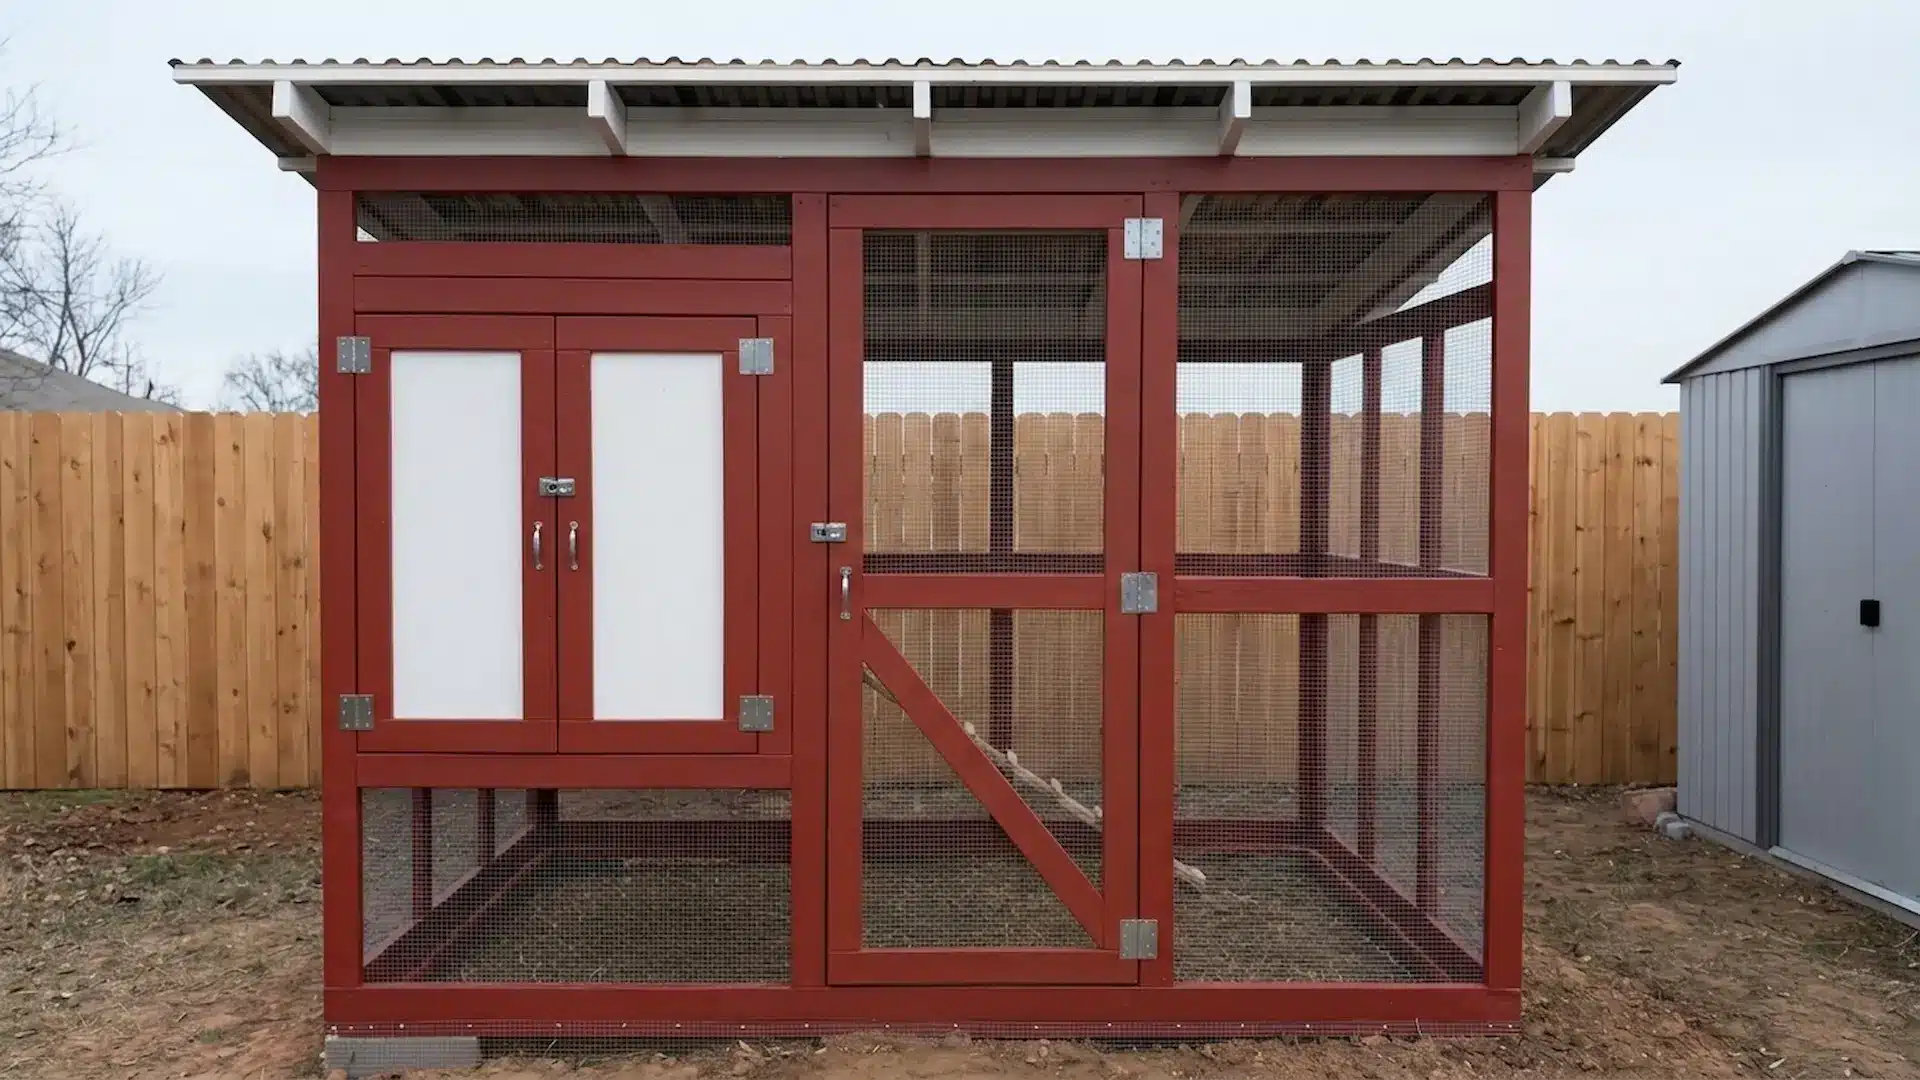
Choose a compact coop design for small city or suburban yards where available space is limited and valuable.
Add a vertical chicken run to maximize usable space while giving chickens enough room to move.
This practical setup works especially well for homeowners raising a small flock in a tight backyard environment.
7. Hoop Coop
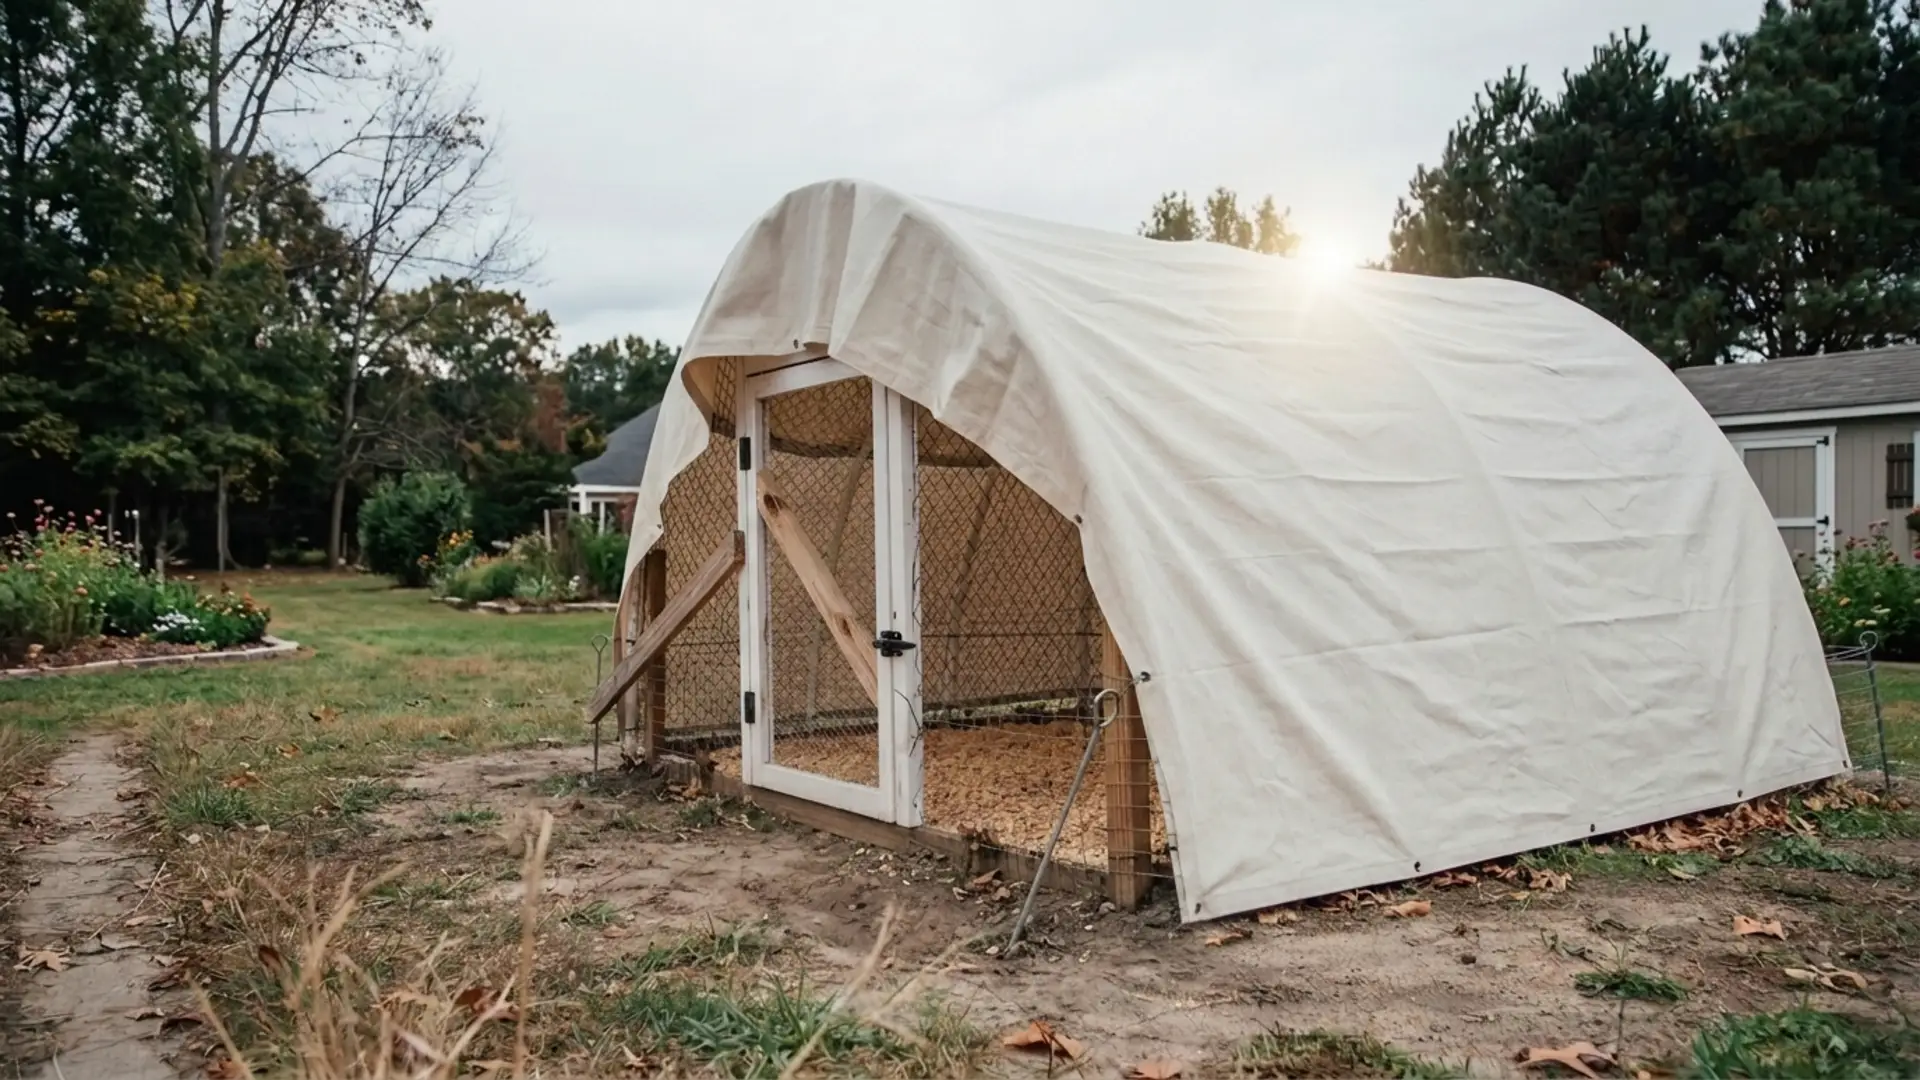
Build this rounded coop by bending cattle panels into arches to create a simple structure without traditional framing.
It covers the panels with tarp, plywood, or hardware cloth based on your climate and local predator risks.
This design saves construction time because the cattle panels provide the main structural framework while remaining simple to assemble.
8. Lean-To Coop
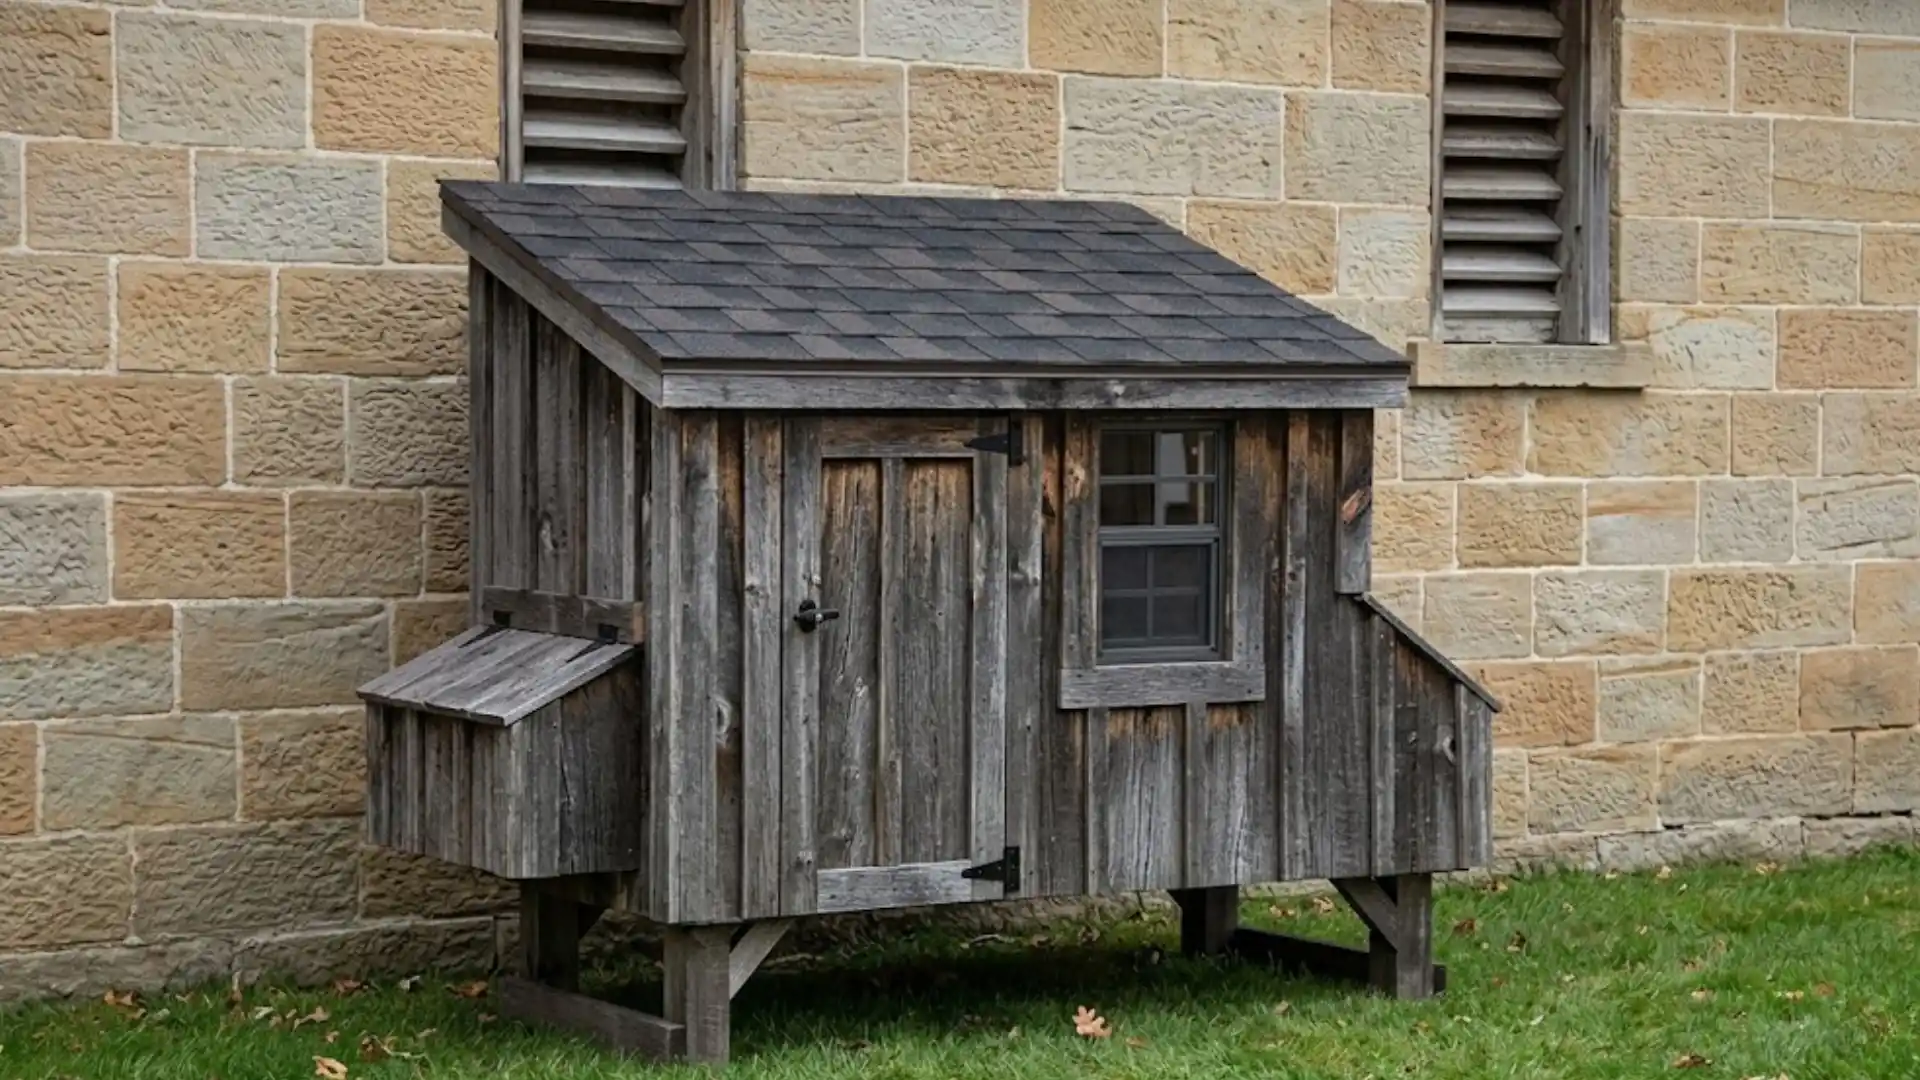
A single-slope roof design built directly against an existing fence, garage wall, or shed side, reducing the materials needed for framing and roofing compared to a freestanding structure.
Because one side already has built-in support, only three walls and a sloped roof need to be constructed.
It noticeably trims both the lumber list and the overall build time for anyone working with a smaller budget.
9. Farmhouse Style Coop
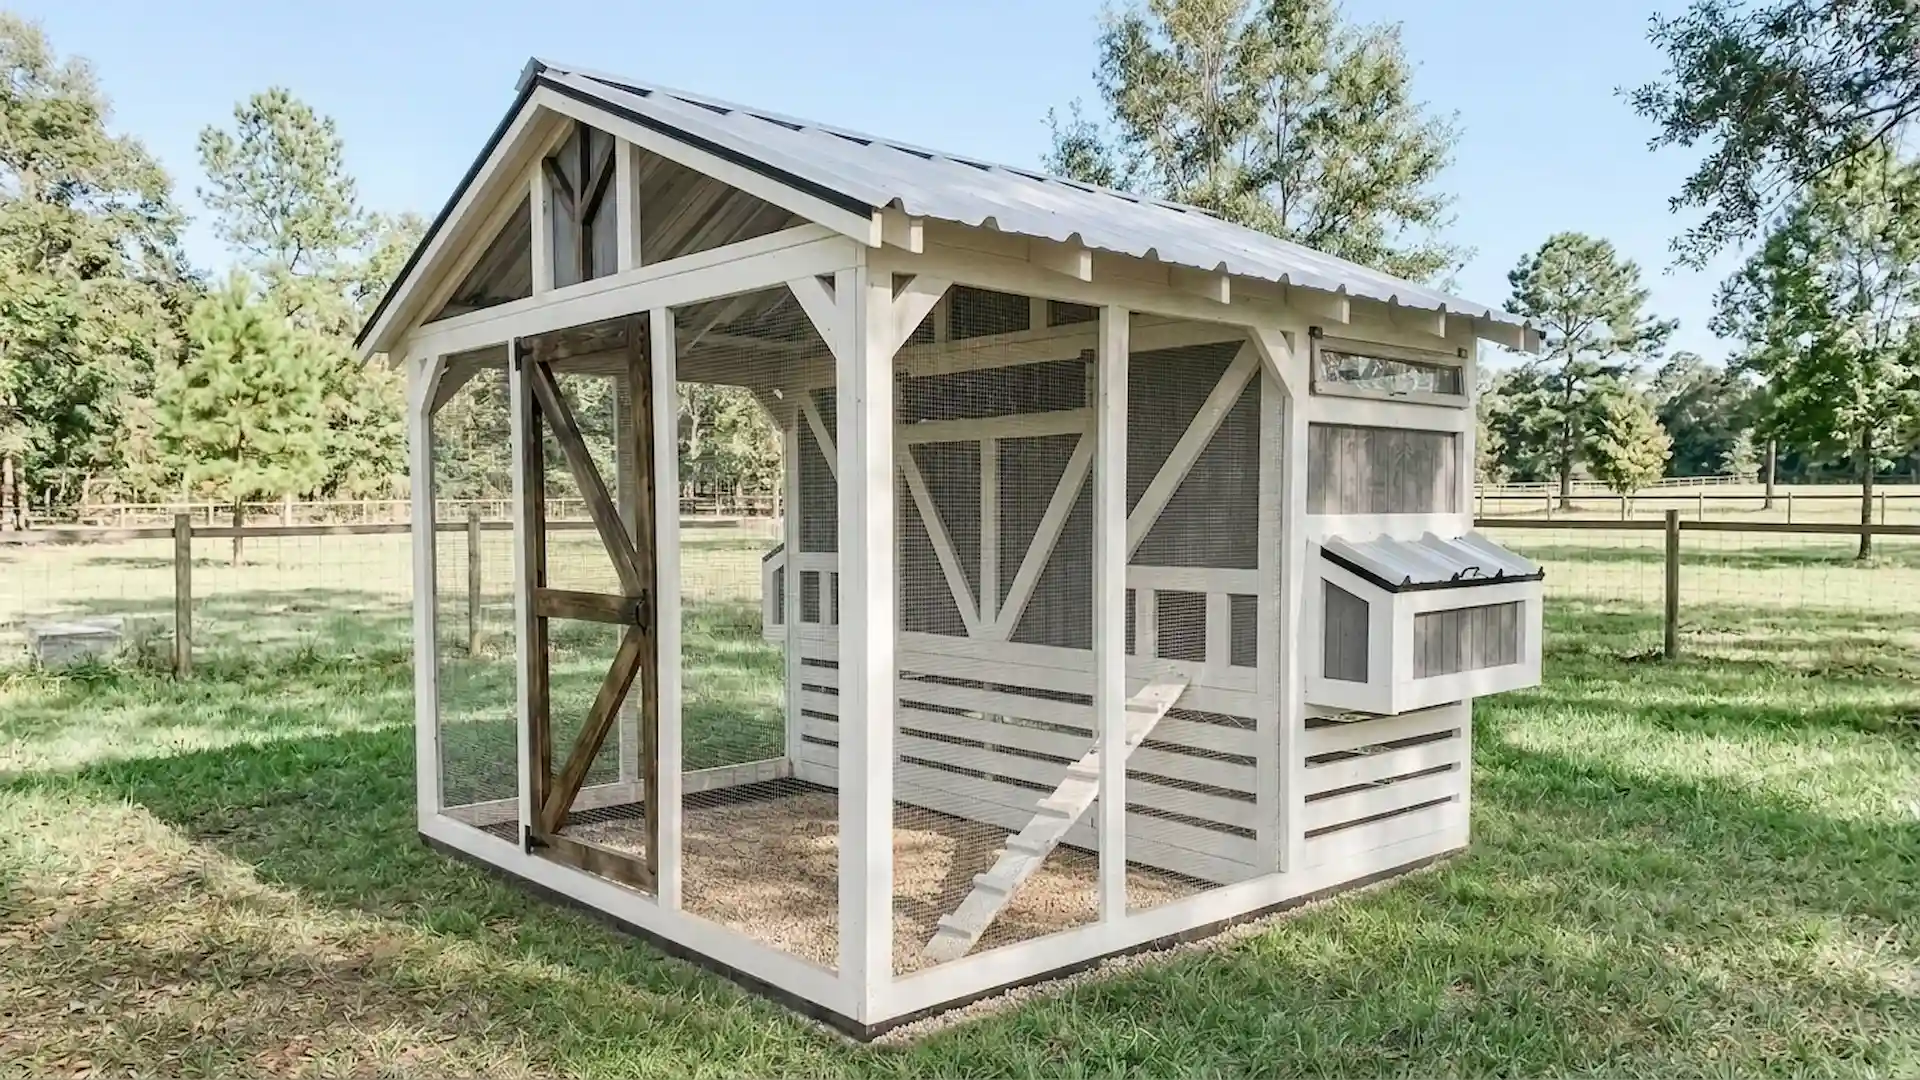
Design the coop with board-and-batten siding, painted shutters, and a matching roofline for an attractive appearance.
Use trim details and coordinated colors to create a miniature house that complements the main property beautifully.
This decorative style combines practical chicken housing with curb appeal, making the coop look polished and intentional.
10. Pallet Coop
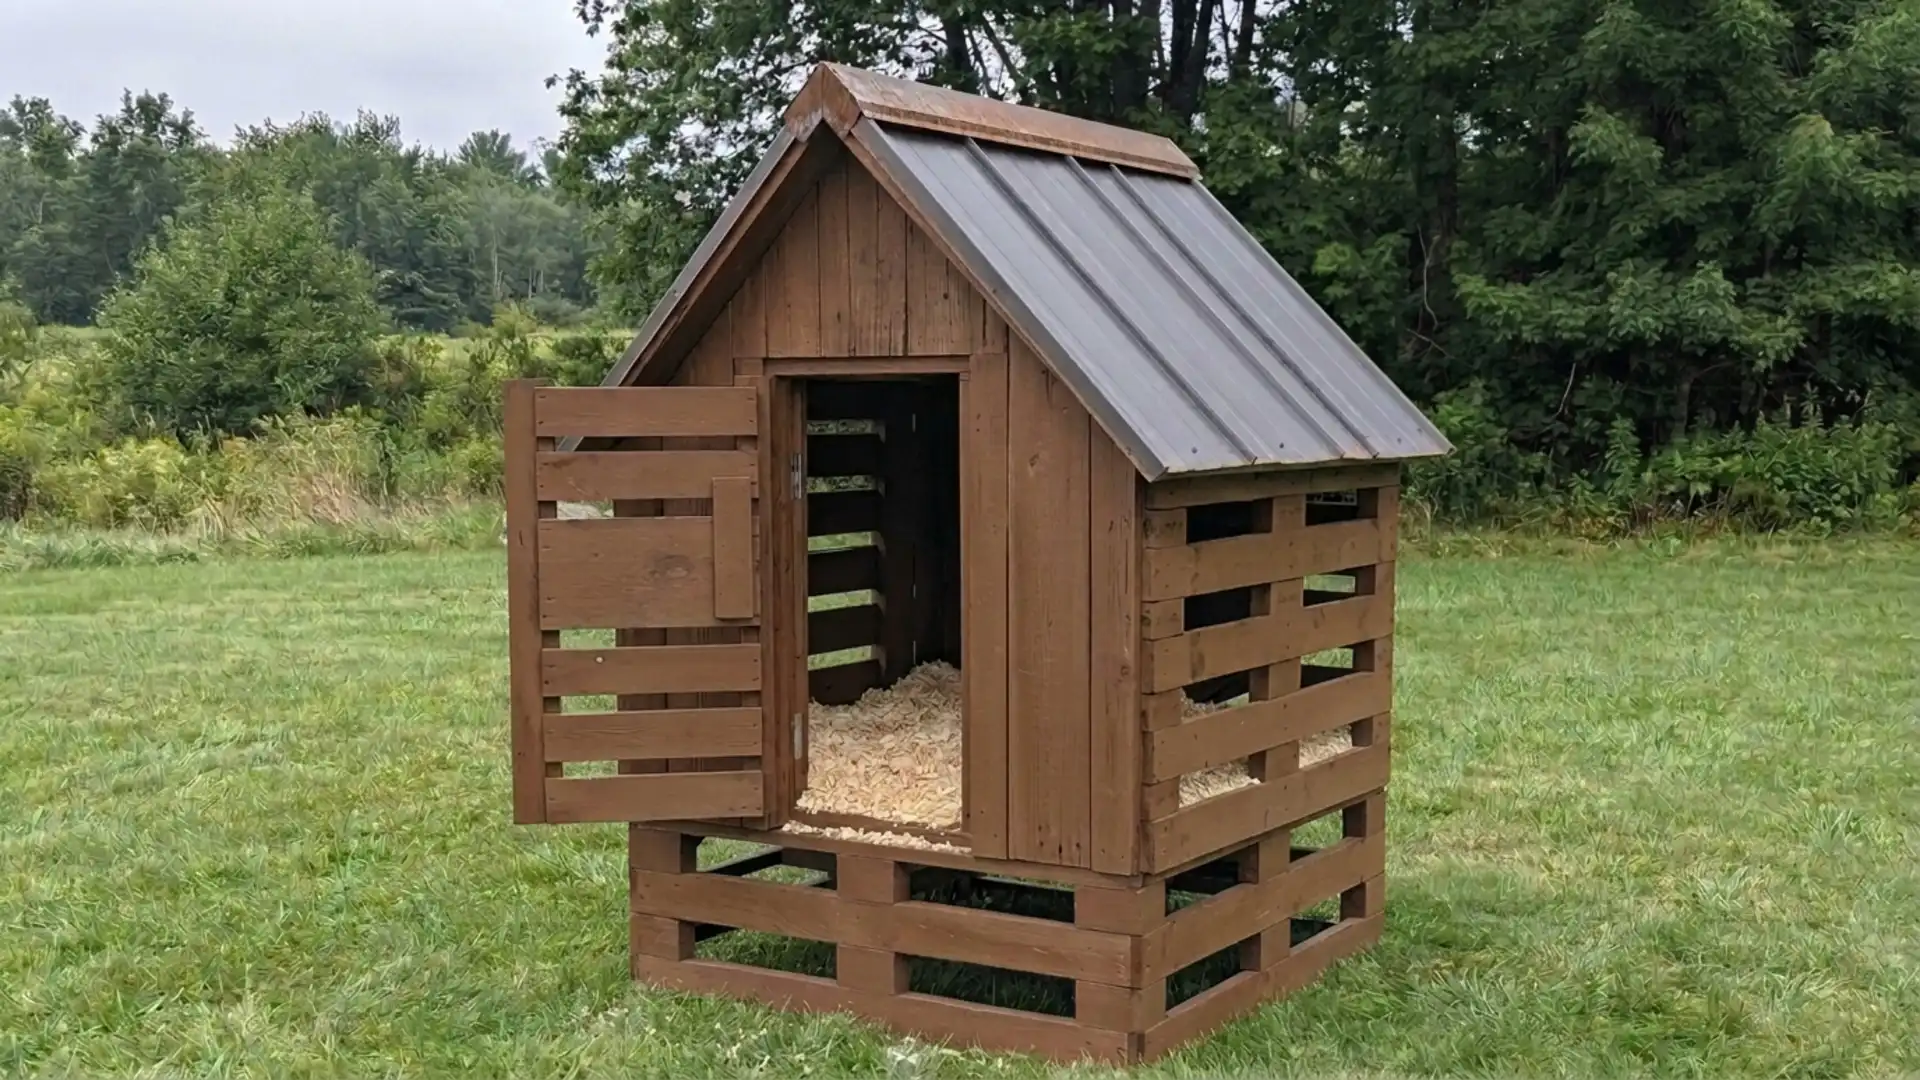
Build the coop mainly from repurposed wooden pallets, reusing individual boards for walls, flooring, and roof framing.
This budget-friendly approach keeps material costs low while providing a practical shelter for a small backyard flock.
It is especially suitable for first-time chicken keepers testing their setup before investing in a permanent structure.
11. Combination Coop and Greenhouse
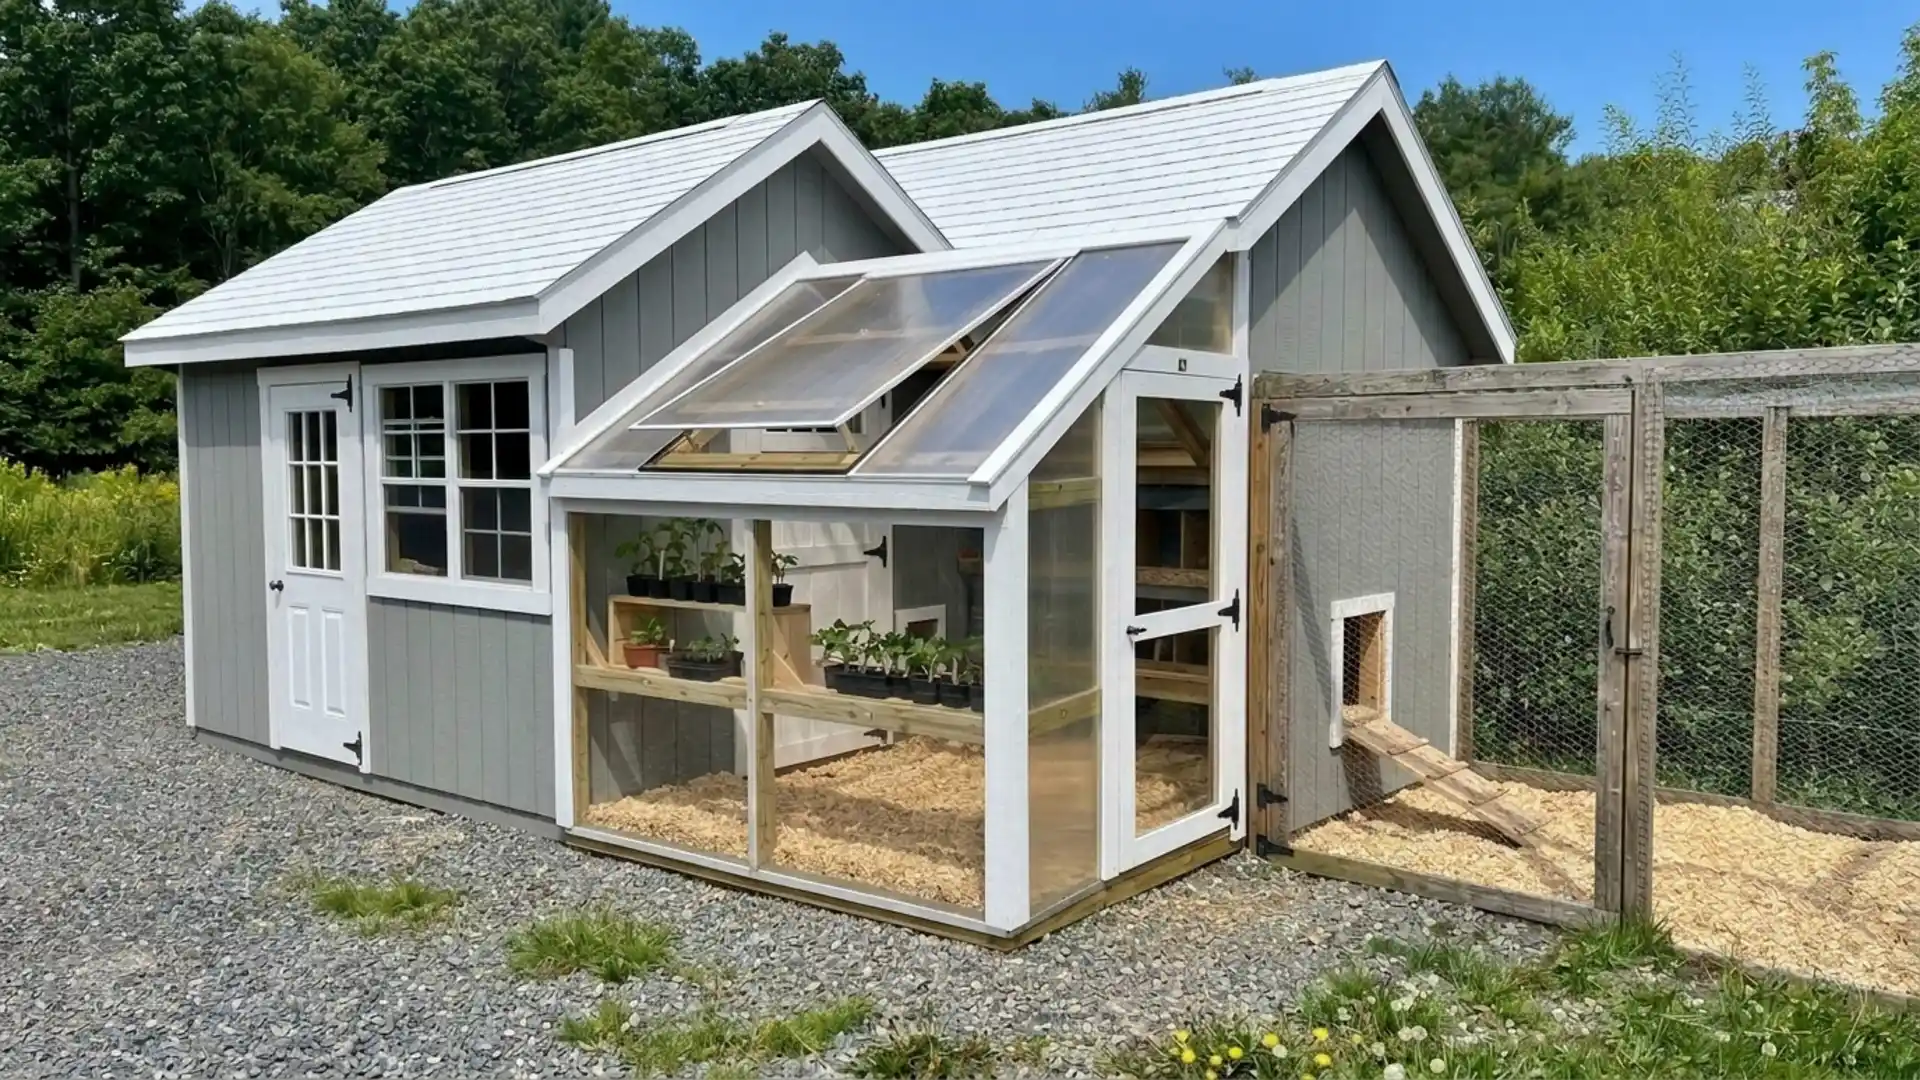
Combine a chicken coop with a small greenhouse or garden shed, sharing one wall and roofline.
This dual-purpose design saves backyard space while providing separate areas for chickens, plants, gardening supplies, or tools.
Building both functions together also reduces construction materials, since the structure shares exterior walls, framing, and roofing.
12. Elevated Coop with Under-Coop Run
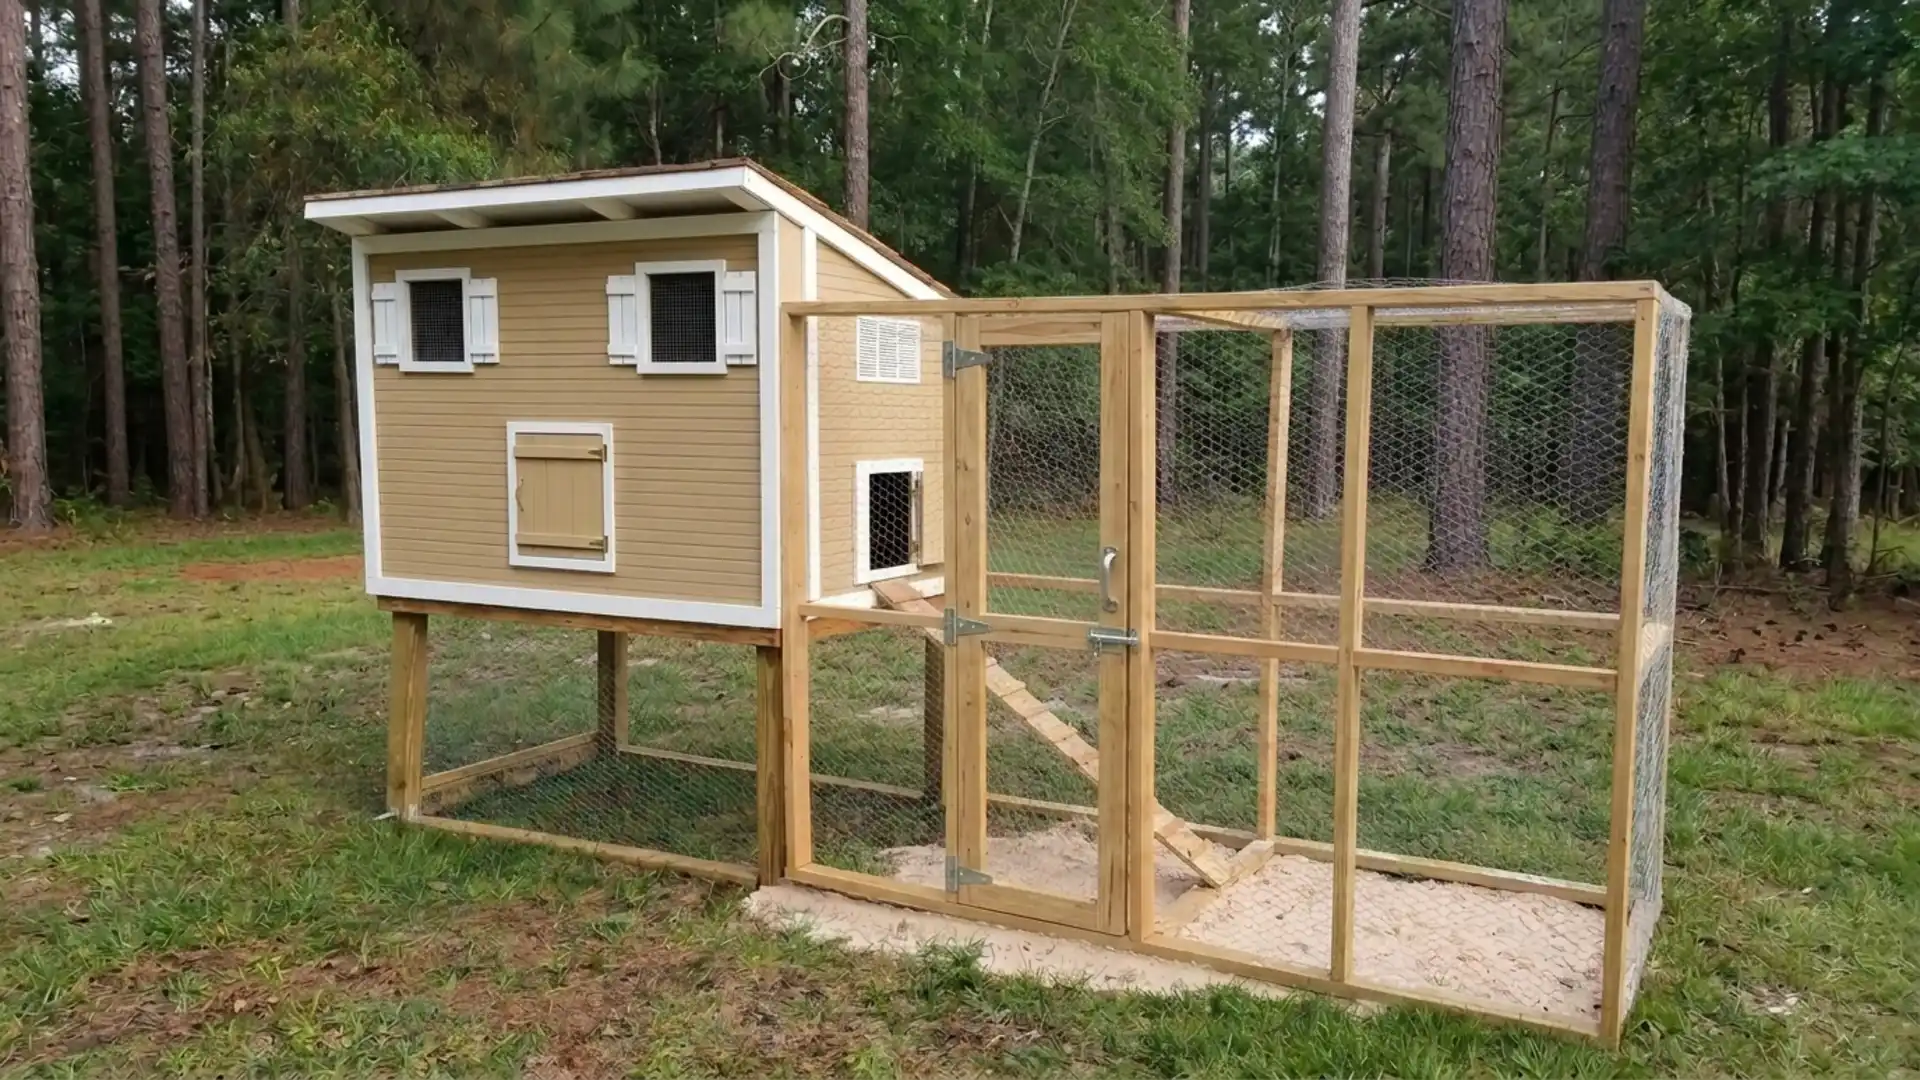
Raise the chicken coop on sturdy legs, creating shaded space underneath that doubles as additional run area.
This design gives chickens extra usable space without increasing the coop’s footprint, making it ideal for smaller yards.
The elevated floor stays drier while protecting chickens from ground-level pests and providing comfortable shade during hot afternoons.
13. Modular Coop with Add-On Run
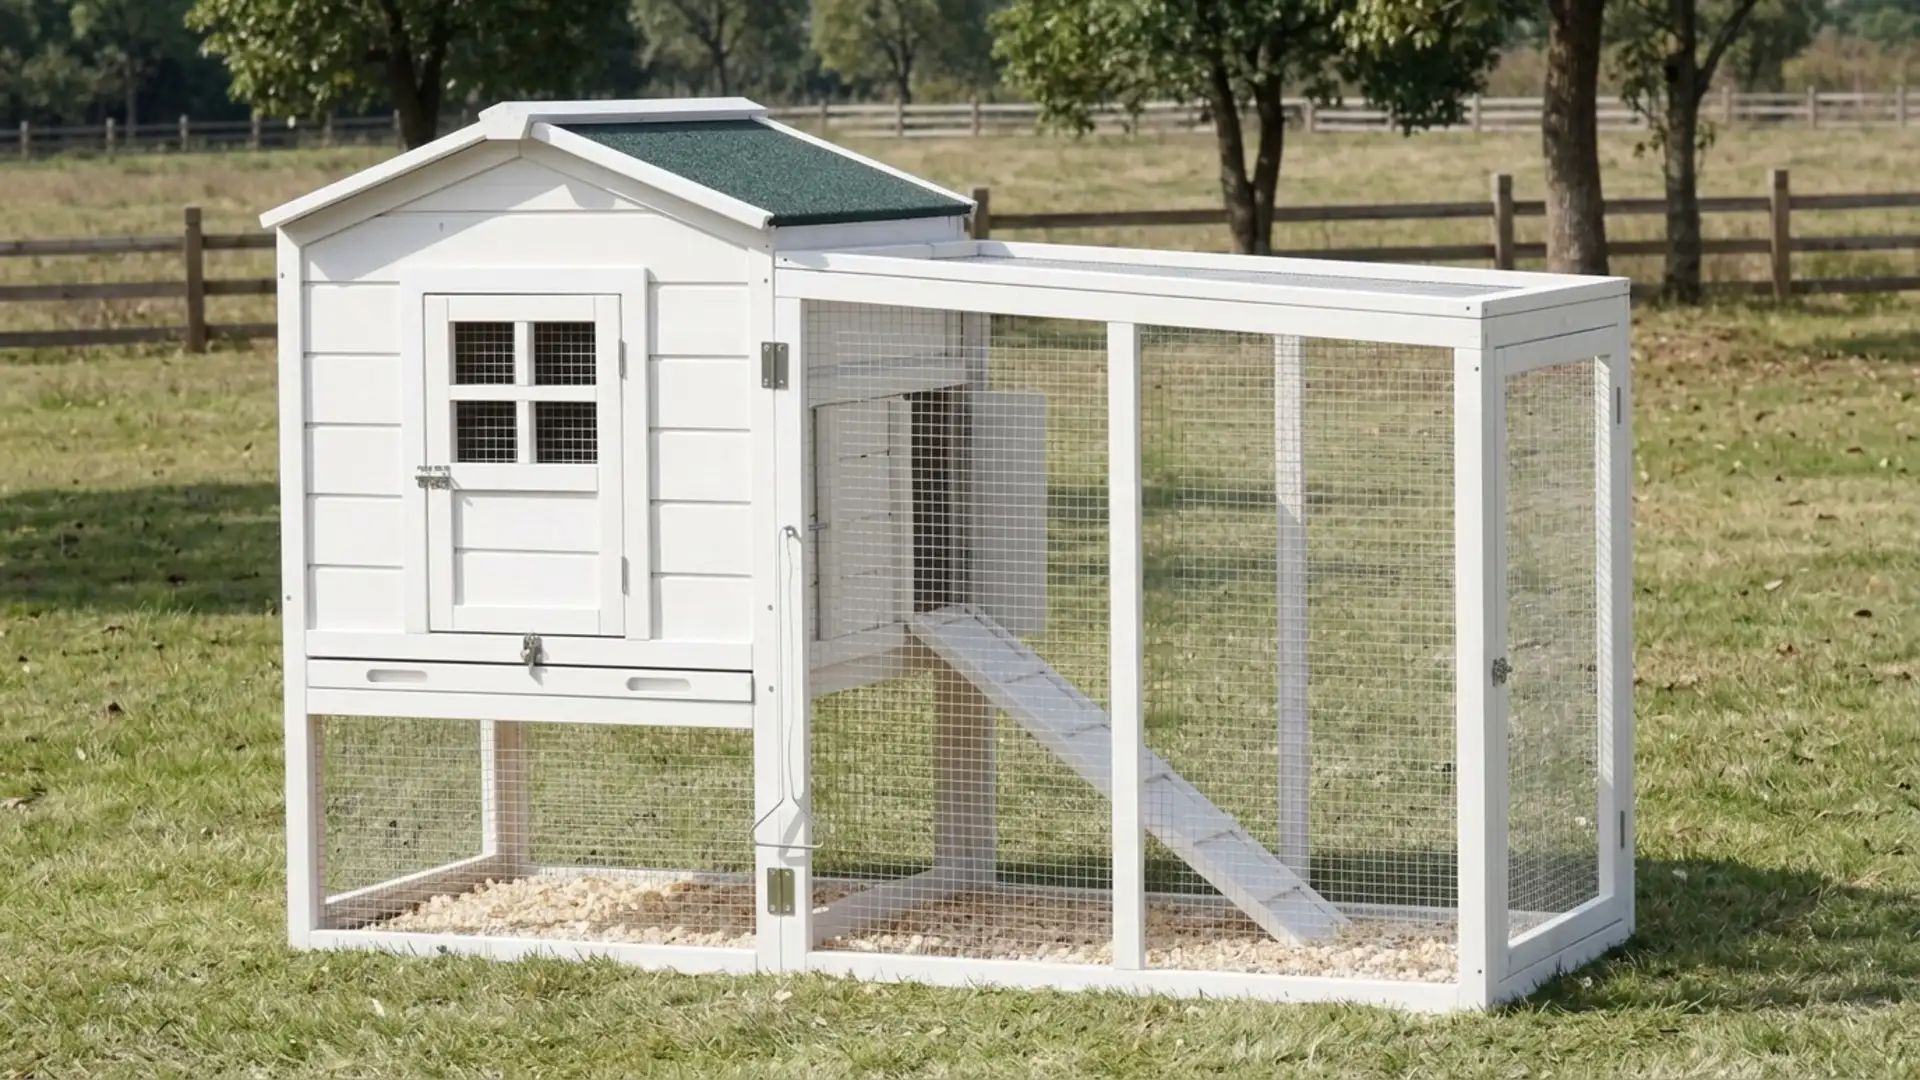
Build the coop with an expandable frame, adding extra joists and connection points for future run extensions.
This flexible design allows you to increase available space as your flock grows without rebuilding the entire coop.
Planning for expansion from the beginning makes future modifications easier, more affordable, and better suited to changing needs.
14. Repurposed Playhouse Coop
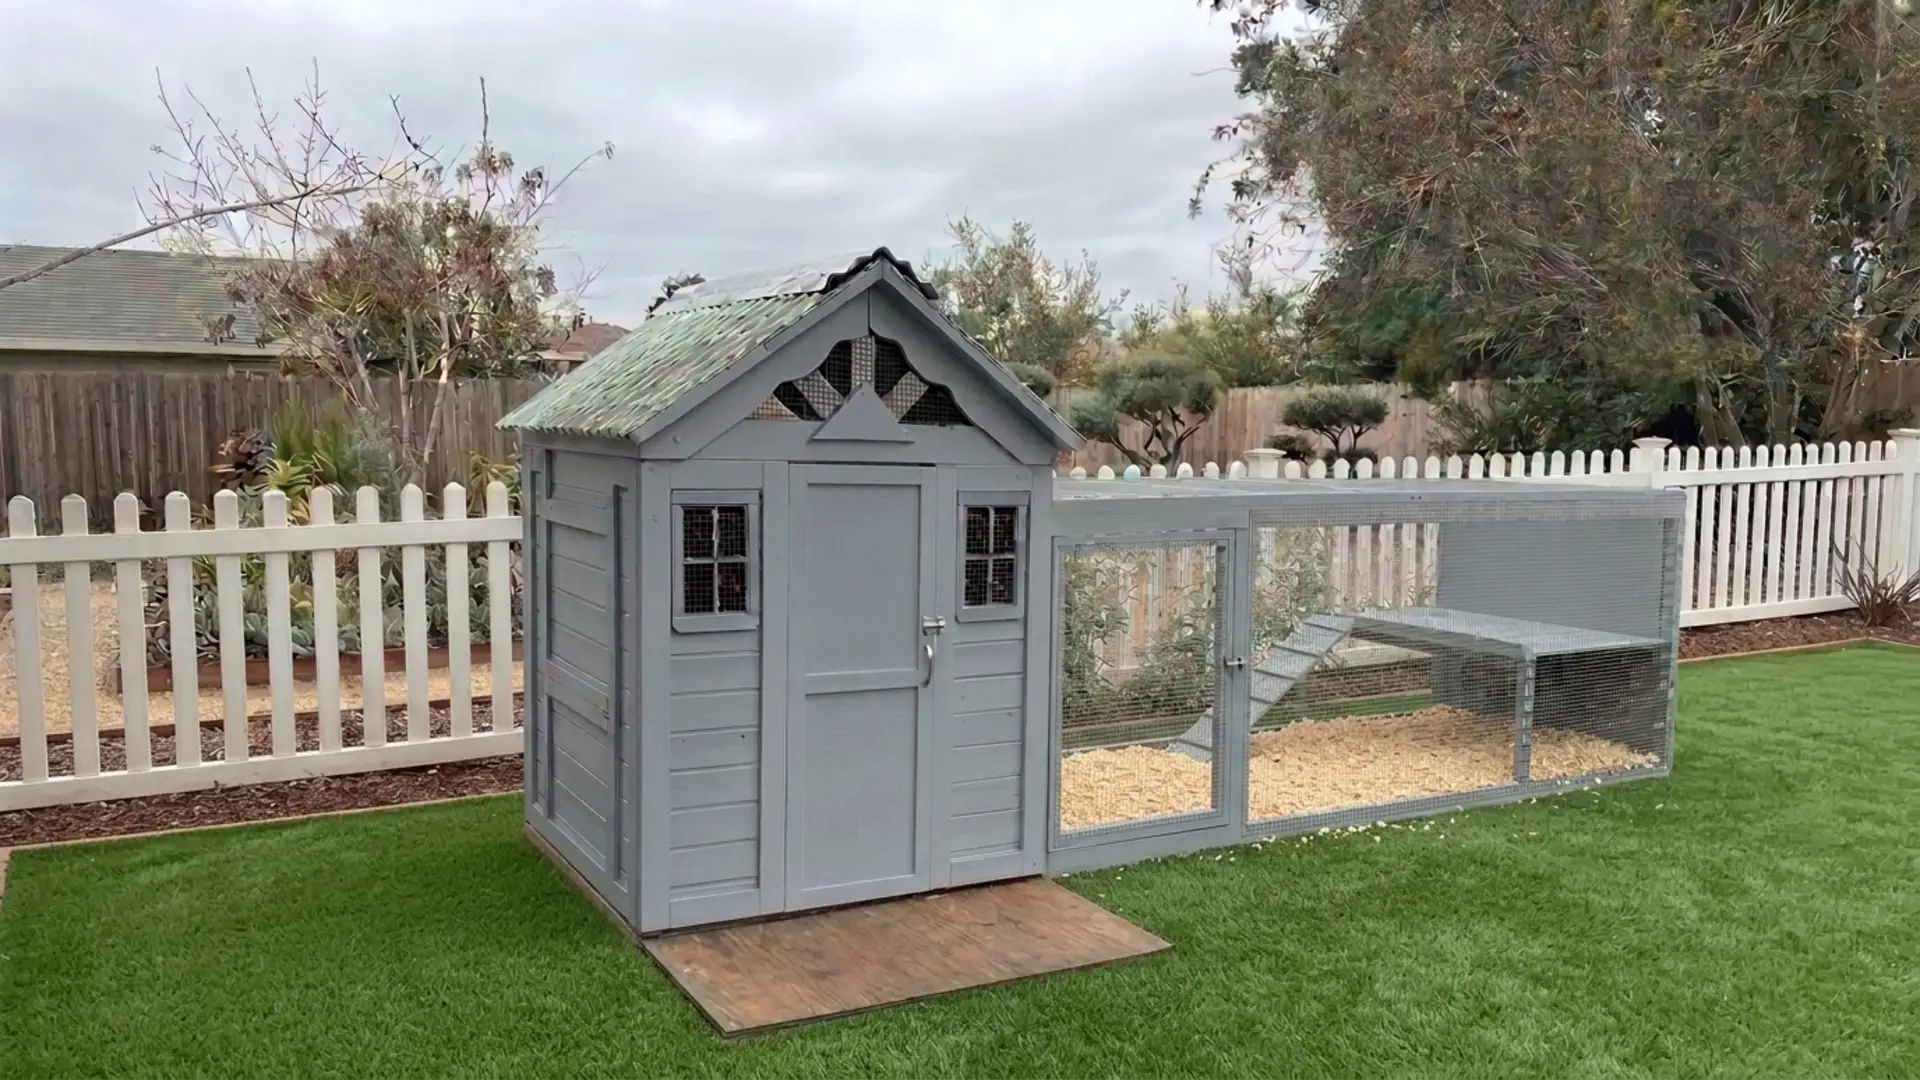
Repurpose an old kids’ playhouse or swing-set by reusing its existing framing, siding, and roof, significantly reducing material costs compared with new lumber.
Add roosting bars, nesting boxes, ventilation, and a chicken-sized door to transform the structure into a practical, resourceful homemade coop.
15. Predator-Proof Bunker Coop
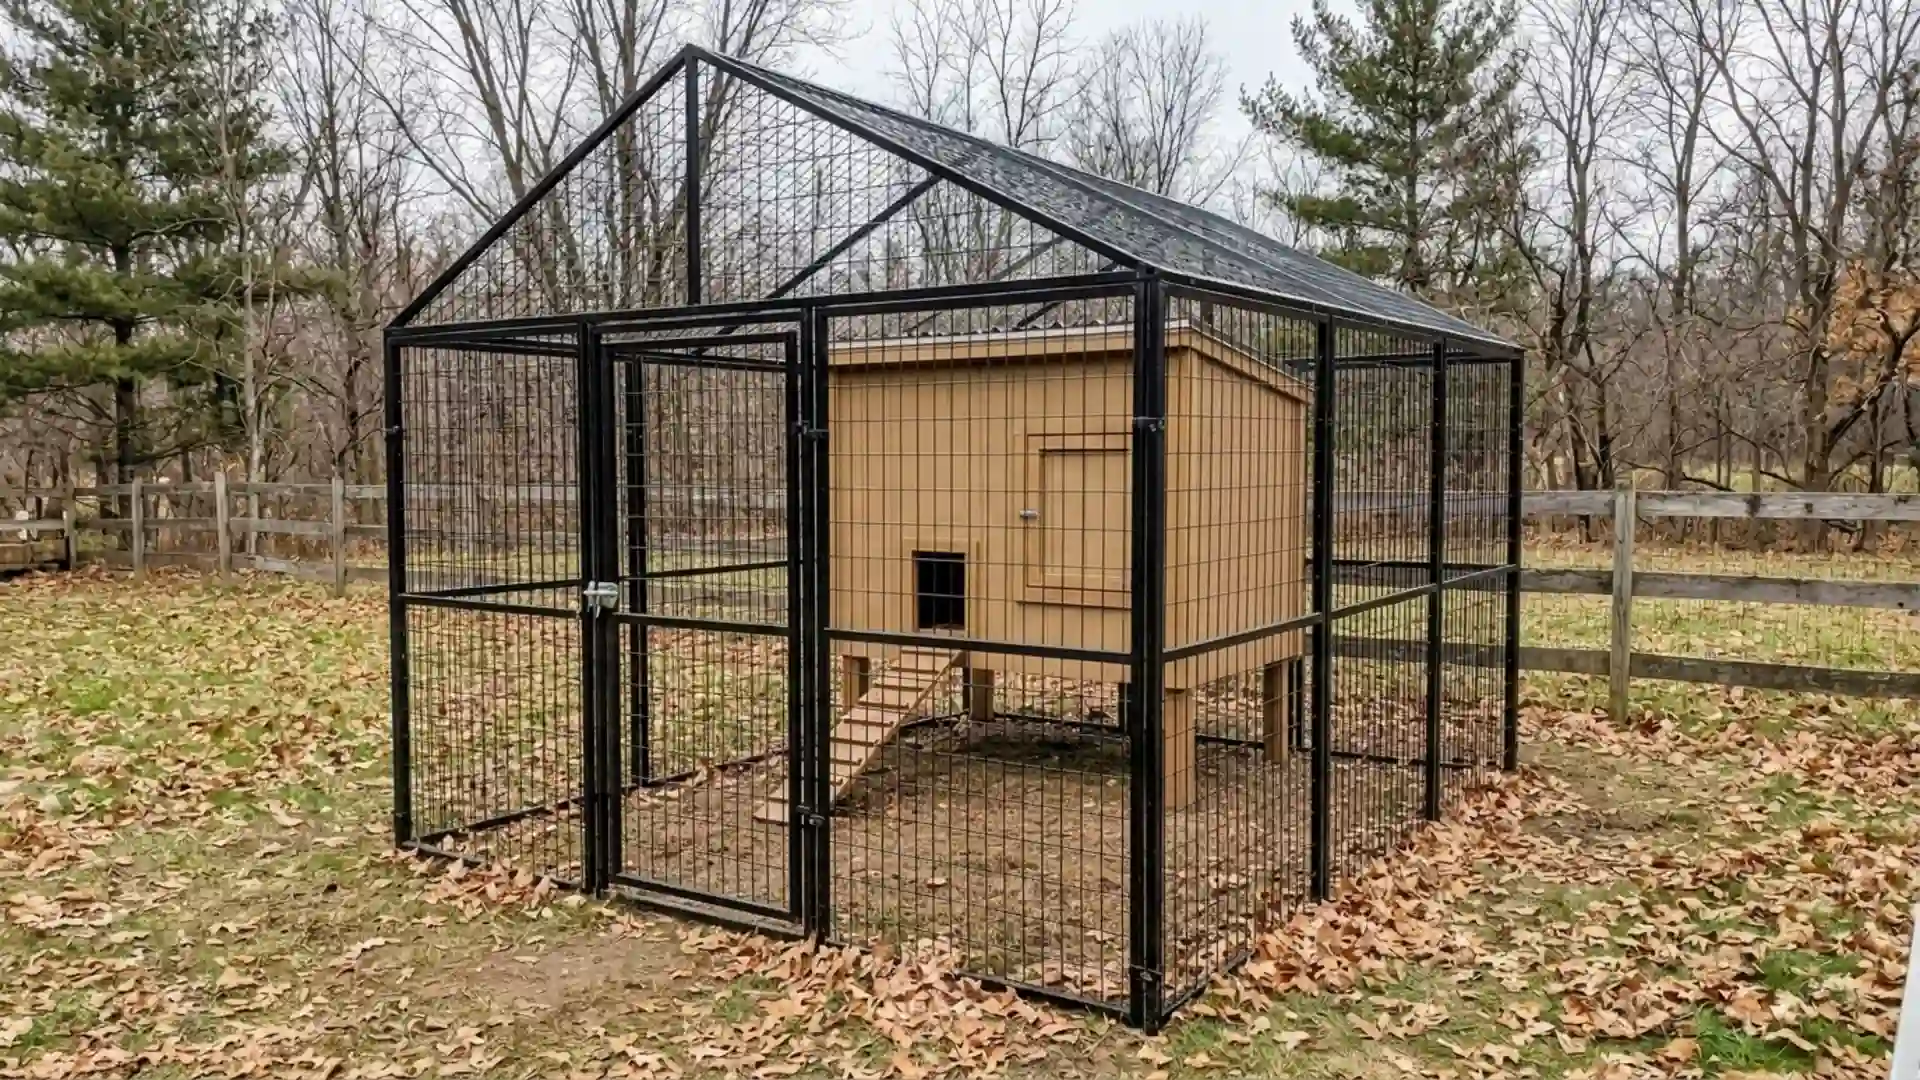
A heavily reinforced design using hardware cloth on every surface, including the floor, built specifically for properties dealing with high predator pressure from coyotes, bears, or persistent digging animals nearby.
Burying hardware cloth a foot or more below ground around the perimeter stops tunneling predators from getting underneath.
Double-layered walls and locking hardware address threats that a standard coop design would not fully cover.
Tips for Building a Chicken Coop On a Budget
A DIY chicken coop does not require expensive lumber. Smart sourcing, reused materials, and right-sizing cut costs without sacrificing durability.
- Reuse what you already have: Old pallets, fence boards, or leftover shed lumber can replace new plywood for siding and framing.
- Buy hardware cloth in bulk: A single large roll works out cheaper per foot than buying smaller pieces multiple times.
- Size the coop to your actual flock: A smaller footprint means less lumber, less wire, and less roofing material overall.
- Skip the paint and trim at first: Add decorative touches later, once the structure is built and functional.
- Check local classifieds and salvage yards: Free or discounted lumber, windows, and doors show up often from people renovating or demolishing sheds.
- Build the run in phases: Start with a smaller enclosed run and expand it later using a bolt-on section instead of the full size upfront.
Patience and resourcefulness, not shortcuts on framing or predator-proofing, are what actually bring the price of a homemade chicken coop down.
Conclusion
Building a DIY chicken coop gives you the freedom to create a space that works for both you and your flock.
Start with the basics: choose the right size, use durable materials, provide good ventilation, and protect the coop from predators and moisture.
You do not need an expensive design or advanced building skills to make a safe homemade chicken coop.
Take your time, measure carefully, and check every part before moving your flock inside.
Which idea do you think fits your backyard the best? Share your opinions in the comments below!
Frequently Asked Questions
Do I Need a Permit to Build a Chicken Coop?
It depends on your city or county, since some areas limit flock size or coop placement near property lines; checking local ordinances before building is worth the ten minutes it takes.
Should I Use Chicken Wire or Hardware Cloth?
Hardware cloth is the better choice for lower walls and the run’s perimeter because it is thicker and stops digging predators, while standard chicken wire is fine higher up where containment is the only goal.
How Many Nesting Boxes Does a Coop Need?
Plan for one nesting box per four hens, each sized about 12 inches deep, wide, and tall. Extra boxes beyond that ratio rarely get used, since hens tend to queue for the same one or two favorites anyway.
How High Should Roosting Bars Sit Inside the Coop?
Set roosting bars 18 to 24 inches off the floor, and always higher than the nesting boxes. Chickens sleep at the highest point available, so a roost above the boxes keeps birds off the eggs overnight.