Every cat deserves a safe place to curl up, especially when the weather turns cold or wet. A DIY cat house gives you an affordable way to create that comfort using simple materials and basic tools.
You can build an insulated outdoor shelter for a stray or community cat, or make a lightweight cardboard hideaway for an indoor pet.
The key is choosing the right size, adding proper insulation, protecting the entrance, and placing the shelter in a dry, secure location.
Below are clear steps to build a basic cat house using simple tools and materials.
What Do Cats Look for in a Shelter?
Cats look for a safe, quiet spot where they can rest without feeling disturbed. Predictable surroundings help a cat feel calm and secure in its shelter.
Many cats also like enclosed spaces since they feel more protected from view. An easy entrance matters just as much as a clear way to exit.
Cats avoid shelters that feel tight, blocked, or hard to escape from quickly. Familiar smells and locations also help a cat accept a new shelter faster.
Placing the shelter in a spot the cat already visits builds trust over time. Comfort and safety always come before anything fancy.
Materials and Tools for a DIY Outdoor Cat House
Building this cat house doesn’t require many materials to get started. Most of the cost comes from a few small purchases since leftover offcuts cover most of the build. Here is a simple list of materials with rough cost ranges:
| Material | Estimated Cost Range |
|---|---|
| Timbers (base frame, 2x2s) | $15–$30 |
| OSB board (offcuts or new sheet) | $10–$25 |
| Insulation offcuts | $0–$10 |
| 25mm insulation sheet (new) | $15–$25 |
| 6mm plywood | $10–$20 |
| Roofing felt | $10–$15 |
| Staples | $3–$5 |
| Adhesive/glue | $5–$10 |
| Timber battens | $5–$10 |
| Cladding offcuts | $0–$20 |
| Cat flaps (pair) | $20–$40 |
| Sander (if not owned) | $30–$60 |
These prices can shift a bit based on local stores and material quality. Using leftover wood and offcuts, like in this build, keeps the total cost much lower.
Note: These costs are rough estimates for general reference only. Actual prices vary by location, store, and material quality.
How to Build a DIY Cat House: Step-by-Step Process
Building a DIY cat house becomes easier when the frame, insulation, roof, and exterior are completed in the correct order. Follow these steps to create a sturdy, weather-resistant shelter that keeps cats safe and comfortable.
Step 1: Cut Timber for the Base Frame

Start by cutting the timber pieces needed to form the rectangular base frame. Use a chop saw or handsaw and measure every piece carefully before cutting.
Add a central support between the outer rails to prevent the floor from bending under the cat’s weight.
Join the pieces with exterior-grade screws, then check that the corners are square. Reclaimed timber is suitable when it is dry, straight, solid, and free from rot or exposed nails.
Tip: Place the frame on a flat surface while assembling it to prevent twisting or uneven corners.
Step 2: Insulate and Cover the Floor
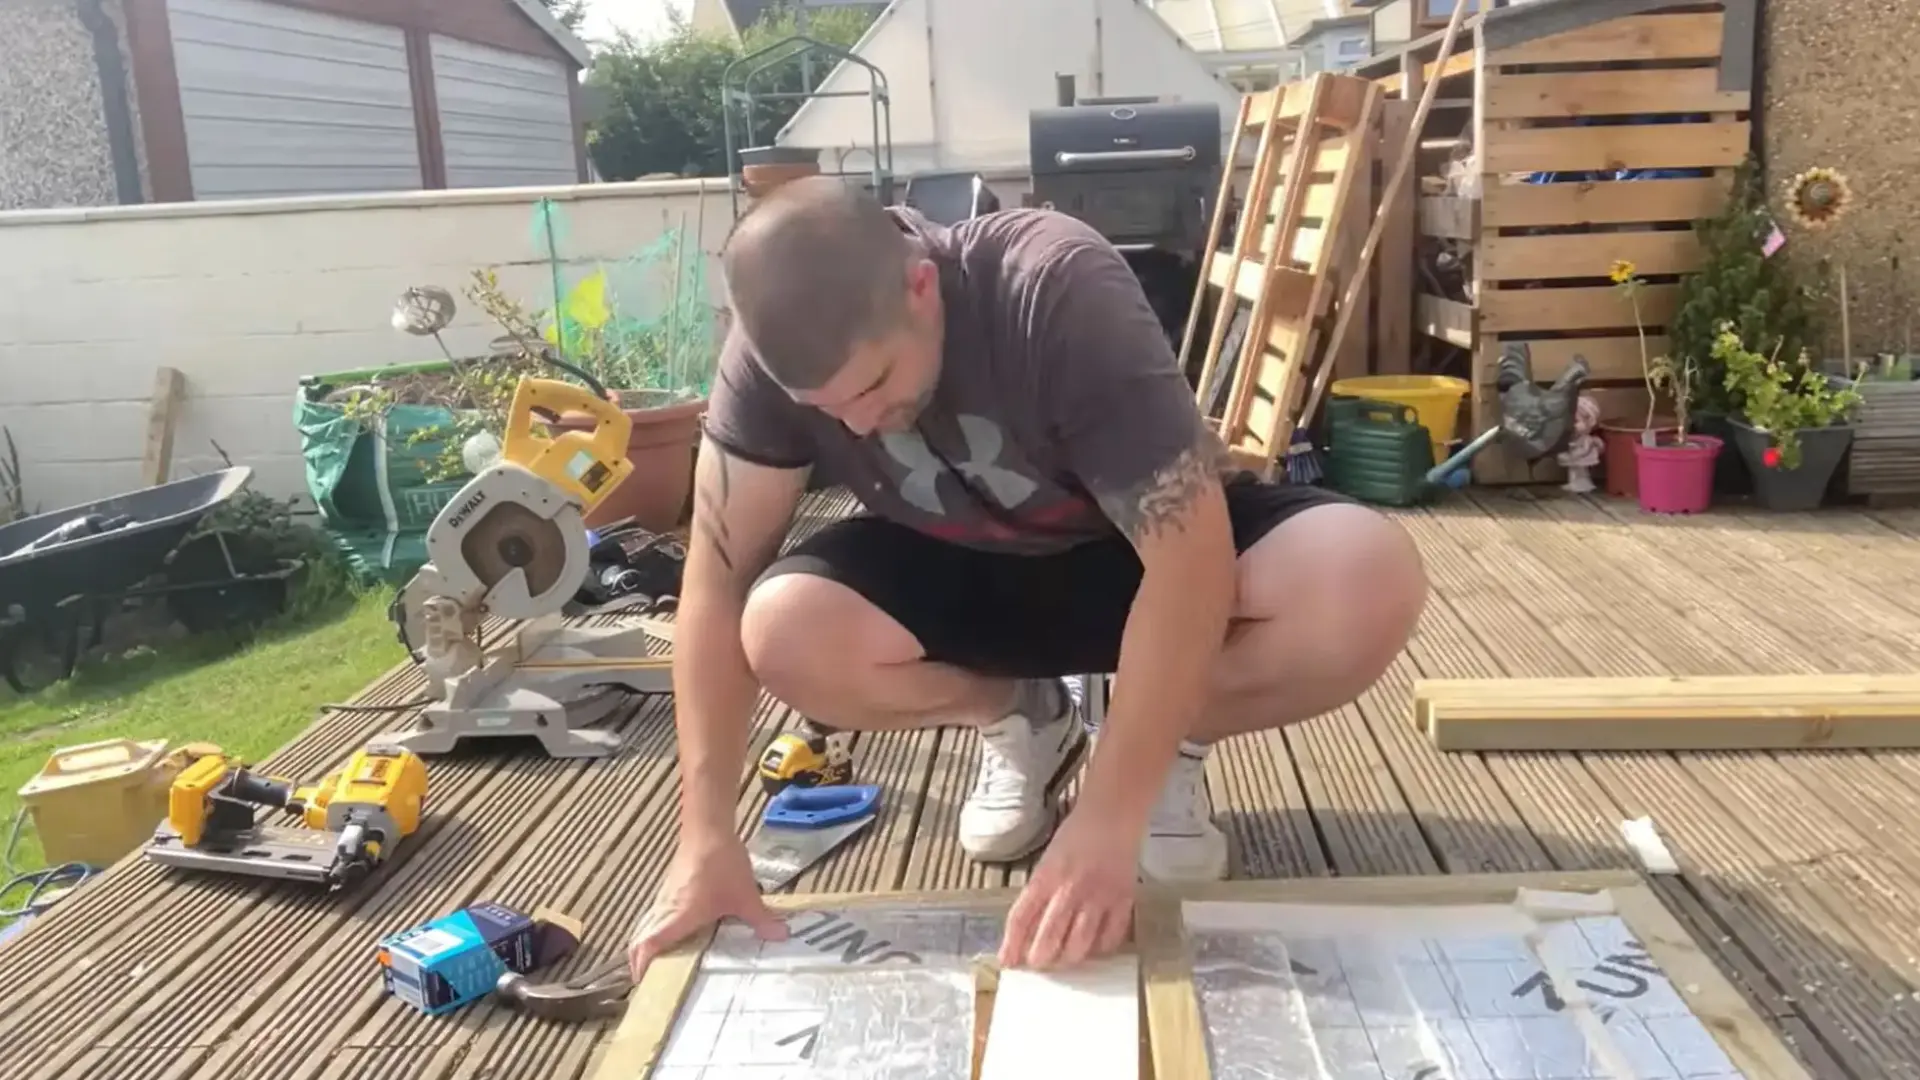
Cut an OSB panel to match the dimensions of the base frame and fasten it securely to the underside.
Turn the frame over and place rigid foam insulation or clean insulation offcuts tightly between the timber supports.
Avoid leaving large spaces where cold air could circulate. Cover the top with OSB or thin plywood to enclose the insulation and create a smooth floor. Secure every edge firmly so the panel does not flex or lift.
Tip: Seal small gaps between insulation pieces with foil tape rather than packing them with loose material.
Step 3: Build the Back Wall Frame

Construct the back wall by cutting two horizontal rails and two vertical side pieces. Join them into a rectangle and install a central timber divider for additional support.
Measure the completed frame against the rear edge of the base to confirm that the width matches.
Position it upright, check it with a level, and screw it through the bottom rail into the floor frame. Add temporary braces if necessary to keep it steady during construction.
Tip: Pre-drill screw holes near timber ends to reduce the risk of splitting the wood.
Step 4: Construct the Side Wall Frames
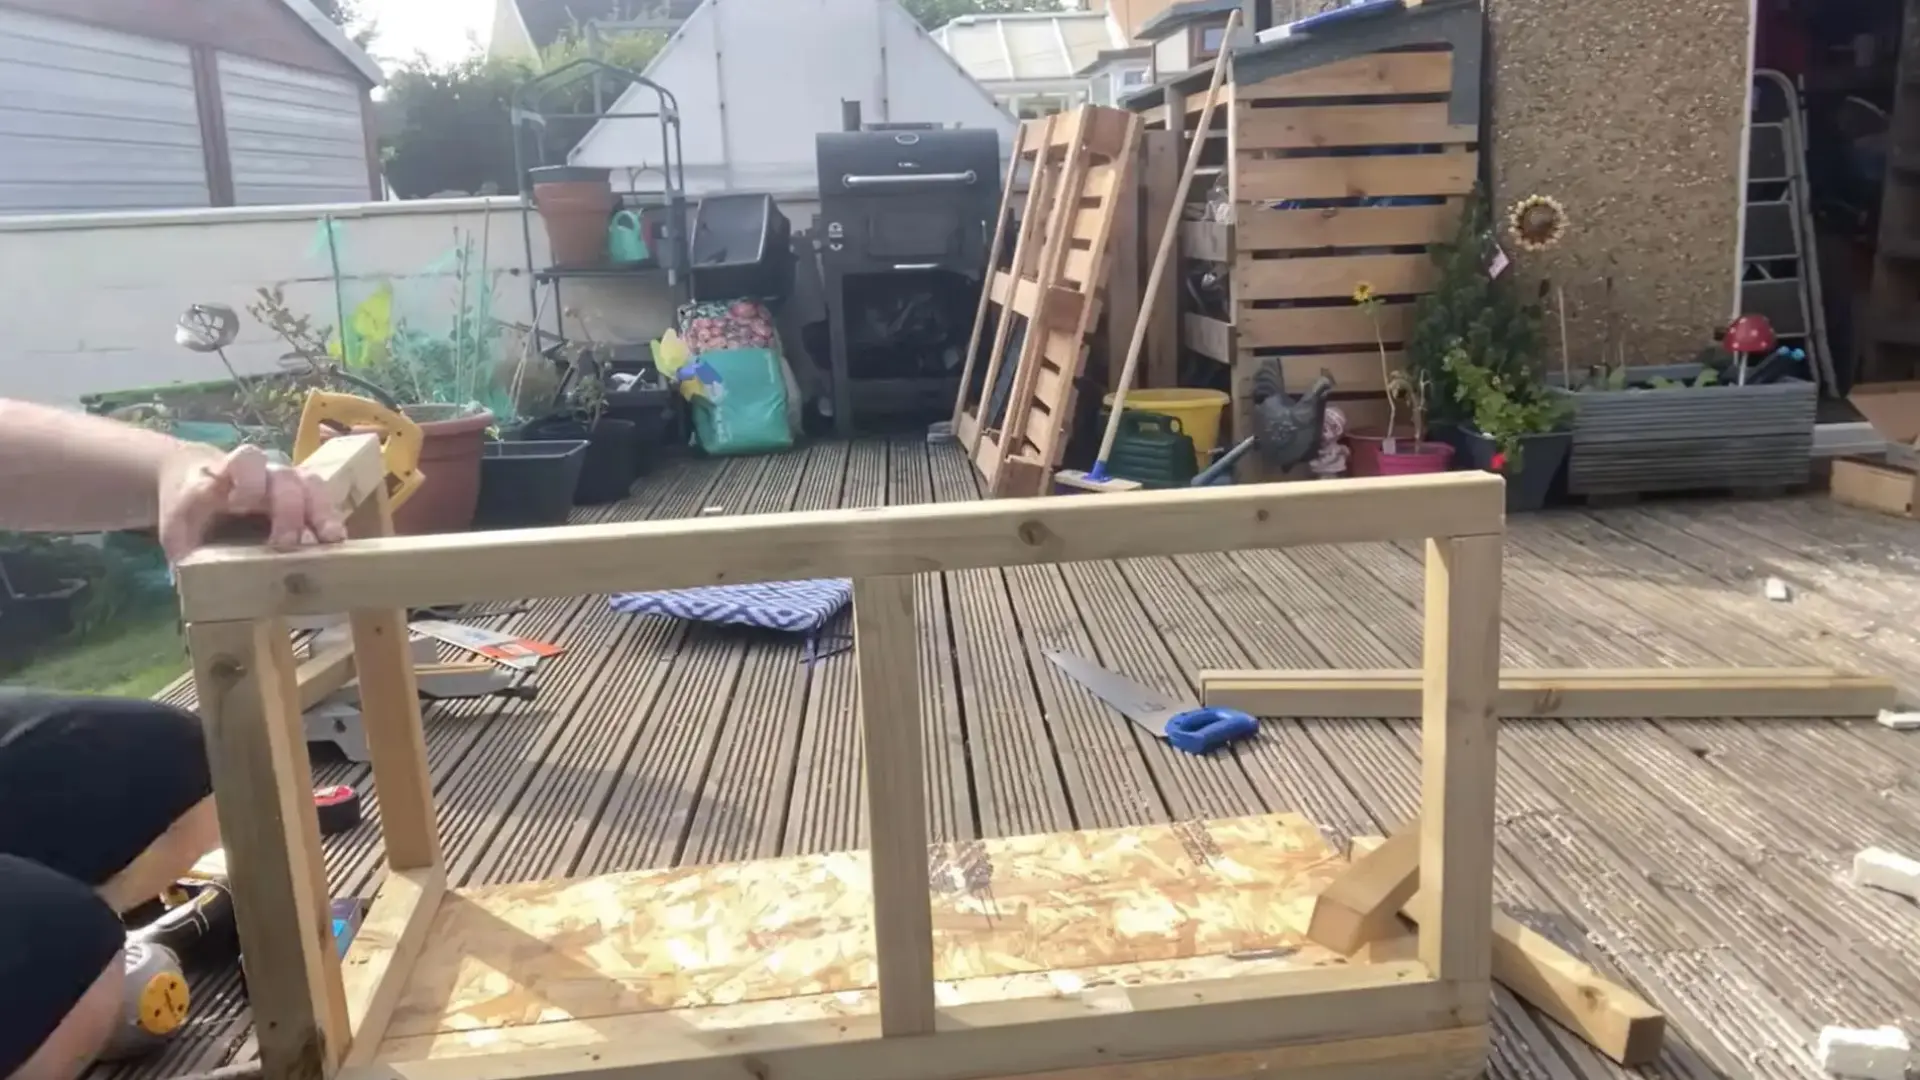
Build two matching side wall frames using timber cut to the planned height and depth of the cat house.
Each side can be made as a simple square or rectangle because the wall coverings will provide extra rigidity later.
Position the frames between the front and back edges of the base, then screw them into the floor and back wall. Check the structure diagonally to make sure it remains square before fully tightening every connection.
Tip: Build both side frames together and compare them directly so their measurements remain identical.
Step 5: Build the Front Frame Around the Cat Flaps
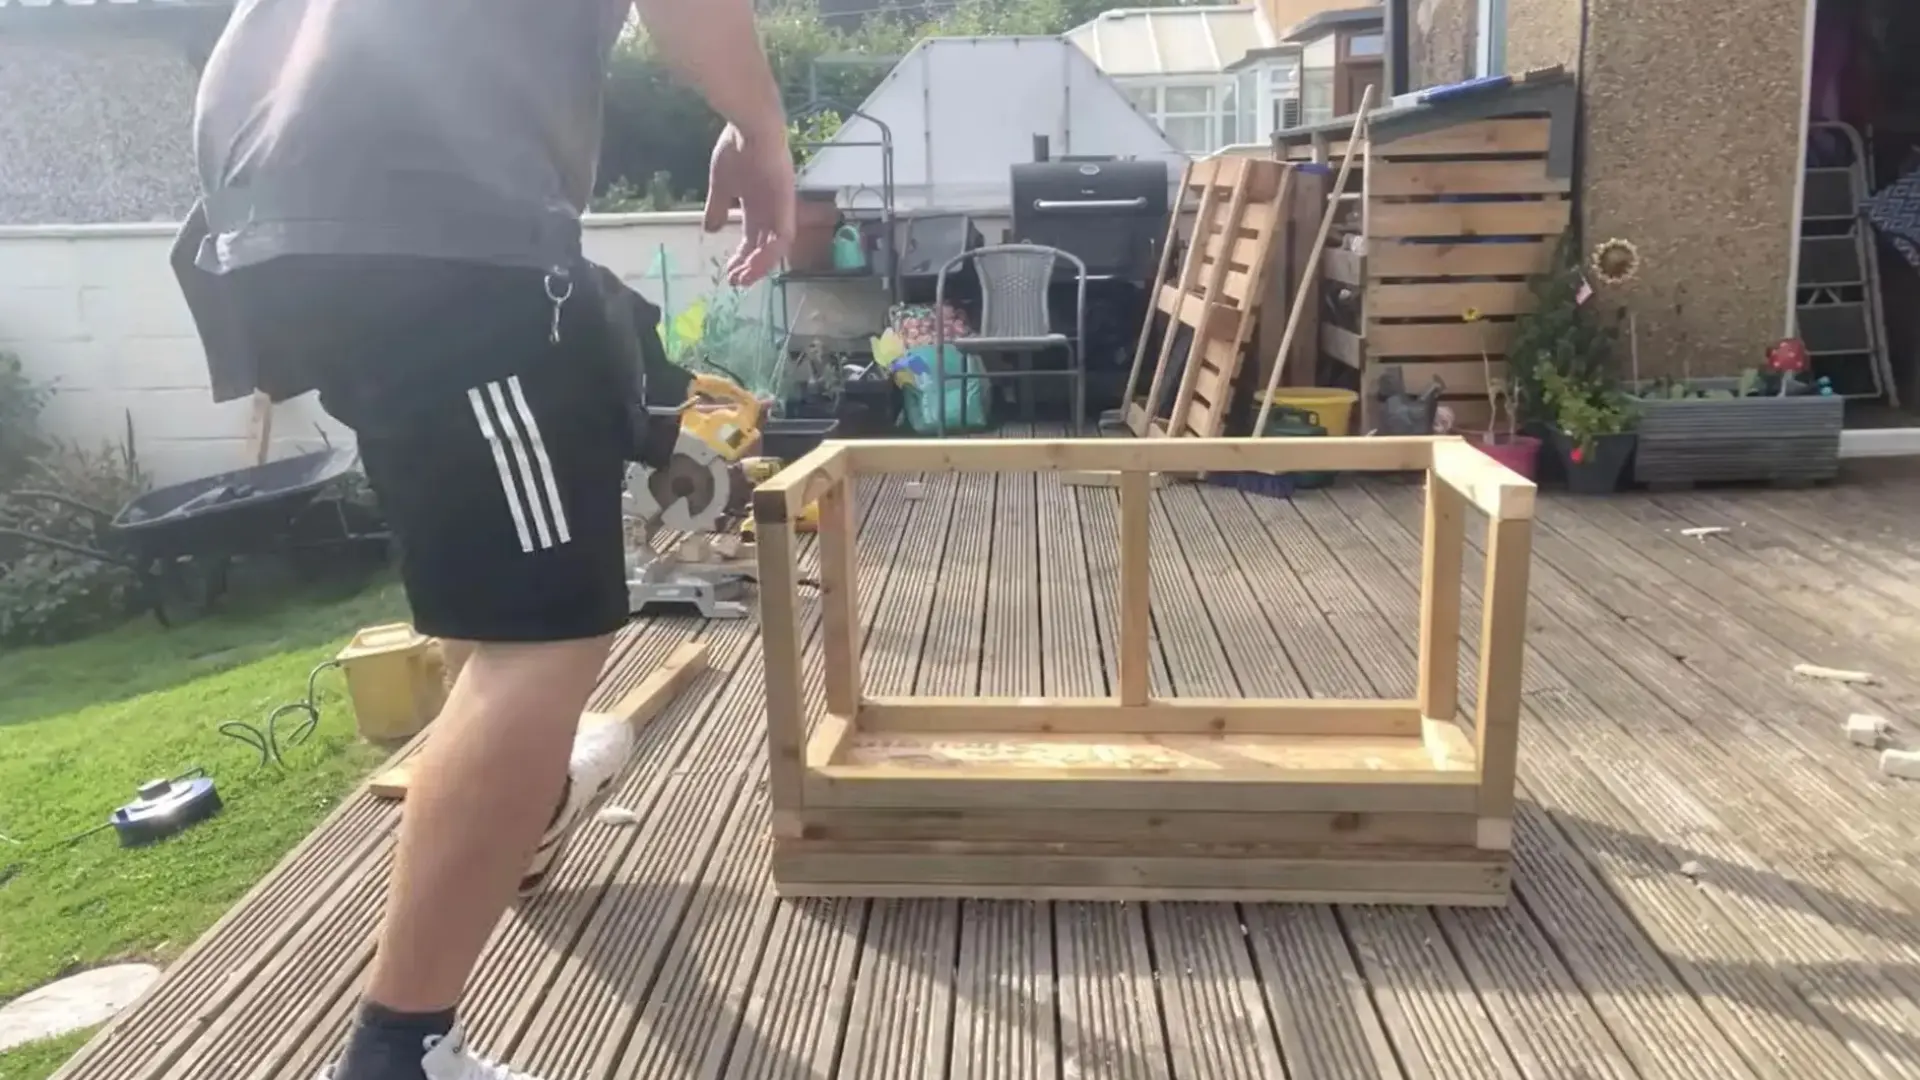
Measure the cat flaps before assembling the front wall because their openings determine the position of the supports.
Create the outer rectangular frame, then add vertical and horizontal dividers around each entrance. Install a lower rail that raises the flaps slightly above the floor and a top rail that supports the opening.
Test-fit the flap frames before securing the wall to the structure. Leave enough clearance for each door to swing without catching.
Tip: Follow the cat-flap manufacturer’s cutting template instead of relying only on the visible outer dimensions.
Step 6: Cover the Exterior Frame With OSB

Cut OSB panels to cover the exterior faces of the timber structure. Fasten each panel to the studs using exterior screws or nails, keeping all panel joints centered over solid timber.
Using one continuous panel per wall is ideal, but smaller offcuts can be combined when they fit securely.
The OSB helps square and stiffen the frame while creating a strong base for insulation and cladding. Trim carefully around the prepared cat-flap openings.
Tip: Leave a narrow expansion gap between adjoining OSB panels to prevent buckling during weather changes.
Step 7: Insulate the Walls
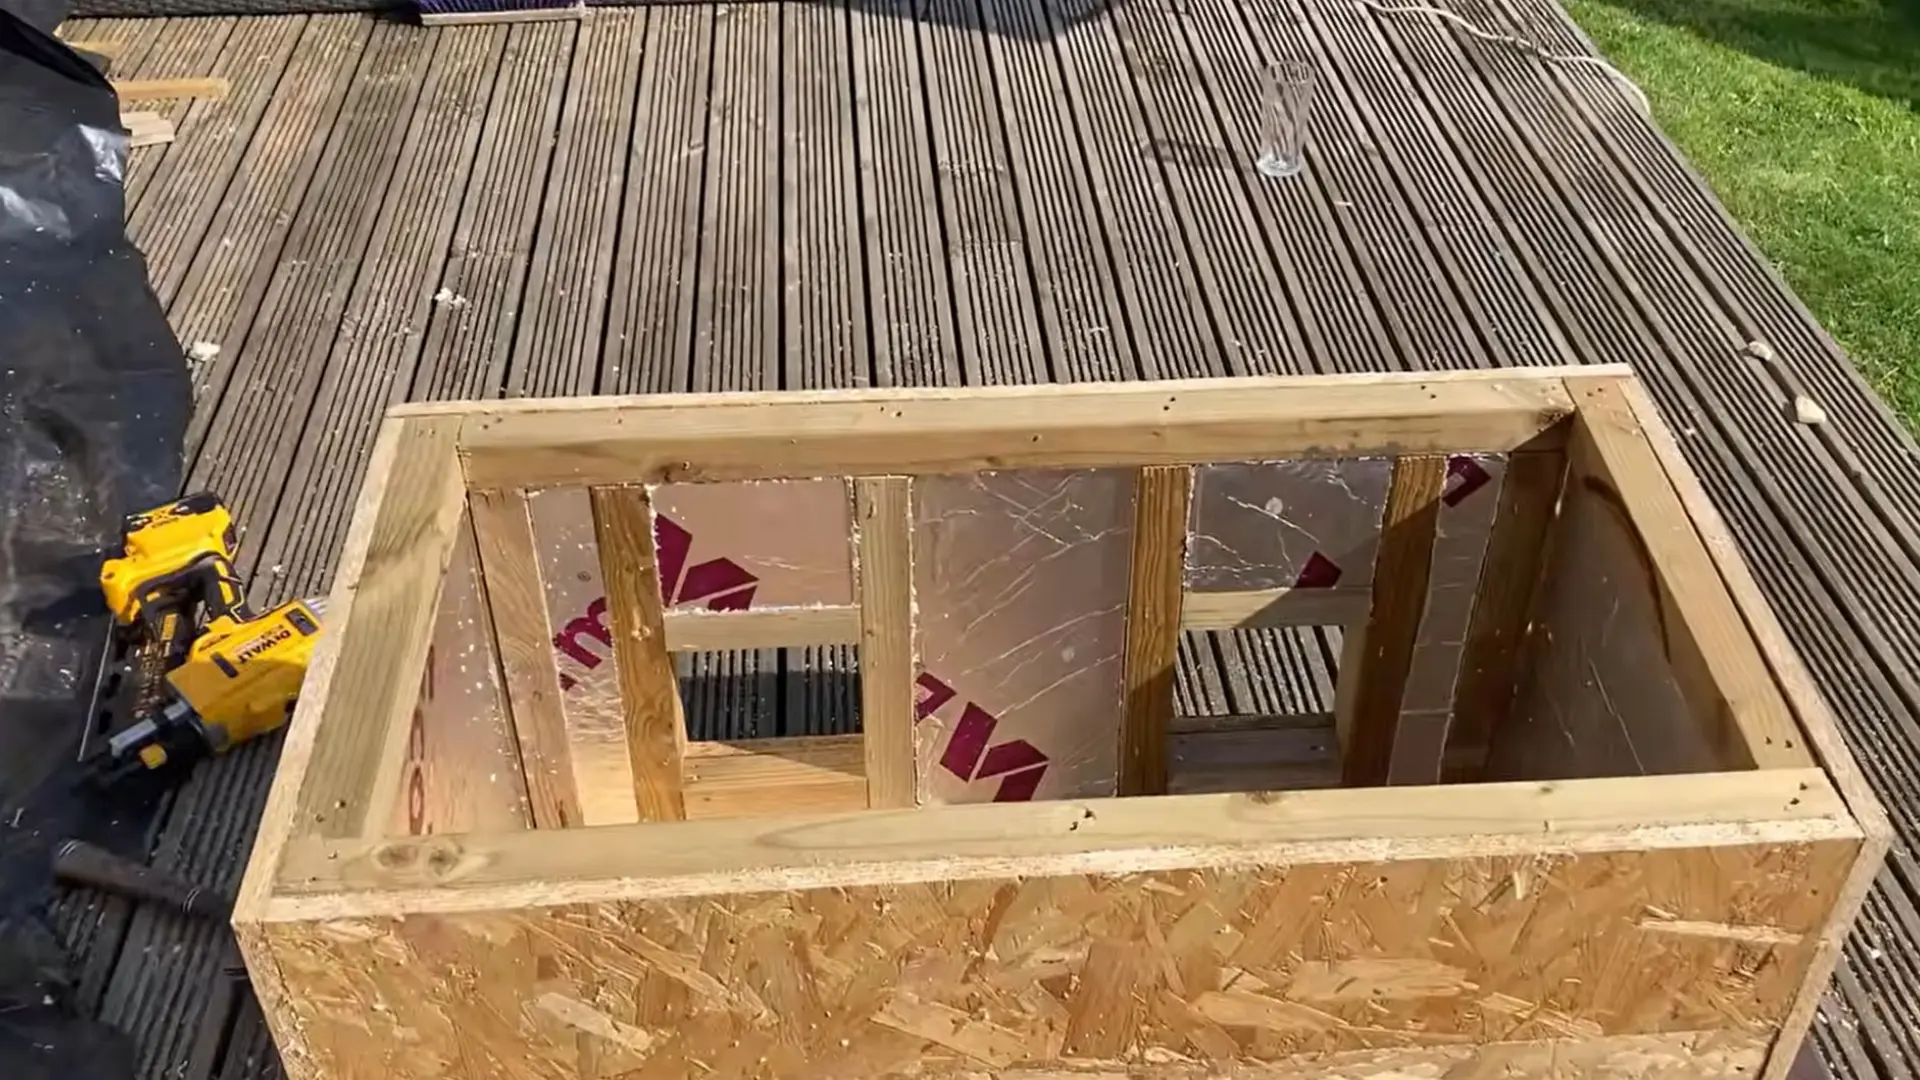
Measure every space between the wall studs and cut rigid foam insulation to fit each cavity closely.
Insert the pieces without crushing or bending them, and fill narrow gaps with smaller foam offcuts. Work carefully around the entrance openings so the insulation does not interfere with the cat flaps.
Covering the entire wall surface reduces drafts and slows heat loss during winter. Avoid leaving exposed loose fibers where cats could scratch, chew, or inhale them.
Tip: Number the insulation pieces as you cut them so each panel returns to the correct wall cavity.
Step 8: Line the Interior With Thin Plywood
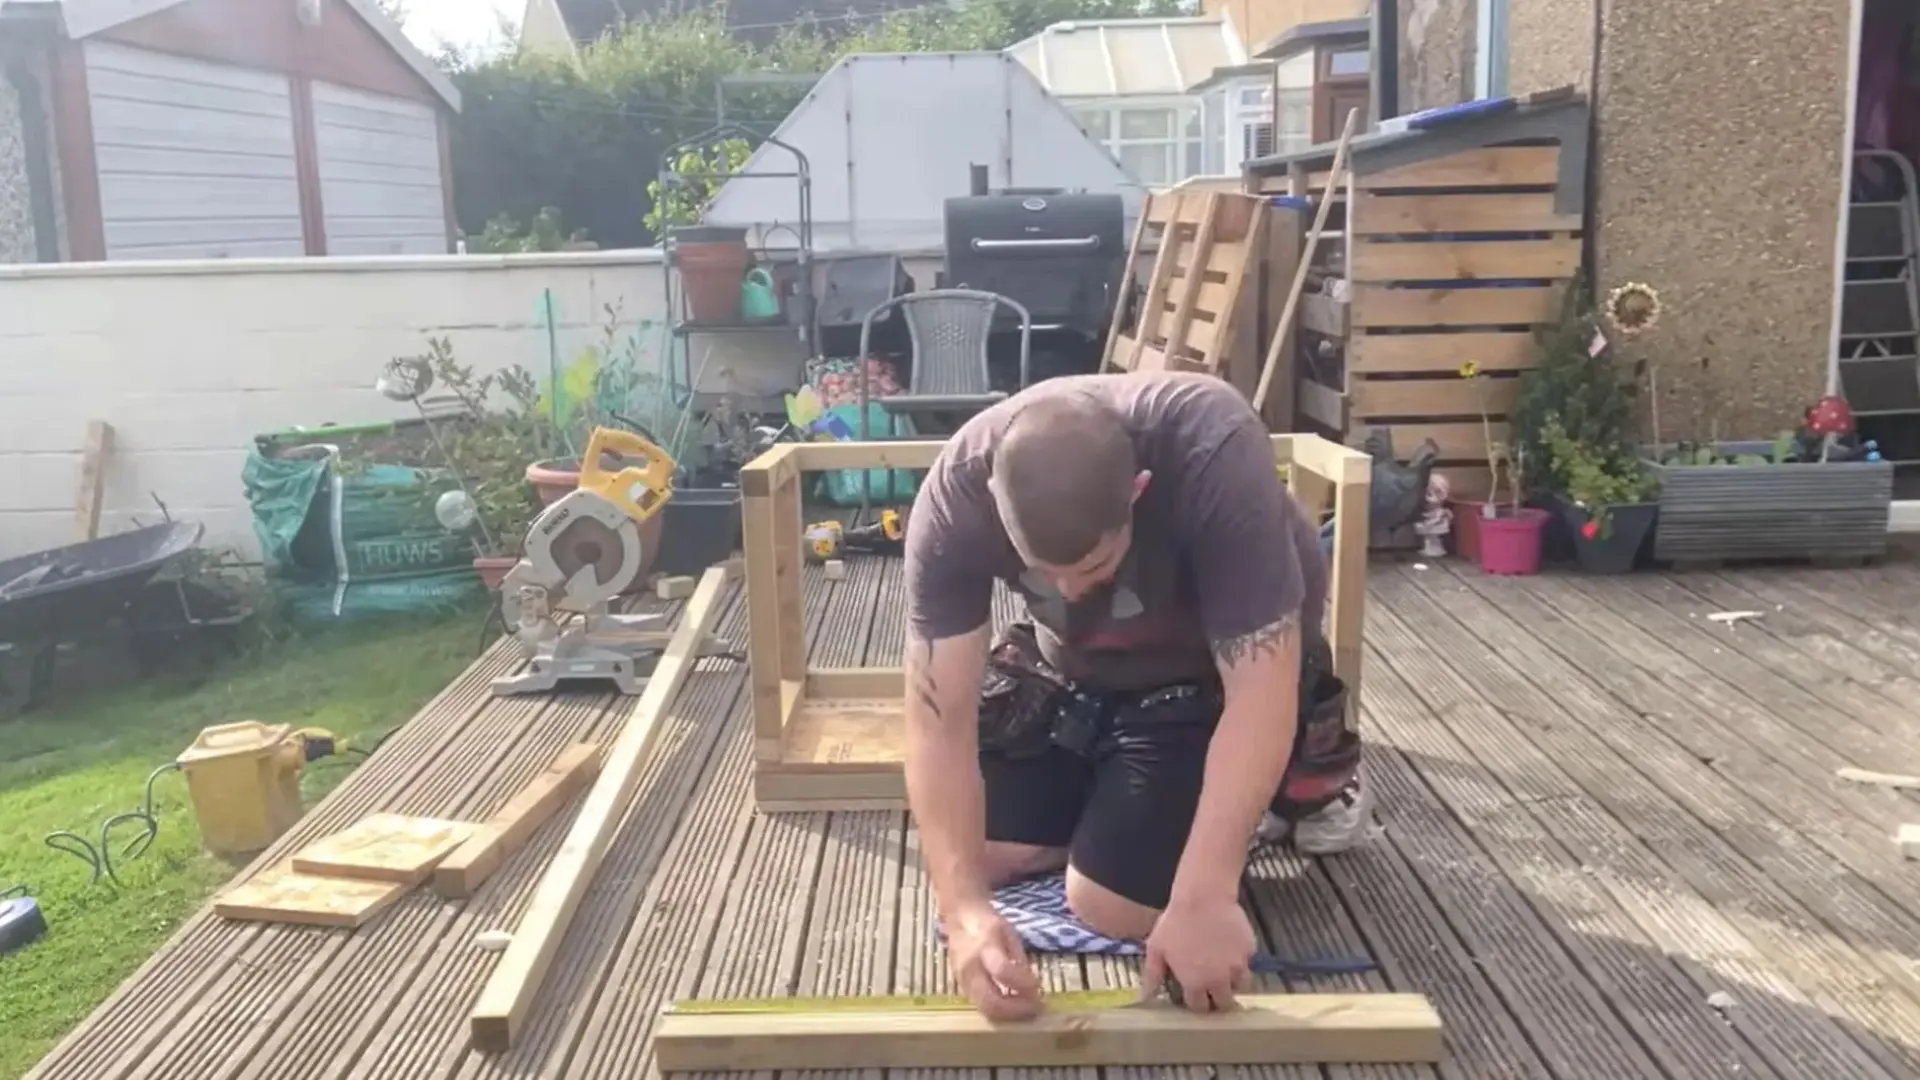
Cut approximately 6 mm plywood panels to cover the insulated interior walls. Thin plywood protects the insulation while taking up less space than thicker boards, which helps preserve the compact sleeping area.
Secure each panel directly to the timber frame using short screws or pins that cannot pass through the outer wall.
Smooth the edges around entrances and corners. Inspect the interior carefully for splinters, sharp fasteners, or small gaps that could trap claws.
Tip: Sand and seal the plywood before installation because the panels are easier to finish while lying flat.
Step 9: Build an Insulated Overhanging Roof
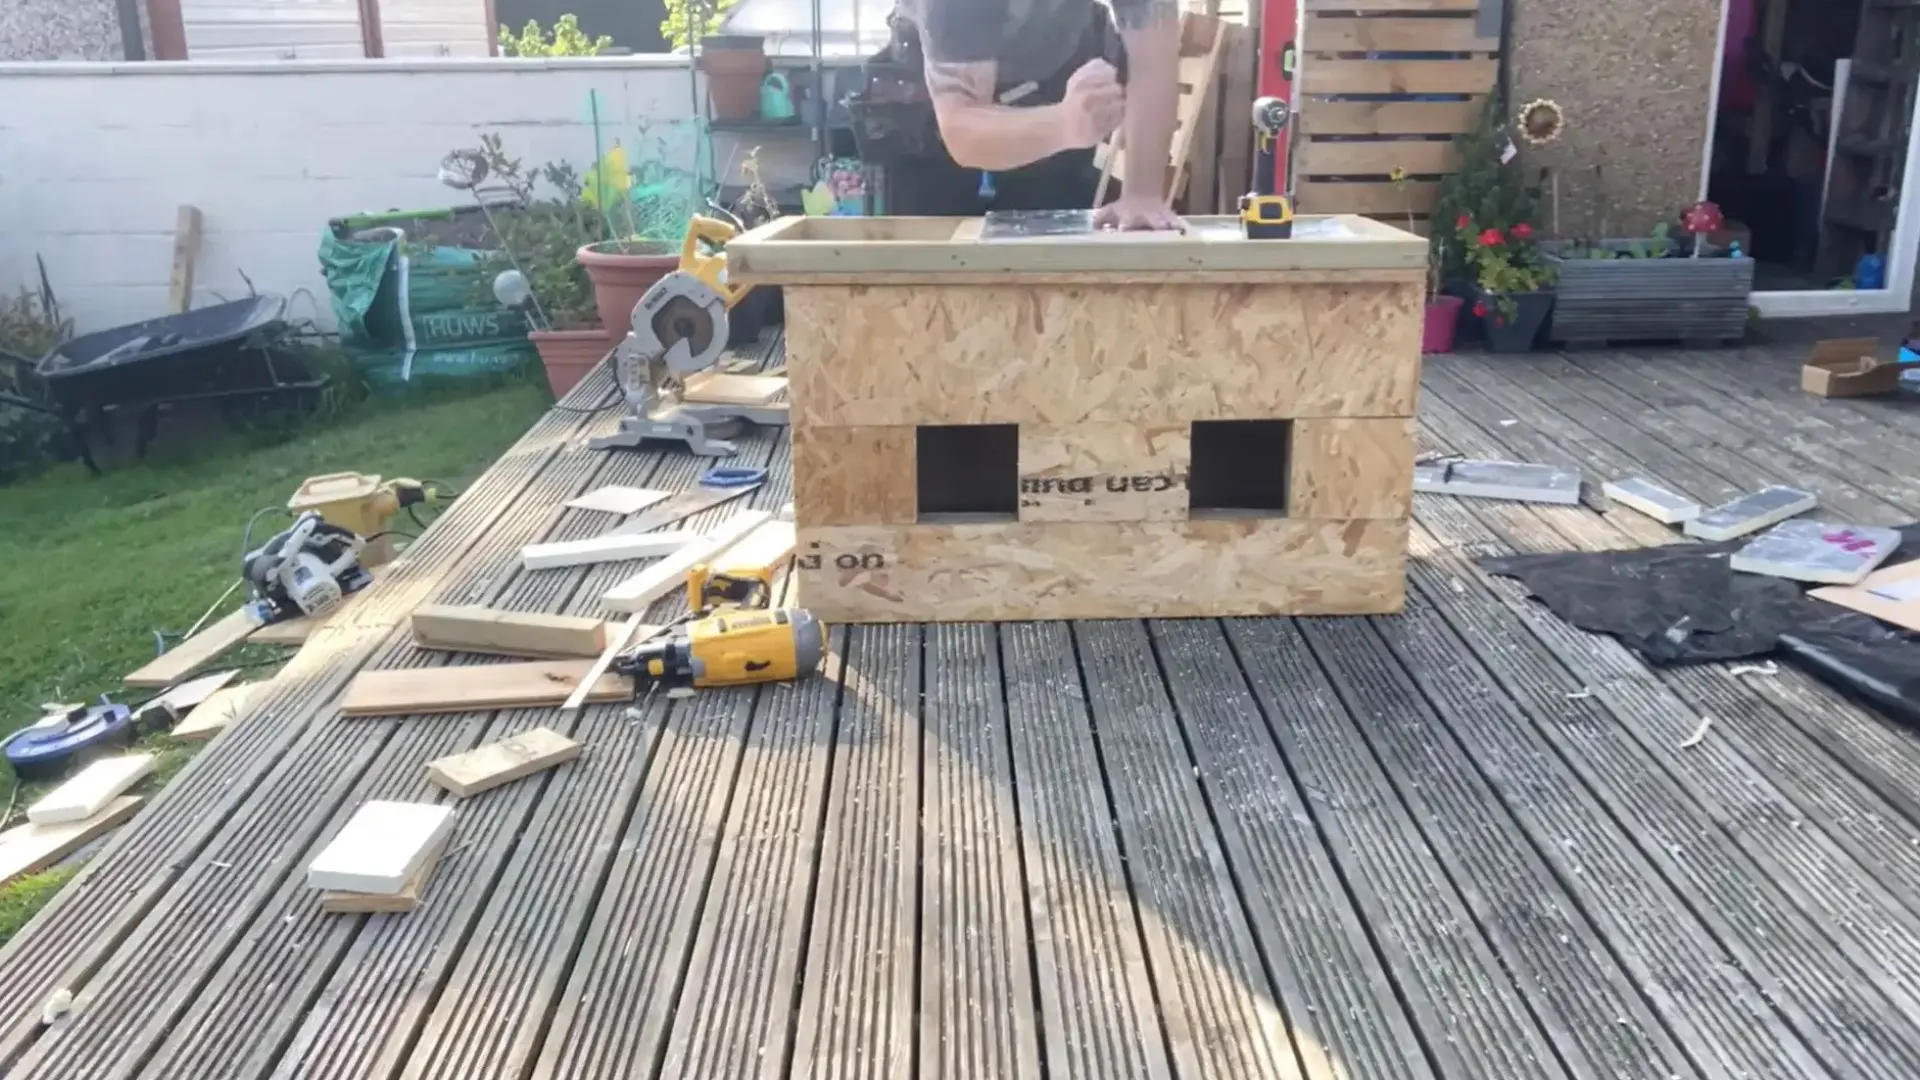
Construct a rectangular roof frame using the same method as the floor and walls. Make it approximately 50 mm larger than the cat house on each side so the finished roof creates a protective overhang.
Fix OSB to the upper face, place rigid insulation between the framing pieces, and cover the underside with thin plywood.
The overhang helps prevent rain from running directly down the walls while the insulated cavity reduces heat loss through the top.
Tip: Keep the roof removable so the interior remains easy to inspect, clean, and repair.
Step 10: Add Roofing Felt

Lay roofing felt over the OSB roof panel and allow enough material to wrap around every edge.
Spread suitable felt adhesive evenly across the surface, then press the roofing material down firmly to prevent bubbles or loose areas.
Fold the felt over the sides and secure it underneath with corrosion-resistant staples. Pay particular attention to corners and overlapping seams because these areas are more likely to admit water. Allow the adhesive to cure before handling the roof.
Tip: Install the felt on a dry day so moisture does not become trapped beneath the roofing layer.
Step 11: Add Roof-Locating Battens
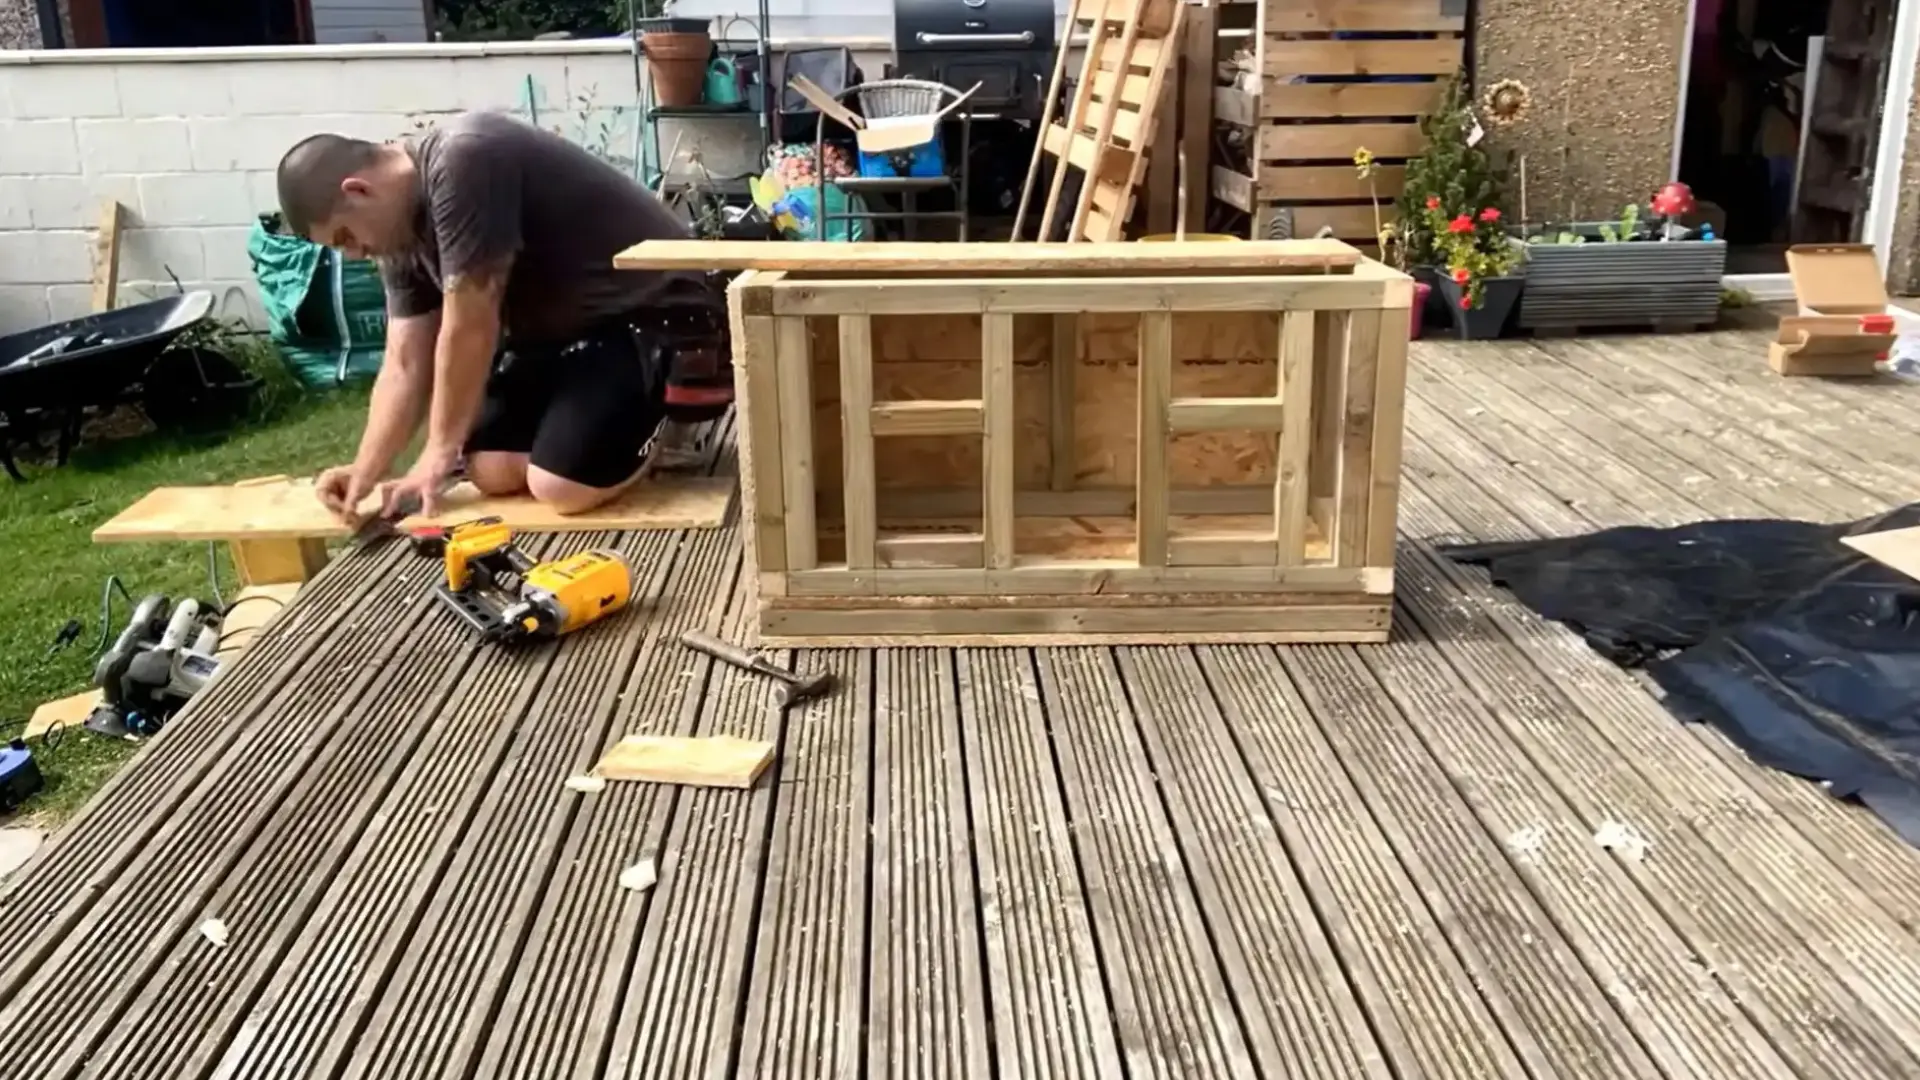
Turn the finished roof over and position short timber battens on its underside. Arrange them so they sit just inside the top edges of the wall frame when the roof is lowered into place.
These pieces prevent sideways movement without permanently fastening the roof to the house.
Apply exterior-grade adhesive to each batten and reinforce it with pins or short screws. Test the fit before the adhesive dries to ensure the roof can be removed without sticking.
Tip: Leave a few millimeters of clearance around the battens because damp timber may expand slightly.
Step 12: Install the Exterior Cladding

Begin attaching exterior timber cladding over the OSB, starting along the bottom edge of each wall. Keep the first board level because every row above it will follow the same line.
Full-length boards create the cleanest finish, but leftover pieces can be staggered to reduce waste and add visual interest.
Cut carefully around the cat-flap openings and secure every joint over a timber support. Maintain the correct overlap so rain cannot easily reach the OSB underneath.
Tip: Paint or seal the hidden back surfaces of the cladding before installation for added moisture protection.
Step 13: Plane, Sand, and Finish the Cladding

Inspect the installed cladding and plane down any raised edges or uneven joints. Sand the surface, corners, and cut ends until they feel smooth and free from splinters.
Remove all dust before applying a pet-safe exterior stain, paint, or wood preservative. Coat exposed end grain thoroughly because it absorbs moisture quickly.
Allow the finish to dry and cure completely before placing bedding inside or allowing cats near the house, especially when using strong-smelling products.
Tip: Choose a light exterior color in warm climates because dark finishes can absorb more summer heat.
Step 14: Fit the Cat Flaps
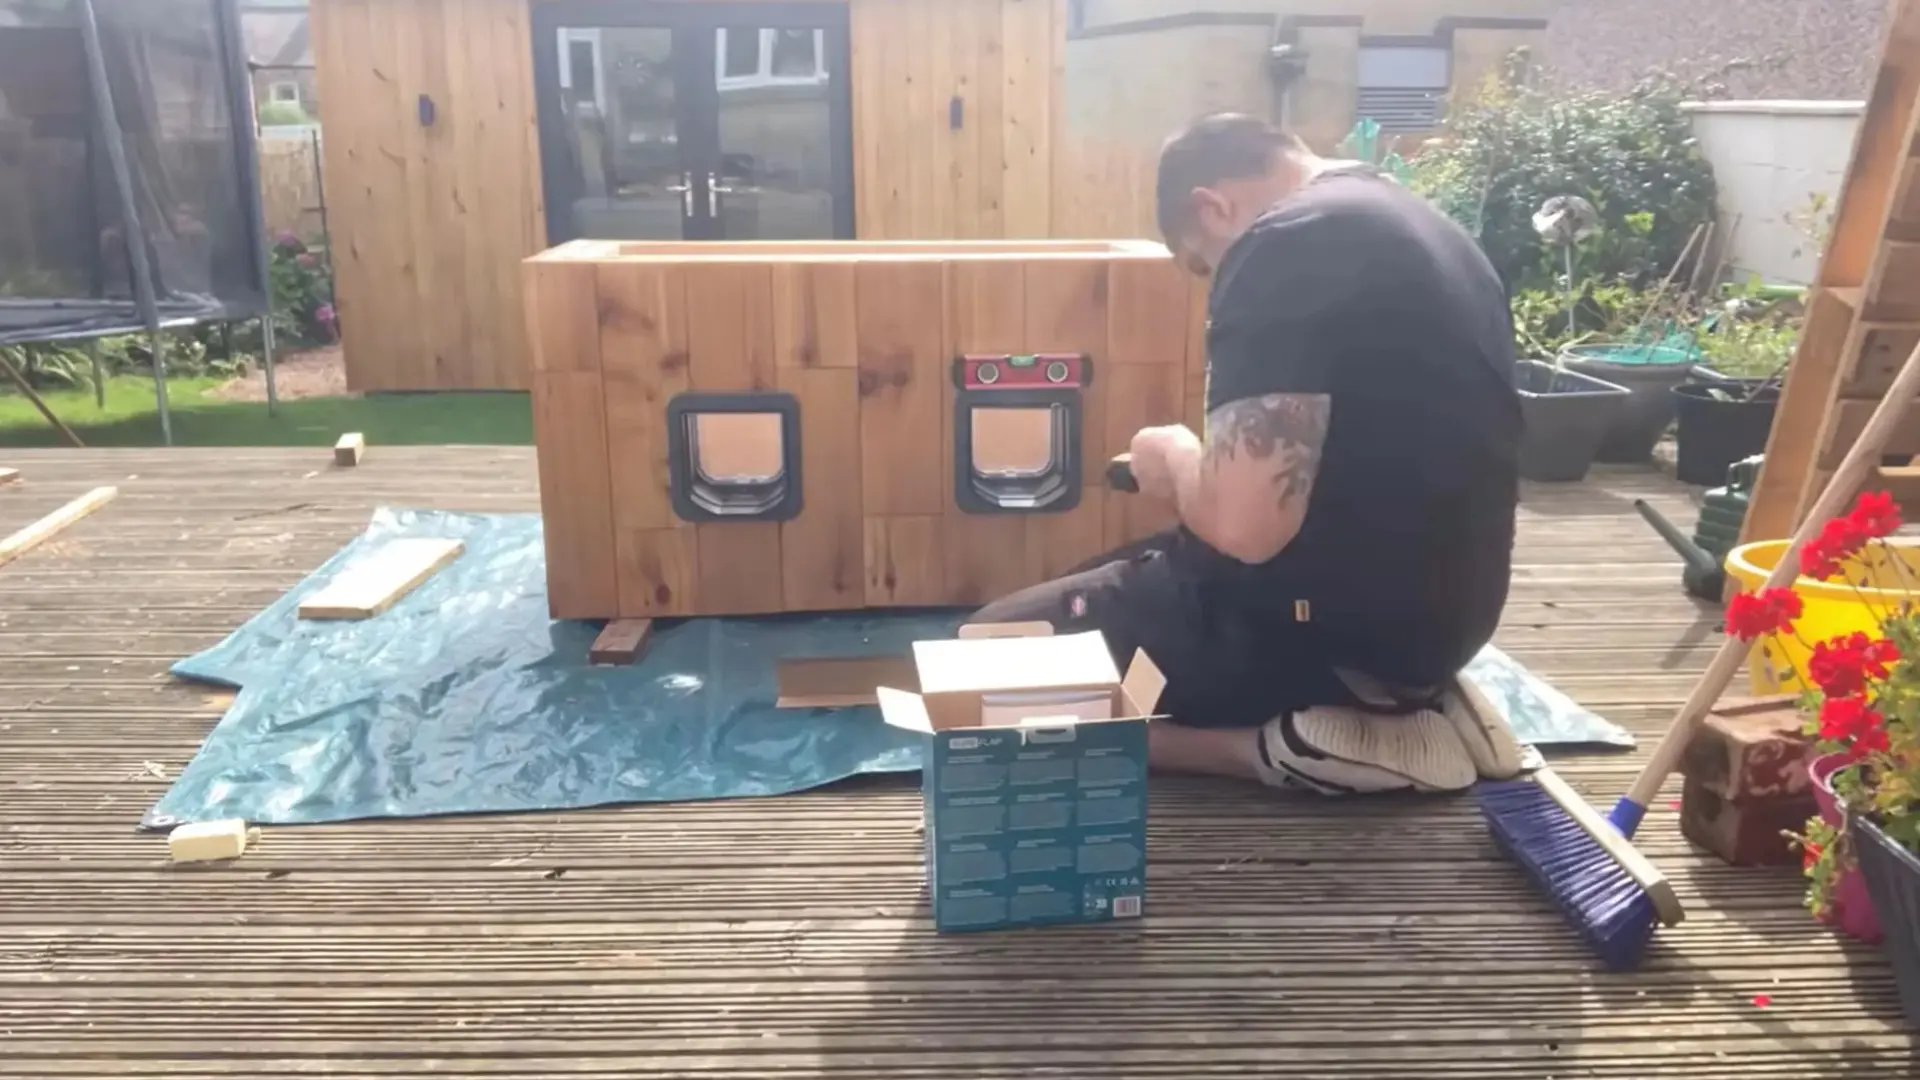
Insert each cat flap into its prepared opening and secure both sides according to the manufacturer’s instructions.
Check that the frame sits flat against the wall and use a suitable exterior sealant around gaps where rain could enter.
Open and close each flap repeatedly to confirm that it moves freely without scraping the cladding.
Examine the interior for protruding screws or rough plastic edges. The flap should block drafts while remaining light enough for the cat to push.
Tip: Temporarily tape the flap open while the cat learns to enter and leave the new shelter.
Step 15: Position and Introduce the Cat House
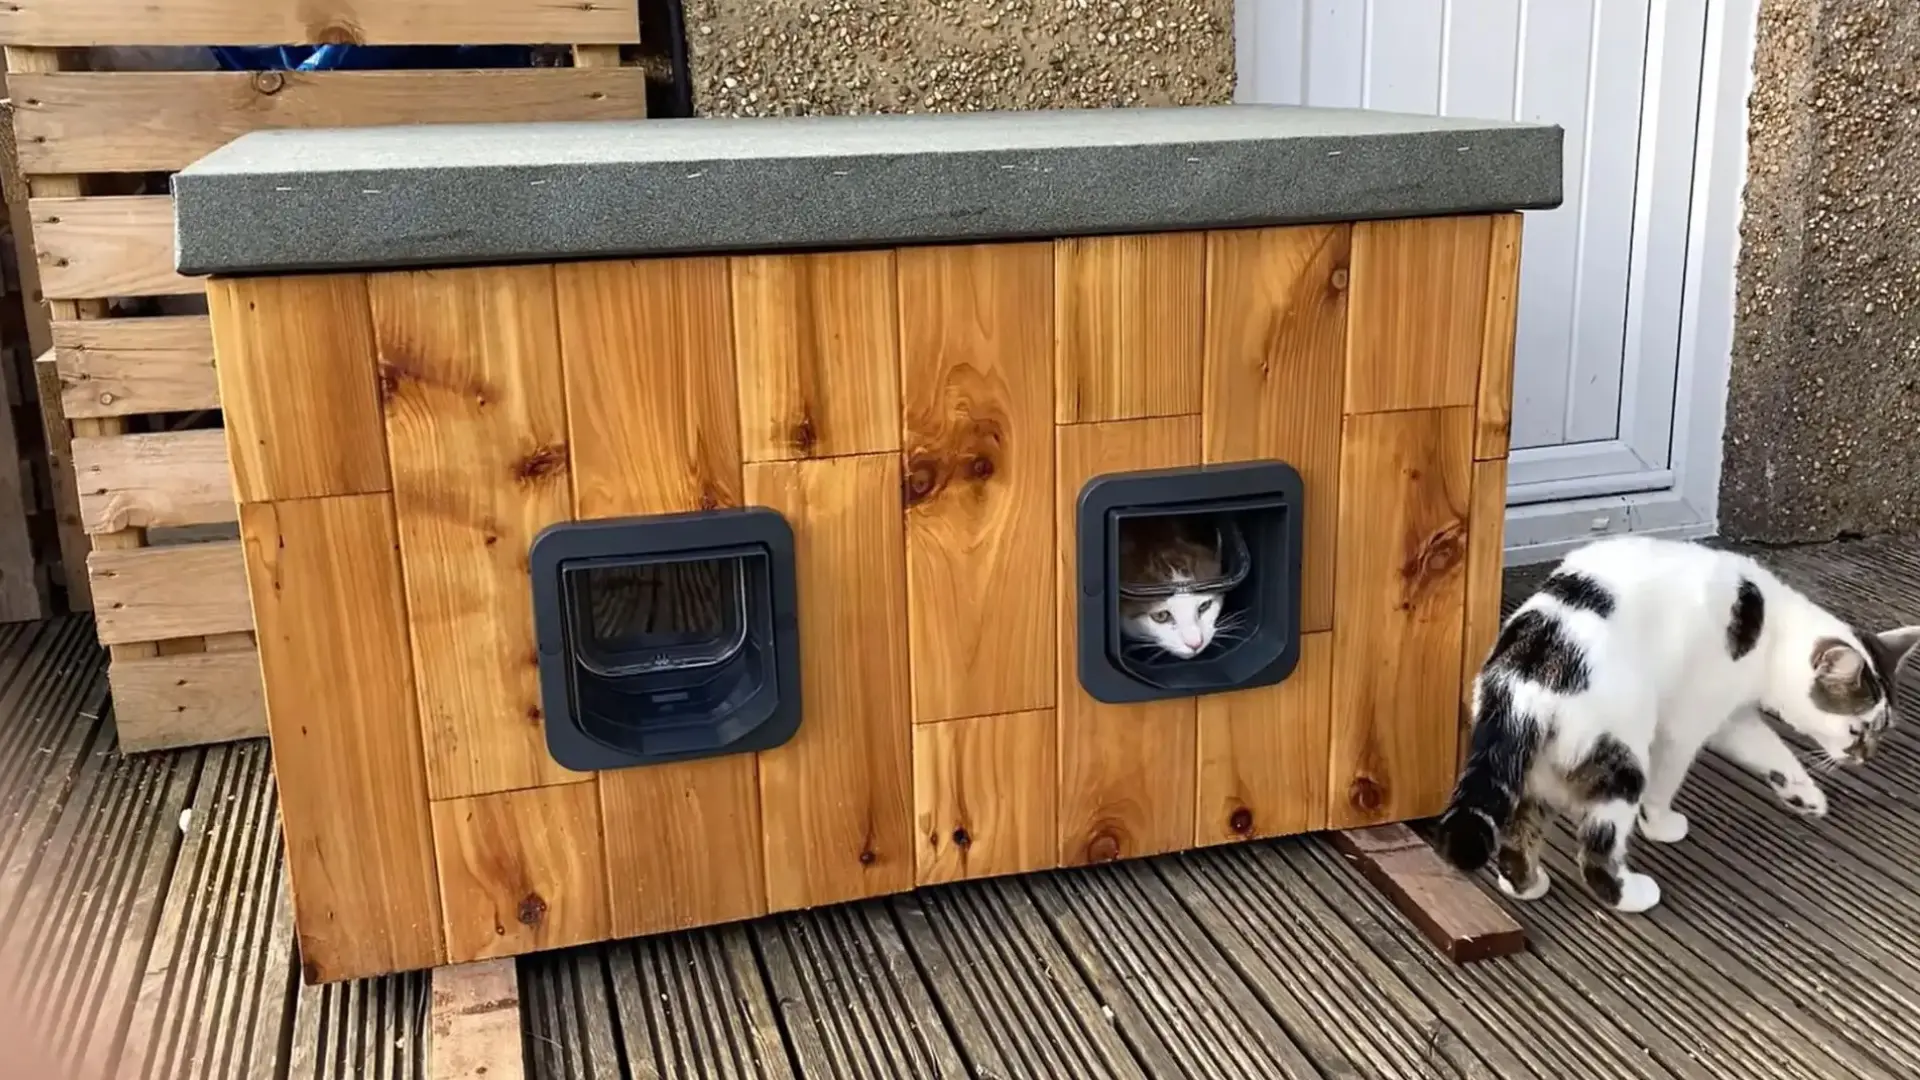
Move the completed cat house to a quiet, sheltered spot protected from strong wind and direct rain. Set it on bricks, pavers, or treated timber so the floor stays above damp ground.
The same wind-and-shade logic used to plan an outdoor furniture layout applies here too. Add bedding, check for safety, then place familiar scents or treats near the entrance and let the cat explore on its own time.
Tip: Face the entrance toward a wall or fence to create an additional barrier against wind and rain.
For more details, watch the video tutorial by The DIY Fix.
How to Keep Cats Comfortable Through Every Season?
A DIY cat house needs small changes to stay comfortable year-round. In winter, add rigid foam insulation and dry straw bedding to hold in heat.
A small raised entrance also helps block cold drafts. Keep the shelter away from rain, snow, and strong wind. In summer, move the house to a shaded and well-ventilated spot.
Remove extra straw so the space does not trap heat. Avoid placing the shelter in direct afternoon sun. Check often for damp bedding, blocked entrances, or pests.
Raise the shelter above wet ground to stop moisture from building up. These small steps keep cats safe and cozy year-round.
How to Maintain and Upgrade a DIY Cat House?
Routine maintenance keeps the shelter clean and comfortable for cats all year. A few simple upgrades also improve protection from rain, wind, heat, and cold. Here are some easy ways to maintain and upgrade the shelter:
- Replace the bedding often: Add fresh, dry straw to keep the inside warm and dry.
- Check the roof regularly: Seal any leaks or loose felt to block rain from getting in.
- Clean the interior monthly: Remove debris and wipe down surfaces to cut down on dirt and odors.
- Raise the base off the ground: Use bricks or timber supports to stop dampness from building up.
- Add a small roof overhang: This helps redirect rain away from the entrance and walls.
Small checks like these help the shelter last much longer. Always make sure upgrades keep the space safe and easy to clean.
Frequently Asked Questions (FAQs)
How large should the entrance be?
A five- to six-inch entrance generally works well for an average adult cat. This size keeps cold air and drafts out.
What is the best bedding for an outdoor cat house?
Loose, dry straw gives good insulation without holding moisture like blankets or towels do. Straw stays warm and dries quickly.
How often should straw be replaced?
Replace it whenever it becomes damp, dirty, compressed, or affected by insects. Fresh straw keeps the shelter clean and warm.
The Bottom Line
That covers everything needed to build a solid diy cat house. Simple materials and steady hands turn spare wood into a cozy shelter. Every wall, panel, and flap plays a part in keeping cold air out.
Regular upkeep keeps the shelter strong through rain, wind, and heat. Cats need a calm, sturdy place to call their own.
Building a diy cat house shows real care for animals without a home. It costs little but gives a lot back to cats in need. Once built, the shelter can protect cats for many seasons.
Small effort now brings big comfort later for furry visitors. Share your build experience in the comments below.