

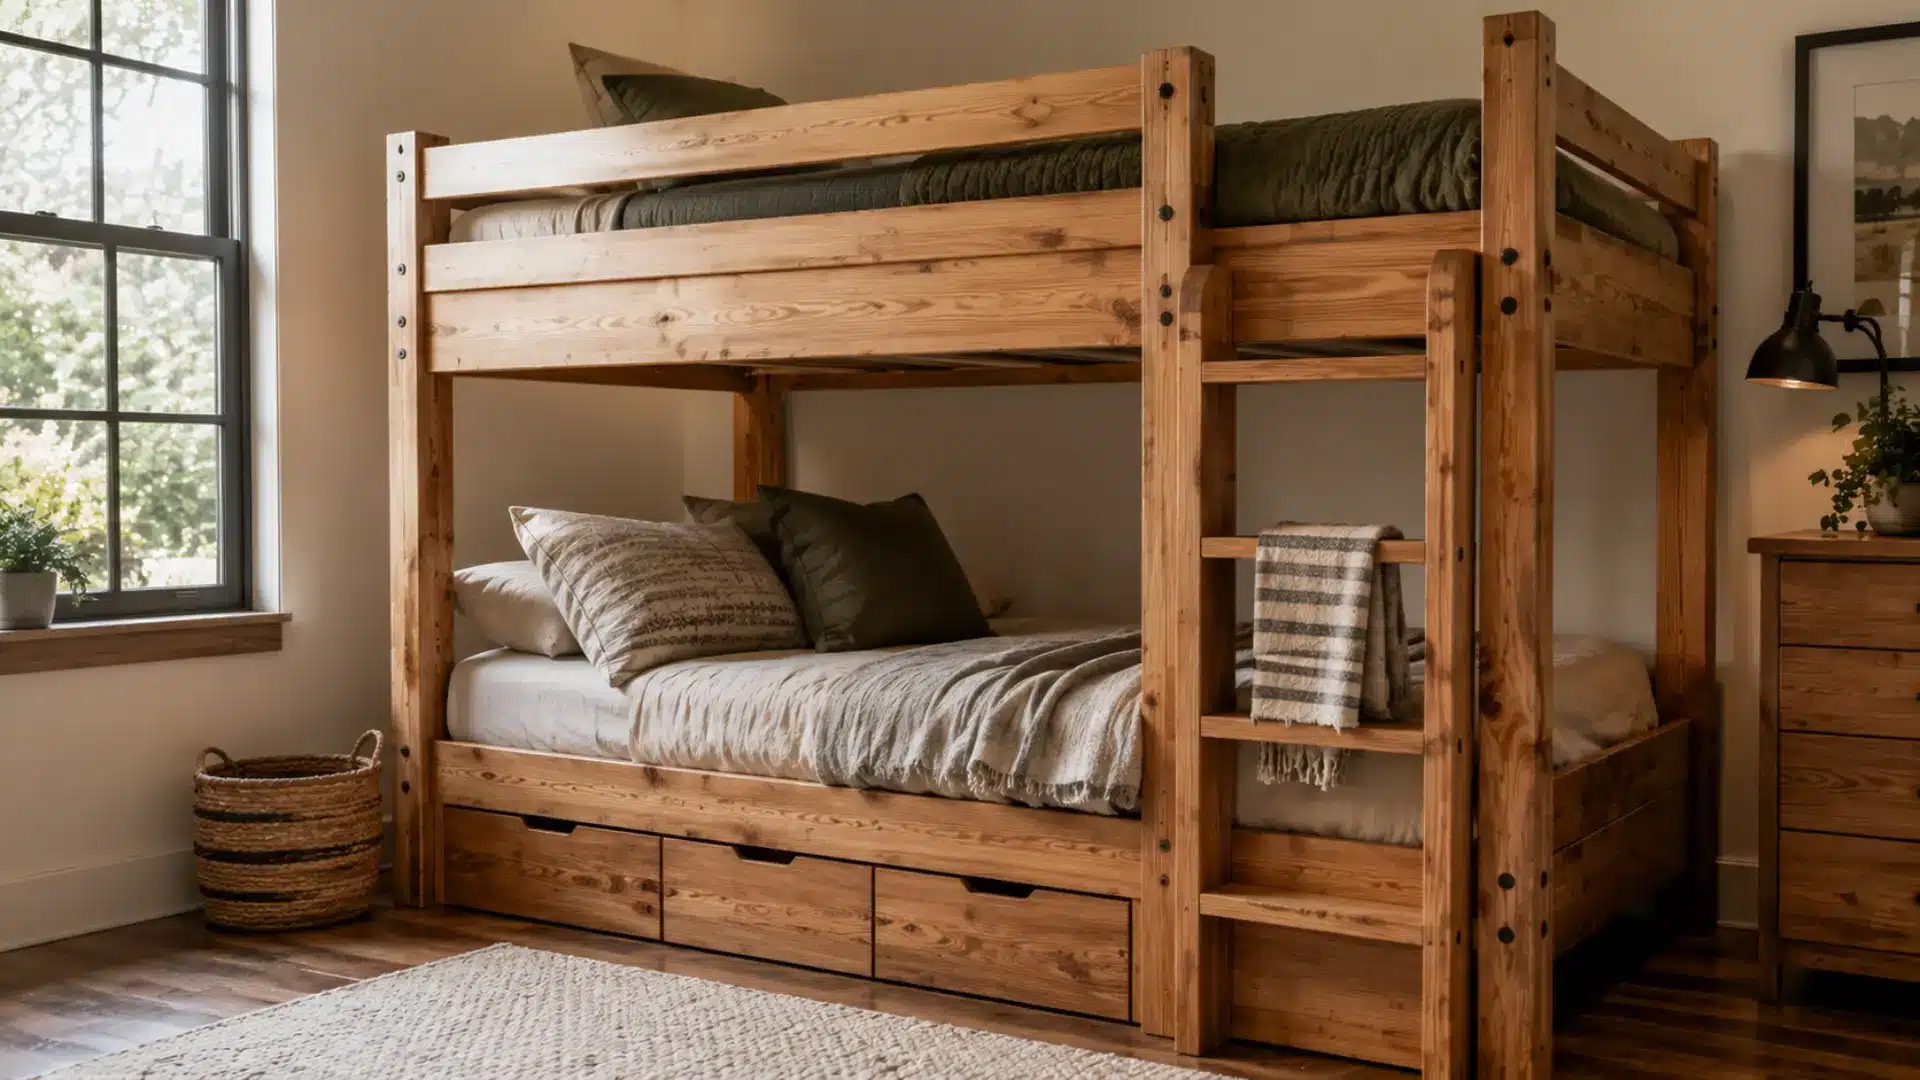
A single wall can sleep two kids, store their clothes, and hold their books all at once. You just have to build it right. DIY bunk beds give you full control over the size, style, and storage.
No flat-pack furniture, no compromises. A built-in bunk bed fits your room the way a store-bought one never will. It also adds real value to your home over time.
If you are building for kids or maximizing a guest room, the results speak for themselves. Read on to find everything you need to get started and finish strong.
What Sets Built-In Bunk Beds Apart From Freestanding Ones?
Built-in bunk beds are not the same as the freestanding ones you find at furniture stores. Standard bunk beds come pre-built and ready to move around.
Built-ins are constructed directly into your room’s walls, floor, or ceiling. That means they stay put permanently. You get a custom fit, better storage, and a much cleaner look.
They also feel sturdier because they are anchored to the structure of your home. The trade-off is higher costs and more upfront planning. But for most homeowners, the long-term payoff is worth it.
What Materials Do You Need for This Project?
Here are the materials you need before starting this project. Having everything ready ahead of time keeps the build moving without unnecessary delays. Here is what to gather before you begin:
Framing and Structure:
| Material | Estimated Quantity |
|---|---|
| 2×4 lumber | 18–24 boards |
| 2×6 lumber | 12–18 boards |
| OSB sheets | 3–5 sheets |
| MDF sheets | 4–6 sheets |
| Plywood strips | 3–4 sheets |
| Red oak or pine boards | 8–12 boards |
| Mattress support slats | 20–24 slats |
Fasteners and Adhesives:
| Material | Estimated Quantity |
|---|---|
| Deck screws | 4 lbs |
| Pocket hole screws | 3 lbs |
| Brad nails | 2 boxes |
| Construction adhesive | 8–12 tubes |
Finishing Supplies:
| Material | Estimated Quantity |
|---|---|
| Wood filler | 2 containers |
| Caulk | 4–6 tubes |
| Primer | 2 gallons |
| Paint | 2–3 gallons |
| Wood stain and finish | 1 quart |
| Sandpaper | 2 packs |
Note: Quantities are estimates for a standard twin-over-twin built-in bunk bed in an average-sized room. Adjust based on your room dimensions and design complexity.
DIY Bunk Beds: Step-by-Step Process
Building DIY bunk beds starts with careful planning and ends with a finished, paint-ready structure. Each step builds on the last, so following the order keeps everything on track. Here is how the full process works:
Step 1: Plan the Layout and Take Measurements
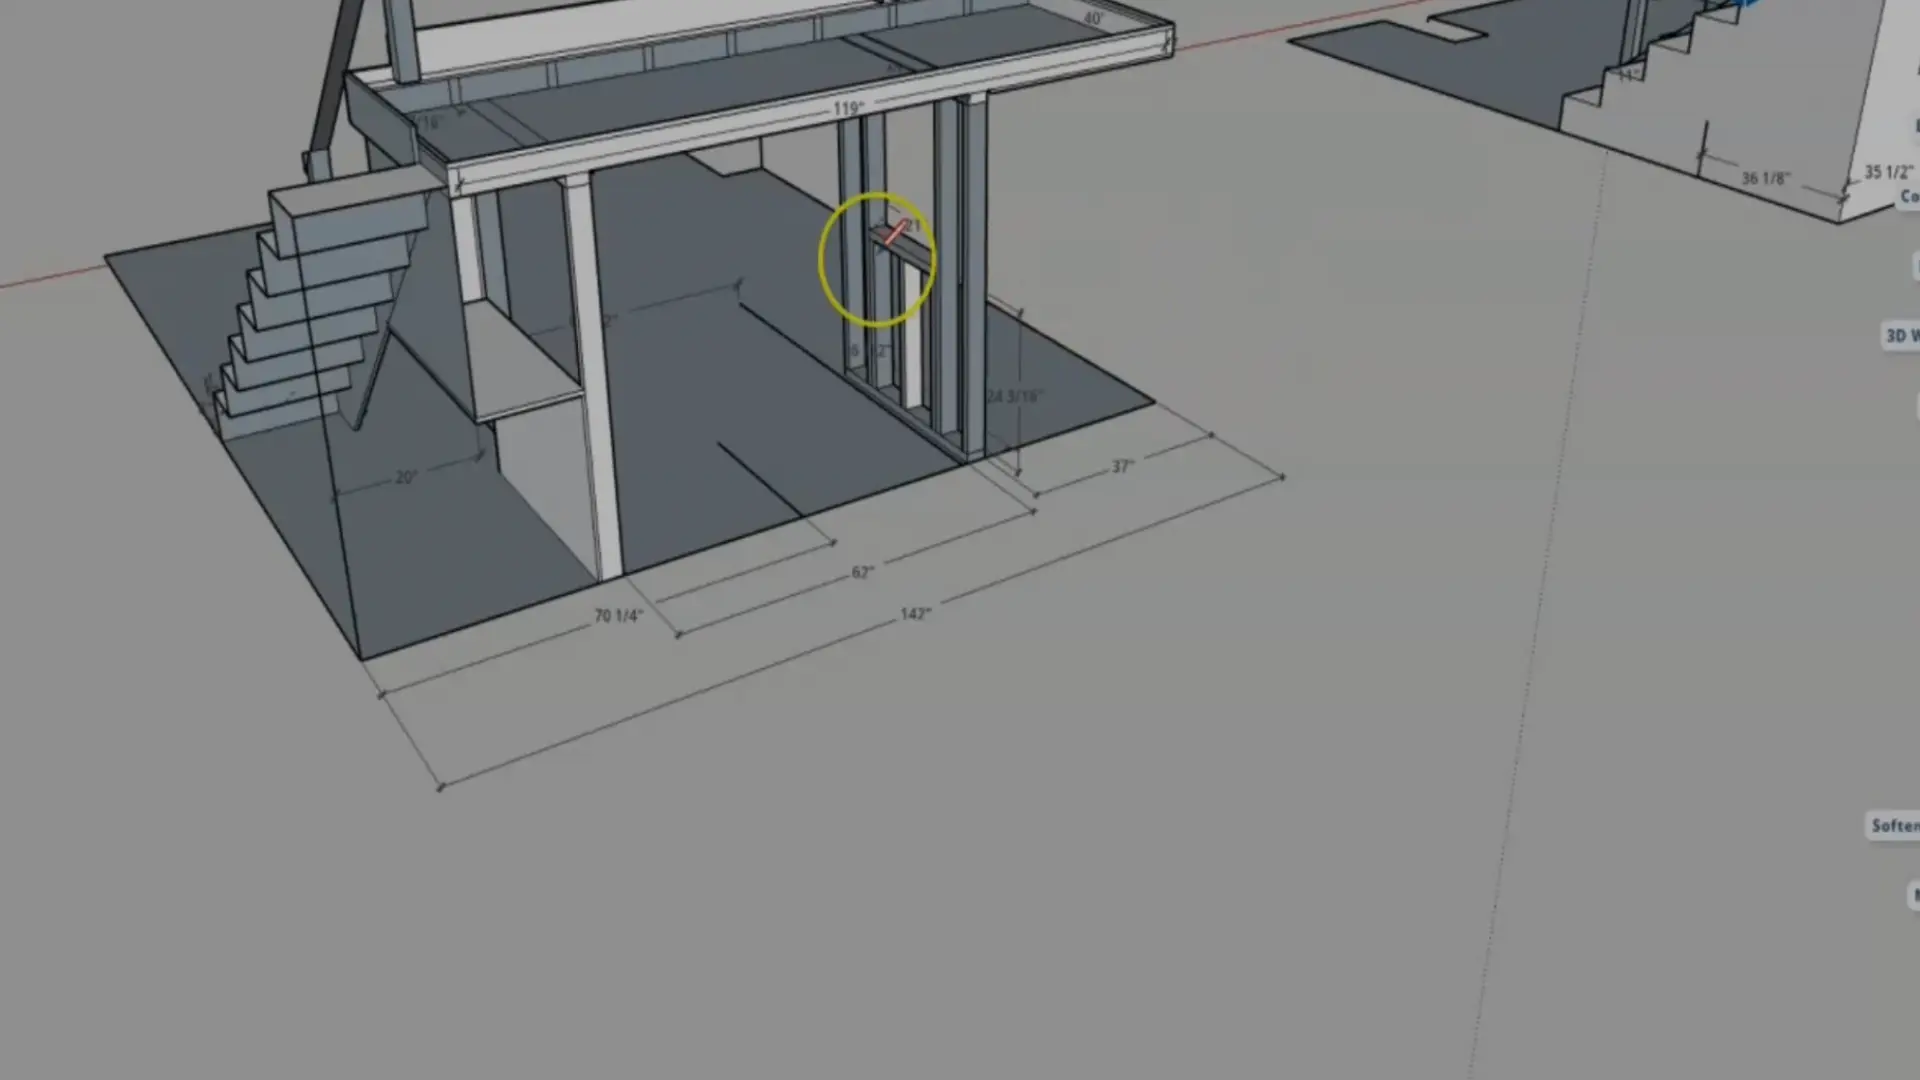
Before cutting any lumber, spend time planning the entire layout. Measure the room, wall length, ceiling height, and mattress size. Decide how much space you need for stairs, storage, and sleeping areas.
Make sure there is enough headroom on both bunks. Careful planning helps the project fit the room properly and prevents changes during construction.
Step 2: Build and Secure the Main Frame
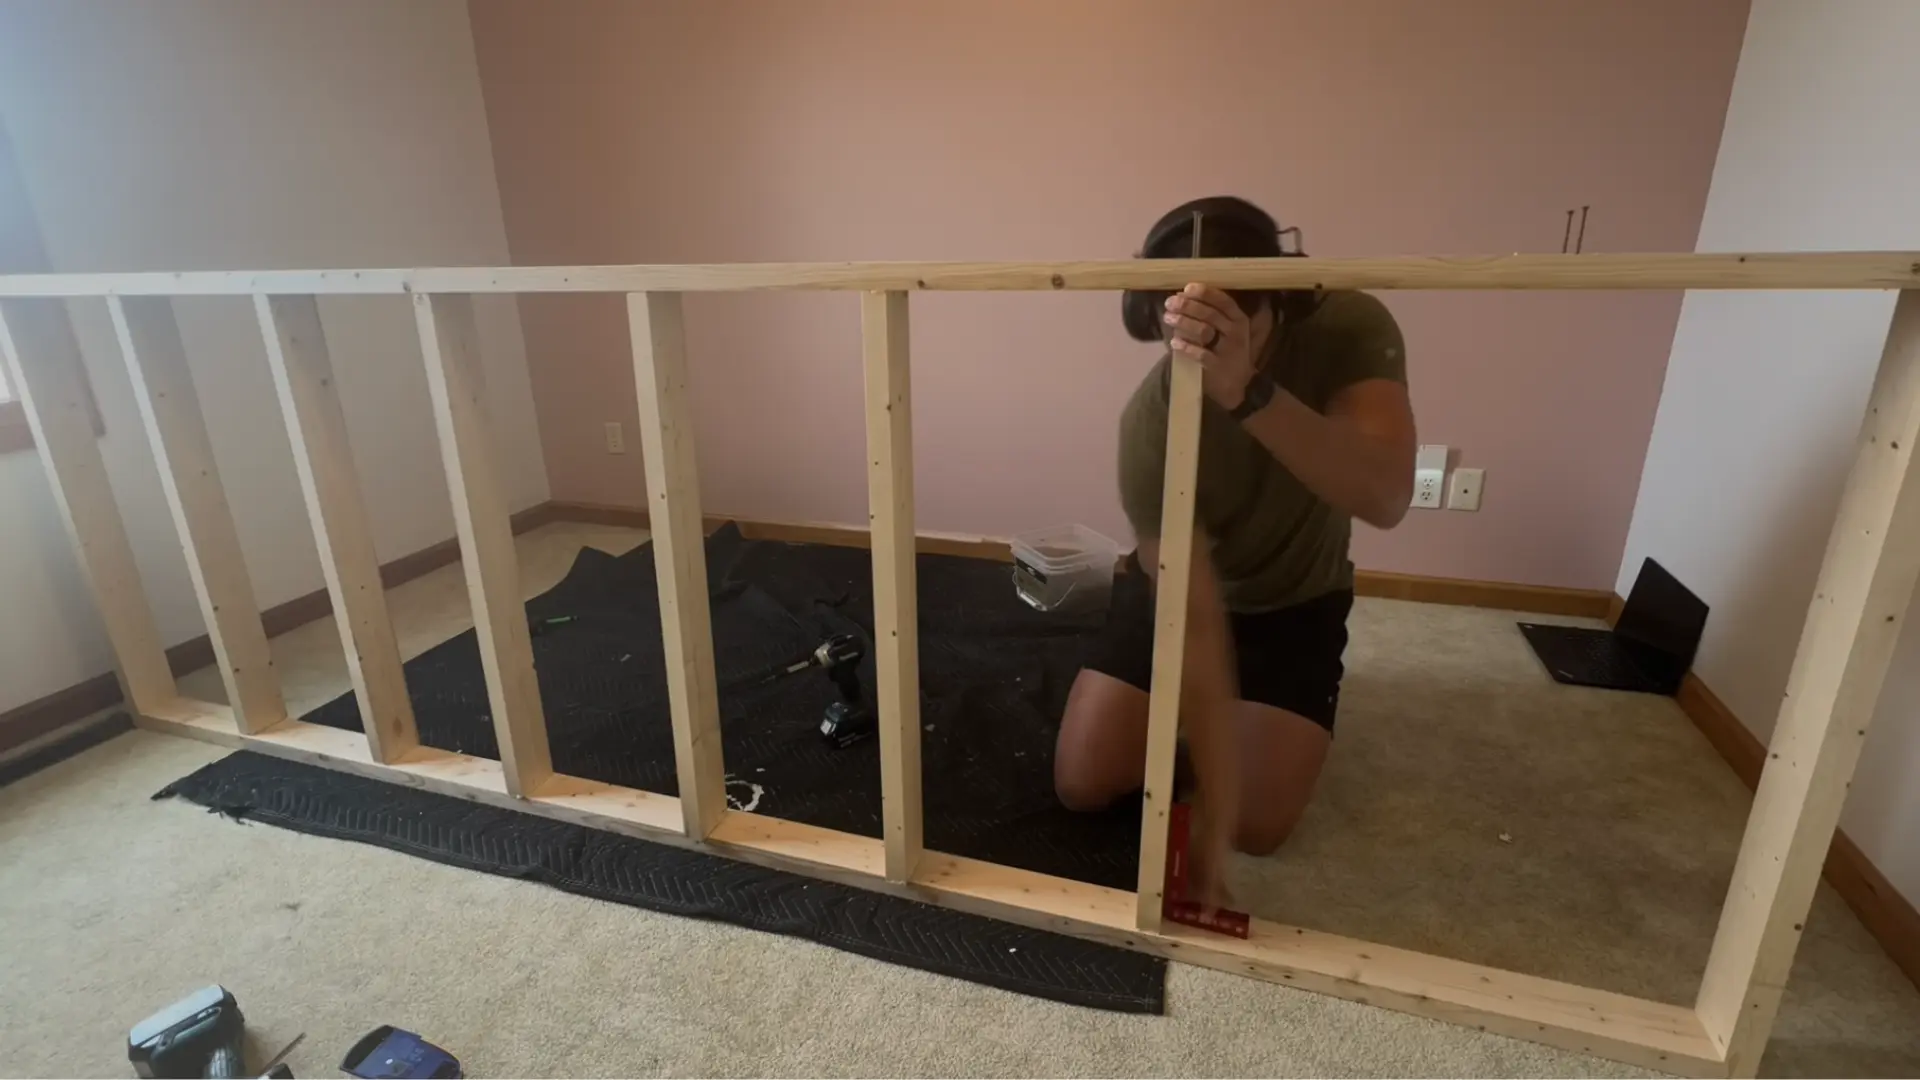
Build the main frame using 2×4 and 2×6 lumber. Start with the side walls and support sections. Assemble each piece on a flat surface whenever possible.
Move the completed sections into the room and secure them to the wall and floor. Check for level and square as you work. A solid frame is the backbone of the entire bunk bed.
Step 3: Install the Upper Bunk Structure
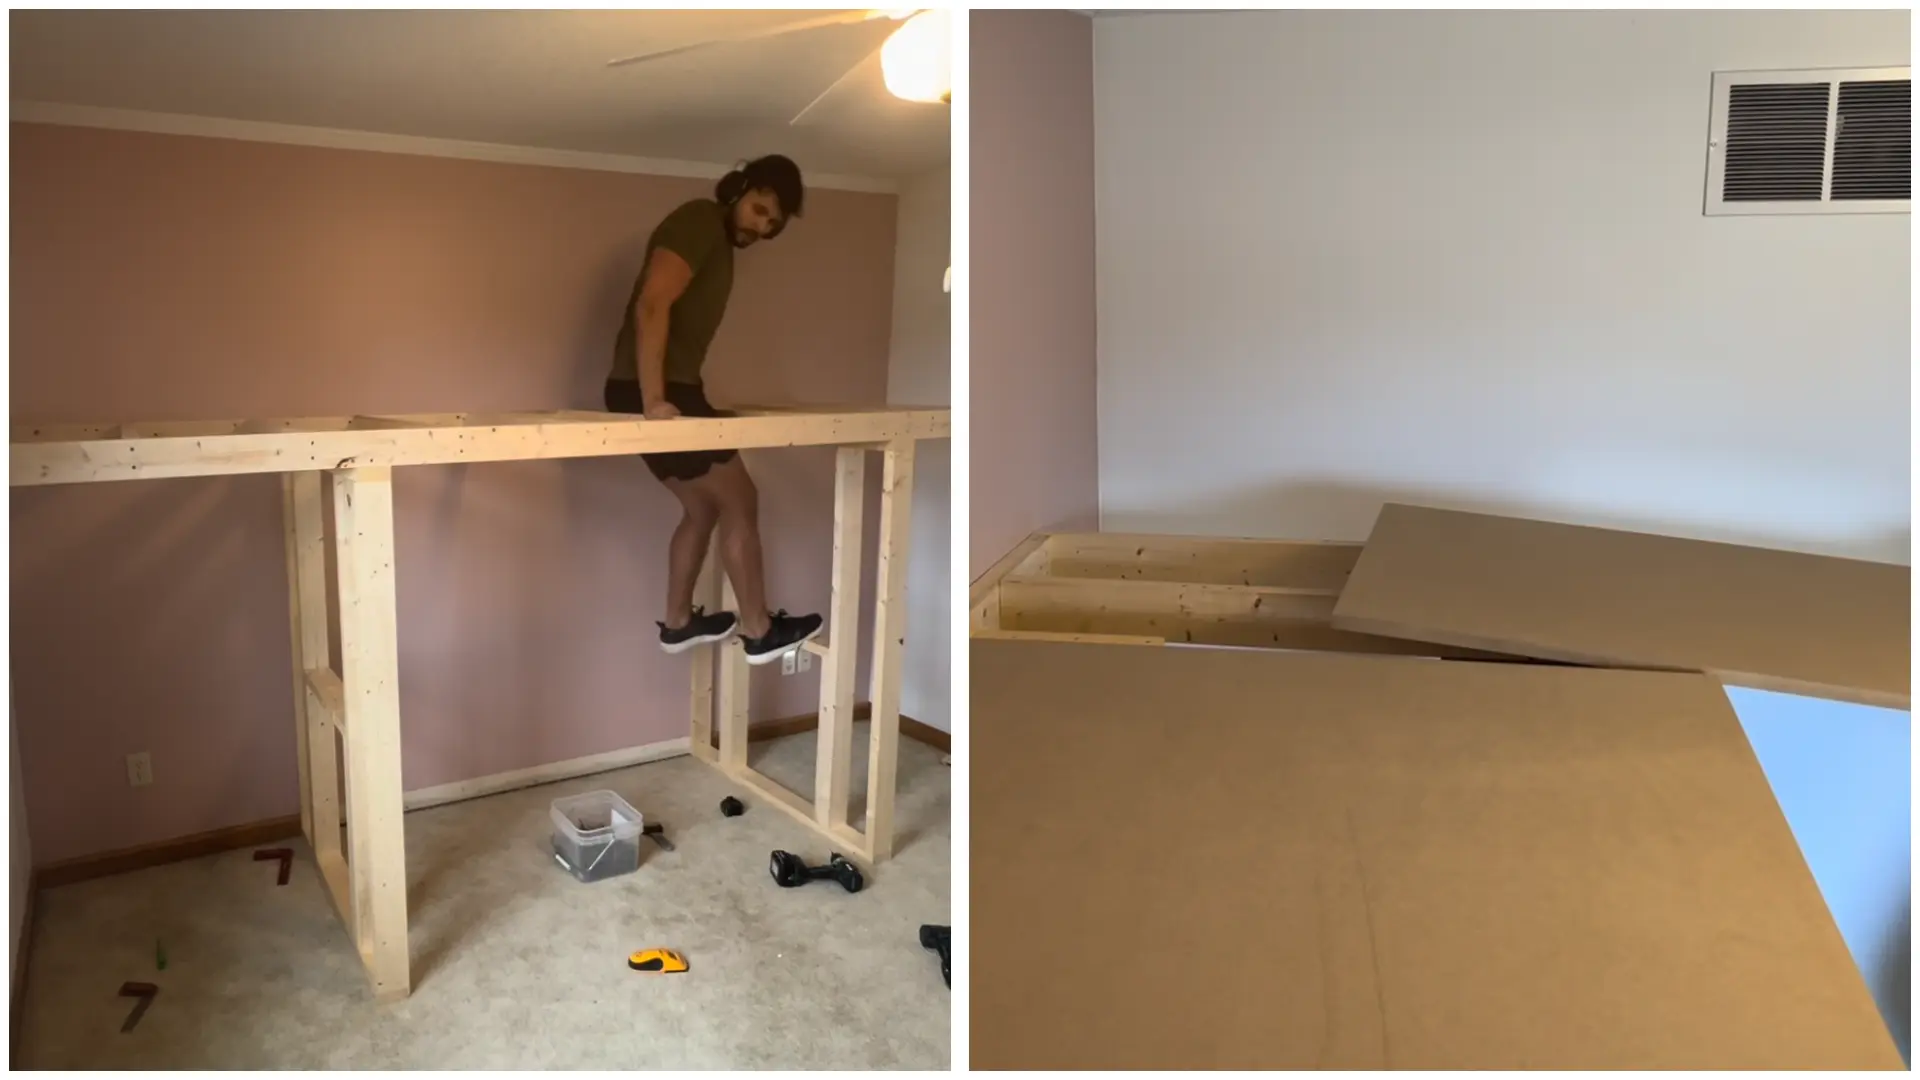
Once the side walls are secured, install the upper bunk frame. Connect the wall sections with horizontal supports to create a strong platform.
Fasten all pieces tightly and double-check alignment before moving on. Test the structure for movement and stability.
This step strengthens the entire build while creating a safe and reliable sleeping space above.
Step 4: Build the Stairs and Add Storage
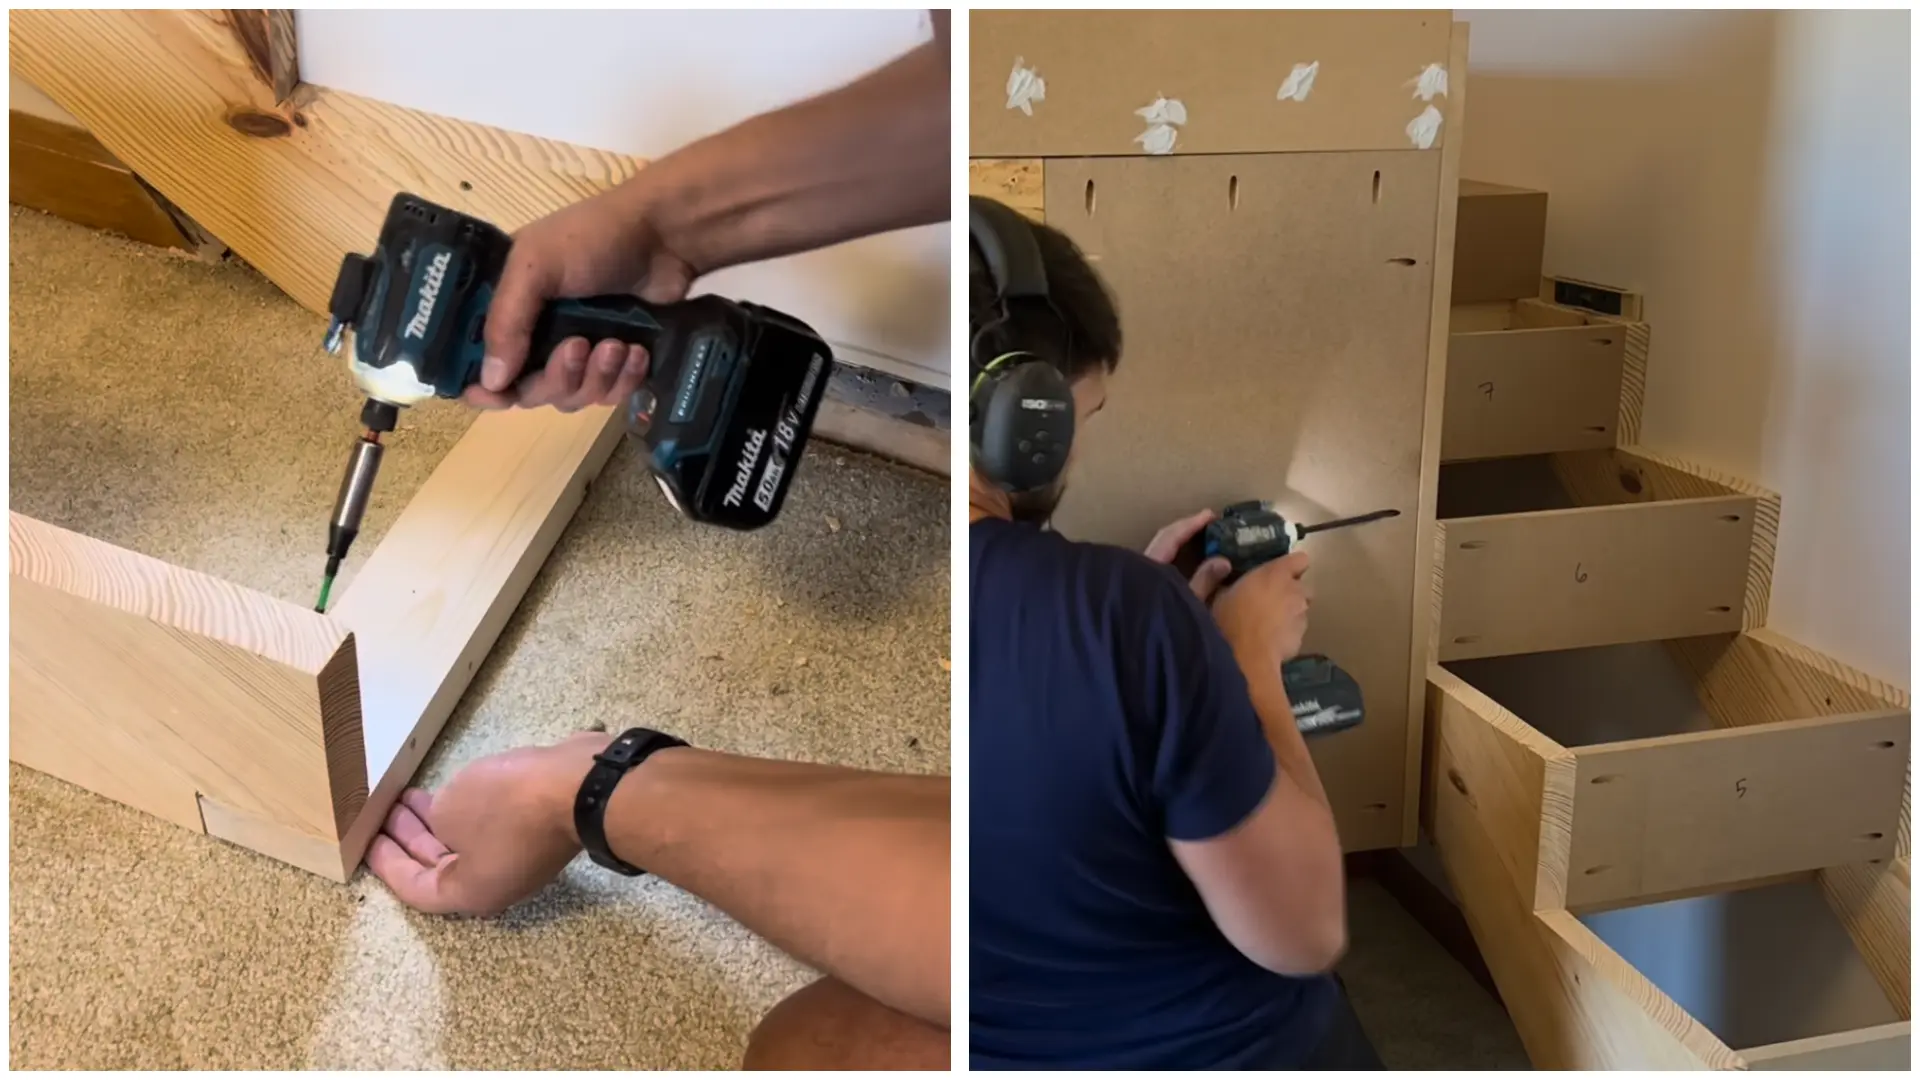
Construct a staircase that provides easy access to the upper bunk. Secure the stair stringers firmly to the frame and add treads for each step.
If space allows, include built-in storage, shelves, or a bookcase beside the stairs. Combining storage with the staircase helps save floor space and gives the project a more custom-built look.
Step 5: Cover the Frame and Add Finishing Details
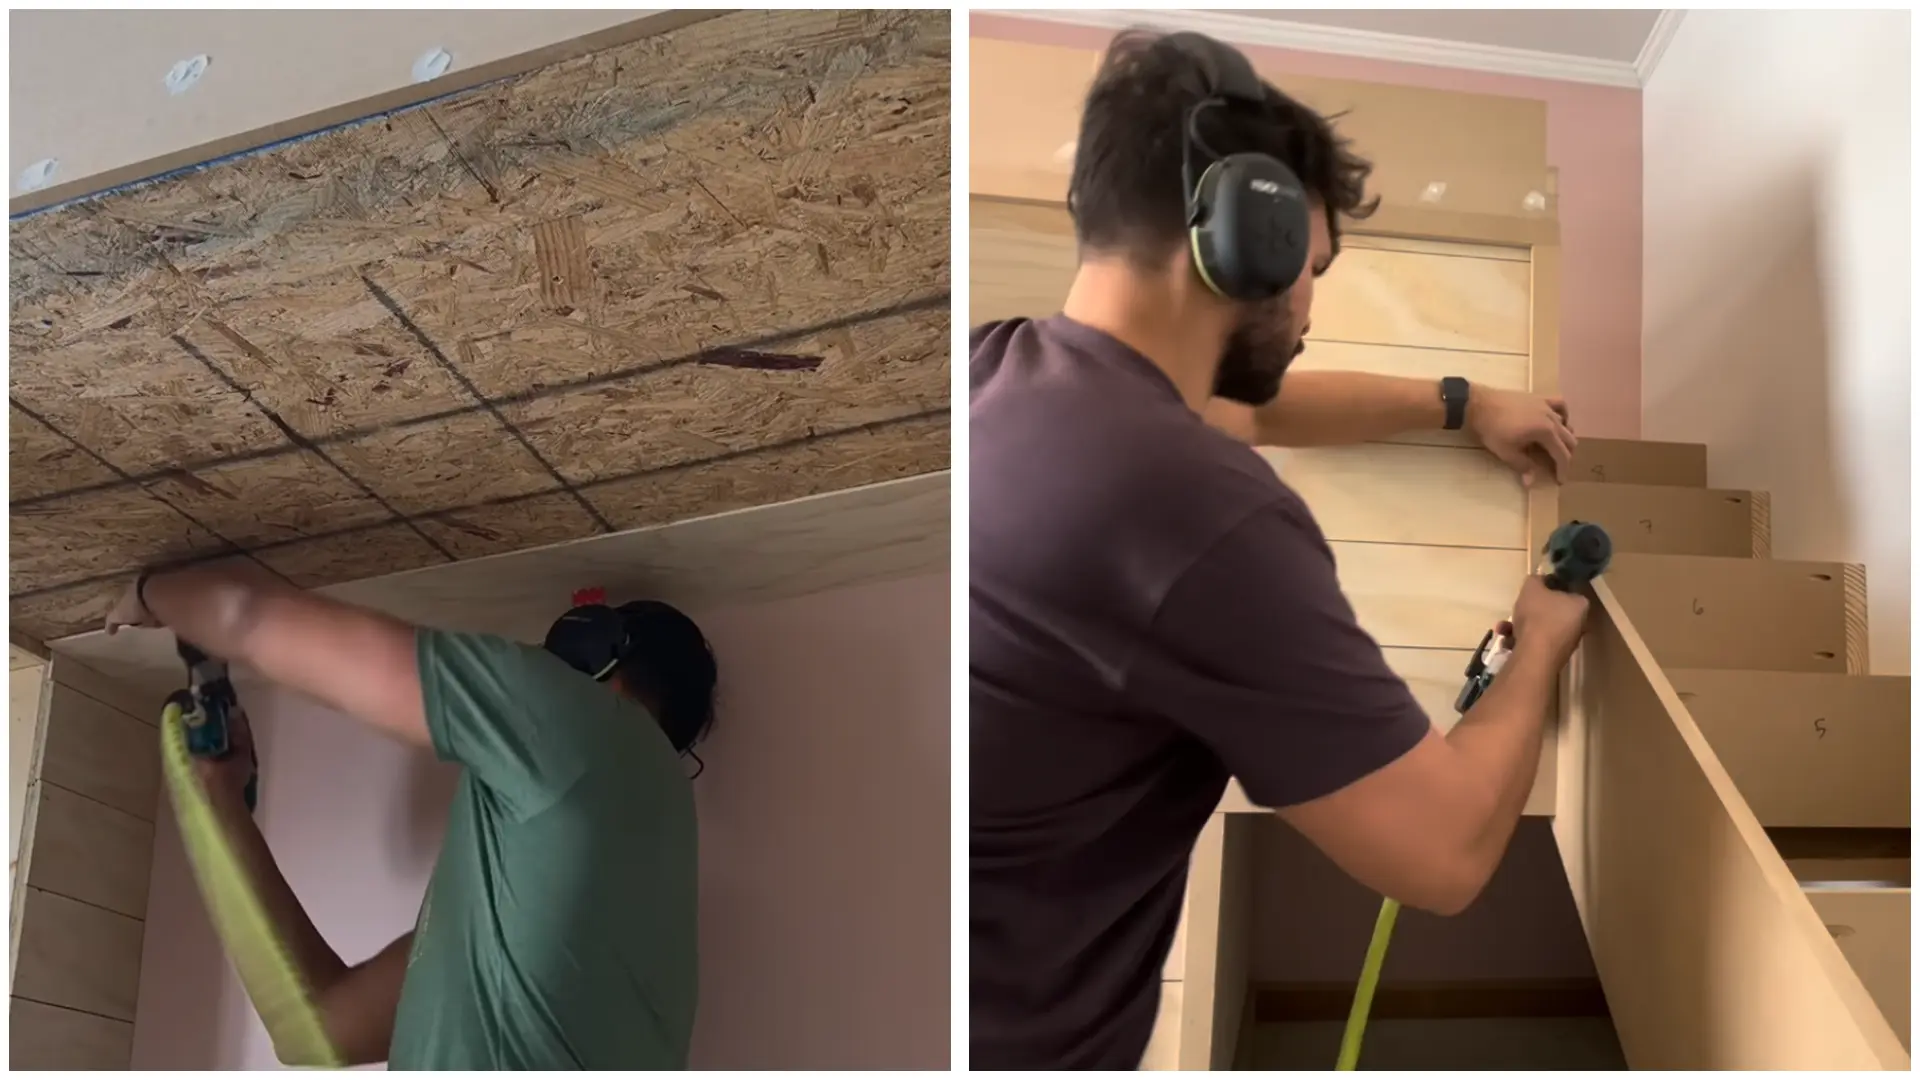
Cover the exposed framing with MDF, plywood, or similar panel material. Install trim pieces around windows, shelves, corners, and edges to create a clean appearance. Add decorative wall panels if desired.
This stage helps hide the structural framework and gives the bunk beds a finished look that integrates naturally with the rest of the room.
Step 6: Install Guardrails, Slats, and Final Finishes
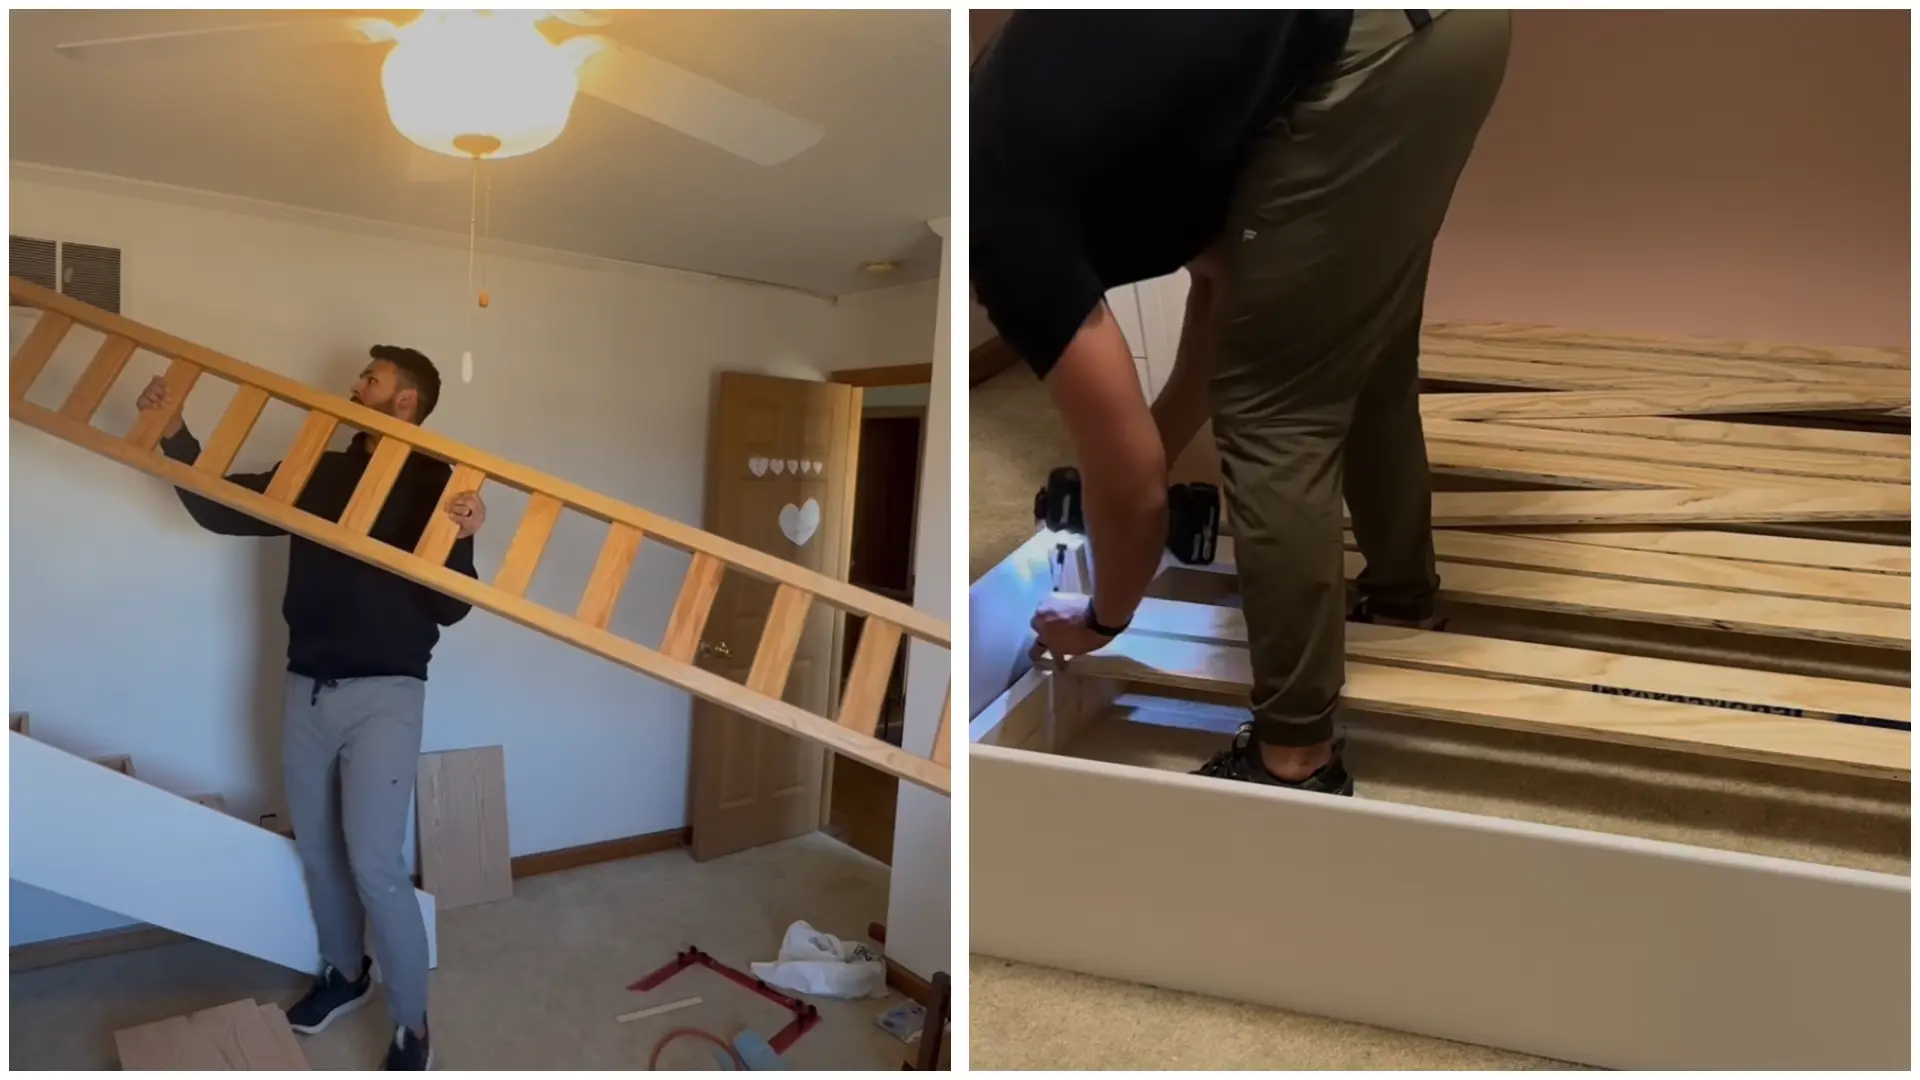
Attach sturdy guardrails around the upper bunk to improve safety. Install mattress support slats with even spacing across both sleeping platforms. Fill nail holes, sand rough surfaces, and caulk any visible gaps.
Finish the project with paint, stain, or a protective coating. Once everything is dry, add the mattresses and enjoy the completed bunk beds.
For more detailed information, visit Donny Graham Builds.
Common DIY Bunk Bed Mistakes to Avoid
Building DIY bunk beds is a rewarding project, but small mistakes can lead to big problems. Knowing what to watch out for before you start saves you time, money, and frustration. Here are the most common mistakes to avoid:
- Poor Measurements: Always measure the wall length, ceiling height, and mattress size carefully before cutting any lumber.
- Weak Structural Support: Anchor the frame properly to the wall and floor using the right fasteners at every connection point.
- Insufficient Guardrails: Install rails on all open sides of the upper bunk and follow standard height guidelines for safety.
- Ignoring Ceiling Clearance: Leave at least 30 to 36 inches of clearance between the upper mattress and the ceiling.
- Choosing the Wrong Materials: Always use construction-grade wood that can handle the daily weight and wear of regular use.
Catching these mistakes early makes the entire build safer and more enjoyable from start to finish. Taking a little extra time at each stage goes a long way toward a result you can feel confident about.
Built-In Bunk Bed Ideas to Inspire Your Build
Built-in bunk beds come in far more styles than most people expect. Here are some of the most popular designs to help you find the right fit for your space:
1. Wall-to-Wall Built-In Bunk Beds
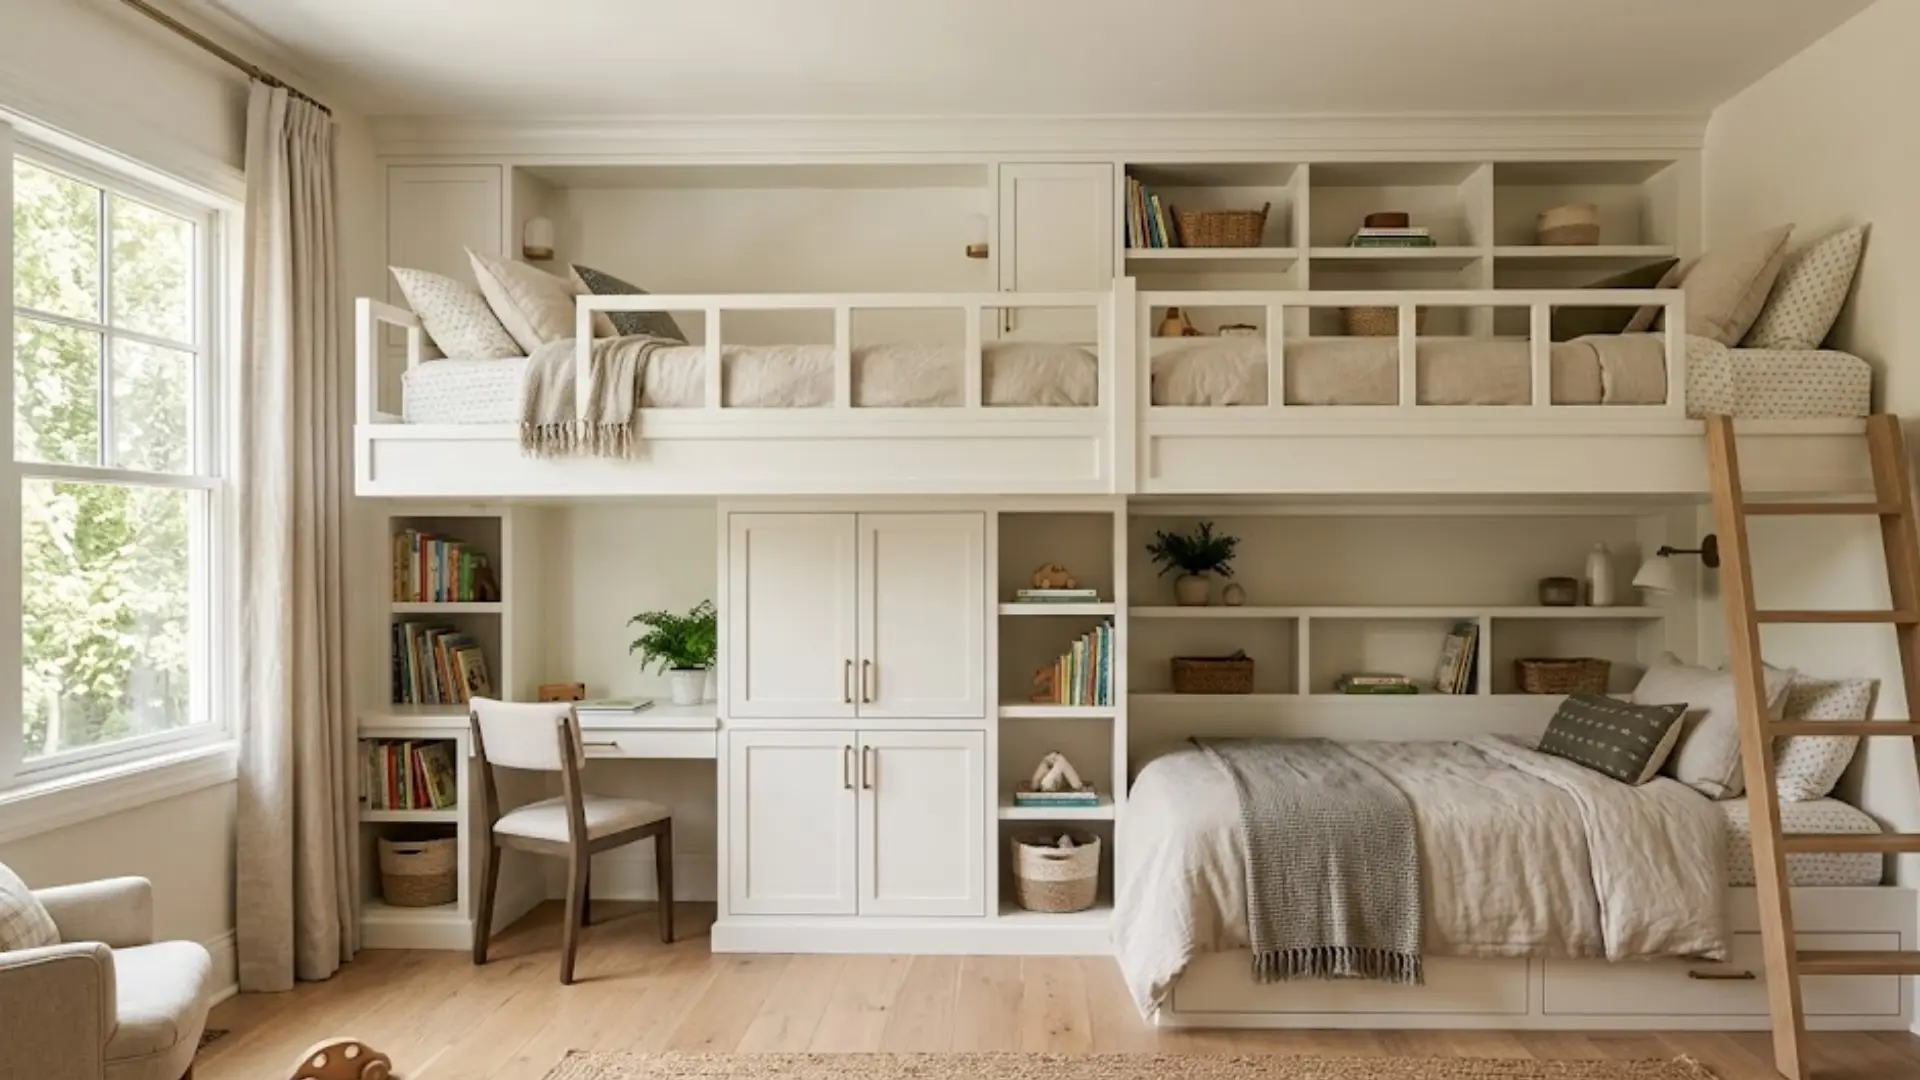
This design spans the full length of one wall from end to end. It creates a bold, built-in look that feels intentional and custom-made. You can add shelves, drawers, or cabinets on either side.
The sleeping areas sit neatly within the structure. It works especially well in rooms where floor space is tight. Best suited for narrow bedrooms where every inch of wall space counts.
2. Corner Built-In Bunk Beds
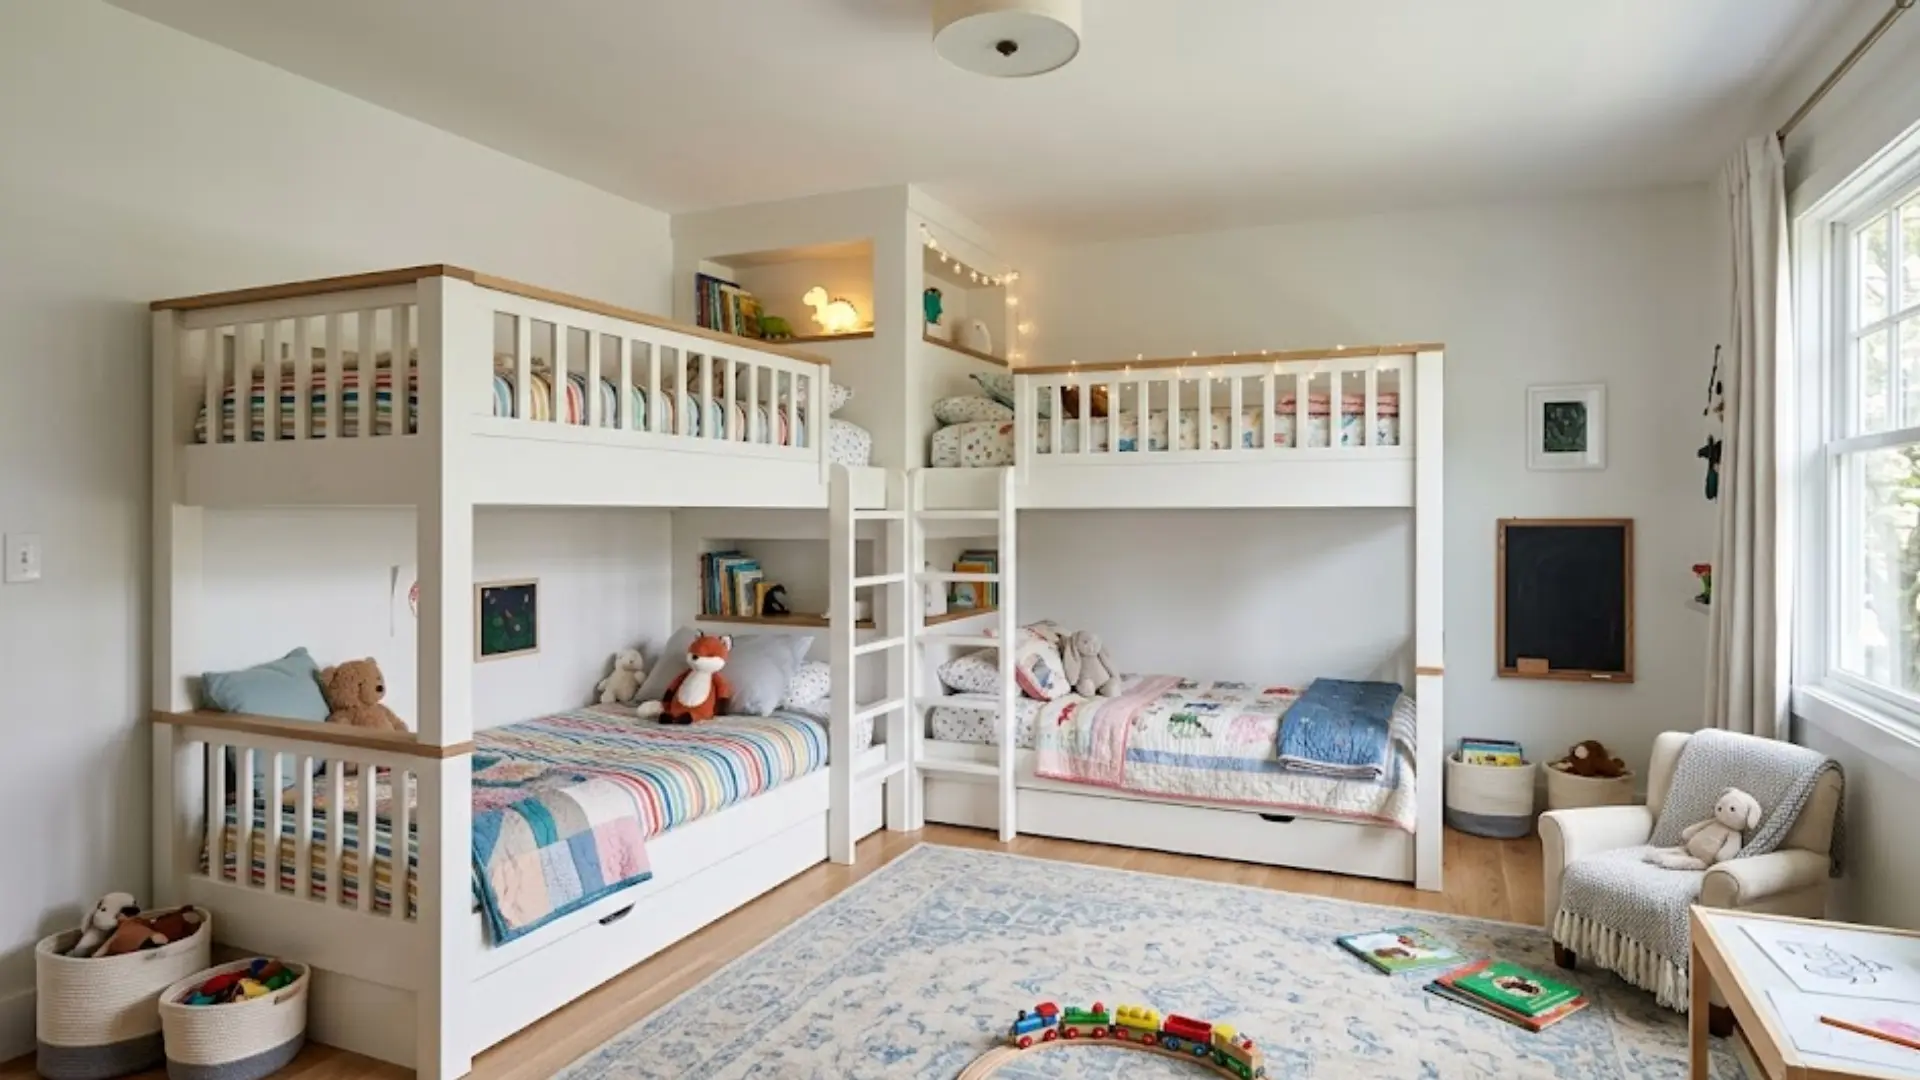
This style fits snugly into a room corner using two adjoining walls for support. One bunk runs along each wall, meeting at the corner. It is a smart pick for shared bedrooms with two kids.
The corner placement keeps the center of the room open and easy to move around in. You gain sleeping space without crowding the floor area. A great option when you need two beds but want to preserve open space.
3. L-Shaped Bunk Beds
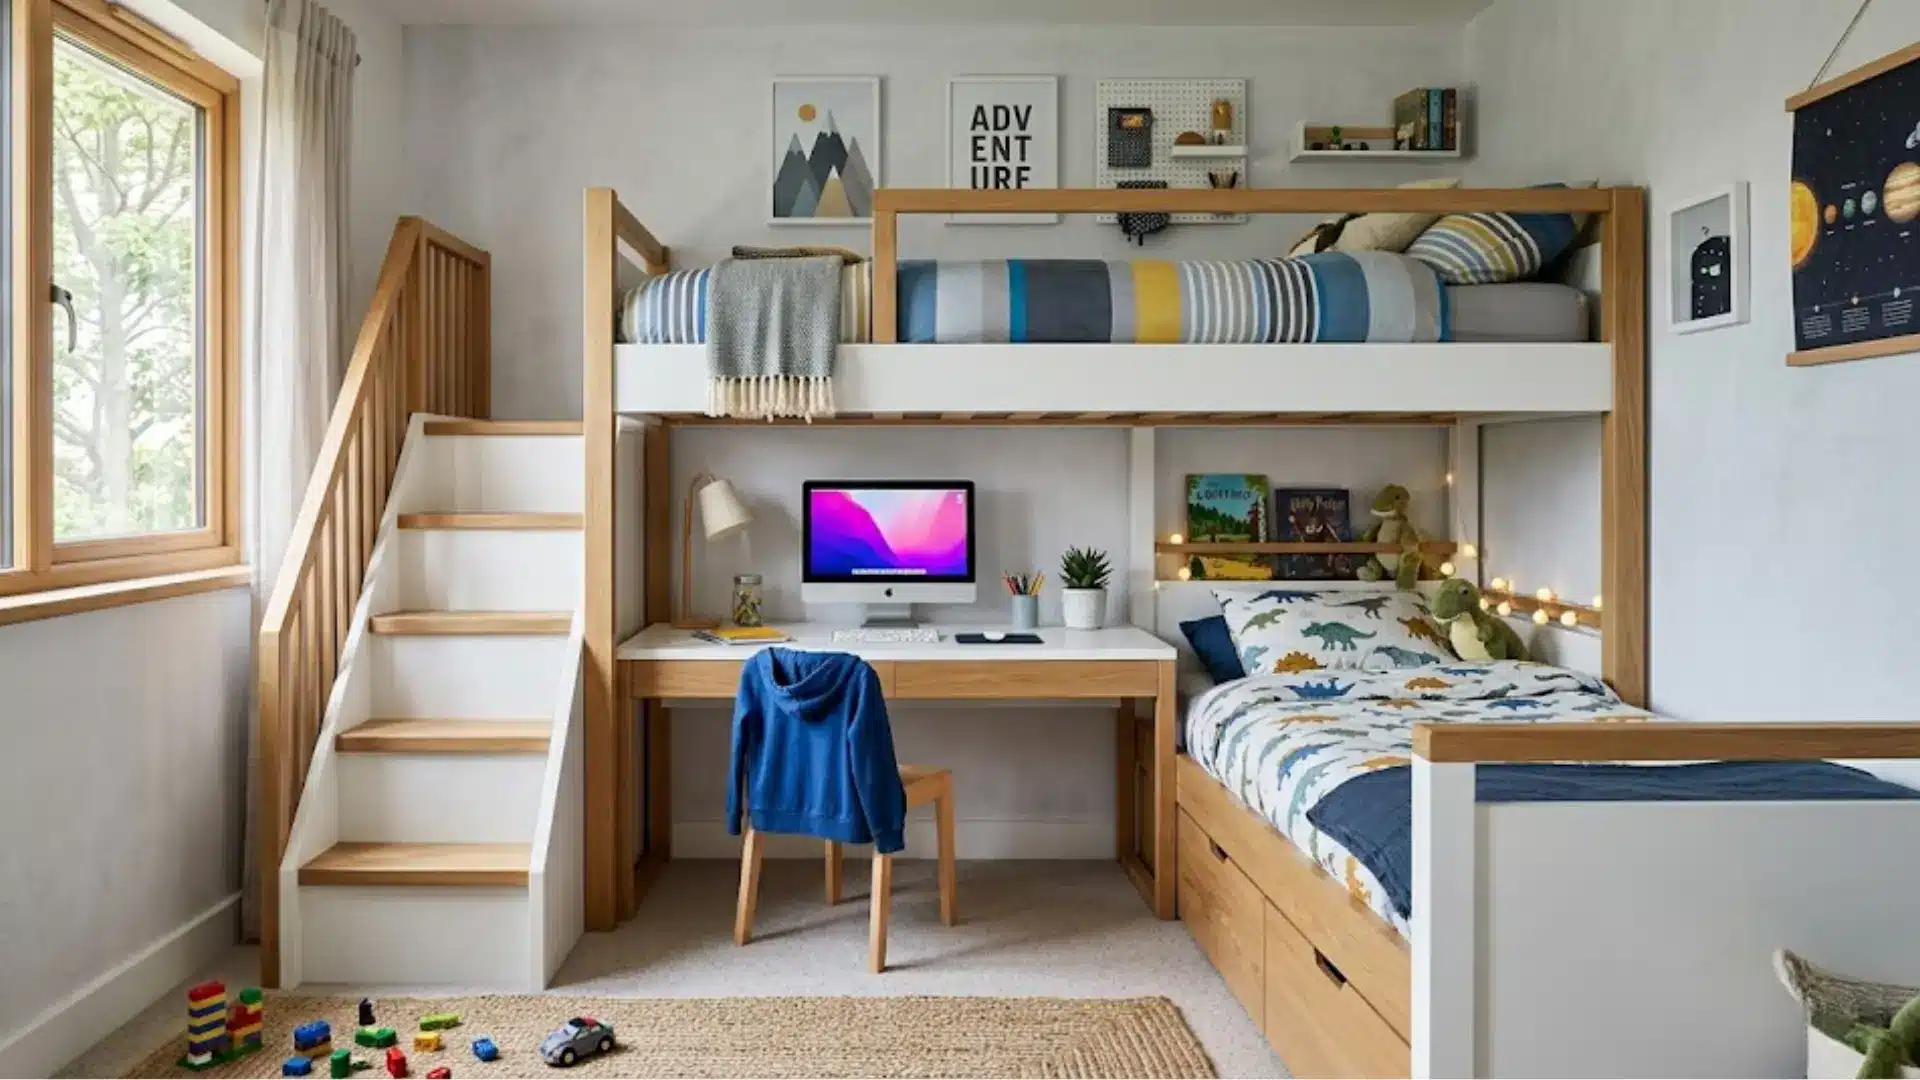
The two bunks here are positioned at a right angle to each other. One bed sits higher while the other runs perpendicular at a lower level. This layout creates a cozy, tucked-in feel for both sleepers.
The open space underneath the higher bunk can hold a desk or storage. Kids who each want their own defined sleeping area will love this setup.
4. Twin-Over-Twin Bunk Beds

This is the most common bunk bed layout you will come across. One twin mattress sits directly above another twin mattress.
The frame is straightforward and works well in most standard bedrooms. It is a practical choice for siblings sharing a smaller room. A simple structure also keeps the overall cost lower compared to other styles.
5. Bunk Beds with a Chalkboard Panel
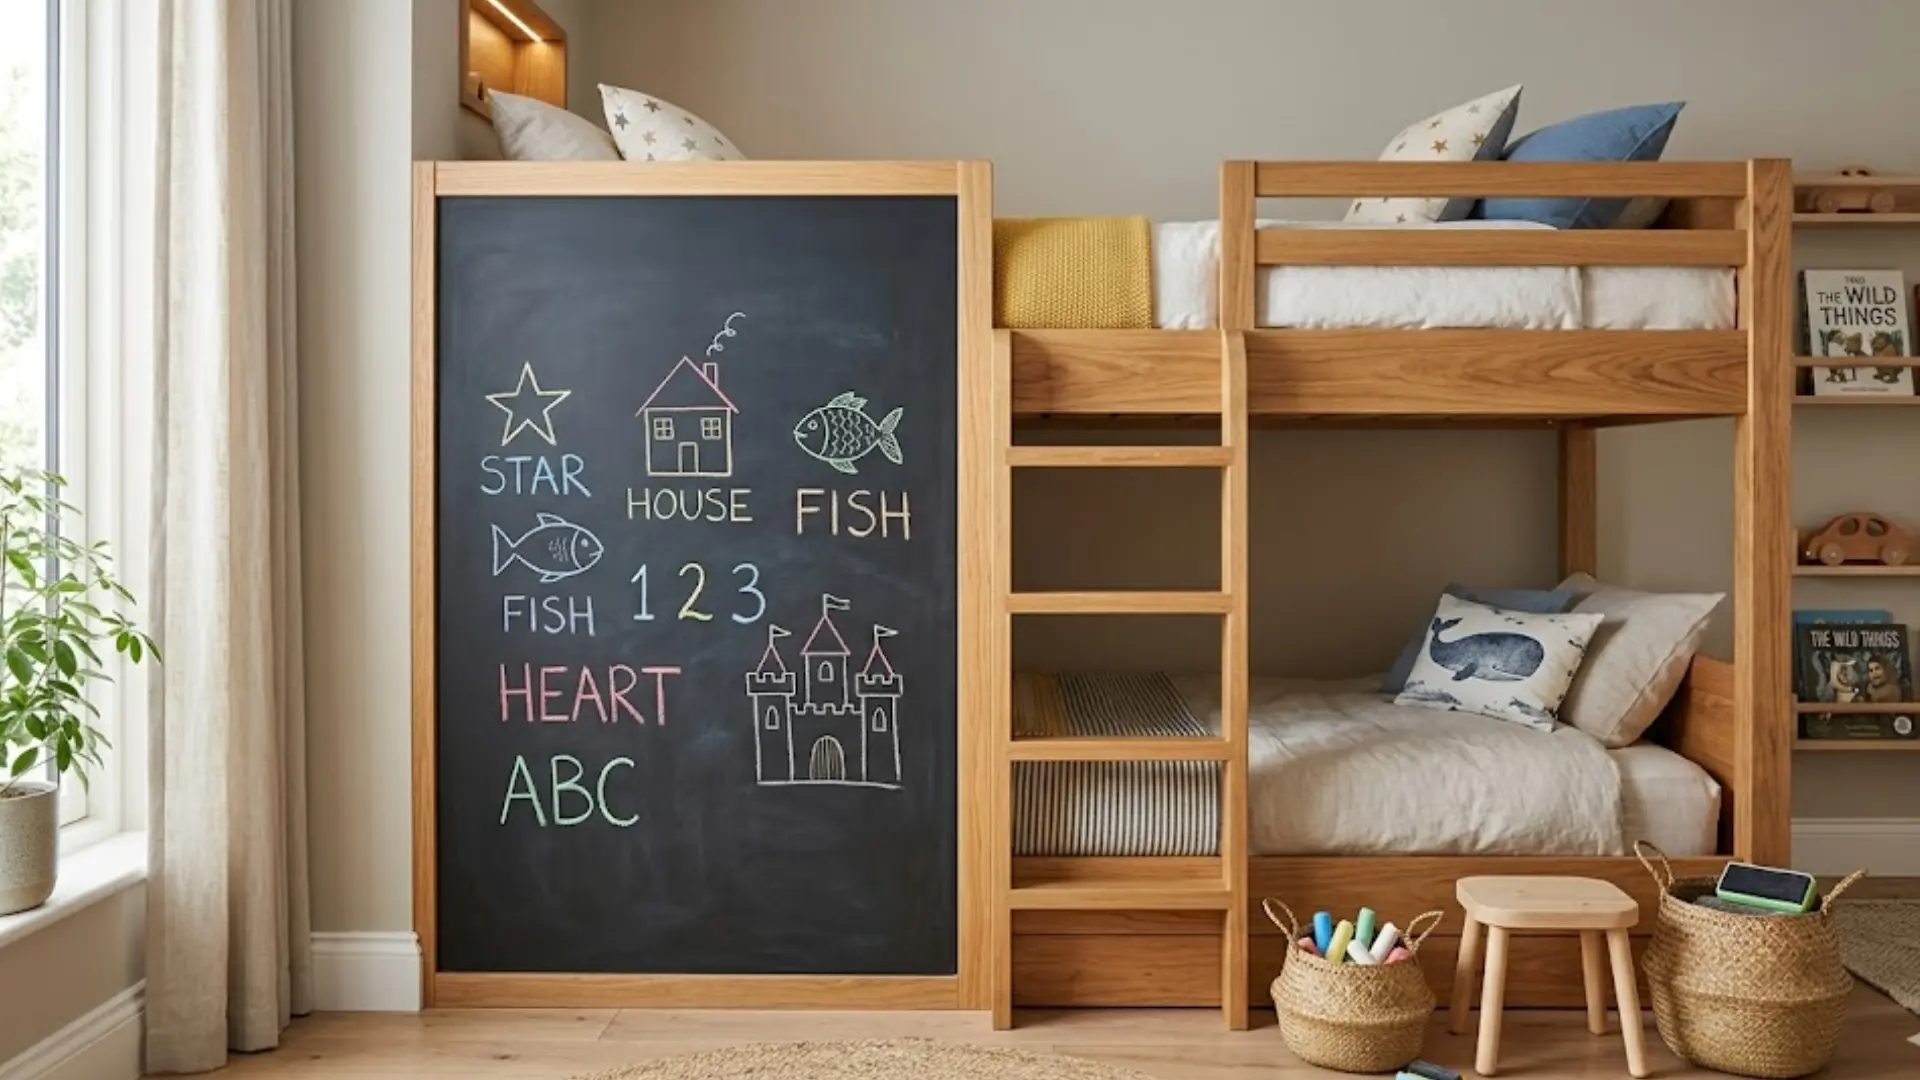
A chalkboard surface is built directly into one side of the bunk frame. Kids can draw, write, and erase freely without touching the walls. It doubles as a creative outlet and a personal noticeboard for each child.
The panel sits flush with the rest of the structure and looks intentional rather than added on. Young children who love art and drawing will make use of this feature every single day.
6. Full-Over-Full Bunk Beds
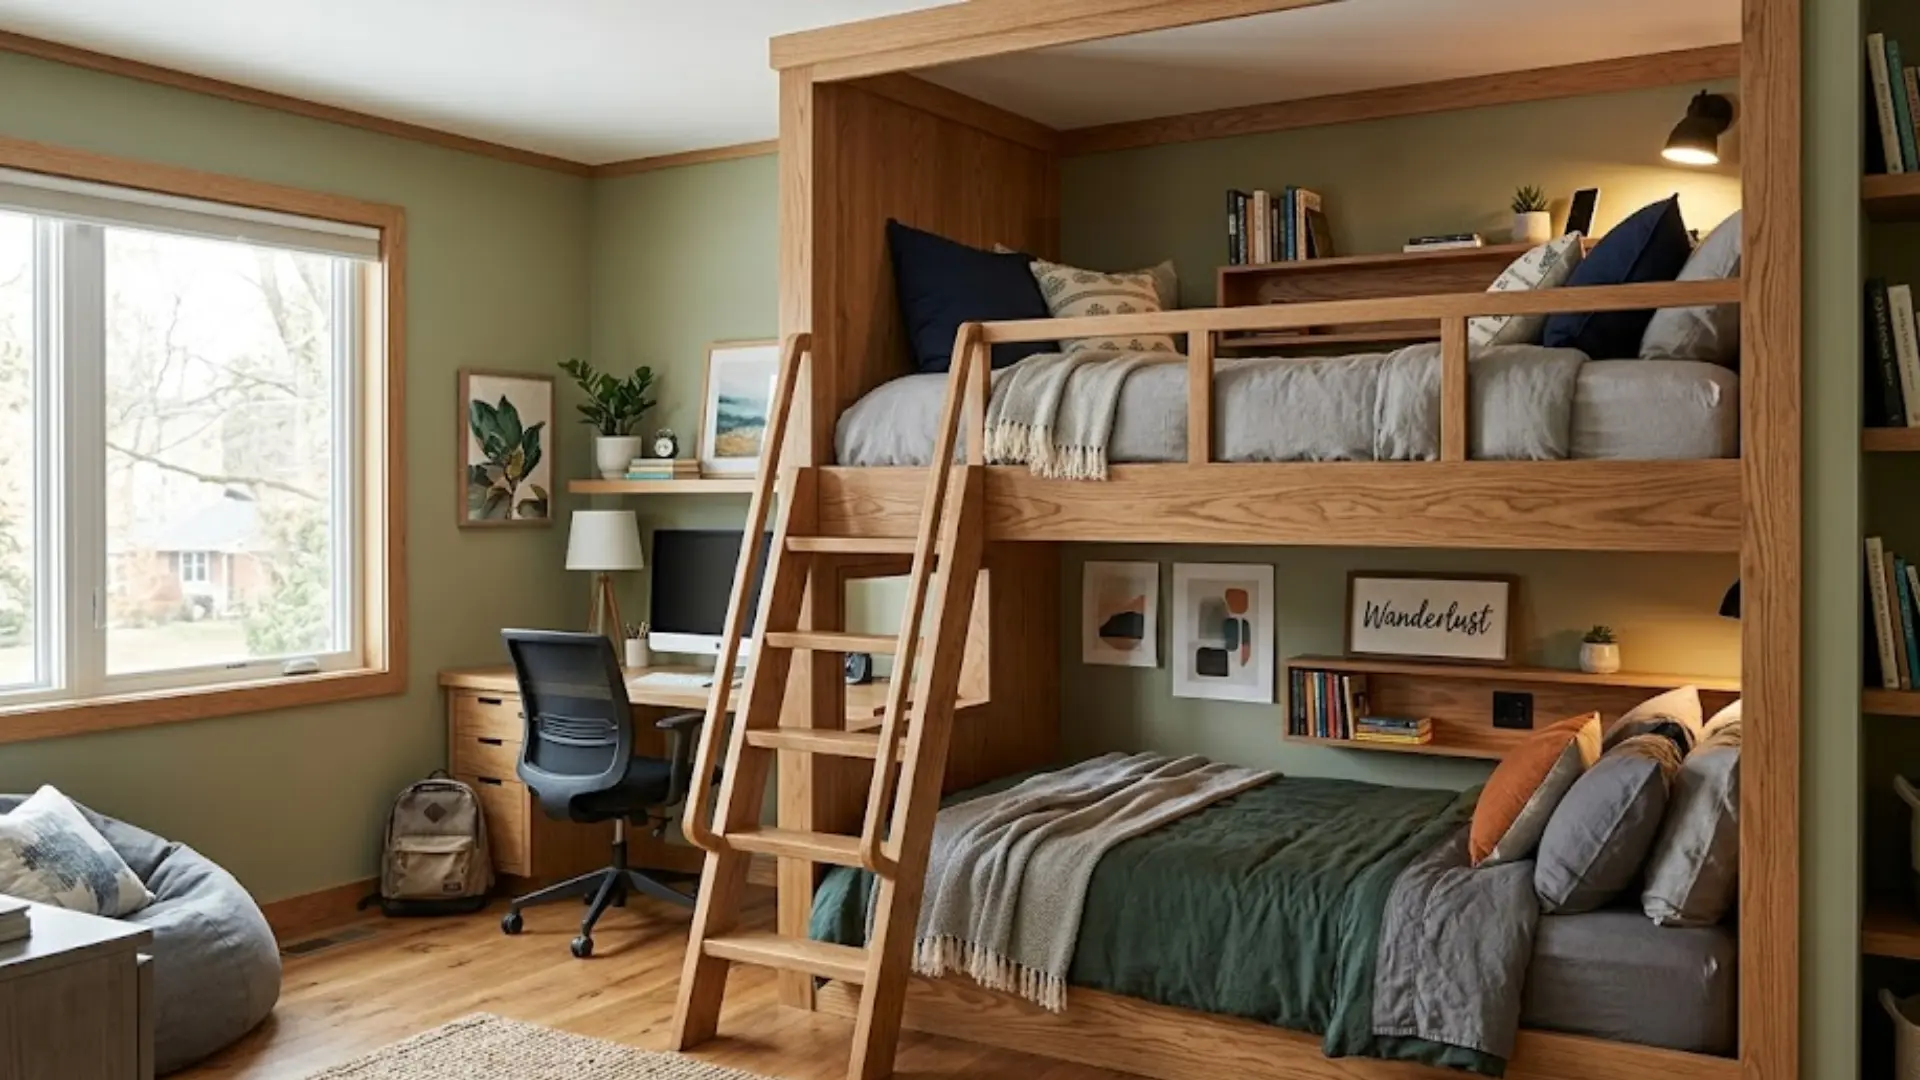
Both bunks here use full-size mattresses, giving each sleeper more room. This layout suits older kids, teenagers, or even adults. The wider frame makes the bed look more substantial on the wall.
It requires a room with decent ceiling height to work comfortably. Older kids sharing a room will find this option worth considering.
7. Bunk Beds Built Around a Support Column
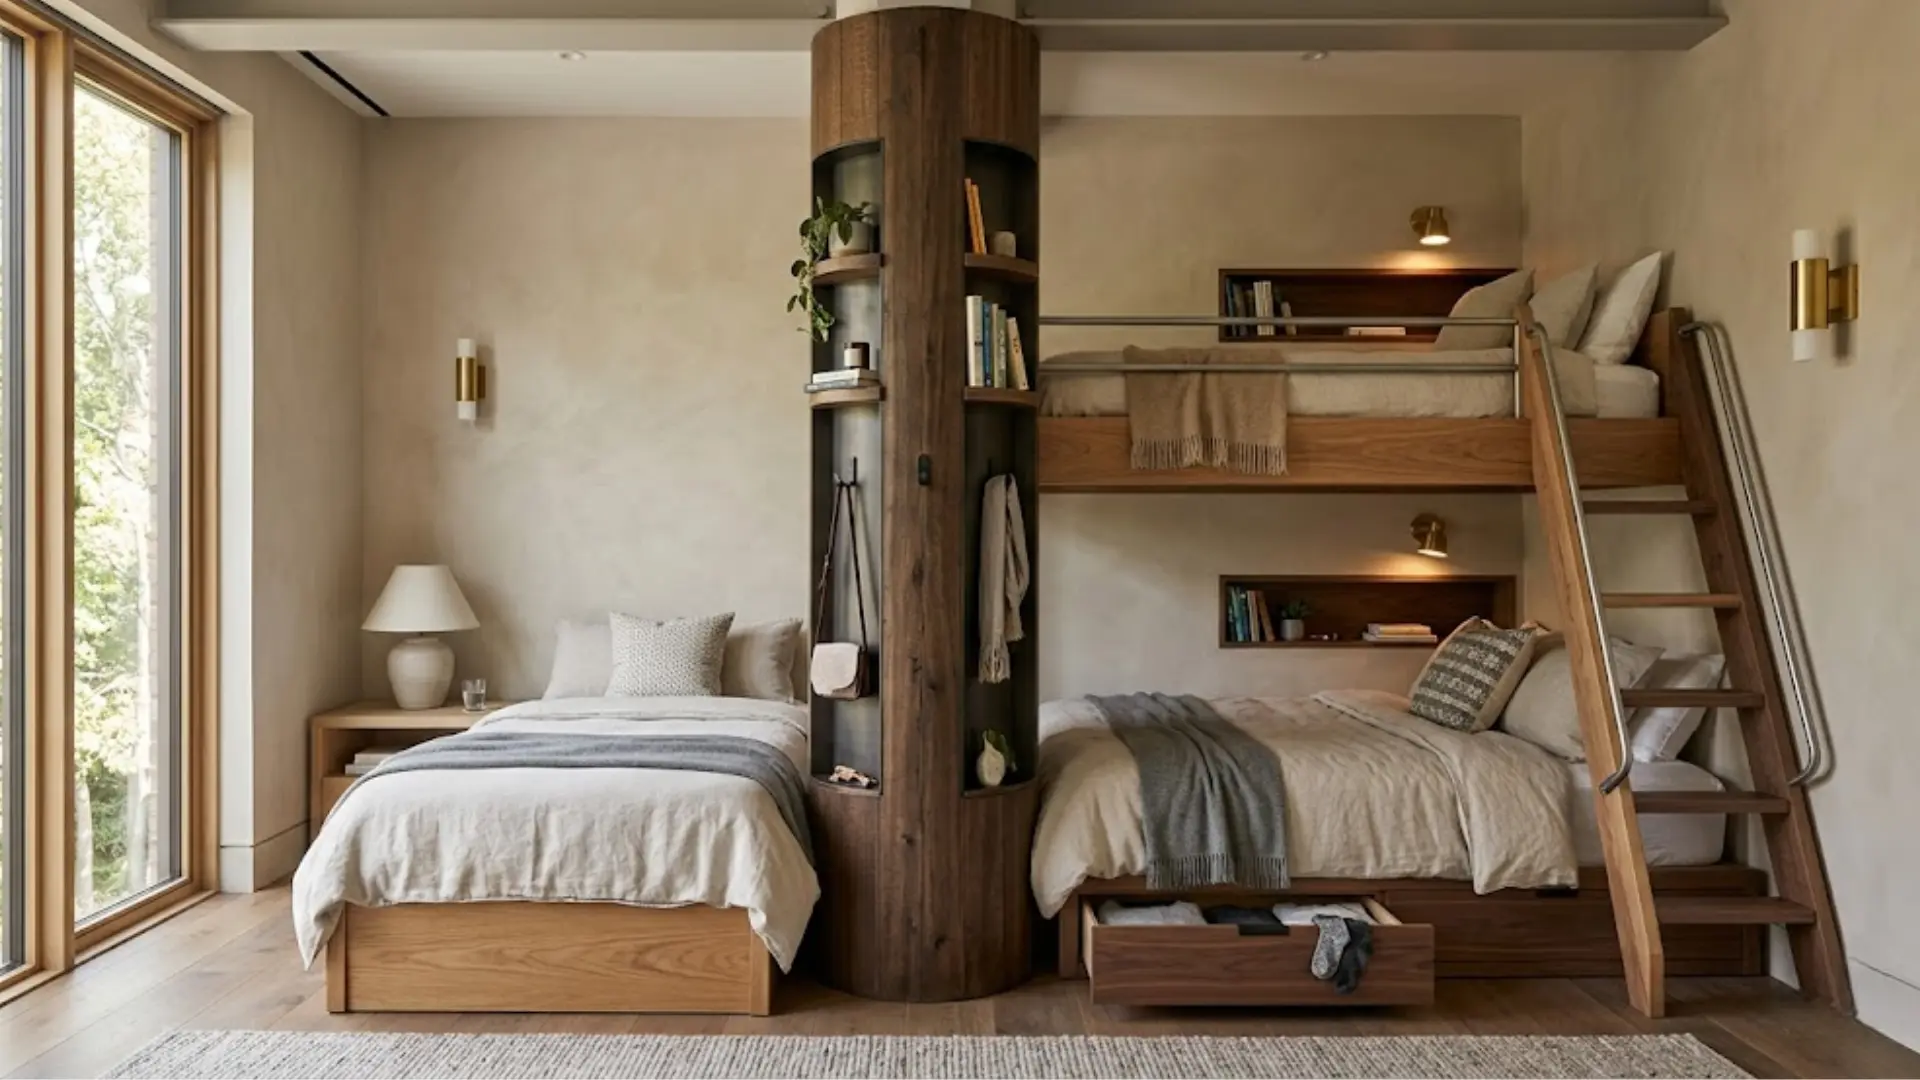
An existing structural column or post in the room becomes part of the bunk frame design. The beds wrap around or attach to the column rather than treating it as an obstacle.
The result looks intentional and architecturally interesting rather than worked around. Shelves or hooks can be added to the column surface for extra storage.
A creative solution for rooms where a central post would otherwise limit furniture placement.
8. Triple Bunk Beds
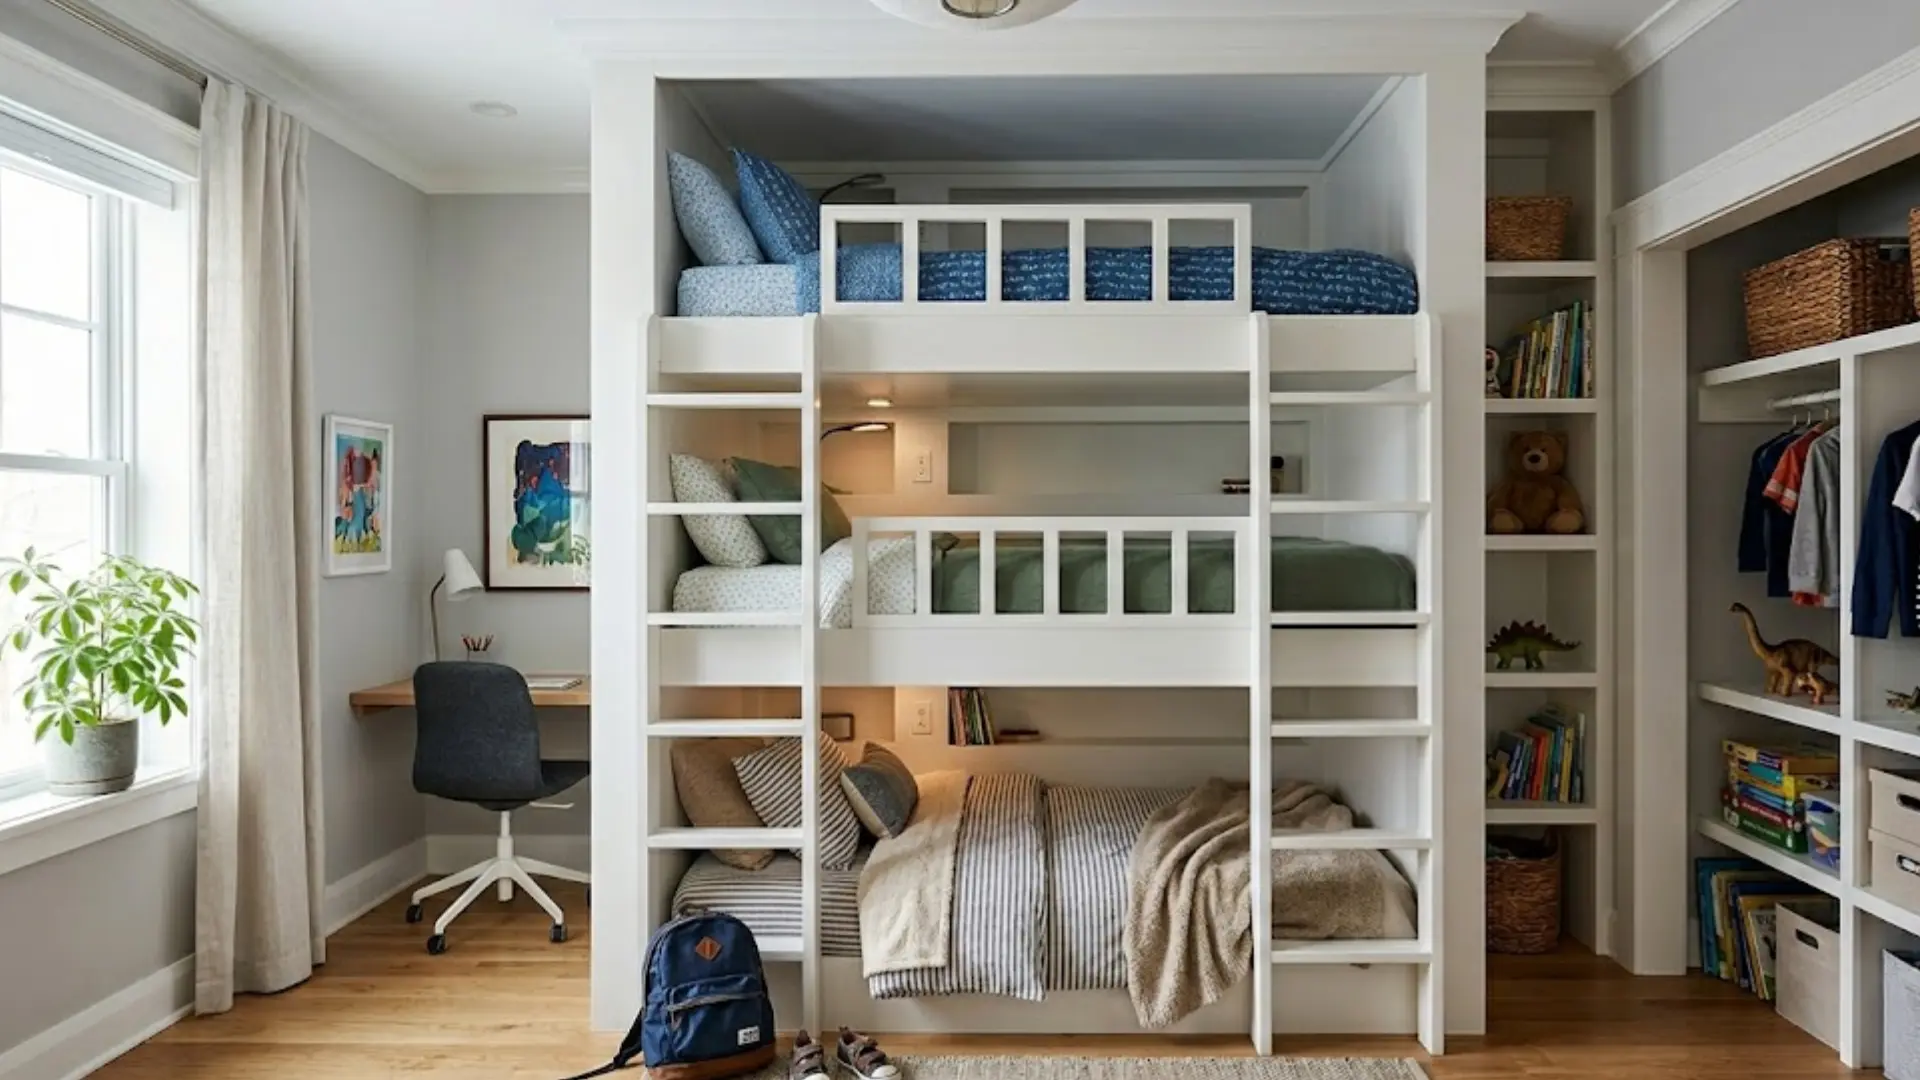
Three sleeping levels are stacked vertically in this design. It is a practical solution when three kids share one bedroom. Each bunk holds a single mattress, and the structure goes higher than standard bunk beds.
Ceiling height is something to measure carefully before building this one. A vertical layout keeps the floor area mostly free for other furniture.
9. Quad Bunk Beds
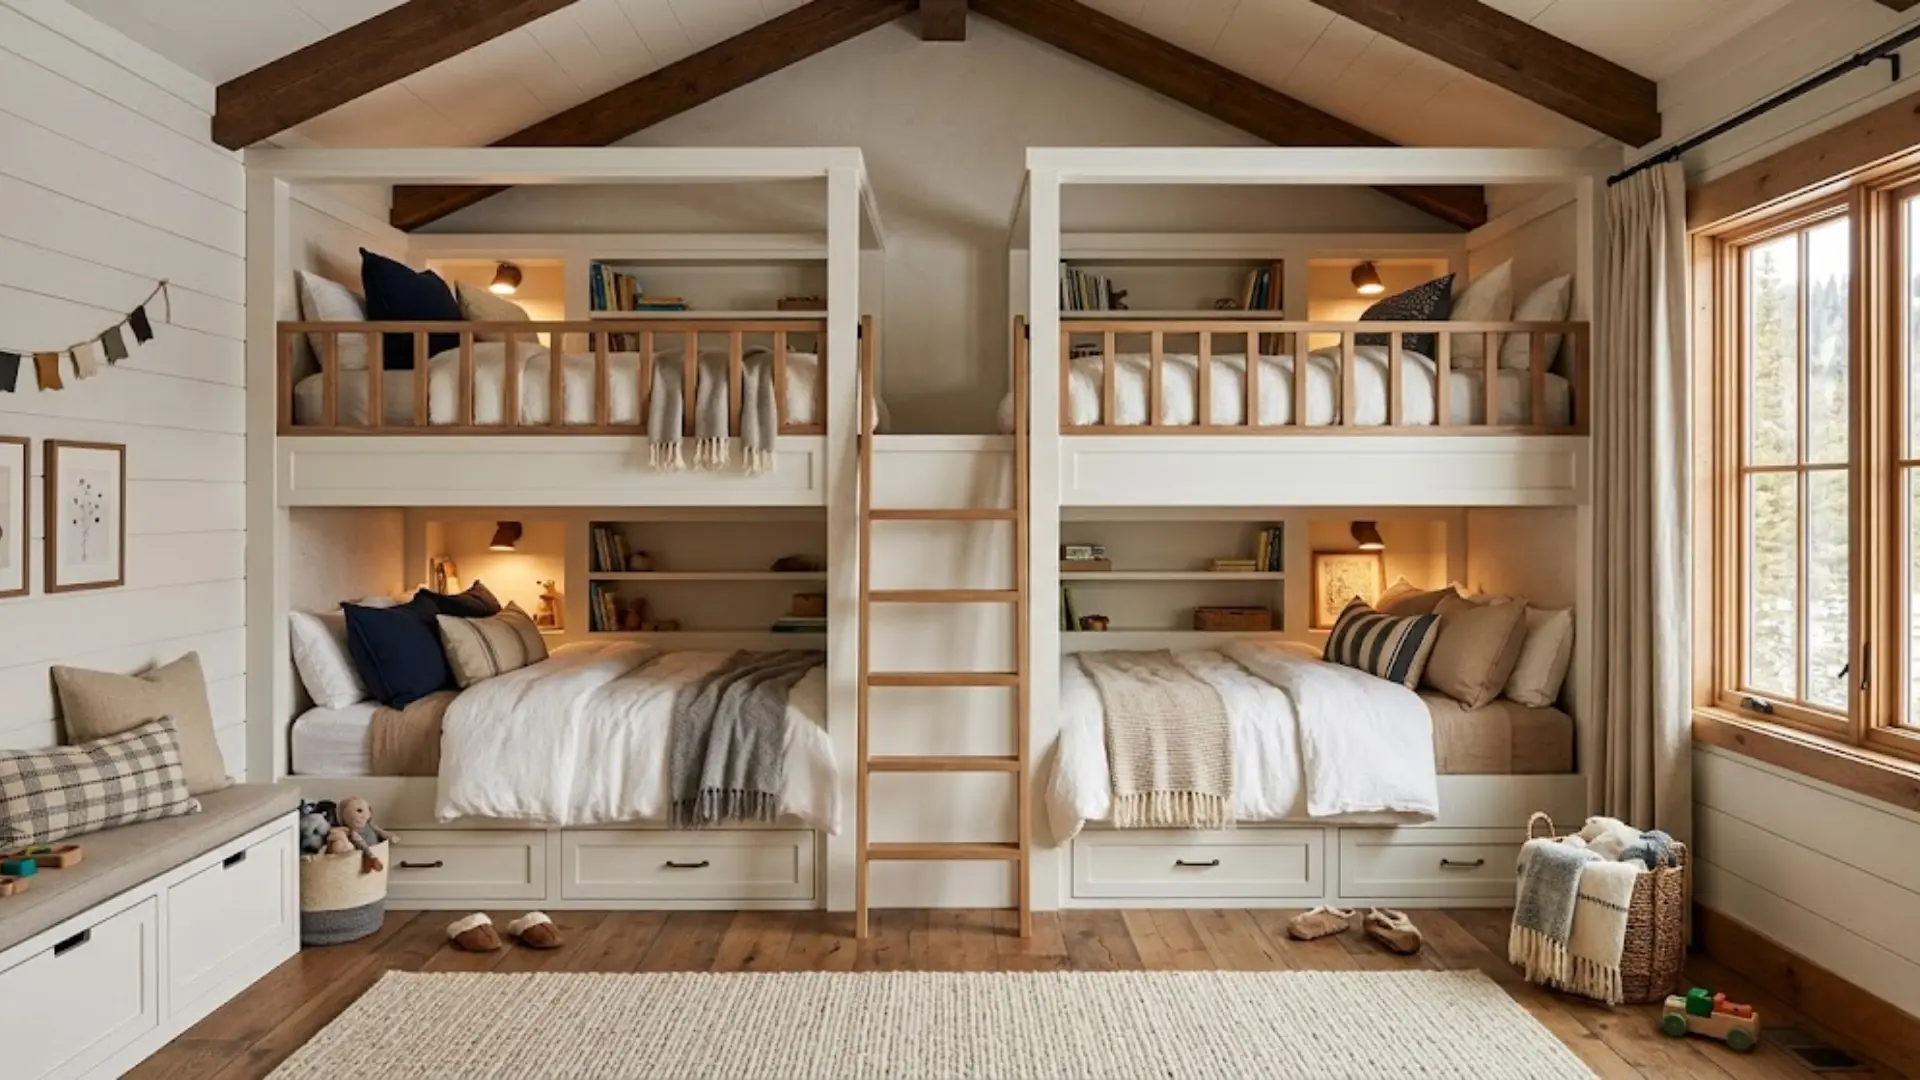
Four bunks are built into this design, usually in two sets of two. It works well in larger shared bedrooms or vacation home setups.
The layout can be side-by-side or stacked, depending on the available wall space. Each sleeper gets their own bunk without taking up extra floor area. A high-capacity sleeping solution built right into your room.
10. Loft Bed with Lower Bunk
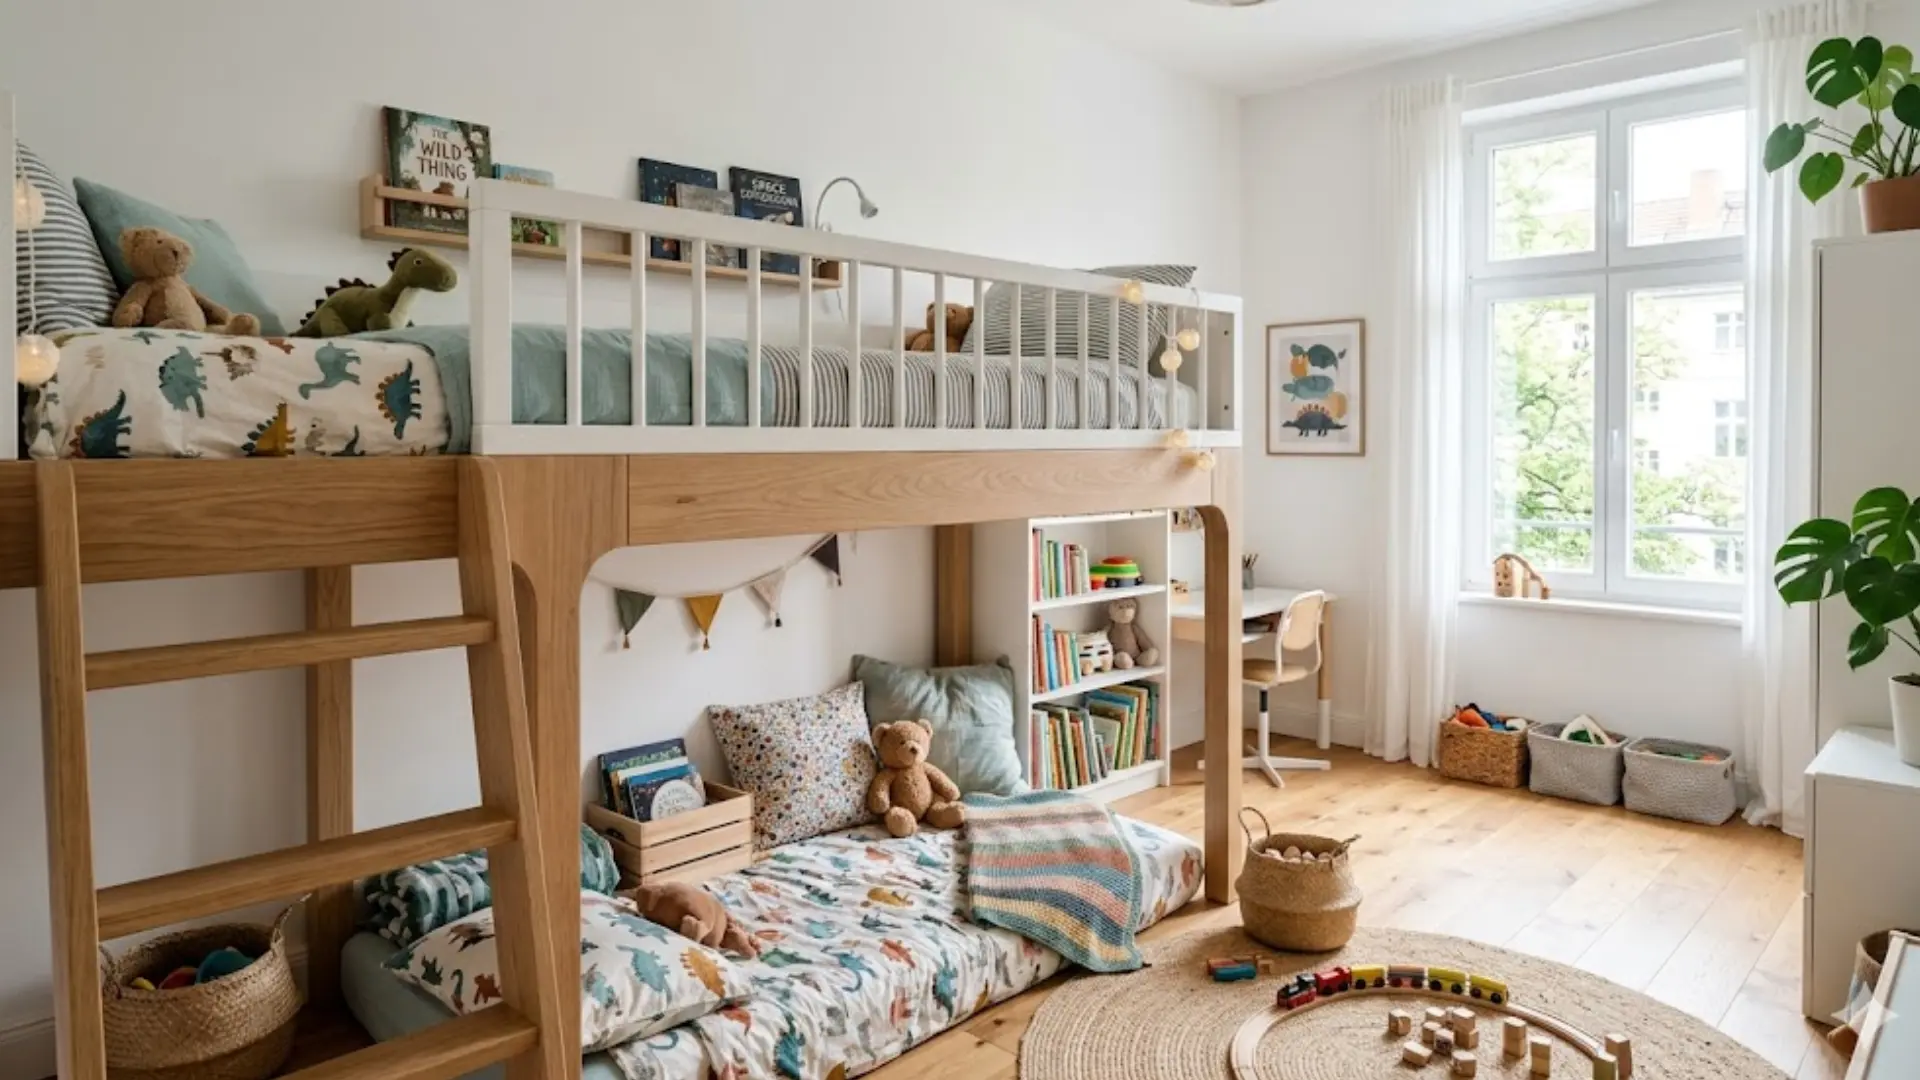
This style raises one bed up high while leaving usable space below it. The lower level can hold a second mattress, a desk, or open storage.
It gives the room a layered, functional look without feeling cluttered. Kids love the heightened sleeping area on top. An open lower section makes the room feel larger than it actually is.
11. Bunk Beds with a Built-In Aquarium

A fish tank is fitted into the base or side panel of the bunk frame behind a glass panel. It adds a calming, ambient glow to the sleeping area without taking up floor space.
The tank sits fully enclosed within the structure for a clean, built-in appearance. Access panels on the back allow for easy cleaning and maintenance. Kids who love nature and animals will find this a genuinely exciting bedroom feature.
12. Bunk Beds with Drawer Stairs
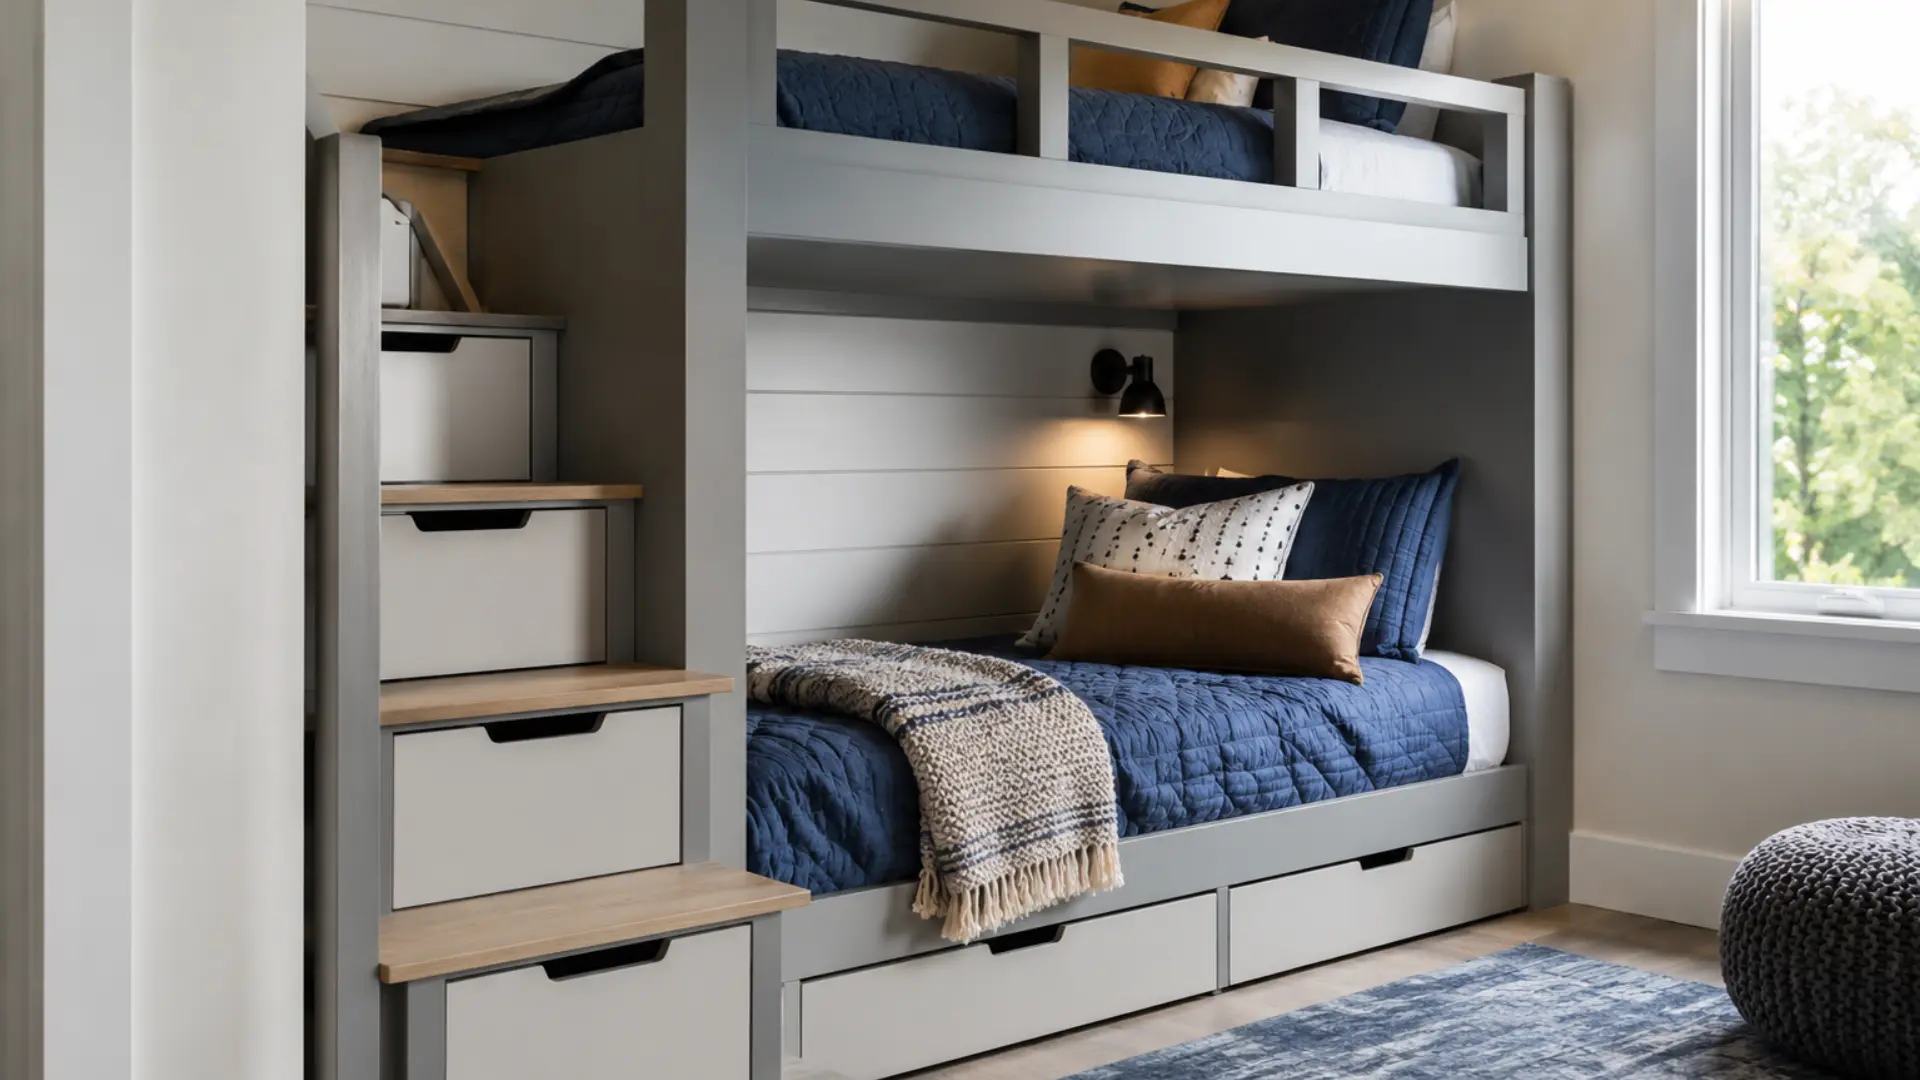
This is similar to storage stairs but focuses specifically on pull-out drawers built into each step. Each drawer slides out smoothly and offers easy access to everyday items.
The staircase looks clean and minimal from the outside. It keeps clutter off the floor without needing a separate dresser in the room. A great pick for small bedrooms that need extra organization.
13. Bunk Beds with a Slide
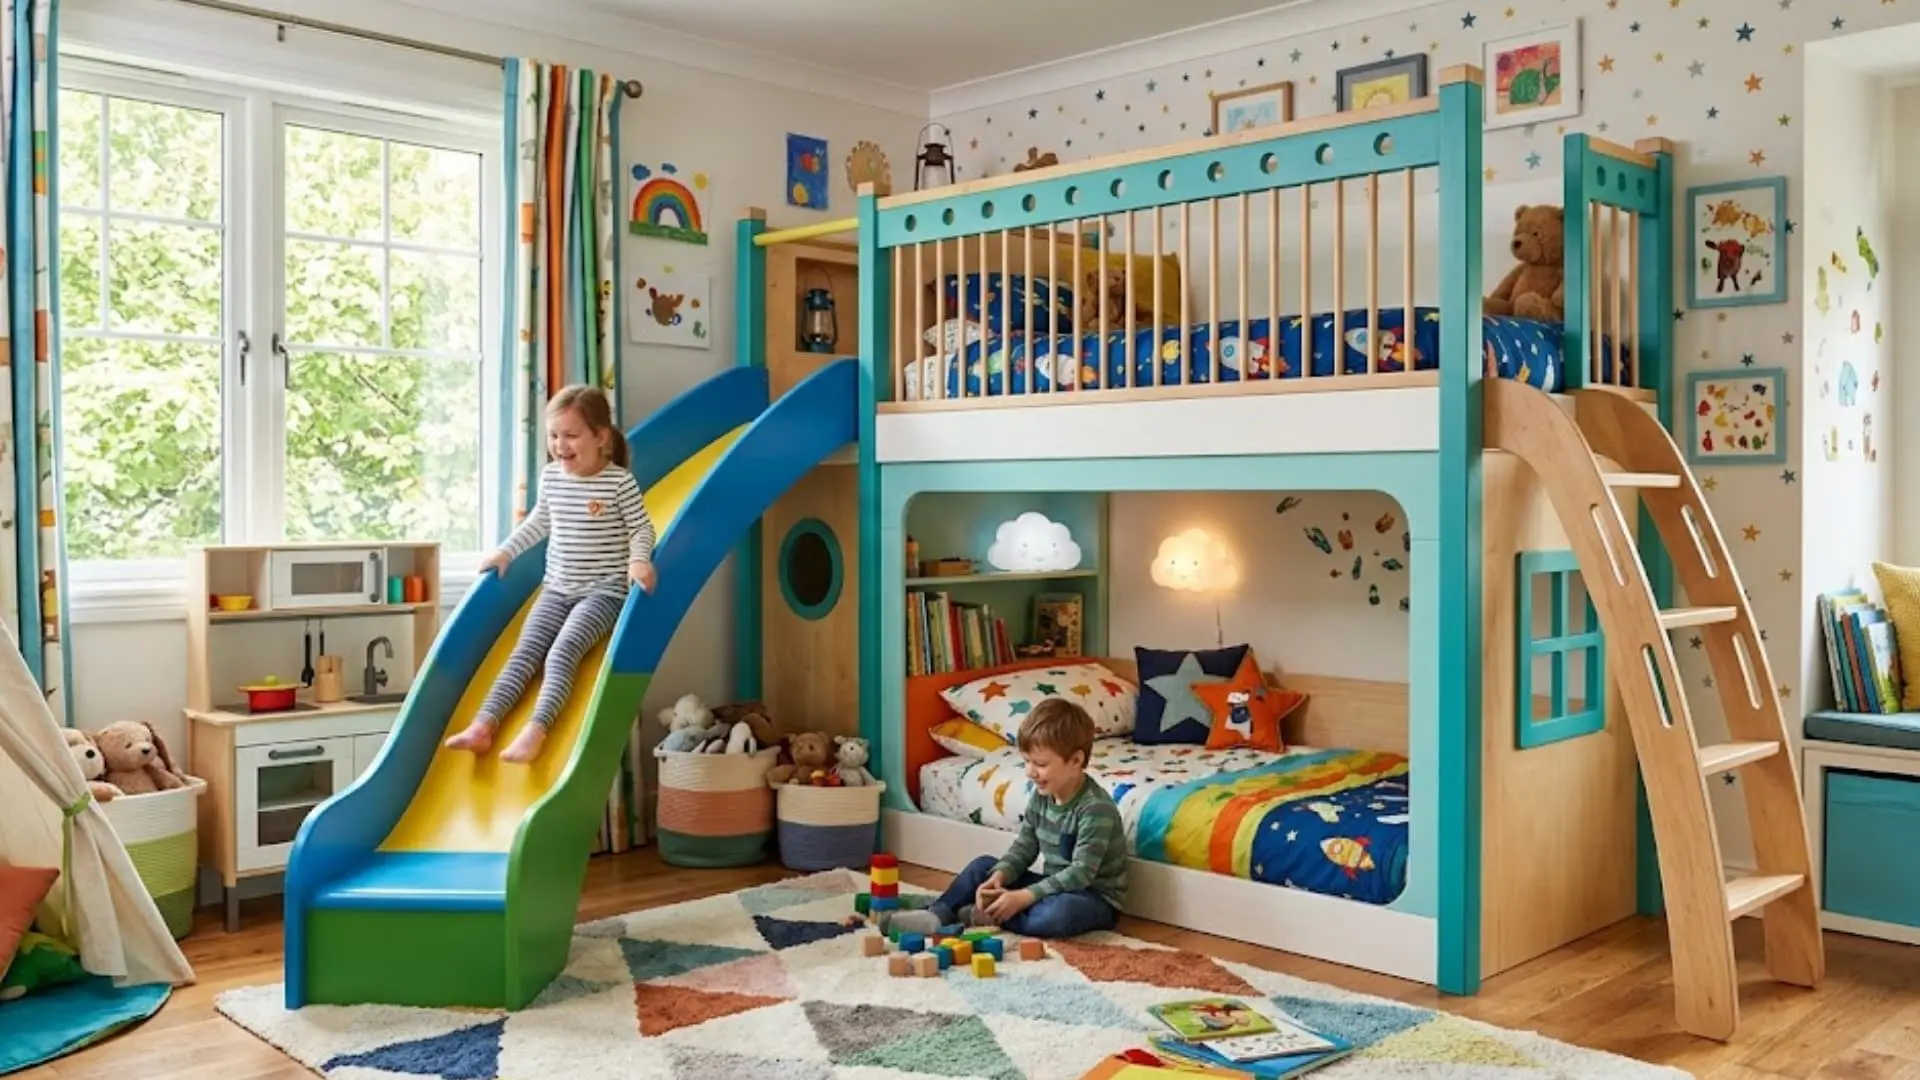
A slide is attached to the side of the upper bunk in place of or alongside a ladder. Kids can climb up using the ladder and come down using the slide. It gives the room a playful, fun energy that younger children enjoy.
The slide can curve slightly or run straight, depending on the available space. Younger kids who love an active bedroom setup will enjoy this layout most.
14. Bunk Beds with a Reading Nook
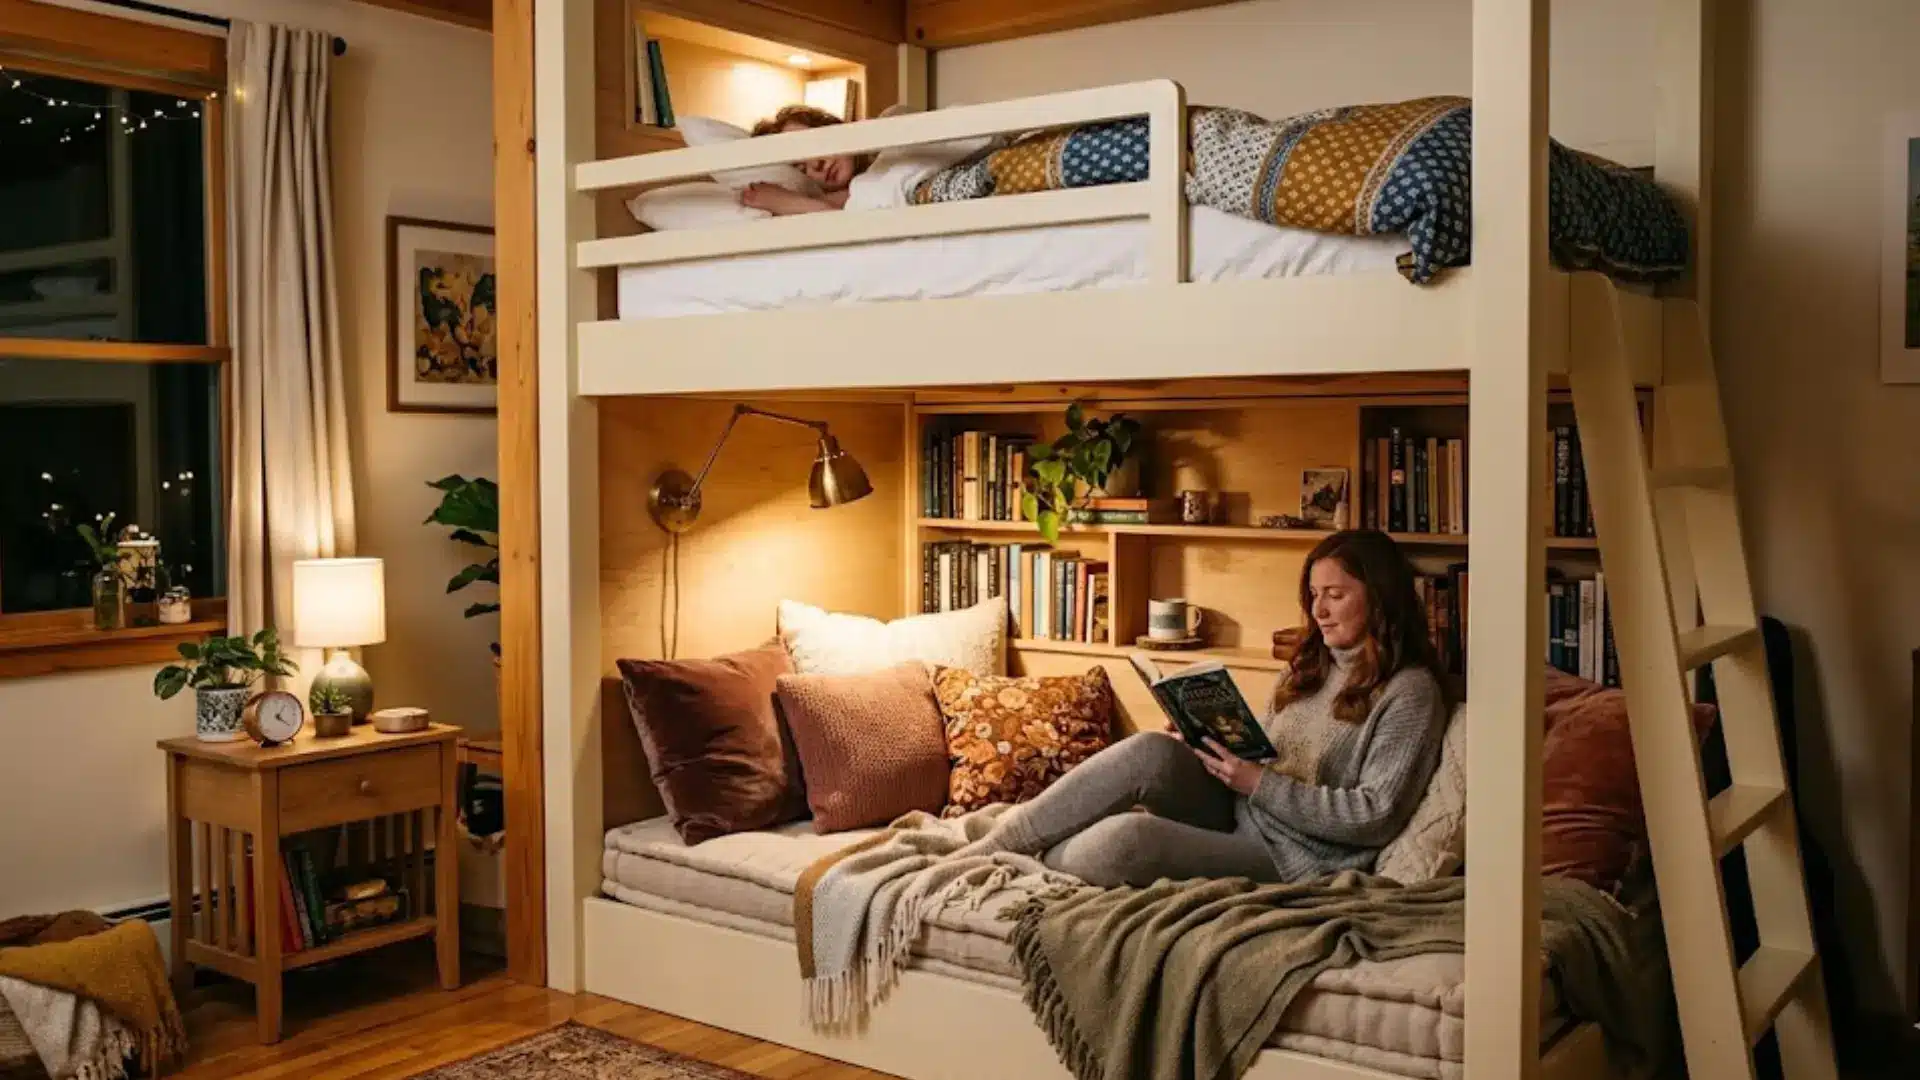
A small recessed nook is built into the lower section of this design. It creates a cozy, tucked-away spot for reading or quiet time. You can add a cushion, a small light, and a few shelves inside the nook.
Above it, the upper bunk sits comfortably while the nook occupies the lower space. A lovely detail that makes the whole setup feel thoughtfully designed.
15. Bunk Beds with a Built-In Desk
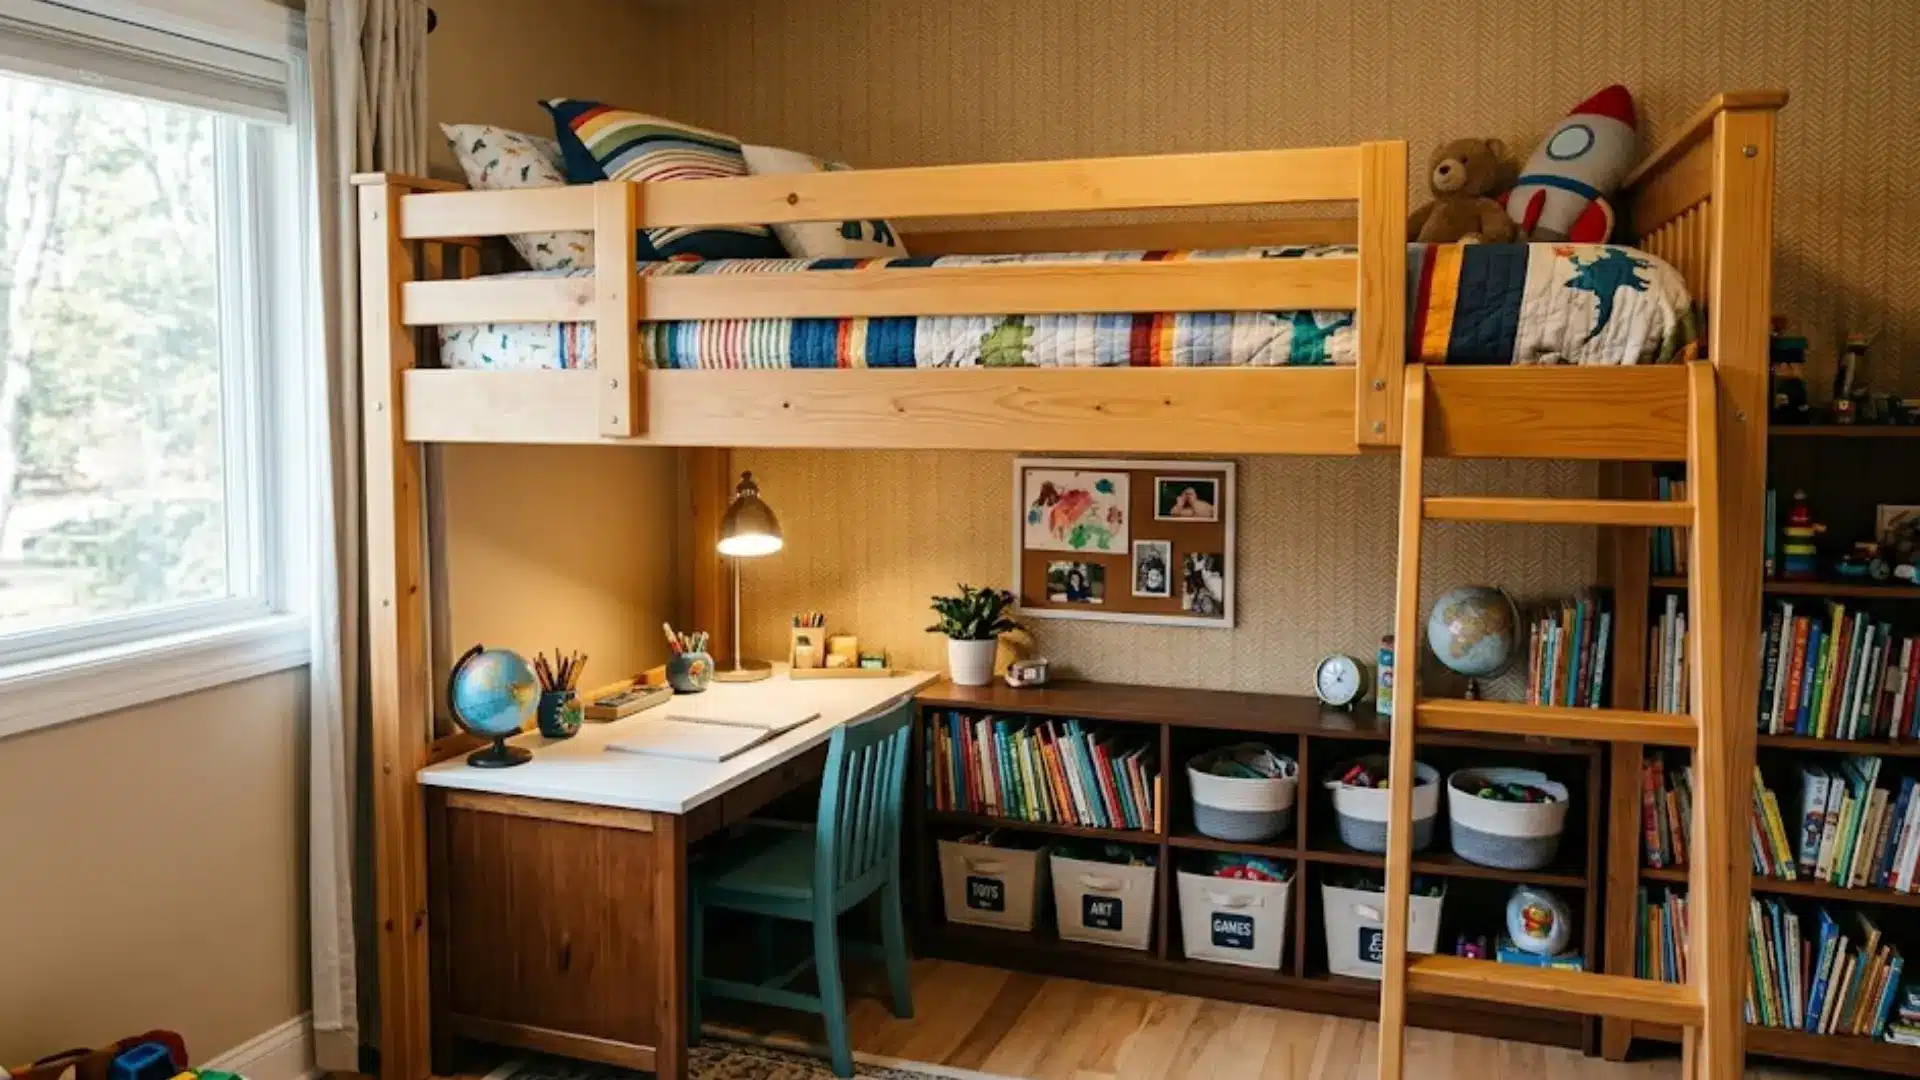
A desk is built directly into the lower section of the bunk structure. Above it, a loft-style sleeping area provides a comfortable upper bunk.
This layout works especially well for school-age kids who need a dedicated study spot. Desk, shelves, and bed all share one wall without feeling cramped.
One of the most functional built-in designs for a growing child’s bedroom.
16. Bunk Beds with a Pegboard Wall
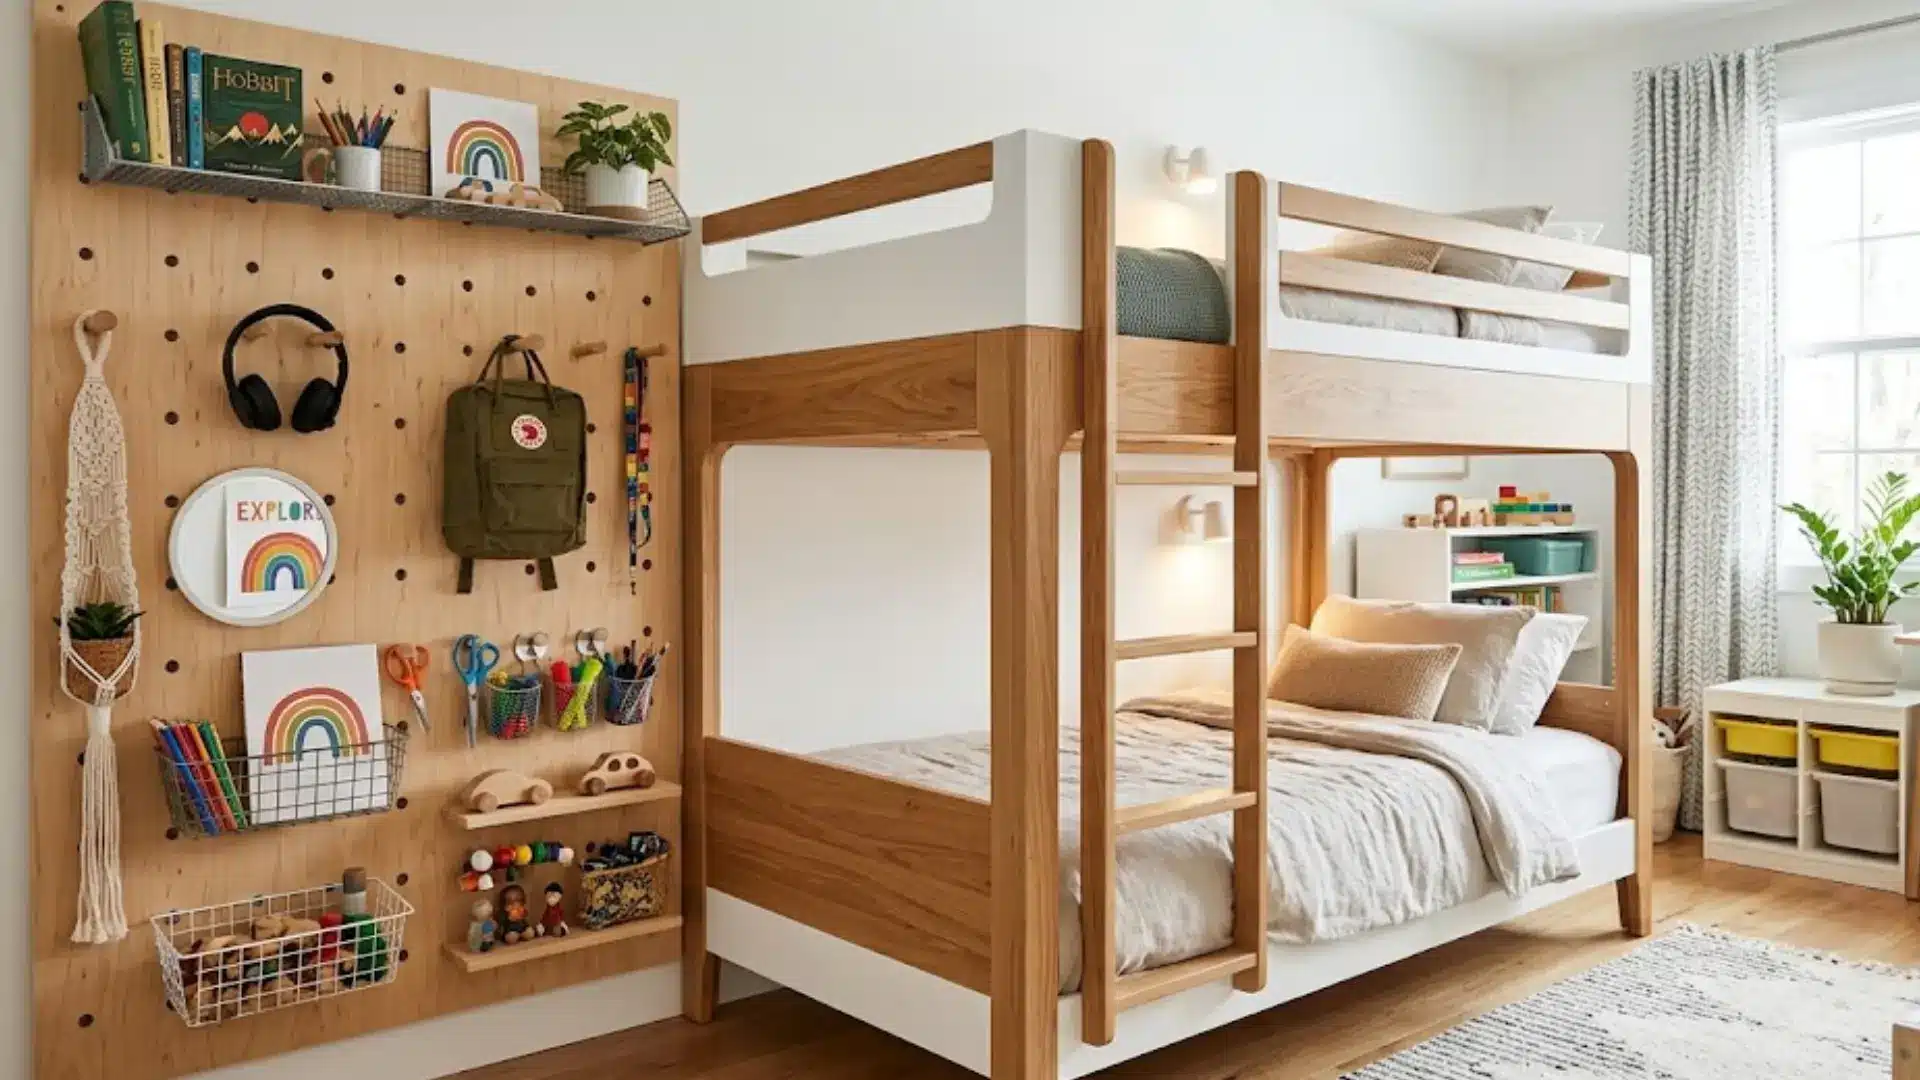
A pegboard panel is built into the side of the bunk frame for hanging accessories and organizing small items. Hooks, baskets, and shelves can be rearranged freely as needs change over time.
It keeps everyday items like bags, headphones, and art supplies off the floor and within easy reach. The pegboard adds texture and visual interest to the overall structure.
A practical and flexible addition that grows with the child as their storage needs change.
17. Bunk Beds with a Closet Underneath
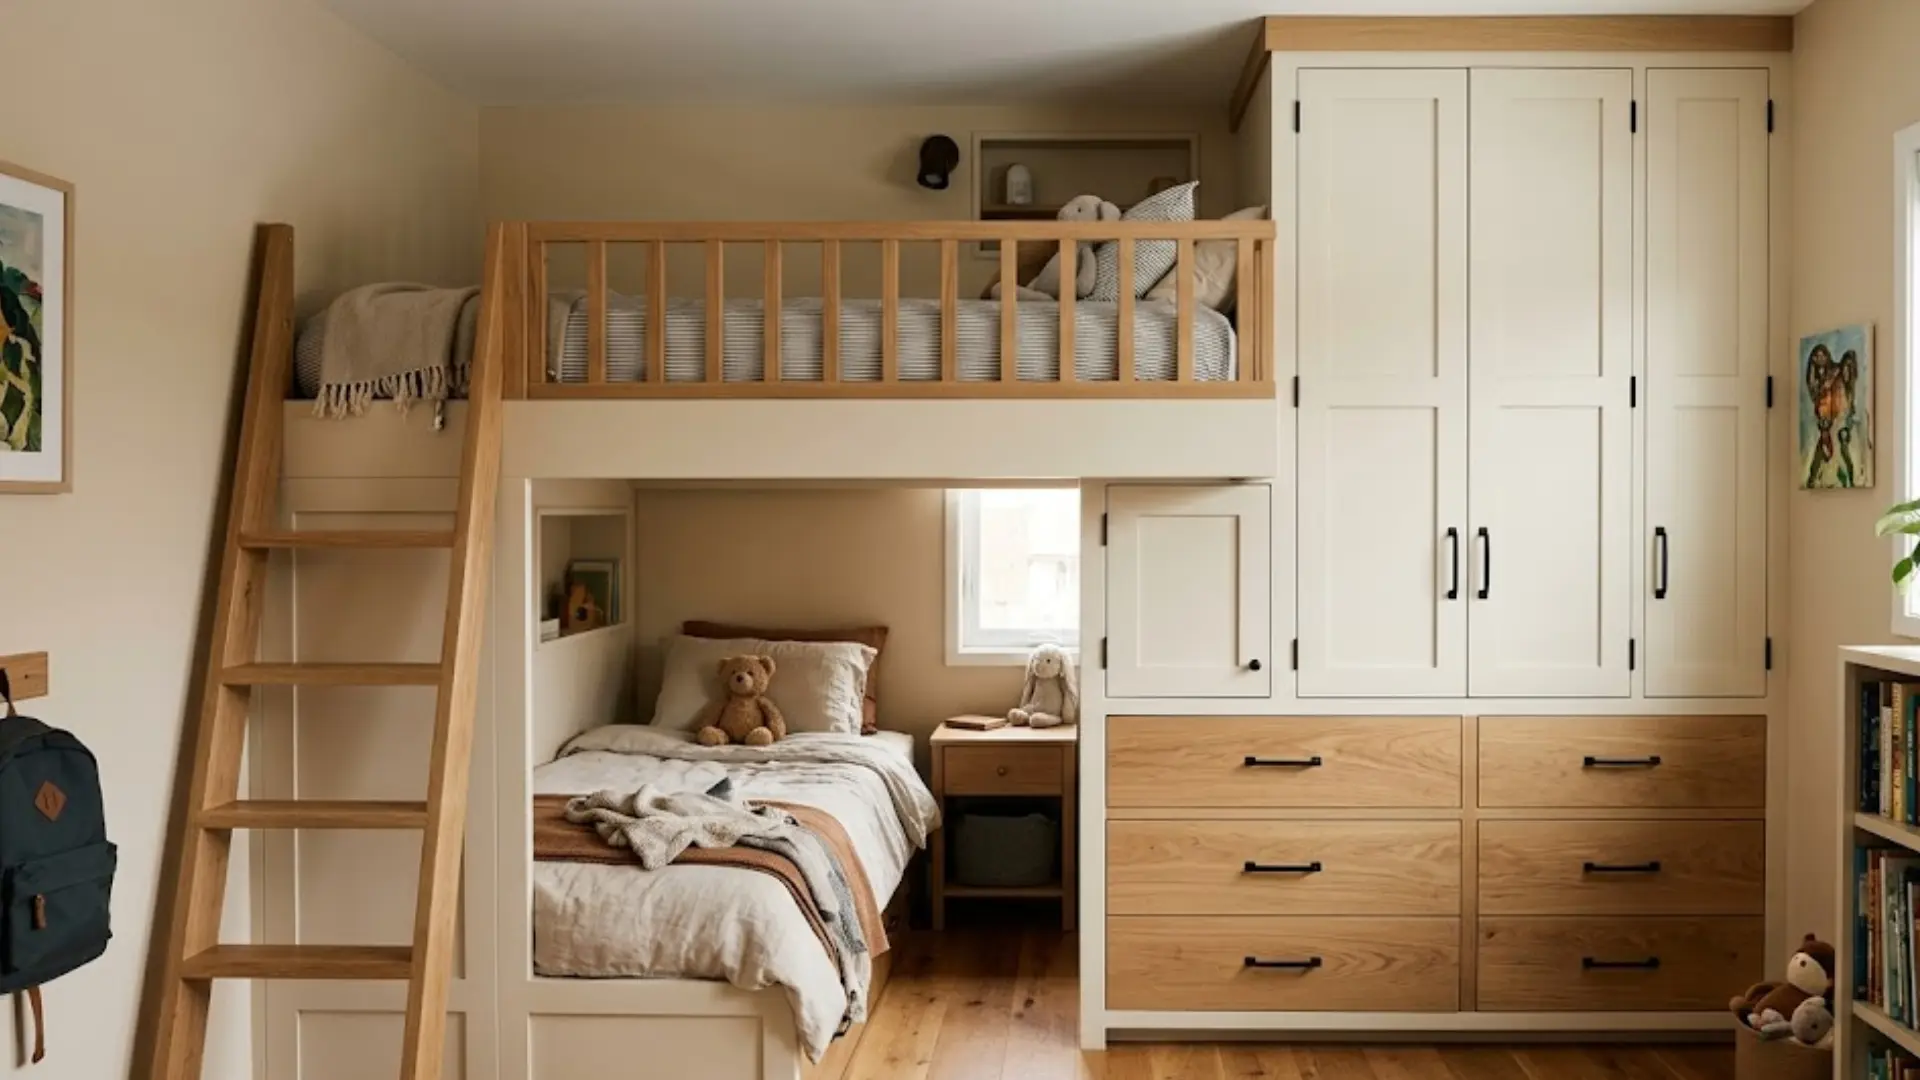
The upper bunk sits at a height, while a built-in closet occupies the space below. Hanging rods, shelves, or drawers can all fit within the lower section.
It removes the need for a separate wardrobe elsewhere in the room. The exterior looks clean and uncluttered. Rooms without existing built-in closets benefit the most from this practical and space-saving layout.
18. Bunk Beds with Bookshelves
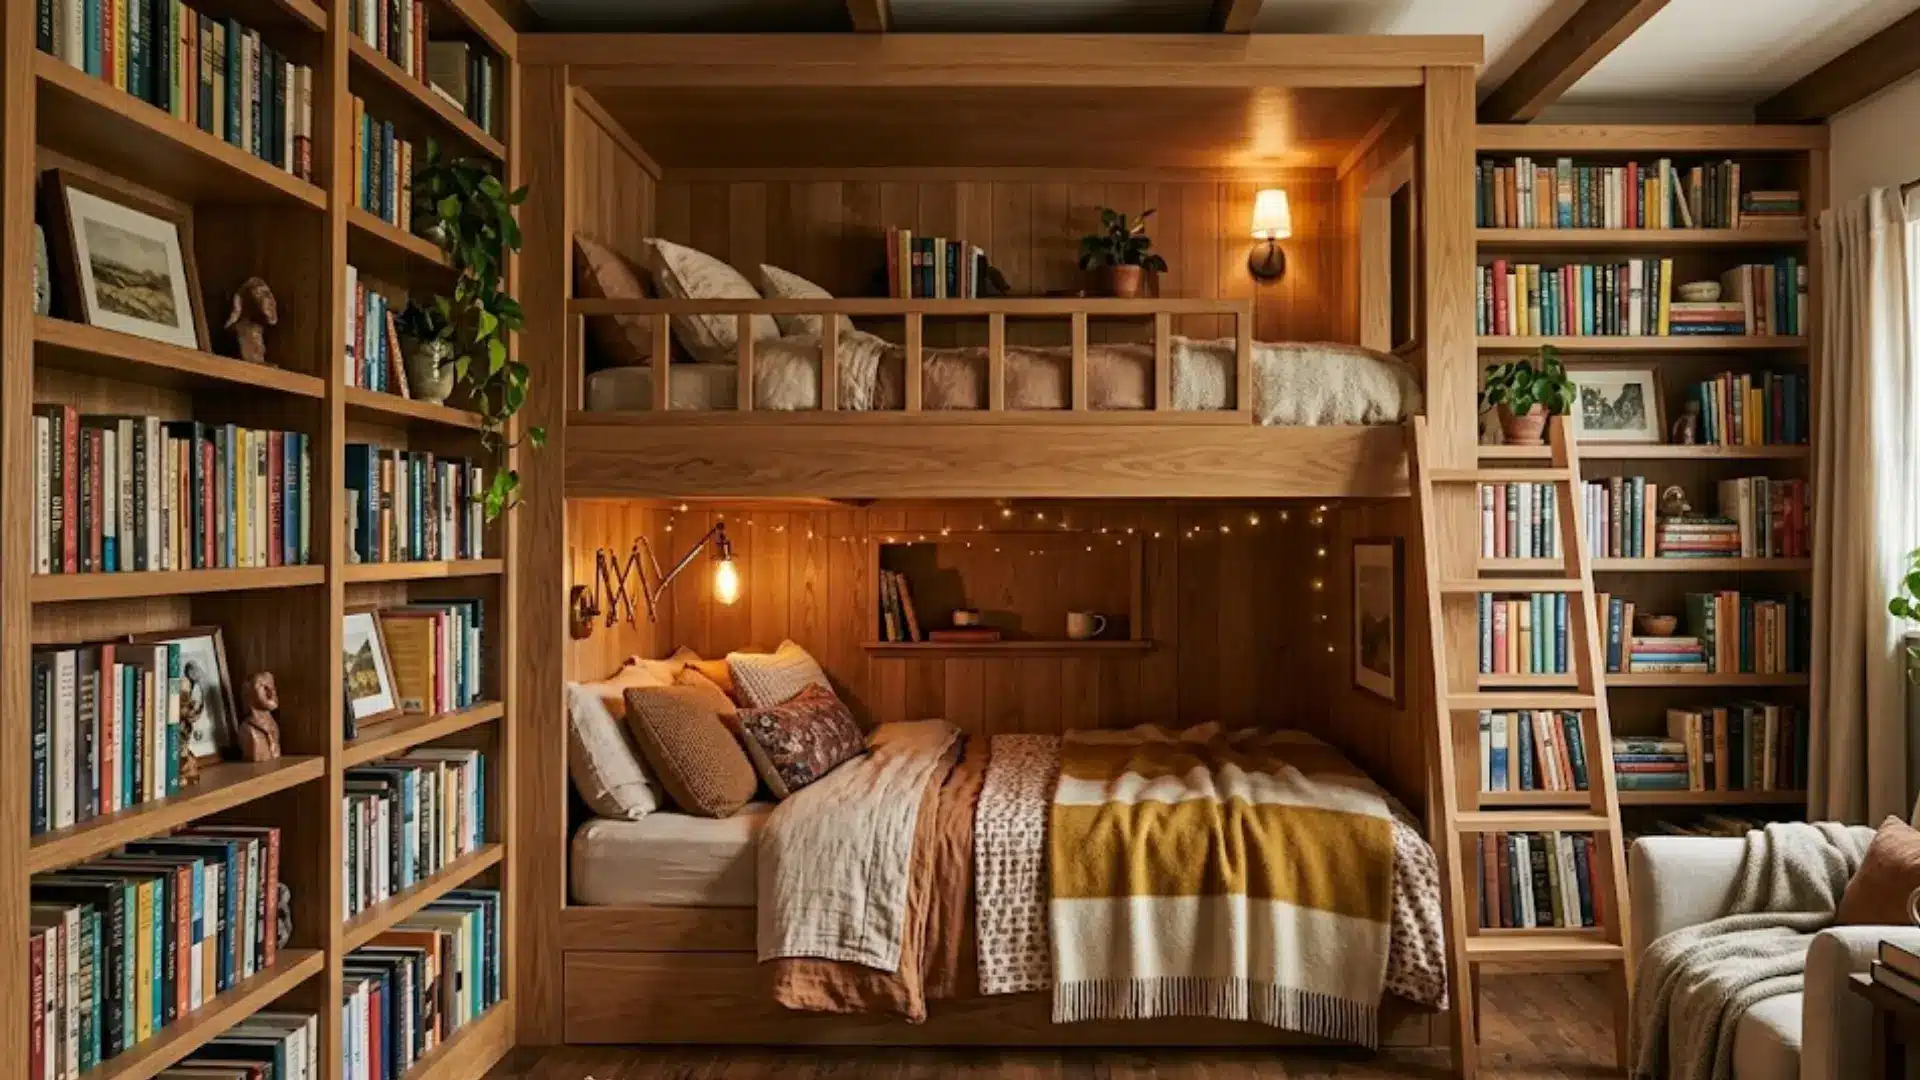
Shelves are built directly into the sides or headboard of the bunk frame. Each sleeper gets easy access to books, toys, or personal items from bed.
The shelves add visual depth and break up the flat surfaces of the structure.
It creates a cozy, well-organized feel throughout the sleeping area. Kids who love reading will appreciate having everything within arm’s reach.
19. Bunk Beds with Hidden Storage Compartments
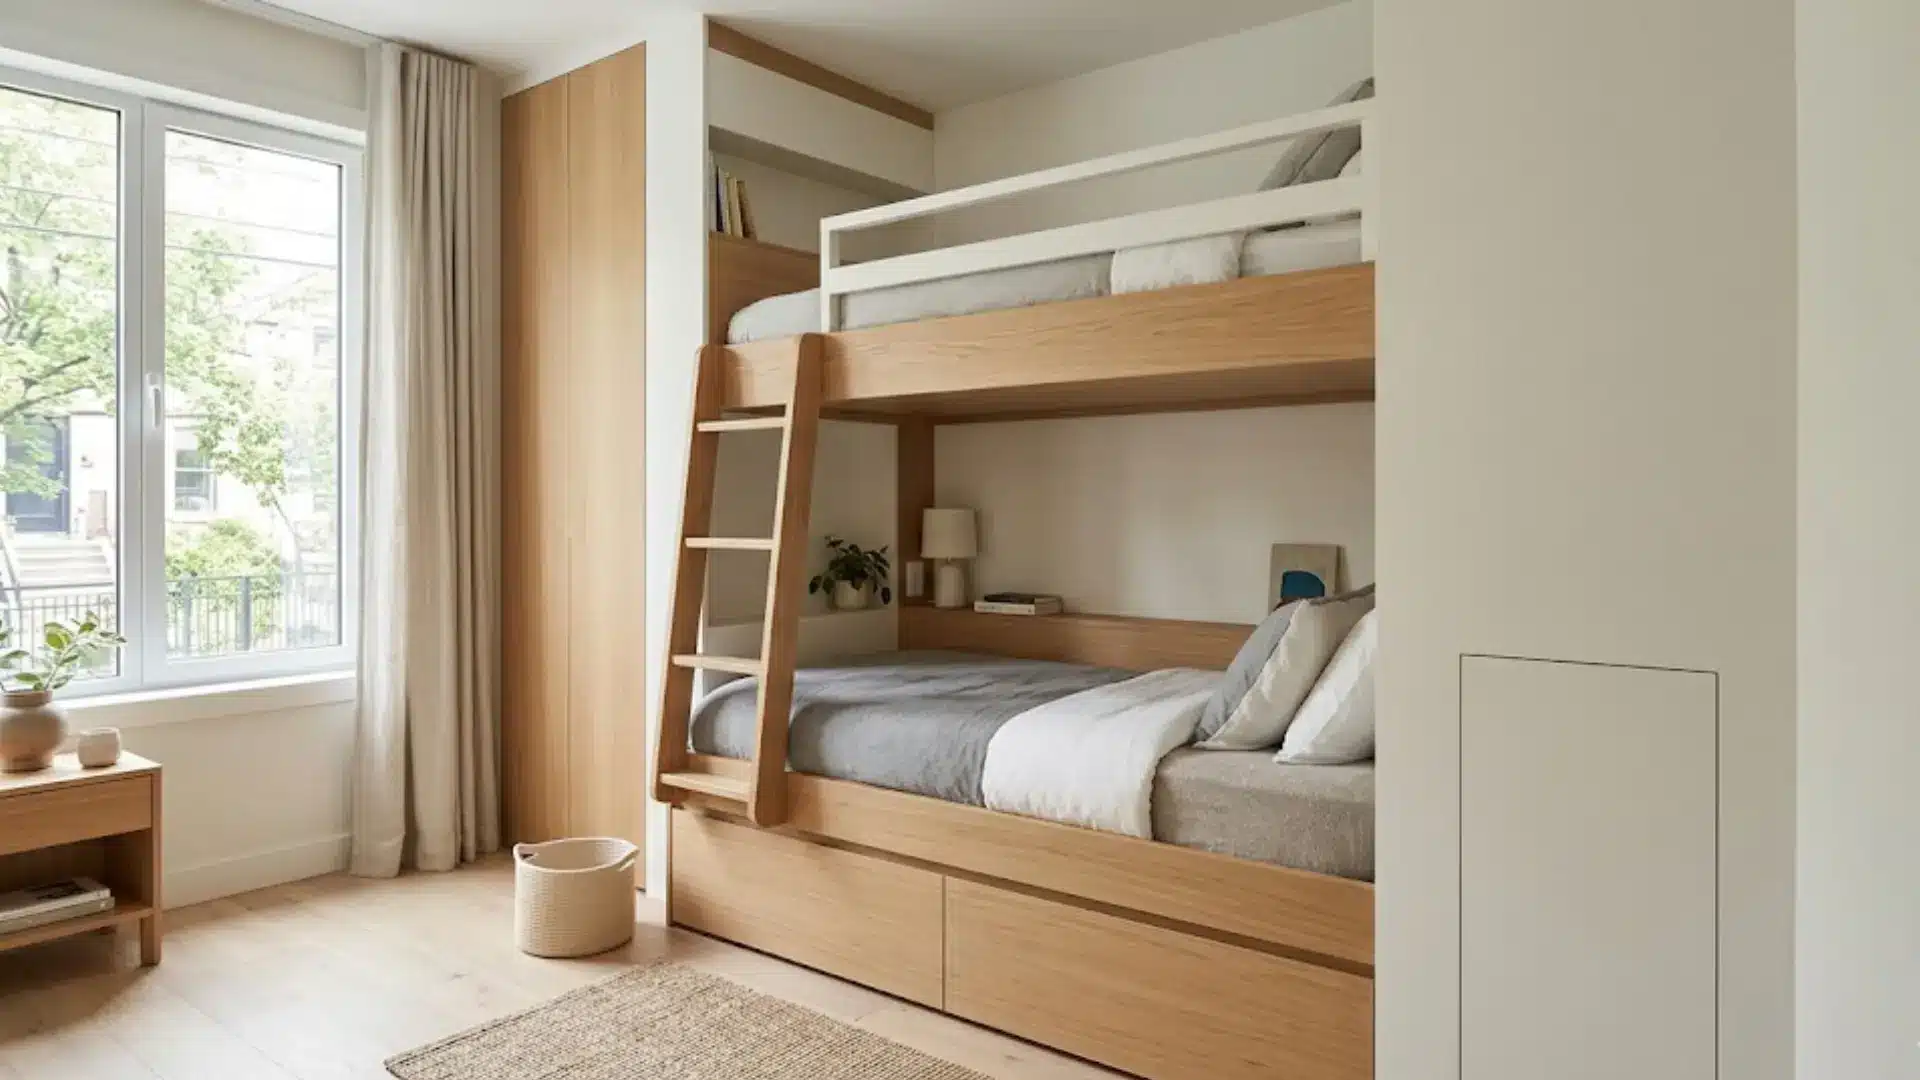
The bunk looks simple and clean from the outside, but storage hides behind panels and under platforms. Pull-out drawers or lift-up sections reveal space for clothes, toys, and everyday items.
Nothing is left visible to clutter the room. It is a clever way to stay organized without adding extra furniture. Families who want a tidy, streamlined bedroom will find this layout very practical.
20. Floating Built-In Bunk Beds

These bunks are anchored directly to the wall with no legs touching the floor. The beds appear to float, giving the room a light and modern feel.
Wall-mounted supports carry the full weight of the structure safely. The open floor space underneath stays clear and easy to clean.
Bedrooms with a sleek, contemporary style pair especially well with this minimal design.
21. Alcove Bunk Beds
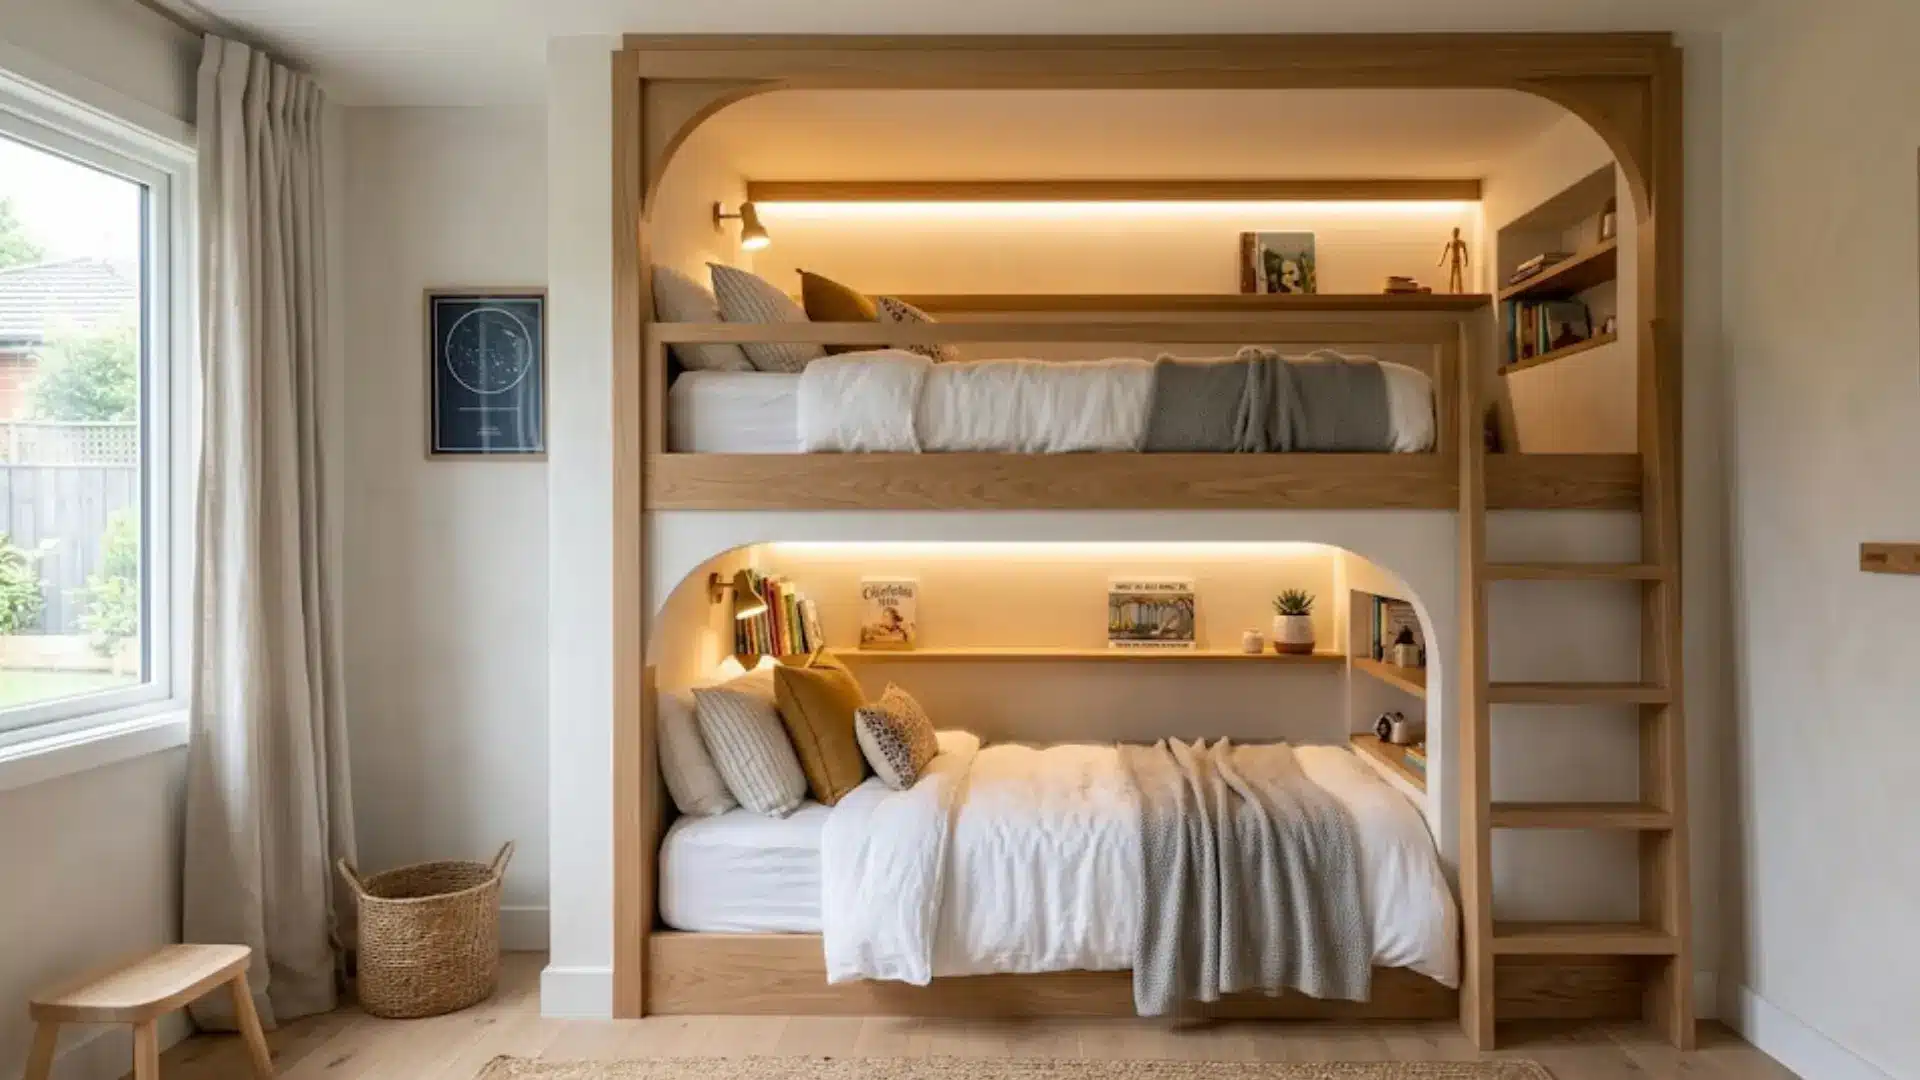
Each sleeping area is recessed into its own nook cut into the wall. The bunks feel enclosed and private, like sleeping in a cozy cave. Curtains or sliding panels can completely close off each alcove.
The recessed design keeps the room looking calm and uncluttered from the outside. Kids who prefer a snug, tucked-away sleeping space tend to love this style.
22. Murphy Bunk Beds
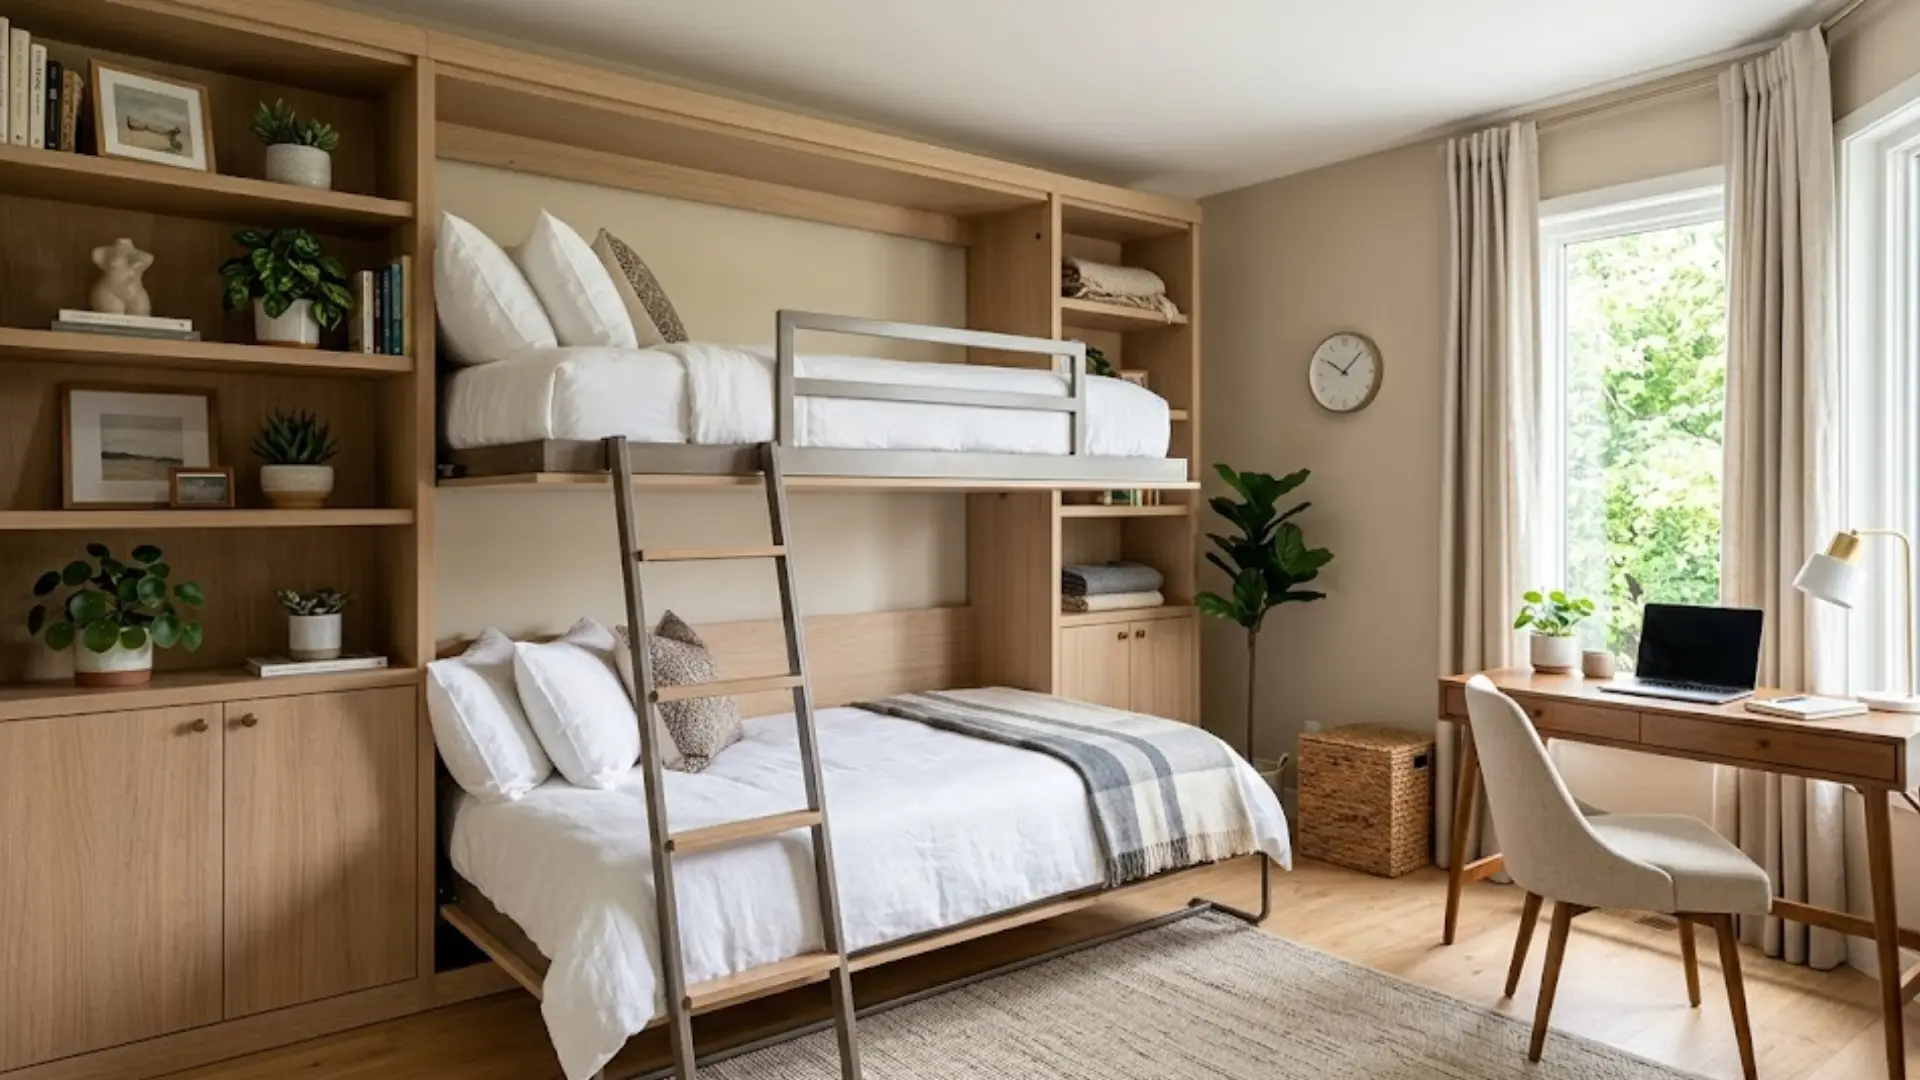
These bunks fold flat against the wall when not in use during the day. The room functions as a regular living or play space until bedtime.
At night, the beds fold down quickly and lock into a safe sleeping position. The floor stays completely clear when the beds are stored away.
Guest rooms and multipurpose spaces benefit the most from this flexible setup.
23. Industrial Pipe Bunk Beds
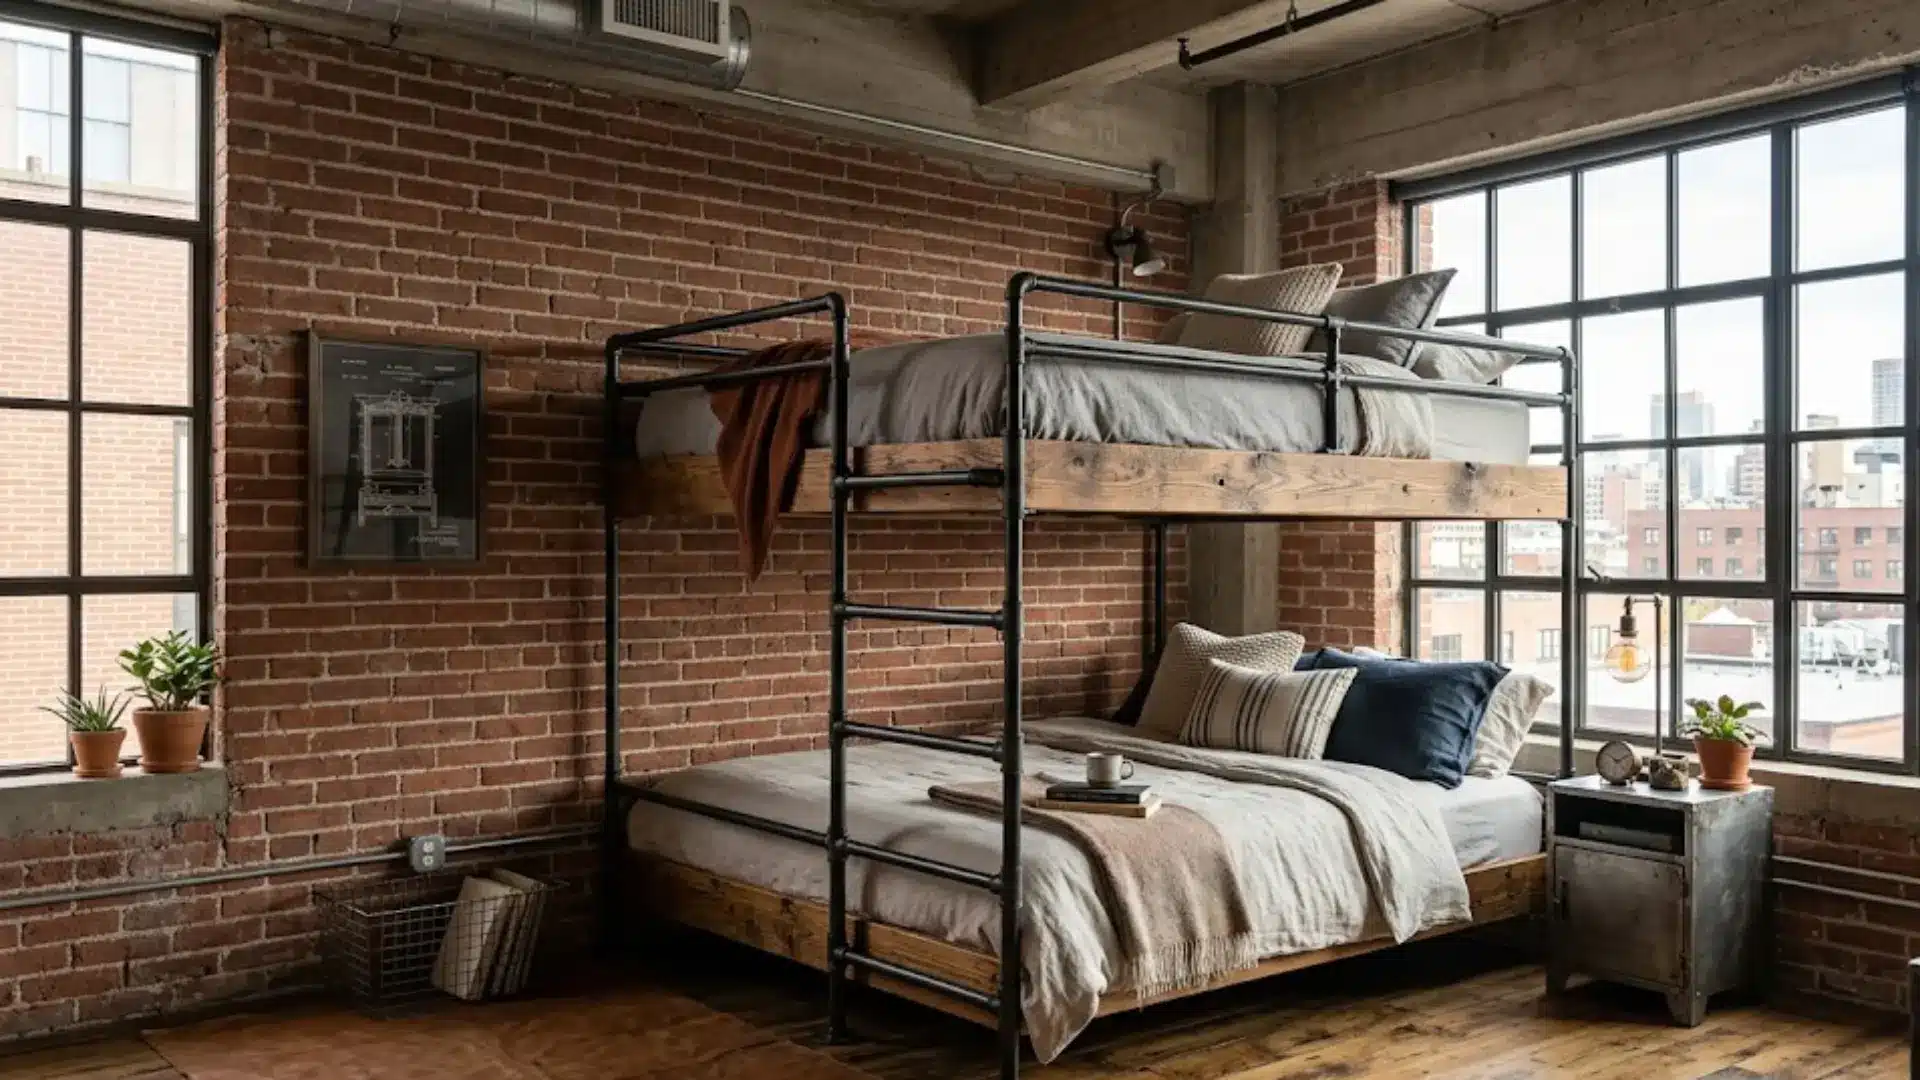
Metal pipes and fittings form the main structural frame of this design. The exposed hardware gives the room a raw, urban, and edgy character.
Dark pipe finishes pair naturally with wood planks for a mixed-material look. The frame is strong, durable, and requires very little maintenance over time.
Teens who prefer a bold and unconventional bedroom style are drawn to this design.
24. Rustic Farmhouse Bunk Beds

Reclaimed wood, shiplap panels, and warm natural finishes define this cozy style. The design feels lived-in and full of character from the moment it is complete.
Barn-style hardware, rope accents, and neutral tones add to the overall farmhouse appeal. Every detail looks handcrafted rather than store-bought.
Families going for a warm, country-inspired bedroom will feel right at home with this layout.
25. Modern Minimalist Bunk Beds
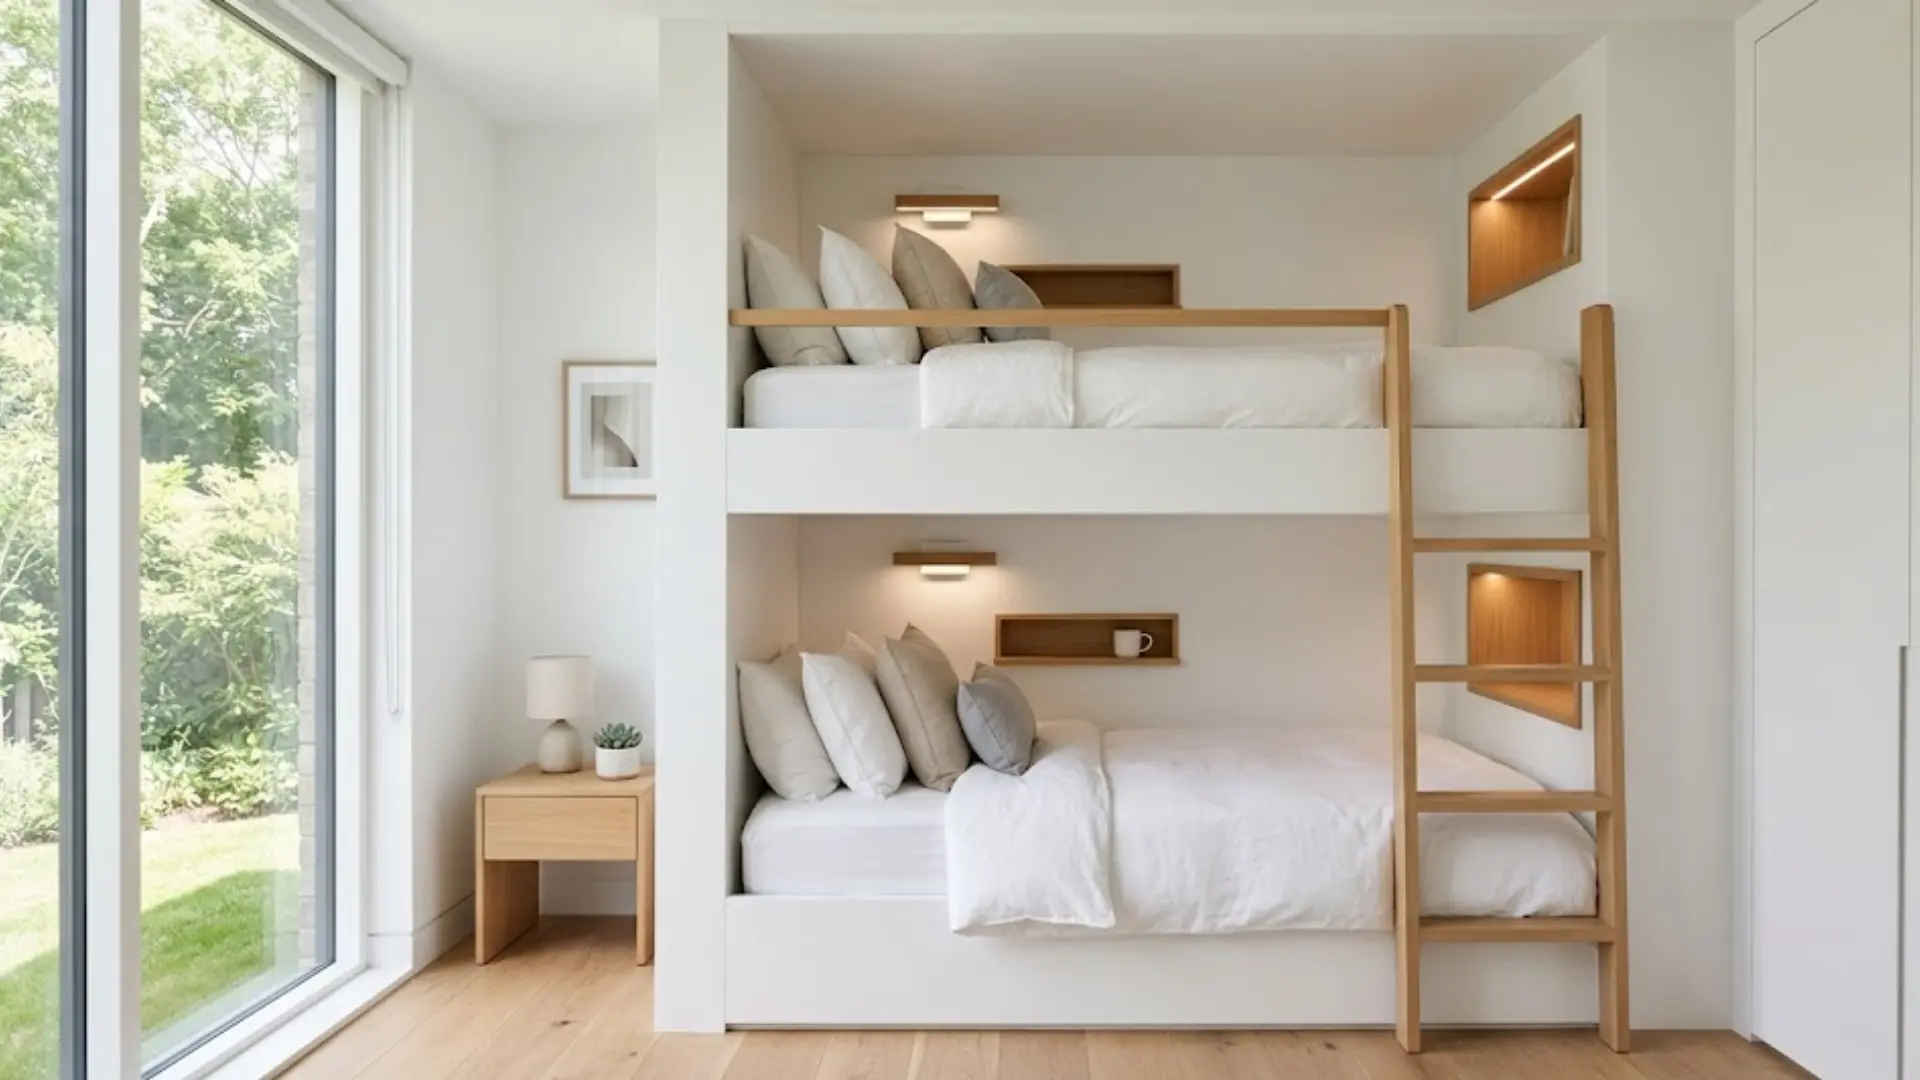
Clean lines, flat surfaces, and a simple color palette define this understated design. There are no decorative details or heavy trim pieces anywhere on the frame.
White, grey, or natural wood tones keep the space feeling calm and open. Every element serves a function without adding visual clutter to the room.
Bedrooms following a contemporary design theme pair perfectly with this style.
26. House-Shaped Bunk Beds

A peaked roofline sits above each bunk to mimic the shape of a small house. The design gives the room a whimsical, storybook quality that younger kids adore.
Each sleeping area feels like its own little home within the bedroom. You can paint the frame in bright colors or keep it soft and neutral.
Young children who love imaginative play are instantly drawn to this adorable style.
27. Treehouse-Inspired Bunk Beds
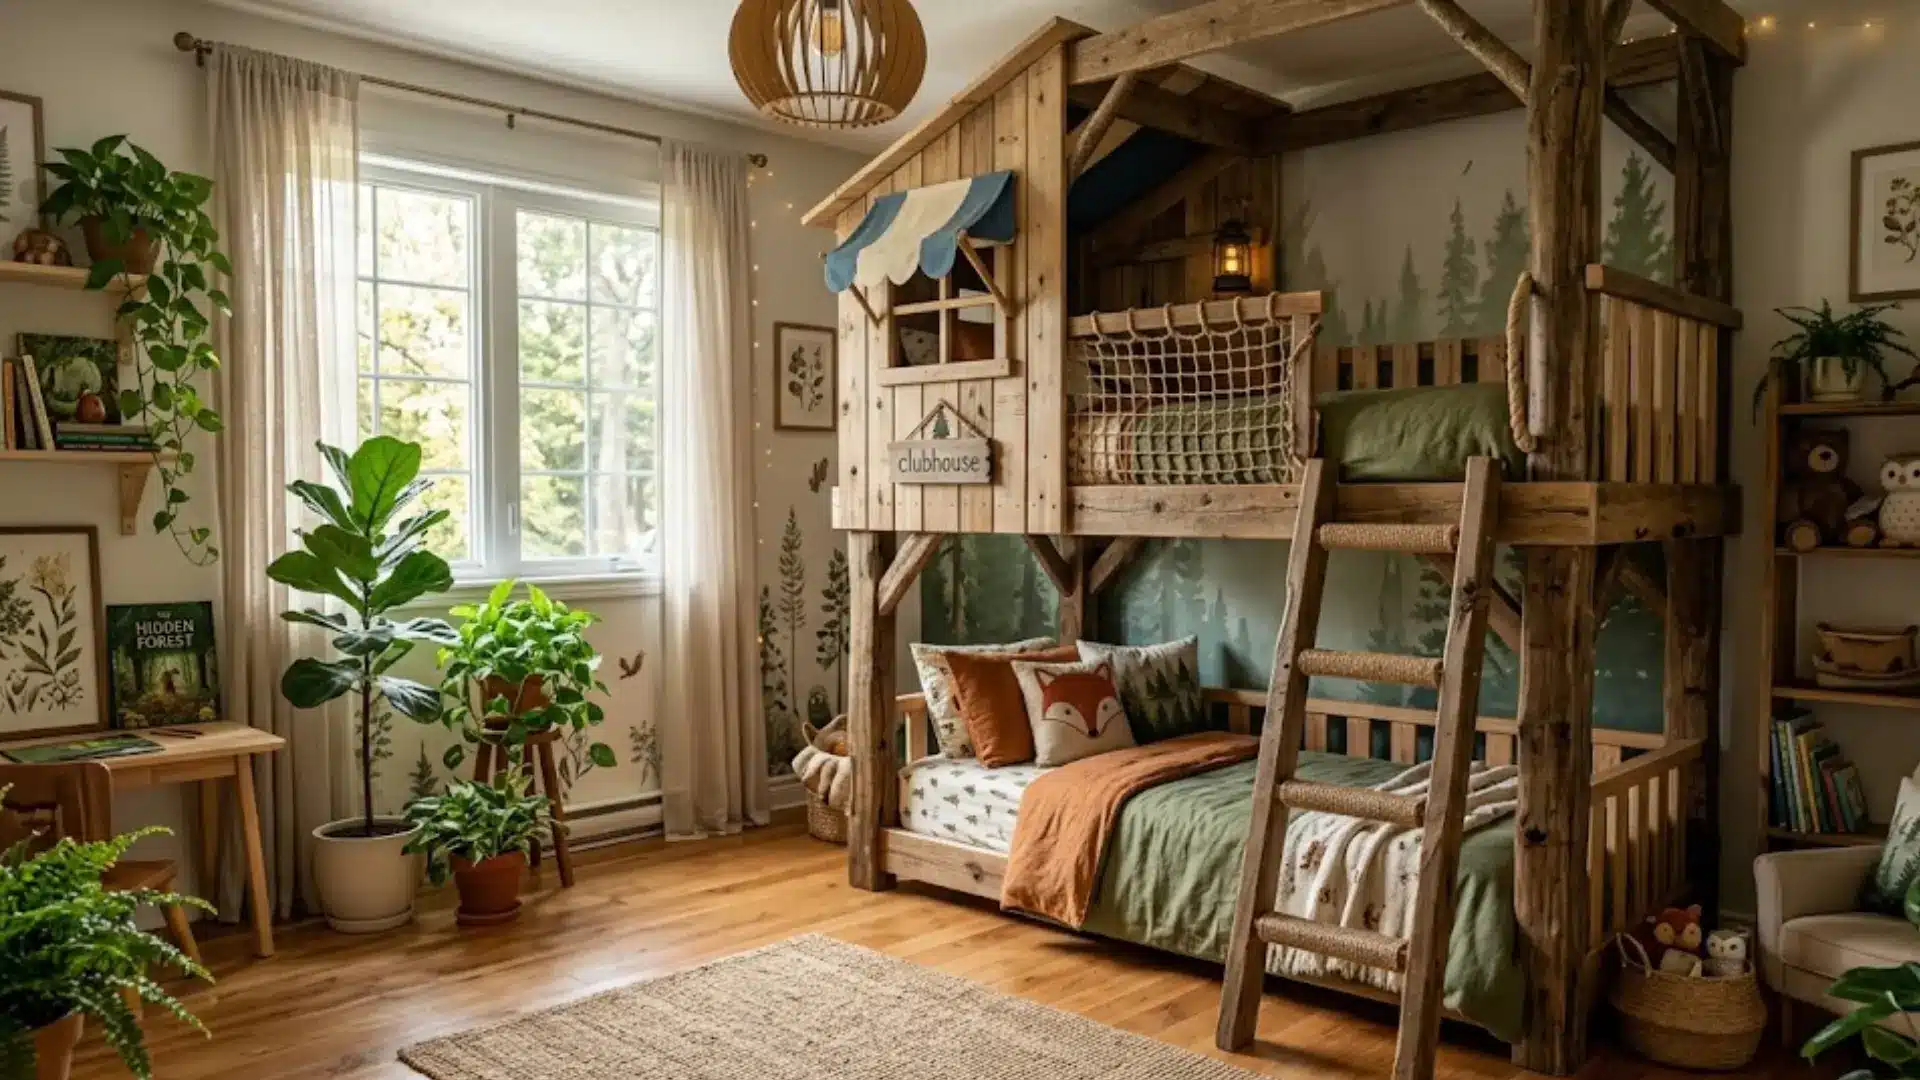
Wooden planks, rope ladders, and natural finishes create an outdoor-inspired look. The upper bunk feels like a high platform tucked among branches and leaves.
Small windows, faux foliage, or rope railings can be added for extra character. The design brings the feeling of a backyard treehouse right into the bedroom.
Kids who love nature and outdoor play will feel completely at home here.
28. Camper Van Bunk Beds
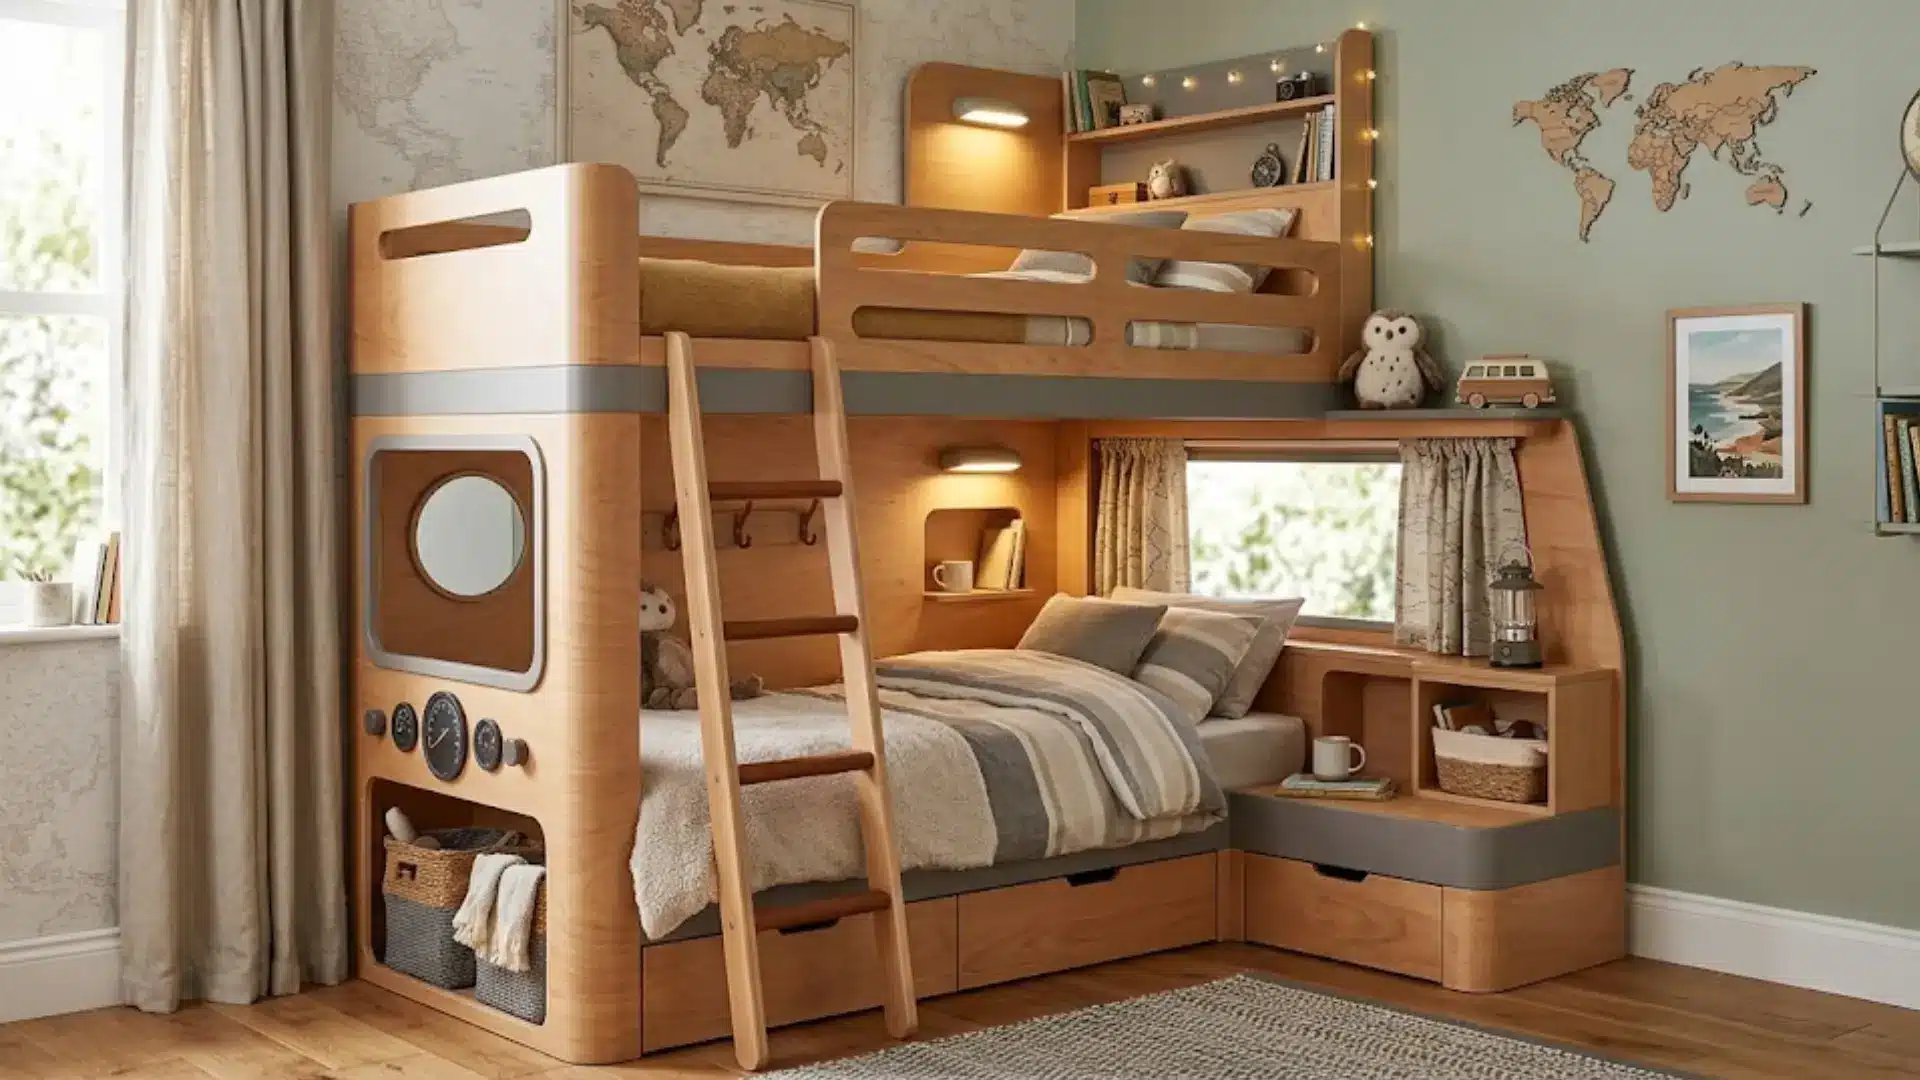
Narrow bunks stacked closely together mirror the compact sleeping setups found in camper vans. Built-in lighting, small shelves, and hidden storage complete the efficient layout.
Every inch of space is used intentionally, just like in a real camper. The overall feel is snug and surprisingly comfortable for a tight setup.
Families who love road trips often carry that spirit right into the bedroom design.
29. Under-Stair Bunk Beds
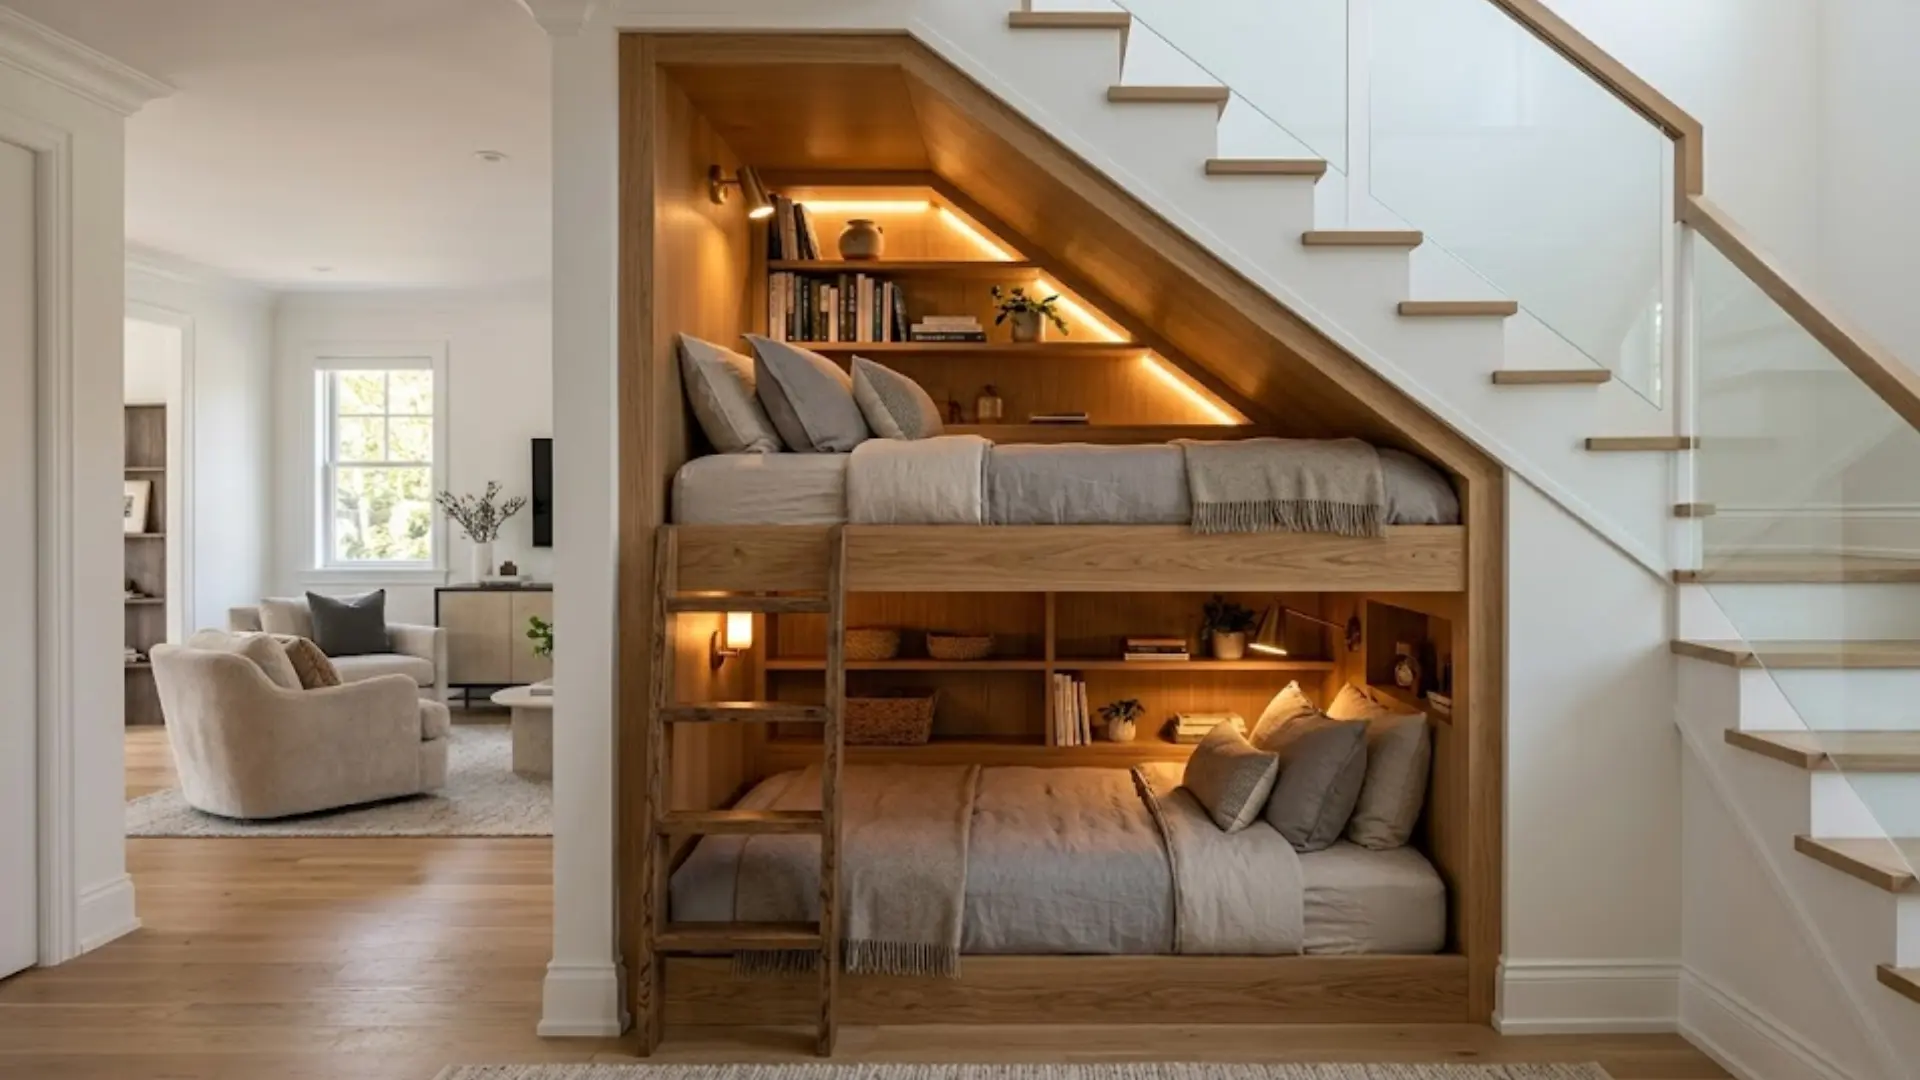
The cavity beneath a staircase is converted into one or two compact sleeping areas. Each bunk can include a small shelf, reading light, and curtain for privacy.
The beds tuck away neatly without affecting the surrounding living space. It puts to work square footage that would otherwise sit completely unused.
Homeowners looking to maximize every corner of their home will appreciate this creative solution.
30. Hallway Niche Bunk Beds
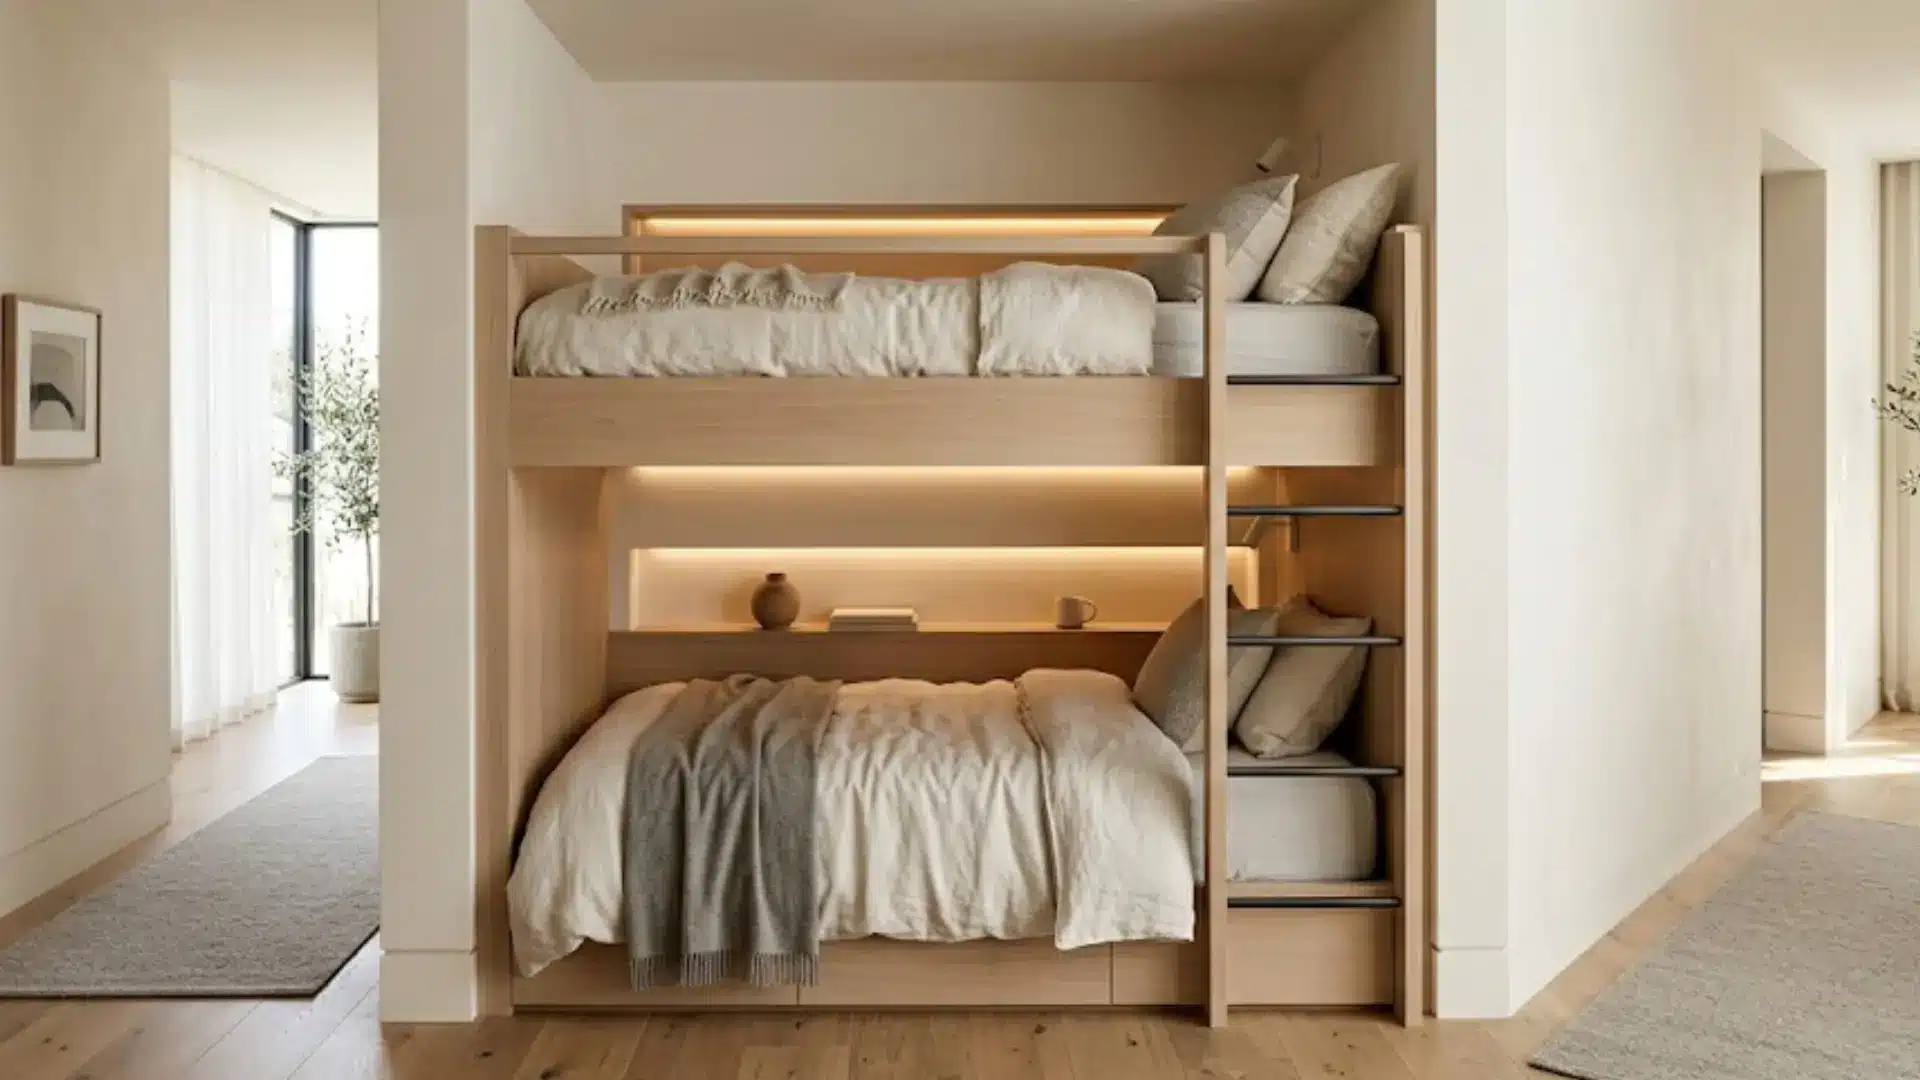
A recessed wall niche or wide hallway section is converted into a compact sleeping space. Bunks are built flush with the surrounding wall for a seamless, intentional appearance.
Guardrails and a small ladder provide safe access to the upper level. Adding curtains or sliding doors gives each sleeper a sense of privacy.
An unexpected but highly functional use of space that most homeowners overlook entirely.
31. Bunk Beds Around a Window
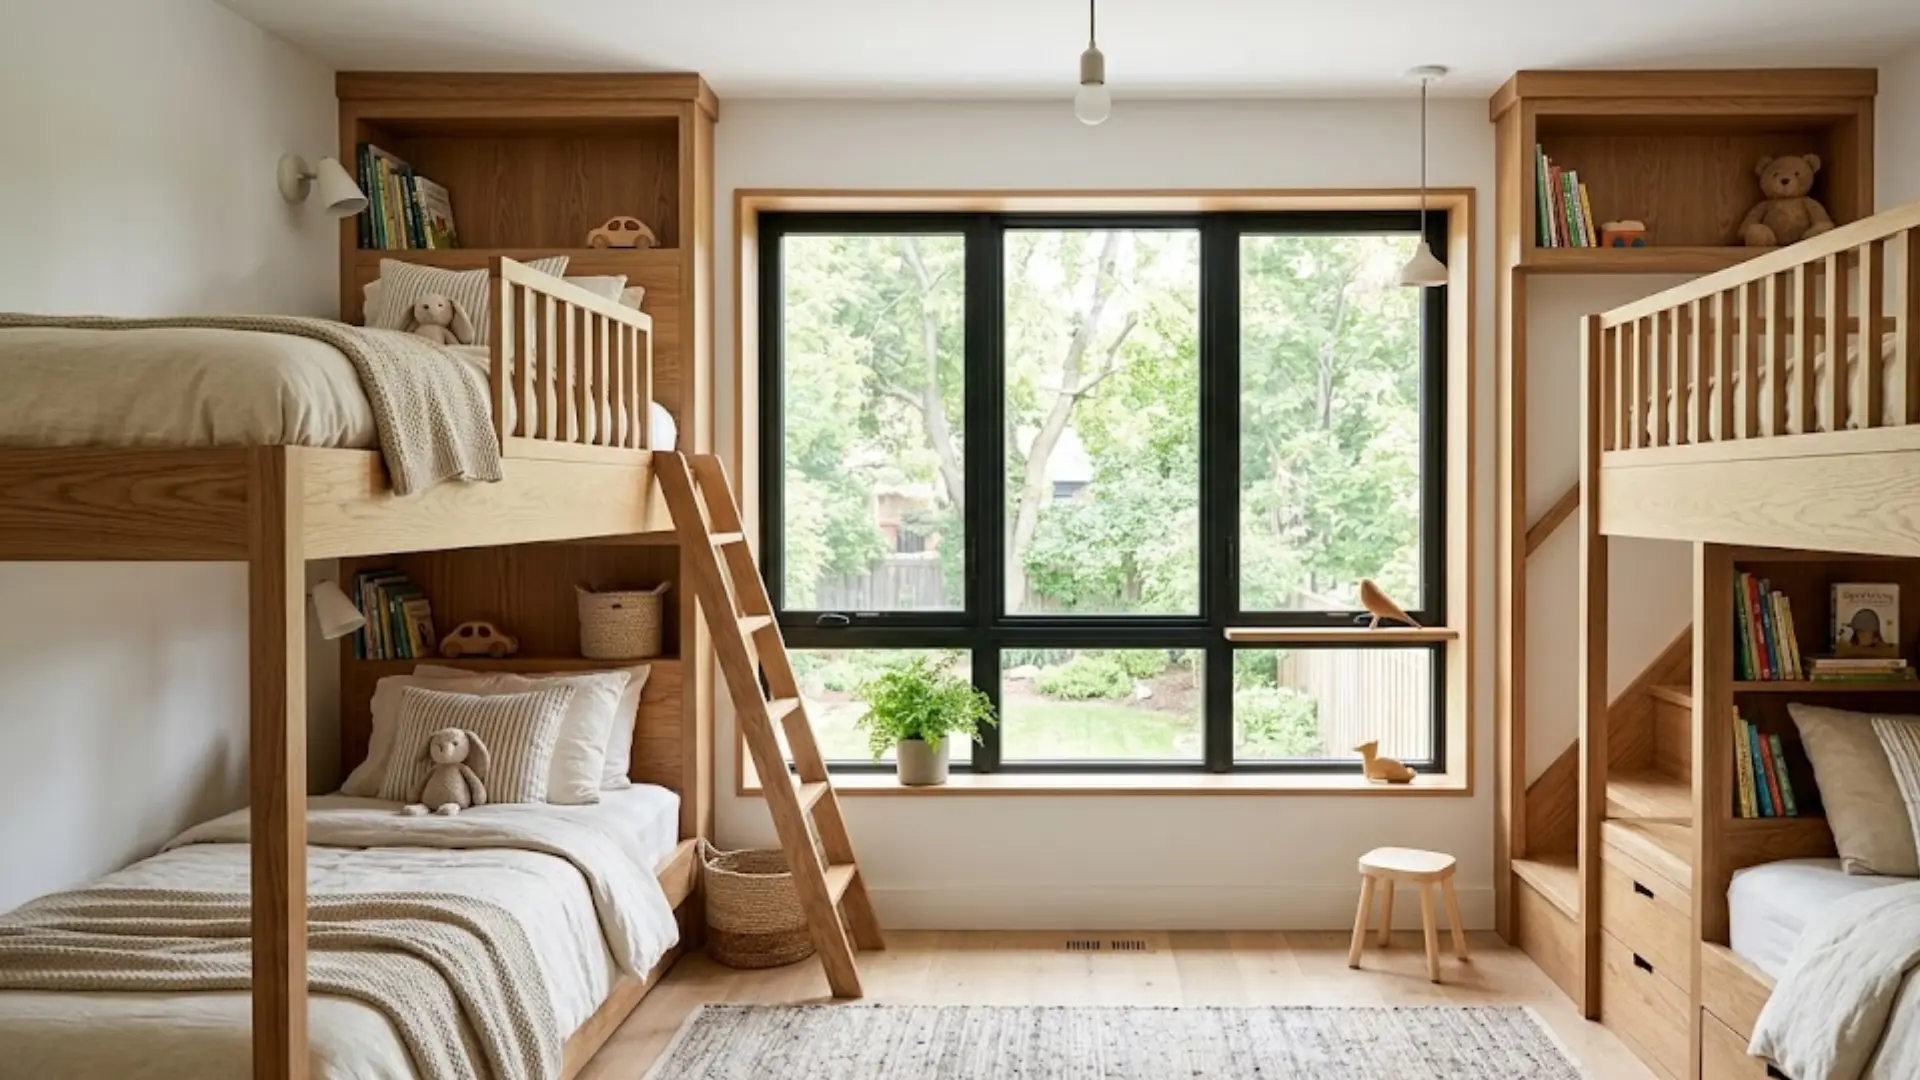
The bunk structure is built around an existing window rather than covering it up. Natural light flows into the sleeping areas, keeping the space bright and airy.
The window can sit between two bunks, above the lower level, or at the head of the upper bunk. Curtains or blinds can be added to manage light during sleep hours.
Incorporating the window makes the entire structure feel thoughtfully planned and well-integrated.
32. Bunk Beds with Privacy Pods

Each sleeping area is enclosed on three sides with panels, curtains, or sliding doors. The bunk feels like a private capsule separate from the rest of the room.
A small shelf, light, and charging outlet can be added inside each pod. Siblings sharing a room each get their own defined personal space within one structure.
Older kids and teenagers who value privacy tend to prefer this layout over open designs.
33. U-Shaped Bunk Room Layout
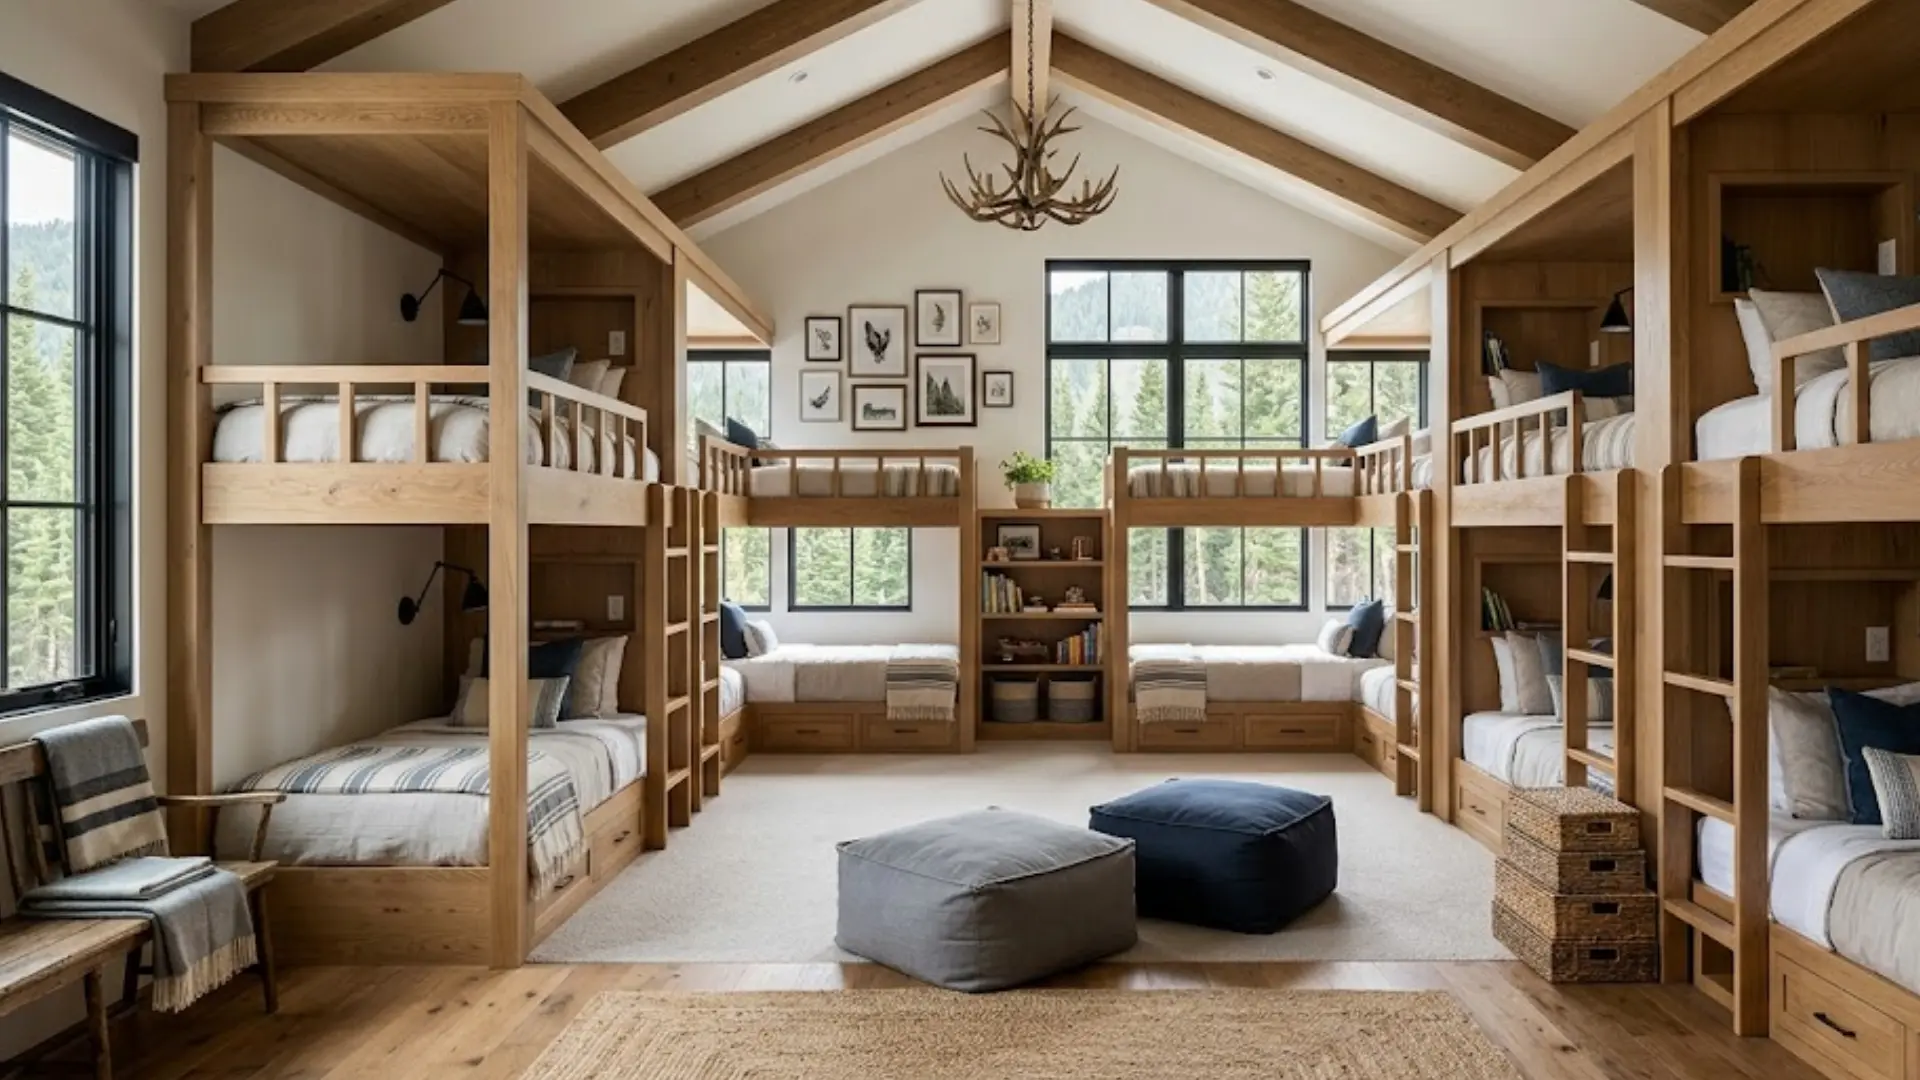
Bunks are built along three walls of the room in a U-shaped configuration. Multiple sleeping areas wrap around the perimeter while the center stays open.
Each bunk can include its own curtain, shelf, and light for a personal touch. The layout works well in dedicated bunk rooms for large families or vacation homes.
Hosting a crowd becomes much easier with a well-designed room like this.
34. Parallel Bunk Bed Walls (Dorm-Style Layout)
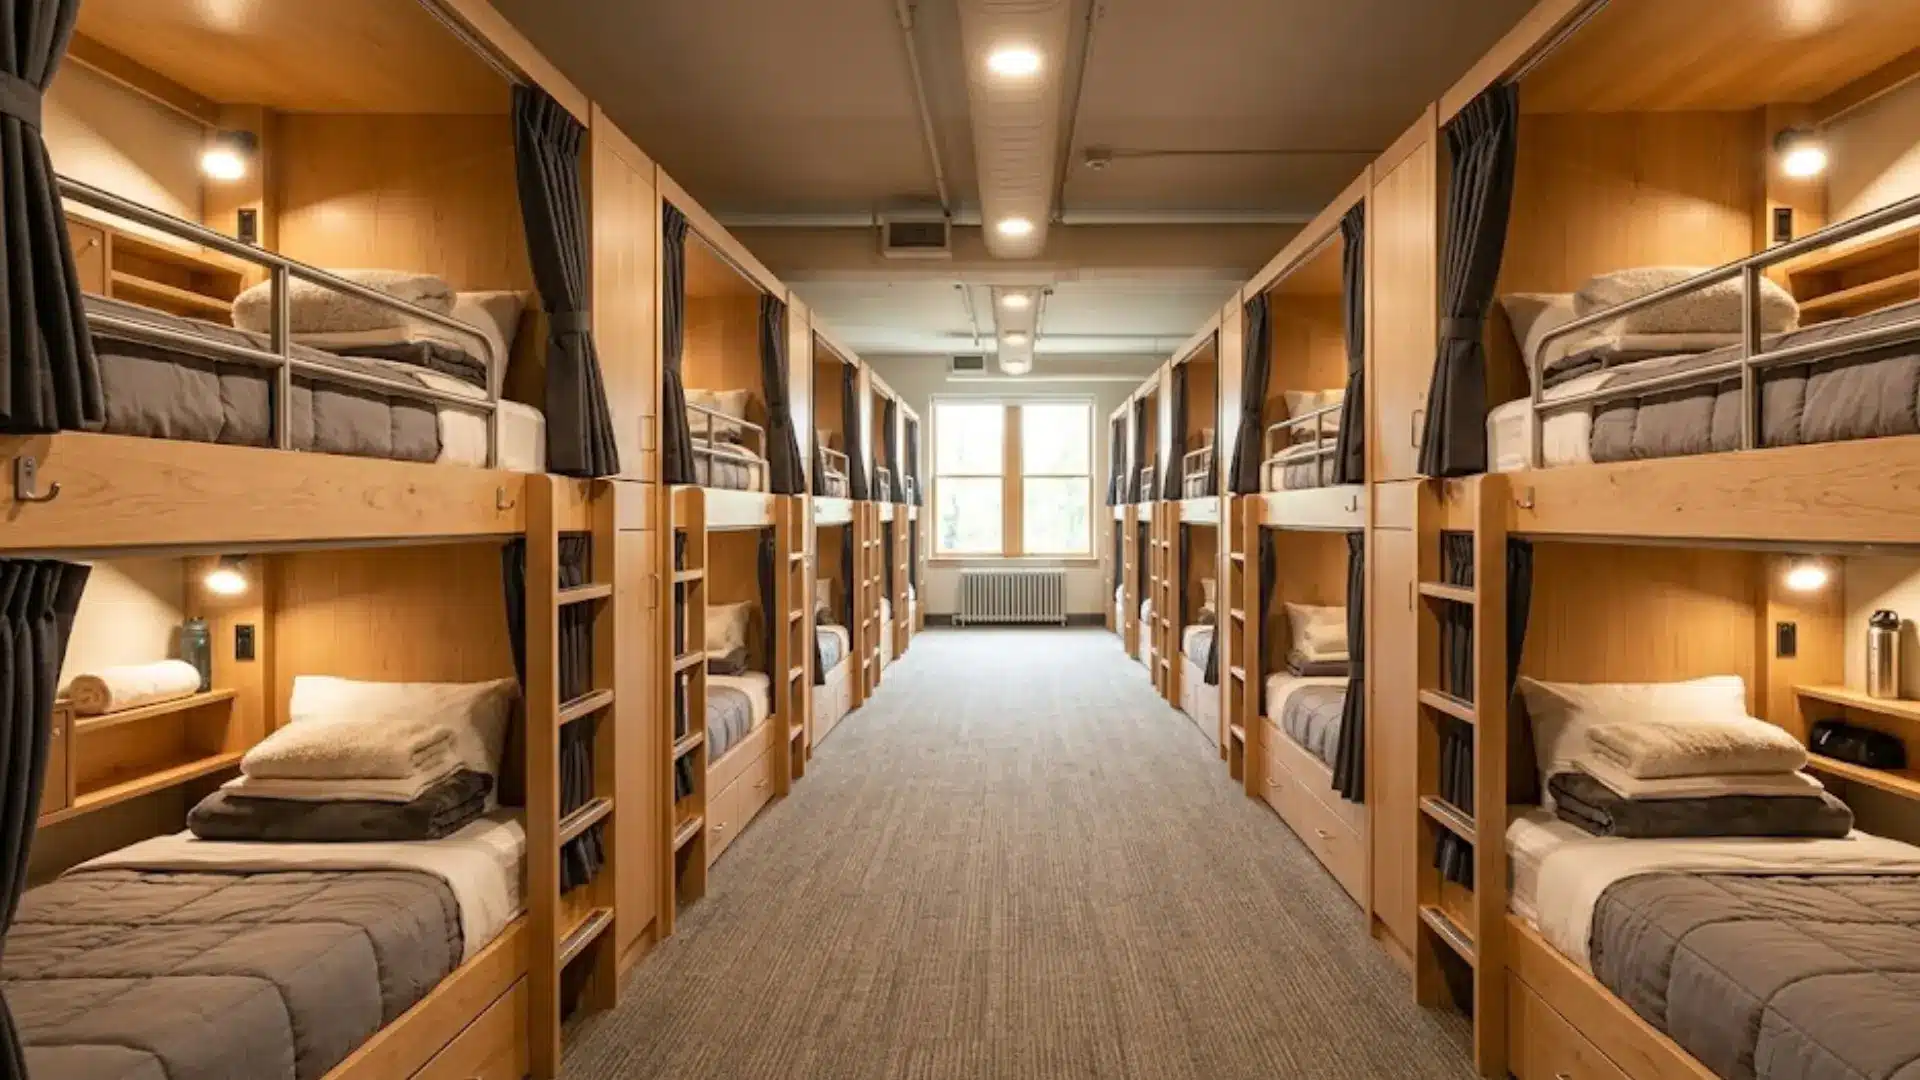
Two facing walls each hold a set of bunks running parallel to one another. A central aisle runs between them for easy access to every sleeping area.
The layout resembles a classic dormitory or summer camp sleeping arrangement. It efficiently fits the maximum number of sleepers into a single rectangular room.
Large families, group retreats, and vacation rental properties get excellent value from this design.
35. Bunk Beds with a Built-In Playhouse Area
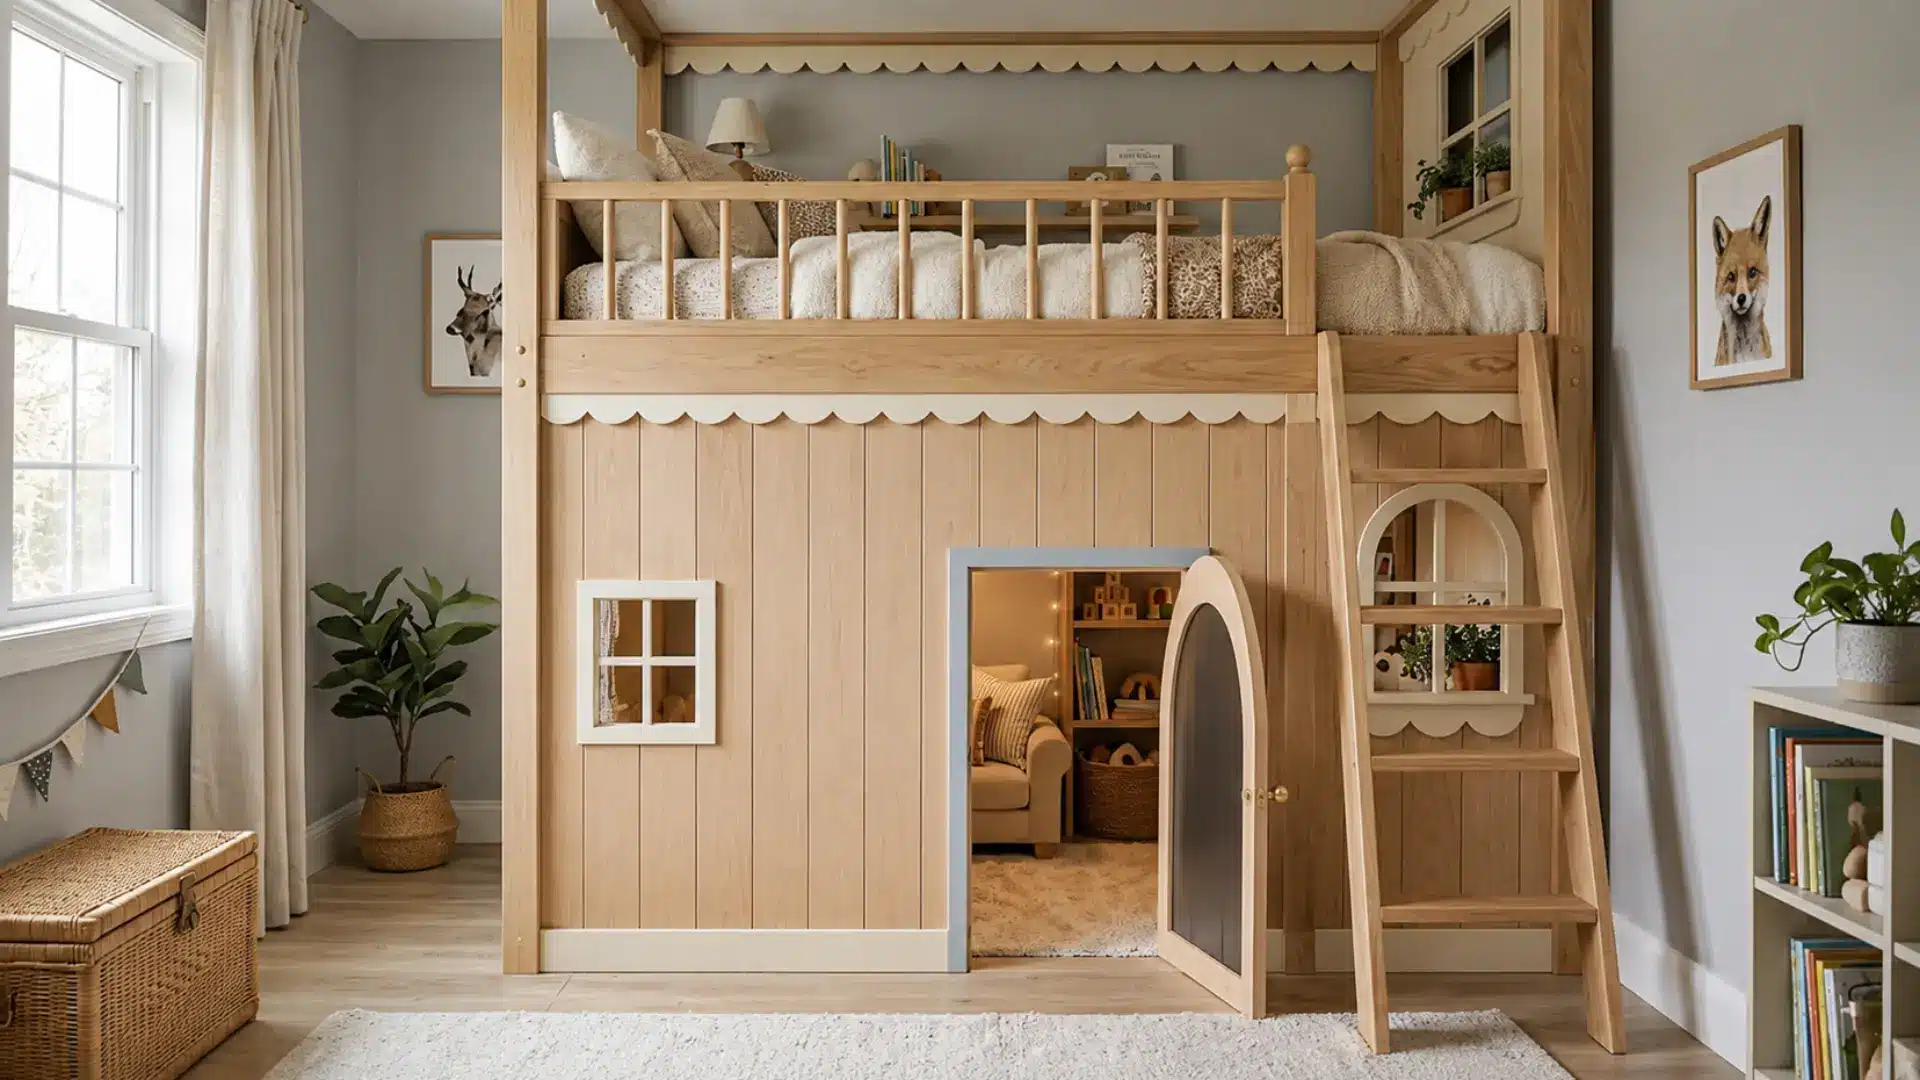
Part of the structure is designed to look and function like a small playhouse. A lower enclosed area with a door opening, small windows, and a roof shape creates the effect.
The upper bunk sits above, while kids use the lower section for play during the day. Bright colors, chalkboard panels, or themed details can be added for extra personality.
Young children who love imaginative play will get years of enjoyment from this creative layout.
36: Bunk Beds with a Murphy Desk

A fold-out desk is built into the side panel of the bunk structure. It folds flat against the frame when not in use and opens out into a full workspace.
The surface locks into place securely for comfortable use during homework or art projects. No separate desk furniture is needed anywhere else in the room.
Kids who need a study spot but share a small bedroom will get a lot out of this layout.
37. Bunk Beds with a Climbing Wall
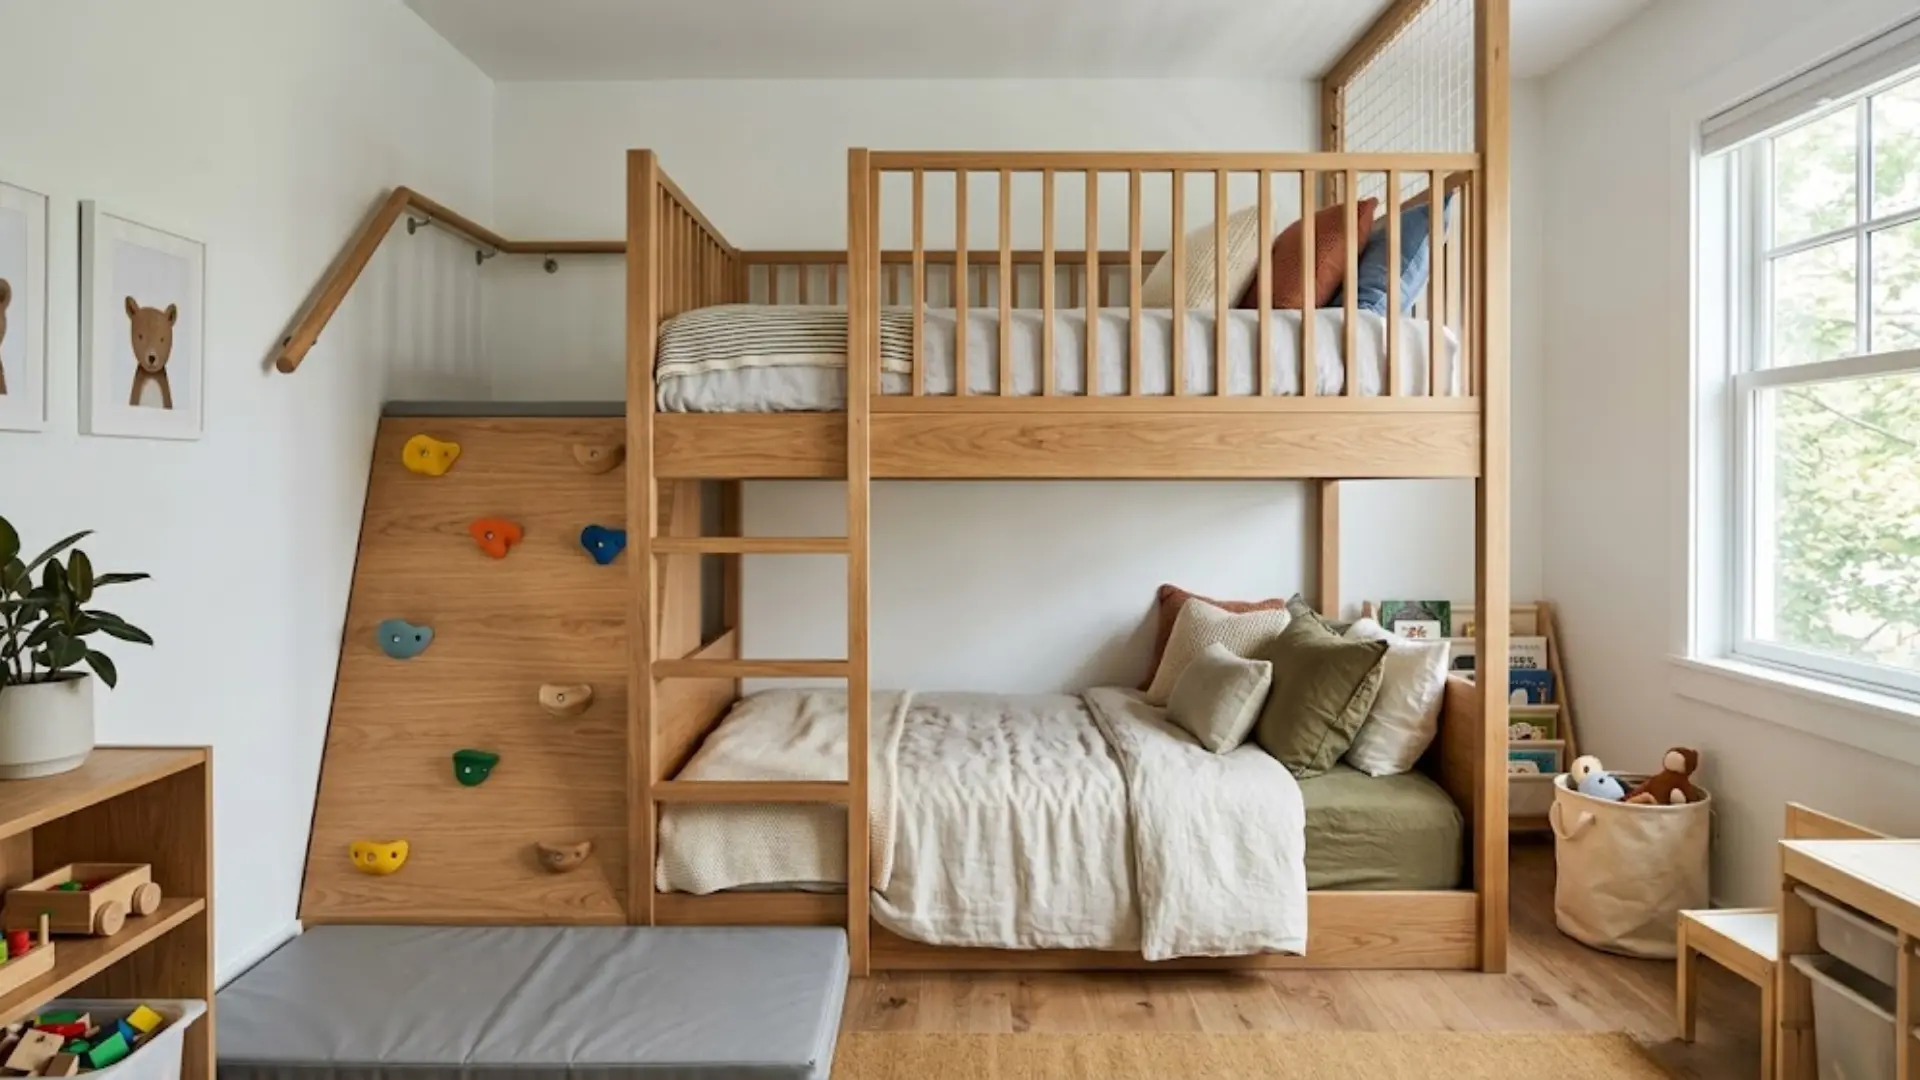
One side of the bunk frame is fitted with small climbing holds instead of a traditional ladder. Kids reach the upper bunk by climbing rather than stepping up.
The holds can be repositioned as kids grow and their reach changes. The wall adds a bold, active element to the room without taking up extra floor space.
A great pick for kids who love to move and stay active indoors.
How to Choose the Right DIY Bunk Bed Design
Choosing the right bunk bed design saves you from costly changes later in the build. Taking time to evaluate a few key factors upfront makes the whole process smoother. Here is what to consider before you decide:
- Room Size: Measure your room carefully before settling on a design, since the layout needs to fit the space comfortably.
- Number of Sleepers: Choose a design that accommodates everyone who will use the beds, whether that is two kids or more.
- Age of Users: Younger children need lower bunks and enclosed railings, while older kids and teens can handle taller structures.
- Storage Requirements: Pick a design that includes drawers, shelves, or stairs with built-in storage if the room lacks adequate space.
- Budget Considerations: Simpler designs with basic materials cost less, so match the complexity of your build to what you can realistically spend.
- Skill Level Needed: Some designs require advanced woodworking skills, so choose a plan that honestly matches your current experience level.
Getting these factors right from the beginning sets the entire project up for success. A design that fits your room, your family, and your budget will always deliver the best outcome.
Frequently Asked Questions
Are Built-In Bunk Beds Stronger Than Regular Bunk Beds?
Yes, built-in bunk beds are generally stronger because they are anchored directly to the wall and floor for added stability.
How Much Does It Cost to Build DIY Bunk Beds?
Costs typically range from $300 to $1,500 depending on the materials you choose, the design complexity, and your local lumber prices.
What Wood Is Best for Built-In Bunk Beds?
Construction-grade pine, red oak, and poplar are popular choices because they are strong, widely available, and easy to work with.
Can Beginners Build DIY Bunk Beds?
Simpler designs are manageable for beginners with basic tools and patience. More complex builds with stairs or storage may require intermediate woodworking skills.
Final Words
Getting to the end of a DIY bunk bed build is a great feeling. You put in the planning, the cutting, and the finishing work yourself.
The result is a bed that fits your room, your family, and your budget perfectly. It holds up for years and adapts as your kids grow.
You also save money compared to hiring a carpenter for a custom build. Take your time at each step and do not rush the finishing details.
A little patience goes a long way with a project like this. Drop your tips and experience in the comments below.



One Response