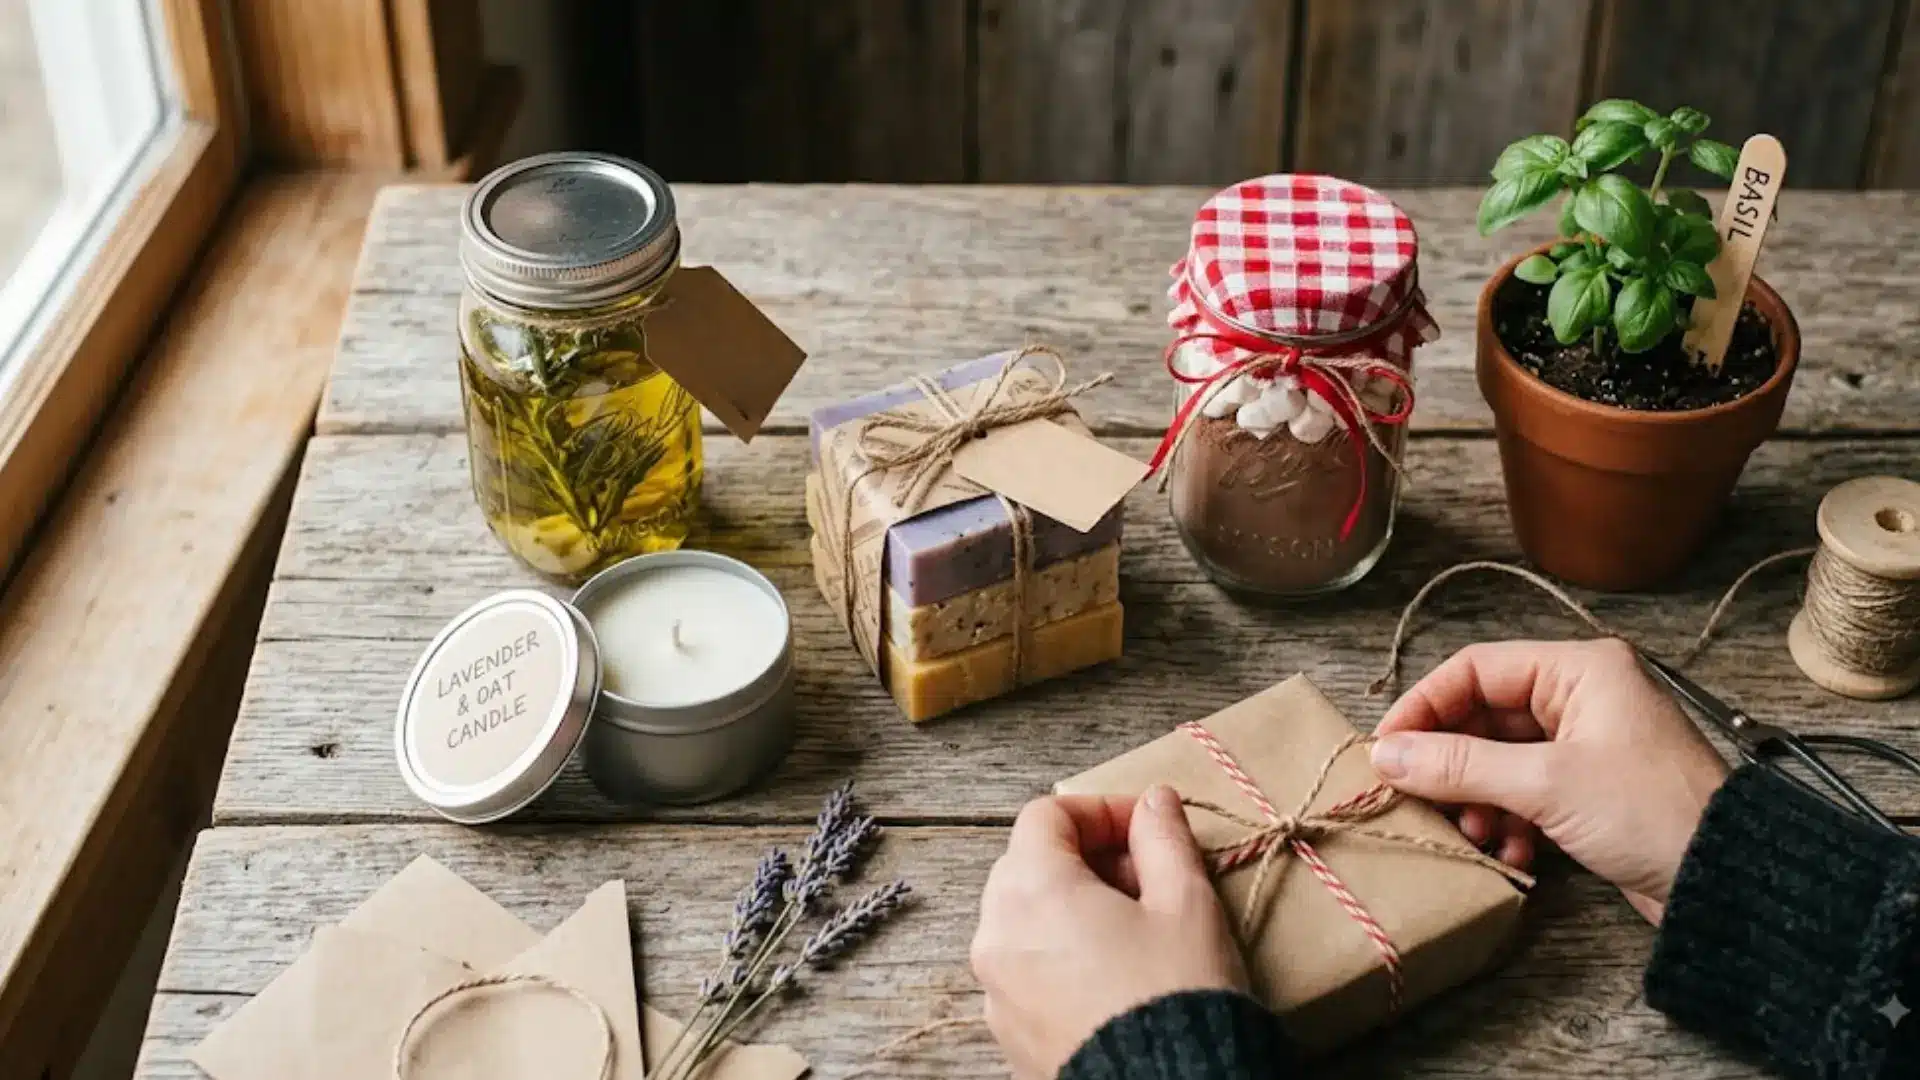
A gift wrapped in effort feels different from anything pulled off a store shelf. You do not need fancy tools or a big budget to make one.
Homemade gift ideas fit kitchens, gardens, and coworkers just as well as kids. Pick a project that matches someone’s hobby or taste, and let it guide your choices.
Every stitch, brushstroke, or scoop of scent puts a piece of you into the gift. Small projects fit tight schedules just as easily as big ones do.
Choose colors, scents, and small details that fit the person perfectly. A quick craft night can turn into a gift someone treasures for years. A homemade touch always leaves the bigger mark.
Safety Note: Always check for allergies before gifting food items, work with resin in a ventilated space using gloves, use caution with hot wax or oils, and keep small parts away from children.
What Makes a Homemade Gift Special?
A handmade gift feels different from something bought off a shelf. The time and effort you put into a project show you care about the recipient.
Customization lets the giver add small details that fit the person well. A gift that reflects someone’s hobbies feels more thoughtful overall. Creativity also helps make the item memorable and unique.
A simple project can feel meaningful when it matches the recipient’s taste. Homemade doesn’t have to be complicated or expensive.
Small, easy projects can carry just as much meaning as bigger ones. Picking a gift based on someone’s interests makes the result feel personal.
Homemade Gifts for the Kitchen Lover
Kitchen gifts are some of the safest choices because they get used instead of stored away. Homemade oils, baked treats, and pantry mixes fit naturally into a cooking routine, so the recipient enjoys them long after the gift is opened:
1. Rosemary Garlic Infused Oil
What You’ll Need: a clean glass bottle, 2-3 rosemary sprigs, 2-3 garlic cloves, olive oil, and a small tag
Steps:
- Add rinsed rosemary and crushed garlic to the bottle, then fill with olive oil
- Seal and store in a cool, dark spot for a week
- Refrigerate, use within 2-3 weeks, and label before gifting
2. Infused Chili Oil
What You’ll Need: dried whole chilies, cinnamon stick, star anise, mustard seeds, black pepper, fennel seeds, chili flakes, 500ml oil, sous-vide bag and machine
Steps:
- Toast whole spices, crush, mix with chili flakes and oil in a sous-vide bag
- Cook at 70°C (158°F) for 6 hours
- Strain into a jar before gifting
3. Biscotti Tin
What You’ll Need: 2 cups all-purpose flour, ¾ cup granulated sugar, 1½ tsp baking powder, ¼ tsp salt, 2 large eggs, ¼ cup melted salted butter, ½ tsp vanilla extract, ½ tsp almond extract, ½ cup sliced almonds, 1 egg for egg wash
Steps:
- Whisk flour, sugar, baking powder, and salt, then mix in eggs, butter, vanilla, and almond extract until dough comes together
- Fold in sliced almonds, then shape dough into two 5x3x1 inch rectangles on a lined baking sheet
- Brush with egg wash and bake at 350°F for 30 minutes, then cool for 20 minutes
- Slice diagonally into ¾ inch pieces, lay cut side down, and bake at 325°F for 20 minutes, flipping halfway
- Cool completely, then wrap individually in wax paper and pack into a tin
4. Shortbread Cookie Box
What You’ll Need: 10 tbsp butter, ½ tsp salt, ½ cup confectioners’ sugar, ½ tsp vanilla, 1½ cups flour
Steps:
- Cream butter, salt, and sugar; mix in vanilla and flour
- Shape into a block, chill until firm, slice evenly
- Bake at 350°F for 10 minutes, flipping halfway
- Cool, then layer with parchment in a box
5. Hot Chocolate Mix Jar
What You’ll Need: unsweetened cocoa powder, sugar, cornstarch, dried milk powder, a jar with a lid, mini marshmallows (optional, for gifting)
Steps:
- Sift cocoa powder, sugar, cornstarch, and milk powder together into a bowl
- Whisk until fully combined and no lumps remain
- Transfer to an airtight jar and seal
- To serve, whisk with milk in a saucepan over heat until simmering and thickened, then top with mini marshmallows
Homemade Gifts for Self-Care Fans
A quiet moment of relaxation is one of the easiest things to give without much extra effort. Scrubs, soaks, and candles work well for coworkers, teachers, or anyone who could use a small pause in their day:
6. Vanilla Sugar Scrub
What You’ll Need: ½ cup white sugar, ½ cup brown sugar, ⅓ cup coconut oil (melted slightly), 2 tbsp honey, ½ tsp vanilla extract, a plastic jar (safer than glass for shower use), small wooden paddle or scoop
Steps:
- Mix white and brown sugar together in a bowl
- Add melted coconut oil, honey, and vanilla, then mix well
- Transfer to a jar and pack tightly
- Add a small wooden paddle for scooping before gifting
7. Peppermint Sugar Scrub
What You’ll Need: 1½ cups sugar, ½ cup coconut oil, peppermint oil (to taste), a few drops of red food coloring, small containers
Steps:
- Mix sugar and coconut oil until fully mixed
- Add peppermint oil and mix again
- Add red food coloring and chop (don’t stir) to create a candy cane swirl
- Pack into containers, pressing down to remove air bubbles
8. Lavender Bath Soak
What You’ll Need: Epsom salt, lavender essential oil, peppermint essential oil, baking soda, pink Himalayan salt, magnesium flakes, dried lavender, a large jar
Steps:
- Combine Epsom salt with lavender and peppermint essential oils, mixing by hand until fully coated
- Add baking soda, pink Himalayan salt, and magnesium flakes
- Mix in dried lavender for scent and visual texture
- Transfer to a jar and seal before gifting
9. Lotion Bar
What You’ll Need: 1 cup coconut oil, 1 cup beeswax, 1 cup cocoa butter, a double boiler (or a bowl set over a saucepan), a soap mold
Steps:
- Combine coconut oil, beeswax, and cocoa butter in a double boiler over medium heat
- Stir occasionally until fully melted and combined
- Pour into a soap mold
- Let set for about an hour before removing and gifting
10. Citrus Bath Soak
What You’ll Need: 2 tbsp English lavender flowers, 2 tbsp coconut flour, 2 tbsp dried lemon peel, Epsom salt (measured to preference), 2 tbsp heather, a jar
Steps:
- Layer lavender flowers at the bottom of the jar
- Add coconut flour on top, pressing gently
- Layer in the dried lemon peel
- Add a generous layer of Epsom salt
- Finish with a top layer of heather
11. Peppermint Lip Balm
What You’ll Need: 3 tbsp unrefined shea butter, 2 heaping tsp beeswax pellets, jojoba oil, lanolin, a few drops of peppermint essential oil, lip balm containers
Steps:
- Melt shea butter and beeswax together in a glass bowl over a saucepan of simmering water, stirring occasionally
- Remove from heat and stir in jojoba oil, lanolin, and peppermint oil
- Work quickly, pouring the mixture into lip balm containers before it sets
- Let sit a few minutes until fully formed before using or gifting
12. Woodwick Soy Candle
What You’ll Need: soy wax (2 lbs for a batch), wooden wicks with clips and stickers, wax dye, fragrance oil (8-10% of wax weight), silicone mold for embeds, tins or jars, a thermometer, bamboo skewers, a pipette, a heat gun
Steps:
- Melt wax over a double boiler to 185°F, stirring to break up chunks, then pour a small amount into silicone molds to make embeds and let harden for 30-45 minutes
- Add fragrance oil once wax cools to 185°F, stir well, then let cool further to 125-130°F
- Attach wicks to the base of each tin, pour the wax, and once the surface is slightly cloudy, dot on colored wax with a pipette and drag with a skewer to create a swirl
- Warm the surface lightly with a heat gun and press embeds into place; let cool undisturbed, then trim wicks before gifting or burning
Homemade Gifts for the Home
Home gifts feel more personal when they show handmade signs. They pair well with other budget-friendly wall decor projects for unique touches. Here are some ideas to try:
13. Pressed Flower Resin Coasters
What You’ll Need: epoxy resin (about 100ml per coaster), silicone coaster molds, dried or pressed flowers, a mixing cup, gloves, and a respirator
Steps:
- Pour a thin base layer of mixed resin into each mold and let it set slightly
- Arrange dried flowers on top of the base layer
- Mix a second batch of resin and pour over the flowers to seal them in
- Let sit undisturbed for a few hours to fully set
- Unmold carefully, sanding any rough edges before gifting
14. Marble Effect Coasters
What You’ll Need: 200ml clear resin, white resin pigment, white alcohol ink, black resin pigment, black alcohol ink, coaster molds, a heat gun, gold paint pen (optional)
Steps:
- Mix white pigment and alcohol ink into resin, keeping it slightly translucent; pour as the coaster’s base layer, then pop any bubbles with a heat gun
- Mix a small amount of dark gray using black pigment and ink, keeping total pigment under 10% of the resin
- Add small drops of the dark mix on top to create the marble veining, then let cure overnight, covered to keep out dust
- Once set, unmold gently, and optionally trace gold lines along the marbling or edges with a paint pen
15. Memory Jar
What You’ll Need: a mason jar with flat sides, Mod Podge, tissue paper in a few colors, fine-tip markers, scissors, a sponge brush, a tea light candle (battery-operated works too)
Steps:
- Cut tissue paper into strips large enough to write on, plus smaller scalloped pieces to cover the jar, then write individual memories on each larger strip
- Brush Mod Podge onto the jar, then press on a layer of the smaller tissue pieces to cover the surface
- Add another layer of Mod Podge over that, then stick the memory strips on top
- Let dry fully, then place a tea light inside to finish
16. Painted Terra Cotta Pot
What You’ll Need: a terracotta pot and saucer, large rubber bands, a small artist’s paintbrush, all-surface primer, acrylic craft paint, aluminum foil, masking tape, spray shellac, an X-Acto knife
Steps:
- Stretch a rubber band around the pot at an angle to mark the dipped line
- Prime below the rubber band on both the pot and saucer, then let it dry
- Paint below the rubber band with 2-3 coats of acrylic craft paint, drying between coats
- Wrap the unpainted top portion in foil, sealing gaps with masking tape
- Apply 2-3 coats of spray shellac and let dry
- Loosen the rubber band by scoring along its edge, then cut and peel it off carefully
17. Hand-Stamped Dish Towels
What You’ll Need: 100% cotton flour sack towels, decorative stamps, ink pads or bottled ink, a sanding block or fine grit sandpaper, a dry iron
Steps:
- Wash, dry, and iron the towels before stamping
- Lightly sand a new stamp in both directions before its first use
- Ink the stamp fully, then press it firmly onto the towel
- Let sit for 24 hours, then heat set with a dry iron
- Wash on gentle after a few more days before gifting
18. Herb Garden Kit
What You’ll Need: a container or basket, potting mix with organic compost, herb starts (like parsley, basil, rosemary, thyme, sage, lavender), plant labels, a small watering can
Steps:
- Group herbs by care needs: woody herbs like rosemary, sage, and thyme together, and tender herbs like basil and parsley together
- Fill the container ¾ full with potting mix, then dig a shallow hole for each plant
- Loosen the roots gently, place each herb at the same depth it was in its original pot, backfill around it, and add plant labels
- Water lightly after planting, and include a short care card noting sunlight needs (about 6 hours for woody herbs, 4-6 for tender ones)
19. Wooden Cutting Board Oil Kit
What You’ll Need: food-safe mineral oil, beeswax (4 parts oil to 1 part wax, by weight or volume), a microwave-safe jar or a double boiler, small containers for gifting
Steps:
- Combine mineral oil and beeswax in a jar or double boiler
- Microwave method: heat in 1-2 minute bursts, stirring between, until fully melted (about 4 minutes total)
- Stovetop method: warm oil to 165°F, add wax, and stir until dissolved, keeping heat below 175°F to avoid discoloring the wax
- Pour into small containers and let solidify before gifting alongside a wooden board
20. Fabric Wrapped Vase
What You’ll Need: a glass vase, a decorative napkin, a large rubber band, twine or ribbon (optional)
Steps:
- Turn the vase upside down
- Center the napkin over the top
- Secure it around the neck with a rubber band
- Flip the vase over and fan out the napkin
- Cover the rubber band with twine or ribbon for a finished look
Homemade Gifts Kids Can Make
Projects made by children carry a charm that store-bought gifts simply can’t match. A slightly uneven bracelet or an imperfect keepsake means more because it shows real effort behind it:
21. Friendship Bracelets
What You’ll Need: embroidery floss (3 strings, just over a yard long), tape or a pin to hold the knot in place
Steps:
- Fold the strings in half, tie a knot at the loose end, and tape it down somewhere secure
- Loop the strings over your fingers, two on one hand and one on the other
- Use your free finger to reach through the loops on the other hand, grab the last one, and pull it through
- Slide that loop up to the next finger and repeat on the other side, pulling snug each time
- Keep going until it’s as long as you’d like, then finish with a knot
22. Painted Rocks
What You’ll Need: smooth rocks (found outdoors or from a landscaping store), acrylic paint or paint pens, a spray sealer
Steps:
- Wash rocks under warm water with a vegetable brush to remove dirt and dust, then let them dry fully
- Paint a design, message, or pattern directly on the rock, or add a base coat first if you want a solid background
- Let the paint dry completely
- Seal with a spray or brush-on sealer to protect it, especially if it’ll be kept outdoors
23. Popsicle Stick Photo Frame
What You’ll Need: popsicle sticks, a hot glue gun, acrylic paint (optional), small decorations like paper flowers or embellishments, a photo or printed quote
Steps:
- Glue four sticks into two layers to form the base frame, adding extra layers on top, offset from the joints below, until the frame looks full
- Build a stand on the back using overlapping sticks with a small gap to slide a support stick through
- Let dry, then paint or decorate the frame as desired
- Trim a photo or printed quote to fit and glue it to the back of the frame
24. Salt Dough Ornaments
What You’ll Need: ½ cup salt, ¼ cup water, ½ cup flour, food coloring, a straw for hole punching, cookie cutters, jute twine, Mod Podge
Steps:
- Heat water until it bubbles, stir in food coloring, then mix into the salt
- Add flour and mix until the dough pulls cleanly away from the bowl
- Roll, shape, or cut the dough into ornament shapes, then punch a hole for stringing with a straw
- Bake at 250°F for 20-30 minutes, depending on size, and let cool completely
- Coat both sides with Mod Podge, letting each side dry 5 minutes before flipping
- String with jute twine and tie a knot at the top
25. Button Art Cards
What You’ll Need: folded cardstock, an assortment of buttons, glue (hot glue or Elmer’s), a pen or pencil for sketching
Steps:
- Lightly sketch a simple outline on the cardstock, like a heart, flower, or bee
- Lay buttons over the design first to check placement before gluing
- Glue buttons down one at a time, following the outline
- Add small details like antennae, leaves, or a bow with extra buttons or doodled lines
- Let it dry completely before writing a message inside or on the back
Homemade Gifts for Pet Owners
Projects made by children carry a charm that store-bought gifts simply can’t match. A slightly uneven bracelet or an imperfect keepsake means more because it shows real effort behind it. Here are a few easy ideas kids can make on their own or with a little help:
26. Peanut Butter Dog Treats
What You’ll Need: 1½ cups flour, 2 eggs, ½ cup creamy peanut butter (xylitol-free, no added salt or sugar), water (1-2 tbsp, as needed), a cookie cutter
Steps:
- Combine flour, eggs, and peanut butter in a bowl, mixing until the dough starts to form
- Add water a tablespoon at a time until the dough comes together
- Roll dough out to about ¼ inch thick on a floured surface
- Cut into shapes with a cookie cutter and place close together on a baking sheet
- Bake at 350°F for about 15 minutes, then cool completely before storing in an airtight container
27. Pumpkin Dog Biscuits
What You’ll Need: 3 cups rolled oats, 1 can pumpkin puree (not pumpkin pie mix), ½ cup nut butter (almond or peanut butter)
Steps:
- Combine oats, pumpkin puree, and nut butter in a bowl and stir until fully mixed
- Roll into golf ball-sized portions
- Freeze until hard
- Store in the freezer and hand out as treats
28. Catnip Pouch
What You’ll Need: two coordinating fabrics (backed with fusible interfacing), 2 inches of sew-in Velcro (¾ inch width), a chopstick for turning corners, loose catnip
Steps:
- Cut two pattern pieces for the back, folding under ¾ inch on each side where the Velcro opening goes, then sew Velcro strips onto the overlapping edges
- Use the assembled back piece as a template to cut the front, pin right sides together, and sew around with a ¼ inch seam
- Trim excess fabric at corners, then turn right side out through the Velcro opening using a chopstick
- Tie the two opposite corners into knots, then fill with loose catnip through the Velcro opening
29. Pet Bandana
What You’ll Need: a fat quarter of fabric in a fun print, scissors, the pet’s collar for sizing reference
Steps:
- Cut the fabric into a triangle sized to fit the pet, using the collar as a rough size guide
- Measure the neck length by adding about 2 inches to the collar size for a loose, comfortable tie
- Hem the edges if desired for a cleaner finish
- Tie around the pet’s neck to the side or back
Homemade Gifts for Garden and Outdoor Lovers
The best gifts for gardeners are the ones that slot right into a routine they already enjoy. Seed packets, plant markers, and outdoor accessories add something useful without creating extra clutter or upkeep. Below are a few ideas that fit naturally into any backyard project:
30. Seed Packets
What You’ll Need: square paper (any size; 6-12 inches works well), no other supplies needed
Steps:
- Fold the square loosely into thirds both ways to mark guide lines, then unfold
- Fold each corner into the center to form a smaller square with crisp creases
- Fold up each edge to the marked lines, forming the base packet shape
- Fold in each of the four corner points in sequence to lock the packet closed
- Fill with seeds, then refold the final point to seal
- Label by hand for a finished look
31. Garden Markers
What You’ll Need: wooden garden stakes, acrylic paint (green, purple, or any color), a fine-point brush for lettering, black paint, paint-on varnish
Steps:
- Paint each stake with a base coat, covering all sides, tops, and bottoms, and let it dry
- Use a fine brush and black paint to letter the names of fruits, vegetables, or herbs onto each stake
- Let the lettering dry completely
- Apply a couple of coats of varnish to weatherproof the markers before gifting
32. DIY Bird Feeder
What You’ll Need: 1 packet gelatin, ¼ cup boiling water, ¾ cup birdseed, cookie cutters or silicone molds, string
Steps:
- Dissolve gelatin fully in boiling water
- Mix in birdseed until well combined
- Press the mixture firmly into cookie cutters or molds, packing tightly
- Let harden for a few hours, or chill in the fridge to speed it up
- Pop out of the molds, thread string through for hanging, and gift or hang outdoors
33. Herb Drying Rack
What You’ll Need: a piece of scrap wood, wooden dowels or Shaker pegs, craft paint (brown and white for a distressed look), a stencil or printed lettering, a drill, sanding sponge, spray sealer, photo hangers
Steps:
- Stain the wood board with diluted brown paint, then whitewash over it with diluted white paint for a distressed look
- Pre-drill holes for the pegs to prevent splitting, then paint and attach the pegs
- Transfer lettering using a pencil scribble technique, then paint in the letters
- Distress lightly with a sanding sponge if desired, then wipe clean
- Seal with a spray top coat and attach photo hangers to the back
- Hang fresh herbs from the pegs to air dry
Homemade Gifts for Newlyweds and Couples
Shared spaces and shared memories make personalized gifts especially meaningful for couples. Take a look at a few ideas worth considering:
34. DIY Macramé Wall Hanging
What You’ll Need: 4mm cord (70 cords cut to 42 inches), a 10-inch embroidery hoop (just the ring), scissors, a comb
Steps:
- Attach cords to the ring using lark’s head knots, working in sets of 7
- Create double half hitch knots, working diagonally from alternating holding cords, forming V shapes that repeat and layer inward
- Continue the pattern until 10 full sets are complete around the ring
- Trim the ends evenly, then comb out the strands for a fringed finish
- Optionally add a hanging loop of cord to the back before mounting
35. DIY Floating Shelf Set
What You’ll Need: one 2x8x8 ft board, a 36-inch oak dowel, wood stain and pre-stain conditioner, spray polyurethane, wall anchors or drywall screws, a circular saw or table saw, a drill with a ½ inch bit, a sander
Steps:
- Cut the board into three equal shelves (about 31 inches each), then cut the dowel into nine 4-inch pins
- Drill matching ½ inch holes into the back edge of each shelf and the wall bracket pieces, then hammer the back pins in place
- Sand, apply pre-stain conditioner, stain, and finish with a few coats of spray polyurethane
- Mount the back bracket pieces into wall studs or anchors, then slide each shelf onto its dowel pins and secure with a screw
36. Handmade Quilt From Old Clothes
What You’ll Need: 10-12 cashmere or wool sweaters, sharp scissors, pins, a flannel sheet backing
Steps:
- Cut sweaters into strips of varying widths and lengths, then sew together into at least 8 strips
- Arrange strips by color, sew them together, and press seams open
- Sew the pieced top to a flannel backing, right sides together, leaving an 8-inch gap
- Turn right side out, press, and topstitch the opening and edges closed
Homemade Gifts for Coworkers and Office Friends
Workplace gifts tend to land best when they stay useful, simple, and low-key. Small terrariums, jars, and desk items strike the right balance between thoughtful and appropriately professional:
37. Mini Terrarium Kit
What You’ll Need: a glass jar with a wide opening, small pebbles or pea gravel, window screen mesh (optional), terrarium substrate mix, a small plant or cutting (like peperomia), moss, small decorative rocks, a spray bottle
Steps:
- Add a drainage layer of pebbles to the bottom of the jar, about ½ inch thick
- Layer in the substrate, sloping it slightly toward the back for depth
- Arrange a few small rocks around the base, then tuck in torn pieces of moss to fill gaps
- Use a stick to make a small hole and plant the cutting, then mist lightly with water
- Wipe down the glass and place the terrarium somewhere with bright, indirect light
38. Snack Mix Jar
What You’ll Need: a 32 oz wide-mouth mason jar, flour, cocoa powder, baking powder, salt, granulated sugar, brown sugar, holiday M&Ms and sprinkles, a funnel (or a rolled sheet of paper)
Steps:
- Layer flour, cocoa powder, baking powder, and salt into the jar, shaking gently to settle each layer
- Add granulated sugar, then brown sugar, pressing down gently to keep layers neat
- Top with M&Ms and sprinkles
- Attach baking instructions: mix jar contents with melted butter, eggs, and vanilla, pour into a greased 8×8 pan, and bake at 350°F for 20-25 minutes
Homemade Gifts on a Tight Budget
Keeping costs low doesn’t mean sacrificing a polished, put-together look. These ideas are easy to make in bulk and become even more affordable when supplies are bought together:
39. Desk Organizer from a Cereal Box
What You’ll Need: 3 cereal boxes, a ruler, scissors, a marker, a glue gun, cellophane tape, printed paper, and washi tape for decorating
Steps:
- Cut the tops off all three boxes and line them up, securing with tape
- On the sides, mark 22cm from the bottom on the first box and 12cm on the last, then repeat on the opposite side
- Connect the marks into diagonal lines on each box, plus straight lines across the front matching the diagonal heights
- Cut along all the lines, then reassemble the boxes in a stepped line and secure with hot glue
- Decorate with printed paper and washi tape
40. Personalized Pens
What You’ll Need: blank paper, making joy pens, 220 and 400 grit sanding paper, spray paint, fine glitter, a non-toxic epoxy alternative sealant (like Brightone), a pen spinner (optional), a lint-free cloth
Steps:
- Disassemble the pens, remove the metal clip, and sand the surface for better adhesion
- Base coat with spray paint and let it gas off for 48 hours
- Apply a thin coat of sealant, add glitter, then spin and dry for several hours
- Continue layering thin coats of sealant, sanding every few coats, until the surface feels completely smooth
- Add any name decals once smooth, seal with a few more coats, then reassemble the pen
41. Fabric Mug Cozy
What You’ll Need: cotton fabric, matching thread, fusible interfacing, ¼ inch elastic (5 inches), a 1 inch or larger button, a fabric marker, a ruler or rotary cutter, a hand sewing needle, an iron
Steps:
- Cut two fabric pieces and two interfacing pieces to fit the mug’s height and circumference (minus ½ inch), then fuse interfacing to the wrong side of each fabric piece
- Sew the elastic loop to one short end of a body piece
- Layer the two body pieces right sides together, pin, and sew with a ¼ inch seam, leaving a small opening to turn right side out
- Turn right side out, fold in the open edges, topstitch around the entire piece, then hand-sew a button opposite the elastic to finish the closure
Packaging Ideas That Make Homemade Gifts Look Store-Bought
Packaging does more work than people expect. A few small choices change how finished a gift looks:
| Packaging Idea | What It Replaces | Best Used For |
|---|---|---|
| Brown kraft paper with twine | Patterned wrapping paper | Boxed treats, small parcels |
| Handwritten tags | Printed labels | Any gift needing a personal touch |
| Reused glass jars with fabric lid cover | Plain jar lids | Mixes, scrubs, infused oils |
| A short note on contents and use | No instructions at all | Bath soaks, oils, treat jars |
| Wax paper or parchment as inner wrap | Plastic wrap or none | Baked goods before boxing |
| A dried herb or flower sprig under twine | Bare twine or ribbon | Adding texture to any wrapped gift |
These small details rarely take more than a few extra minutes. Yet they make a noticeable difference in how thoughtful and finished these diy gift ideas feel.
Frequently Asked Questions (FAQs)
What Are Good Homemade Gifts for Coworkers?
Spice mixes, mini candles, and coffee syrup work well for coworkers since they’re useful without feeling too personal for an office setting.
How Far in Advance Should I Make Homemade Gifts?
Infused oils need about a week to develop flavor. Candles and bath soaks can be made a day ahead. Baked goods are best made within two to three days of gifting so they stay fresh.
What’s the Best Way to Store Homemade Gifts Before Giving Them?
Most homemade gifts store well in a cool, dry place until they’re ready to give. Airtight containers or sealed jars help baked goods and mixes stay fresh the longest.
Final Words
You’ve got plenty of homemade gift ideas now, so picking one should feel easy. Choose a project that fits the person’s taste and your own schedule.
Kitchen treats, self-care jars, and garden markers all work well. Kids can join in too, adding their own creative spin. Simple packaging, like kraft paper and twine, makes any gift look finished.
Pick one project and try it this week. These homemade gift ideas give you options for every person on your list. Try one, then share your favorite pick in the comments below.