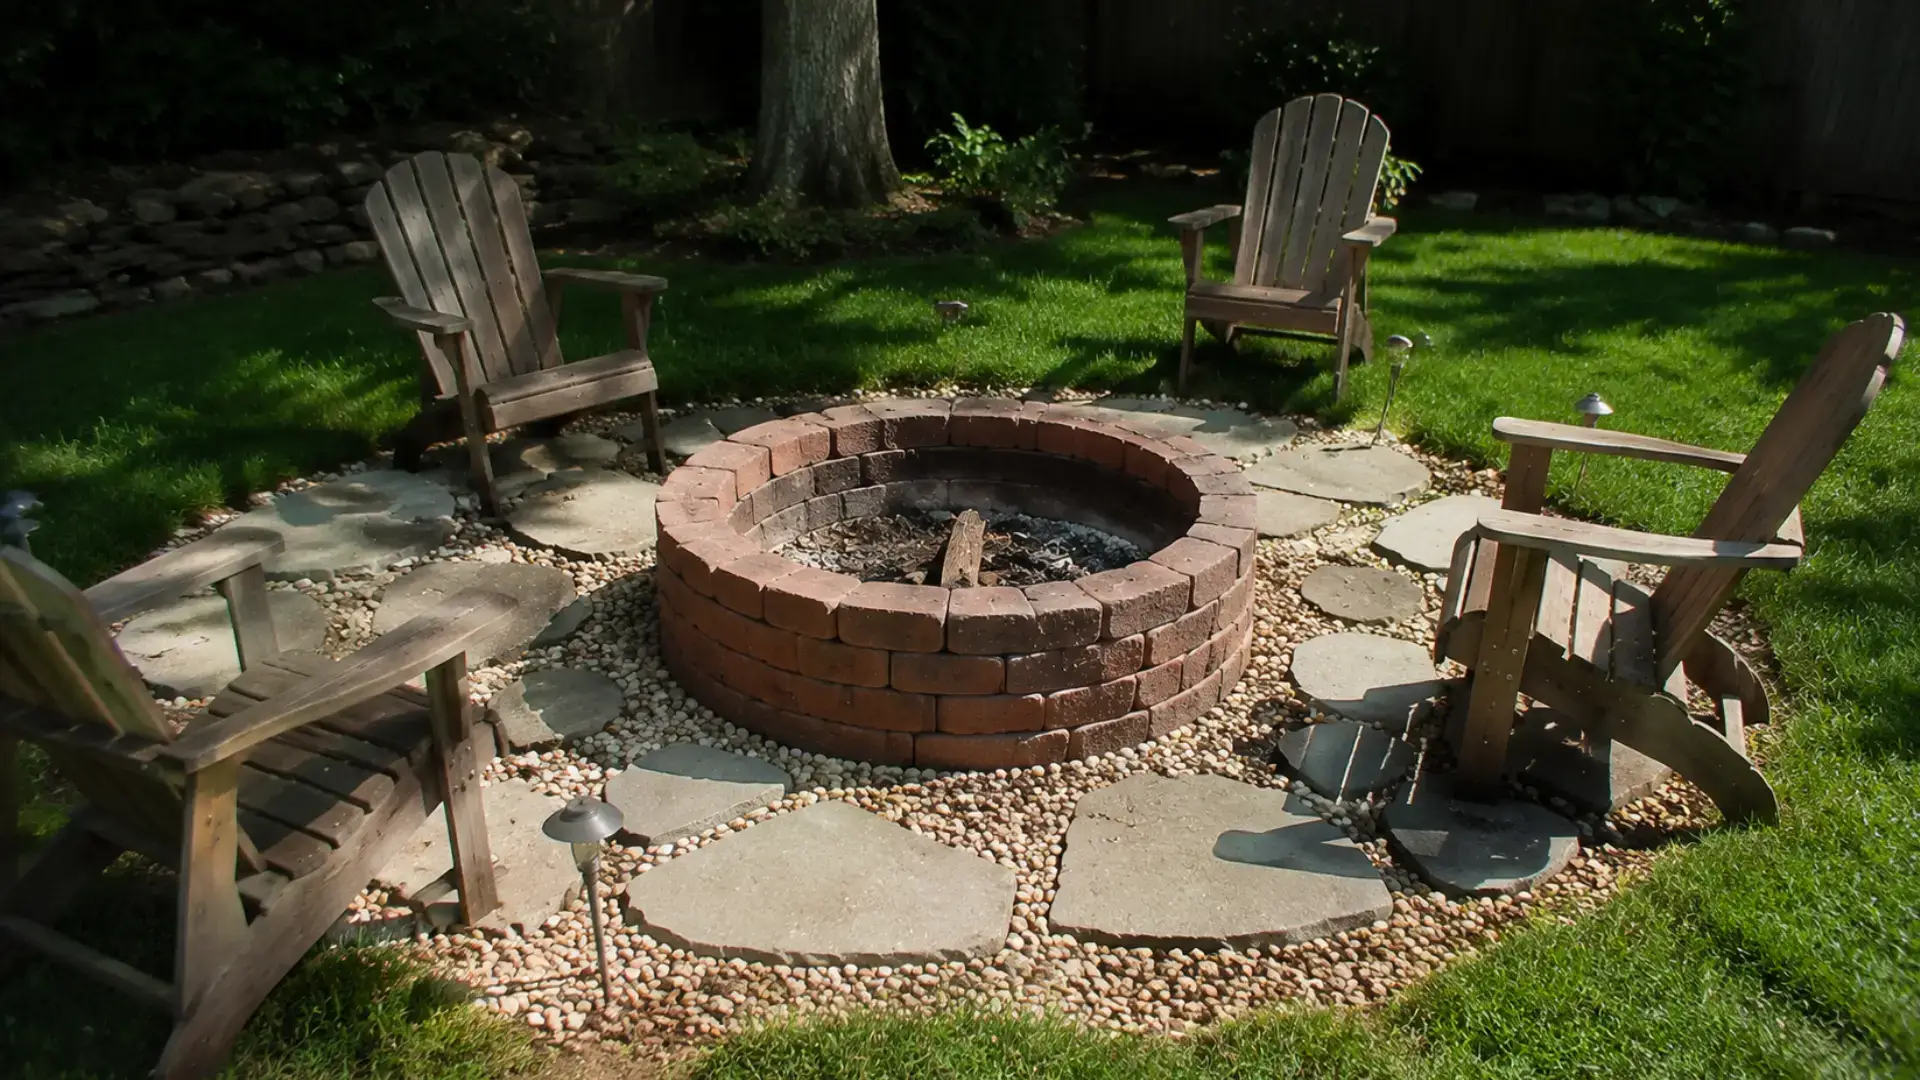
A backyard fire pit sounds like a project that needs a big budget and a contractor, but that is not true. With a weekend, a trip to the hardware store, and a bit of patience, anyone can build a cozy spot for evening gatherings without spending hundreds of dollars.
The trick lies in choosing affordable yet sturdy materials, planning the layout before any digging starts, and following a few safety basics so the finished pit holds up season after season.
This article breaks down low-cost fire pit ideas, the exact materials needed, realistic price estimates, safety precautions to keep in mind, and clear steps for putting it all together.
The goal is a fire pit that works well and keeps more money in your pocket.
What Is the Cheapest Way to Build a Fire Pit?
The cheapest way to build a fire pit almost always comes down to using basic, affordable, easy-to-find materials, such as gravel, standard bricks, concrete blocks, or even repurposed items like an old metal drum or a used steel wheel rim.
These materials cost far less than the decorative stone or manufactured fire pit kits sold at home improvement stores, and they still hold up well when installed correctly.
A DIY fire pit built from these basics can often be completed for a fraction of the price of a store-bought unit, since store-bought fire pits usually include the cost of manufacturing, shipping, and branding on top of the materials themselves.
Building one yourself also means avoiding the labor markup you’d incur if you hired someone to install a premade option. That said, the total cost of any fire pit, DIY or purchased, depends on a few key factors:
- Fire pit size: A larger pit requires more bricks, blocks, or gravel, which increases the overall cost.
- Materials chosen: Basic concrete blocks cost less than natural stone or decorative pavers.
- Ground preparation: Sites that require leveling, digging, or extra gravel for drainage increase labor and material costs.
- Extra features: Adding a seating area, a cooking grate, or a spark screen can push the budget beyond that of a simple fire ring.
Average Cost to Build a Cheap DIY Fire Pit
Costs for a DIY fire pit vary widely depending on the materials and style you choose, but even the pricier options remain well below what most store-bought or professionally installed fire pits cost.
Here is a quick breakdown of what you can expect to spend on some of the most popular cheap fire pit styles.
| Fire Pit Type | Estimated Cost | Best For |
|---|---|---|
| Gravel fire pit | $50–$100 | Lowest-cost option |
| Concrete block fire pit | $100–$200 | Easy weekend project |
| Brick fire pit | $150–$300 | Classic backyard look |
| Metal ring fire pit | $100–$250 | Quick installation |
| Stone fire pit | $200–$500 | Natural outdoor style |
Beginners can stay under $100 by sticking with a gravel fire pit or a small metal ring setup, since both need minimal materials and no special tools.
Just dig a shallow circle, add a layer of gravel for drainage, and stack a single ring of concrete blocks or a repurposed metal ring on top to contain the flames. Skipping extras like decorative stone, seating, or a cooking grate keeps costs down.
Buying only what you need and sourcing free or discounted blocks locally will keep the total close to that $100 mark.
Before Building a Cheap Fire Pit, Plan These Things First
Planning ahead saves you from wasted money and safety issues down the road. A few key decisions upfront make the rest of the process much smoother.
- Choose a flat, open area away from structures, trees, fences, and low branches
- Consider wind direction so smoke doesn’t drift toward seating or neighbors
- Avoid placing it under covered patios, pergolas, or enclosed spaces
- Larger fire pits need more materials, raising overall cost
- Small pits suit tight budgets, medium pits suit family gatherings
- Bigger designs fit regular entertaining, but confirm your needs before buying
- Check city, county, and HOA rules before digging or buying materials
- Some areas restrict burning, set distance requirements, or limit pit types
- Knowing rules early avoids having to rebuild or relocate later
Getting these three decisions settled before any shopping or digging starts sets the whole project up for a smoother build and a fire pit that stays within both your budget and local rules.
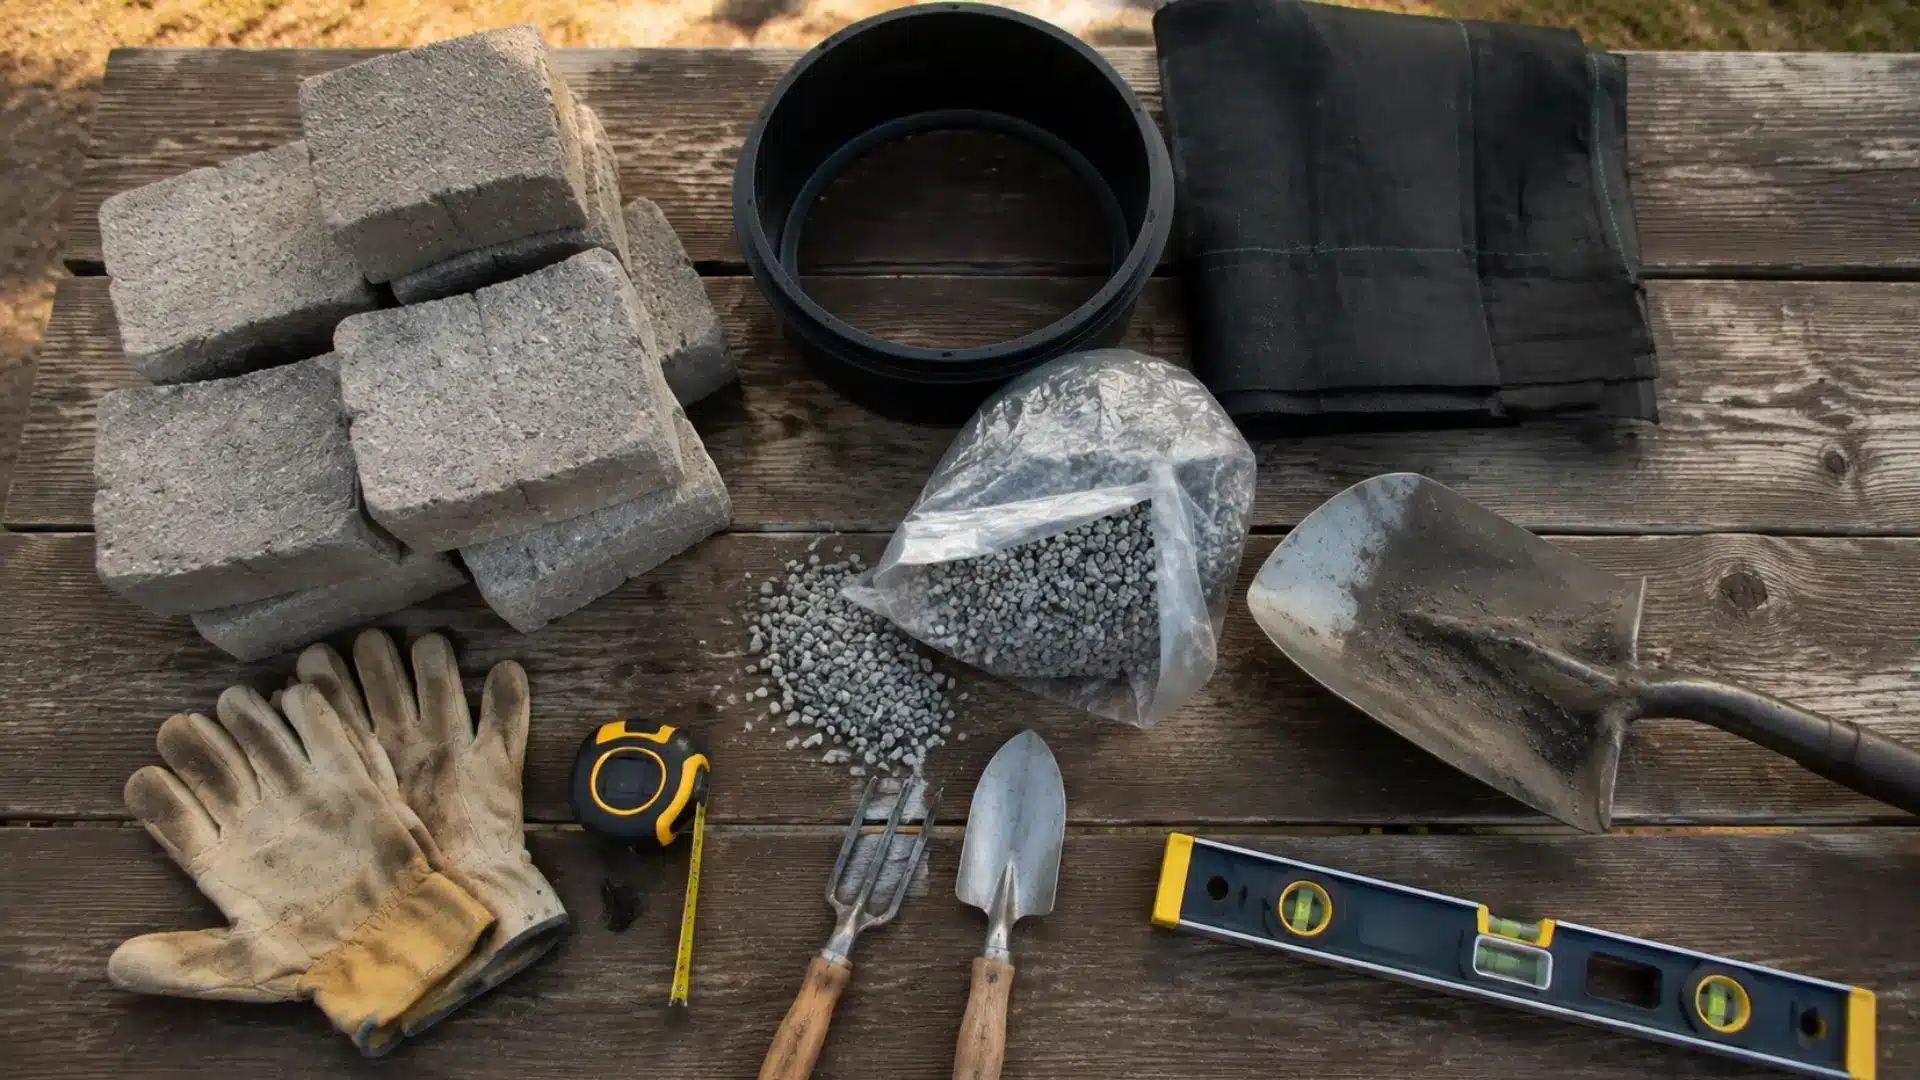
Materials and Tools You Need to Build a Cheap Fire Pit
How to Build a Fire Pit Cheap Step by Step
Building a budget fire pit comes down to following the right order: prepping the ground, laying a stable base, stacking your chosen materials, and finishing with safety details.
Each step below walks through exactly what to do, in the order it should happen, so the finished pit turns out sturdy, safe, and ready for its first fire.
Step 1: Mark Your Fire Pit Area and Prepare the Ground
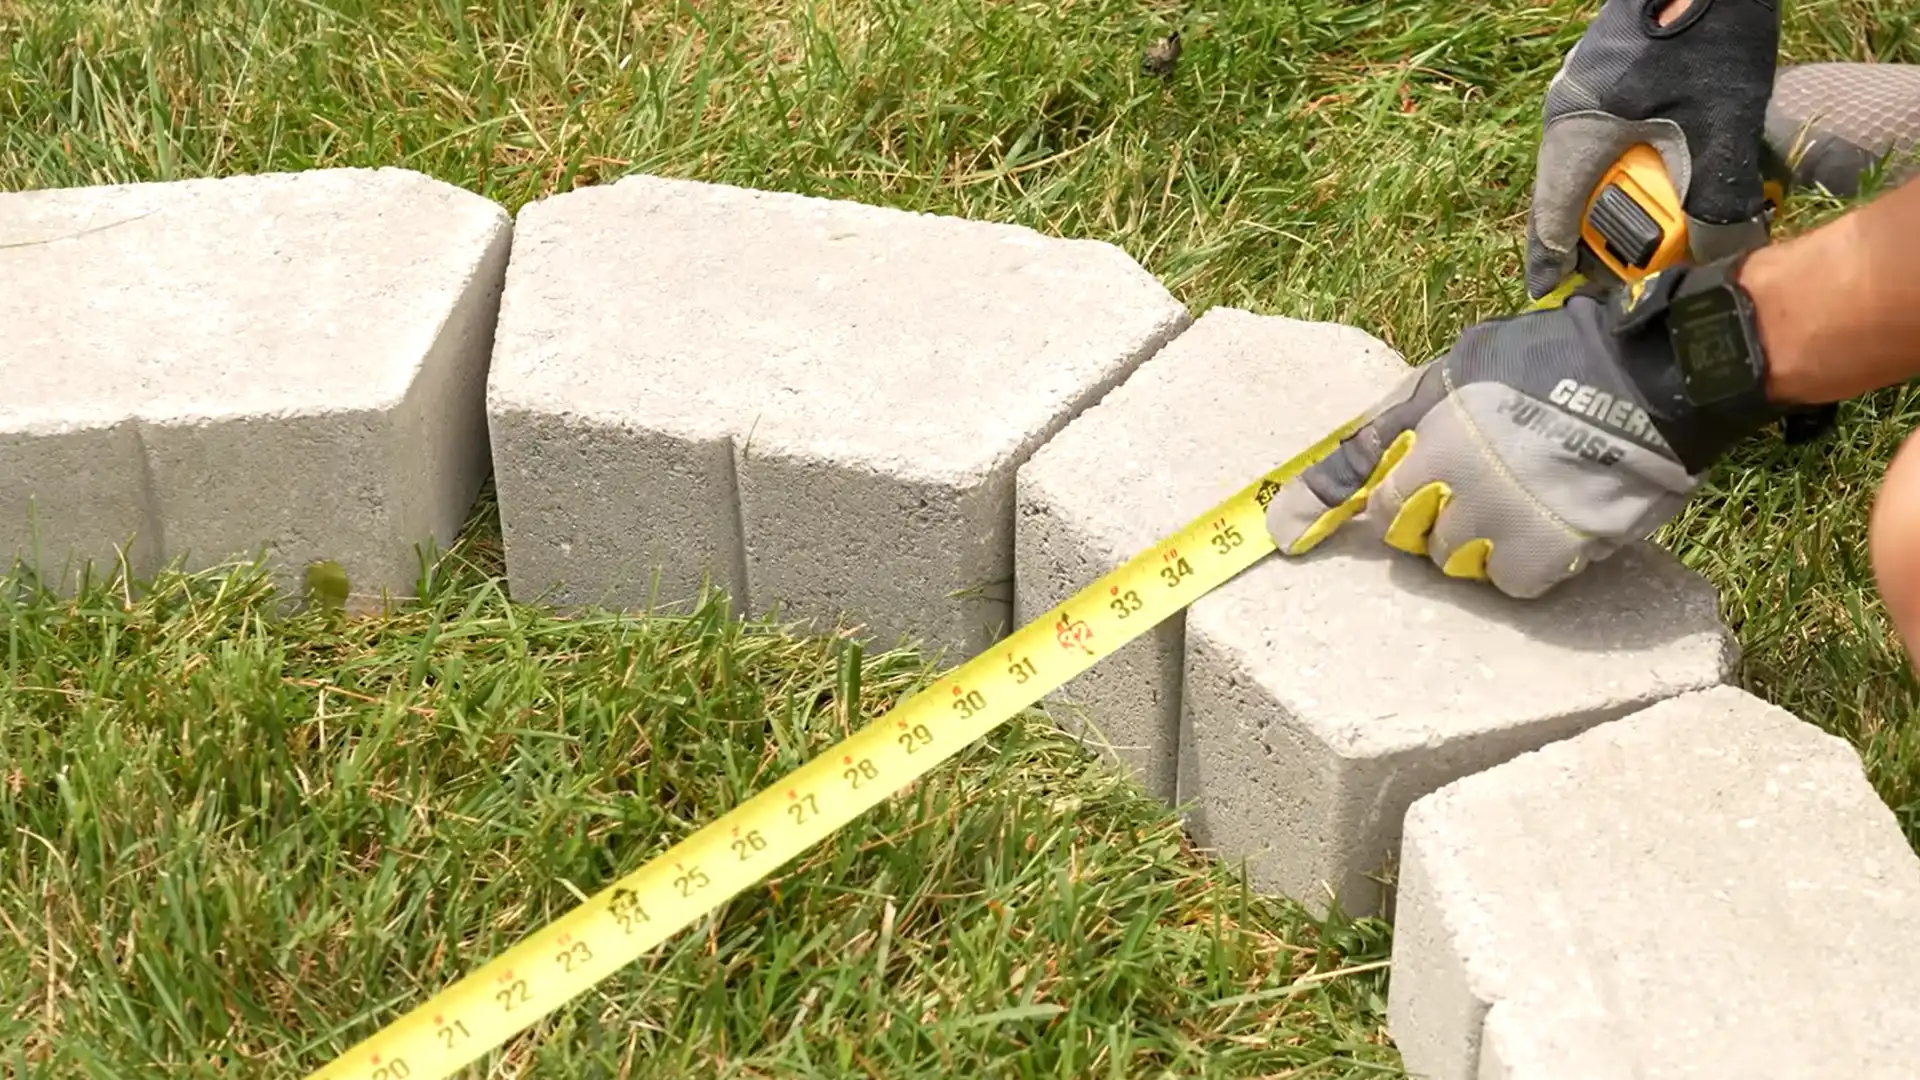
Start by measuring the diameter you want for your finished fire pit, keeping in mind the size guidelines discussed earlier in this guide.
Use a length of rope, a garden hose, or a can of spray paint to trace the outline directly onto the grass so you have a clear boundary to work within.
Once the circle is marked, remove the grass, roots, and any loose soil inside the outline down to a consistent depth.
Finish by leveling the ground with a shovel and a level, since an uneven base will cause problems with every layer added afterward.
Estimated Cost: $0–$20
Step 2: Create a Stable Base for Your Fire Pit
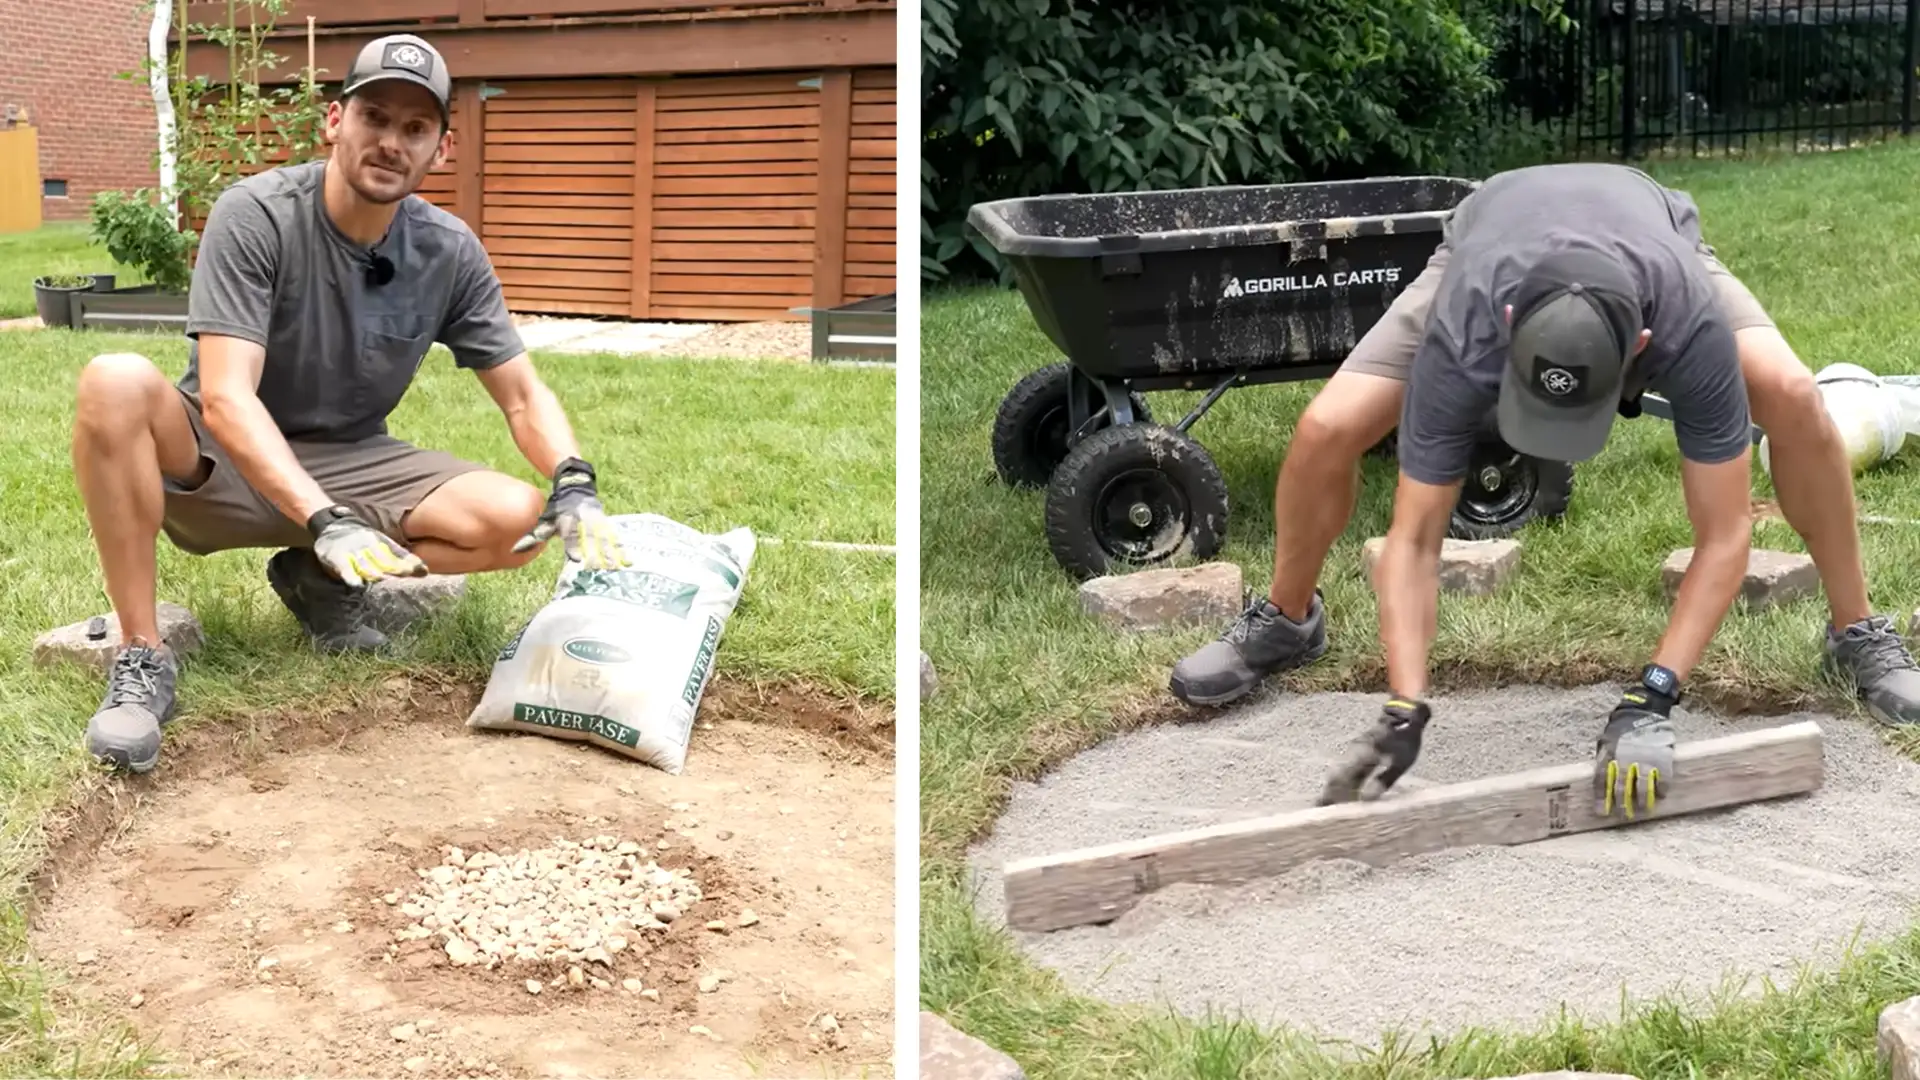
A solid base keeps the entire structure from shifting, sinking, or cracking over time, and it also helps with drainage so rainwater does not pool inside the pit.
Lay a sheet of landscape fabric across the cleared area if you want to block weeds from growing up through the base. Fill the space with a few inches of gravel or sand, spreading it evenly across the entire circle.
Compact the surface firmly using a hand tamper or by walking over it repeatedly so it forms a solid, even foundation for the blocks or bricks.
Estimated Cost: $20–$50
Step 3: Arrange the First Layer of Fire Pit Blocks or Bricks
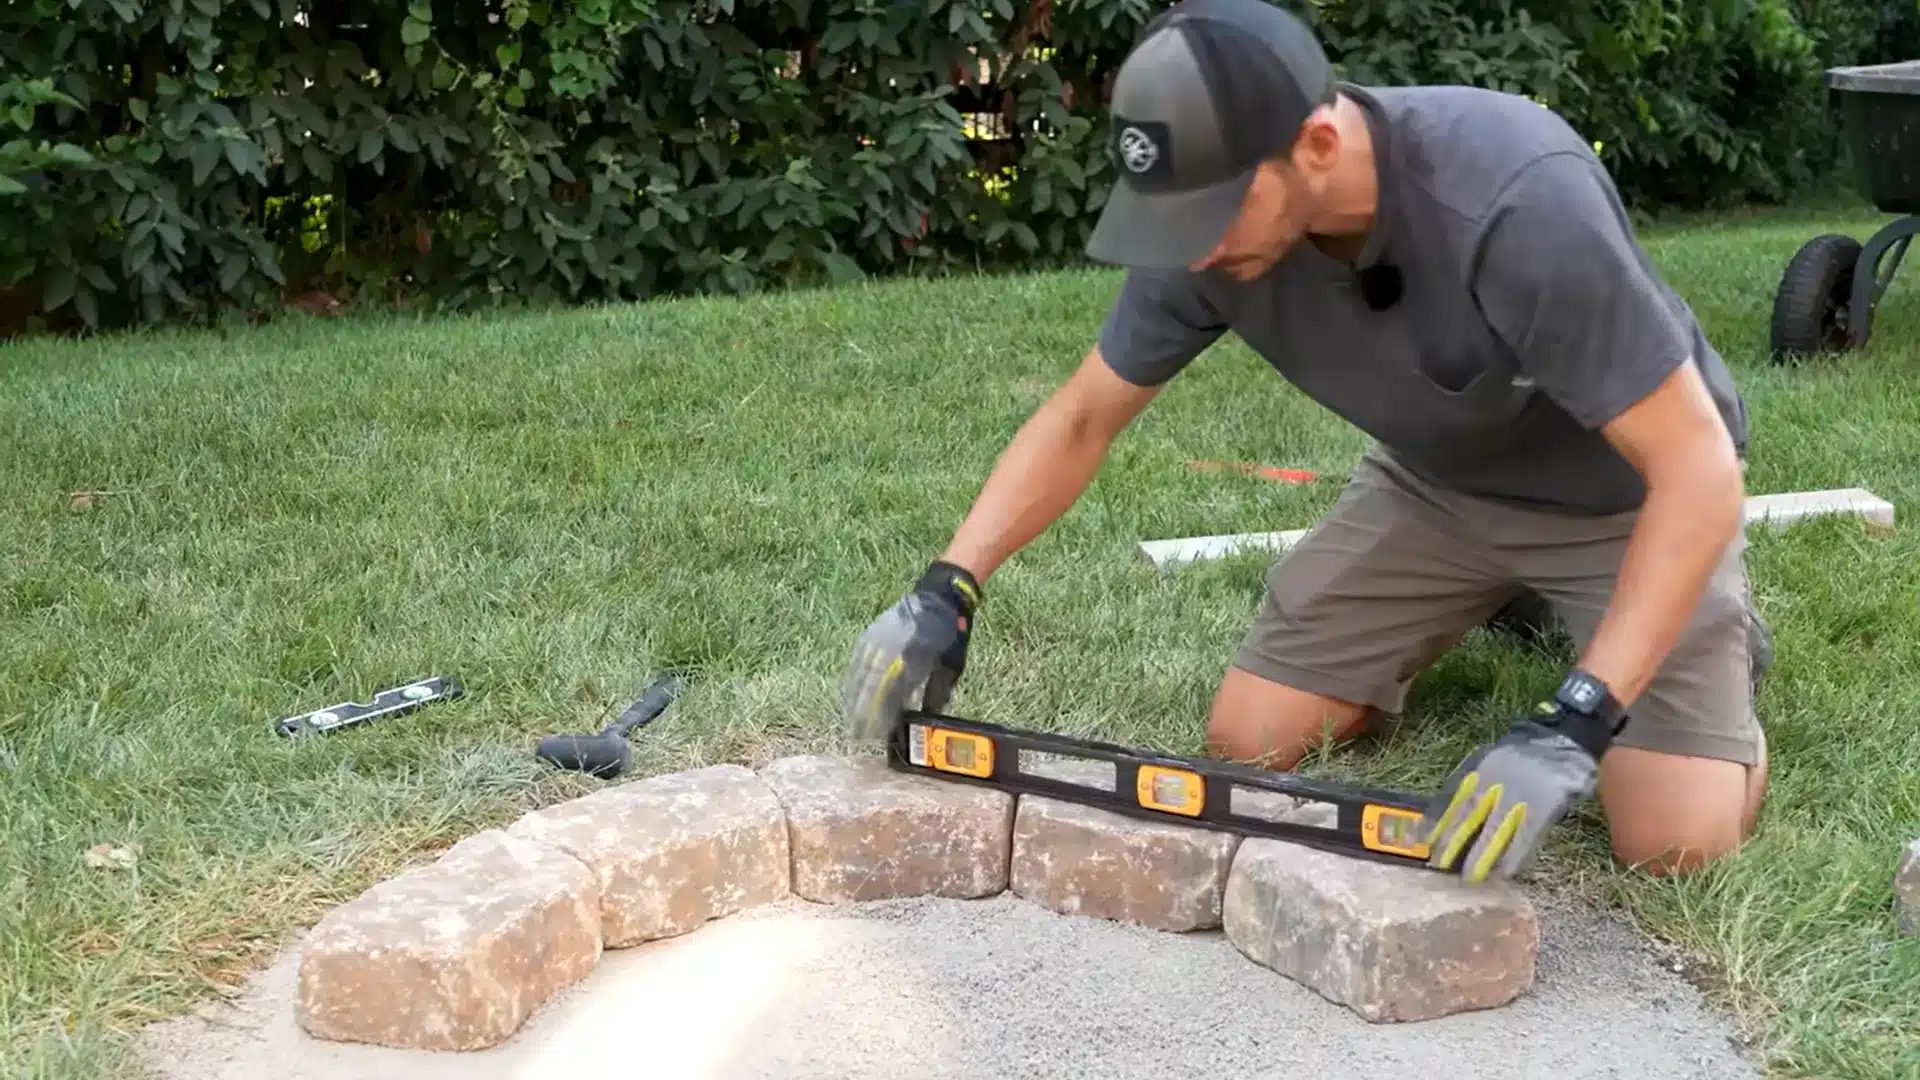
The first layer sets the shape and stability for everything built on top of it, so take your time getting this right. Place each block or brick along the marked circle, checking frequently that they sit flat and level against the base.
If your design calls for airflow at the bottom, leave small, even gaps between a few blocks in this first row.
A crooked or uneven first layer will throw off every layer that follows, so it is worth double-checking before moving on.
Estimated Cost: $50–$150 depending on material
Step 4: Build Up the Fire Pit Walls
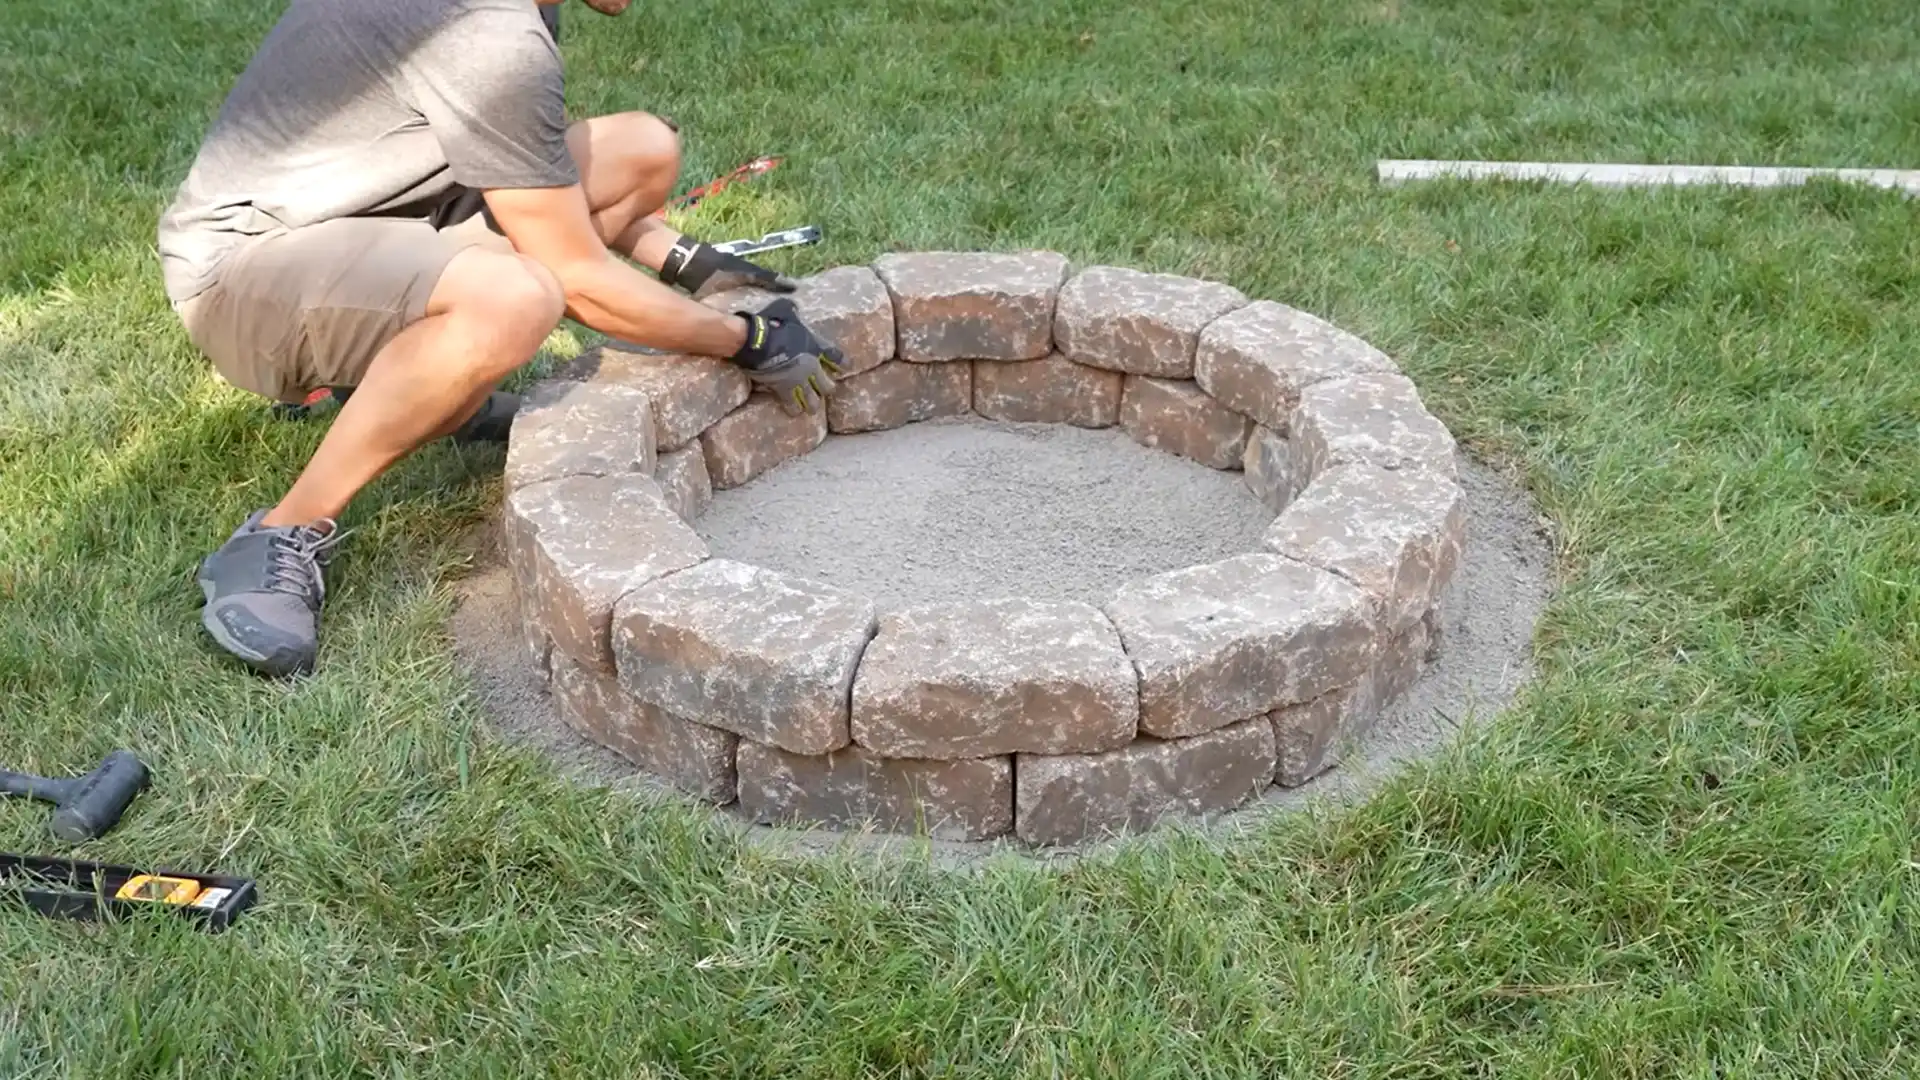
Continue adding layers on top of the first row until the walls reach your desired height. Offset each new layer slightly from the one below it, similar to how bricks are staggered in a wall, since this adds strength and stability to the structure.
Keep the total height in check, as walls that are too tall can restrict airflow to the fire, making the pit harder to use and less safe.
Estimated Cost: Included in block or brick cost
Step 5: Add Fire-Safe Materials Inside the Pit
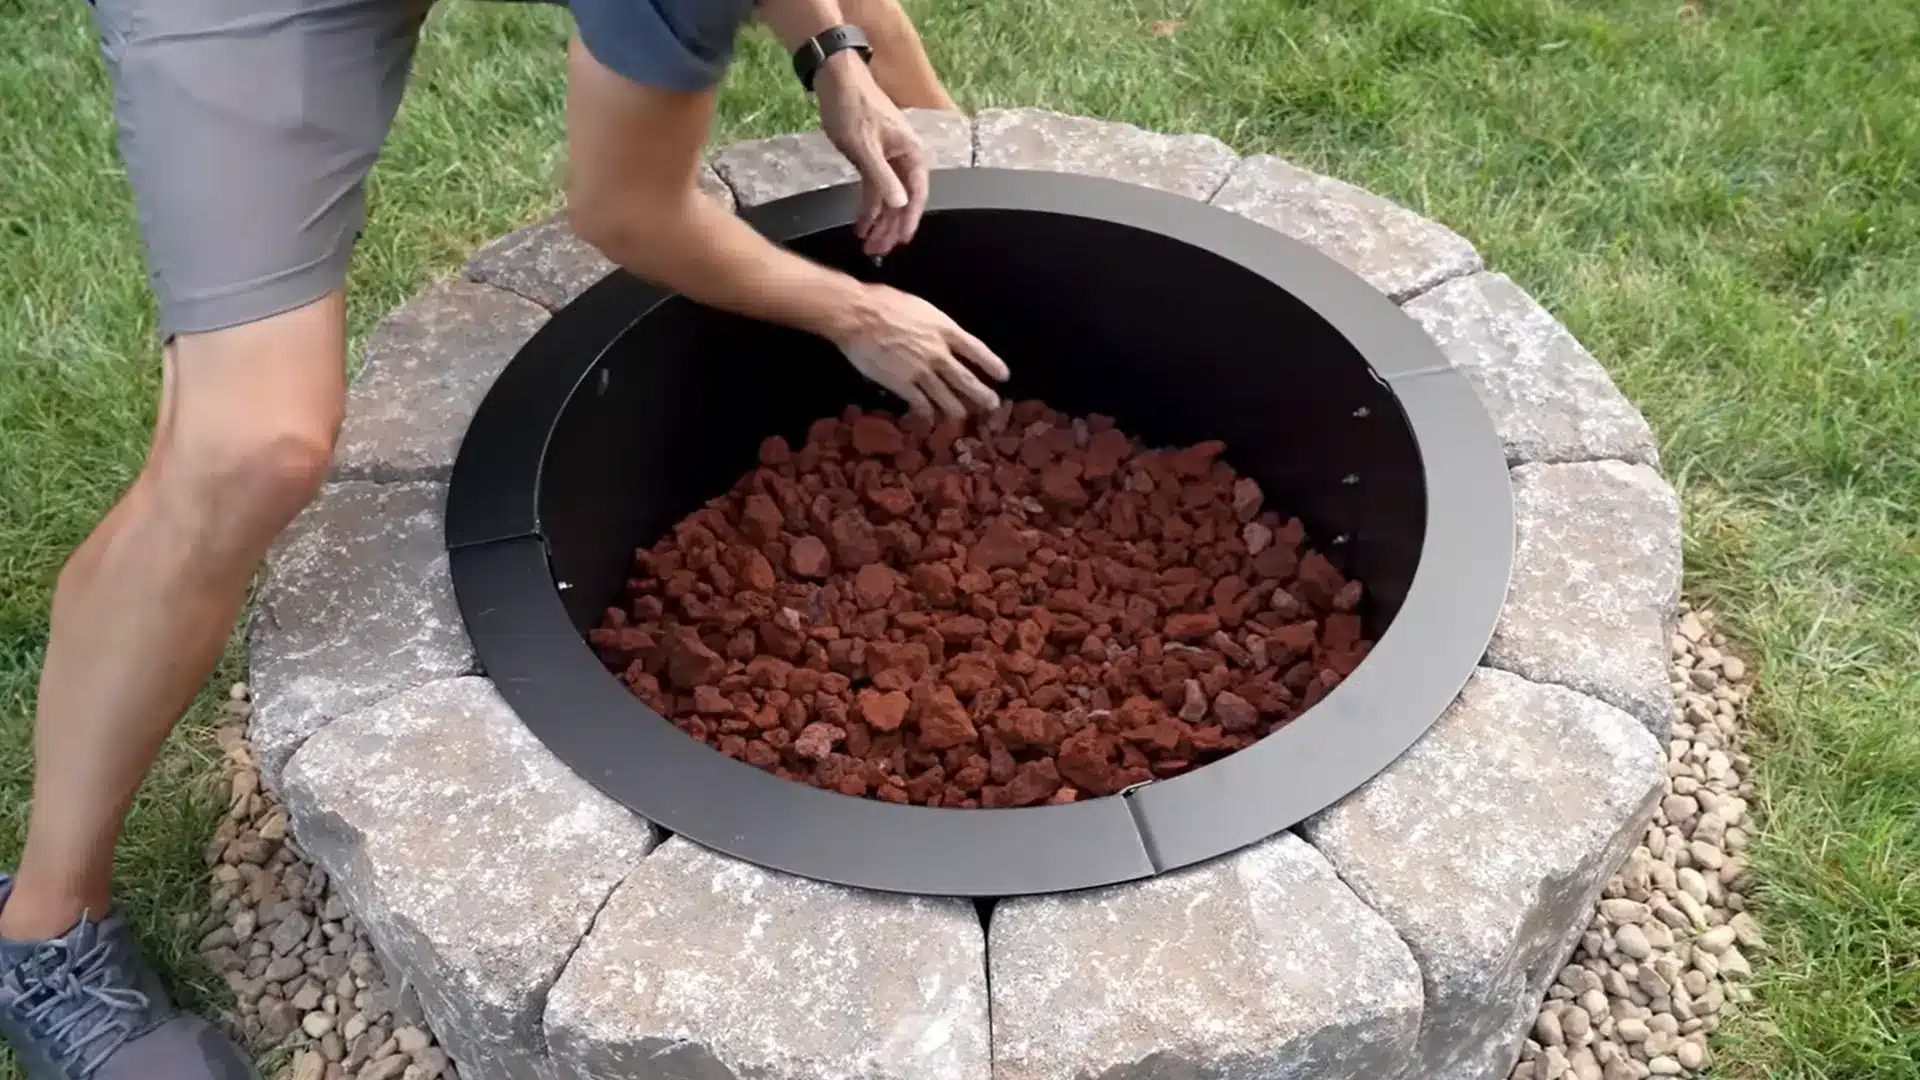
Once the walls are built, line the interior with materials designed to handle direct heat and flame.
Lava rock, fire-rated gravel, and a sand base all work well, since they resist cracking and do not release moisture that can cause popping or splitting when heated.
Avoid regular river rock, decorative landscaping stone, or any rock pulled from a creek or yard, since these can trap moisture and shatter or explode when exposed to high heat.
Estimated Cost: $15–$50
Step 6: Add Finishing Touches Without Increasing the Budget
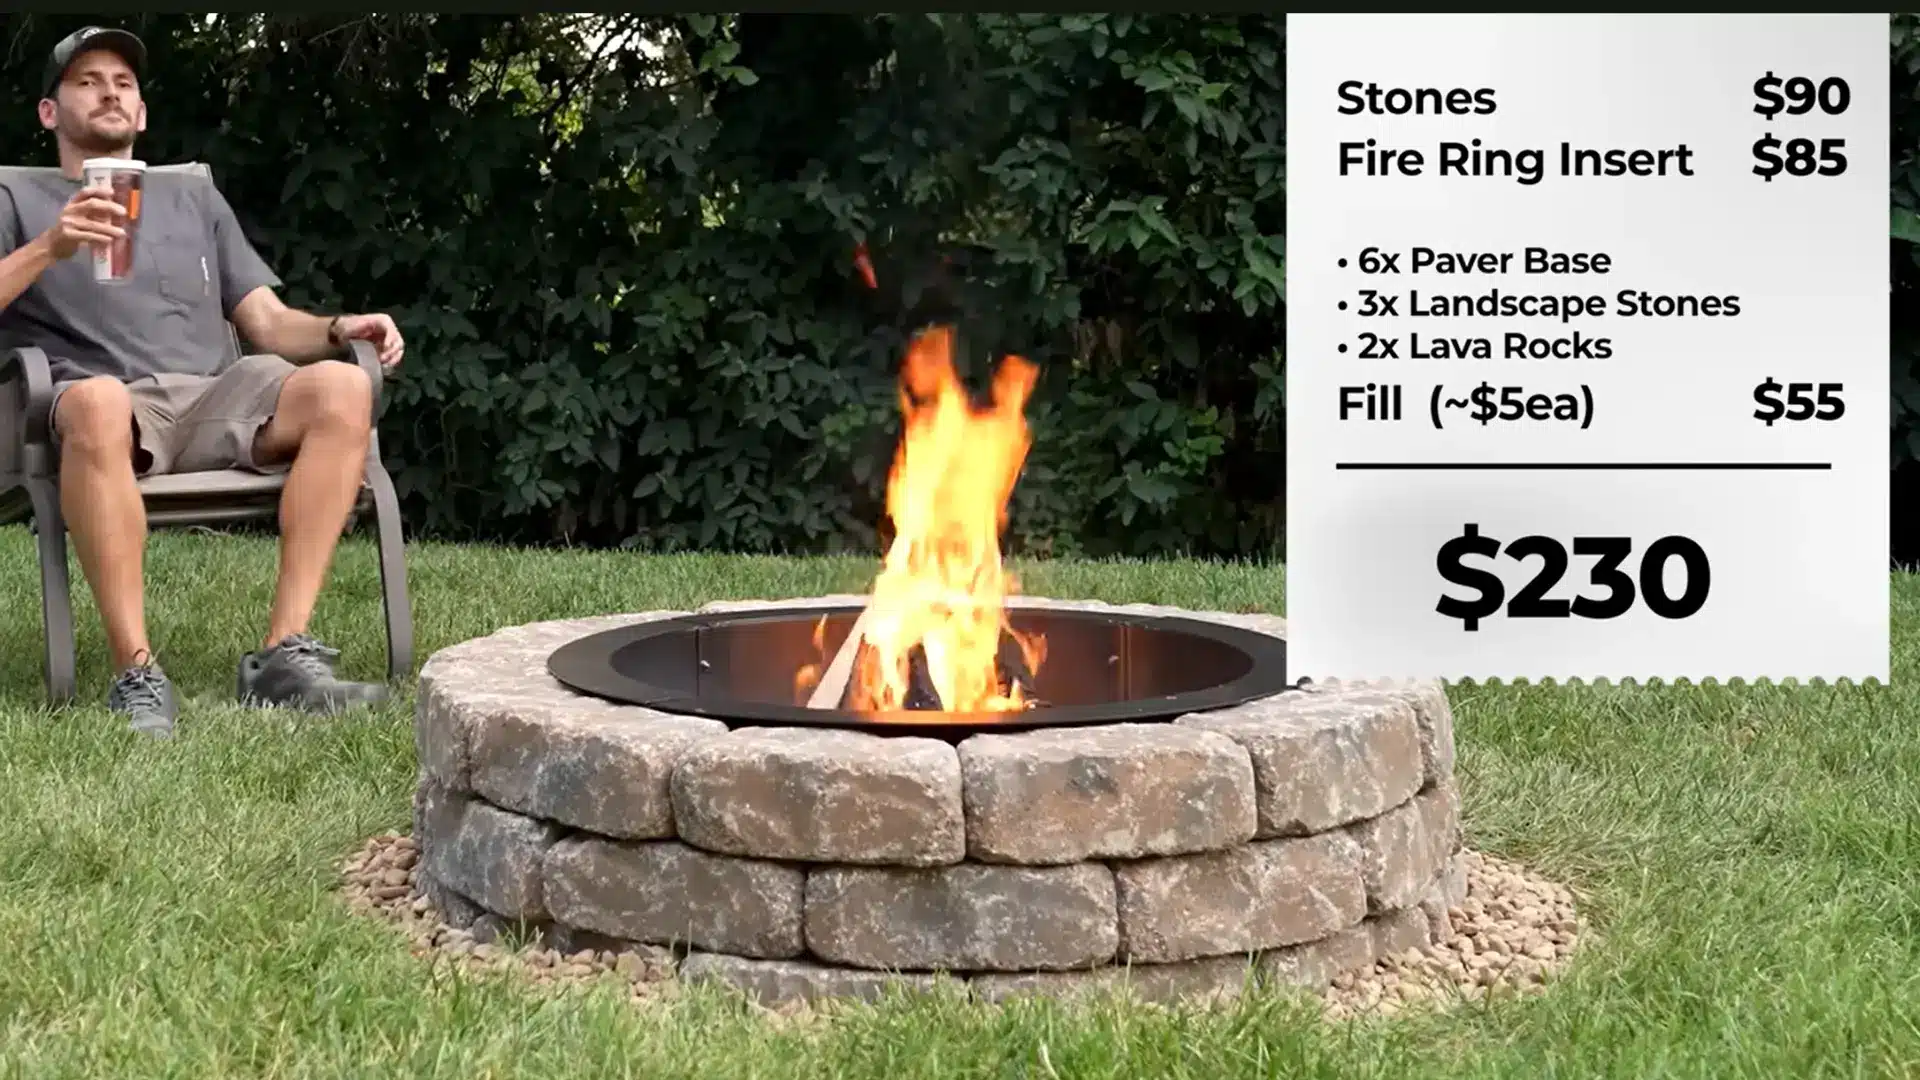
The last step is optional, but a few low-cost extras can make the space feel finished without pushing the budget much further.
Simple DIY seating made from repurposed benches or cinder blocks with cushions, a strand of string lights hung nearby, a few outdoor cushions, and a basic wood storage rack all add comfort and style for very little money.
None of these require professional installation, and most can be added gradually over time as budget allows.
Estimated Cost: $0–$100
For a detailed, step-by-step tutorial, click on the video tutorial below
Cheap DIY Fire Pit Ideas Under Budget
Whether you want something you can build in an afternoon or a design that becomes a backyard centerpiece, there is a low-cost fire pit style to match almost any budget and skill level.
The seven ideas below range from the simplest weekend project to more decorative options, giving you a starting point no matter what look or price range you are working with.
1. Simple Gravel Fire Pit Under $50
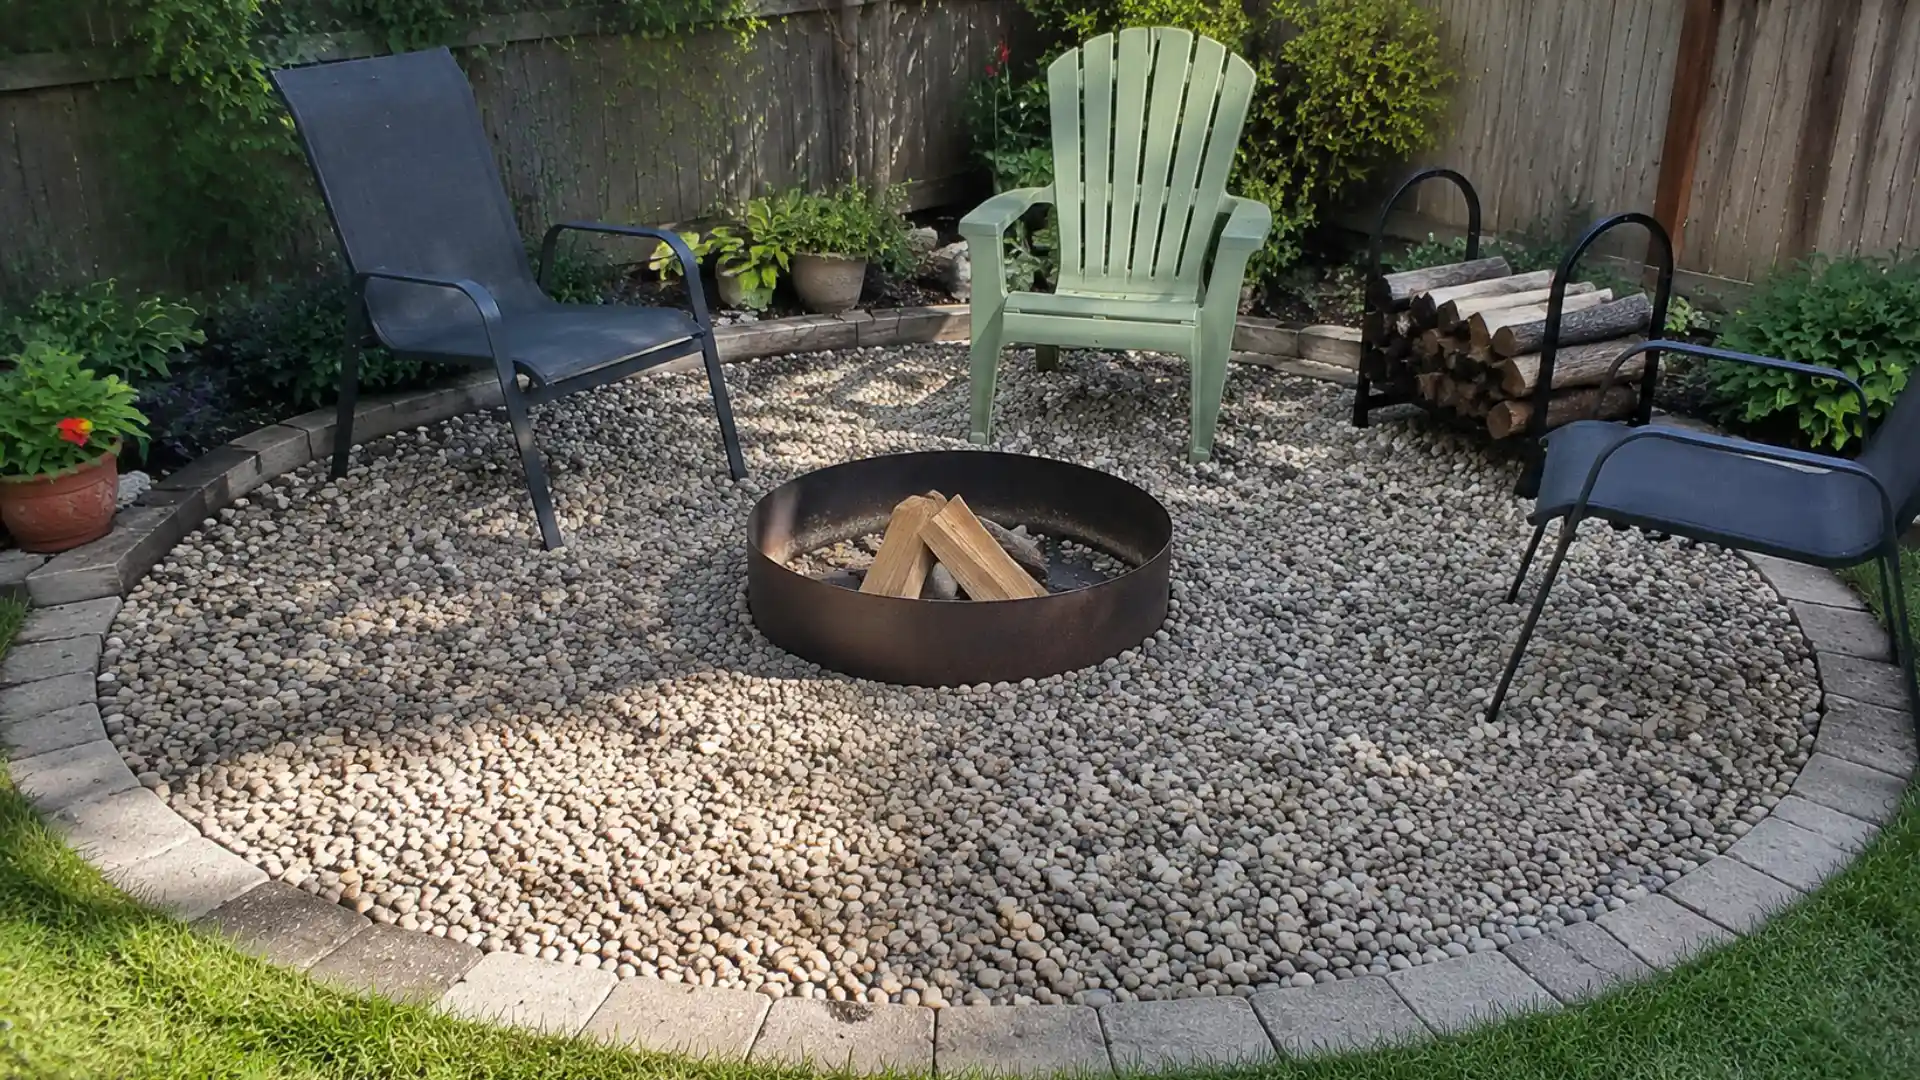
This design uses a gravel bed, a basic metal fire ring, and a few simple landscaping materials to create a functional fire pit without complicated construction.
It is one of the easiest beginner projects because it skips mortar, precise block-laying, and heavy digging, relying instead on layering materials that naturally hold their shape.
This style works best for small backyards with limited space and for anyone who wants a finished fire pit in a single weekend.
Estimated Budget: $40–$75
2. Concrete Block Fire Pit Under $150
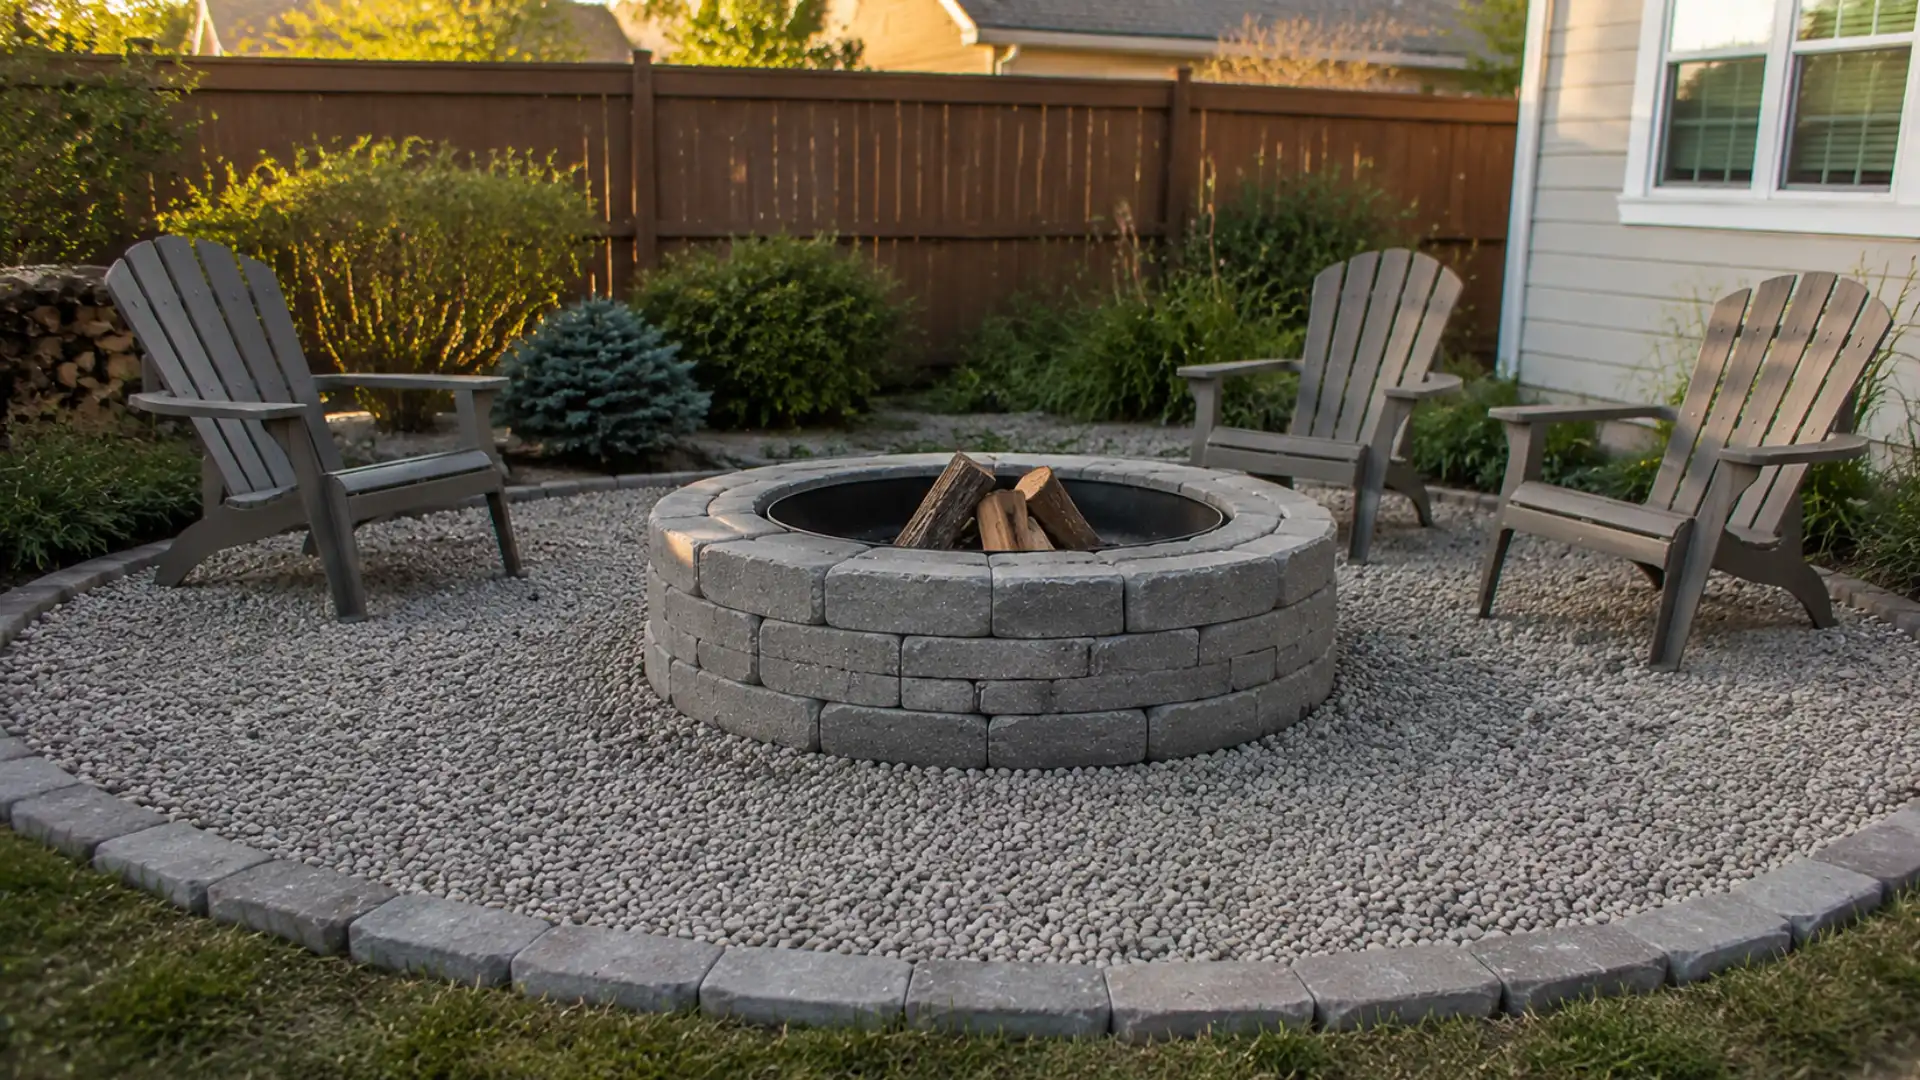
Affordable retaining wall blocks or standard concrete blocks form the walls of this design, stacked in a circle to create a sturdy and long-lasting structure.
The interlocking or stacked shape of the blocks naturally holds the circular form without needing mortar, making assembly straightforward even for first-time builders.
For added durability, a heat-resistant metal liner can be dropped inside the block ring to protect the concrete from direct flame contact over time.
Estimated Budget: $100–$150
3. DIY Brick Fire Pit With Classic Backyard Style
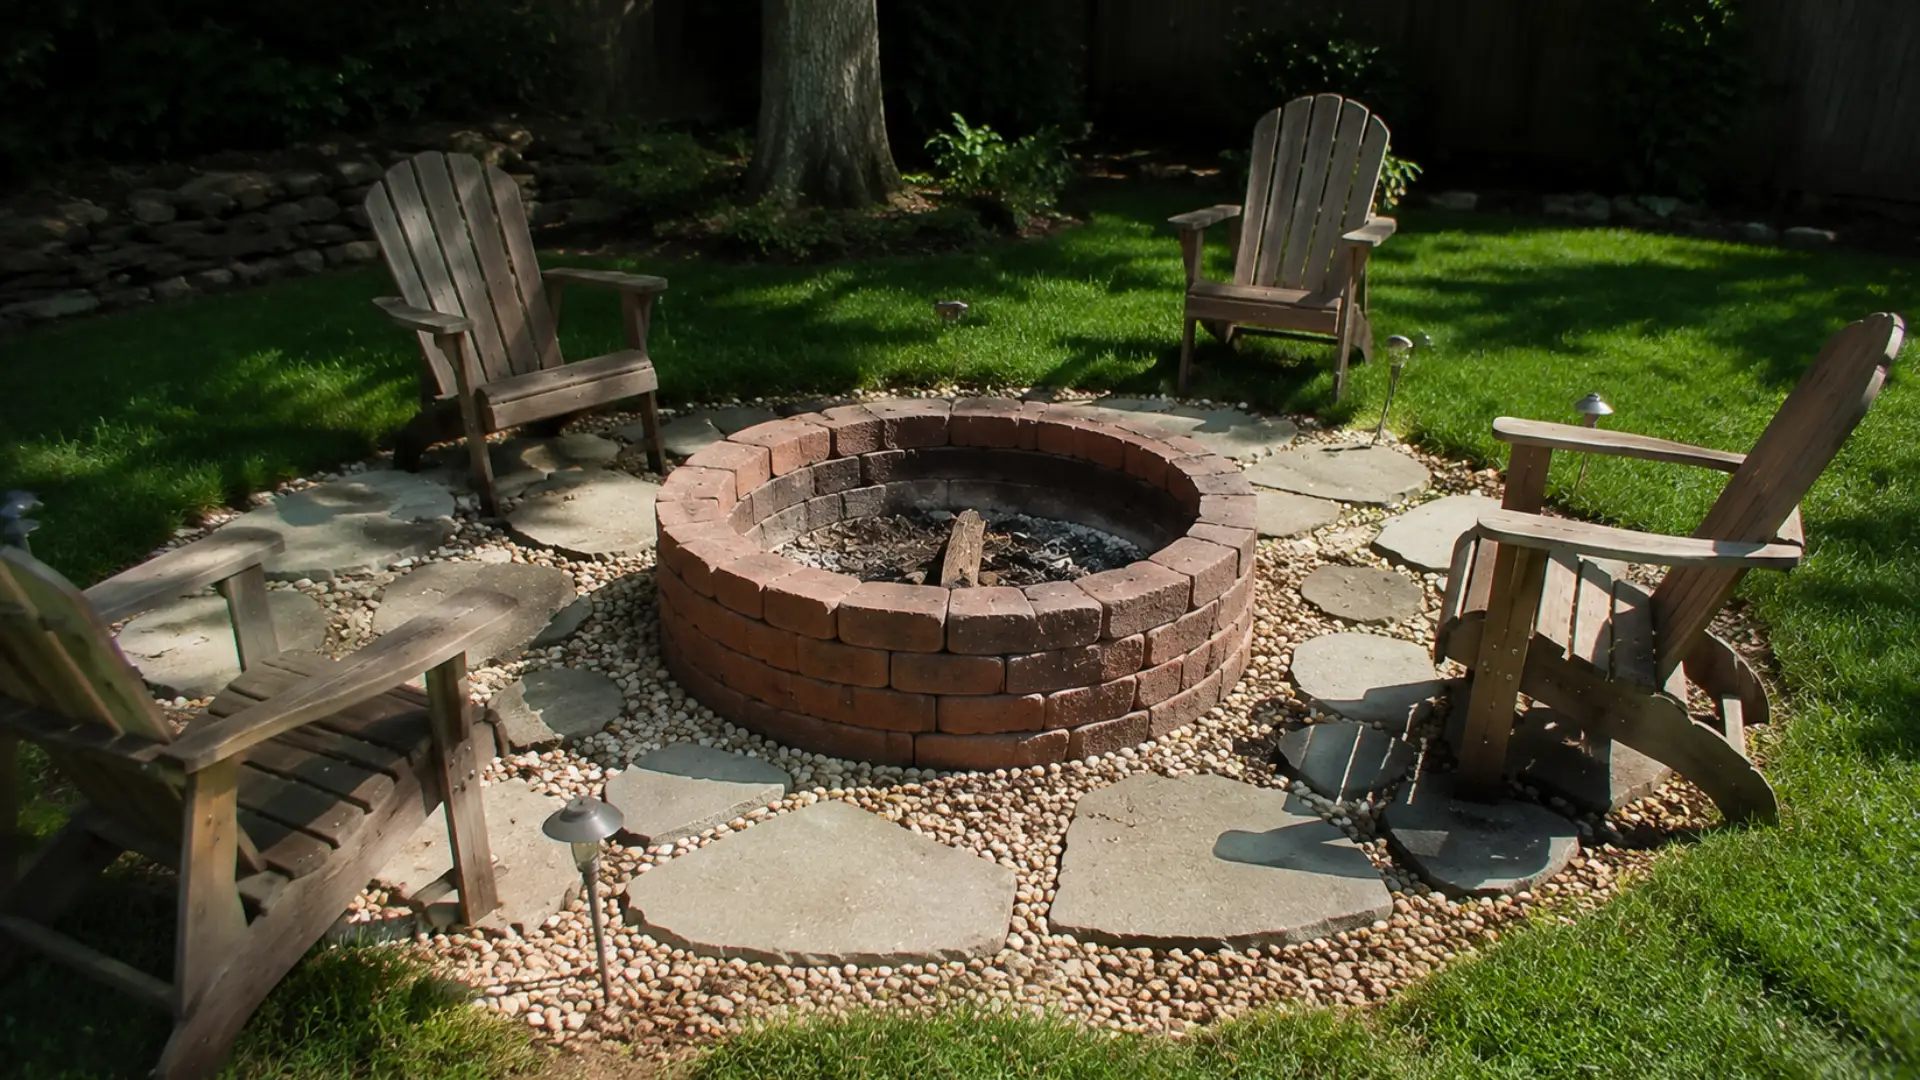
Reclaimed or secondhand bricks can significantly reduce the cost of this project compared to buying new materials, especially if you find them through local listings or demolition sites.
Arranging bricks in a traditional circular or hexagonal layout creates a timeless, classic backyard look that pairs well with almost any outdoor style.
Before using any reclaimed bricks, check that they are solid and rated for fire use, since some decorative or hollow bricks can crack or crumble under high heat.
Estimated Budget: $150–$250
How to Make Your Cheap Fire Pit Look More Expensive
A few thoughtful touches can make a budget fire pit look like it belongs in a magazine, without adding much to the total cost. The key is to choose upgrades that gradually improve visual appeal and functionality, rather than trying to buy everything at once.
1. Add a Budget-Friendly Seating Area
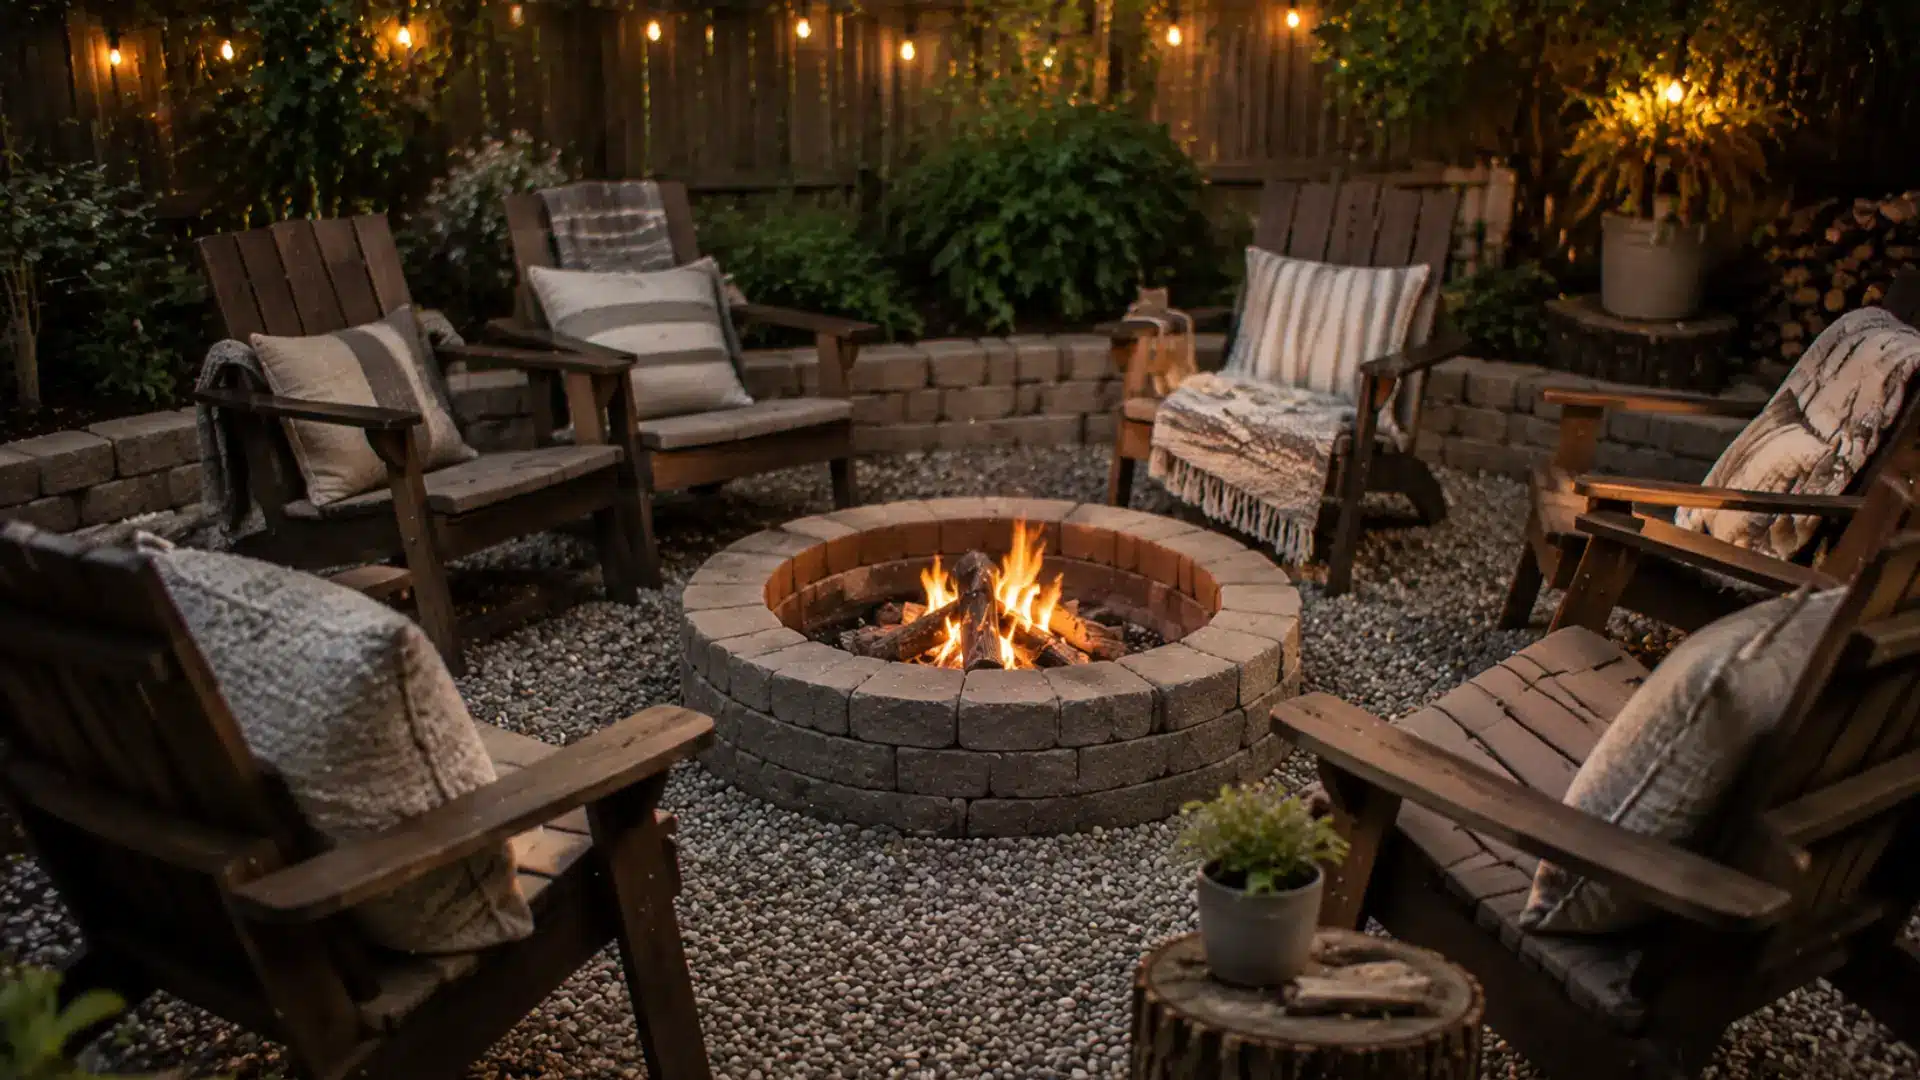
Seating instantly makes a fire pit feel like a finished gathering space rather than a bare patch of yard.
Simple wooden benches, Adirondack-style chairs, weatherproof outdoor cushions, and repurposed furniture like old porch chairs or wooden crates all work well and can often be found secondhand or built with basic materials.
Mixing a few different seating types around the pit also gives the space a more intentional, curated look instead of a matched patio set straight out of a box.
2. Create a Cozy Fire Pit Surround
The area immediately around the fire pit has a big impact on how polished the whole setup feels.
A gravel border helps define the space and keeps grass from creeping in, while a ring of stepping stones creates a clear path and adds visual structure.
Plants placed a safe distance from the heat soften the hard edges of stone or block walls, and a few strands of outdoor lighting strung nearby add warmth and ambiance once the sun goes down.
3. Add Functional Features Over Time
Rather than buying every accessory upfront, spacing out purchases over several weeks or months keeps the project affordable while still building toward a fully equipped fire pit.
A cooking grate opens the option to roast or grill directly over the flames, a firewood holder keeps logs organized and off the ground, a weather cover protects the pit from rain and debris between uses, and a spark screen adds an extra layer of safety for windy nights or dry conditions.
Adding these one at a time makes each purchase easier to fit into a tight budget.
How Much Does It Cost to Build a Fire Pit Cheap?
Pulling everything from this guide together, here is a realistic look at what each fire pit style typically costs from start to finish, based on the materials and steps covered above.
| Project Type | Total Estimated Cost |
|---|---|
| Basic gravel fire pit | $50–$100 |
| Concrete block fire pit | $100–$200 |
| Brick fire pit | $150–$300 |
| Stone fire pit | $200–$500 |
| DIY upgraded fire pit area | $300–$700 |
These ranges cover the full project, from ground prep through the finishing touches, and give a solid starting point for setting a realistic budget before shopping for materials.
To keep your total closer to the lower end of any of these ranges, a few simple habits make the biggest difference:
- Buy materials locally to avoid shipping costs and markups from online retailers.
- Reuse landscaping materials already on hand, such as extra gravel, pavers, or leftover bricks.
- Build smaller, since reducing the diameter by even a foot can noticeably reduce blocks, gravel, and labor.
- Skip unnecessary accessories like decorative liners, built-in seating, or premium spark screens until the budget allows.
Common Mistakes to Avoid When Building a Cheap Fire Pit
Even a well-planned fire pit build can run into trouble if a few key details get overlooked. These common mistakes are easy to avoid once you know what to watch for, and steering clear of them keeps the project safe, sturdy, and on budget.
- Heat-Safe Materials: Porous or decorative stone can crack, explode, or crumble under heat, so use fire-rated blocks or dense natural stone instead.
- Safe Distance: Keep the pit at least 10 feet from fences, sheds, branches, and the house, and check wind direction for smoke and embers.
- Base Prep: Level and compact the ground first, since uneven or loose soil causes blocks to shift and settle over time.
- Right Size: Match the pit’s size to actual use, since bigger builds cost more in blocks, gravel, and firewood.
- Airflow: Leave small gaps at the base so air reaches the flames and the fire doesn’t smolder or smoke.
Final Thoughts: Build a Backyard Fire Pit That Fits Your Budget
A cozy backyard fire pit has never been about how much money you spend on it.
As this guide shows, a few basic materials, a little planning, and a weekend of effort are enough to create a warm gathering spot that holds up for years to come.
Whether it is a simple gravel pit, a stacked concrete block design, or something built from repurposed materials, the right choice comes down to your budget, your space, and how much time you want to put into the project.
Starting small is always a smart move, since seating, lighting, and other upgrades can be added gradually as time and budget allow.
Now it is your turn. Pick the design that fits your yard and your wallet, gather your materials, and start building the fire pit your backyard has been missing.
Frequently Asked Questions ( FAQs )
Can you build a fire pit for under $100?
Yes, a basic gravel or metal ring fire pit can typically be built for $50–$100 with simple materials.
What is the cheapest material to build a fire pit with?
Gravel combined with a basic metal fire ring is usually the most affordable option available.
How many blocks do I need for a small fire pit?
A small fire pit, around 3-4 feet in diameter, typically requires 12–14 blocks per row.
Can I build a fire pit directly on grass?
No, grass and roots should be removed first to create a safe, level, non-flammable base.
Do I need a metal ring inside my DIY fire pit?
It is optional, but a metal ring helps protect the blocks and contains the fire more effectively.