

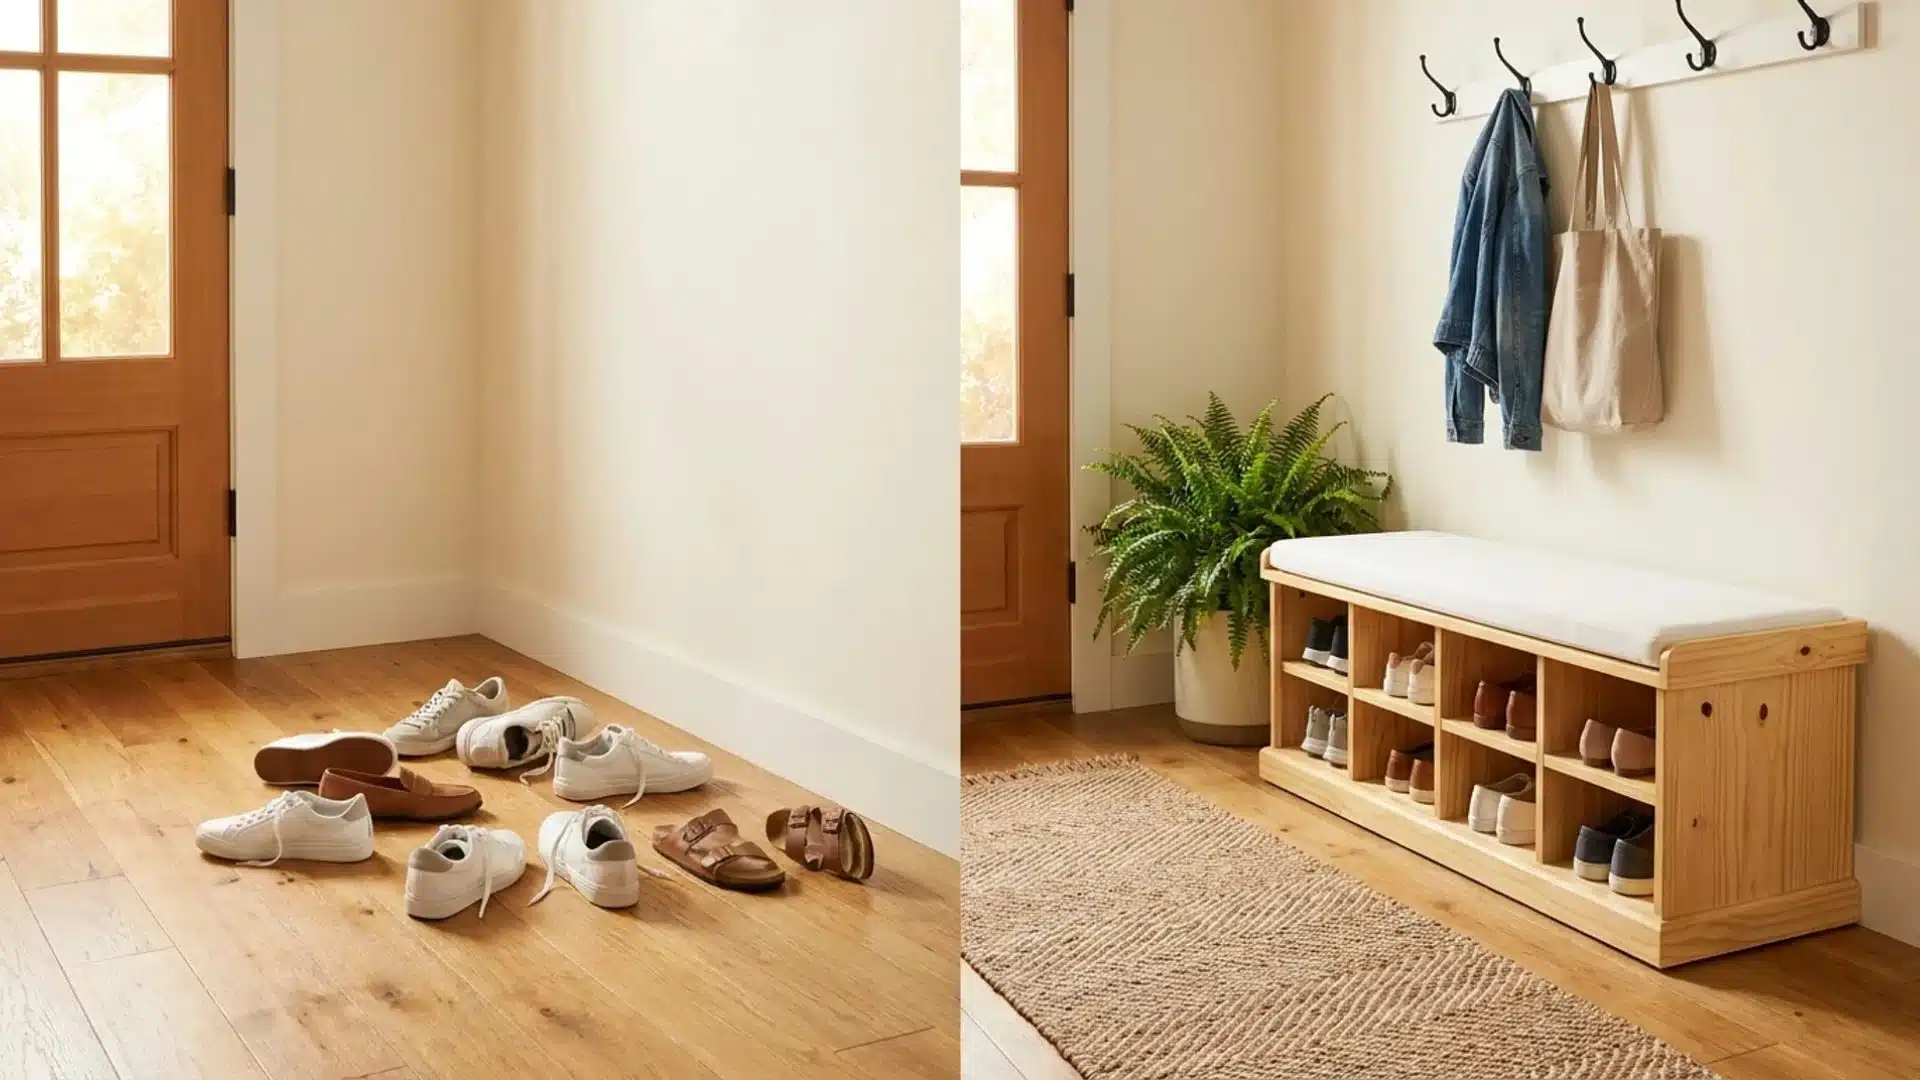
Shoes by the door, under the bed, spilling out of the closet.
Sound familiar? A cluttered shoe pile does not just look bad; it steals your time every single morning.
Building a DIY shoe rack does not require a carpentry degree or an expensive toolkit. All it takes is the right idea and a free afternoon.
This list brings you practical, budget-friendly builds, from rope-and-wood hanging racks to cardboard honeycomb organizers, each designed for real homes and real people.
Pick your favorite and start building today.
How Does DIY Shoe Storage Help Keep Your Home Organized?
A simple change like adding DIY shoe storage can make daily life feel much more organized and calm. When shoes are left near doors, under furniture, or scattered across rooms, they quickly create a visual mess and waste space.
However, a proper shoe storage setup gives every pair a fixed place, which instantly improves how a room looks and feels.
One big advantage is better use of space, especially in small homes where storage is limited. The setup also helps reduce clutter buildup since shoes are no longer left randomly around the house.
It also helps keep floors cleaner and reduces the time spent tidying up. Over time, it helps build a habit of keeping things in order without much effort.
DIY Shoe Rack Building
Building a shoe storage unit becomes easier when each stage is planned with proper measurements and clear execution.
Materials Required
Before picking up a single tool, knowing what you need saves time, money, and unnecessary trips to the hardware store. Most of these materials are affordable, easy to find, and may already be sitting in your home.
| Material | Purpose |
|---|---|
| Wooden planks (18mm thickness) | Form the main structure and shelves |
| Screws (1.5–2 inches) | Secure all joints firmly |
| Measuring tape (up to 5 meters) | Ensure accurate sizing before cutting |
| Drill machine | Fix screws and assist with installation |
| Sandpaper (medium grit) | Smooth rough wood edges safely |
| Wall brackets (metal, 4–6 inches) | Provide extra support and stability |
Step-by-Step: DIY Shoe Rack
These steps help create a stable, balanced, and space-efficient structure.
- Step 1: Measure the space carefully with tape, ensuring a width of 36 inches, a depth of 12 inches, and a height of 48 inches to fit the structure.
- Step 2: Cut wooden planks into two side panels (48 x 12 inches), four shelves (36 x 12 inches), and one top panel of the same size.
- Step 3: Smooth all cut wooden edges with medium-grit sandpaper, removing rough surfaces and splinters to ensure safe handling and a better finish for painting or polishing.
- Step 4: Build the frame by joining the side panels, top, and base with screws and brackets, maintaining a height of 48 inches and ensuring strong, square corner alignment throughout.
- Step 5: Fix shelves inside the frame, maintaining equal spacing of 10-11 inches to allow comfortable placement of sneakers, sandals, and boots without overcrowding.
- Step 6: Secure the structure to the wall with metal brackets at the top corners to ensure stability, alignment, and long-term durability during daily use.
A well-built shoe rack takes less than an afternoon and costs far less than buying one. Once it is up, every pair has a place, and the floor stays clear for good.
Some Great DIY Shoe Rack Ideas
Tired of tripping over shoes every single day?
These simple DIY shoe rack builds suit every home, every space, and every skill level. Your perfect storage solution starts right here.
1. Wooden Pallet Shoe Rack
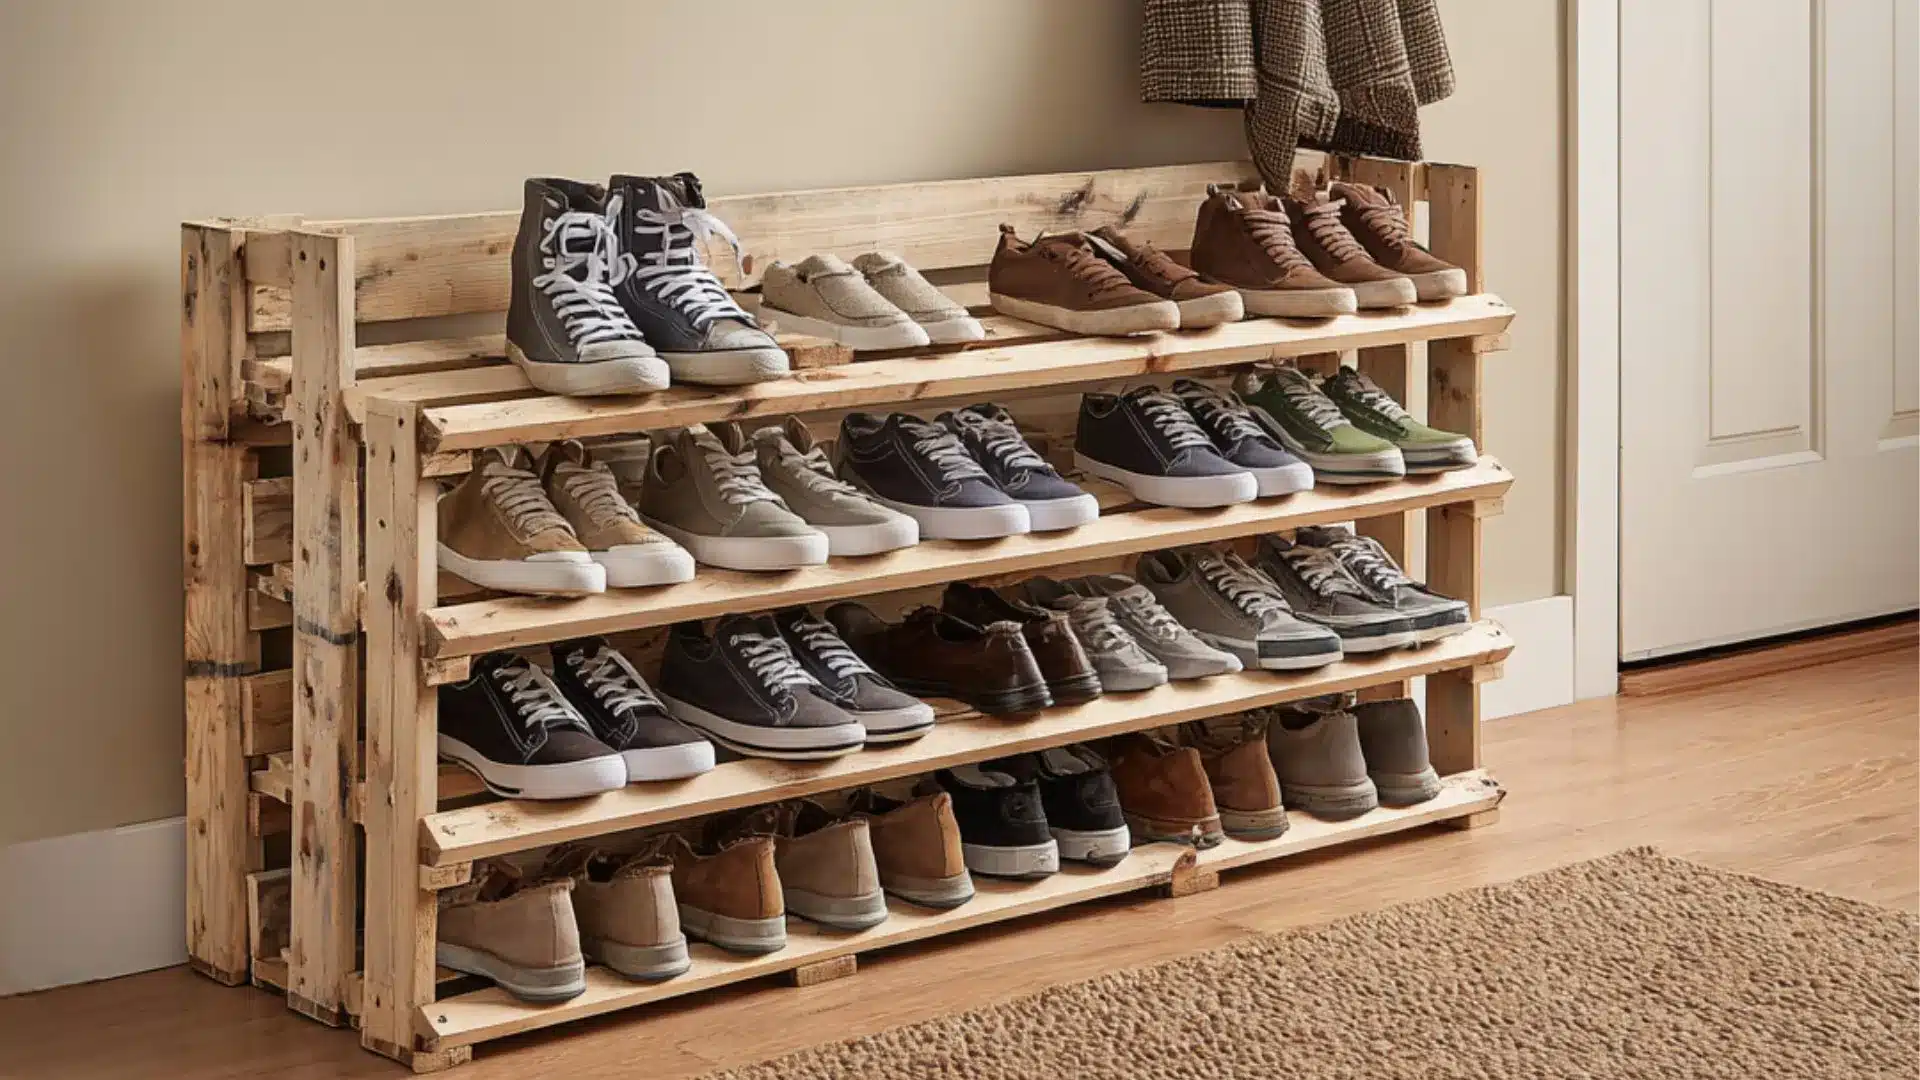
A wooden pallet is placed upright or flat, with slats added to create open sections for storing footwear. It creates a rustic structure suitable for entryways or garages.
Shoes stay visible and separated for quick access. This reduces floor clutter and maintains an organized, open layout that makes daily shoe selection simple and fast.
Materials Needed: Wooden pallets for the main structure; use nails or screws to secure joints. Hammer or drill supports assembly. Sandpaper smooths rough edges.
2. PVC Pipe Shoe Rack
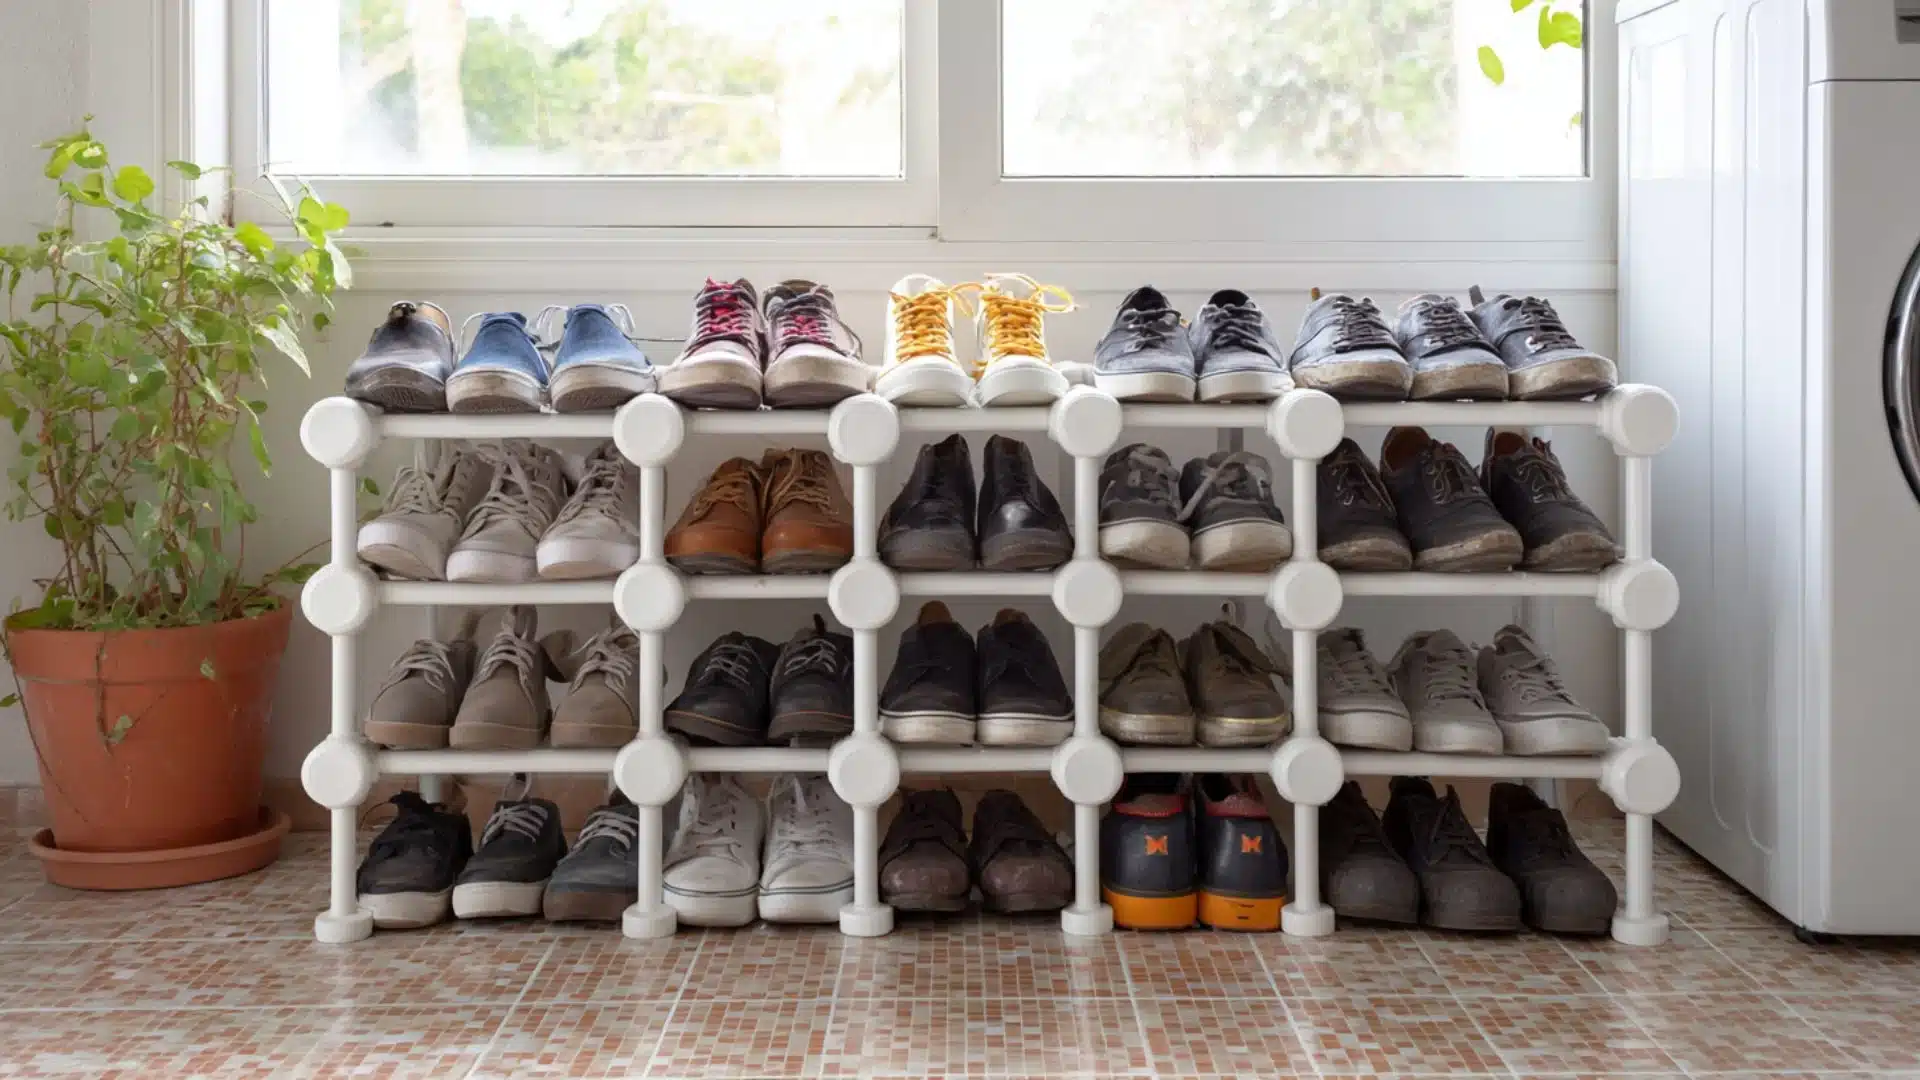
Cut PVC pipes are arranged in stacked rows or honeycomb shapes, with each pipe holding one pair of shoes. The structure forms a compact grid that fits easily into narrow spaces.
Shoes stay clean and separated inside each section. This works well for tight areas where vertical storage is needed without blocking movement.
Materials Needed: PVC pipes create storage slots. A pipe cutter shapes sections. Adhesive joins pieces together. Sandpaper smooths sharp pipe edges.
3. Floating Wall Shelves for Shoes
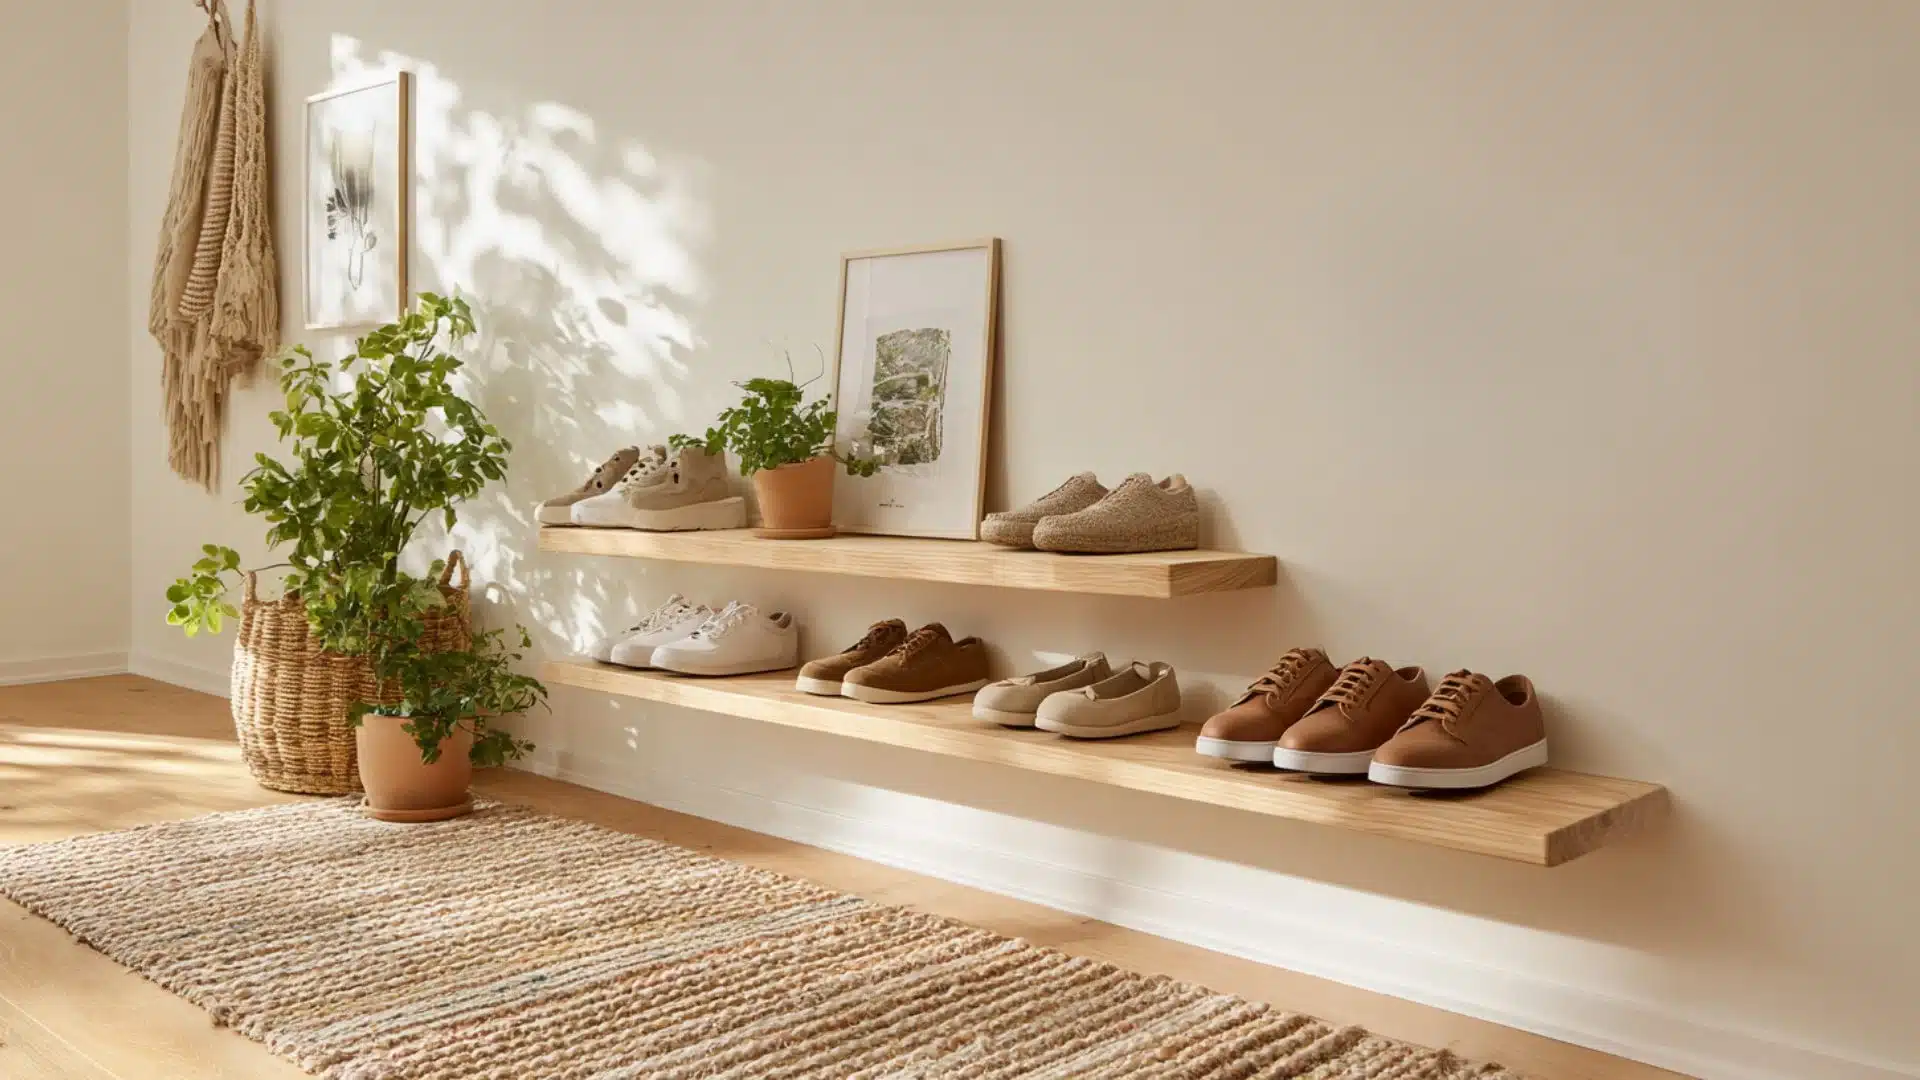
Wooden planks are fixed to walls in layered rows where shoes rest openly. The structure uses vertical wall space instead of floor space.
Shoes remain easy to reach and neatly placed. This improves the use of unused wall areas while maintaining clear floor space in compact rooms or entry zones.
Materials Needed: Wooden planks for shelves. Wall brackets support the structure. Screws and plugs fix it. Drill installs shelves securely.
4. Shoe Storage in Labeled Boxes With Photos
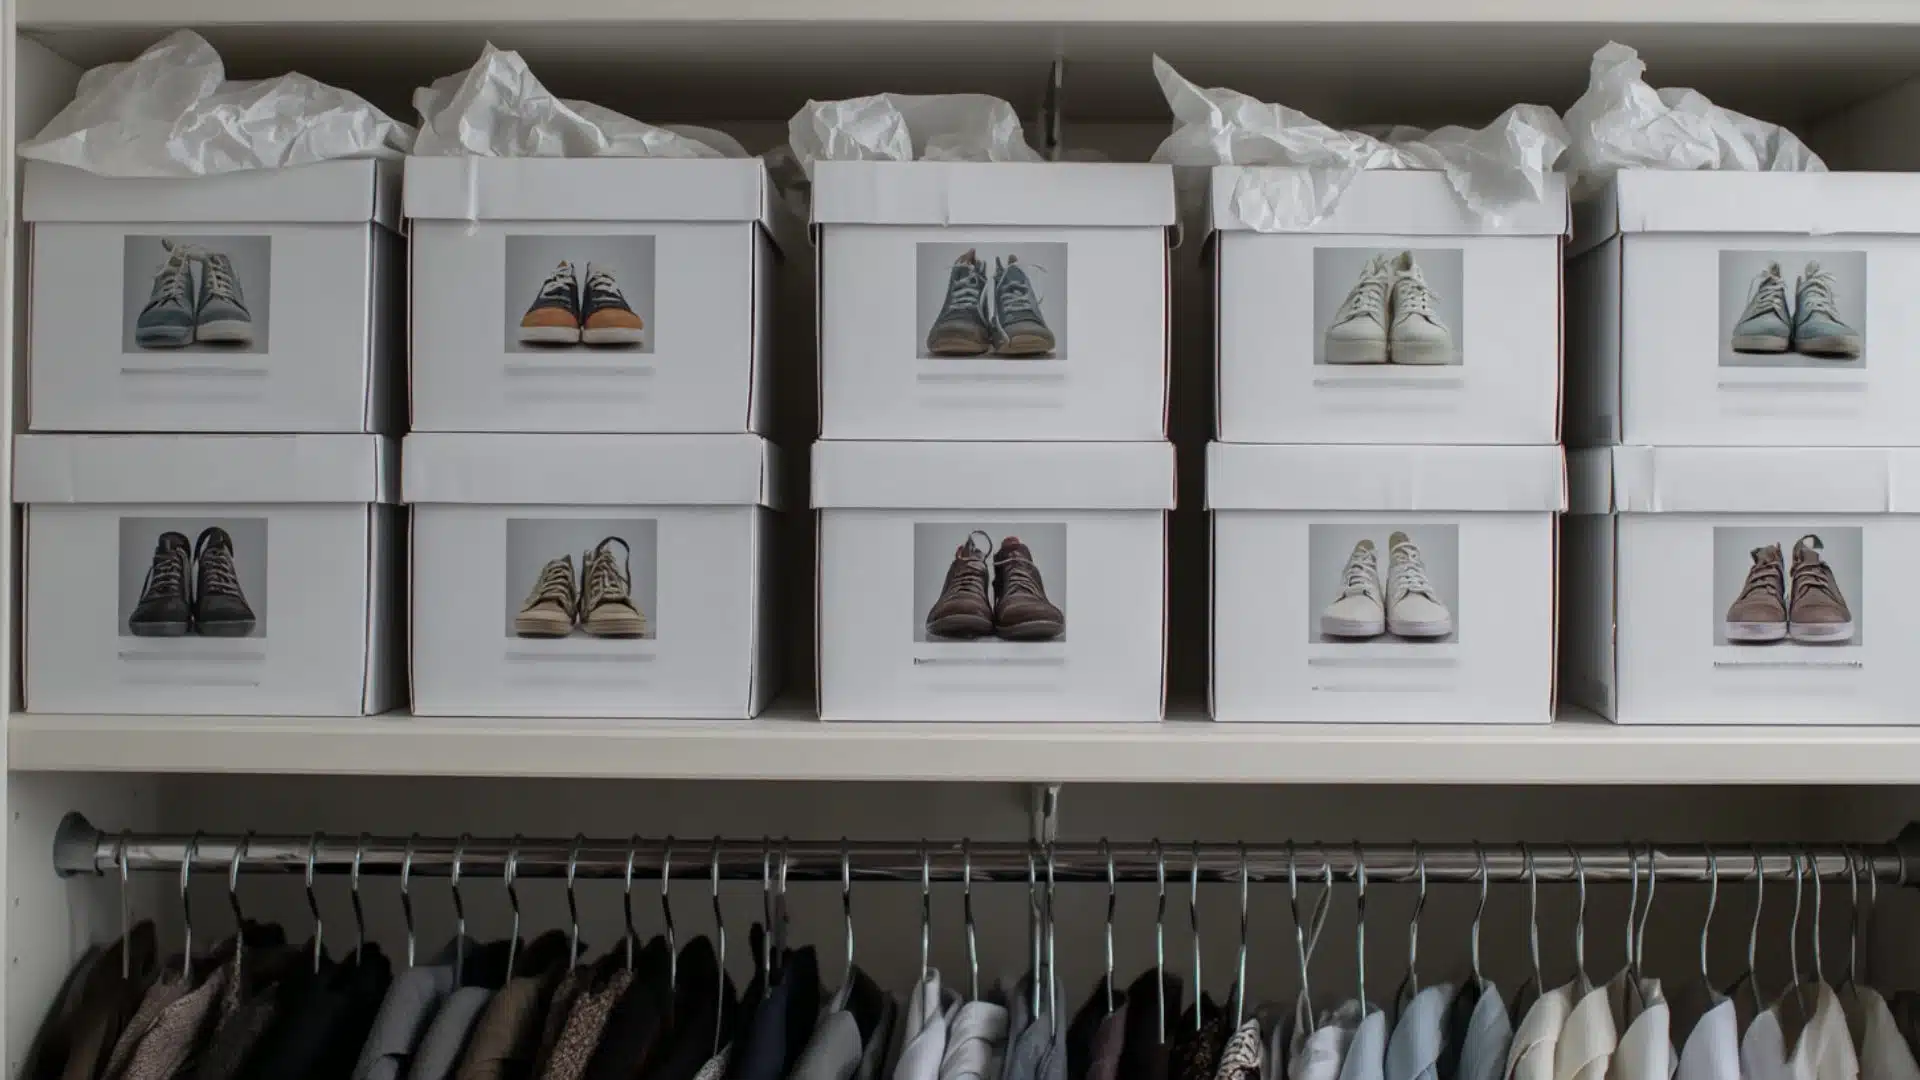
Storage boxes are arranged in stacks, each marked with a shoe photo for quick recognition. The setup keeps footwear hidden yet well sorted. Boxes can be placed in closets or under beds.
This simplifies identification while protecting shoes from dust and seasonal damage during long-term storage.
Materials Needed: Cardboard or plastic boxes to store shoes. Printed photos label contents clearly. Tape or glue fixes images. Marker adds written labels.
5. Repurposed Bookshelf Shoe Rack
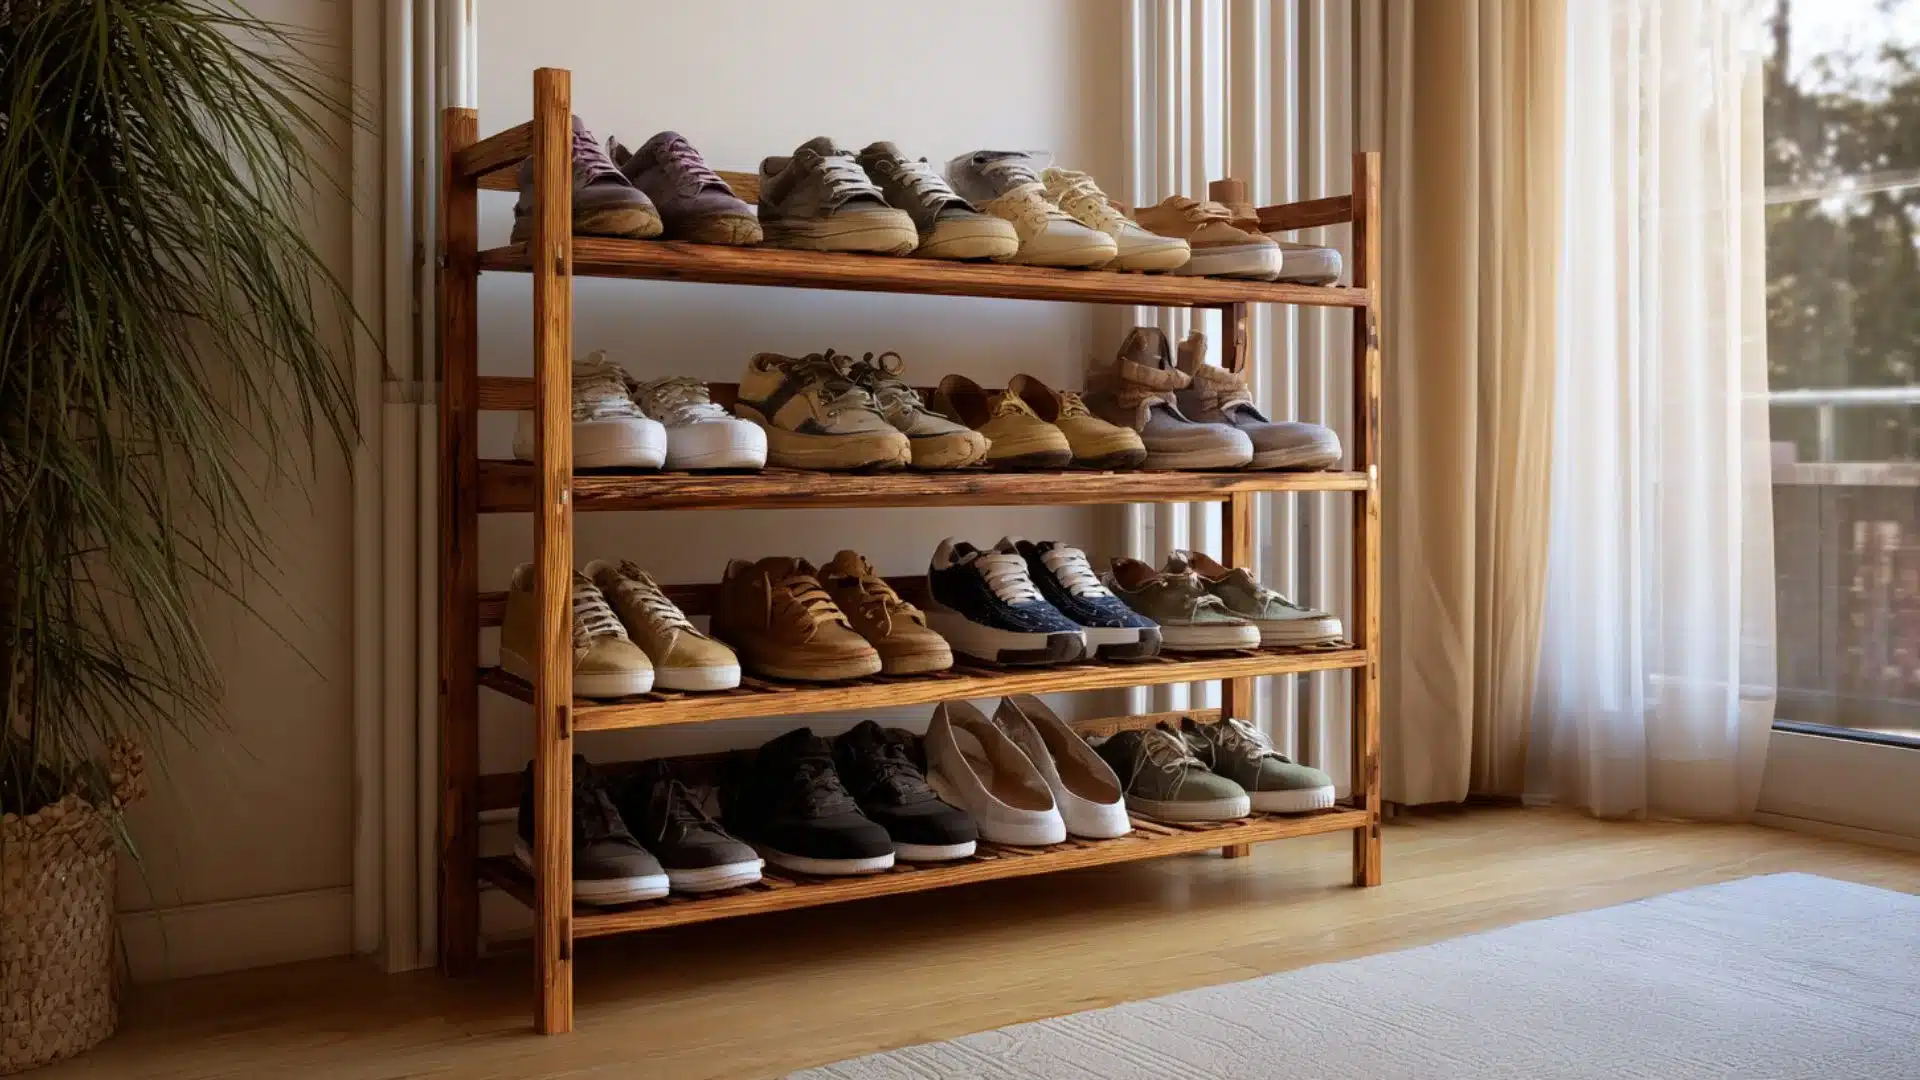
An old bookshelf is repurposed as open shoe storage, with each shelf holding different types of footwear. The structure fits easily in rooms or hallways.
Shoes stay arranged in clear rows for simple selection. This extends the use of existing furniture while improving organization without extra cost or construction effort.
Materials Needed: An old bookshelf forms the base unit. A cleaning cloth prepares the surface. Shelf liners protect the base. Screws reinforce weak sections.
6. Stackable Milk Crate Shoe Rack
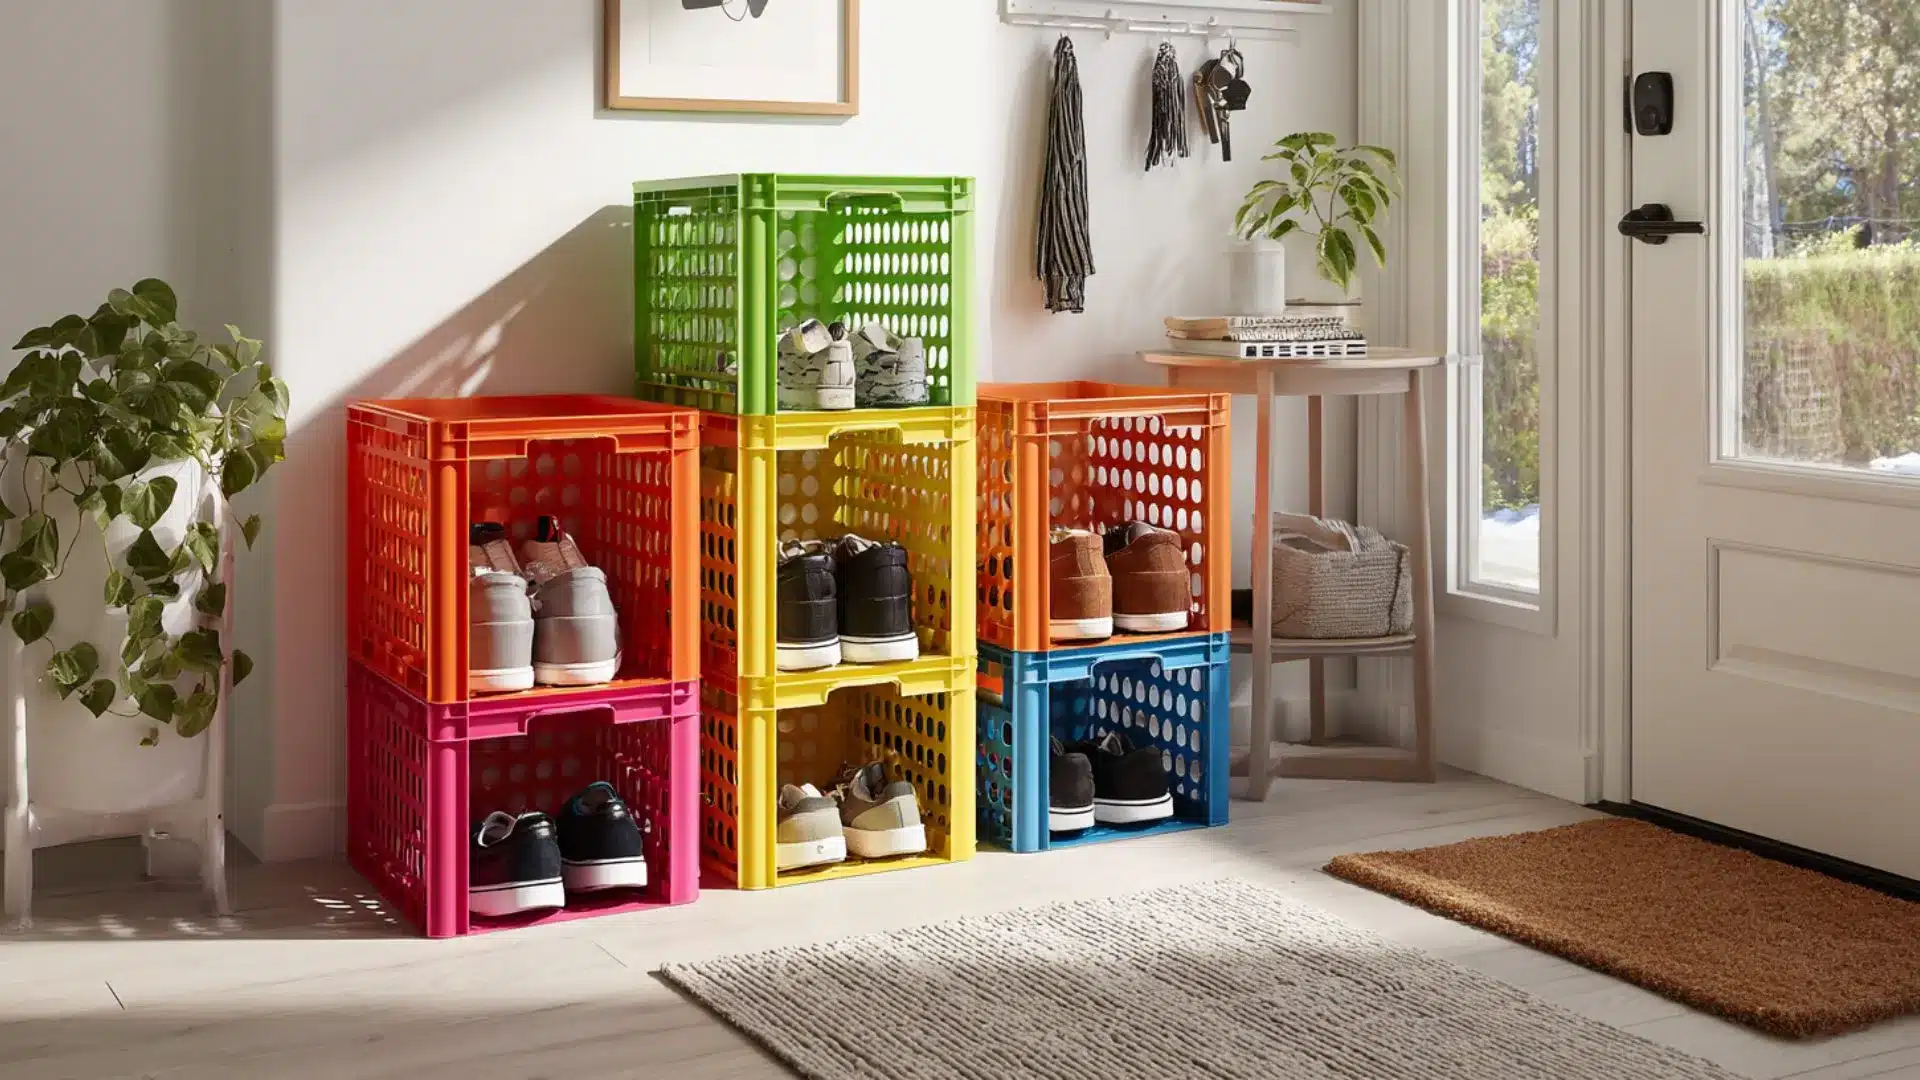
Plastic milk crates are stacked or placed side by side to form open compartments. Each crate holds multiple shoes in separate sections.
The system can be easily expanded or moved. This provides flexible storage that adapts well to changing space needs in homes or rented rooms.
Materials Needed: Plastic milk crates from units. Cable ties secure stacking. A cleaning cloth prepares crates. Wheels are optional for movement.
7. Wooden Ladder Shoe Display
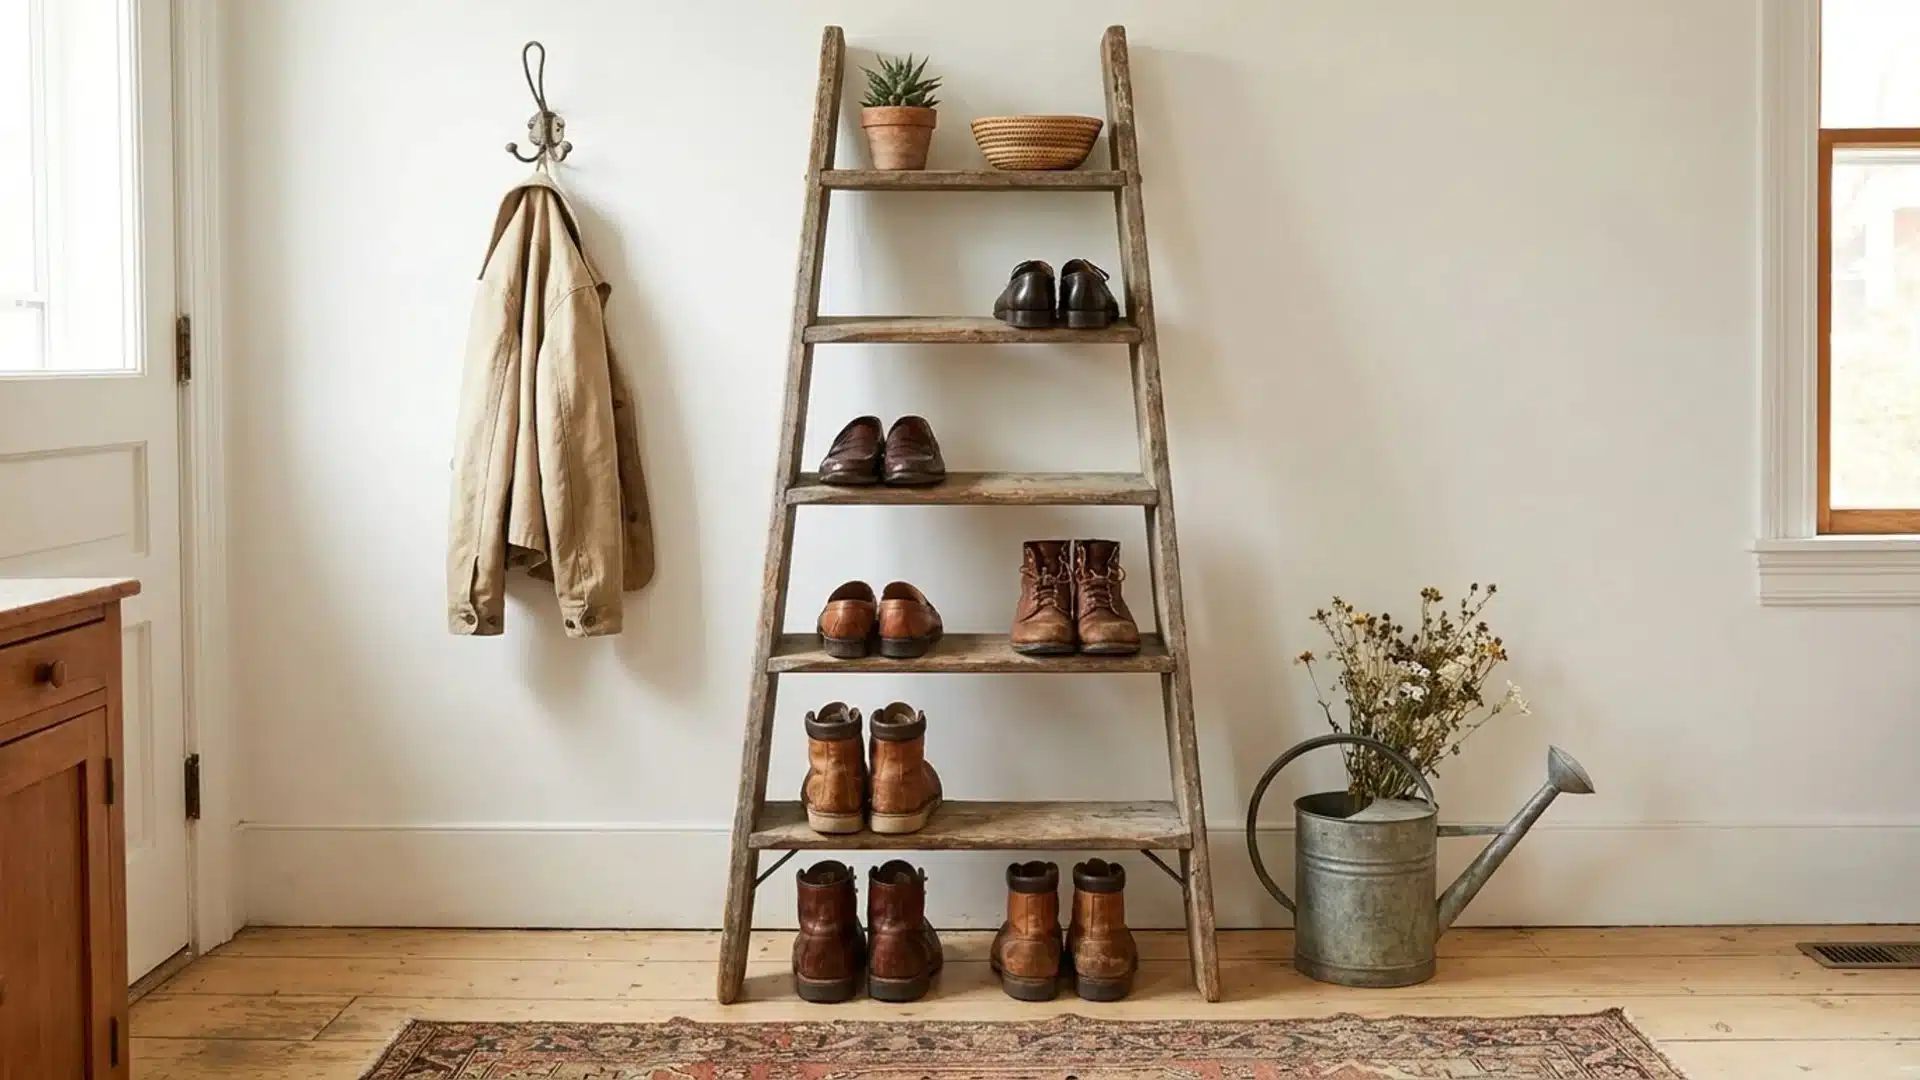
A wooden ladder leans against a wall, with shoes placed across each step. The structure forms a vertical display without a complex setup.
Shoes rest in staggered positions for airflow. This repurposes old ladders into functional storage while keeping footwear visible and easily accessible daily.
Materials Needed: A wooden ladder serves as a structure. Sandpaper smooths the surface. Wall strap adds safety. Wood polish improves finish.
8. Copper Pipe Shoe Stand
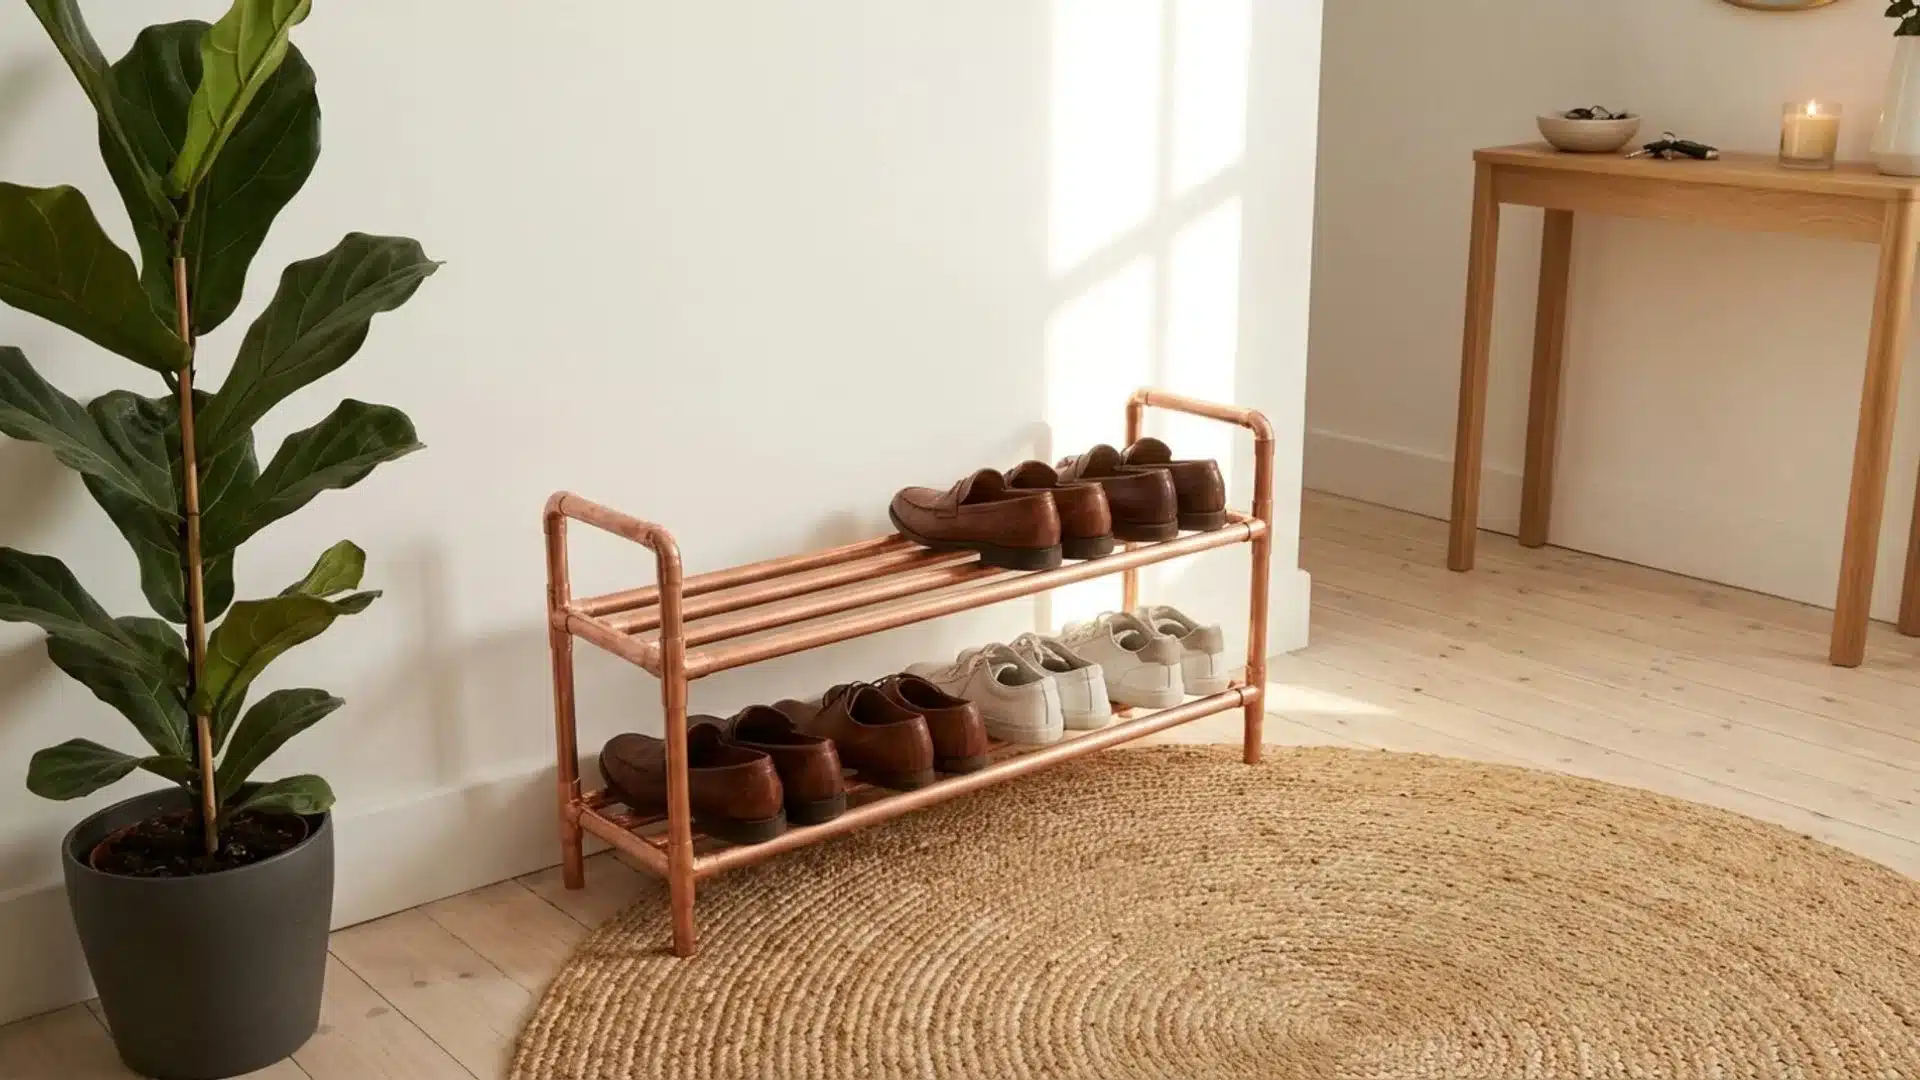
Thin copper pipes are arranged into a simple rectangular frame, with horizontal bars supporting rows of shoes. The structure gives a clean, industrial look suitable for entryways or bedrooms.
Assembly requires cutting pipes to size, joining them with elbow joints, and tightening fittings, providing stable, long-lasting storage that improves room organization.
Materials Needed: Copper pipes form the frame structure. Pipe cutter shapes lengths accurately. Elbow joints connect sections securely. The wrench tightens all fittings firmly.
9. Old Dresser Drawer Shoe Organizer
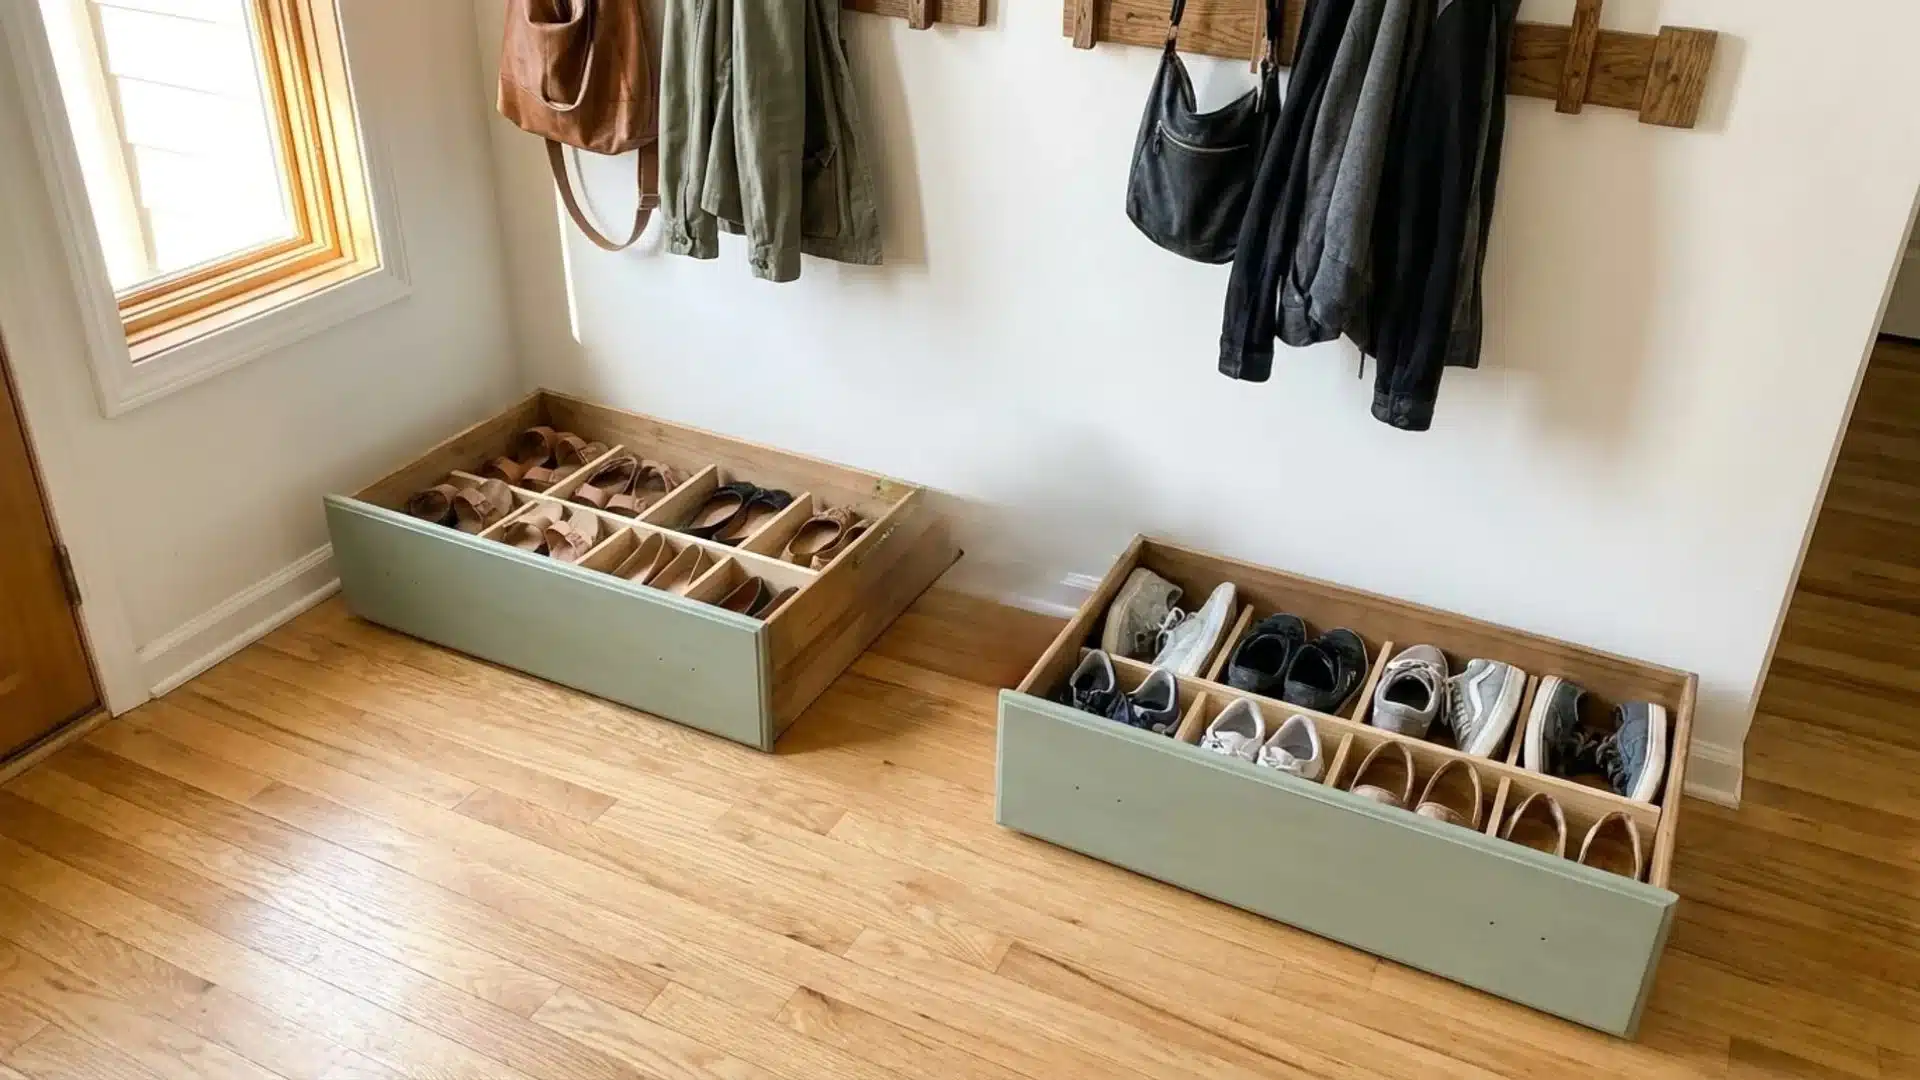
Old dresser drawers are removed and placed individually on the floor or mounted on a wall to act as shoe trays. Each drawer holds pairs neatly while keeping separation between categories.
It extends furniture’s lifespan while providing structured storage that improves space reuse and keeps footwear neatly grouped.
Materials Needed: Old dresser drawers from storage units. Sandpaper smooths surfaces for safety. Screws mount drawers if the wall is fixed. Paint is optional for a finishing look.
10. Rope and Wood Hanging Shoe Rack
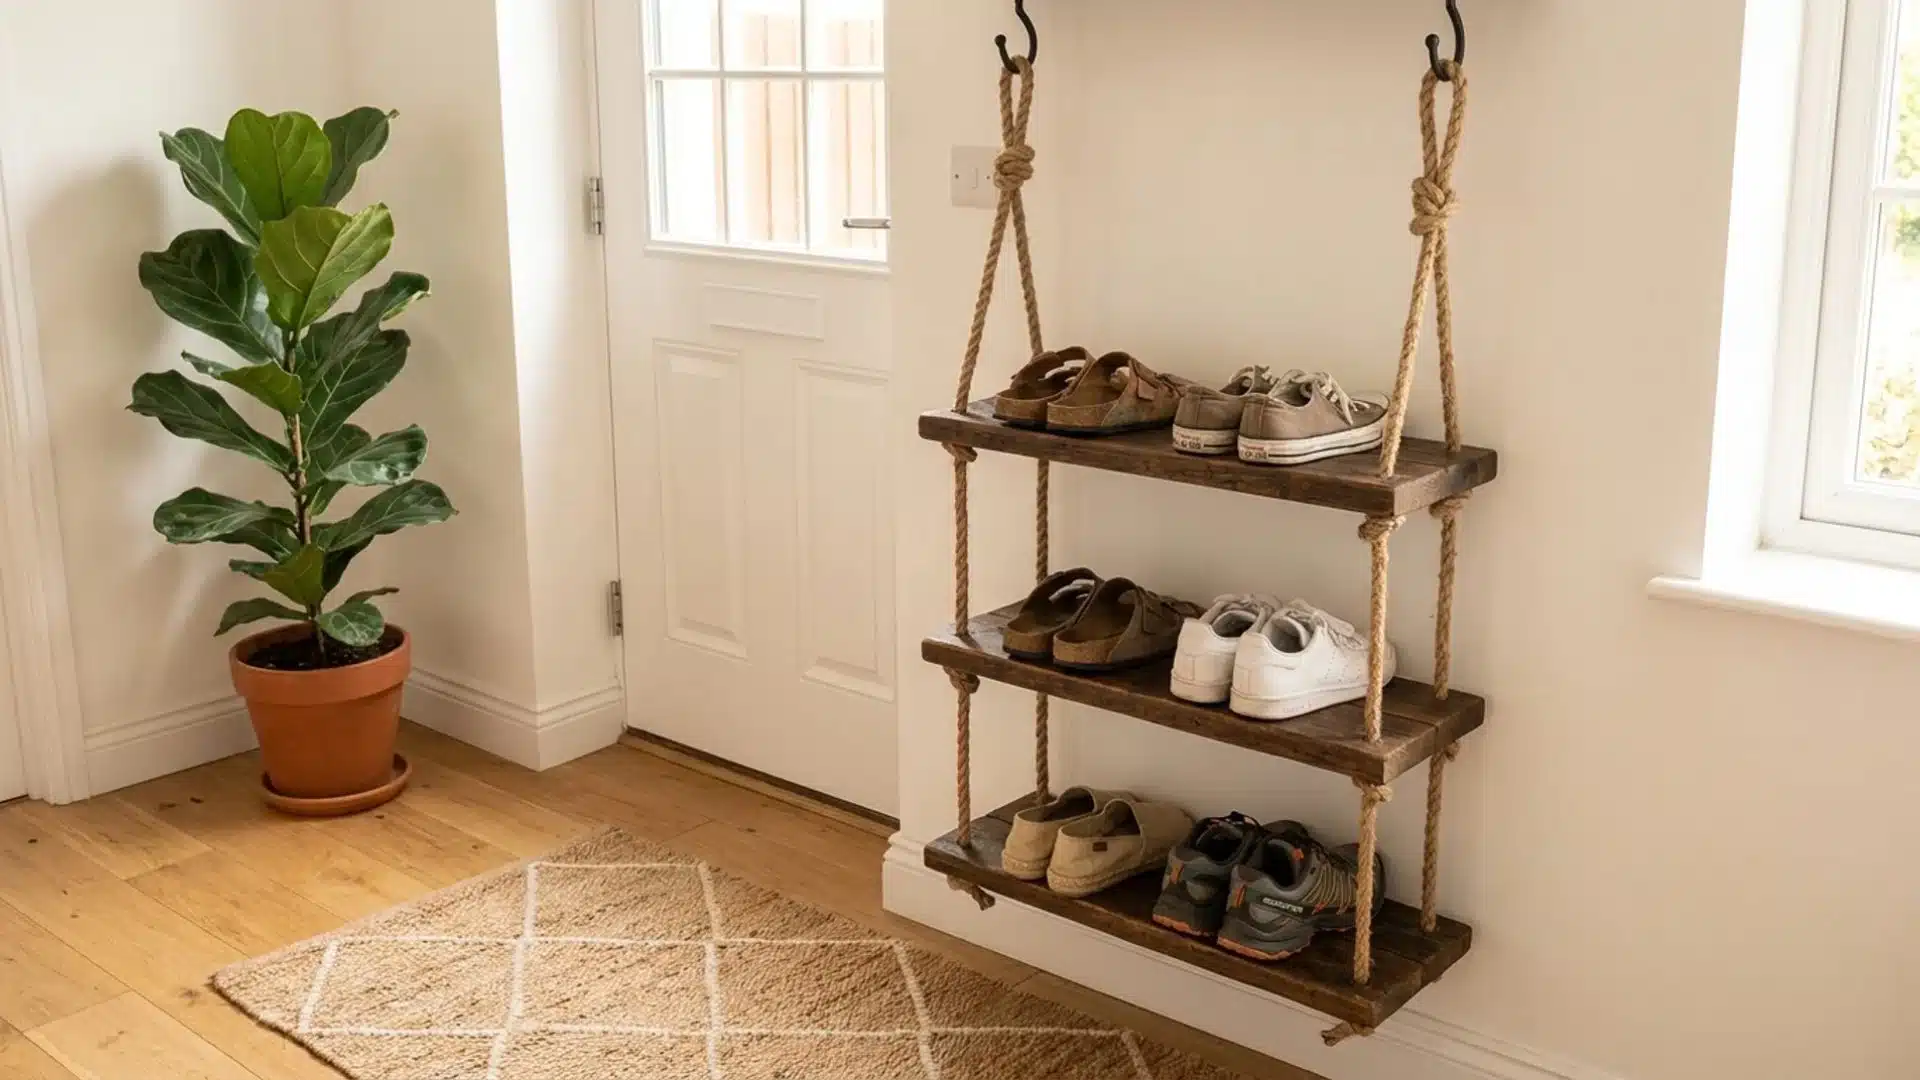
Wooden planks are suspended using thick ropes tied at both ends, forming hanging shelves for shoes. The structure hangs from ceiling hooks or strong wall points.
This arrangement creates vertical storage while adding flexibility and light movement to the space, improving the use of unused upper areas in compact rooms.
Materials Needed: Wooden planks act as shelves. A strong rope supports the hanging structure. Ceiling hooks provide anchor points. Drill installs hooks securely.
11. Wicker Basket Shoe Storage Unit
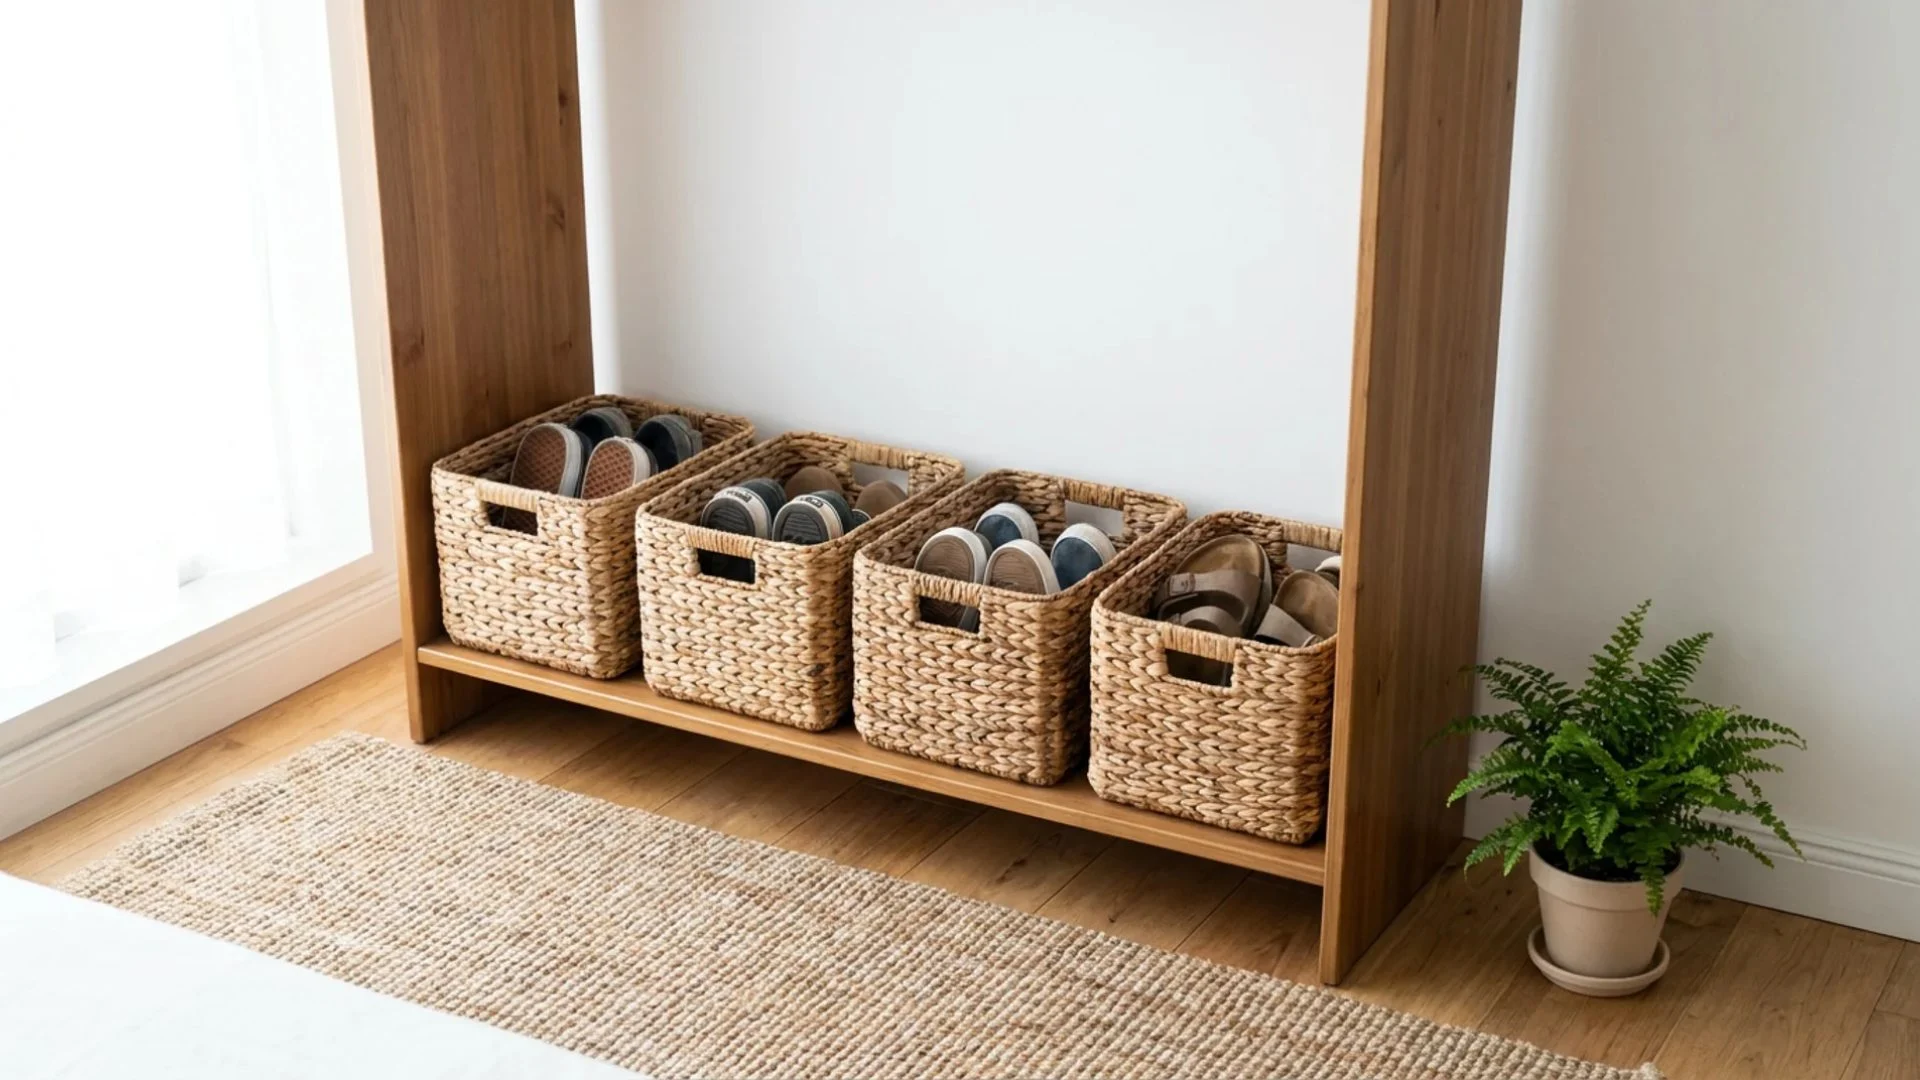
Wicker baskets are arranged in rows on shelves or inside cabinets, each basket holding a set of shoes. The setup gives a soft, natural storage appearance suitable for bedrooms or entry spaces.
This improves organization while keeping footwear contained and easy to carry when needed.
Materials Needed: Wicker baskets store shoes neatly. Labels identify each basket clearly. The shelf unit supports placement. Cloth liners are optional for protection.
12. Pull-Out Shoe Drawer Under Stairs
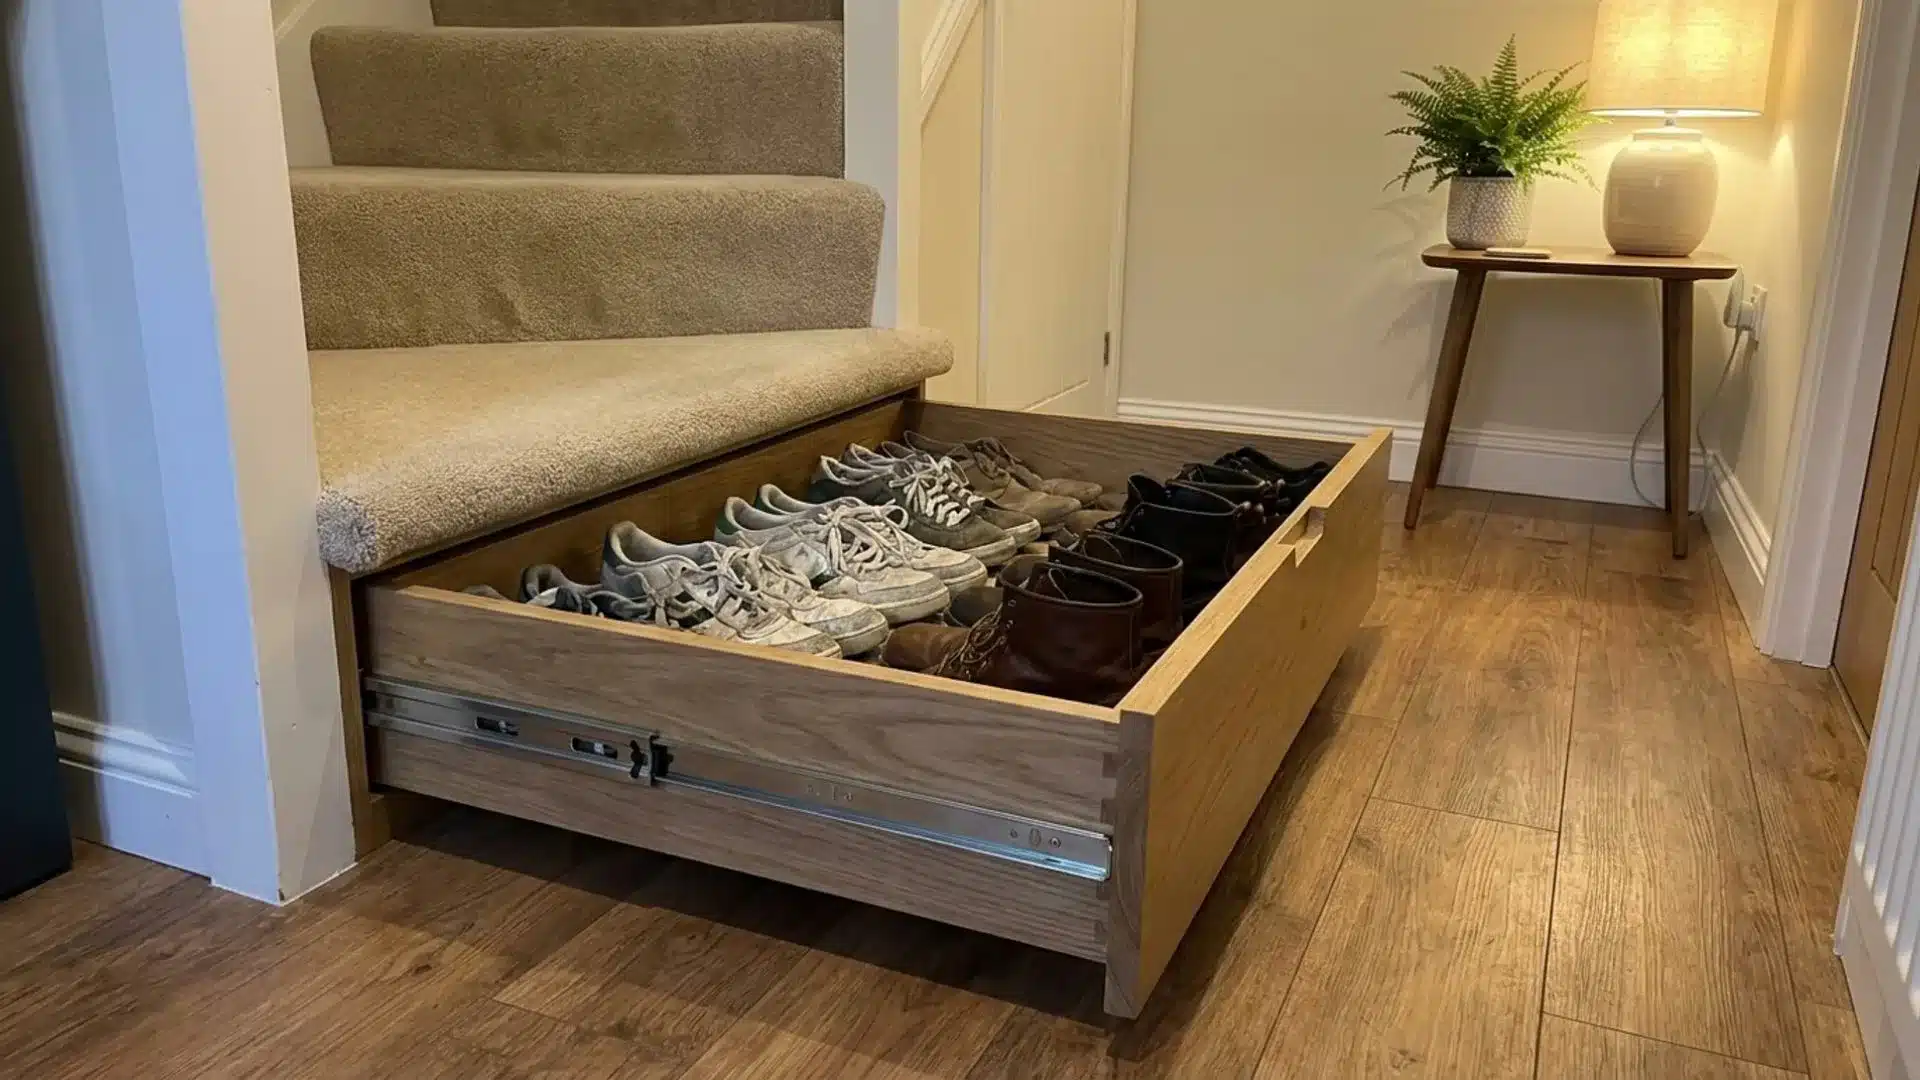
A sliding drawer system is installed beneath the staircase space where shoes are stored in hidden compartments. The structure moves smoothly on rails, allowing full access when pulled out.
This design uses unused areas effectively while maintaining a clean and hidden storage solution that improves home organization.
Materials Needed: Wooden boards to build the drawer frame. Sliding rails allow smooth movement. Screws fix the structure firmly. A measuring tape ensures an accurate fit.
13. Cloth Pocket Hanging Shoe Organizer
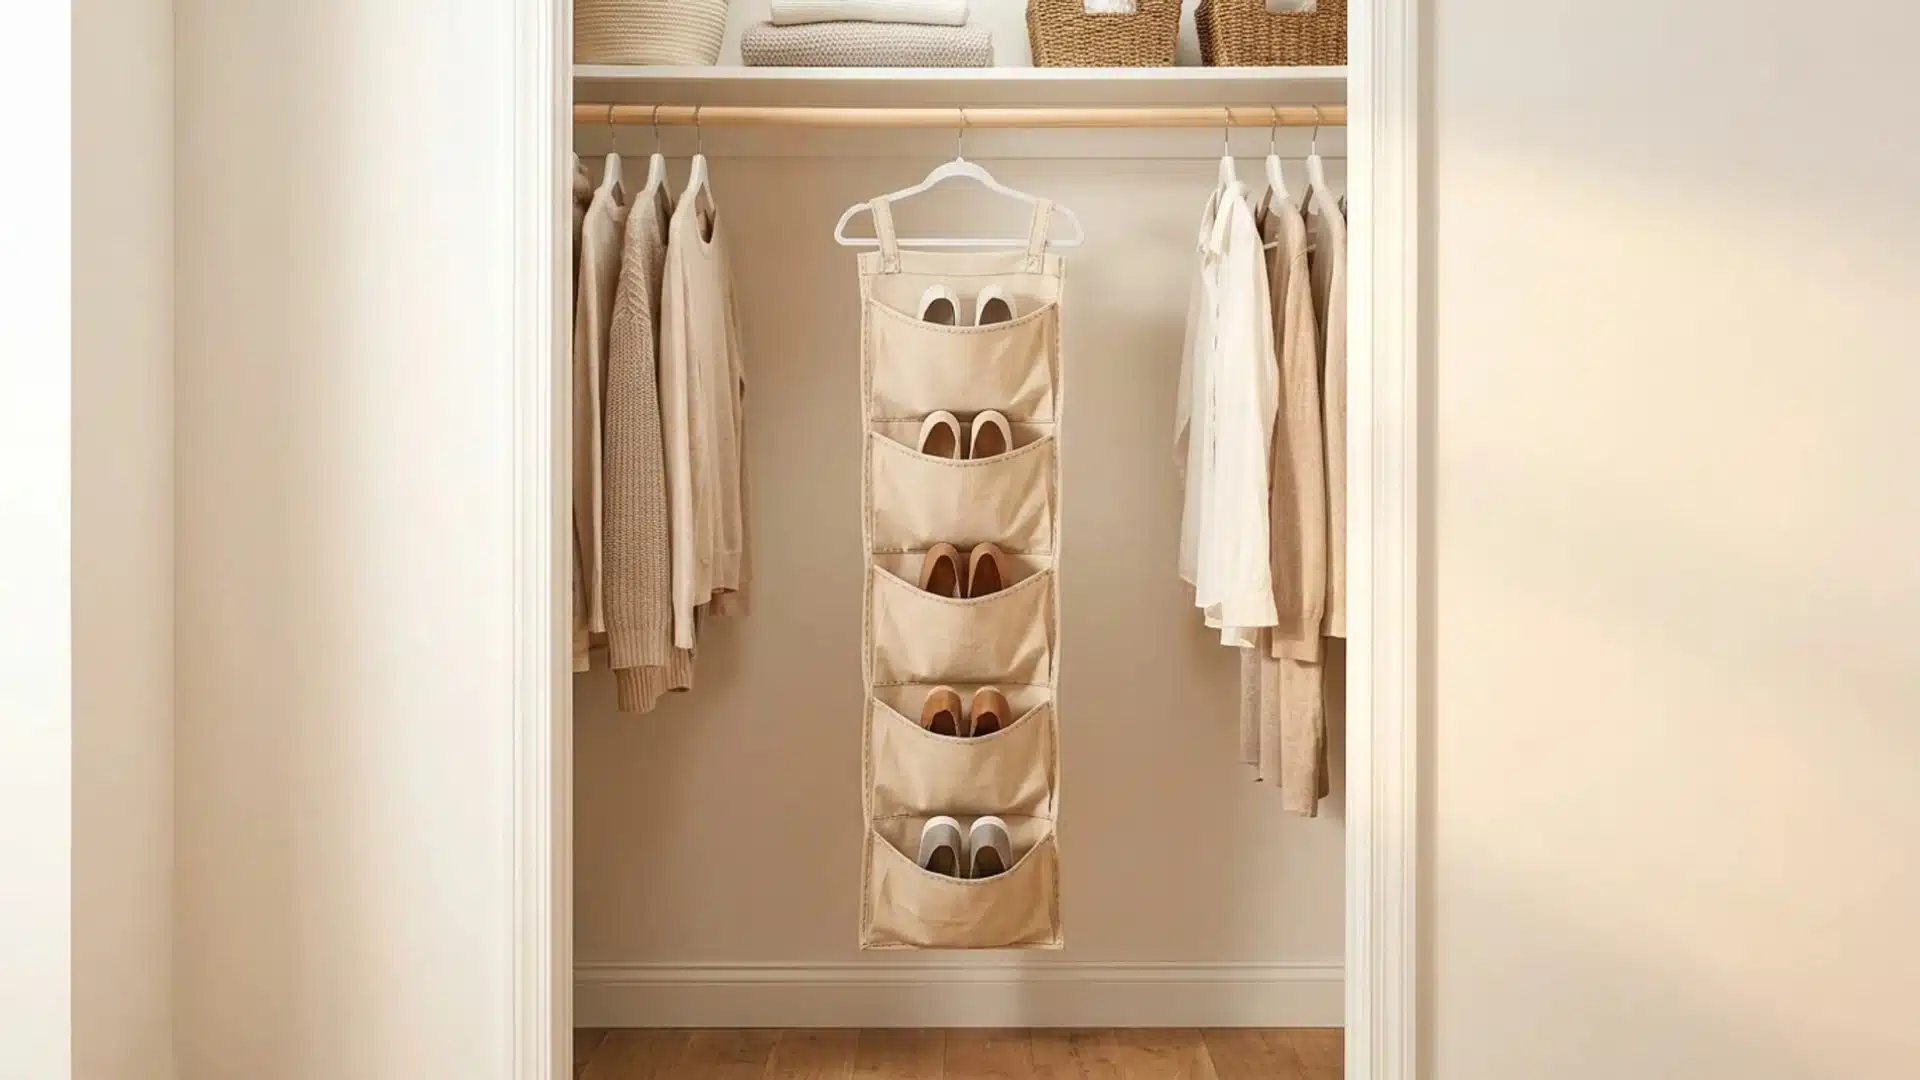
A denim fabric hanging organizer is mounted on a closet rod or hook system and features multiple stitched pockets stacked vertically. Shoes slide into each pocket and remain partially covered.
This creates compact vertical storage that uses narrow corners efficiently while keeping lightweight footwear grouped and easy to retrieve for daily use.
Materials Needed: Denim fabric forms the pocket base. Hooks support the hanging system firmly. Thread stitches compartments evenly. The closet rod holds the structure.
14. DIY Mudroom Shoe Cubby With Hooks Above
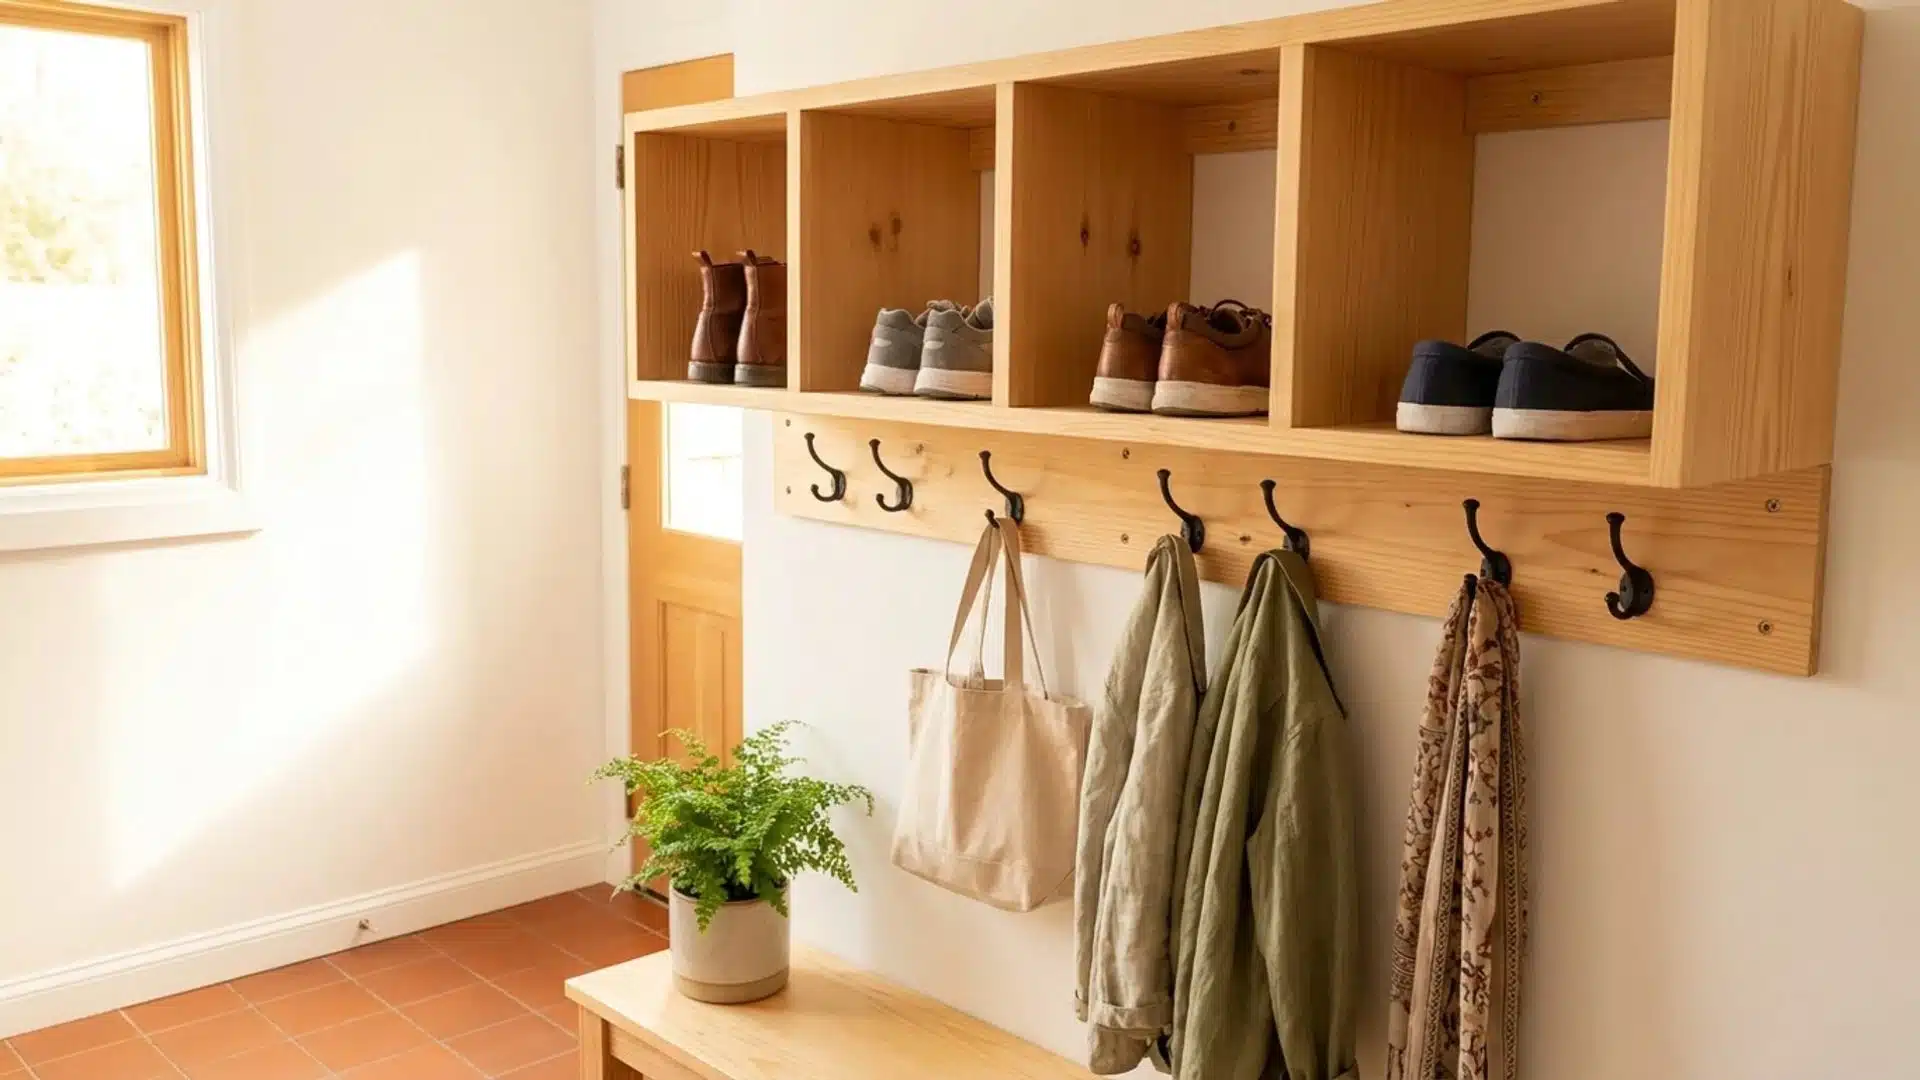
A wooden cubby unit is built at floor level with hooks installed above for jackets or bags. Shoes are placed inside separate cubby slots.
Building includes framing compartments, fixing wall-mounted hooks, and securing the structure against the wall. This setup improves entryway organization by combining footwear storage with hanging space for daily essentials.
Materials Needed: Plywood creates cubby sections. Wall hooks support hanging items. Screws fix the frame tightly. Drill installs all fittings.
15. Ottoman with Shoe Storage
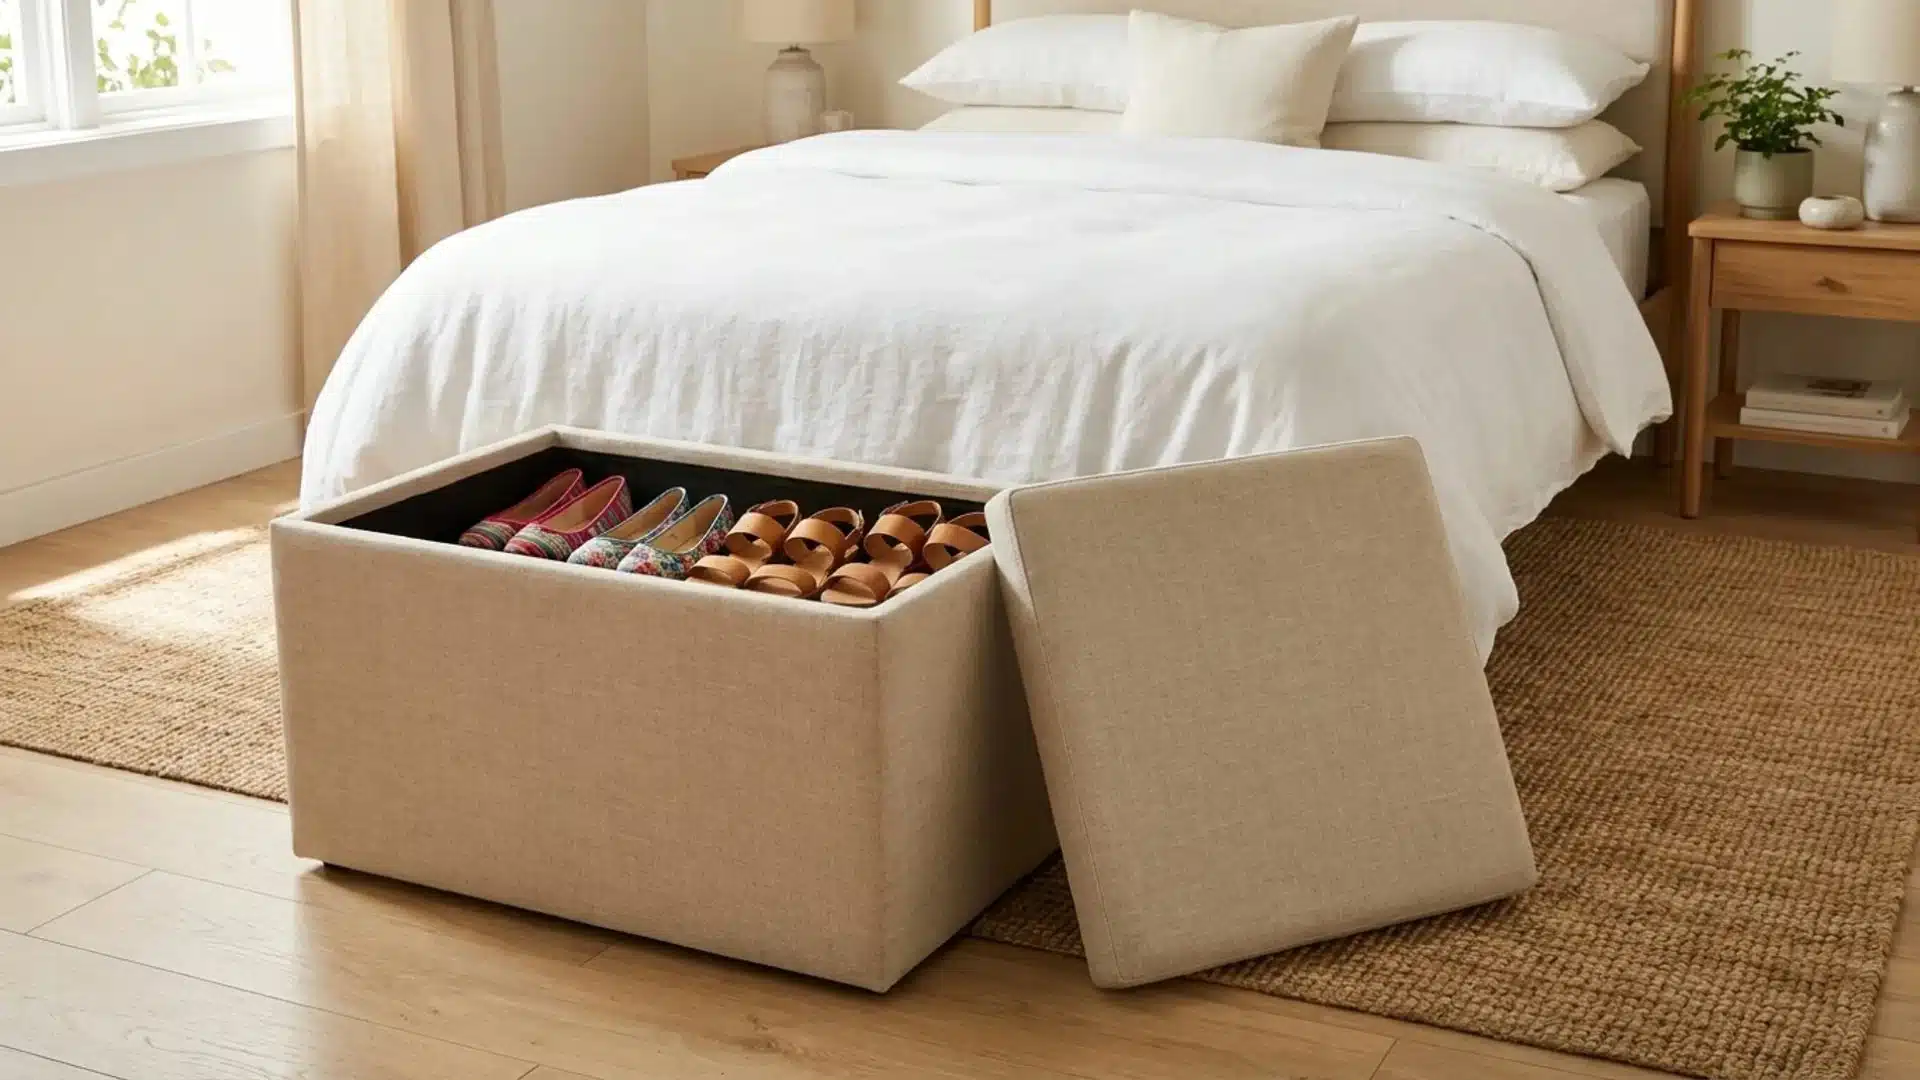
A padded ottoman is modified or built with a hollow interior used for shoe storage. The top opens to reveal hidden compartments. Construction involves building a wooden box frame, adding cushioning, and attaching a hinged lid.
This design enhances dual functionality by combining seating and concealed storage into a single compact piece of furniture.
Materials Needed: A wooden frame builds the base structure. Foam adds a seating comfort layer. Fabric covers the exterior finish. Hinges allow the lid to open.
16. Cedar Shoe Bench with Open Bottom Storage
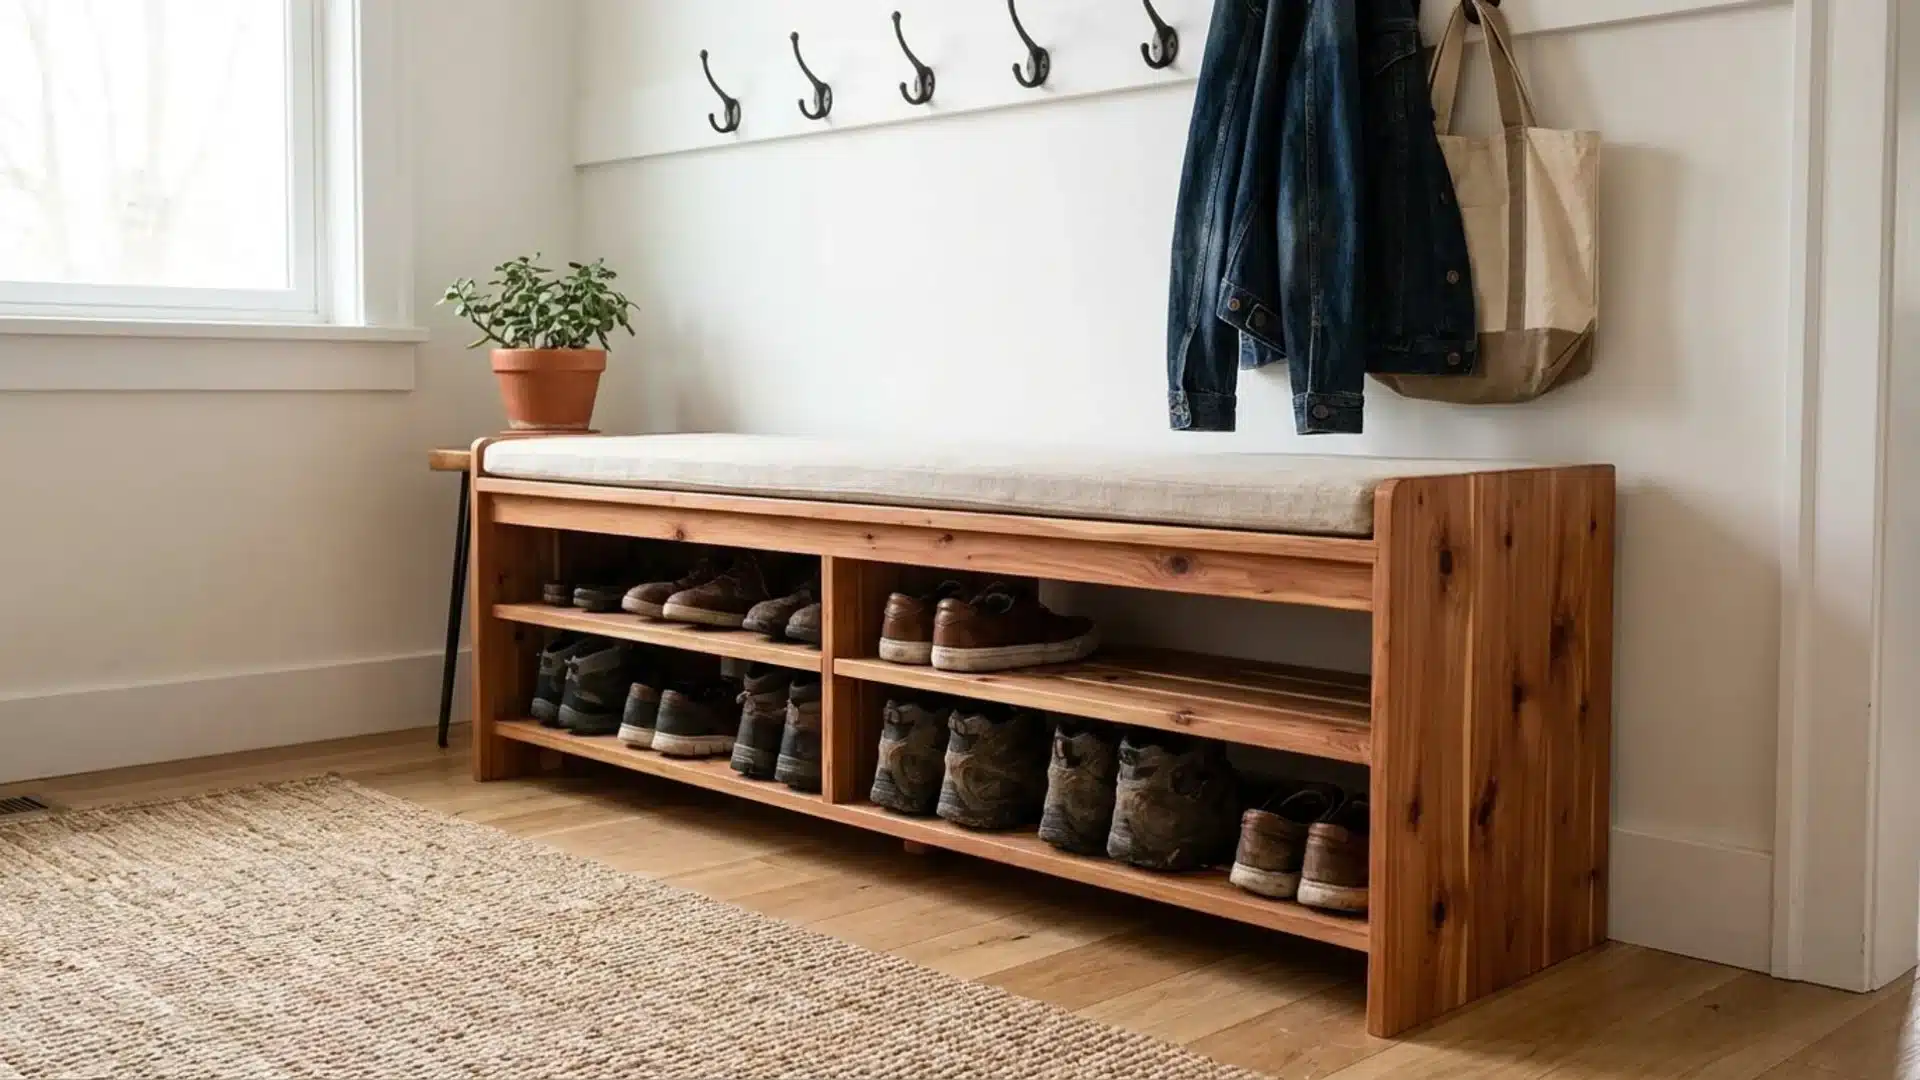
A wooden bench made from cedar includes an open lower section where shoes are placed in rows. The top serves as seating while the bottom remains accessible.
Building involves constructing a sturdy bench frame, adding cross supports, and leaving the bottom space open. This improves entryway usability by combining seating with visible footwear storage.
Materials Needed: Cedar wood forms a bench frame. Screws secure joints tightly. Saw cuts wooden panels. Sandpaper smooths surfaces.
17. Repurposed TV Stand Shoe Rack
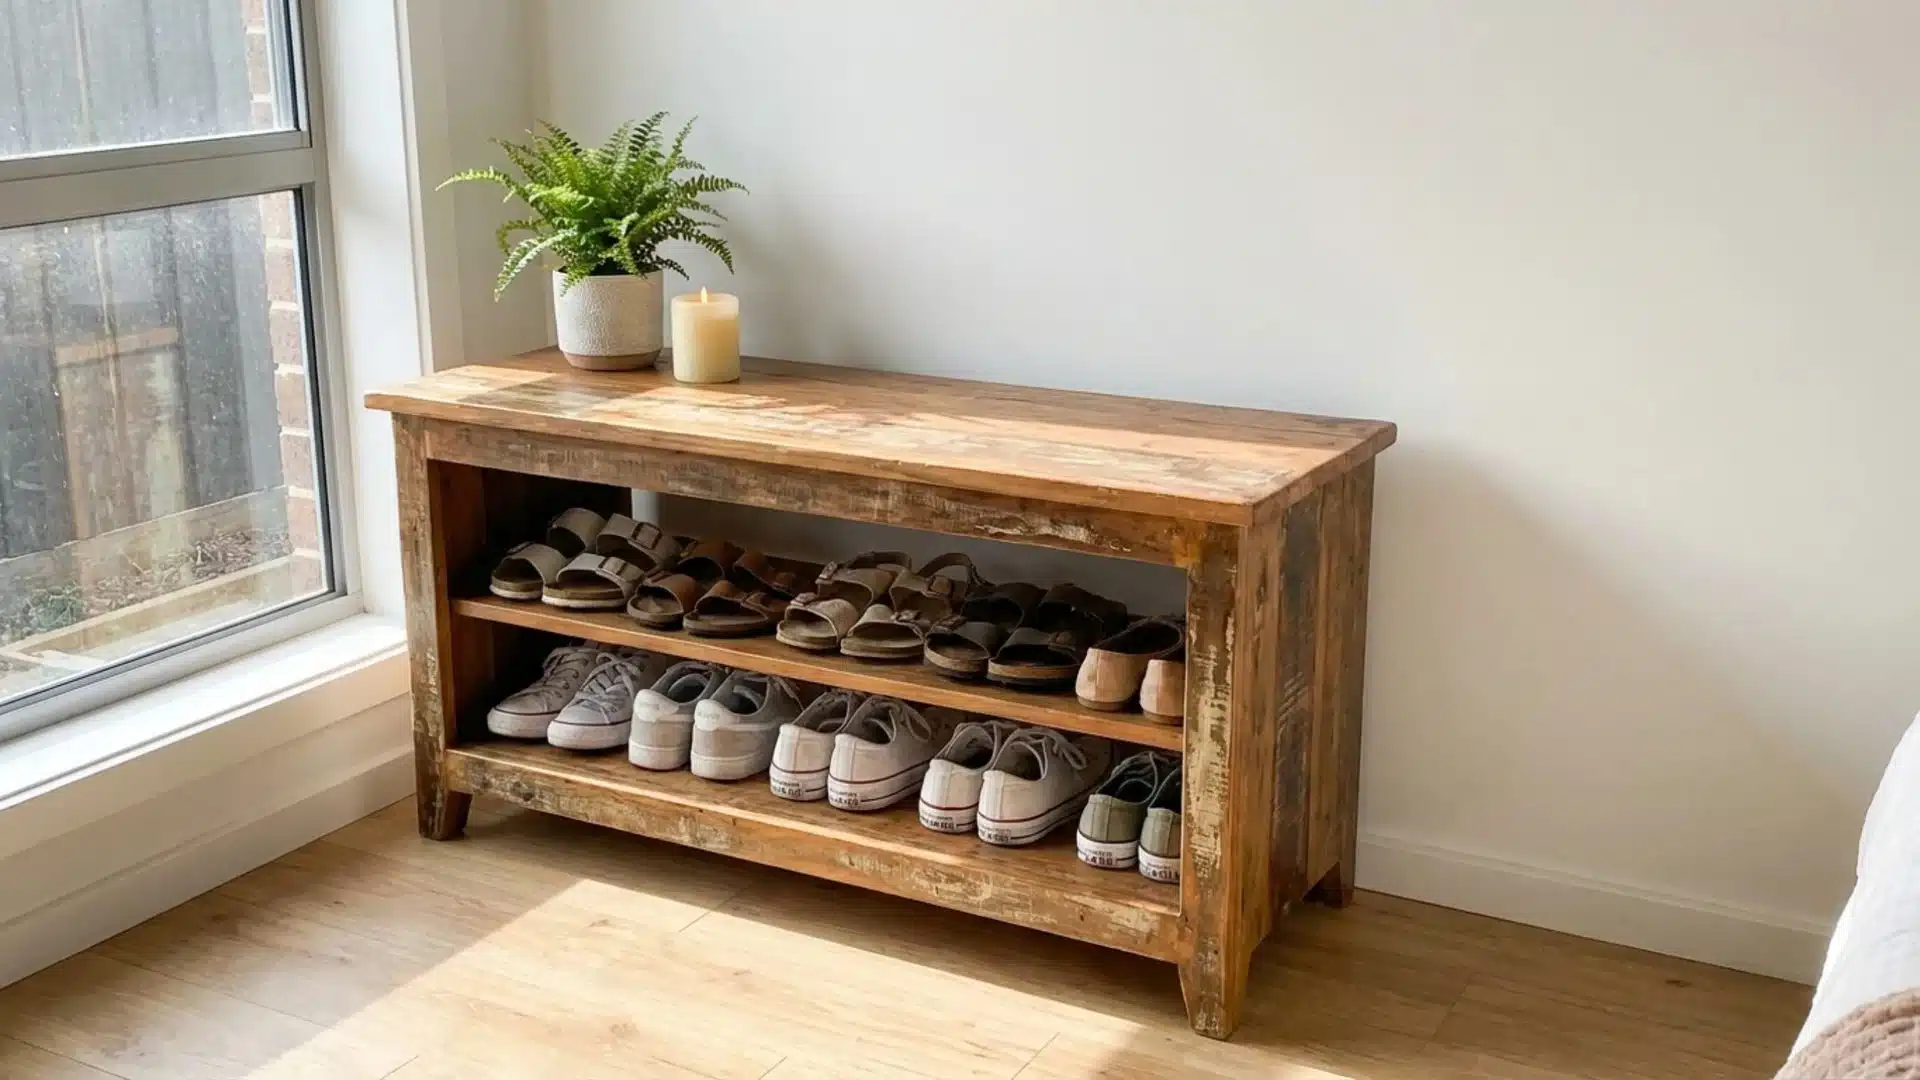
An old TV stand is repurposed by converting its shelves into shoe storage. Shoes are placed in rows where electronics once stood. Setup involves cleaning the unit, adjusting shelf heights if needed, and reinforcing the structure.
This approach improves the reuse of existing furniture while creating structured storage without additional construction work.
Materials Needed: An old TV stand serves as the base. A cleaning cloth prepares the surface. Screws reinforce weak joints. Shelf liners protect surfaces.
18. Hanging Knotted Net Shoe Rack
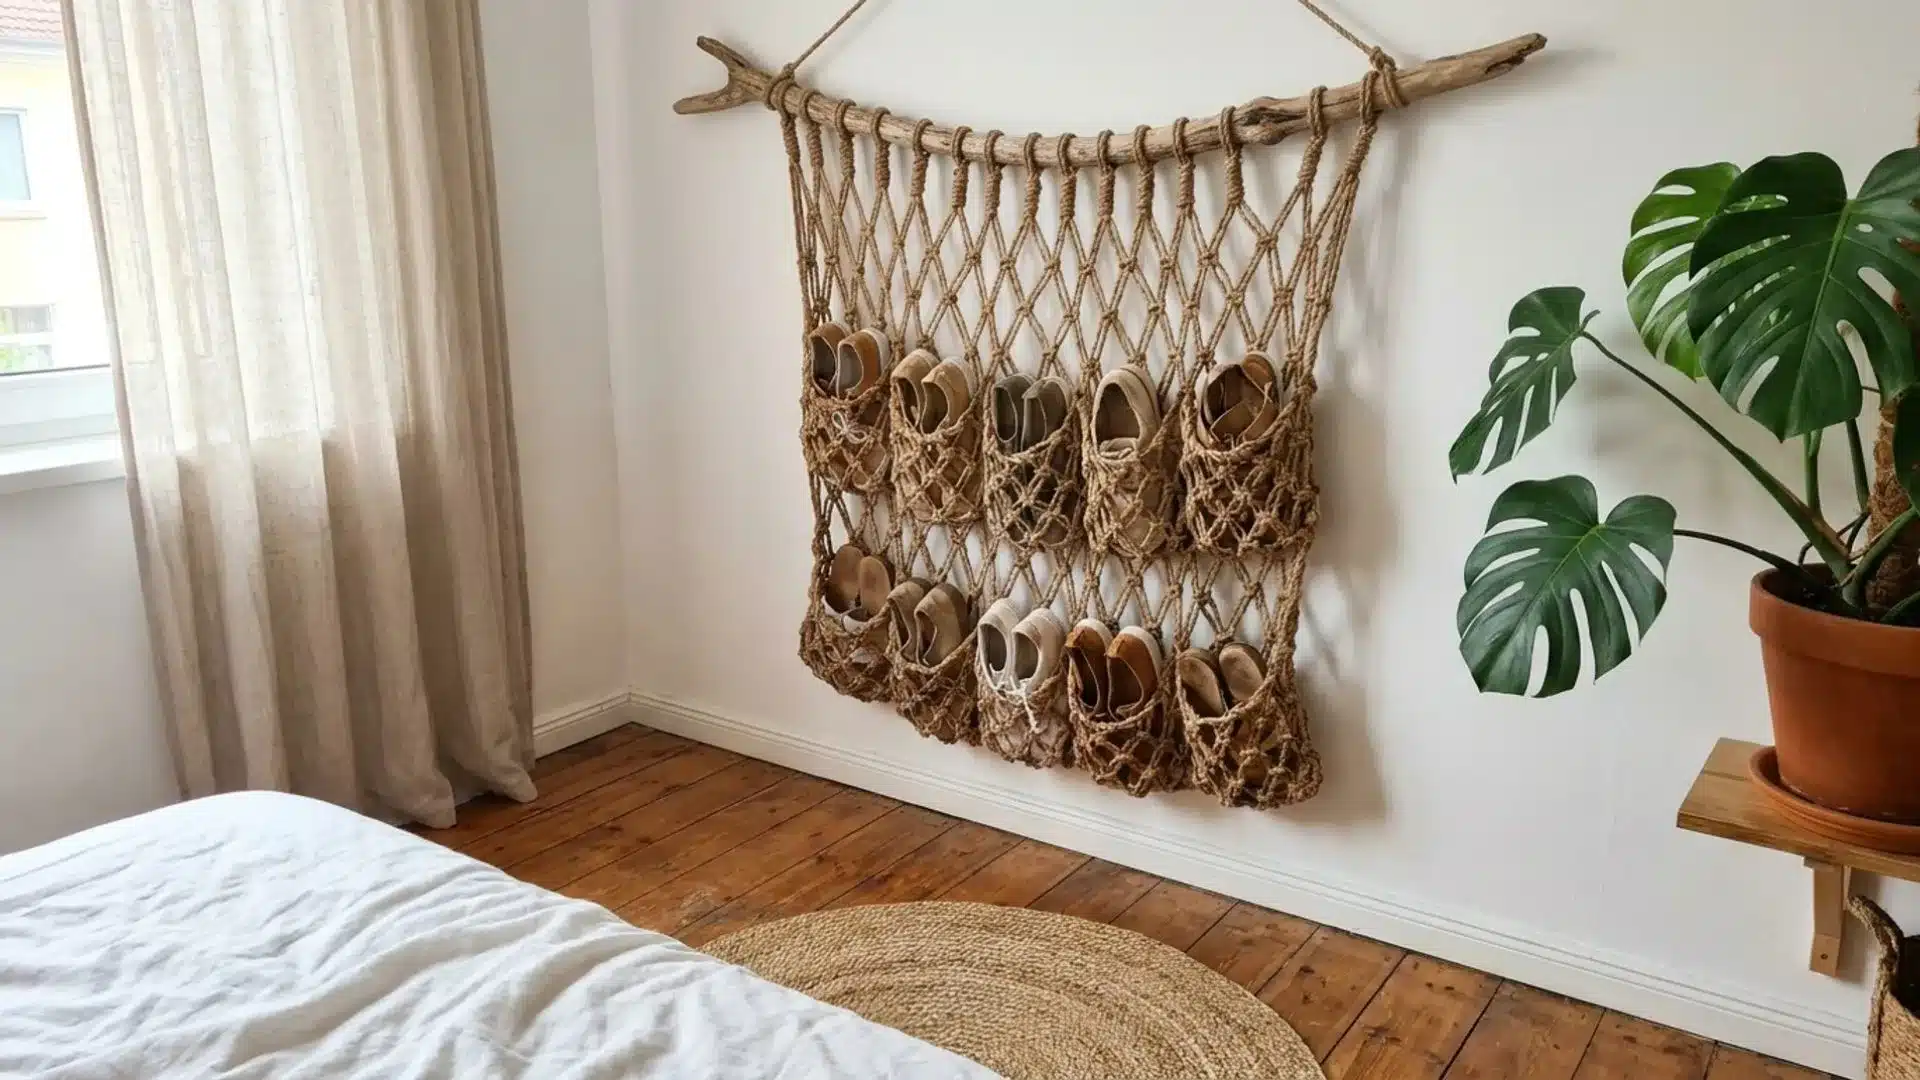
A rope net is knotted into pockets or loops and suspended from hooks on a wall or ceiling. Shoes are placed inside each net opening. Construction includes tying knots evenly, securing anchor points, and balancing the structure.
This design improves vertical storage use while creating flexible compartments for lightweight footwear.
Materials Needed: Strong rope forms a net structure. Ceiling hooks support the hanging system. The knotting tool assists in tying. A measuring tape ensures spacing.
19. Stair-Step Wooden Shoe Display Stand
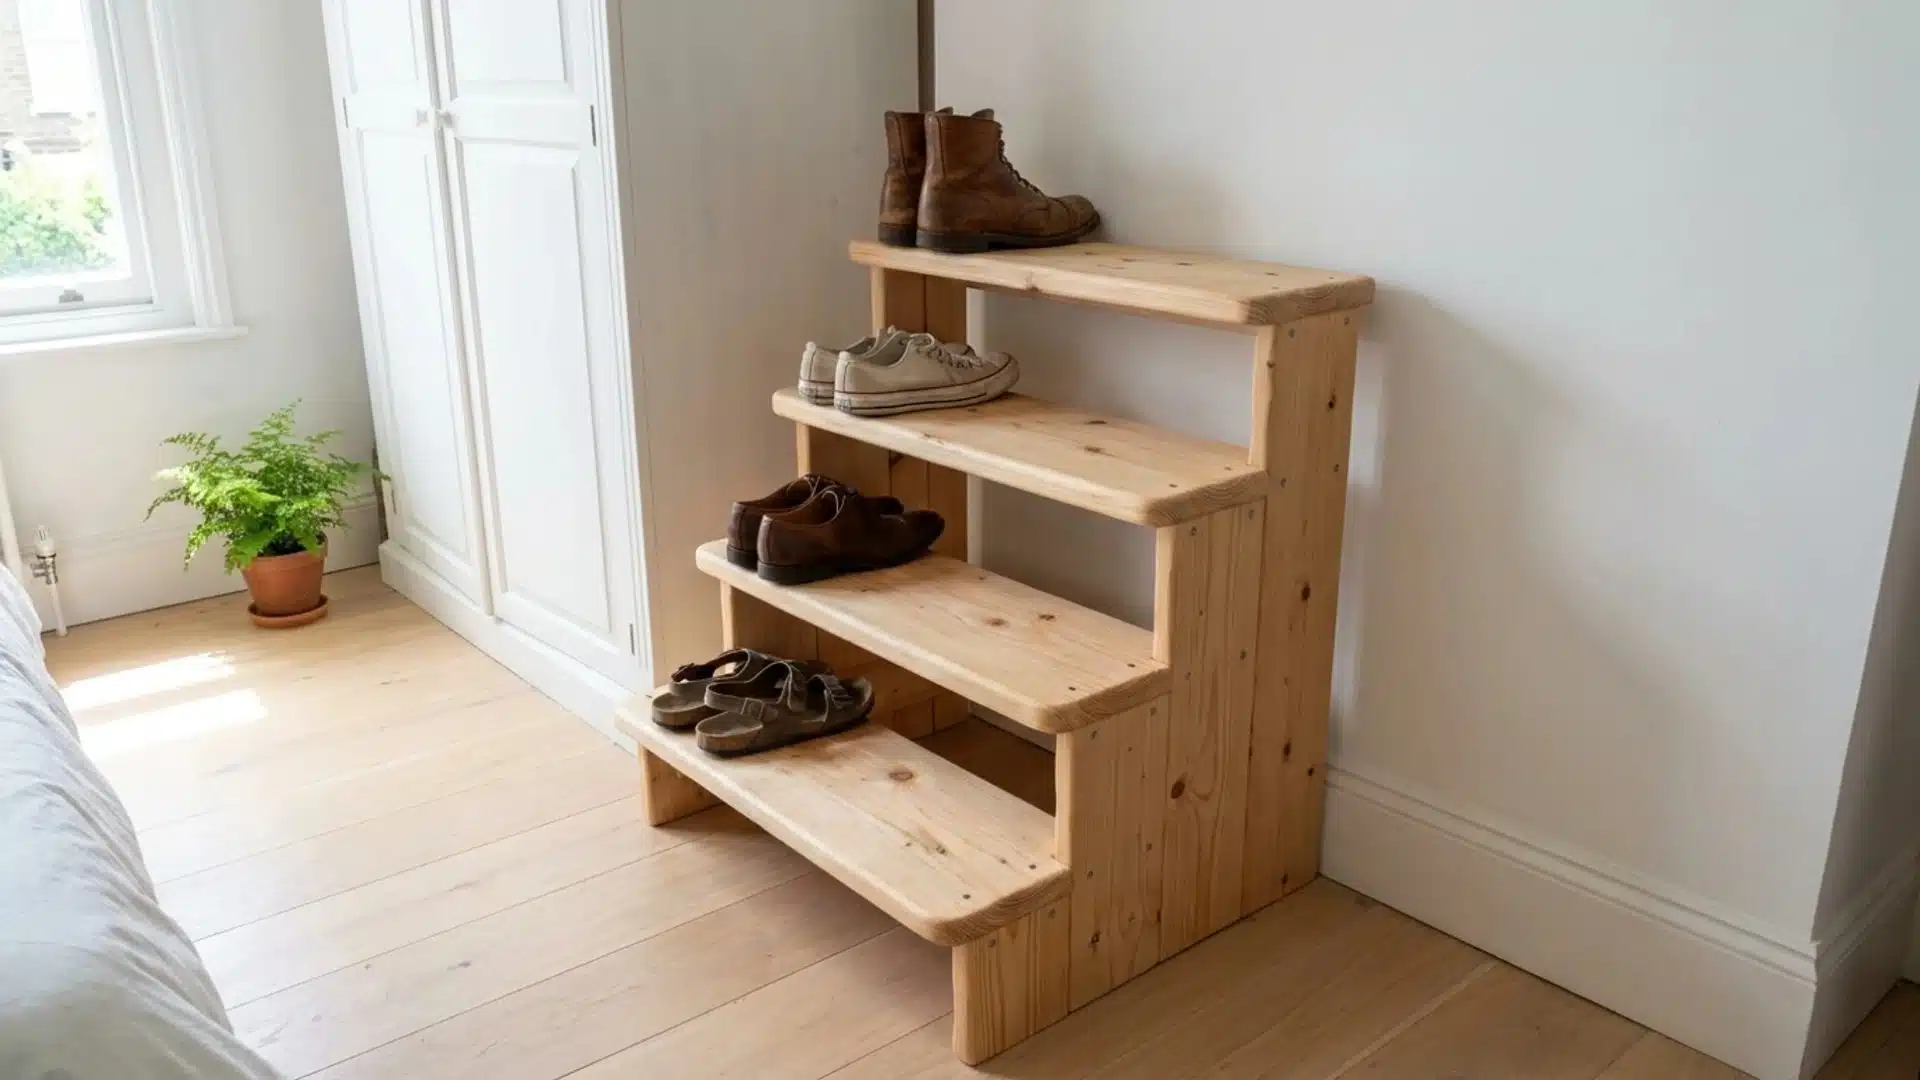
Wooden planks are arranged in a stair-step pattern, with each level holding shoes. The structure resembles small steps placed side by side. Building involves cutting wood into equal platforms, fixing side supports, and gradually aligning heights.
This improves visibility of footwear while offering structured layering that fits hallways or dressing areas.
Materials Needed: Wooden planks for steps. Side frames support the structure. Screws fix joints firmly. Drill assists the installation process.
20. Magnetic Strip Shoe Wall for Kids’ Sandals
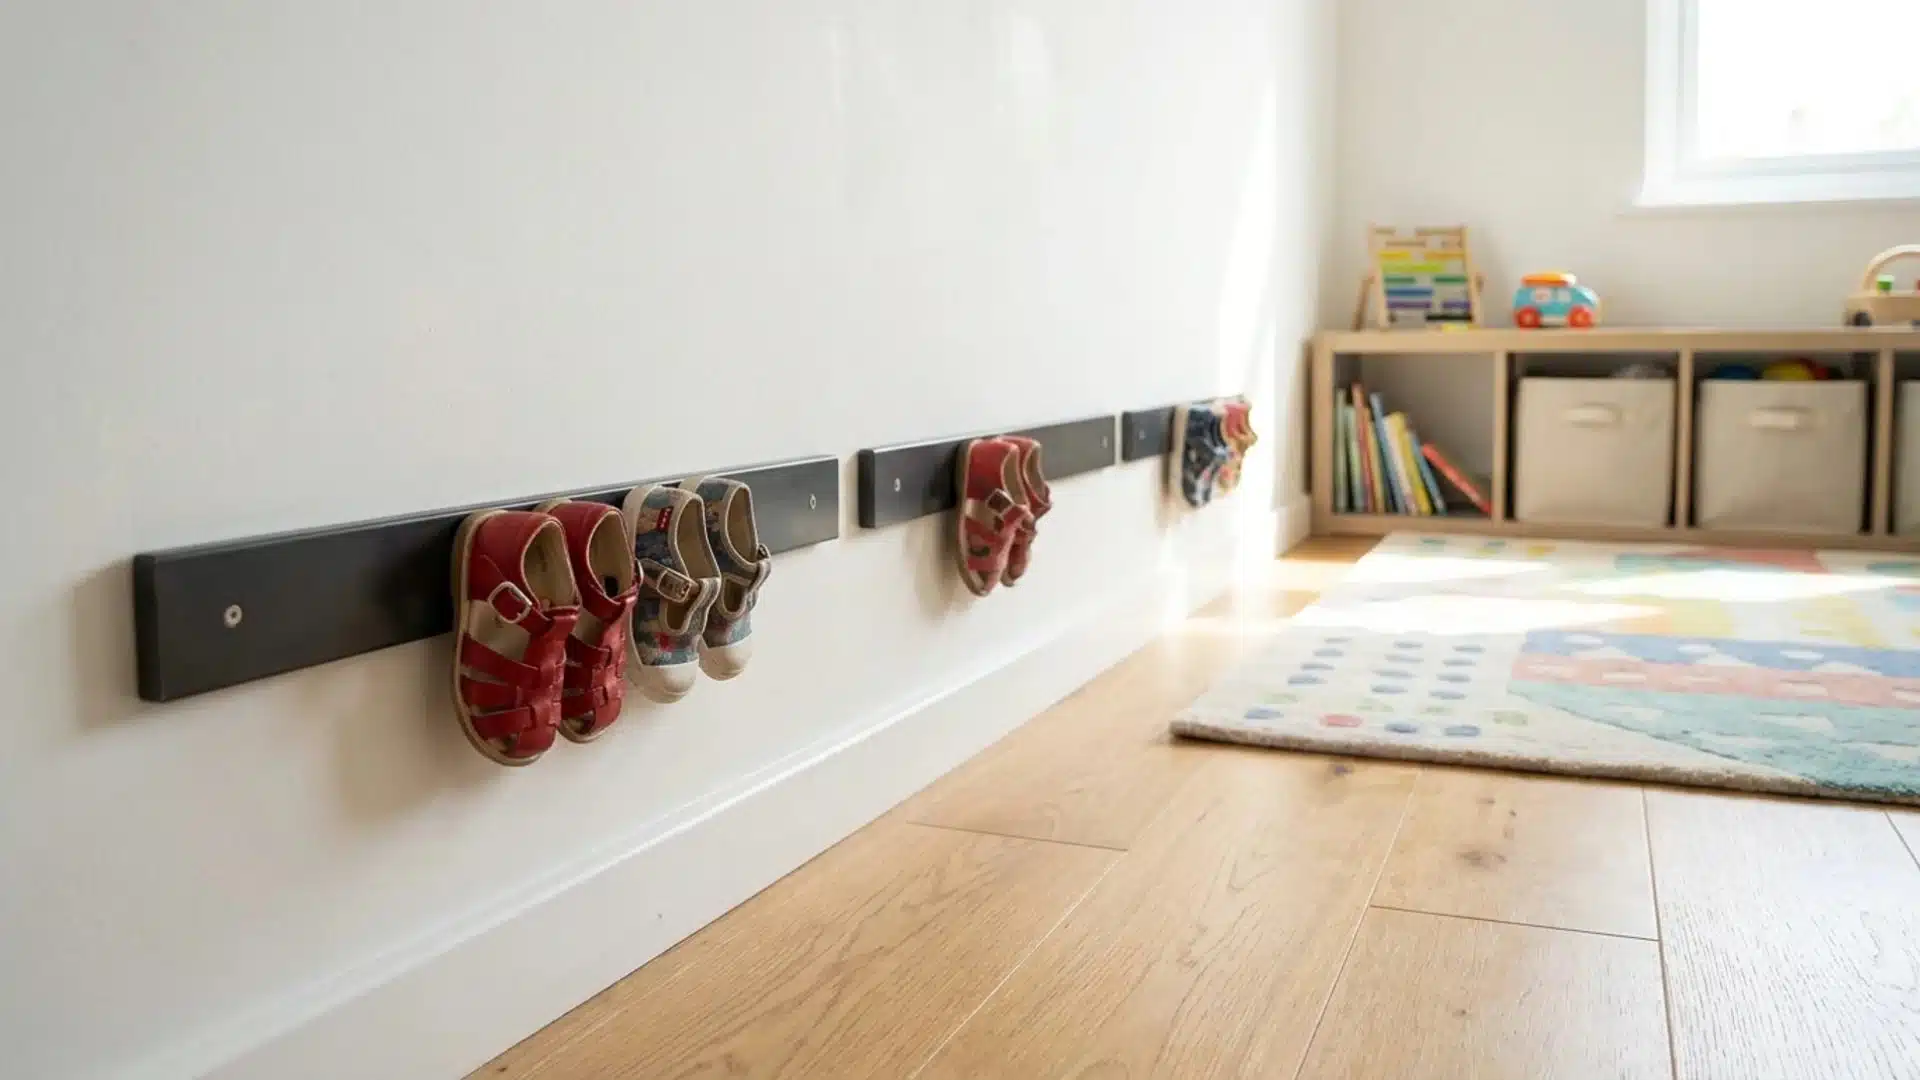
Strong magnetic strips are mounted on a wall where lightweight sandals with metal elements or added clips attach directly. The setup keeps shoes off the floor and makes them easy to grab.
Construction involves securing the strips and testing hold strength. This improves accessibility for children while encouraging quick placement after use.
Materials Needed: Magnetic strips create a holding surface. Wall screws fix strips firmly. Adhesive clips assist attachment. Drill installs mounting points.
21. PVC Grid Panel Shoe Organizer
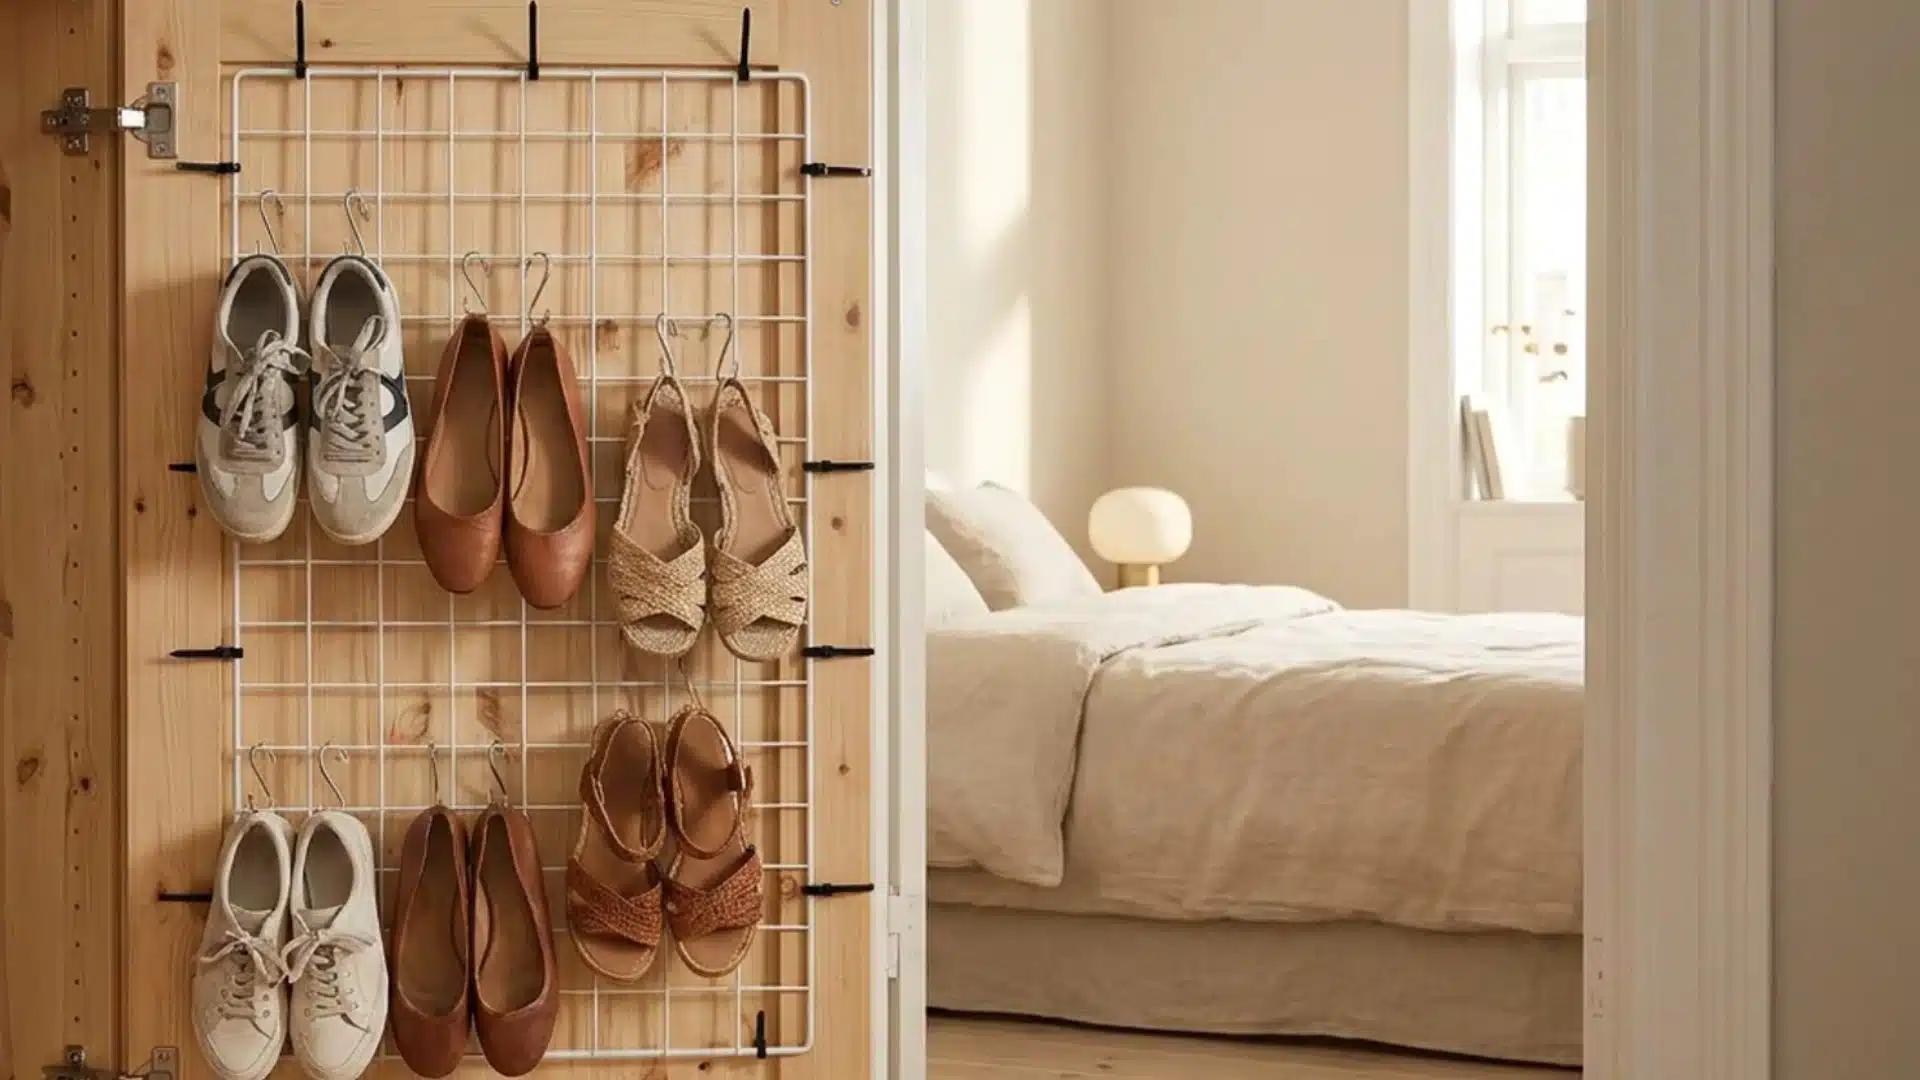
PVC pipes are connected to form a grid-like frame with square openings, into which shoes are placed individually. The structure is lightweight and modular. Building includes cutting pipes, forming square joints, and securing intersections.
This design improves customizable storage layouts while allowing expansion based on available wall or floor space.
Materials Needed: PVC pipes for a grid structure. Pipe joints connect sections. Adhesive strengthens frame stability. Cutter shapes pipe lengths.
22. Hanging Rain Gutter Shoe Rail
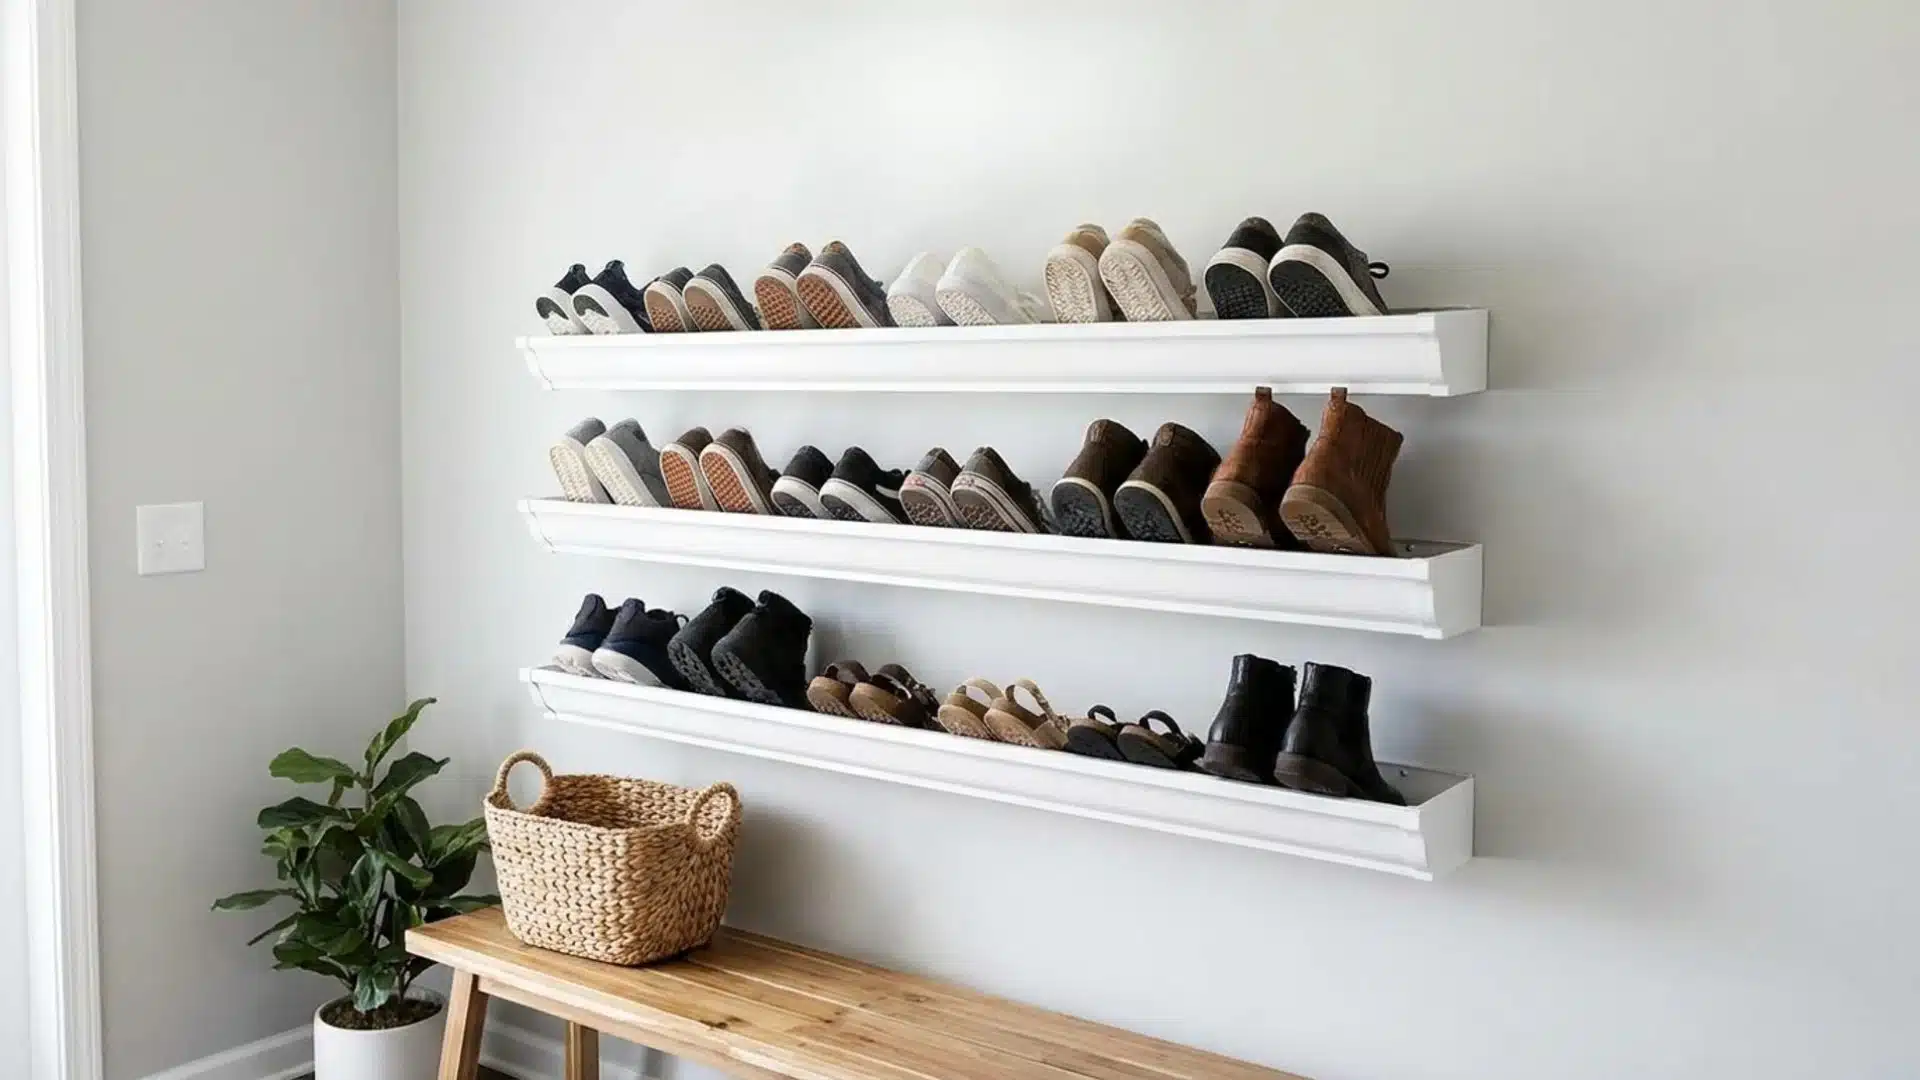
Plastic rain gutters are mounted horizontally on a wall in stacked layers, with shoes sliding in and resting securely. Installation involves measuring wall space, fixing brackets, and locking gutters in place.
The structure uses vertical space efficiently while keeping footwear visible and separated, making small entry areas more organized and easier to manage.
Materials Needed: Plastic gutters for storage rails. Wall brackets support the structure firmly. Screws fix mounts securely. Drill installs fittings precisely.
23. Wooden Spice Rack Shoe Holder
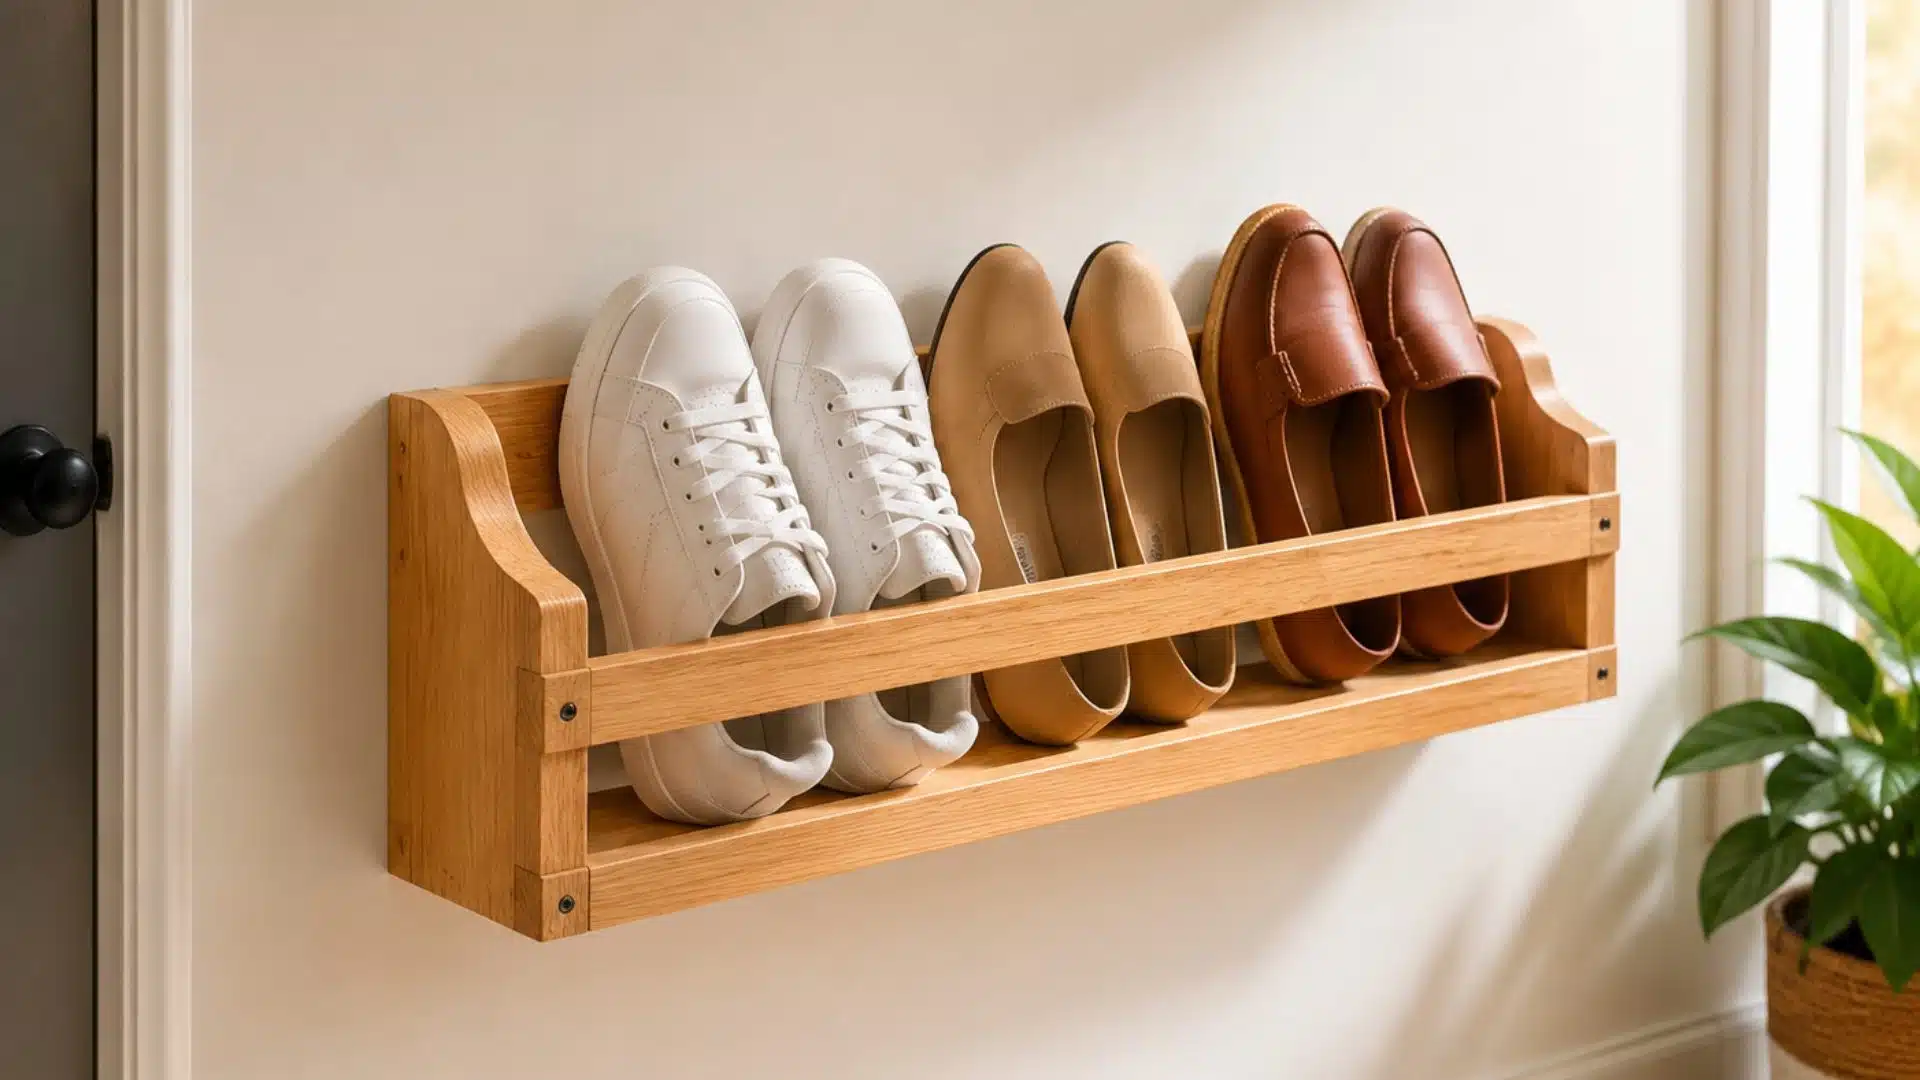
Small spice racks are mounted side by side on a wall, each holding one pair of lightweight shoes. The setup includes marking equal spacing, drilling mounts, and securing racks in rows.
The compact design transforms kitchen storage into a footwear display while optimizing wall space and keeping shoes easily accessible in narrow entry zones.
Materials Needed: Wooden spice racks act as holders. Screws attach racks to the wall. Drill secures installation points. A measuring tape aligns spacing evenly.
24. Cinder Block and Wood Plank Shoe Shelf Bench
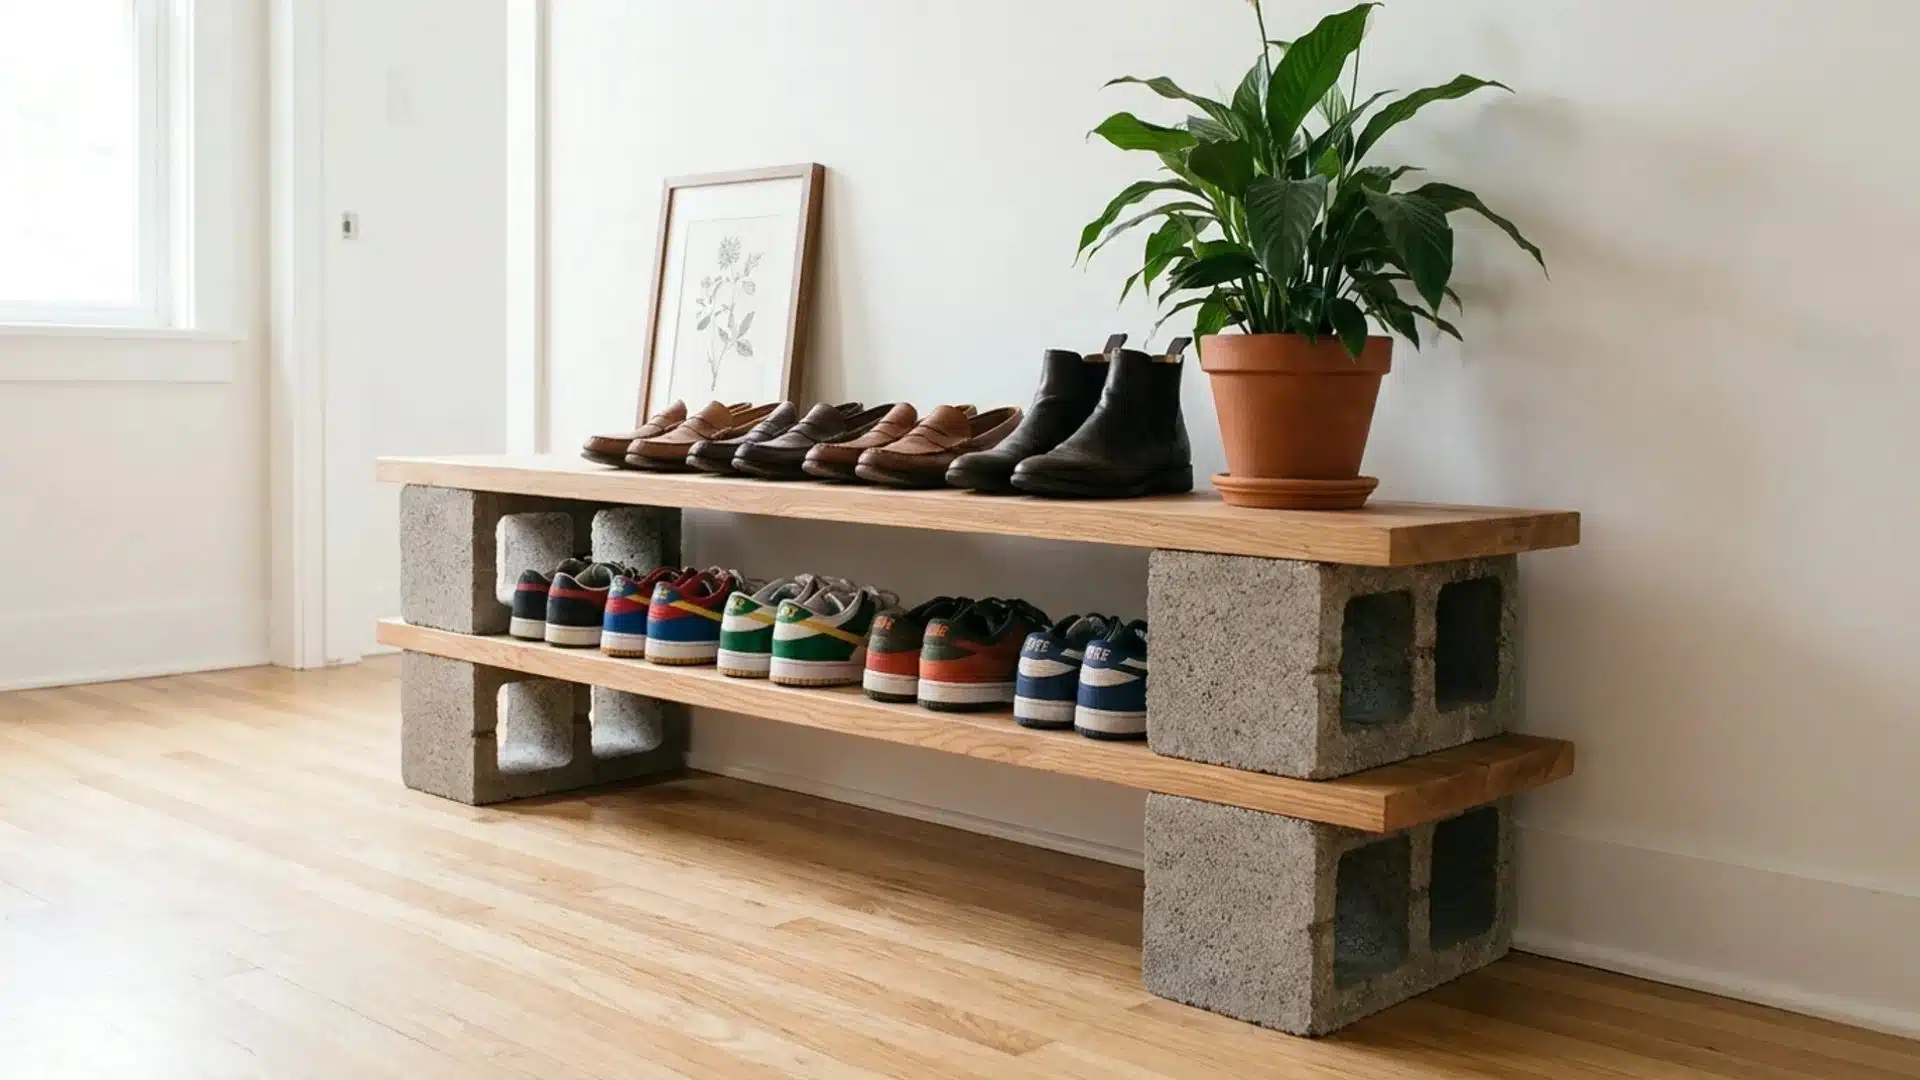
Cinder blocks are stacked in sturdy columns with thick wooden planks laid across them to form open shoe tiers. The structure creates a bench-like surface on top while lower layers hold footwear in clear rows.
Assembly requires arranging blocks for stability, placing leveled planks, and adjusting spacing.
Materials Needed: Cinder blocks form the base structure. Wooden planks create shelving surfaces. The level tool ensures balance during assembly. Rubber pads protect the floor and improve stability.
25. Cardboard Tube Honeycomb Shoe Wall Organizes
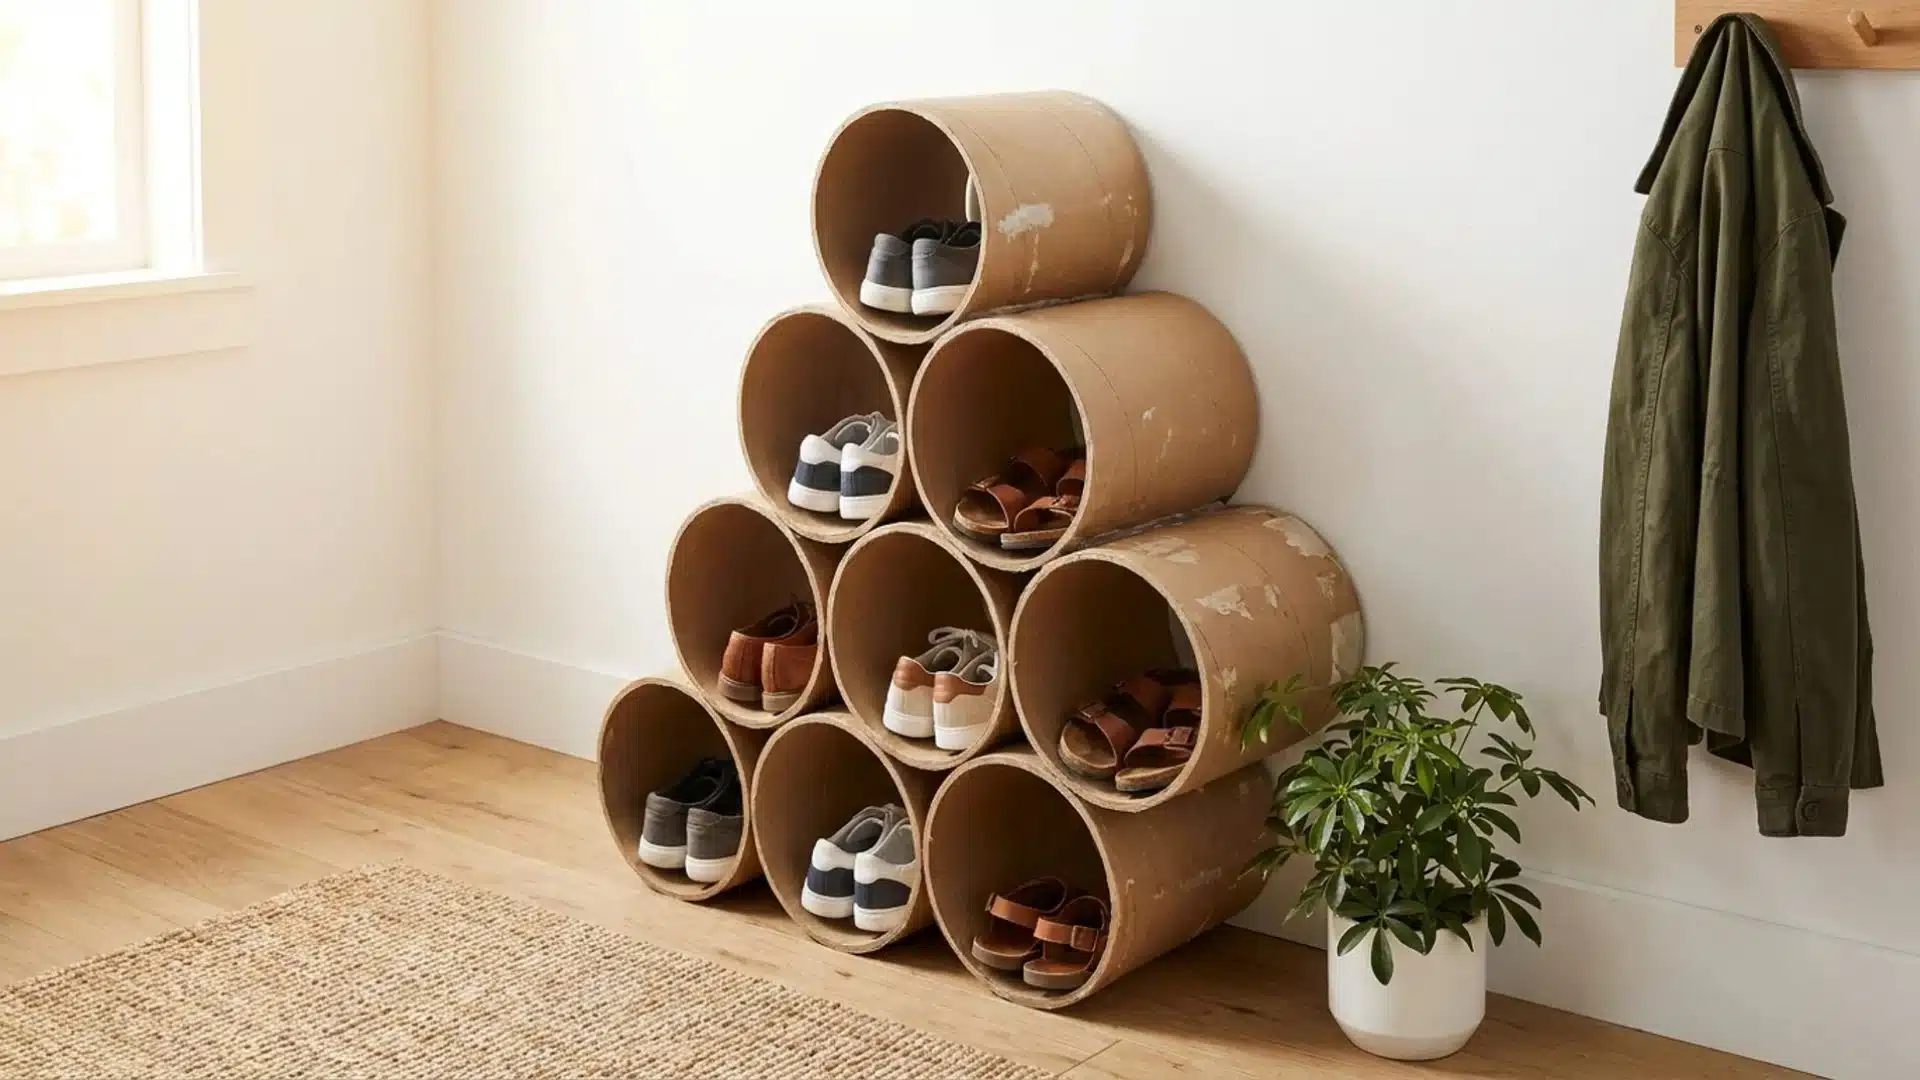
Cardboard tubes arranged in a stacked honeycomb pattern are mounted on the wall. Each tube holds shoes securely inside individual compartments.
The design uses vertical space efficiently and keeps footwear separated, visible, and easy to access in compact areas.
Materials Needed: Cardboard tubes for storage cells. A wooden board supports the structure. Strong adhesive or screws secure tubes. Drill assists with wall mounting.
26. Wire Hanger Vertical Shoe Rack Frame
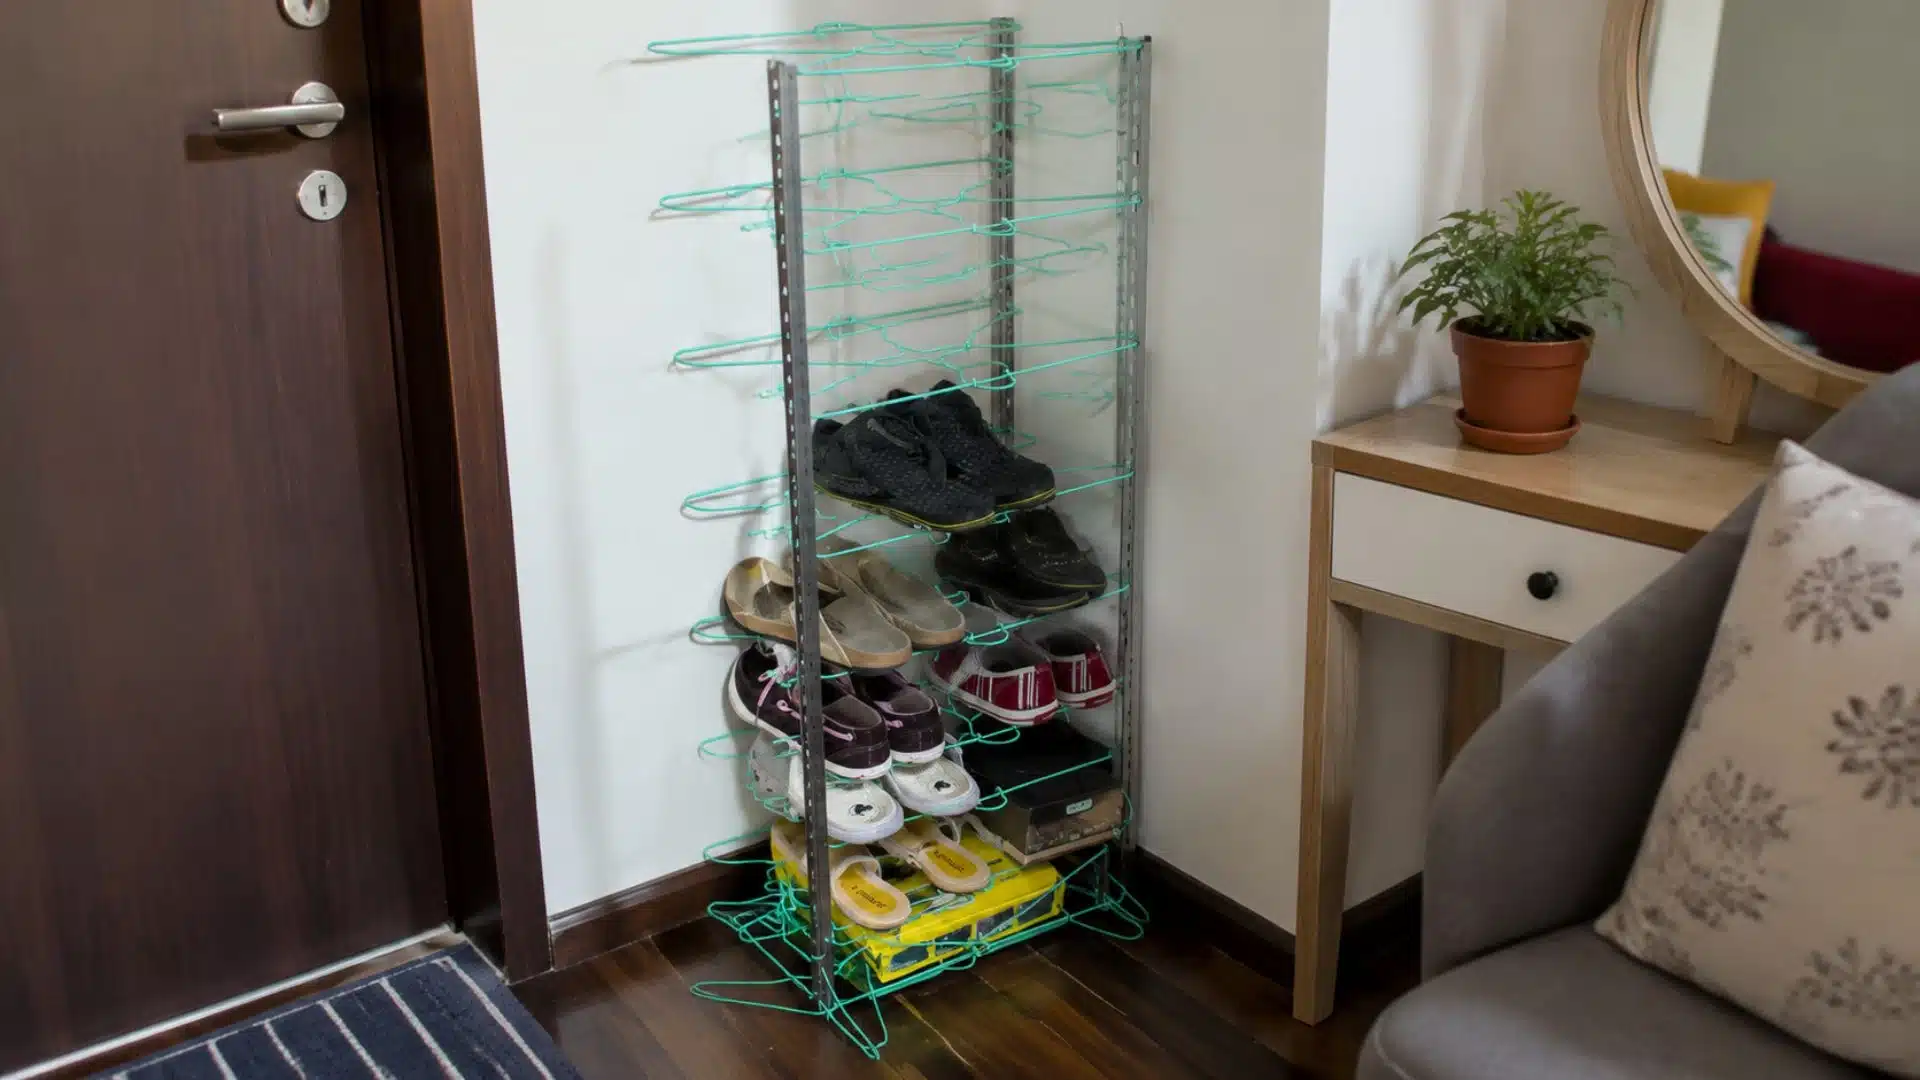
The structure features a vertical metal frame fitted with multiple rows of bent-wire supports that form angled shoe holders. Each pair rests on a separate wire level in a stacked formation.
This arrangement creates compact vertical storage that uses height efficiently while keeping footwear visible and separated.
Materials Needed: A metal frame supports the structure. Wire rods create angled holders. Screws secure side frames. Drill installs and tightens fittings.
27. Vertical Wooden Dowel Shoe Peg Rack
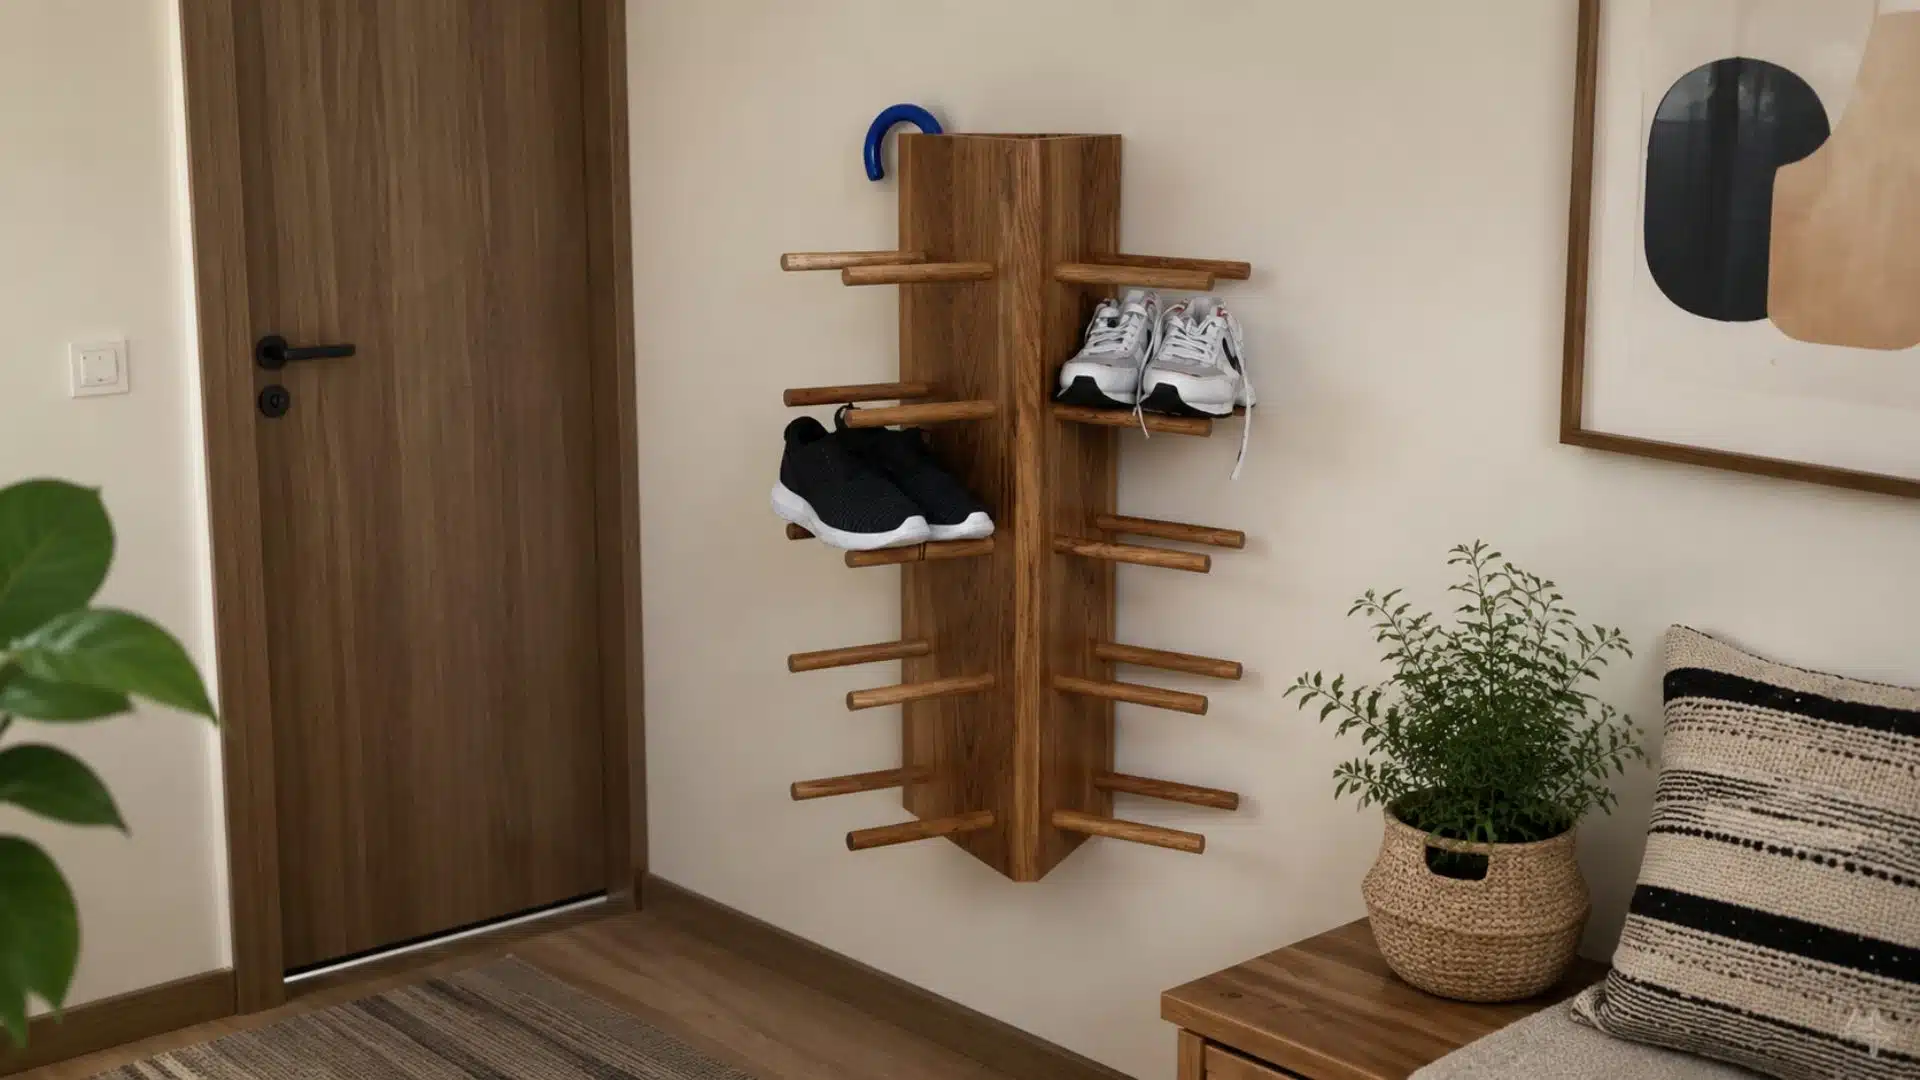
Vertical wooden frame shoe rack made with two side panels and multiple horizontal wooden dowels extending outward like pegs. Shoes rest on rods in staggered positions, using both sides for storage.
This design uses minimal floor space while efficiently offering accessible, adjustable shoe placement for different footwear types.
Materials Needed: Wooden boards form the main vertical frame structure. Wooden dowels act as horizontal shoe holders. Screws and nails secure joints firmly. Drill creates aligned holes for accurate fitting.
28. Wall-Mounted Peg and Shelf Shoe Organizer
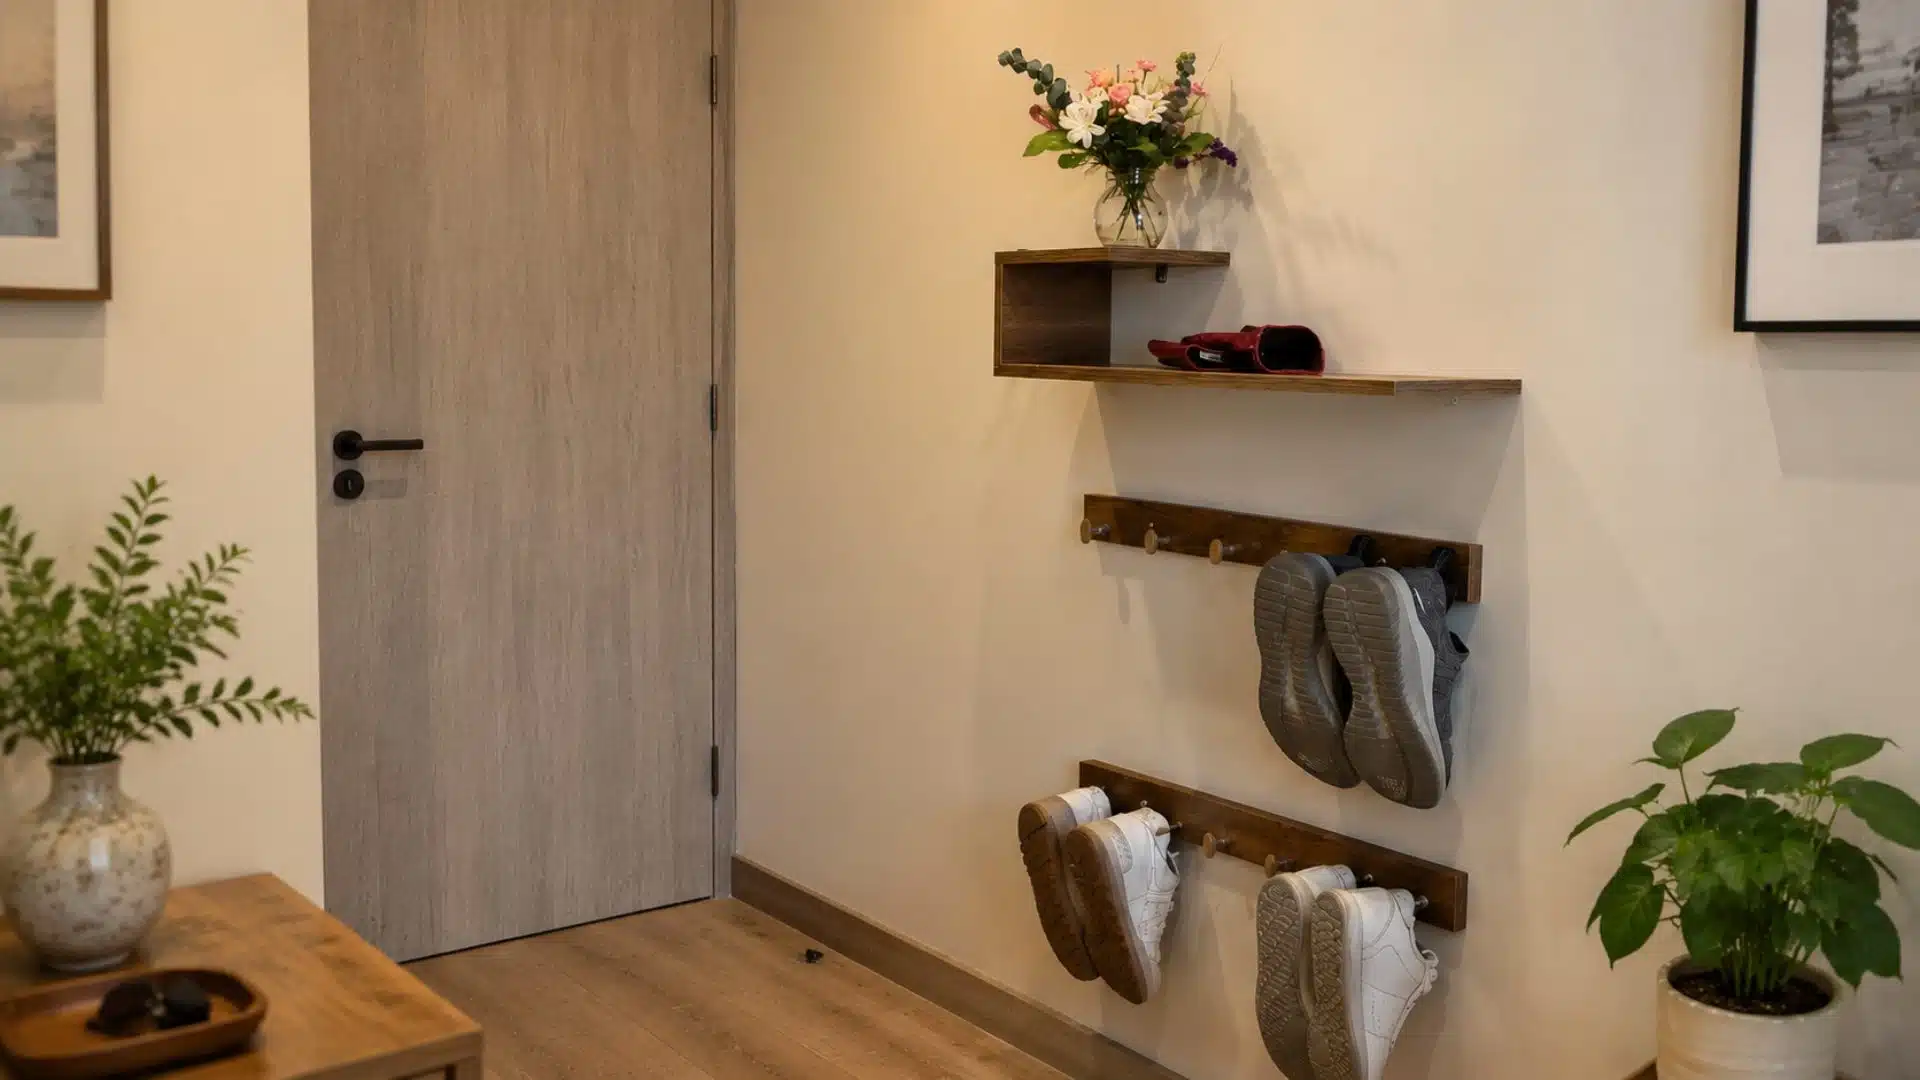
A wall-mounted shoe system combines a small top shelf with wooden peg rails below, creating layered storage for footwear. Shoes hang on pegs while lighter items or decor sit on the upper shelf.
This setup improves entryway organization by using vertical wall space and neatly keeping shoes off the floor.
Materials Needed: Wooden boards for the shelf and peg base. Wooden pegs create hanging support points. Screws and wall anchors secure the structure firmly. Drill and measuring tape assist in installation accuracy.
29. Sliding Wooden Peg Slot Shoe Rack
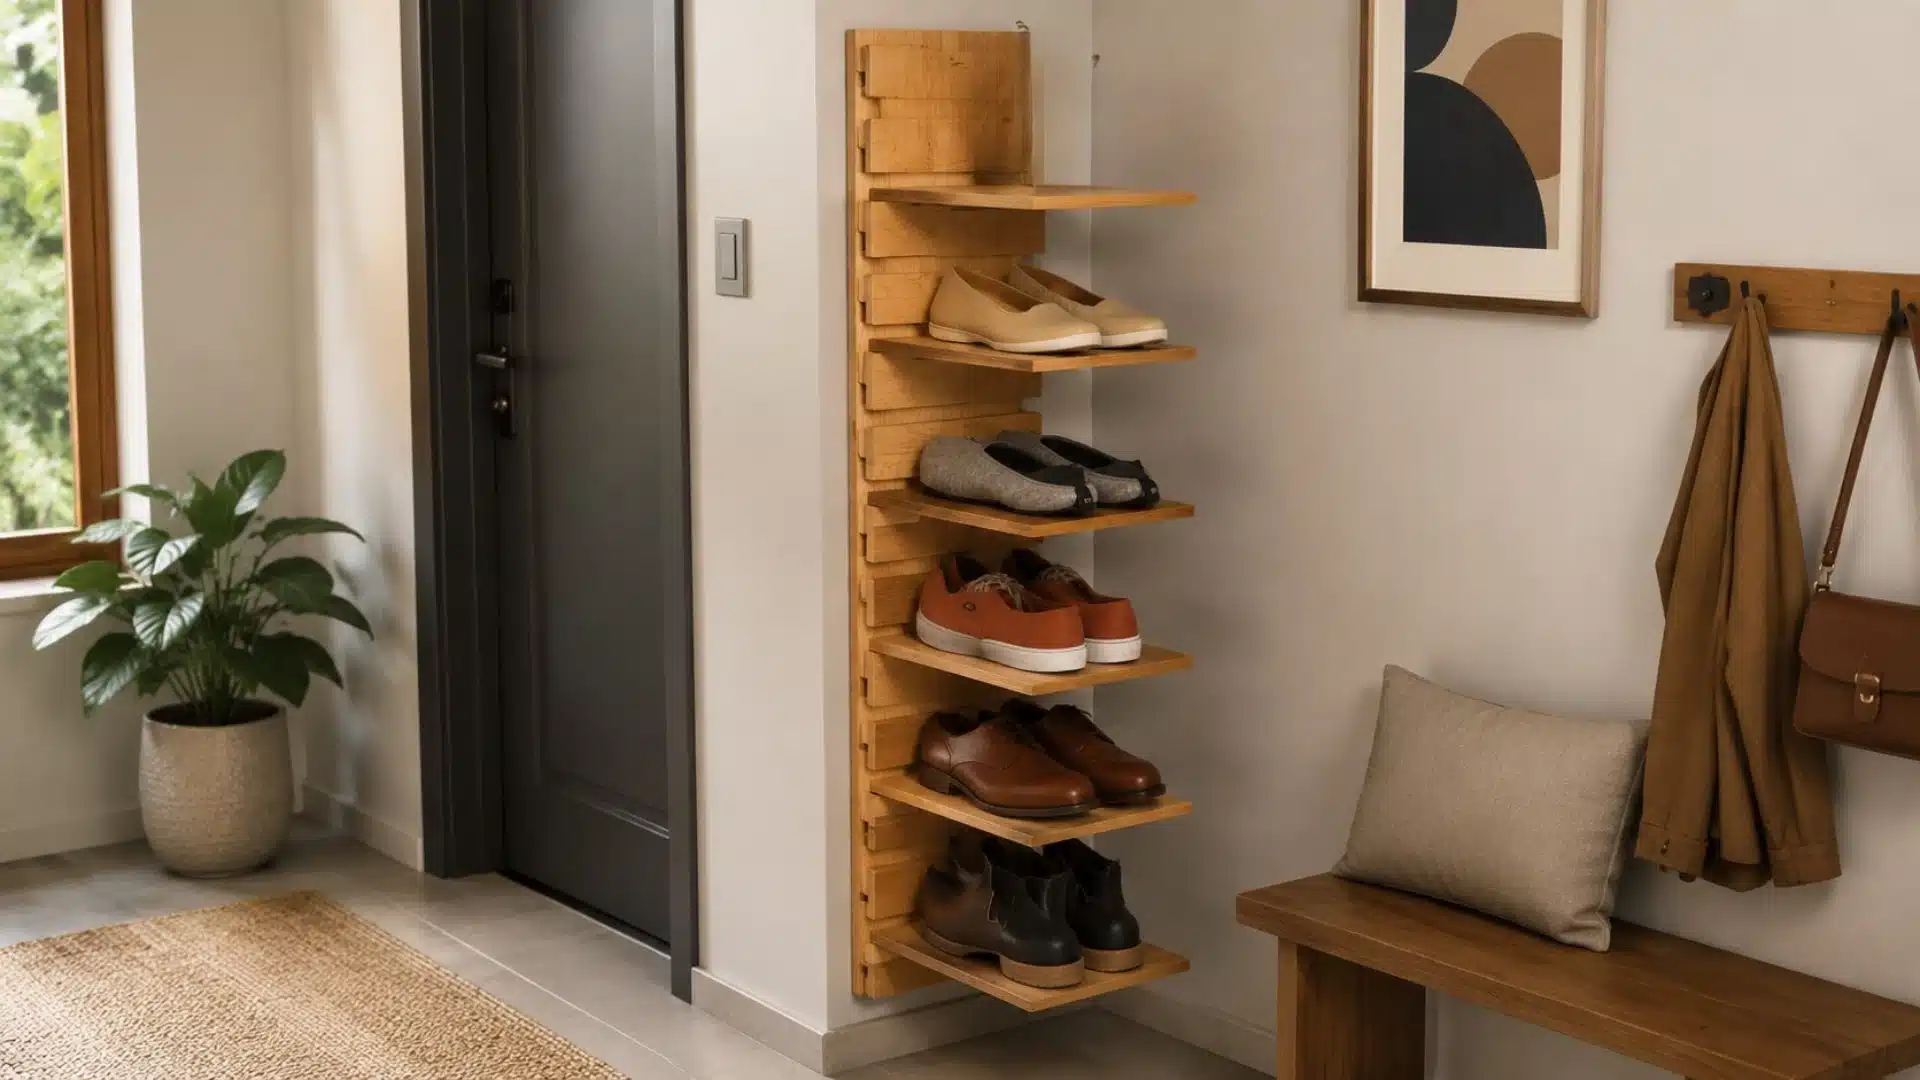
Wooden vertical frame features multiple side slots where flat shelves slide into different height positions, creating adjustable shoe storage levels. Each plank serves as a removable tray that can be repositioned to accommodate footwear sizes.
This structure improves flexibility, space control, and easy customization for daily use.
Materials Required: A wooden plank forms a vertical spine. Wooden shelves act as sliding trays. Wooden pegs support adjustable slots. Screws and wall anchors secure the installation.
30. Triangle Cardboard Honeycomb Shoe Rack
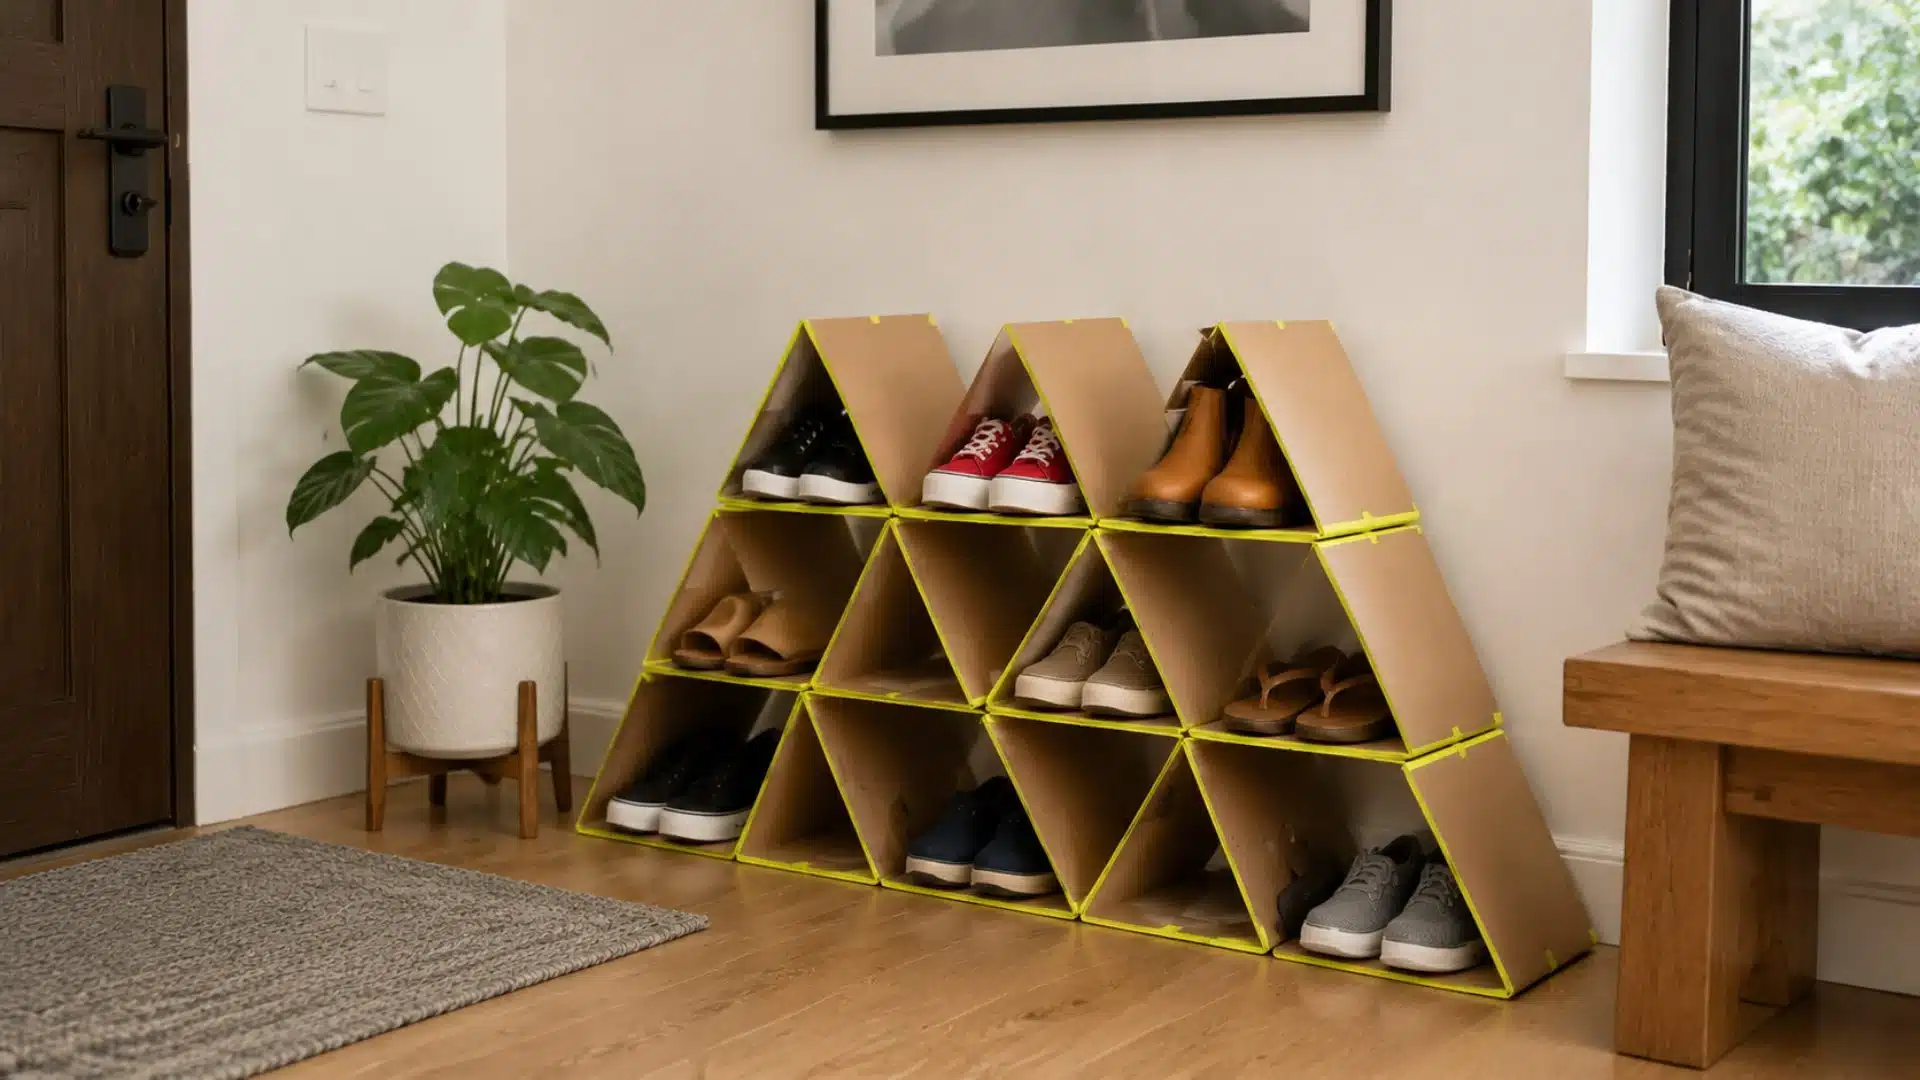
A modular shoe storage unit made using folded triangular cardboard compartments arranged in a honeycomb pyramid structure. Each section holds one pair of shoes and keeps them separated in a stable grid.
The structure works well for lightweight storage, corner placement, and expandable organization needs in small spaces.
Materials Required: Cardboard sheets form a triangular cubby structure. Adhesive tape secures edges and joints firmly. Cutter shapes precise triangular panels. The measuring scale ensures uniform alignment and sizing.
31. Corner Triangle Wooden Shoe Rack
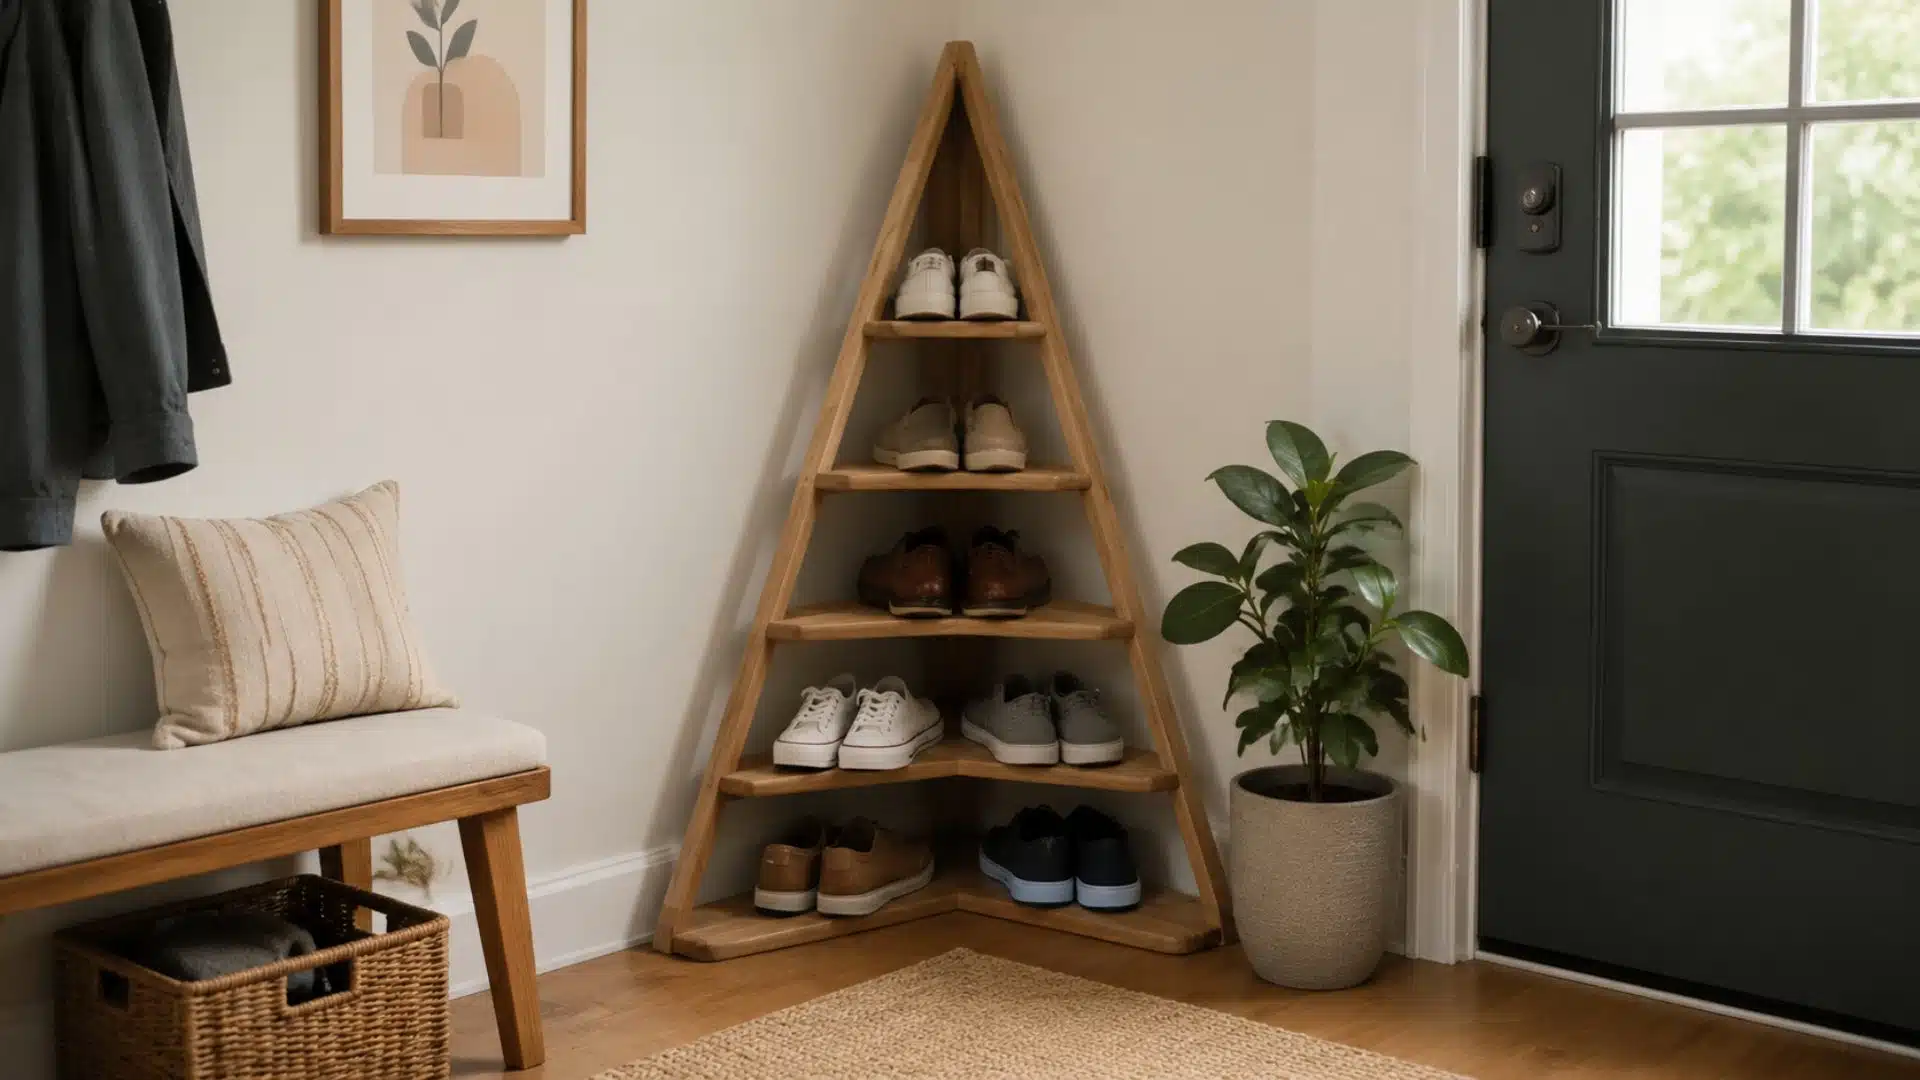
A triangular wooden corner shoe rack fitted between two walls, forming a pyramid-like structure with layered shelves. Each level holds pairs of footwear neatly in ascending order.
This design uses unused corner space efficiently, improves vertical storage, and keeps shoes organized, visible, and easily accessible in tight entry areas.
Materials Required: Wooden planks to form a triangular frame. Screws and wall anchors secure the mounting firmly. A measuring tape ensures accurate corner alignment. Drill helps fix shelves and supports.
32. Foldable Wall-Mounted Tilt Shoe Rack
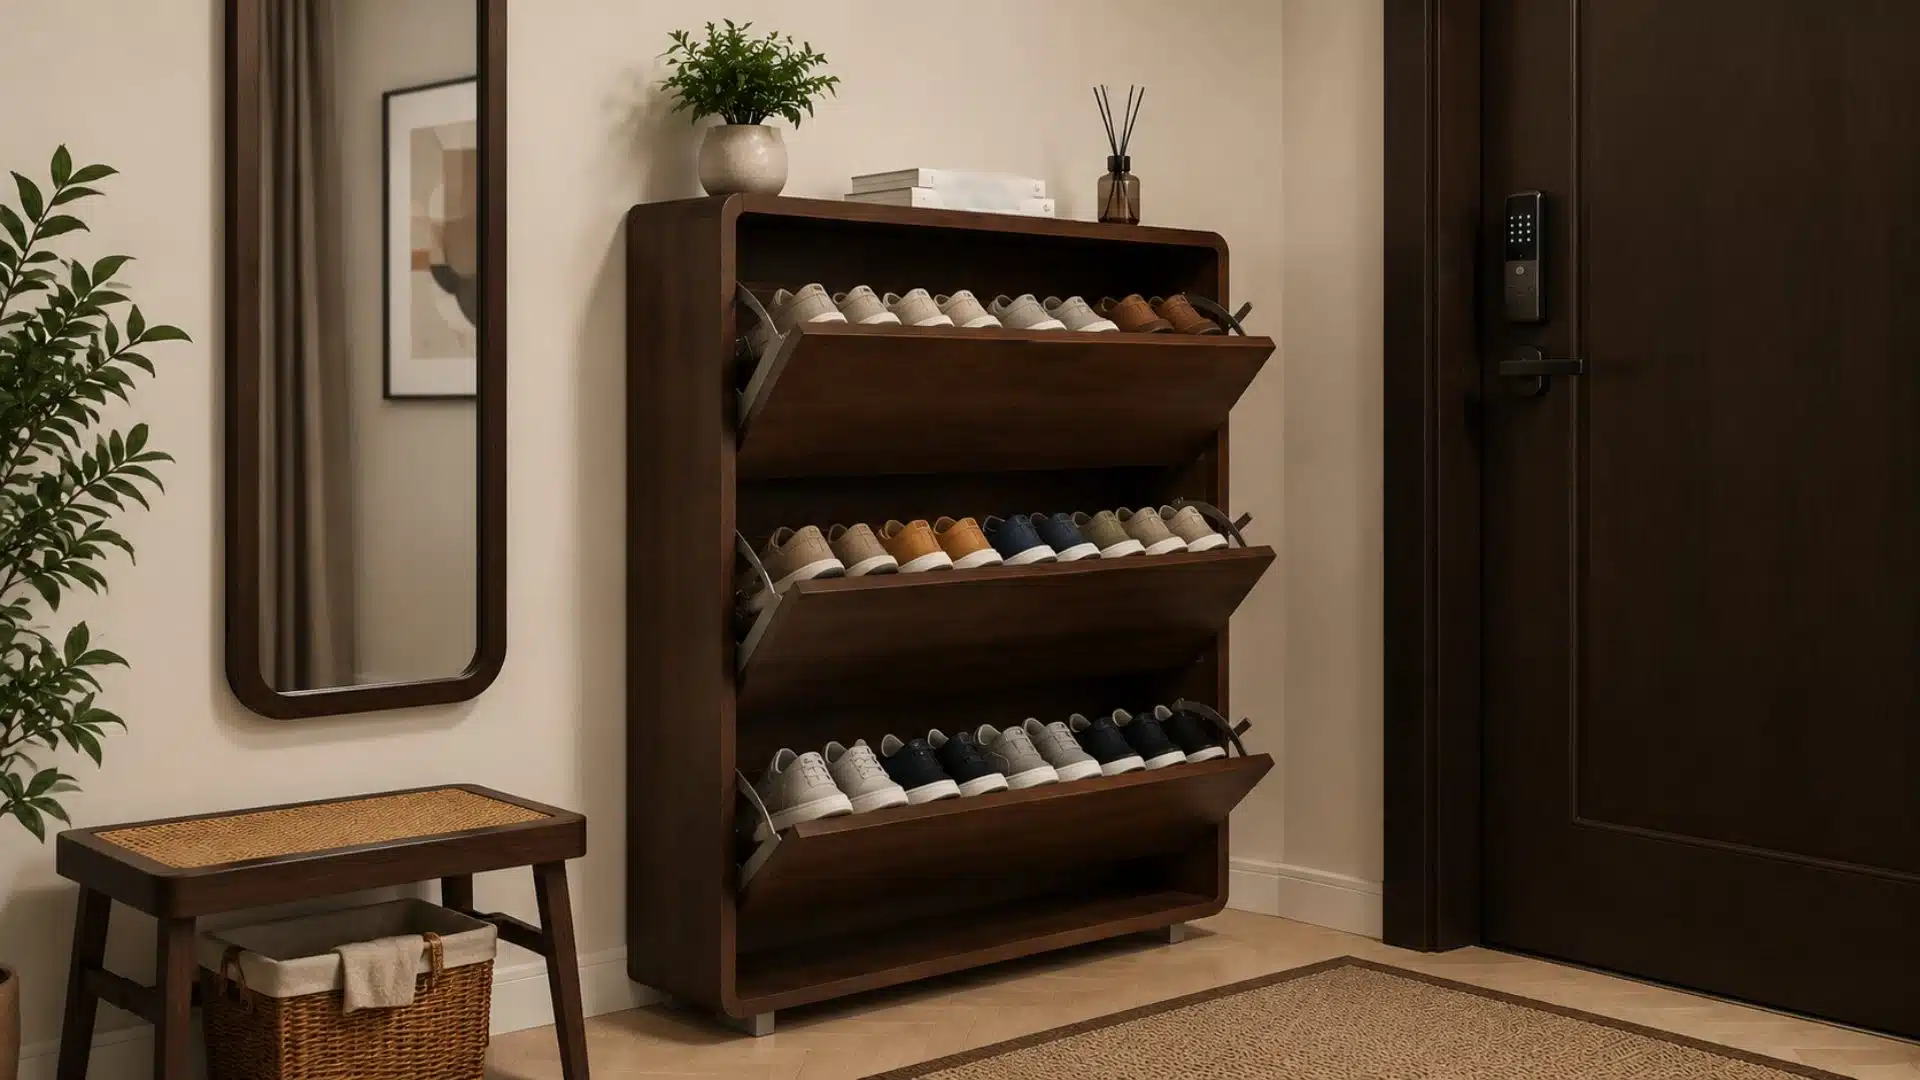
Foldable wall-mounted wooden shoe rack with multiple hinged shelves that tilt outward to hold footwear and fold flat when not in use. The structure is installed on a wall frame with side supports and smooth folding joints.
It improves compact storage in narrow entryways while allowing quick access and space saving for daily shoe access use
Materials Required: A wooden board frame supports the main foldable shoe rack structure system. Hinges allow shelves to fold smoothly against the wall surface. Screws secure the unit firmly while the drill ensures accurate installation alignment.
33. Cardboard Modular Tier Shoe Rack
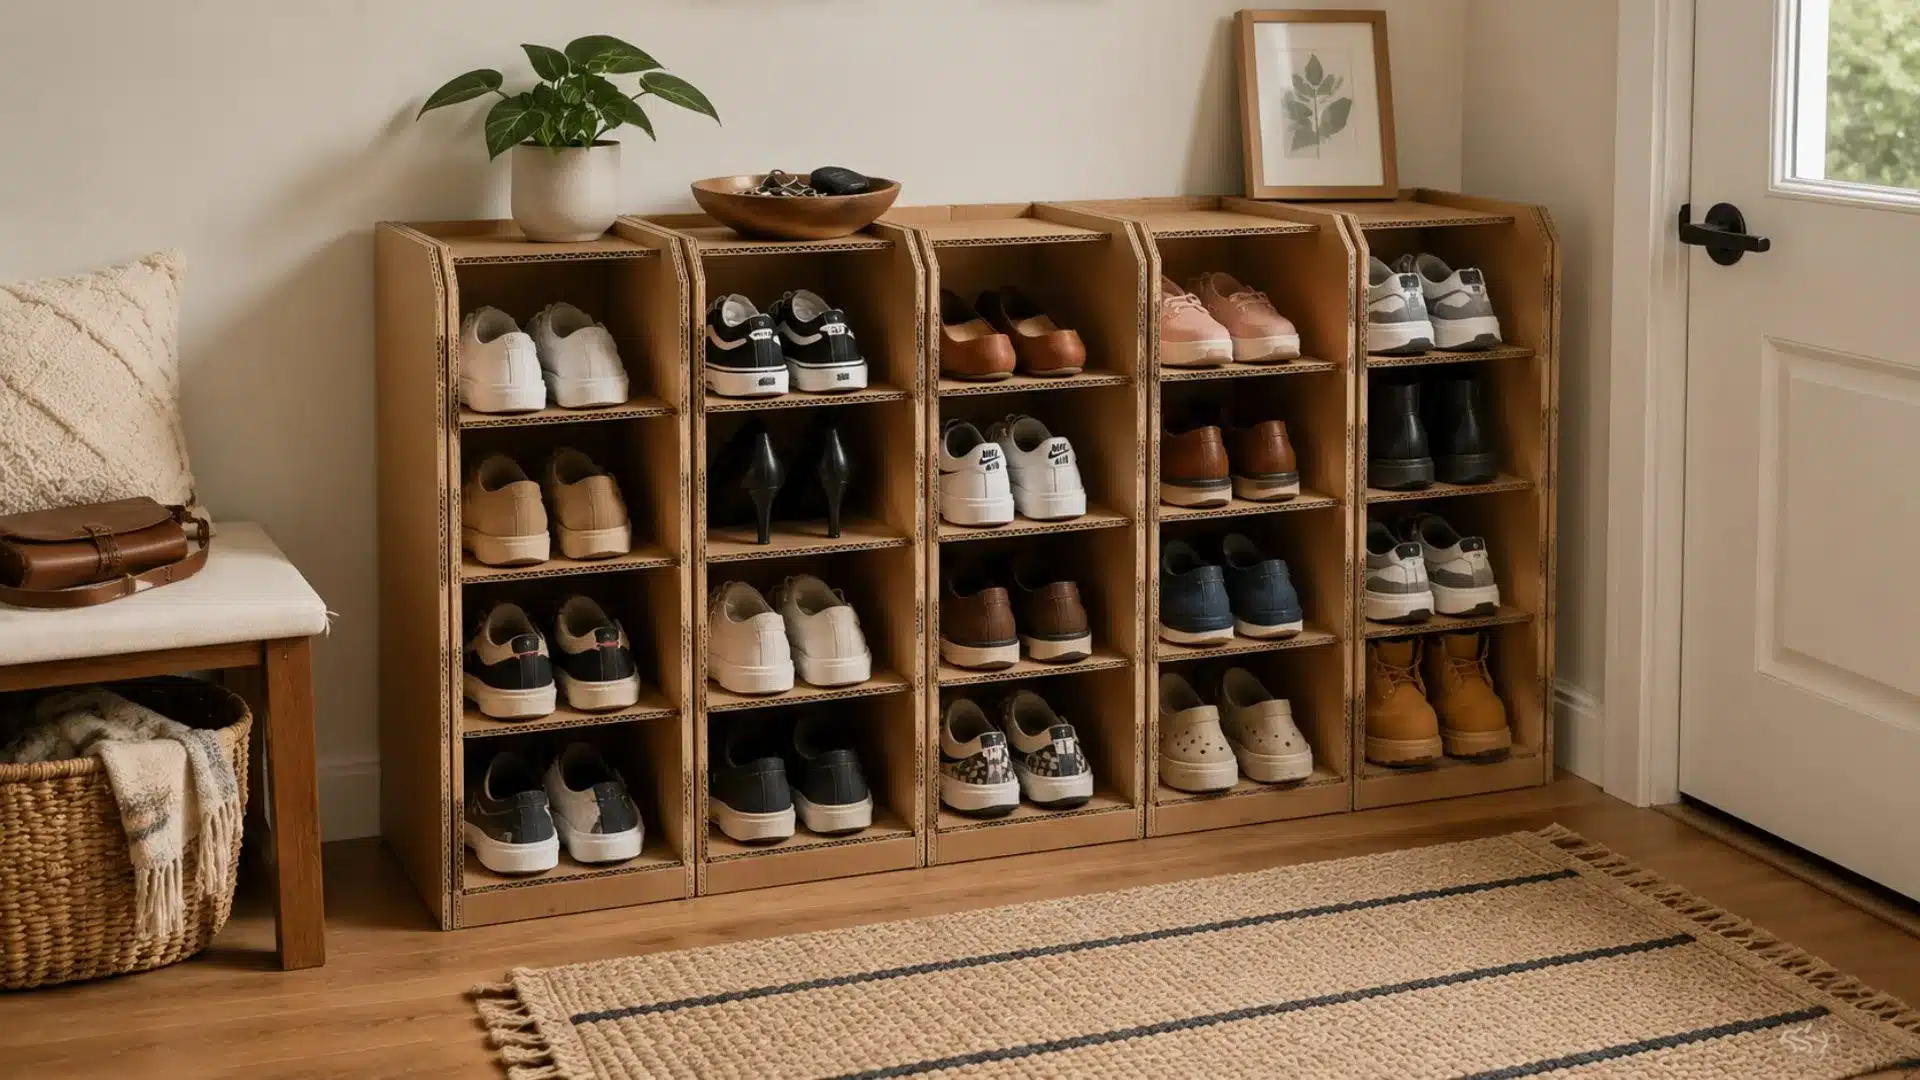
A modular shoe storage unit made from thick cardboard sheets arranged into vertical compartments and horizontal dividers. Each section holds one pair of shoes, creating a lightweight grid system that can be easily expanded or resized.
It offers simple organization for compact spaces and temporary storage needs use
Materials Required: Cardboard sheets for the compartment structure. Strong tape securely reinforces joints and edges. Cutter shapes panels into required sections.
Every DIY shoe rack idea on this list works in a real home without fancy tools or big budgets. Pick the one that fits your space and start building today.
Common Mistakes to Avoid in DIY Shoe Storage Setup
Setting up a DIY setup system may seem simple, but small errors can compromise space, durability, and usability. Avoiding these mistakes helps create a more stable, practical setup that lasts longer and remains easy to use.
- Placing shelves too close together reduces space for different shoe sizes and makes storage cramped over time
- Ignoring wall strength can lead to weak mounting and unsafe storage units that may loosen or fall later
- Using uneven spacing between compartments creates an imbalance and makes the structure look untidy and harder to maintain daily
- Overloading shelves beyond capacity causes bending or damage, reducing the lifespan of wooden or cardboard storage systems significantly
- Skipping measurements before installation leads to misaligned racks that waste space and reduce overall storage efficiency in entryways
Careful planning and proper setup choices ensure DIY shoe storage remains functional, safe, and visually clean in everyday home use.
Summing It Up
A cluttered entryway often hides the simple fix every home needs. With the right ideas and smart planning, building a practical storage solution becomes easy and effective.
This article shared creative layouts, material choices, and common mistakes to avoid while designing a functional setup that fits different spaces.
A well-planned DIY shoe rack brings order, saves space, and improves daily comfort without extra effort.
Start building your own setup today and turn messy corners into organized storage that works better for your home and lifestyle.
Frequently Asked Questions (FAQs)
How Can DIY Shoe Rack Designs Prevent Odor Buildup?
Adding ventilation gaps, using breathable materials, and keeping shoes dry help effectively reduce odor buildup in closed storage compartments.
Which Wall Type Works Best for Mounting Lightweight Shoe Storage Systems?
Solid brick or concrete walls provide a stronger grip and better support for lightweight DIY shoe storage installations compared to drywall.
How Often Should Shoe Rack Setups Be Reorganized for Functionality?
Reorganizing every few months helps maintain accessibility, prevents clutter buildup, and improves the overall usability of shoe storage systems.



2 Responses