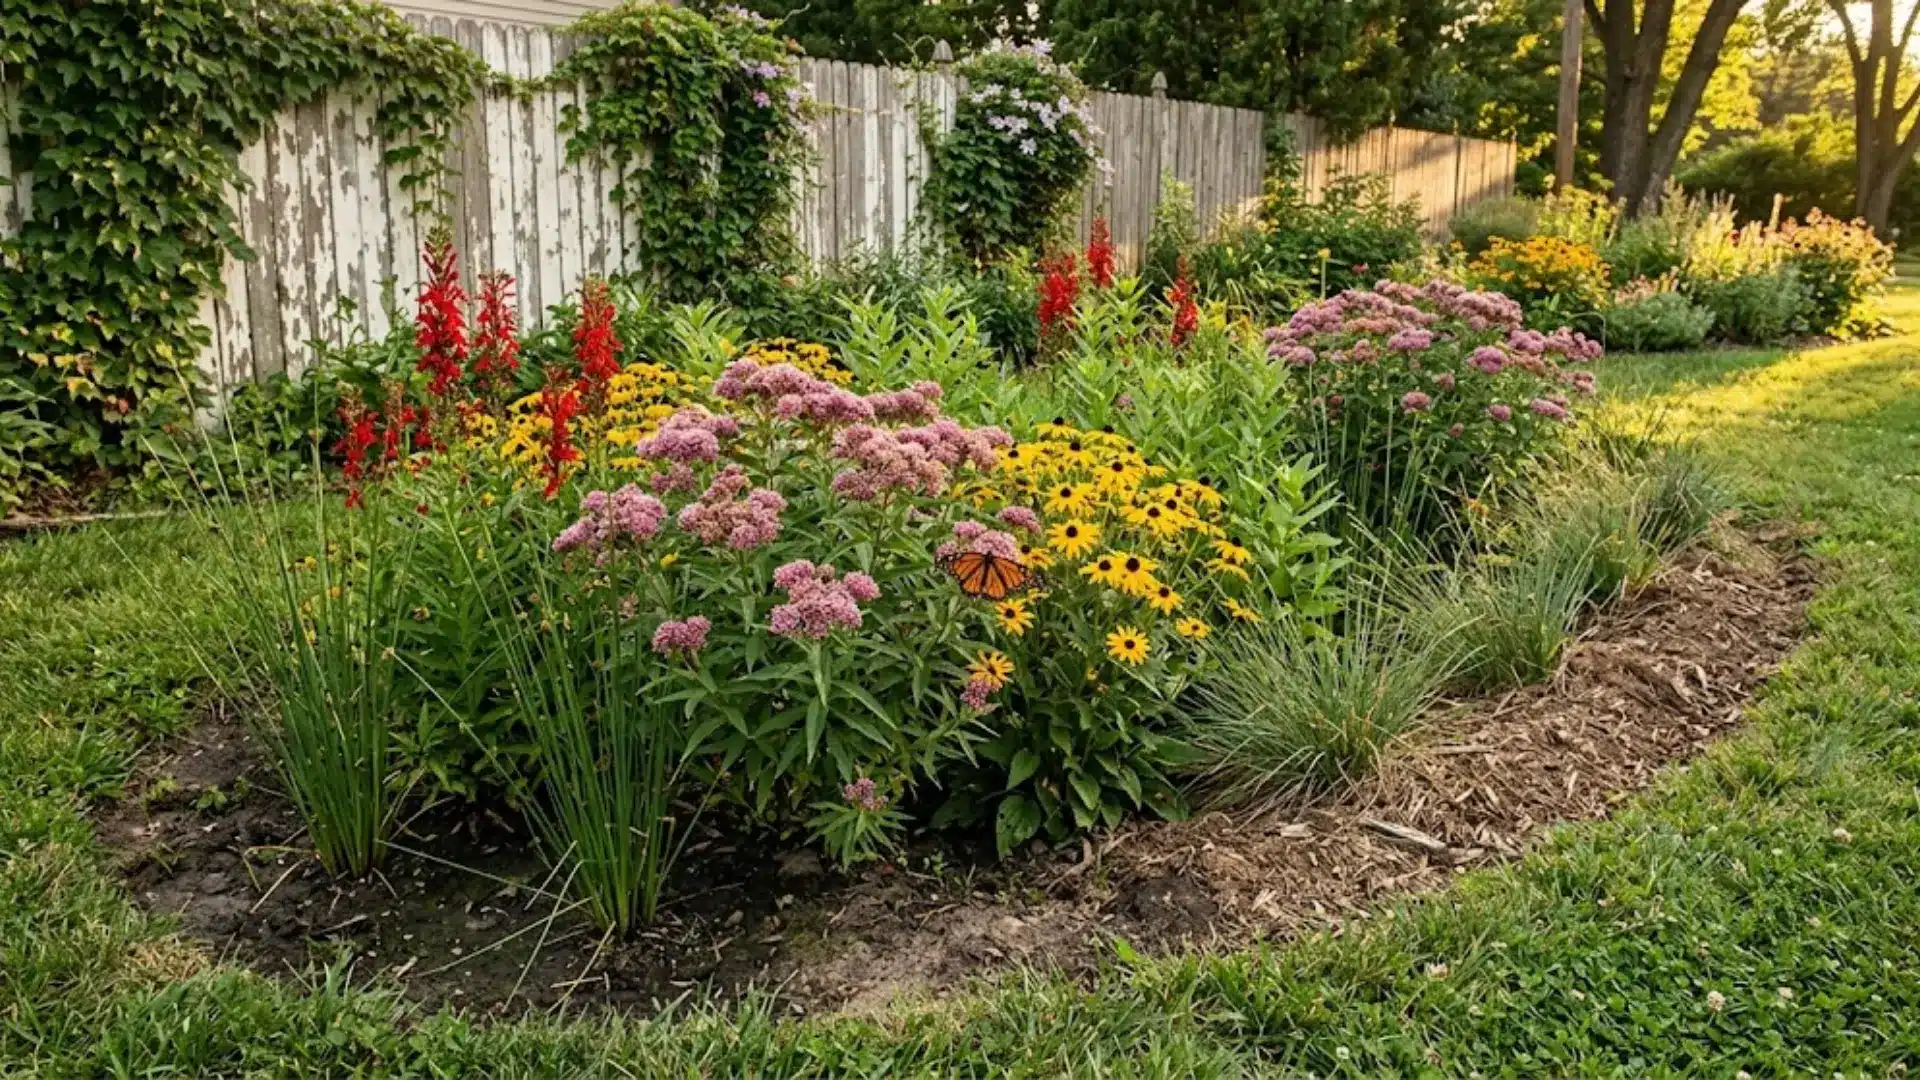
A backyard rain garden is one of those ideas that feels almost too good to be true: a pretty little pocket of blooms that quietly fixes your soggy yard while it’s at it.
Instead of watching rainwater pool by the fence or carve little trails through your mulch, you let it sink into a planted dip designed to catch and filter it naturally.
The payoff goes beyond drainage too, since healthy soil, happy pollinators, cleaner runoff, and serious curb appeal all come along for the ride.
We’re getting into planning, choosing the right spot, designing the layout, building it, picking plants, keeping it thriving, and dodging the mistakes that trip up most first-timers.
What is a Backyard Rain Garden?
A rain garden is a shallow, planted dip in your yard built to catch and clean stormwater before it goes anywhere else.
It works like a mini ecosystem in motion. Rain falls, then runoff slides off your roof or driveway and pools into the depression instead of your lawn.
From there, the soil filters out pollutants as water seeps downward, while native roots soak up extra moisture along the way.
The whole setup mimics natural hydrology, doing quietly what pavement and turf grass simply can’t.
That little loop above sums up the whole mechanism: rain hits the roof, runoff travels toward the dip, the soil strains out pollutants as it pools, and what’s left either sinks underground or gets pulled up by the roots waiting for it.
Benefits of Installing a Backyard Rain Garden
A rain garden earns its spot in the yard by working as hard as it looks good. Here’s what it brings to the table.
- Reduced Runoff: Keeps stormwater from rushing straight into the street.
- Flood Prevention: Stops water from pooling near the house after heavy rain.
- Better Drainage: Eases pressure on soggy lawns and waterlogged beds.
- Cleaner Waterways: Filters out pollutants before they reach nearby streams.
- Pollinator Support: Draws in birds, bees, and butterflies all season long.
- Lower Water Bills: Native roots mean less irrigation once established.
- Added Curb Appeal: Boosts property value with a polished, intentional look.
Put together, these perks turn a once-soggy corner of the yard into one of its biggest assets.
Where Should You Build a Rain Garden?
Placement decides whether your rain garden actually solves a drainage problem or quietly creates a new one. A few site checks upfront save a lot of digging later.
Best Locations
- Near downspouts where roof water concentrates
- Below gentle slopes, where runoff naturally gathers
- Low spots that already pool after rain
- Edge of the driveway to intercept runoff early
- Patio edges that catch overflow from hardscaping
Places to Avoid
- Within ten feet of home foundations
- Directly above septic systems
- Over buried utility lines
- Beneath large tree roots
- Areas that stay wet year-round
Step-by-Step: How to Build a Rain Garden?
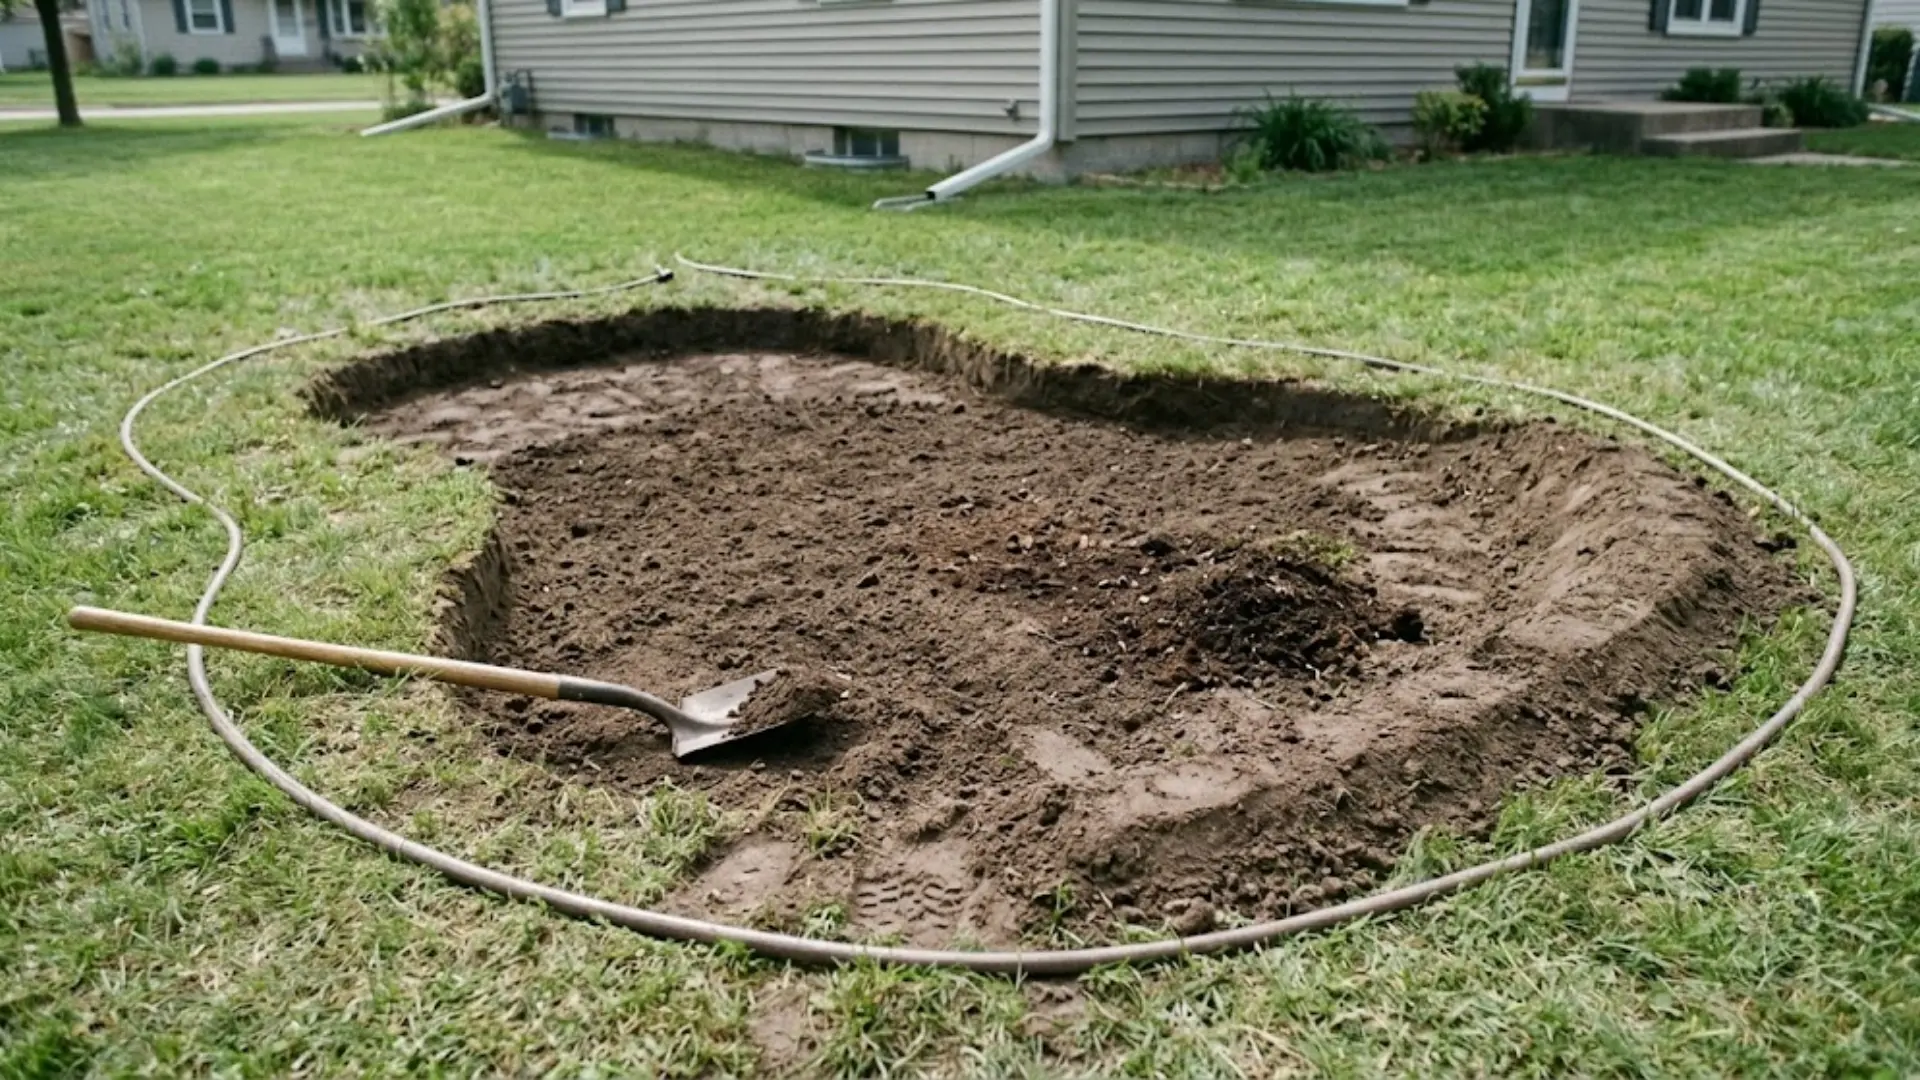
Building one is less about heavy construction and more about reading your yard correctly before you dig. Each step builds on the last, from evaluation to planting.
Step 1: Evaluate Your Drainage
Watch your yard during an actual rainstorm before touching a shovel.
Note where puddles form, the direction water travels, and the size of the contributing area, since this tells you exactly how much runoff the garden needs to handle.
Runoff assessment checklist
- Watched the water flow during active rainfall
- Marked the direction water naturally travels
- Identified the lowest point where water collects
- Measured the rough size of the contributing drainage area
- Noted any existing erosion or standing water spots
Step 2: Perform a Soil Drainage Test
Dig a hole about a foot deep, fill it with water, and time how quickly it drains.
This single test tells you whether your soil can actually handle a rain garden or needs amending first, and it takes the guesswork out of site selection entirely.
| Drainage Rate | Suitable? | Recommendation |
|---|---|---|
| Fast | Yes | Excellent site |
| Moderate | Yes | Ideal site |
| Slow | Possibly | Improve soil first |
| Very slow | No | Choose another location |
Step 3: Calculate Rain Garden Size
Sizing depends on how much water flows toward the space, not just how much room you have.
Roof area, driveway runoff, soil infiltration rate, and average local rainfall all factor into the math, and skipping any of them tends to produce a garden that overflows during the first real storm.
For a 500-square-foot roof draining into soil with moderate infiltration, a garden roughly 30 to 50 square feet typically handles the runoff comfortably, with adjustments up or down based on rainfall intensity in your area.
Step 4: Design the Shape
Curved, organic shapes hold up better visually than anything geometric.
Kidney shapes and crescents work well along borders, ovals suit open lawn spots, and freeform curves blend naturally into existing beds.
Whatever shape you pick, soft curves read as intentional landscaping rather than a drainage fix, which keeps the space looking like a garden first.
Step 5: Mark the Garden Layout
Before digging, lay out the exact footprint so you can walk around it and adjust.
- Garden hose for flexible, easy-to-reshape curves
- Rope for a lightweight, temporary outline
- Spray paint for a marking that survives wind and rain
- Stakes paired with string for straighter reference points
Step 6: Excavate the Basin
Dig the basin to a depth of 4 to 8 inches, keeping the bottom flat so water spreads evenly instead of pooling in one corner.
Use the displaced soil to build a low berm along the downhill edge that holds runoff inside the garden long enough to soak in rather than spill past it.
Step 7: Improve the Soil
Blend compost and topsoil into the excavated area to boost infiltration without compromising structure, adding sand only when the existing soil is dense clay.
Heavy-handed amendments can backfire, loosening soil so much it slumps or erodes.
The goal is steady drainage paired with enough stability to hold plant roots and the garden’s shape over the long term.
Step 8: Install Overflow Protection
Even a well-sized garden needs somewhere for water to go during unusually heavy storms.
A shallow spillway, lined with rock or gravel, directs excess water in a controlled direction rather than carving a new path through the lawn.
This single detail prevents erosion and protects the berm from gradually washing away over time.
Step 9: Plant the Rain Garden
Plant selection follows moisture zones within the basin itself.
| Zone | Moisture Level | Plant Type |
|---|---|---|
| Bottom Zone | Wettest | Moisture-loving plants |
| Middle Zone | Moderate | Moderately wet-tolerant plants |
| Edge Zone | Driest | Drought-tolerant plants |
Step 10: Mulch the Garden
Shredded hardwood mulch settles well and resists being washed away during heavy rain, unlike loose mulch that tends to float right out of the basin.
Apply it to a depth of 2 to 3 inches, keeping it away from plant stems to prevent rot while still suppressing weeds and retaining moisture throughout the bed.
Step 11: Water Until Established
New plantings need consistent watering through their first growing season regardless of rainfall, since roots haven’t yet spread deep enough to rely on natural moisture alone.
A steady schedule during dry stretches helps them establish fully, after which the garden settles into the low-maintenance rhythm it’s designed for.
Best Plants for a Backyard Rain Garden
Plant choice depends entirely on where each species sits in the basin, since moisture levels shift dramatically between the bottom and the edge.
Here’s a single reference for the whole layout.
| Zone | Plant | Why It Works |
|---|---|---|
| Lowest area | Blue flag iris | Tolerates standing water for extended periods |
| Swamp milkweed | Thrives in saturated soil, attracts pollinators | |
| Cardinal flower | Handles wet feet, adds vivid color | |
| Soft rush | Stabilizes soil in the wettest spot | |
| Mid-slope | Black-eyed Susan | Adapts to fluctuating moisture levels |
| Joe-Pye weed | Handles moderate wetness, draws butterflies | |
| Coneflower | Resilient through wet and dry spells alike | |
| Bee balm | Supports pollinators in variable conditions | |
| Edge | Little bluestem | Drought-tolerant once established |
| Prairie dropseed | Handles drier soil with minimal upkeep | |
| Coreopsis | Thrives in well-drained edge conditions | |
| Yarrow | Resilient in the driest part of the basin | |
| Shrub | Red twig dogwood | Tolerates wet soil, adds winter color |
| Winterberry | Handles seasonal flooding well | |
| Buttonbush | Thrives in consistently moist conditions | |
| Summersweet | Adapts to both wet and average soil |
When it comes to native versus non-native choices, native species generally win on every front.
They settle in with lower maintenance needs, support local pollinators more effectively, develop deeper root systems suited to regional rainfall, and adapt naturally to the climate they evolved in.
Rain Garden Design Ideas
A rain garden doesn’t have to look like a drainage fix. With the right style, it becomes the most intentional corner of the yard.
1. Small Backyard Rain Garden
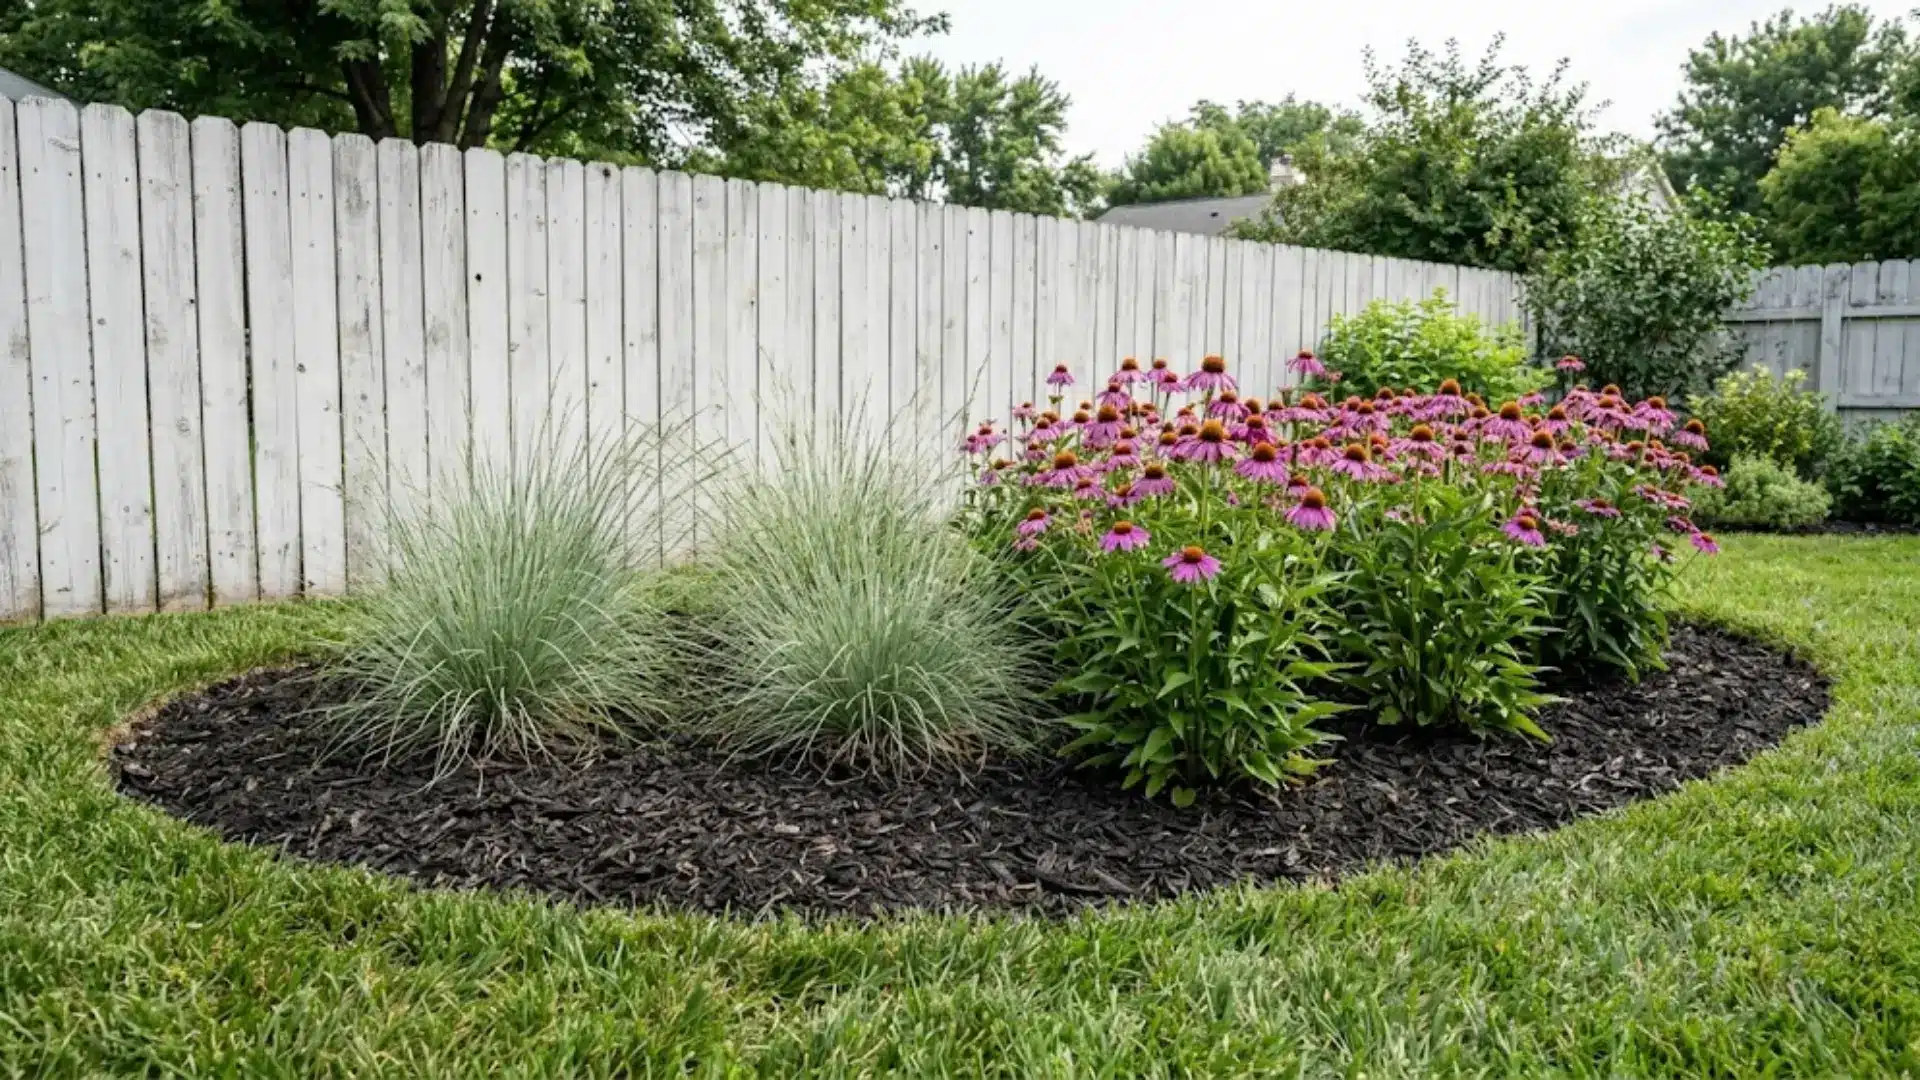
Limited space doesn’t limit impact. A compact kidney-shaped garden tucked near a downspout or fence line handles runoff efficiently while leaving the rest of the yard intact.
Keep the plant palette tight, two or three species maximum, and let texture do the work. Ornamental grasses paired with a single flowering perennial read as a deliberate design choice rather than a filler planting.
Small scale, done well, always looks intentional.
2. Modern Rain Garden
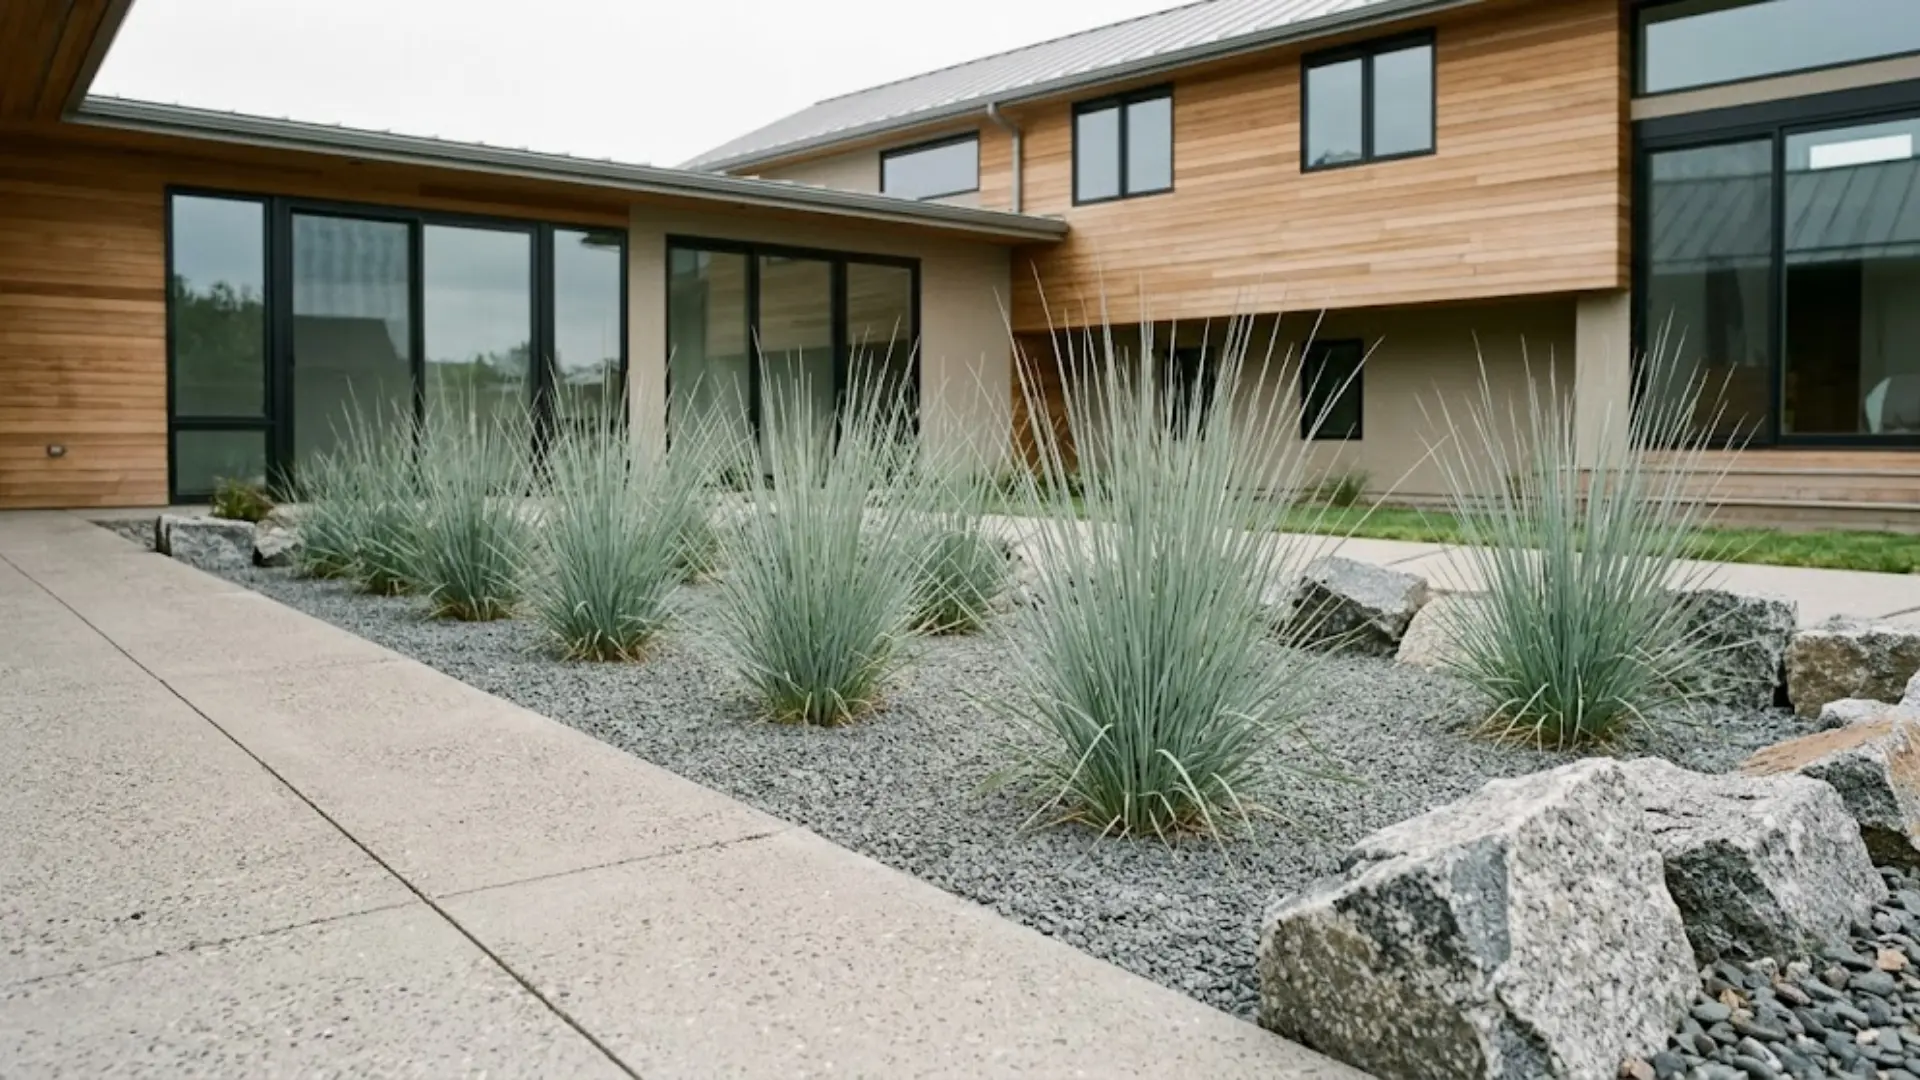
Clean lines and a restrained plant palette give a rain garden a contemporary edge. Think geometric boulders, gravel mulch, and architectural grasses like little bluestem arranged with breathing room between each plant.
Skip the cottage abundance and lean into negative space.
A modern rain garden sits comfortably alongside poured concrete patios and minimalist landscaping, looking less like a planted bed and more like a considered landscape feature with a quiet purpose.
3. Cottage Garden Style
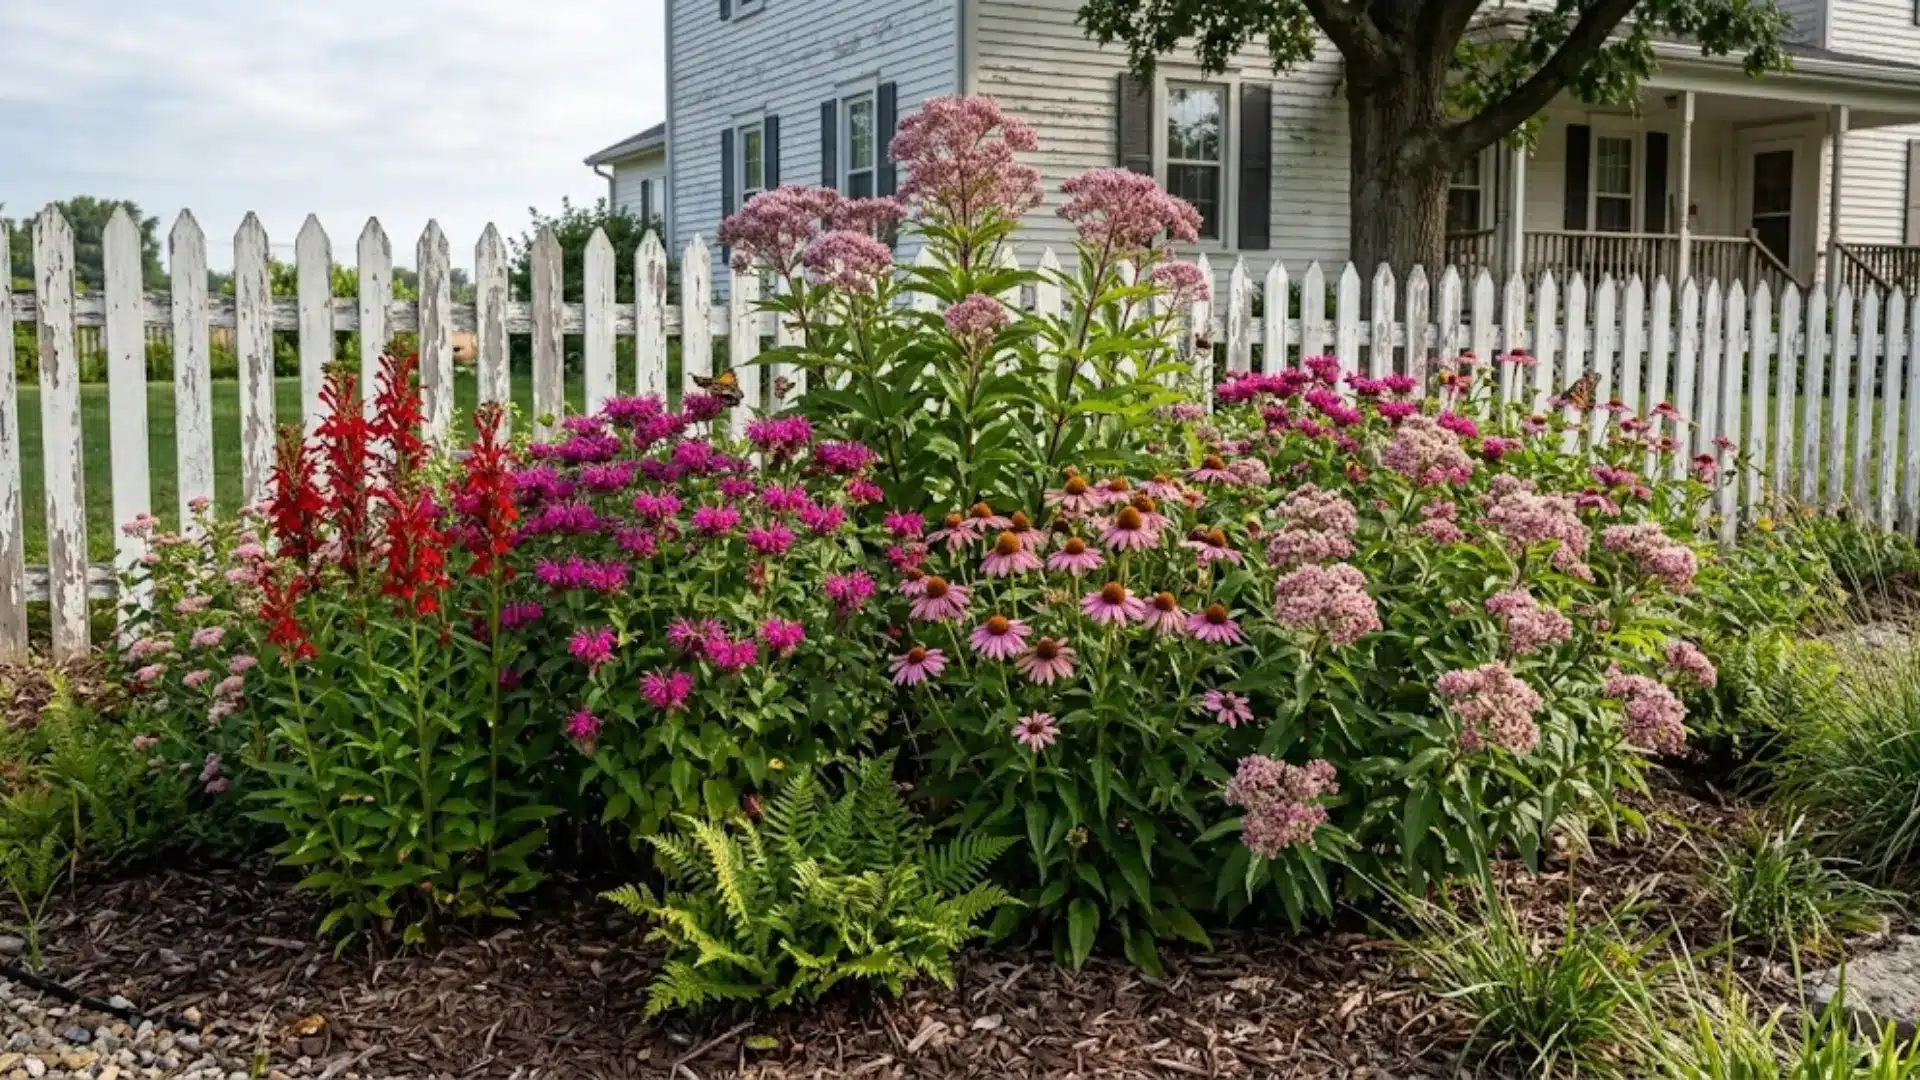
Soft, layered, and slightly wild-looking, a cottage-style rain garden leans into abundance. Cardinal flower, bee balm, coneflower, and swamp milkweed tumble together in a way that feels romantic rather than planned.
The key is varying heights so the tallest plants anchor the center and shorter blooms spill toward the edges.
This style suits older homes, picket fences, and yards that already carry a relaxed, romantic character through the rest of their landscaping.
4. Pollinator Rain Garden
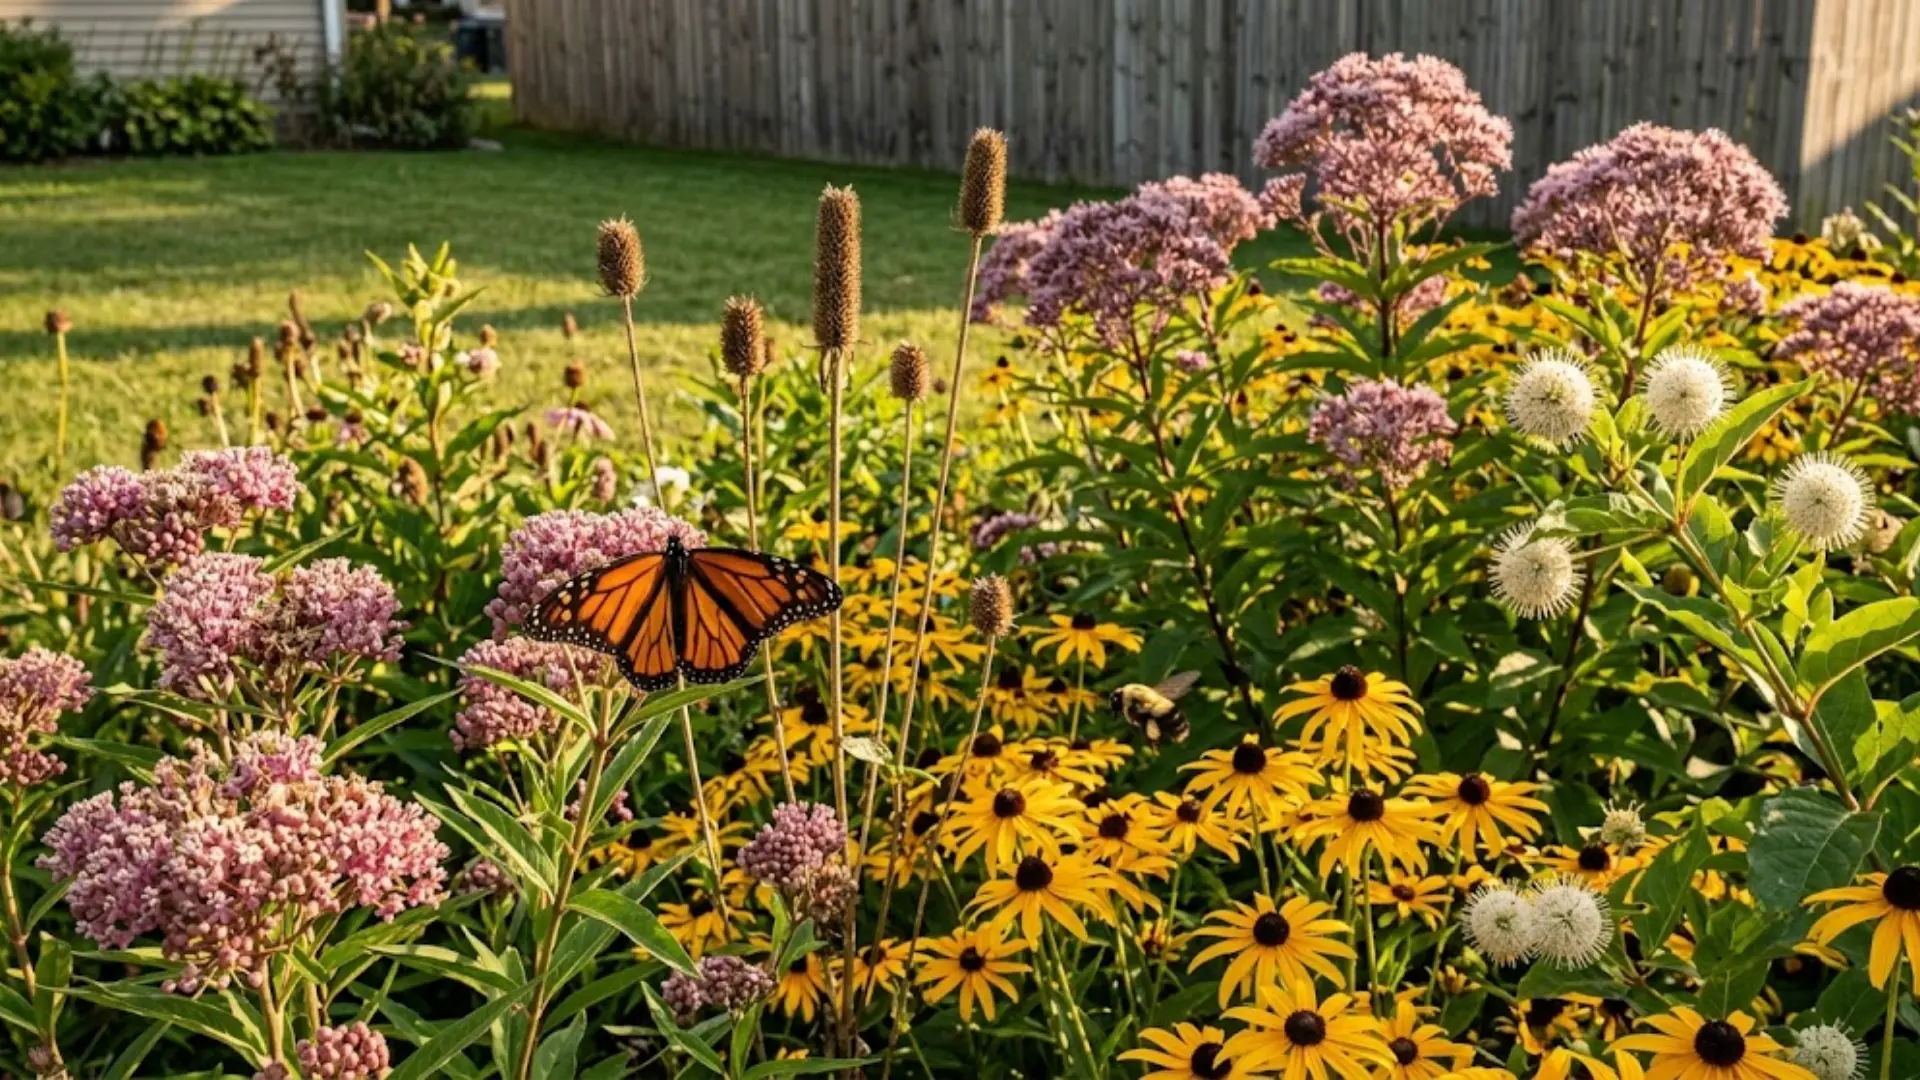
Design the whole basin around attracting wildlife, and the maintenance practically takes care of itself.
Native species like swamp milkweed, black-eyed Susan, Joe-Pye weed, and buttonbush create a layered habitat that supports bees, butterflies, and birds through multiple seasons.
Stagger bloom times so that something is always flowering, and leave seedheads standing through winter to provide birds with a food source long after the last bloom has faded.
5. Rock and Rain Garden Combination
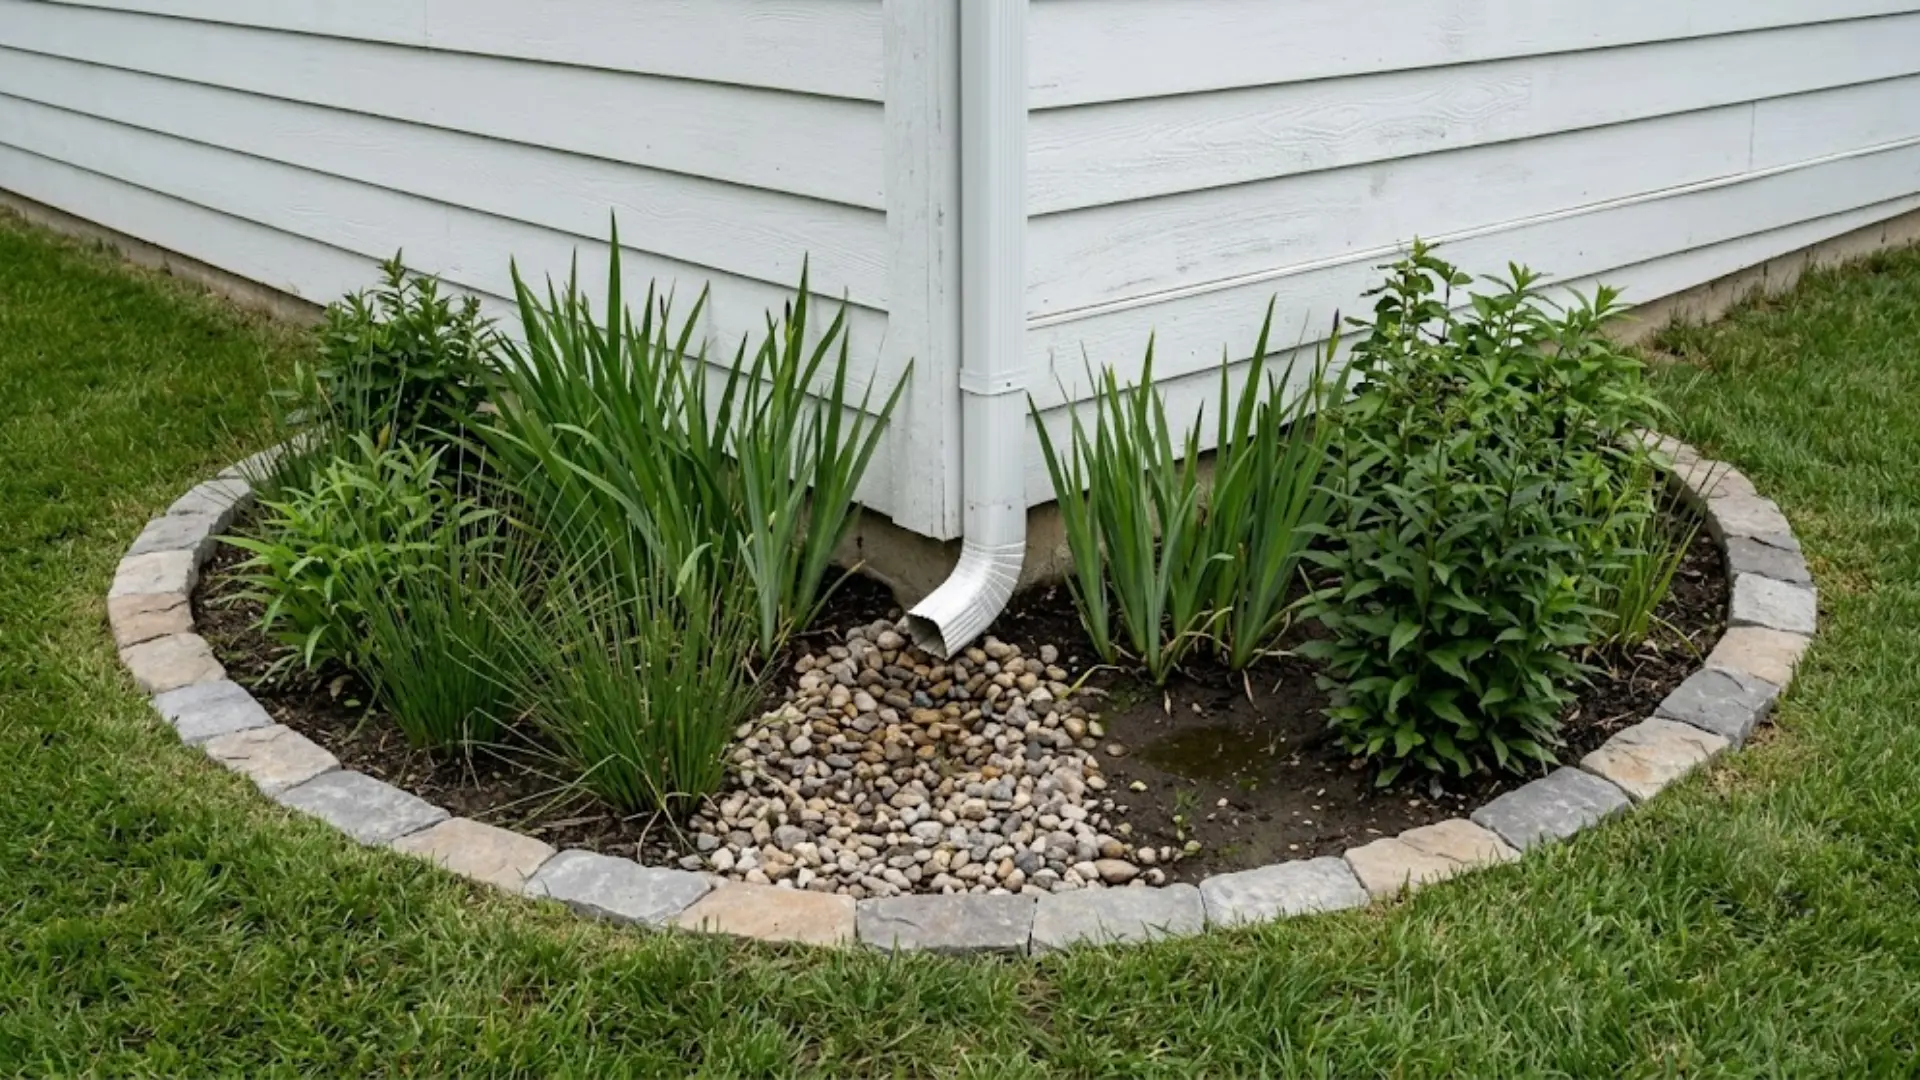
River rock and boulders serve a practical role in a rain garden while also adding serious visual weight.
Line the inlet channel and basin edges with smooth stones to slow incoming water and prevent erosion, then let plantings grow up between them for contrast.
The combination of hard and soft materials creates a naturalistic look that photographs beautifully and ages even better as plants fill in around the rock over successive seasons.
How Much Does It Cost to Build a Rain Garden?
The total spend depends heavily on garden size, soil conditions, and how much of the work you do yourself.
Here’s a realistic breakdown of what each component typically runs for a DIY build.
| Item | DIY Cost Range | Notes |
|---|---|---|
| Plants | $100 – $500 | Native species run $5–$20 per plant; specialty varieties up to $50 |
| Soil amendments | $50 – $200 | Compost, coarse sand, or loam; more for heavy clay soil |
| Mulch | $50 – $150 | Shredded hardwood; some municipalities offer it free |
| Tools | $50 – $200 | Shovels, wheelbarrow, tamper; rent rather than buy where possible |
| Decorative stone | $50 – $200 | River rock for inlet channel and basin edging |
| Drainage pipe | $50 – $300 | Overflow spillway or gravel trench; complexity drives cost |
| Total (DIY) | $350 – $1,550 | Varies by size, site conditions, and plant selection |
Professional installation typically runs $2,500 to $6,500 for a standard residential garden, covering design, excavation, soil preparation, planting, and drainage.
Rain Garden Maintenance Throughout the Year
Once established, a rain garden asks for very little. A handful of seasonal tasks keep it draining well and looking its best year-round.
- Spring: Pull early weeds, refresh mulch, and check that the overflow spillway is clear.
- Summer: Water new plantings during dry stretches and stay on top of invasive weeds before they spread.
- Fall: Clear fallen leaves from the basin, trim selectively, and inspect the berm for any soft spots.
- Winter: Leave seedheads standing for wildlife and check for erosion after heavy storms.
- Year-round: Avoid over-maintaining; too much tidying does more harm than good in a native planting.
A light touch each season is all it really needs to keep performing exactly as it should.
Rain Garden vs. Bioswale vs. Dry Creek Bed
All three manage water, but they solve different problems and suit different yards.
Here’s how they stack up side by side.
| Feature | Rain Garden | Bioswale | Dry Creek Bed |
|---|---|---|---|
| Primary purpose | Collects and absorbs runoff in one spot | Moves and filters runoff along a channel | Redirects runoff decoratively across the yard |
| Water storage | Holds water temporarily until it soaks in | Channels water slowly toward a drainage point | Moves water rather than storing it |
| Planting | Native perennials, grasses, and shrubs | Grasses and low groundcover along the channel | Minimal; optional plants along the edges |
| Appearance | Lush planted garden bed with a natural shape | Vegetated swale or shallow channel | Rocky streambed with a naturalistic look |
| Maintenance | Low once established; seasonal tidying | Moderate; channel needs periodic clearing | Low; mainly stone repositioning after storms |
The Bottom Line
A backyard rain garden is one of those rare additions that genuinely give back more than they take. It handles the soggy corners, feeds the pollinators, filters the runoff, and somehow manages to look intentional doing all of it.
The yard gets prettier, the drainage gets smarter, and the maintenance stays light once everything settles in.
If you’ve been sitting on a drainage problem or simply want a planting bed with real purpose, this is a satisfying place to start.
Tell us in the comments what’s prompting yours: a perpetually soggy lawn, a downspout situation, or just the blooms?
Frequently Asked Questions (FAQs)
Can I Build a Rain Garden in Clay Soil?
Yes, but the soil needs amending before it can drain properly. Mixing in coarse sand and compost improves infiltration enough to make most clay-heavy sites workable.
How Far Should a Rain Garden Be from My House?
At least ten feet from the foundation is the general rule. This keeps absorbed moisture from working its way toward the structure over time.
Will a Rain Garden Attract Mosquitoes?
A well-built rain garden drains within 24 to 48 hours, which is too fast for mosquito larvae to develop. Standing water that lingers longer usually signals a drainage issue worth fixing.
What’s the Difference Between a Rain Garden and a Regular Flower Bed?
A rain garden is specifically sited, graded, and planted to absorb stormwater runoff. A regular flower bed is planted for aesthetics, with no engineering behind how water moves through or around it.